


-

- STEP 081 > Tilt your Figure Stand and like magic, the figures now STAY IN THEIR PEGS 🙂 No more tipping when placing or cleaning 🙂 How cool is that ?
-
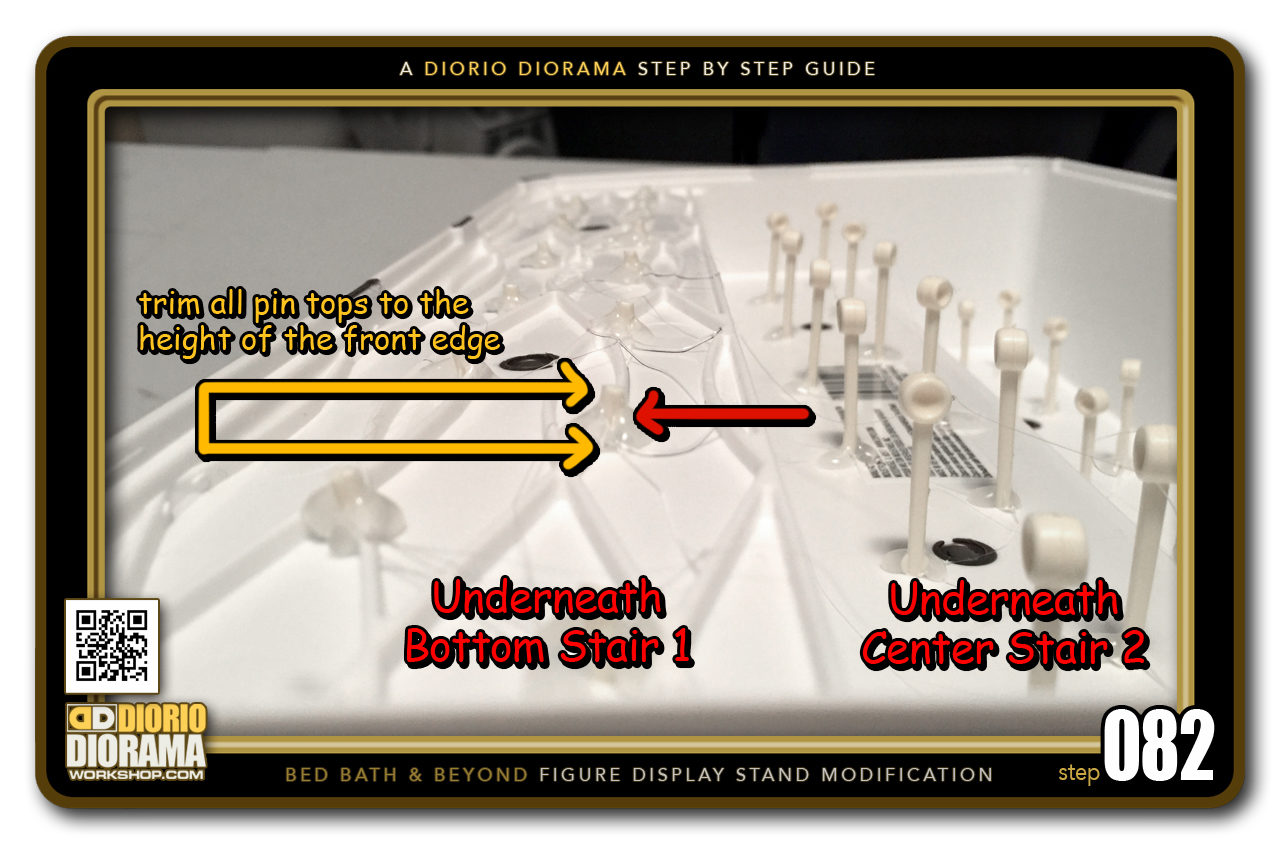
- STEP 082 > Now one thing you need to do so that the Figure Stand can lay flat on any surface is to FLIP it UPSIDE DOWN and on the BOTTOM STAIRS section ONLY (well you can do it for the others too but it would be waste of time) is to TRIM OFF the TOP portions of every plastic Hair Curler Pin to the same HEIGHT as the FRONT LIP or EDGE. They must be just a little lower than the front to allow the entire Figure Stand to lay FLAT and NOT wobble and look ugly.
-
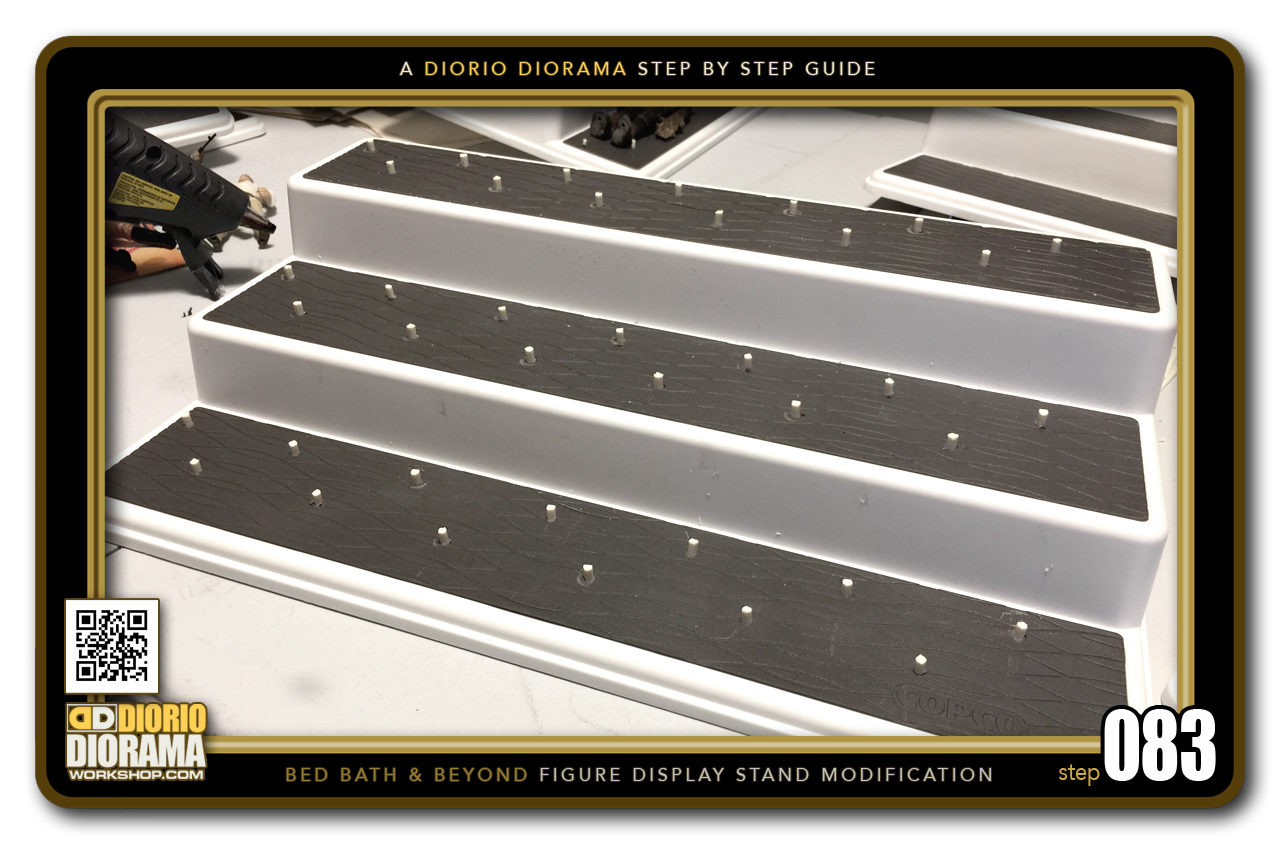
- STEP 083 > Here you can better understand what I was trying to explain in Step 082. With the BOTTOM STAIR 1 plastic Hair Curler Pin tops trimmed to the front edge height, the entire platform now lays FLAT against your table or shelf surfaces.
-
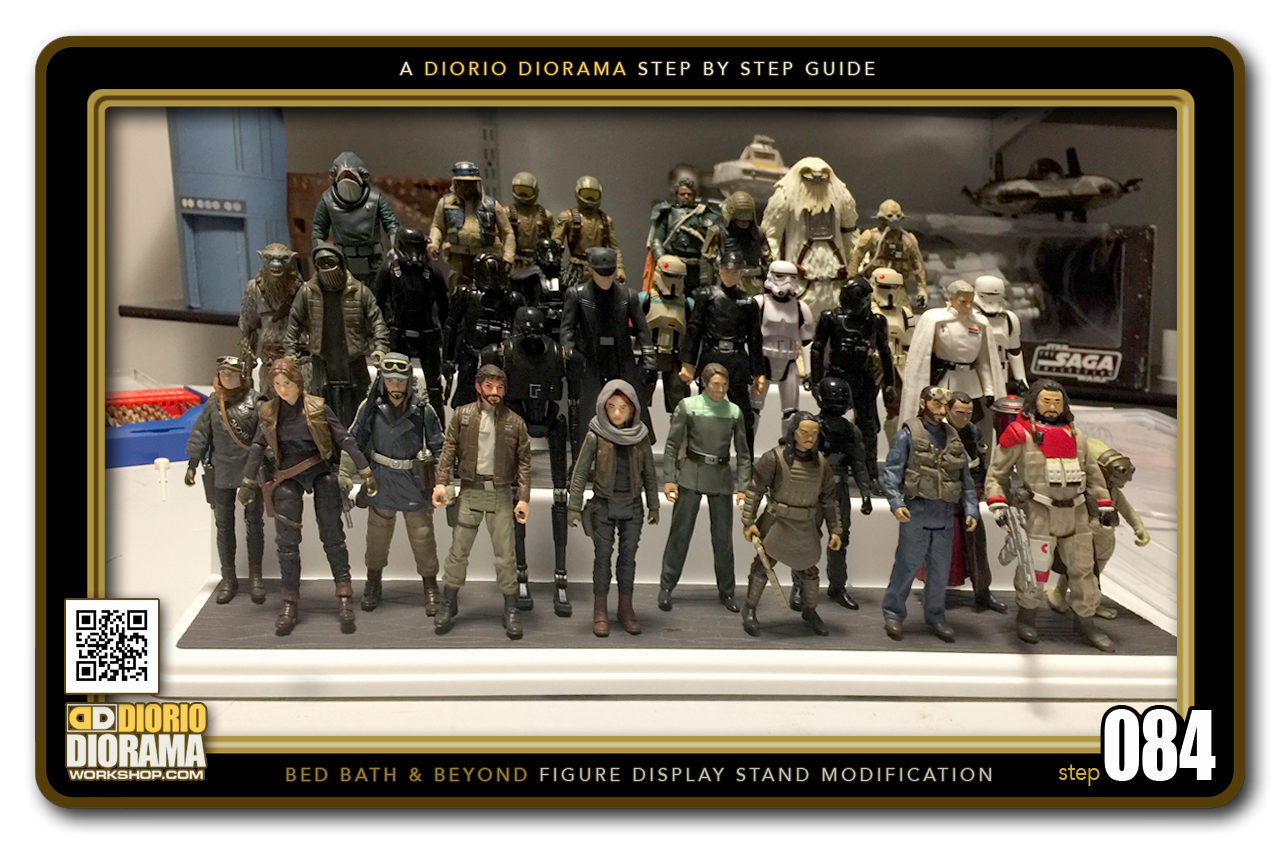
- STEP 084 > You are now ready to place your figures for display. The hardest part maybe how to group them all together... By film, by date of release, by character, you decide which is part of the fun 🙂
-
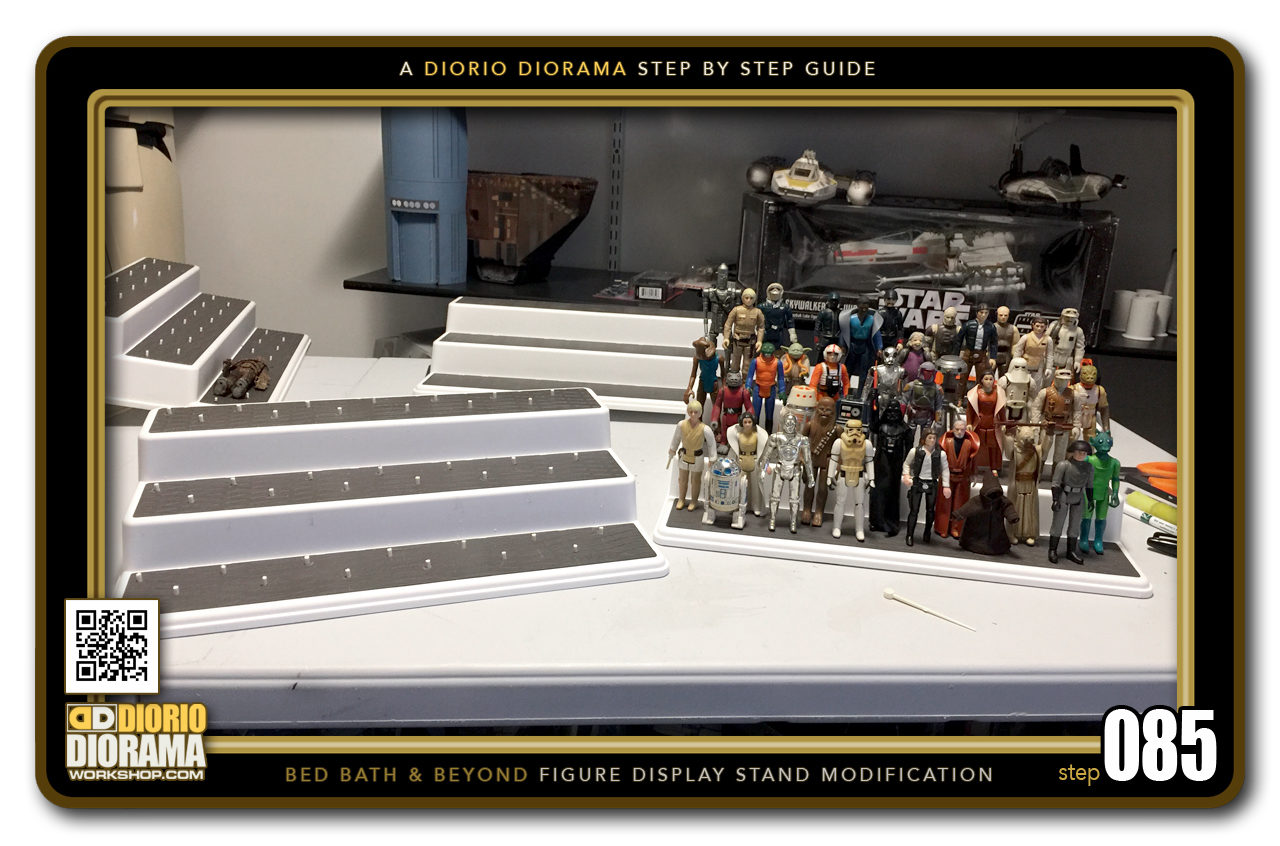
- STEP 085 > A side by side comparison shows you that even if the pegs you created are not the sexiest, once all the figures are in place, you cannot see them. They look nice and orderly just like the old Kenner display trays, minus the spinning function. That was fun 🙂
-
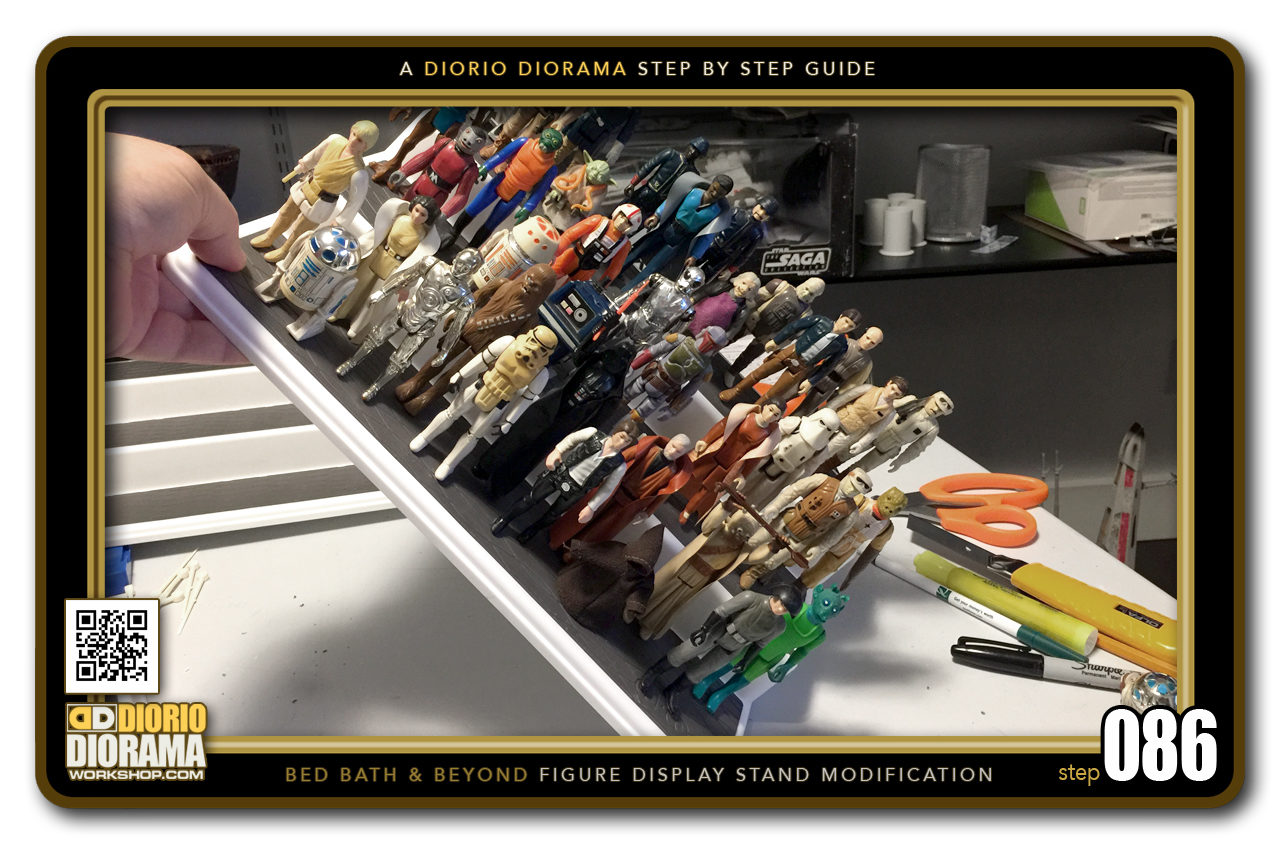
- STEP 086 > Plus the whole point of going through with the modification of adding pegs is so that no more playing dominoes with your Action Figures 🙂 Yay !!!!
-
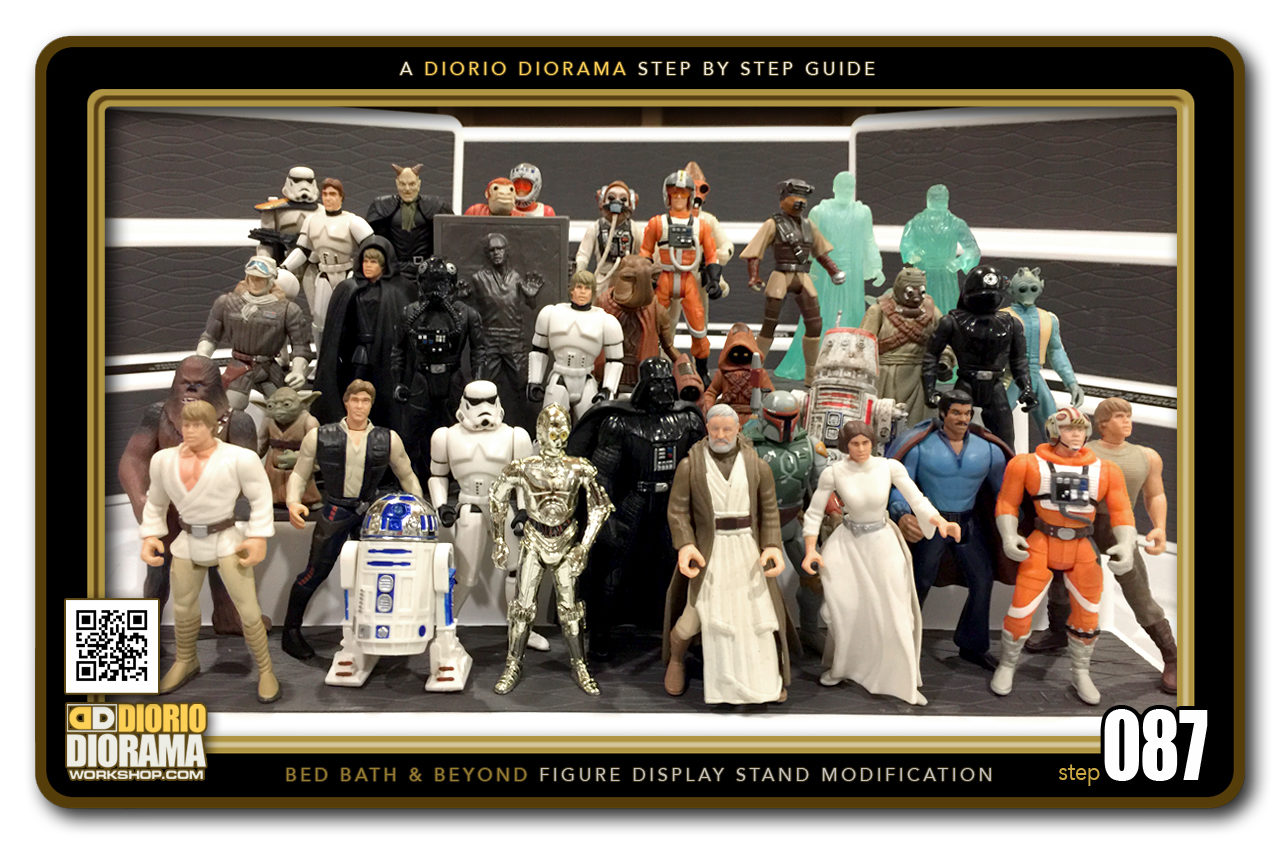
- STEP 087 > So there you have it. If you don't have the time or space for movie accurate diorama displays and want a simple way to modify a easy way to showcase your collection, grab a few Bed Bath & Beyond stands and some plastic Hair Curler Pins and you are all set 🙂 Let me know in the comments if you tried this at home 🙂 Frank.

.
Did you already build this Diorama ? At home or at our Star Wars Celebration Diorama Builders workshop ? Would you like to show it in the site’s GALLERY VISITORS DIORAMAS section, YES ? That is Awesome !!! You can find out all the details on how to email me your photos on the VISITORS SUBMISSIONS INFO page … When I get your photos, I will create your very own page just like this one. You may not realize it but work does inspire others to join in the fun of making Action Figure Dioramas.
.
NOT FOR RESALE ALL Decals, tutorials and artwork are ©FrankDiorio (dioramaworkshop.com) and offered FOR FREE to the fans – that would be you ? so you can build and display my diorama designs in your very own home. I realize I cannot control what one does with my graphics once I place them on the web, I can only ask you as one fan to another, please respect the artist and do not be that jerk who uses my designs and tutorials to build a copy of my work only to sell it on EBAY or trade/sale groups and forums. Thank You. Frank.
.
.
If you have a facebook account, why not join the Official Diorama Builders Fan Club today, simply click the logo link below.
 .
.
Catch up with fellow visitors and exchange stories, read cool interviews with the crew, exchange photos, fun surprises and grab some FAN ONLY merchandise next year at actual future conventions ?
.
©2018 Frank Diorio DioramaWorkshop.Com
.
IF YOU LIKE WHAT YOU SEE, PLEASE SHARE WITH YOUR FRIENDS
USING THE SOCIAL MEDIA BUTTONS BELOW
Joshua Berkowicz
August 12, 2019 @ 1:53 pm
Frank this is great. Do you happen to know if it fits in an ikea detolf? They are 15” wide as is the spice rack. Just curious if they will work together. I will post after I complete if so.
Frank Diorio
August 22, 2019 @ 2:51 pm
Hey Joshua, The BBB Shelf unit I used is EXACTLY 15″ x 9″ Deep. If the IKEA is 15″ it will likely be too small, if IKEA from inner glass wall to wall is 15.25″ or 15.5″ there should be no problem. I was also told that a SMALLER medium size BBB shelf unit exists as well, though this is the size I found in my city store.