


-
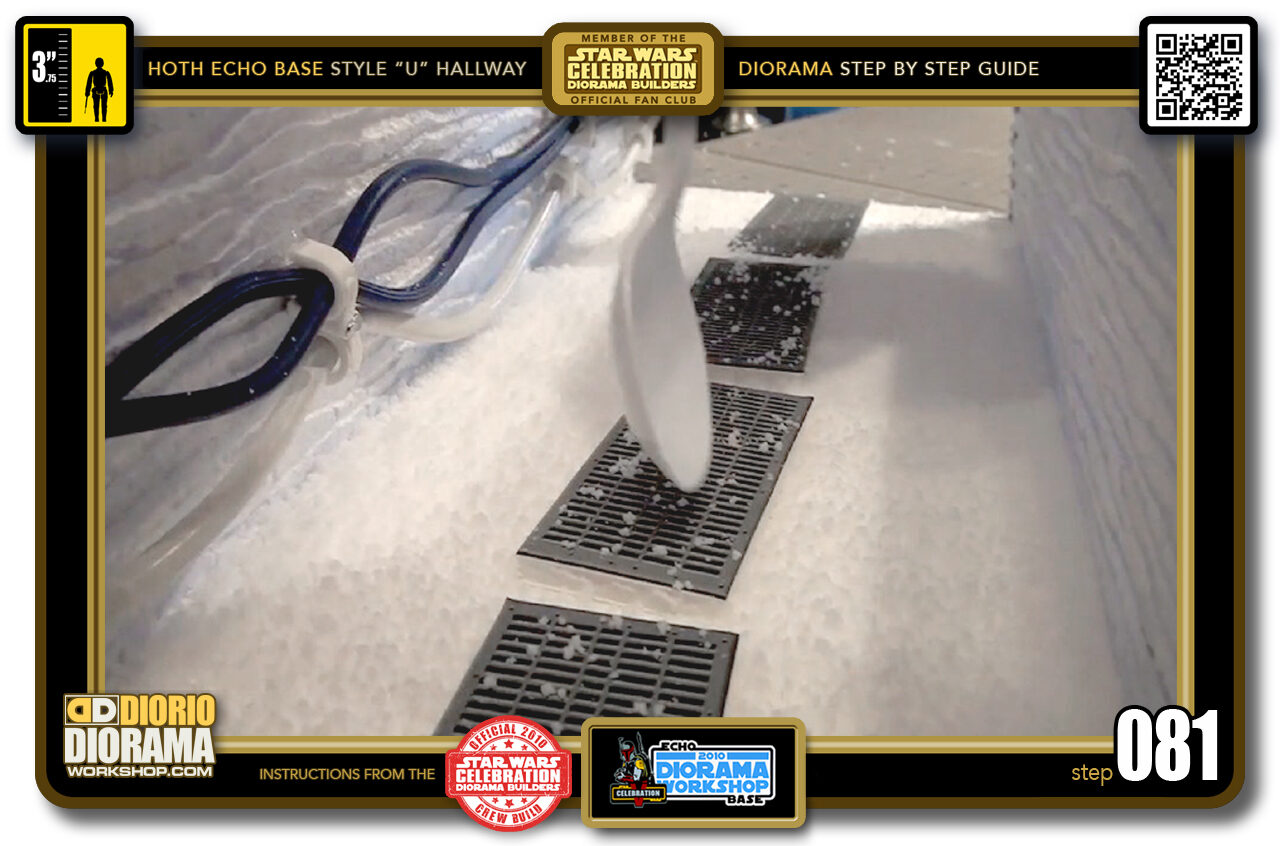
- Step 081 >> Now you can sprinkle your snow on the floor surface. At the convention we used INSTANT SNOW which was great for the interactivity, but after 24 hrs it returns to it's granular salt like original state which is not great. At home I use Baking Soda. It's what ILM used for the AT-AT miniatures, looks like snow and doesn't harm the figures.
-
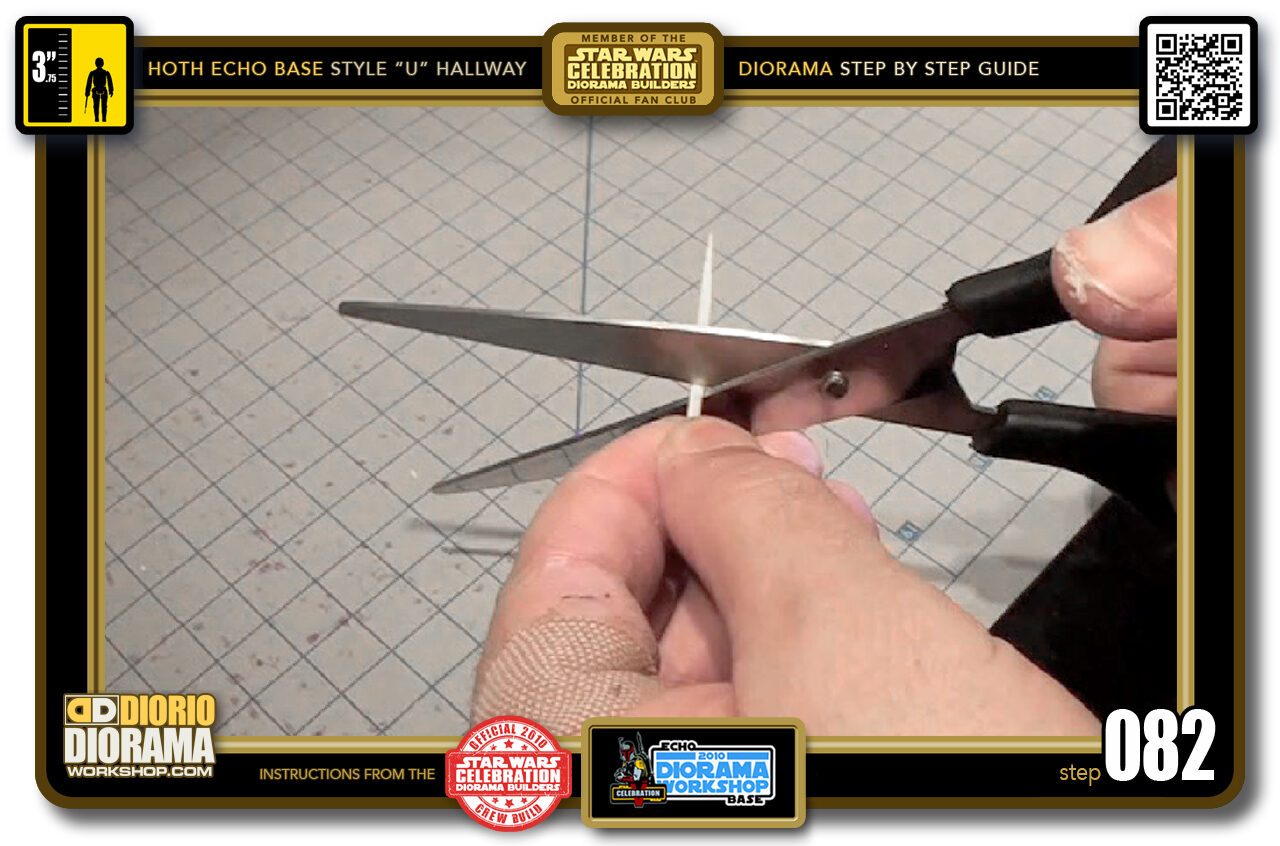
- Step 082 >> Now we don't want our figures to tip over once placed, so I learned a trick... just grab a toothpick and cut it in half.
-
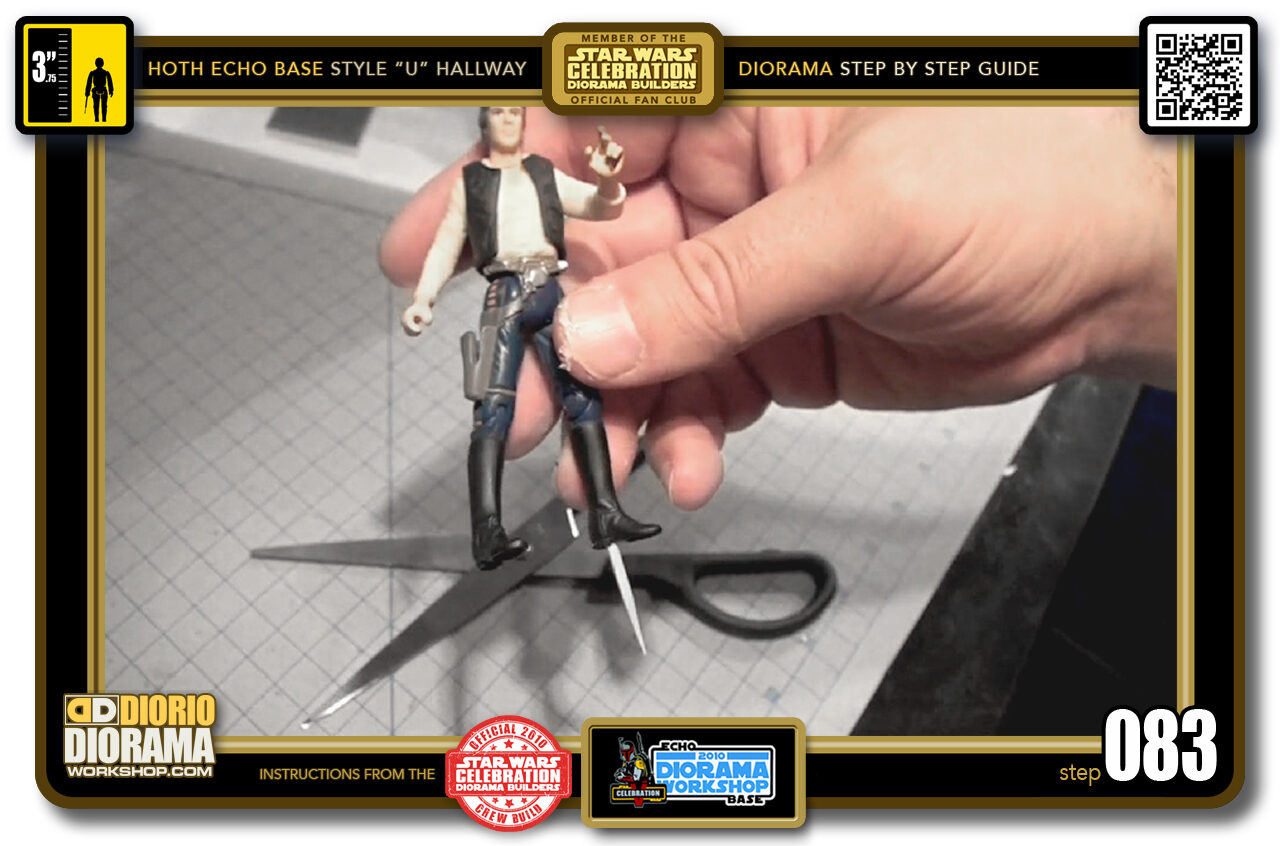
- Step 083 >> The toothpick fits PERFECTLY into the figures foot peg hole. You don't even need to add any glue.
-
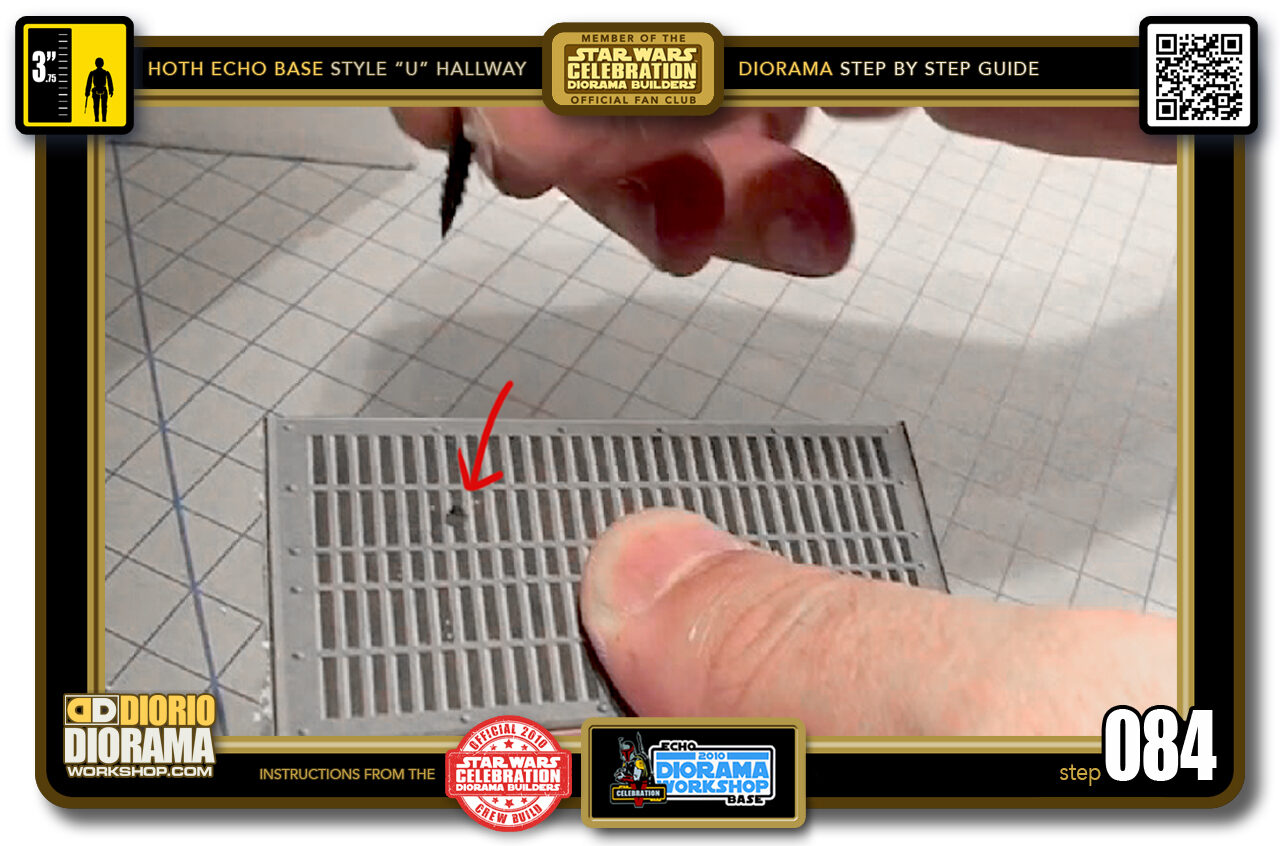
- Step 084 >> The Foamcore is TOO HARD to have a toothpick poke through it without breaking. So you first need to make a pilot hole with a nail or screw first. Just poke it where you want your figure to stand.
-
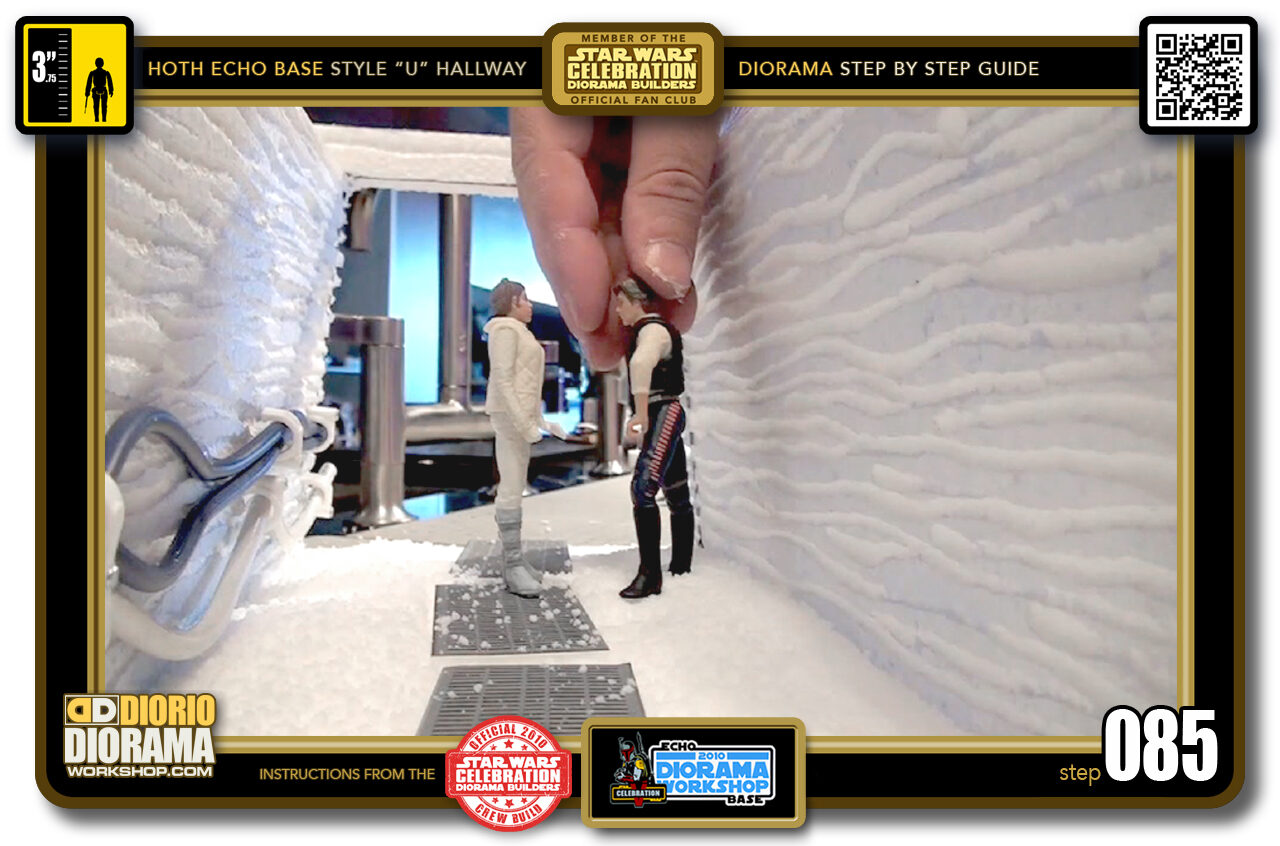
- Step 085 >> Your figures toothpick can now go through that hole and THROUGH the softer Styrofoam floor with no problem and will never fall over 🙂 .
-
-
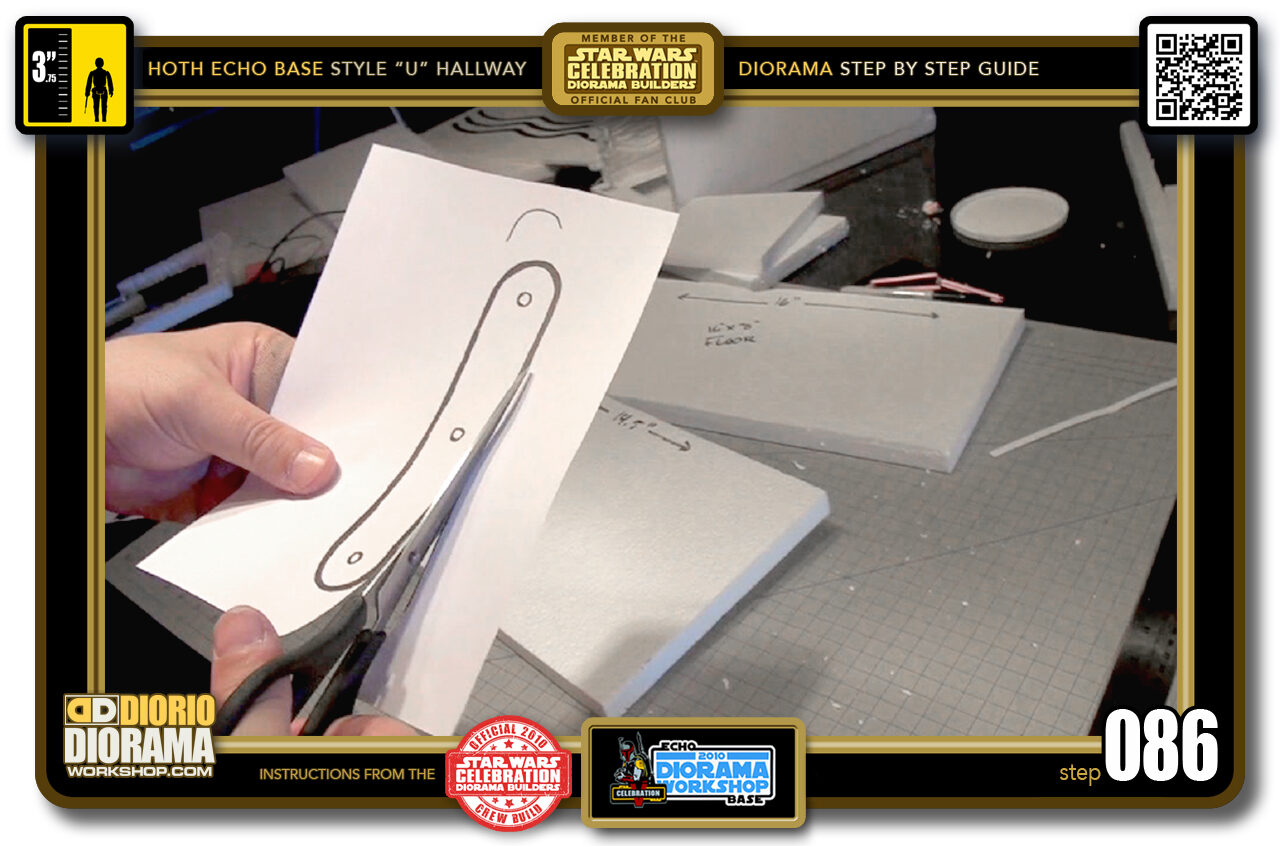
Step 086 >> Now the following steps were for the fans and my original prototype build. It maybe that these specific lights are no longer available a decade later so you may have to adapt this part yourself to fit whatever LED light source you can purchase at your store. The technique regardless which light is used is the same.
You can print out the LIGHT TEMPLATE page from the "U" Hallway Blueprints. Cut around the template shape with your scissors.
-
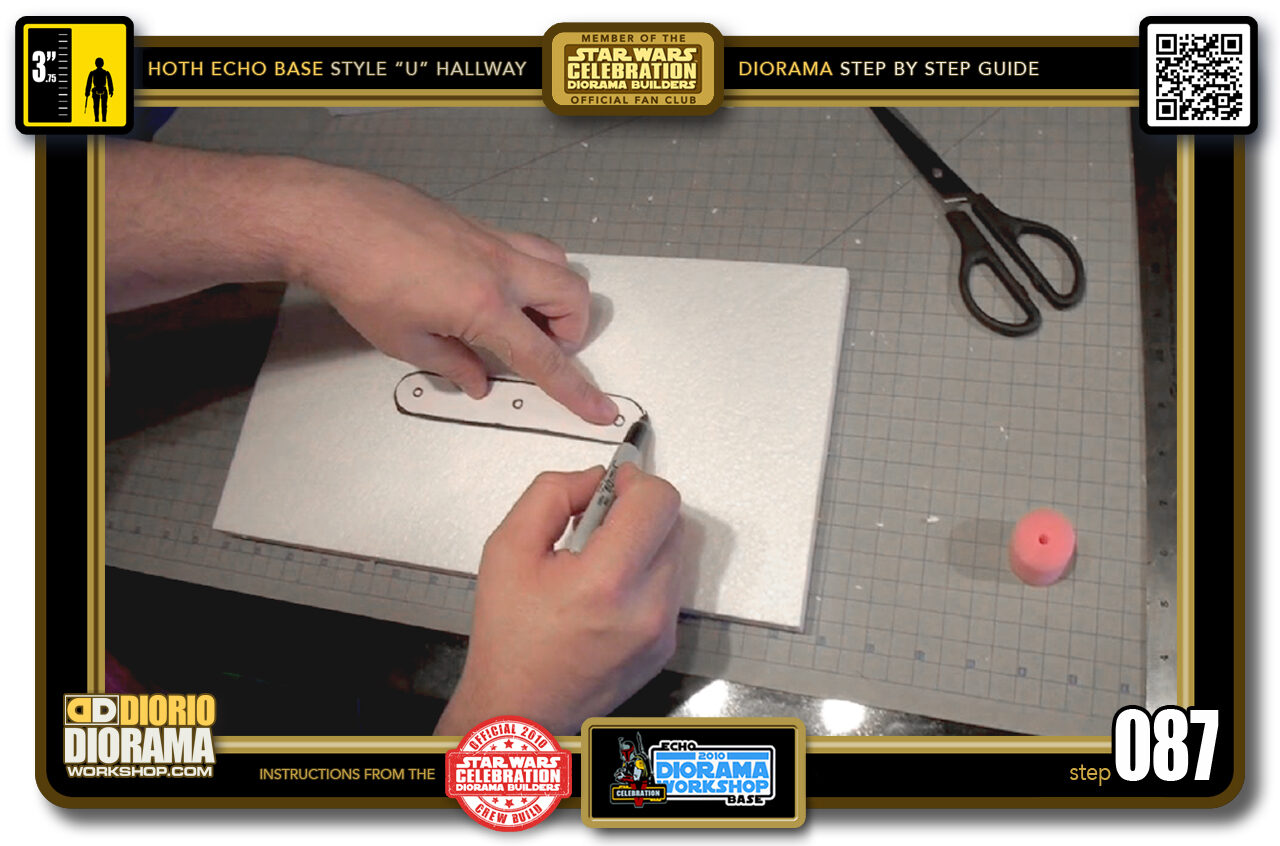
- Step 087 >> Place the template in the centre of the ceiling piece. With a sharpie, outline the OUTSIDE of the template shape.
-
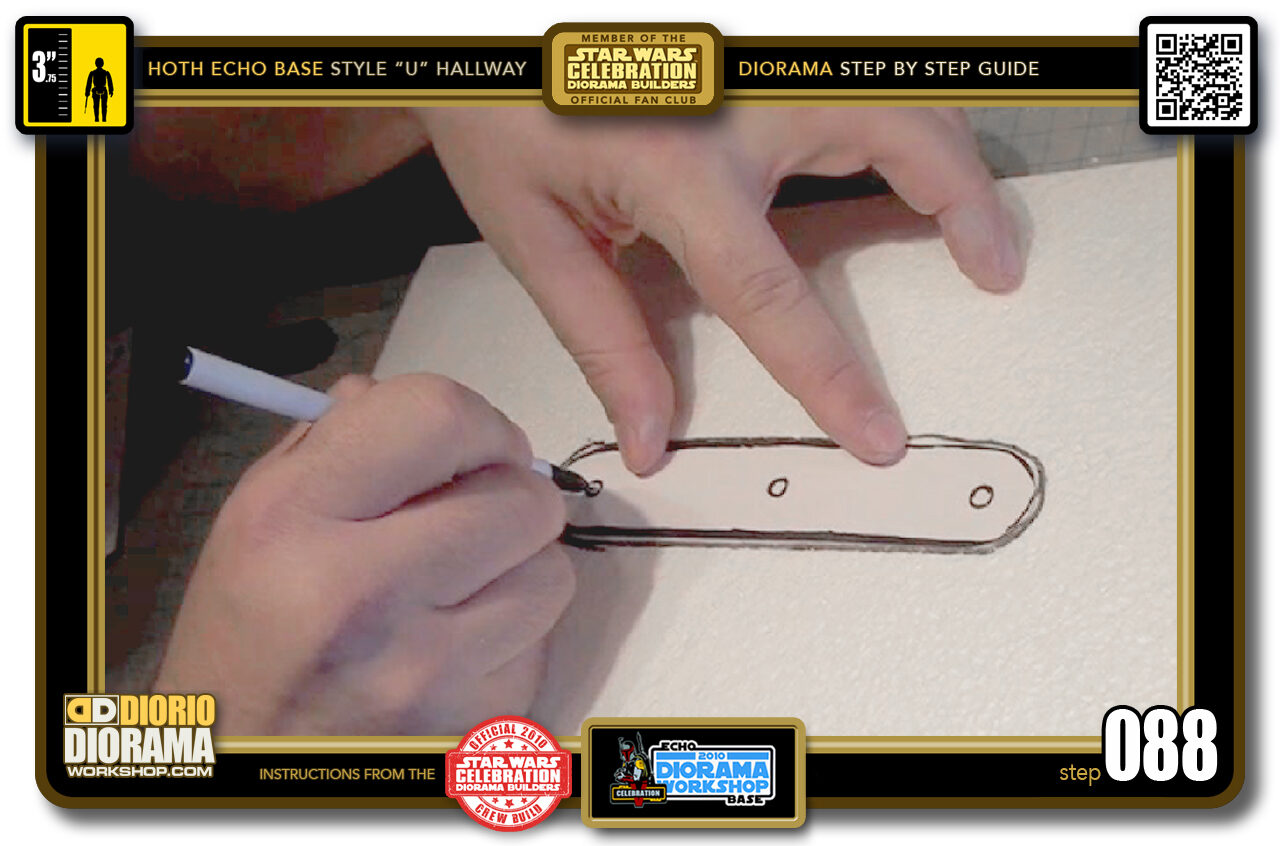
- Step 088 >> Then with a pen, POKE INSIDE the THREE inner circles or in the area where YOUR light source would shine through.
-
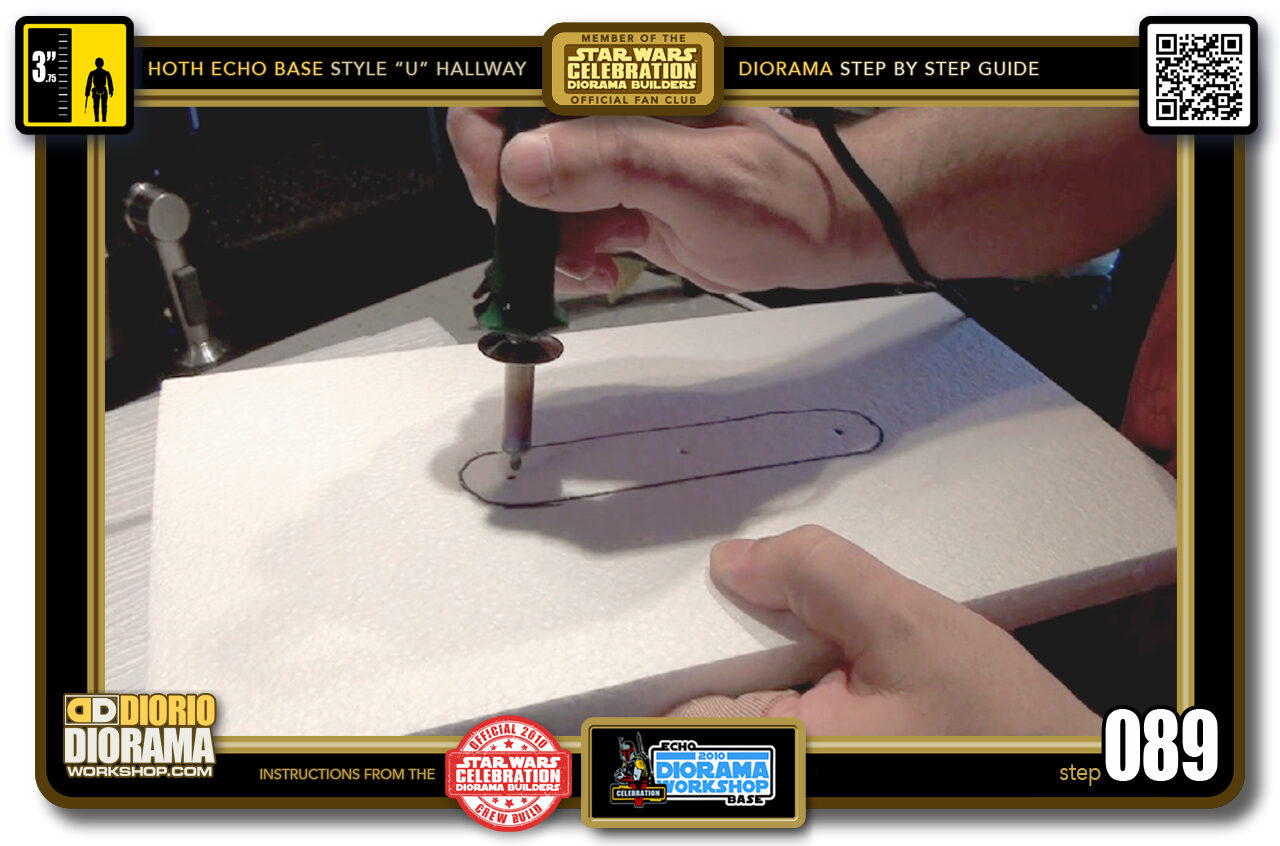
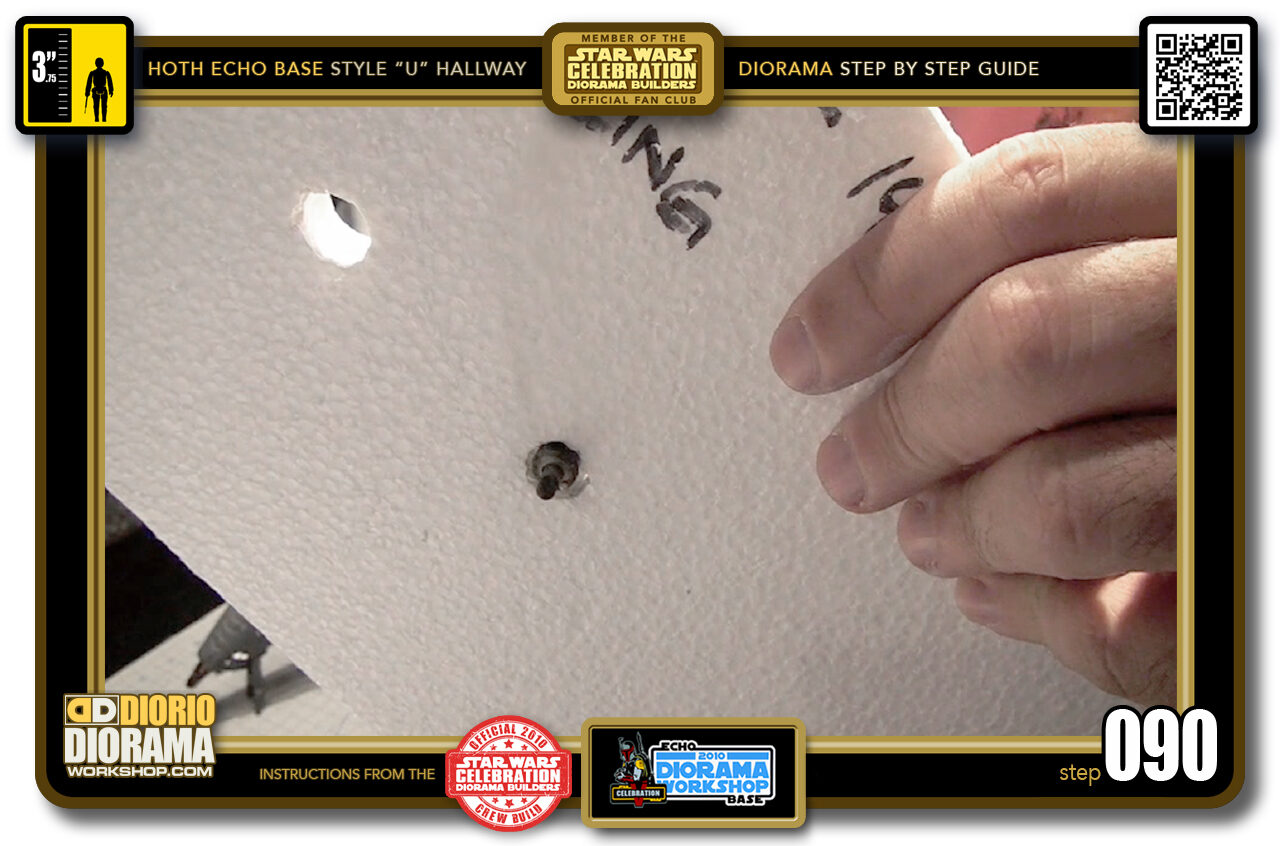
- Step 089 >> Use your WOODBURNING PEN to poke all the way through the styrofoam to the other side.
-
- Step 090 >> The pen is HOT and burns through the Styrofoam like melted butter and the holes will allow your light source to shine all the way through and light up the diorama like the movie set.
-
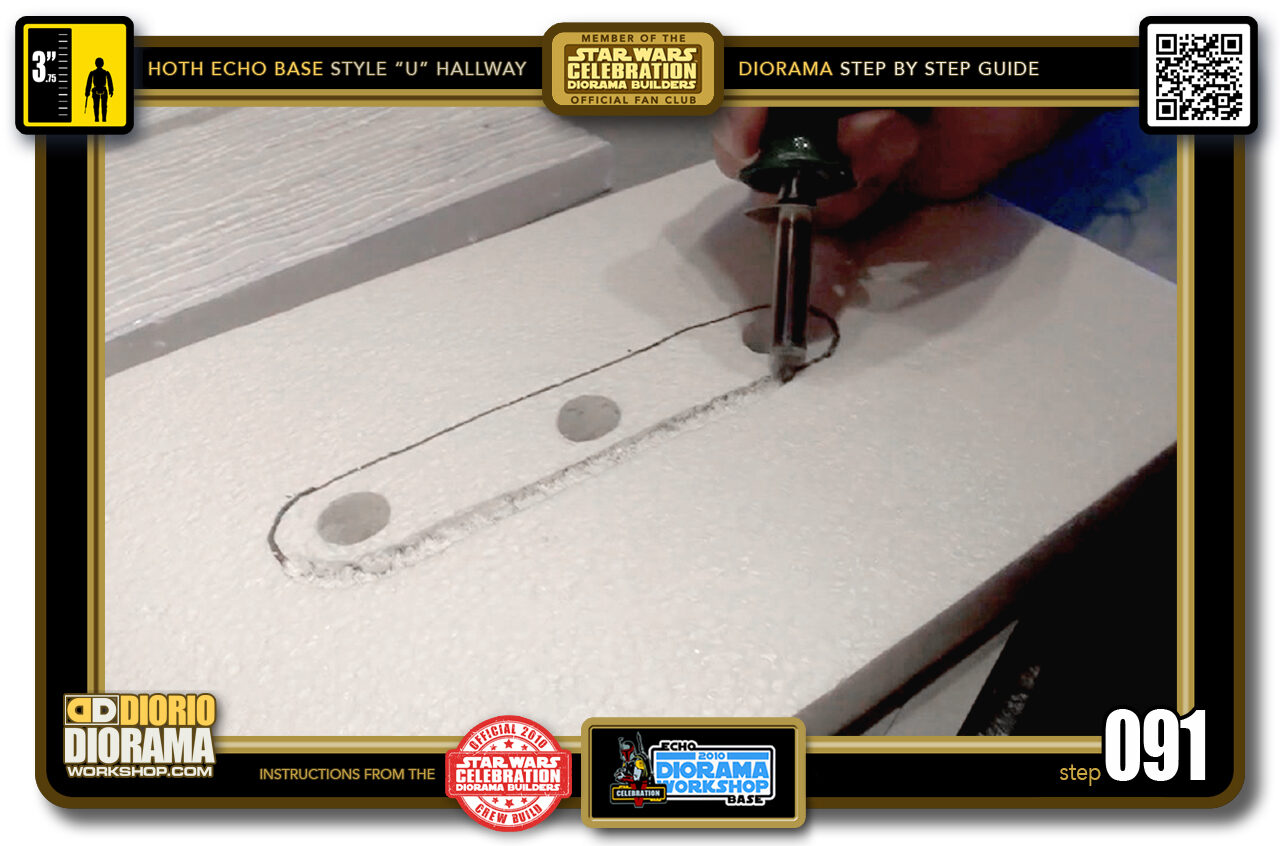
- Step 091 >> If you were able to find the same lights as we did back in 2010, you will need to carve, "melt" a little bed to allow the light to lay flat.
-
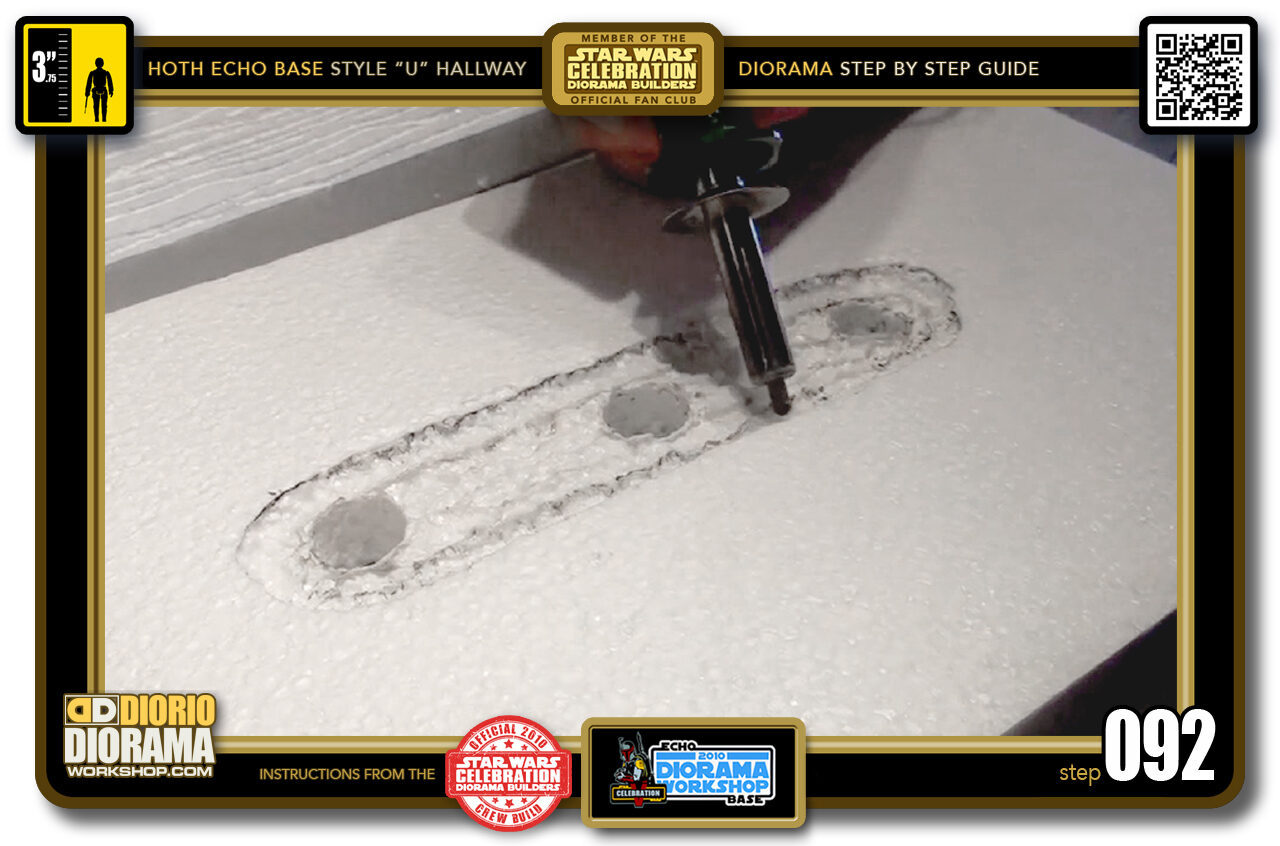
- Step 092 >> Continue this until you get a nice even groove. Doesn't need to be perfect just so the light lays flat. Again, depending of what light you use, this step may look different on your side.
-

- Step 093 >> Fits perfectly and the lights shine through the 3 holes.
-
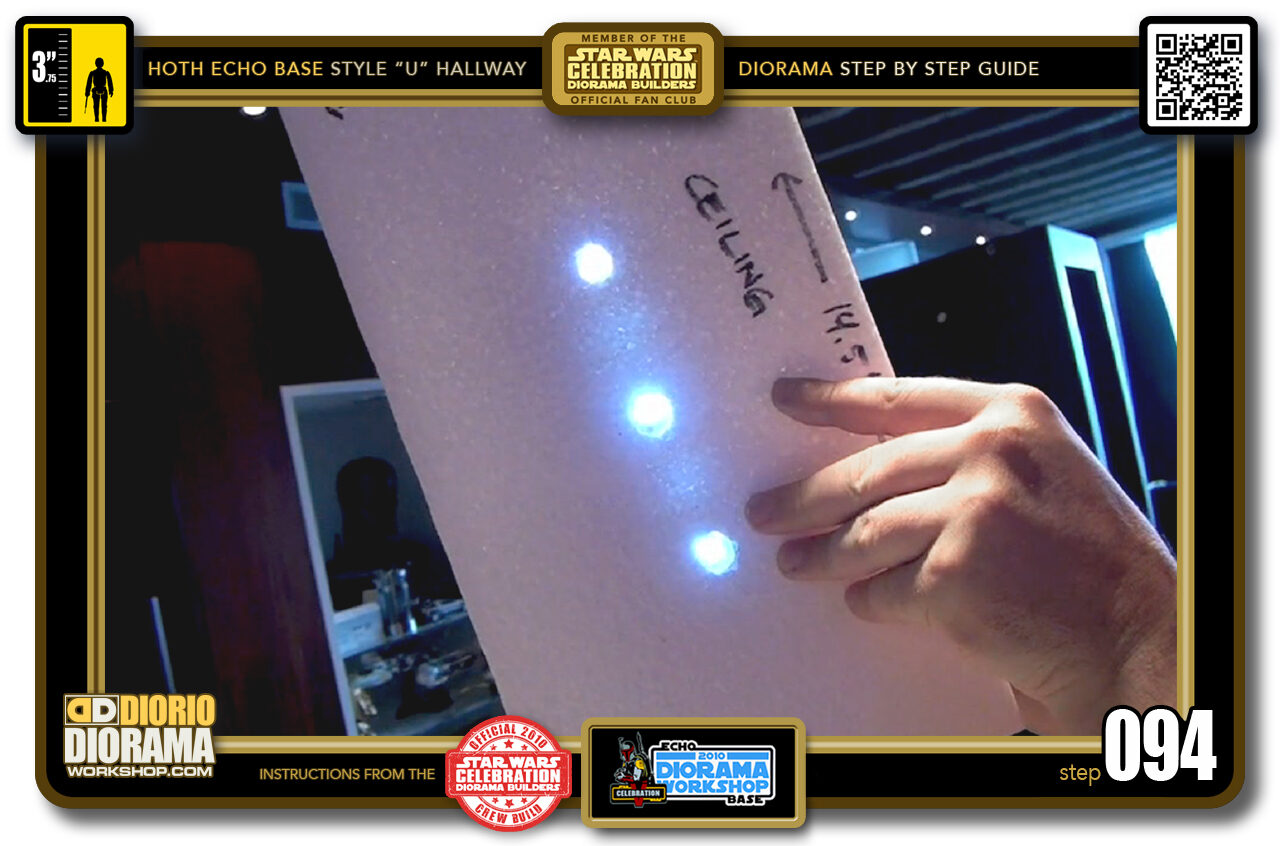
- Step 094 >> You can see here how the light shines directly through the holes on the other side and creates spotlights on the hallway floor.
-
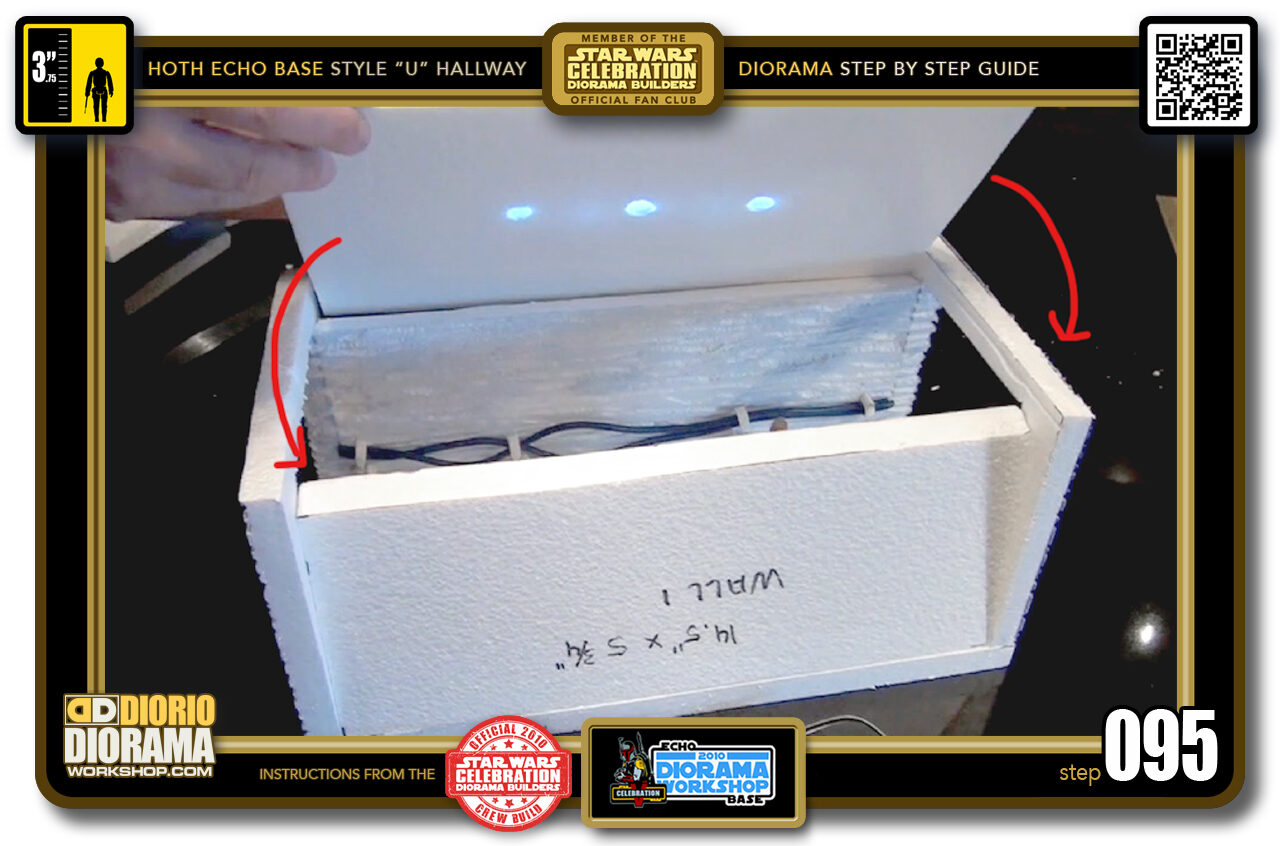
- Step 095 >> Your ceiling piece is now ready to be lowered in place. No need to hot glue, let gravity and the top of the wall sides to pinch it in place.
-
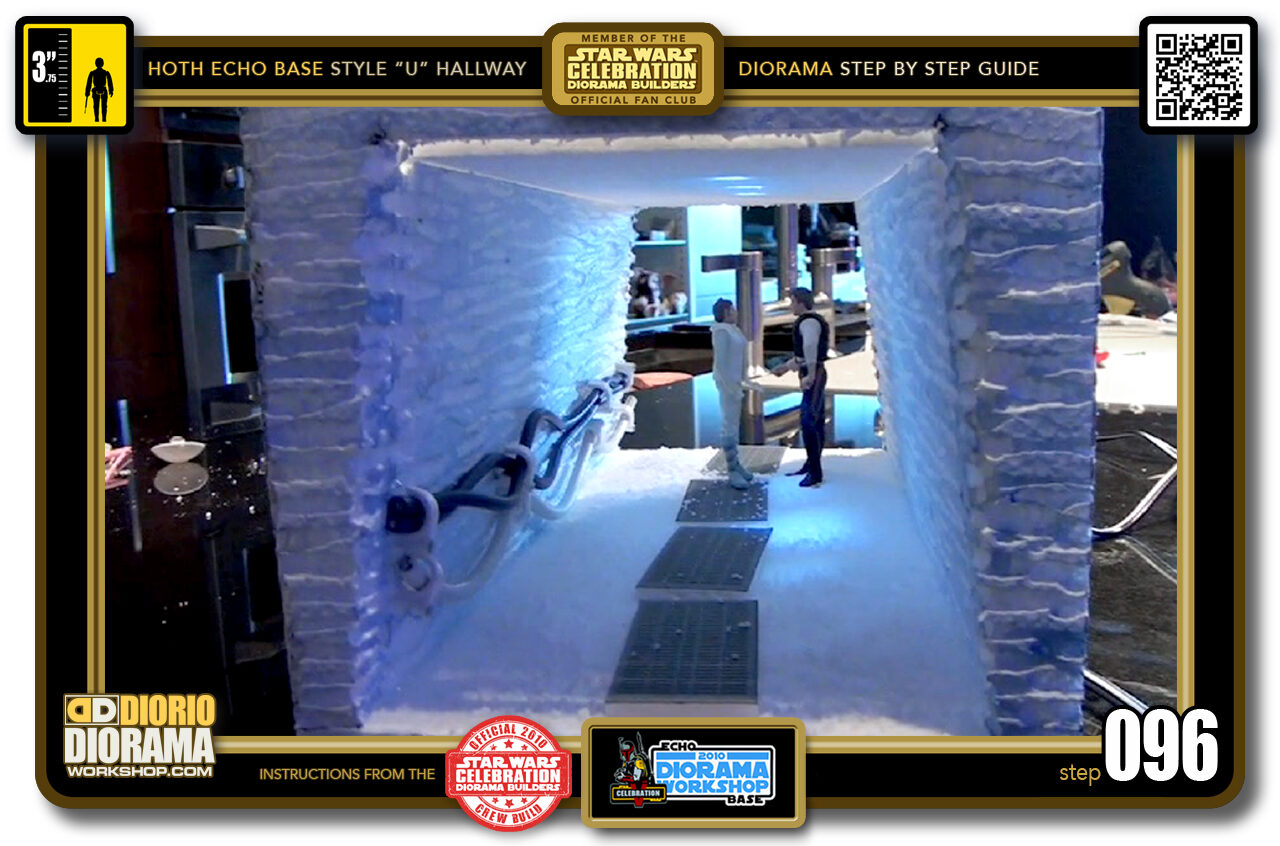
- Step 096 >> Your "U" Hallway is complete. You can make as many as you want to make connecting hallways. If you do a 3 Arch wall, you need at least 3 copies of this to place behind. Looks pretty cool if I do say so myself 🙂
-
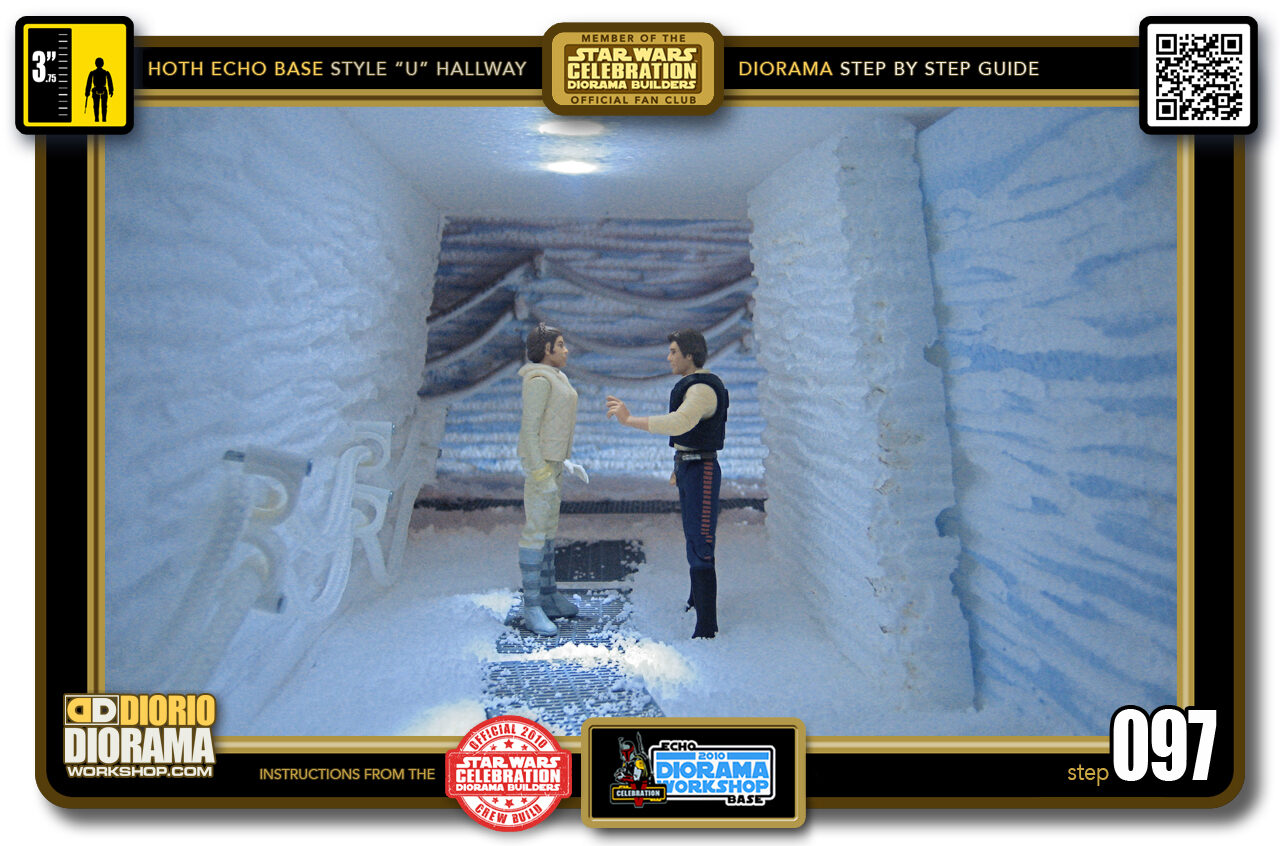
- Step 097 >> You can now also build and place a "L" hallway at the rear to give you the illusion of a connecting corridor just like in the movie 🙂 Happy Building 🙂 Frank.
.
Did you already build this Diorama ? At home or at our Star Wars Celebration Diorama Builders workshop ? Would you like to show it in the site’s GALLERY VISITORS DIORAMAS section, YES ? That is Awesome !!! You can find out all the details on how to email me your photos on the VISITORS SUBMISSIONS INFO page … When I get your photos, I will create your very own page just like this one. You may not realize it but work does inspire others to join in the fun of making Action Figure Dioramas.
.
NOT FOR RESALE ALL Decals, tutorials and artwork are ©FrankDiorio (dioramaworkshop.com) and offered FOR FREE to the fans – that would be you ? so you can build and display my diorama designs in your very own home. I realize I cannot control what one does with my graphics once I place them on the web, I can only ask you as one fan to another, please respect the artist and do not be that jerk who uses my designs and tutorials to build a copy of my work only to sell it on EBAY or trade/sale groups and forums. Thank You. Frank.
.

.
.
If you have a facebook account, why not join the Official Diorama Builders Fan Club today, simply click the logo link below.
 .
.
Catch up with fellow visitors and exchange stories, read cool interviews with the crew, exchange photos, fun surprises and grab some FAN ONLY merchandise next year at actual future conventions ?
.
©2021 Frank Diorio DioramaWorkshop.Com
.
IF YOU LIKE WHAT YOU SEE, PLEASE SHARE WITH YOUR FRIENDS
USING THE SOCIAL MEDIA BUTTONS BELOW