


-
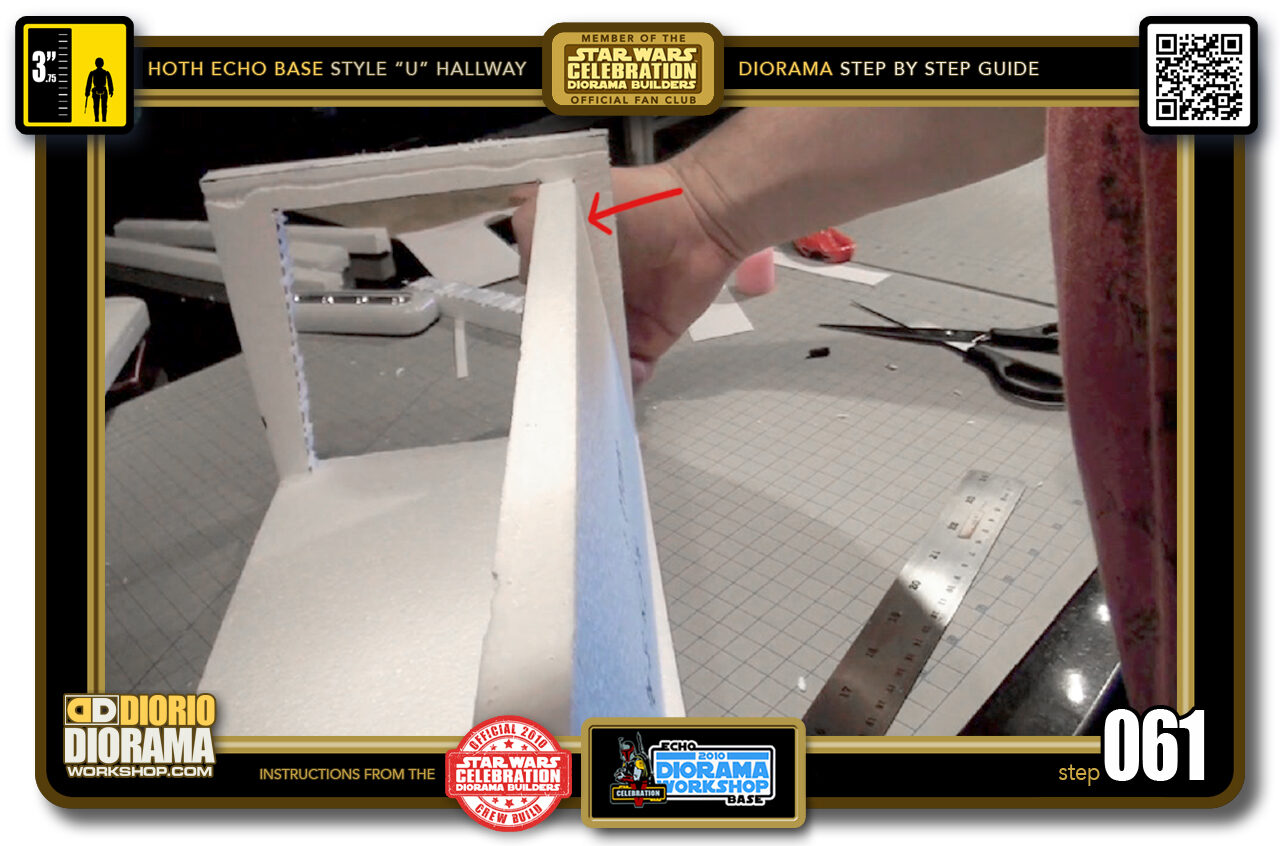
- Step 061 >> What you WANT to see now is the GAP on the OUTSIDE of the walls (Red Arrow).
-
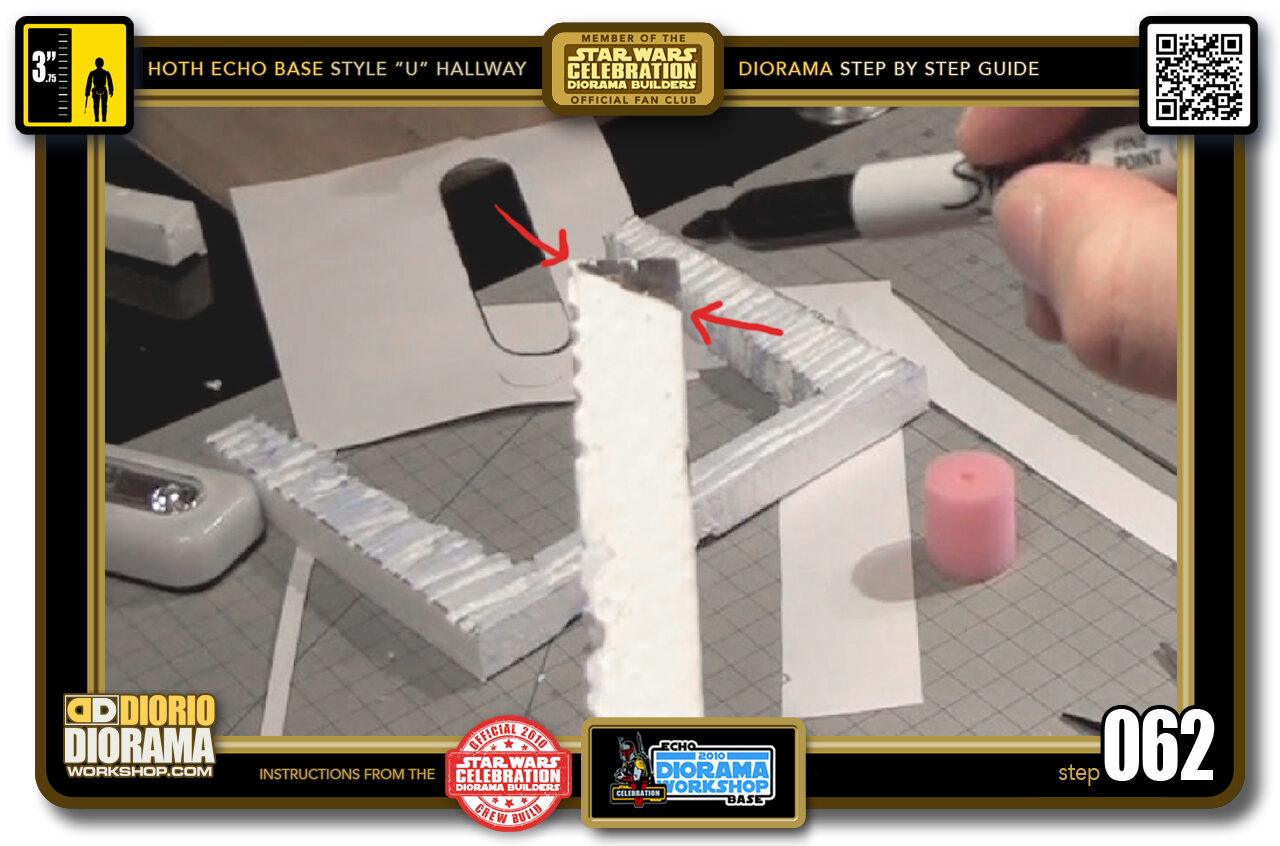
- Step 062 >> Now since the walls will be slightly tilted, the ceiling won't fall on it properly anymore, so we need to angle the TOP EDGE to return it to a flat surface when tilted. So we want to slice off what I marked in black between the 2 red arrows. You can also understand this better when watching the You Tube tutorial.
-
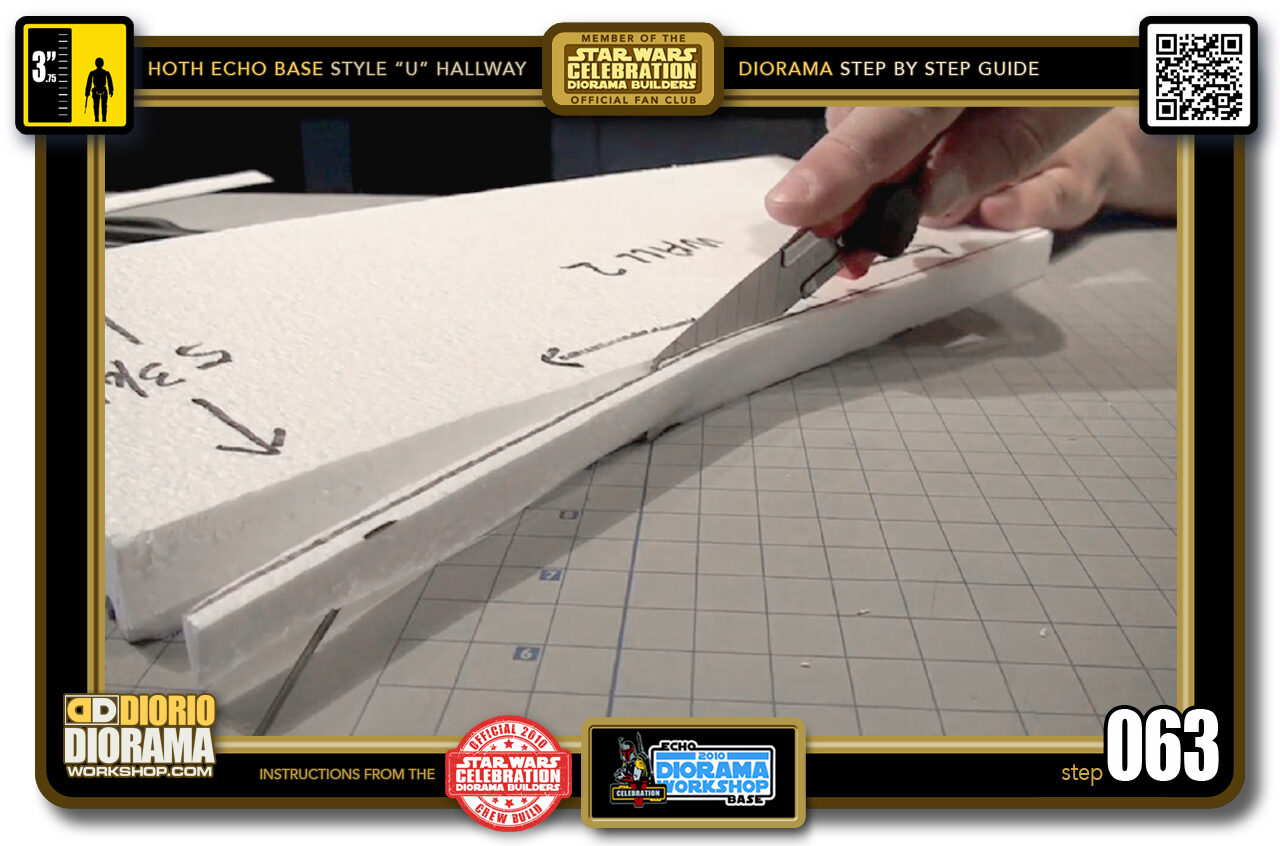
- Step 063 >> Using a NEW blade, slice at an angle all the way across your wall's ceiling.
-
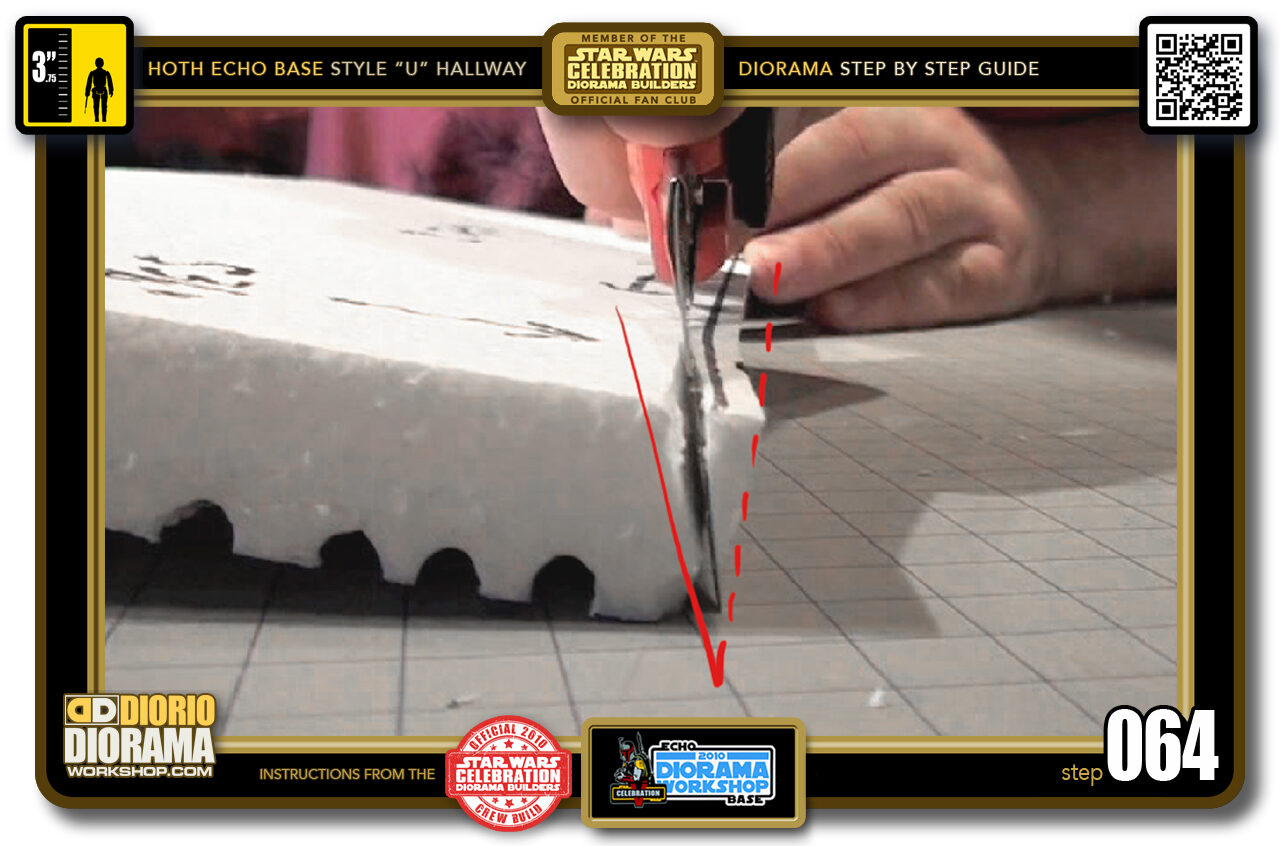
- Step 064 >> It doesn't have to be perfect, you just want the rear of the wall to be lower than the inside.
-

- Step 065 >> Now let's start with the first wall. Use Hot Glue on the BOTTOM - the edge you DID NOT just cut at an angle and ALSO along the SIDE that will touch the arch wall.
-
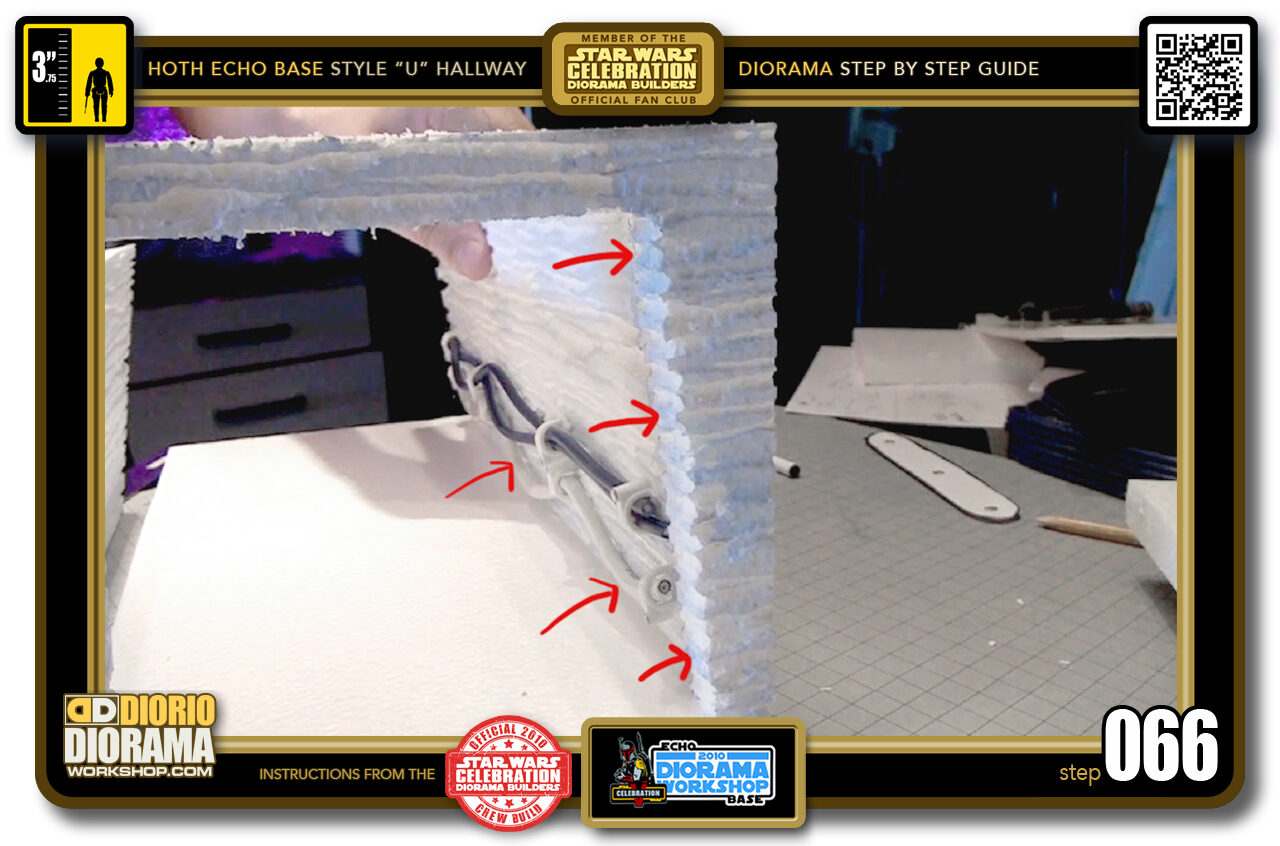
- Step 066 >> Start by placing the wall along the floor THEN SLIDE the wall TOWARDS the Arch. You must do this FAST because the Hot Glue cools and hardens very quick. You should now be able to perfectly align your wall with the INNER Arch Wall.
-
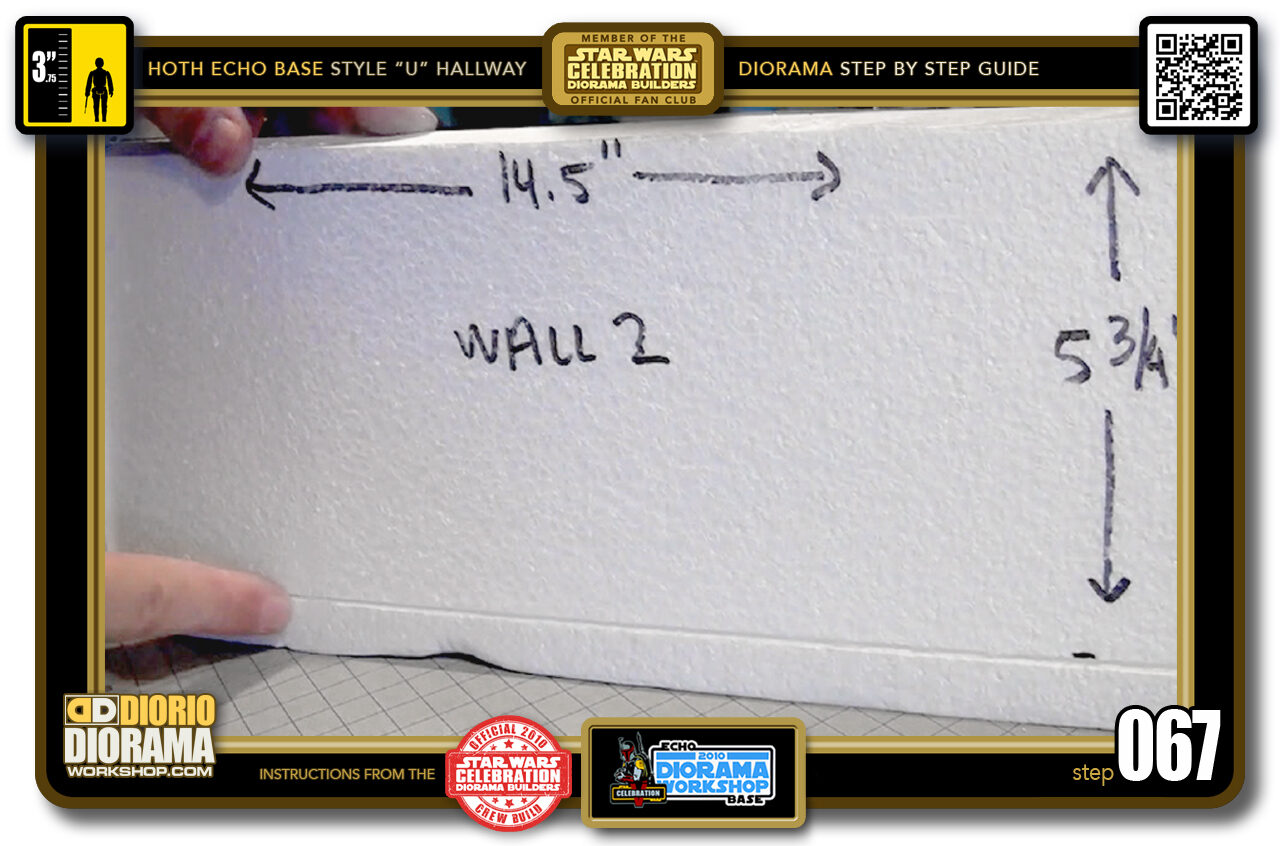
- Step 067 >>On the back, the bottom rear of the wall should align FLUSH with the floor edge.
-
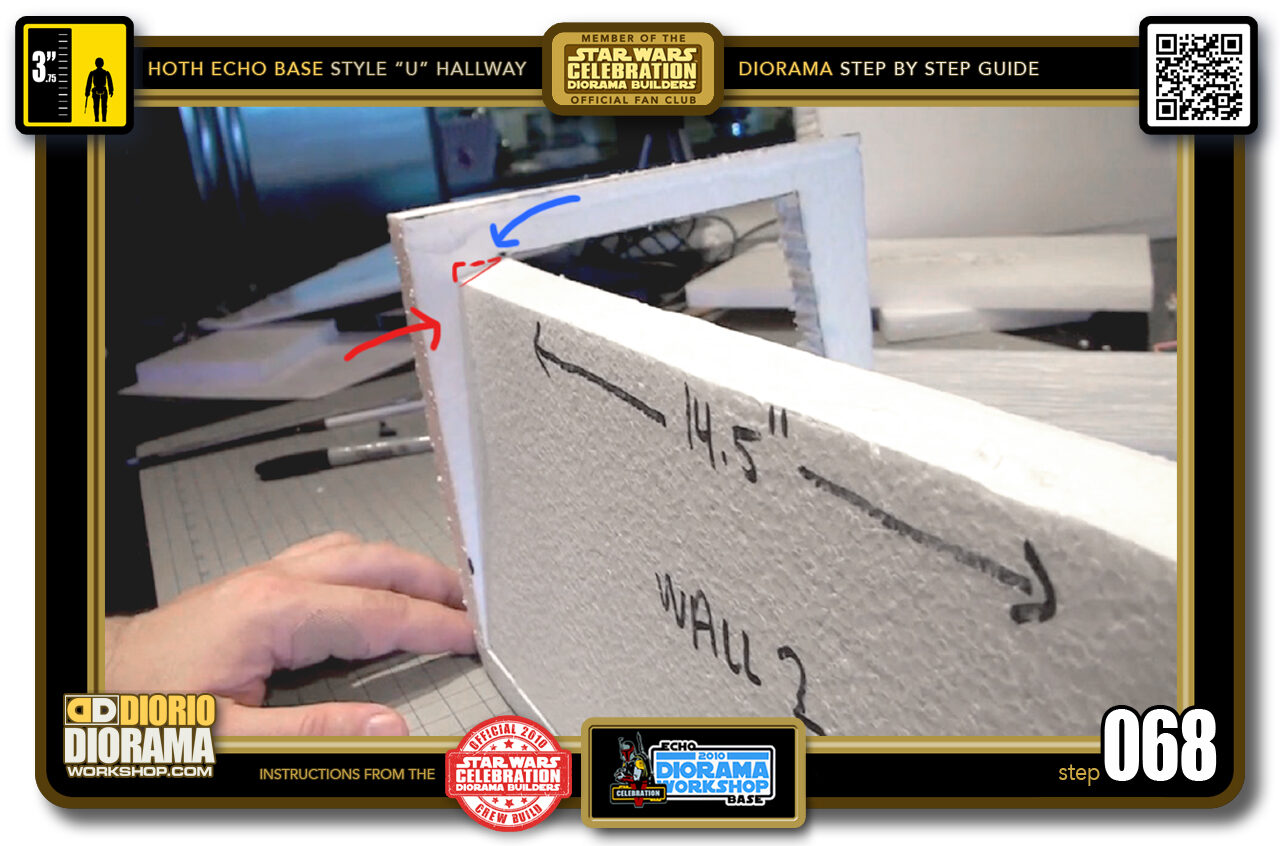
- Step 068 >> And remember to ANGLE the TOP so that the INSIDE TOP of the wall aligns perfectly with the TOP CORNER of the Arch Wall (Blue Arrow) leaving you a slight GAP where the red arrow is pointing. ALSO NOTICE the red line indicates the original top edge of your wall BEFORE we sliced it off at an angle.
-
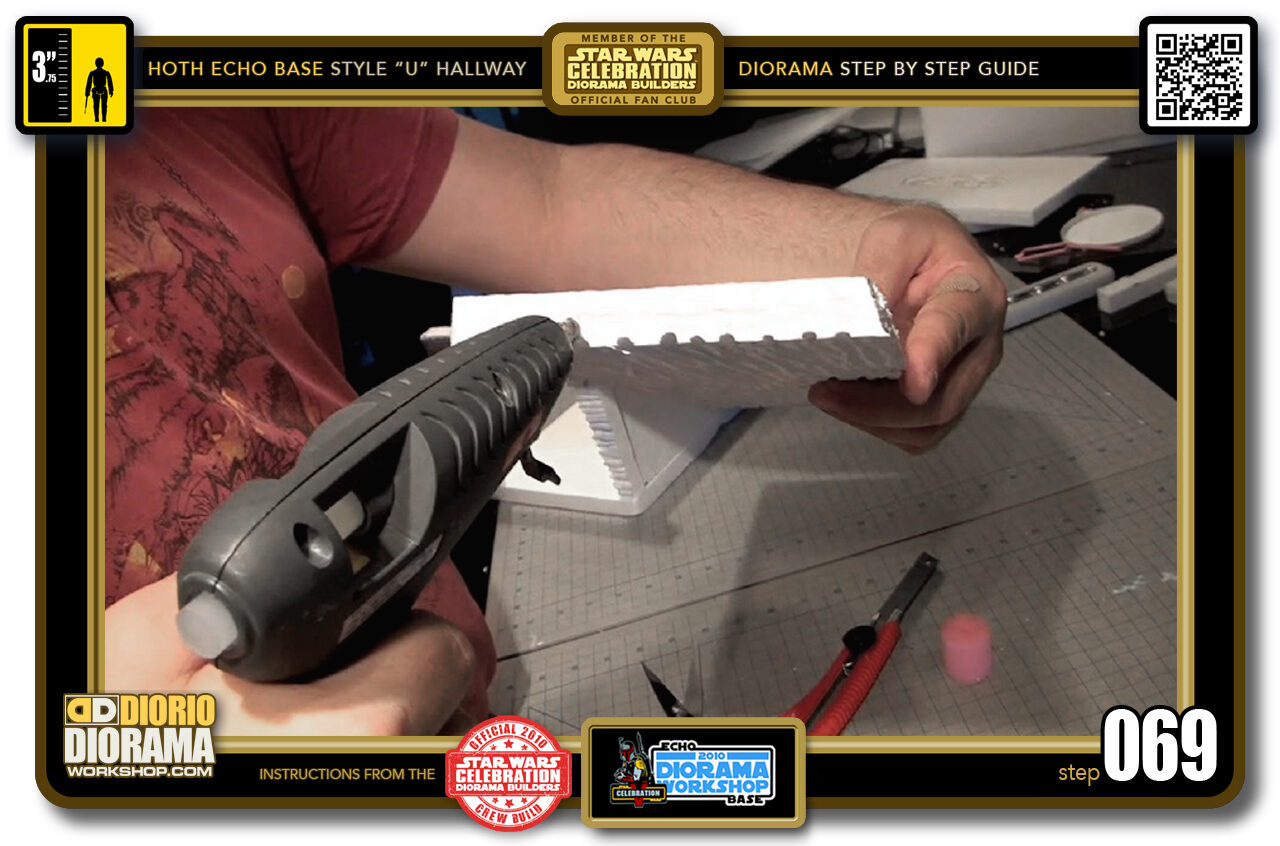
- Step 069 >> We need to do the same for the other wall now. After the angle cut you can apply some hot glue...
-

- Step 070 >> ... And press it into place as we did the opposite side.
-
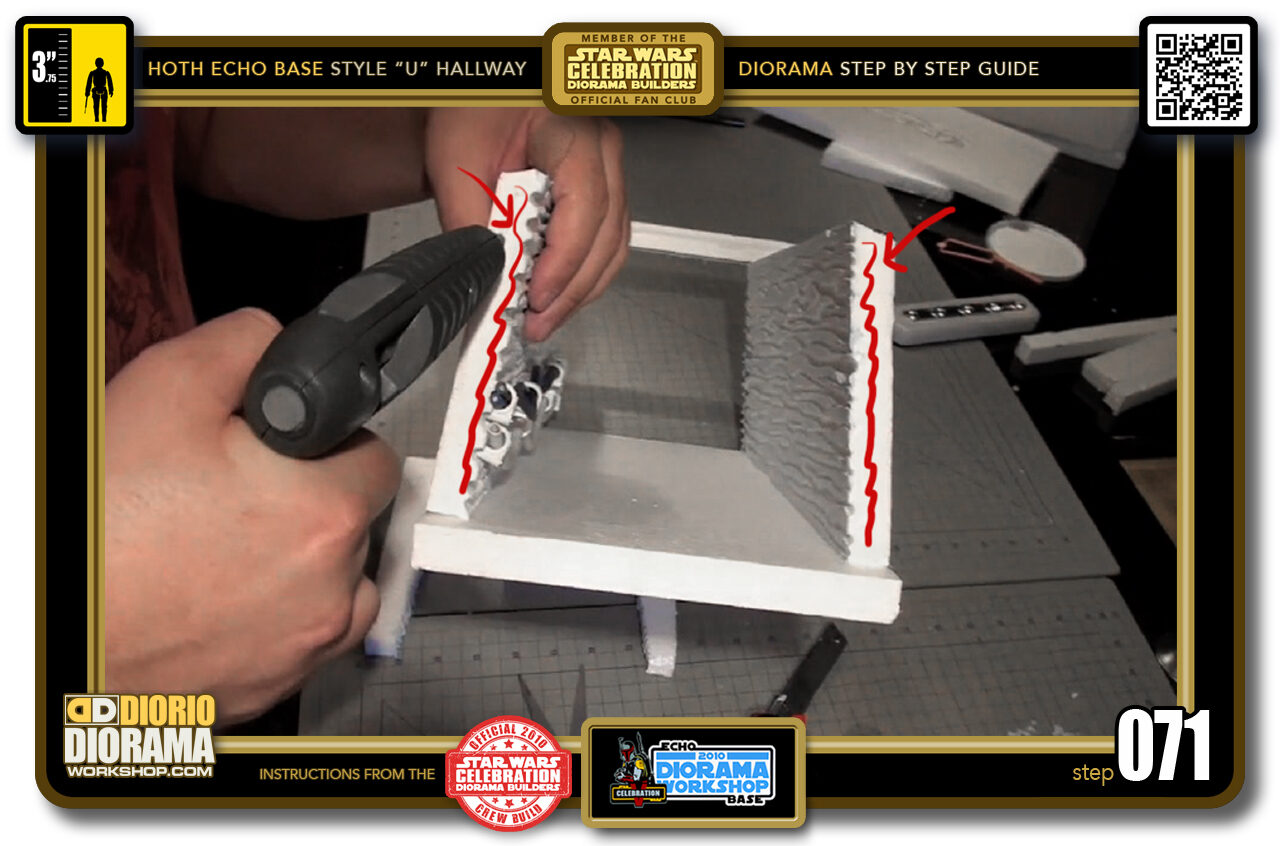
- Step 071 >> Now it's time to cap off the hallway. Place some hot glue along the sides of both walls.
-
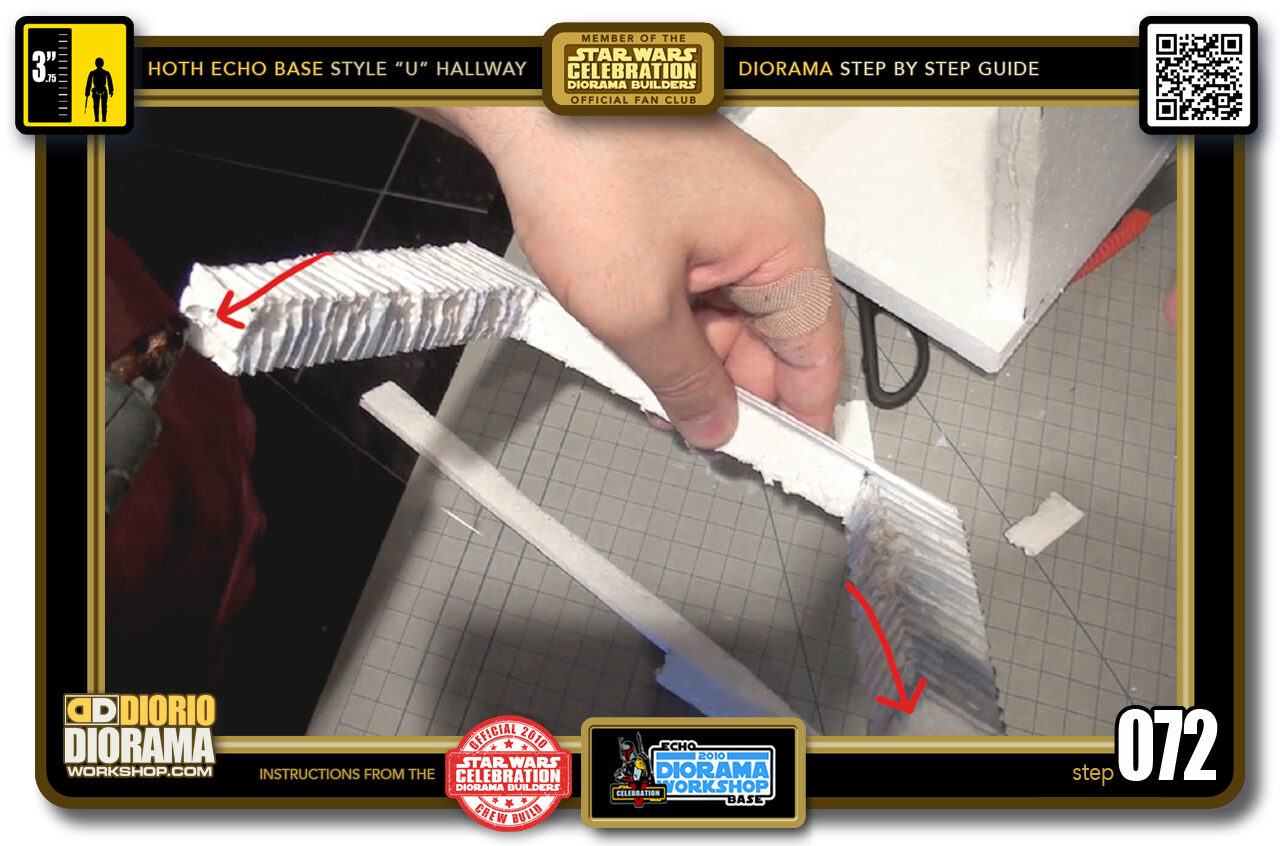
- Step 072 >> ... As well as the 2 BOTTOMS of your 2nd Archway.
-
-
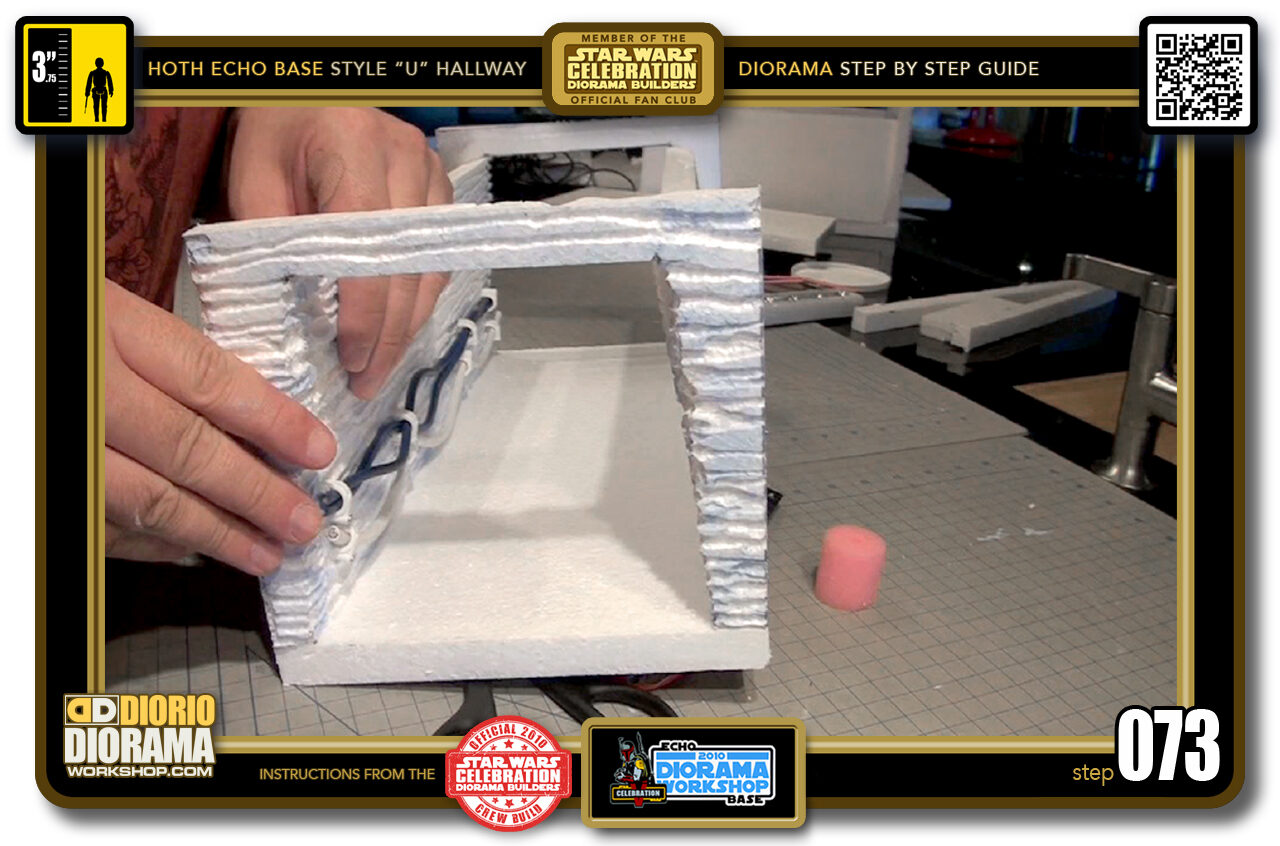
Step 073 >> Start lowering the arch near the floor, keeping the TOP at an angle and AWAY from the wall sides for the moment. Gently press the BOTTOM of your Archway to the floor and SLOWLY angle the TOP back towards a 90 degree angle to make it contact with the sides and gluing the 3 pieces together.
Make sure the INSIDES of BOTH Walls line up FLUSH with the Insides of your Arch BEFORE the glue hardens.
-
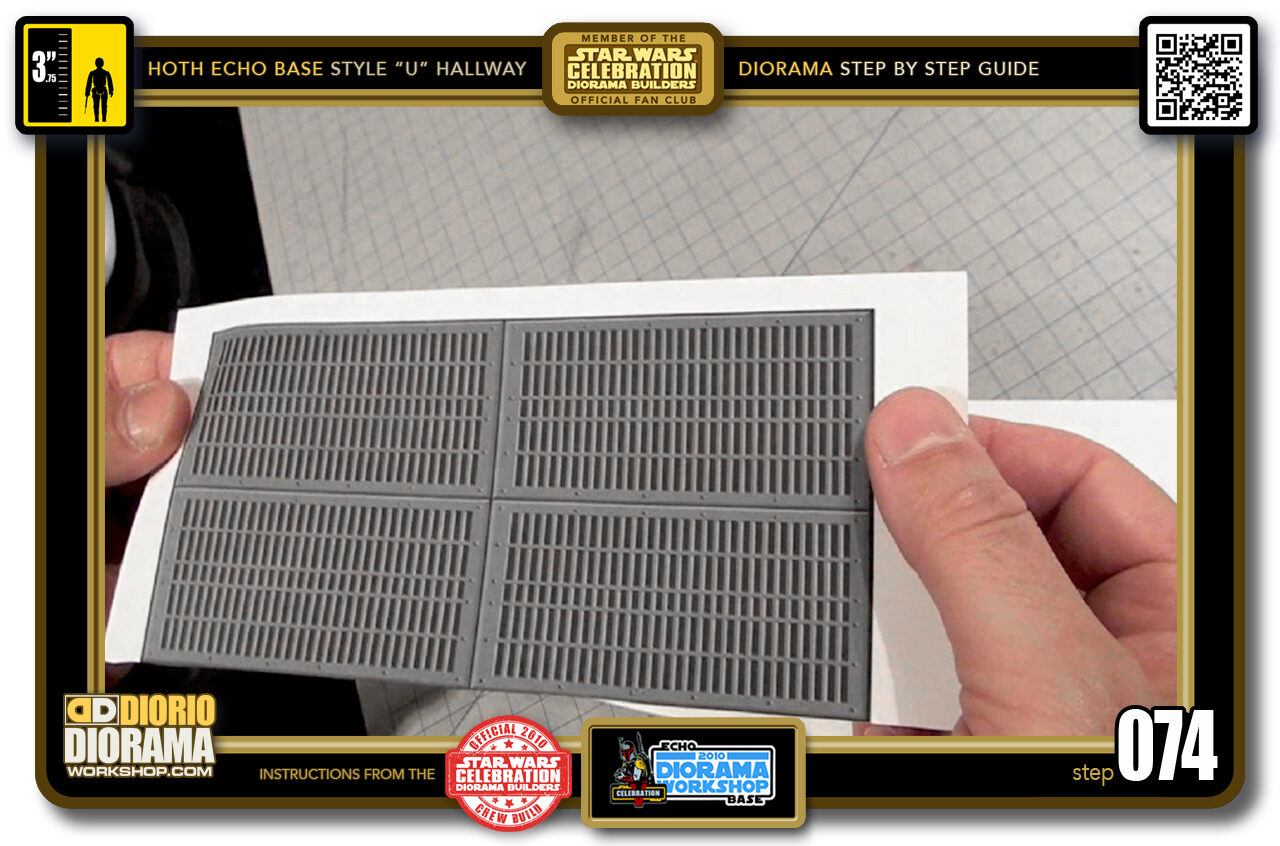
- Step 074 >> Now grab your printed Floor Grid Decals. I like to use full size label sheets for my decals. (you can use regular sheet of paper with gluestick as well - NEVER HOT GLUE WITH DECALS)
-
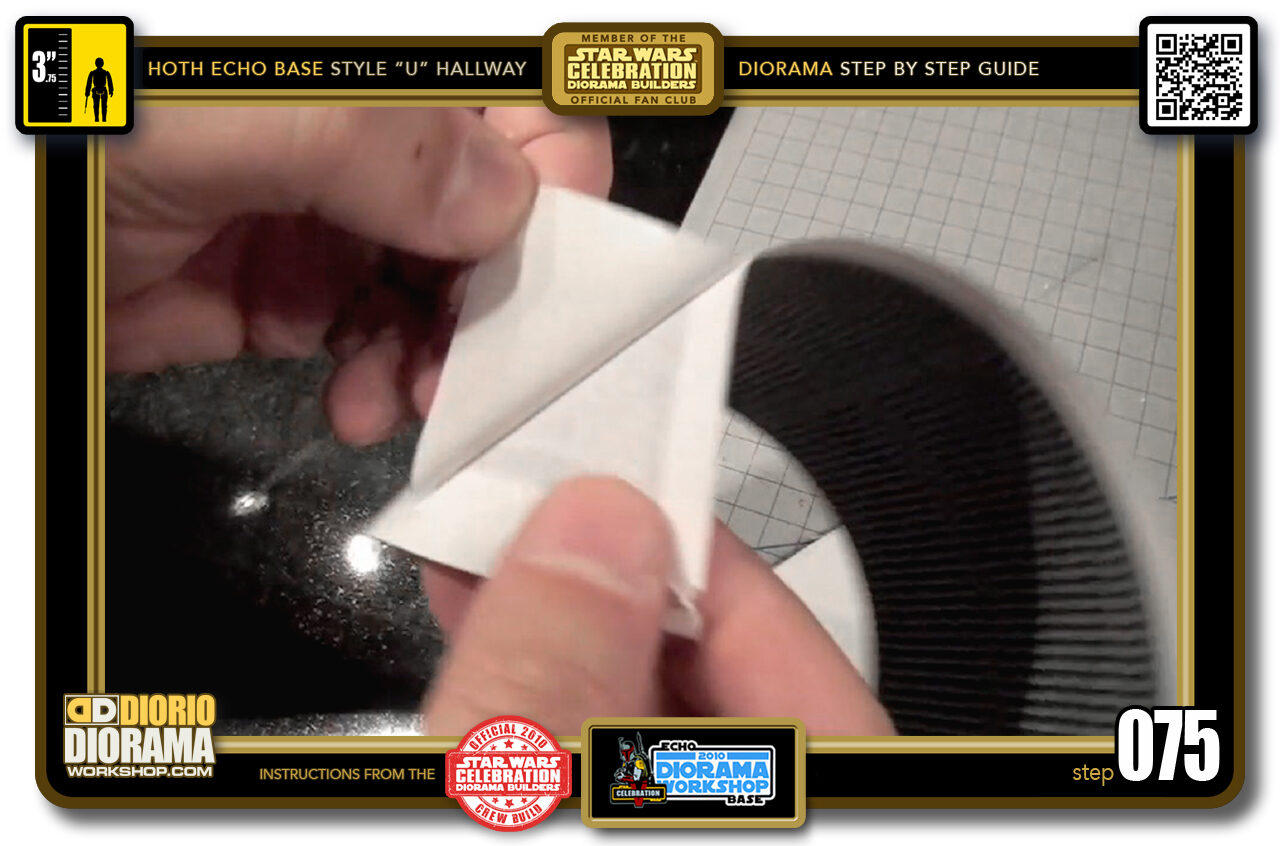
- Step 075 >> Peel the back of your decal sheet if you used the same printer paper as I did.
-
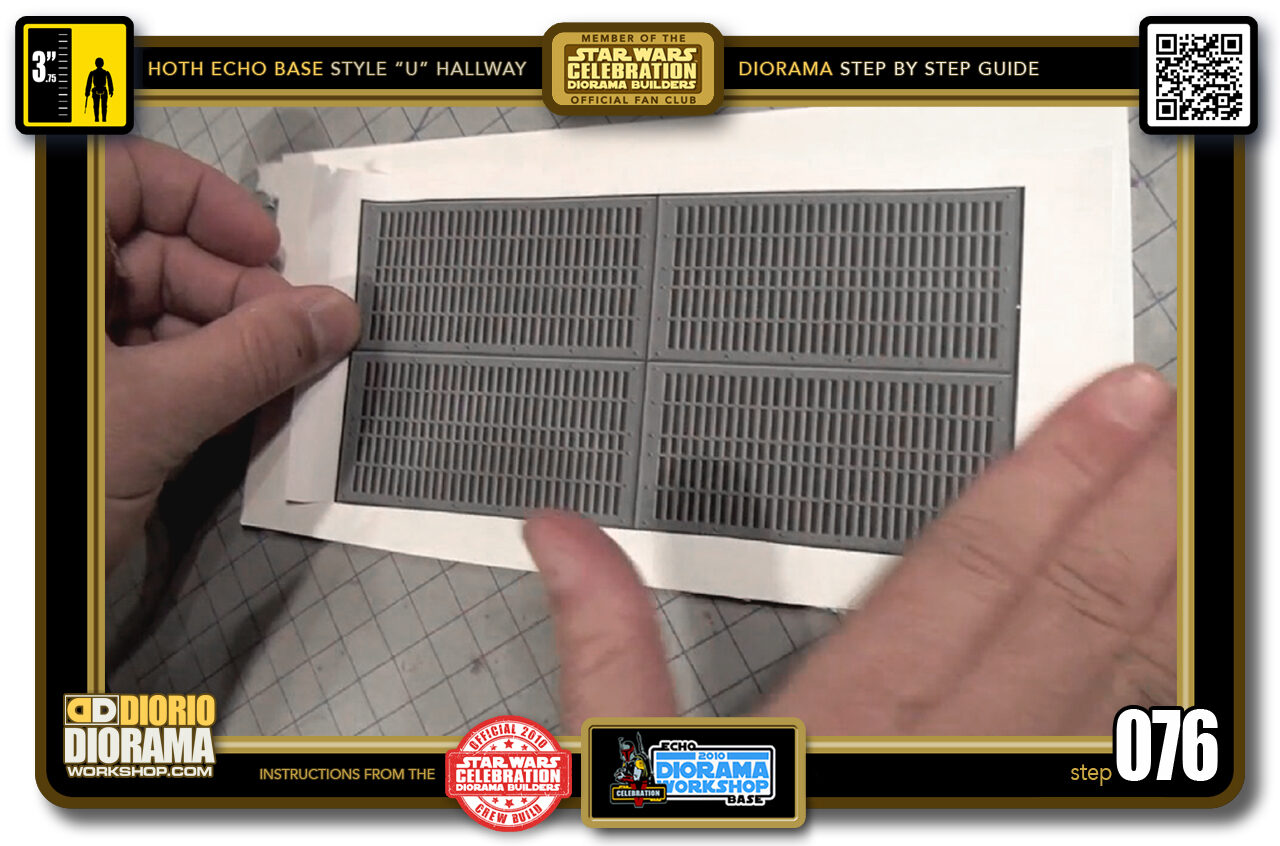
- Step 076 >> Press your decal against a piece of Foam Core (Foam Board).
-
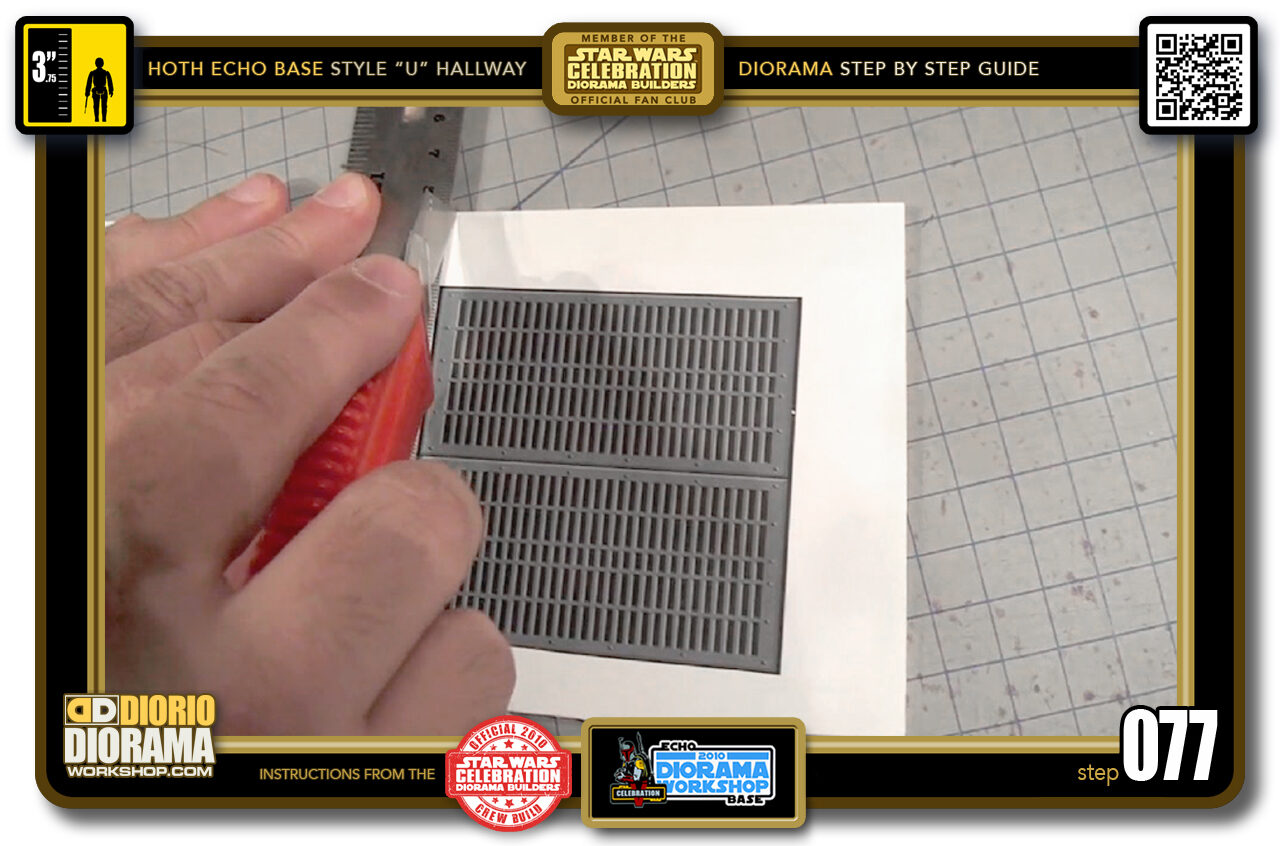
- Step 077 >> Use your X-Acto Knife to cut around the outside edges.
-
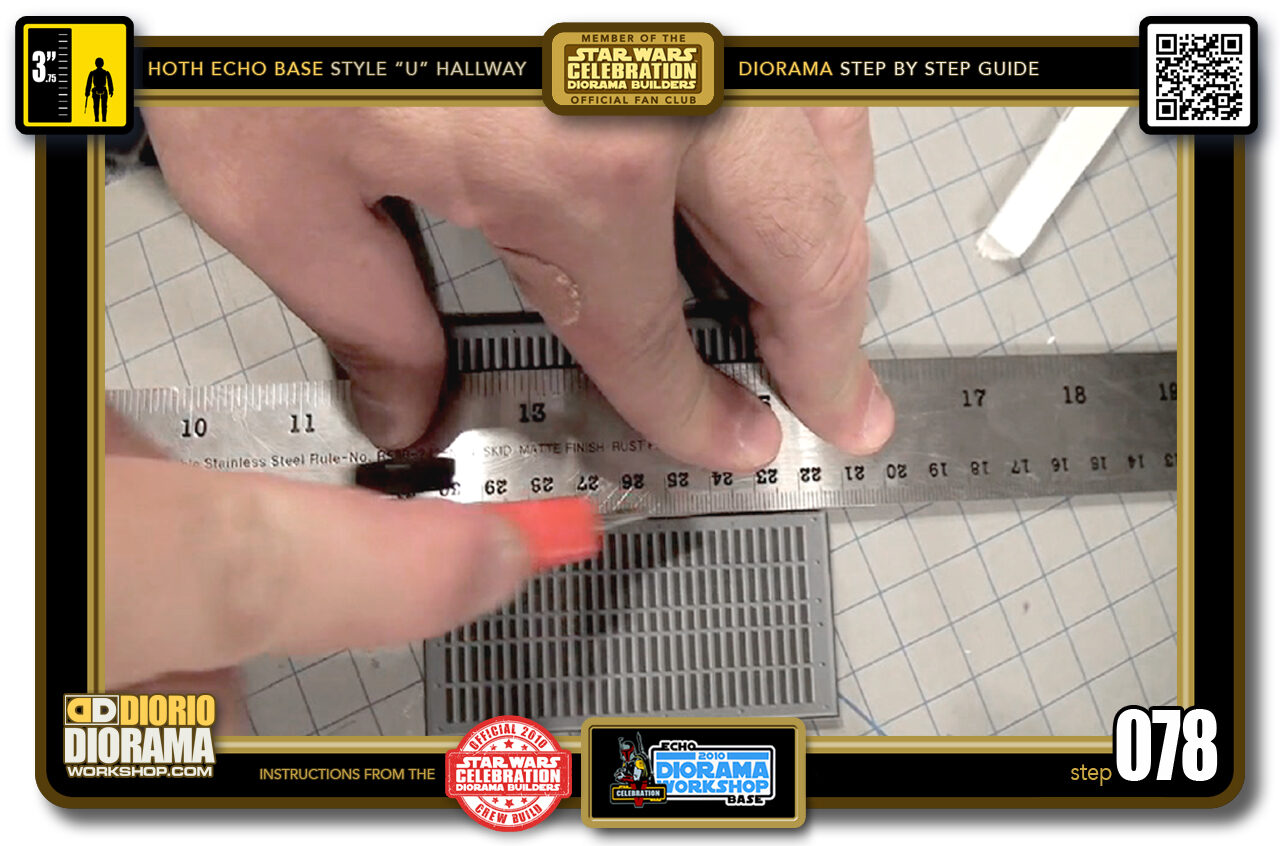
- Step 078 >> Then slice in between the pieces ...
-
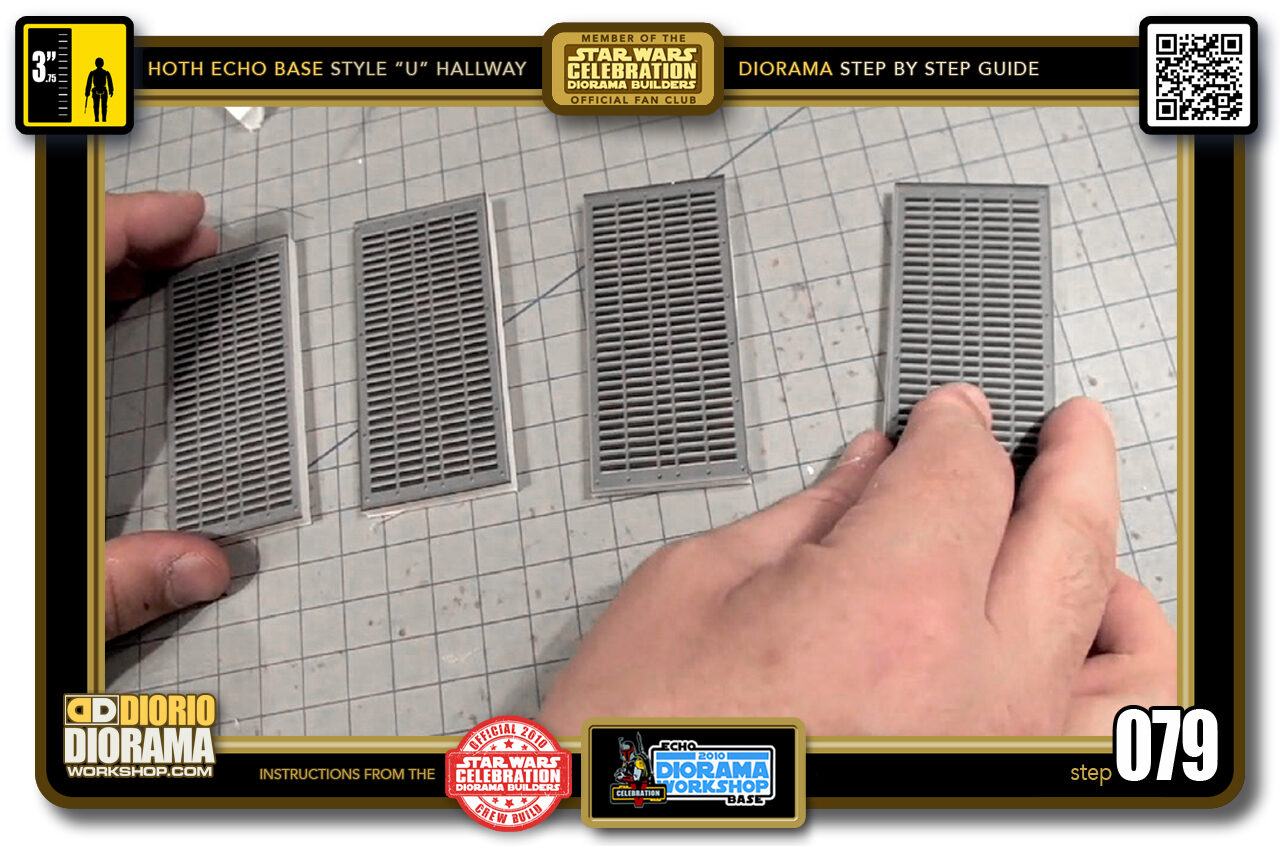
- Step 079 >> ... leaving you with FOUR floor grid pieces. If your hallway is longer, you can place as many as you wish.
-
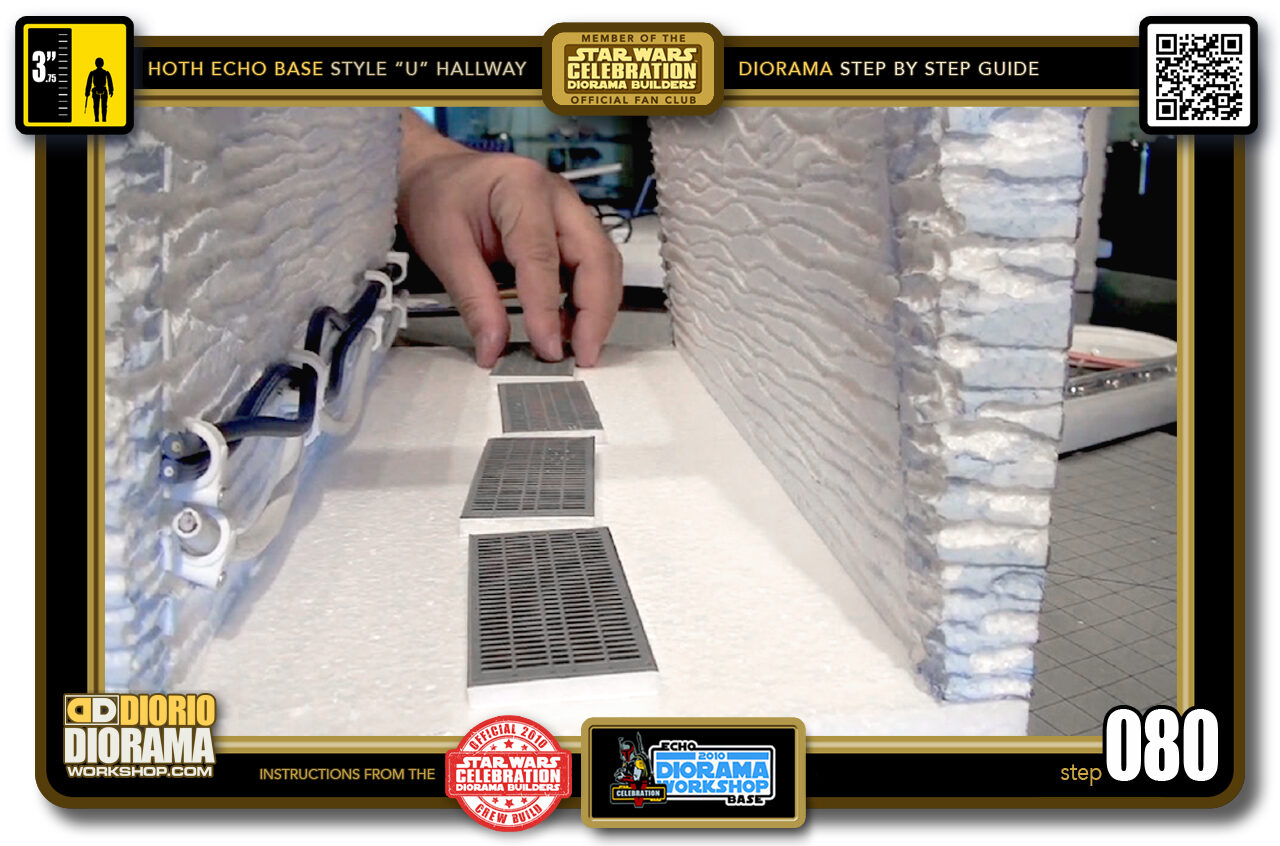
- Step 080 >> Place your grids along the floor of your Hallways. I like to have them slightly angled and not a perfect line to make it more like the film.
.
Did you already build this Diorama ? At home or at our Star Wars Celebration Diorama Builders workshop ? Would you like to show it in the site’s GALLERY VISITORS DIORAMAS section, YES ? That is Awesome !!! You can find out all the details on how to email me your photos on the VISITORS SUBMISSIONS INFO page … When I get your photos, I will create your very own page just like this one. You may not realize it but work does inspire others to join in the fun of making Action Figure Dioramas.
.
NOT FOR RESALE ALL Decals, tutorials and artwork are ©FrankDiorio (dioramaworkshop.com) and offered FOR FREE to the fans – that would be you ? so you can build and display my diorama designs in your very own home. I realize I cannot control what one does with my graphics once I place them on the web, I can only ask you as one fan to another, please respect the artist and do not be that jerk who uses my designs and tutorials to build a copy of my work only to sell it on EBAY or trade/sale groups and forums. Thank You. Frank.
.

.
.
If you have a facebook account, why not join the Official Diorama Builders Fan Club today, simply click the logo link below.
 .
.
Catch up with fellow visitors and exchange stories, read cool interviews with the crew, exchange photos, fun surprises and grab some FAN ONLY merchandise next year at actual future conventions ?
.
©2021 Frank Diorio DioramaWorkshop.Com
.
IF YOU LIKE WHAT YOU SEE, PLEASE SHARE WITH YOUR FRIENDS
USING THE SOCIAL MEDIA BUTTONS BELOW