


-
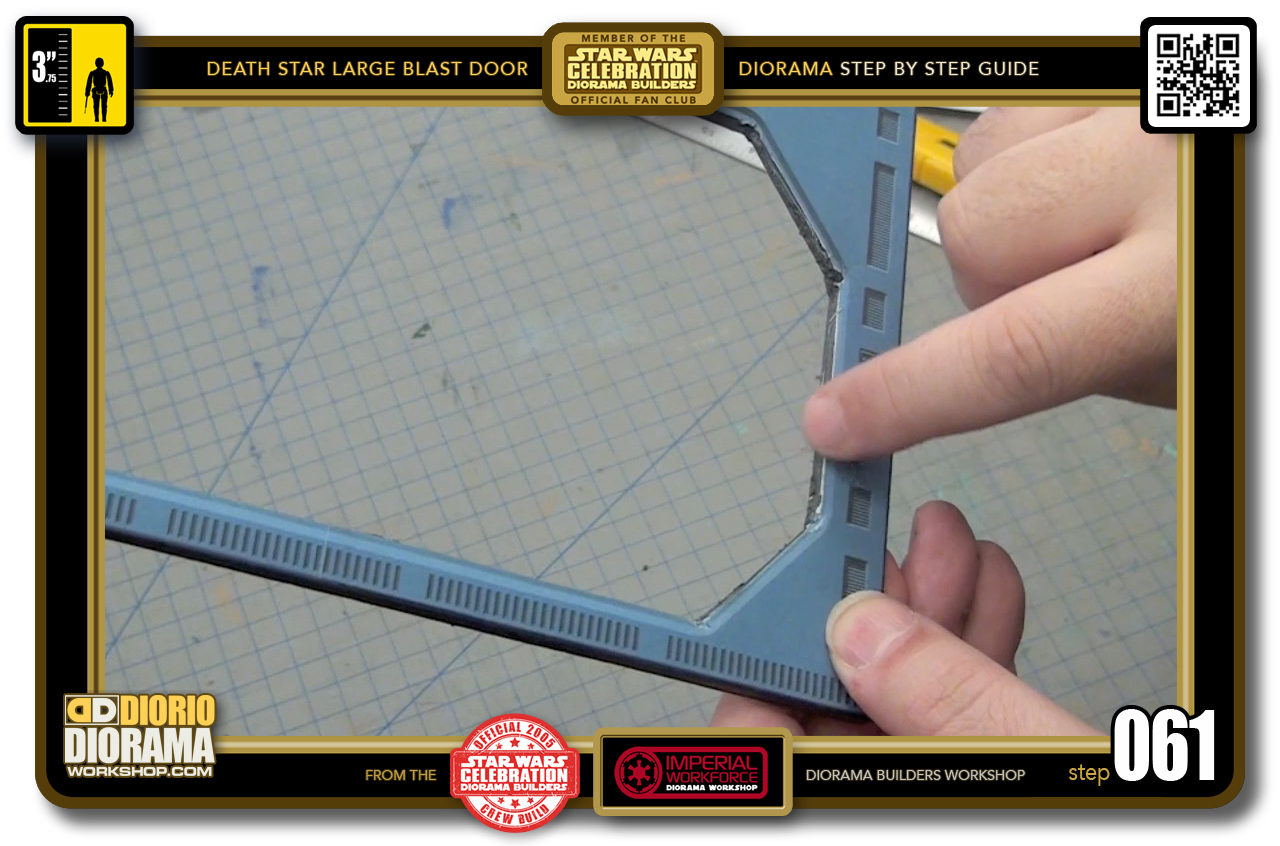
- STEP 061 > To help you blend the edges a little better than just leaving the cuts as is, you can bend the decal inwards to create a rounded smoother effect.
-
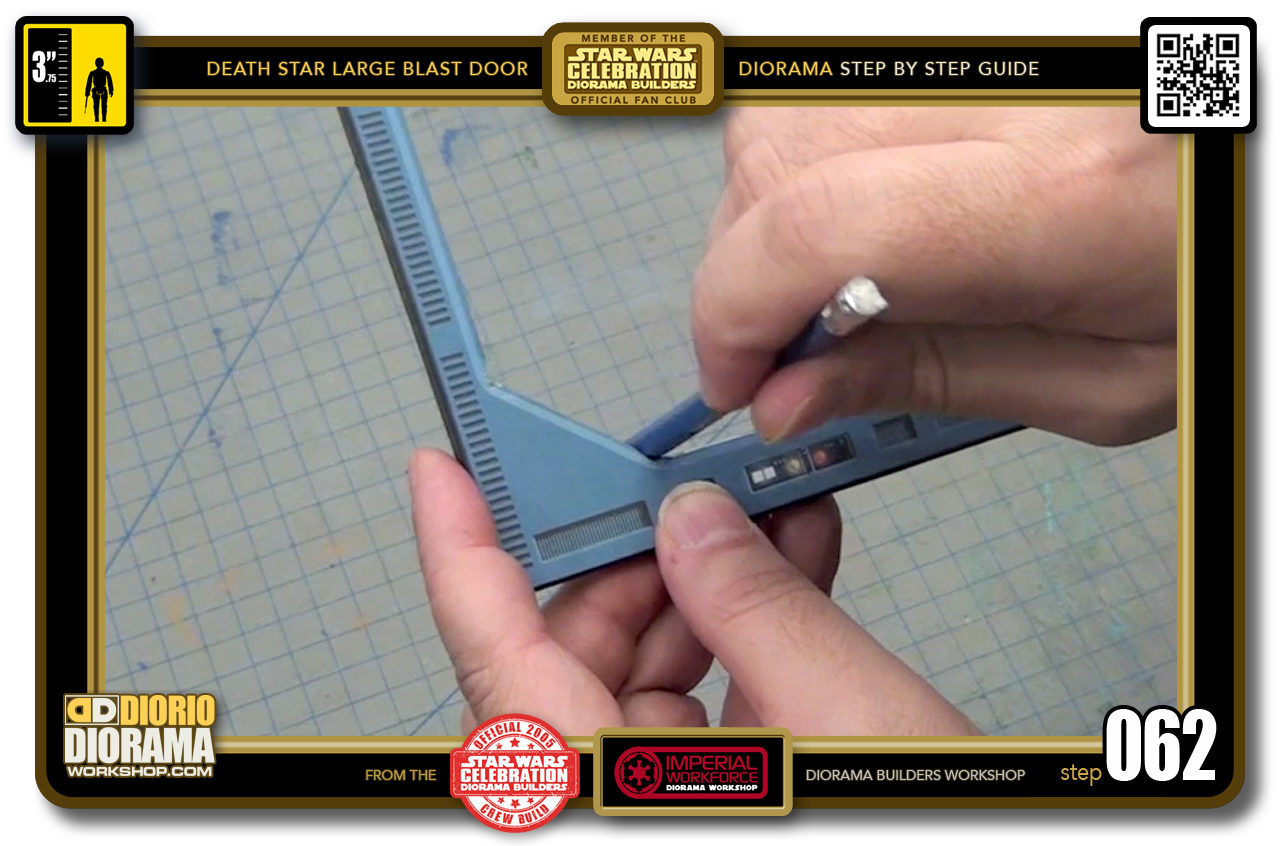
- STEP 062 > The best way to to this is to use a pencil in the corners as the circumference is very close to the curve in the door frame. Simply rub the pencil along the edges softly at first to start the bending of the paper and then apply more and more pressure to get the foamcore to follow too.
-
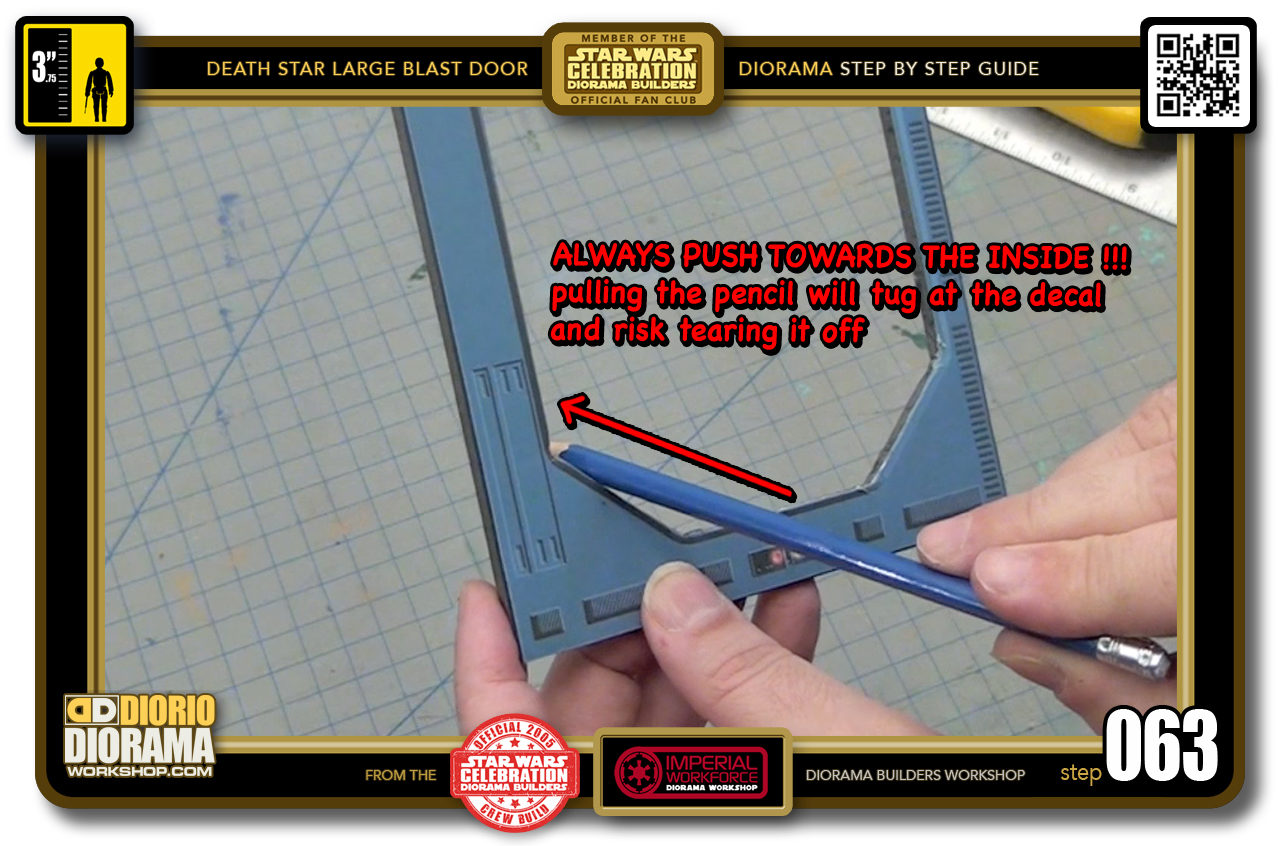
- STEP 063 > Just make sure, if you create a up and down motion - this usually happens when we try round the corners too fast - to start pressing with the tip end of the pencil, and as you push the pencil in, move it along the edges. When you pull the pencil towards you to bring it back to the tip, try and move it away from the frame to avoid it tugging and pulling the decal which could result it tearing. With practice you can to the technique correctly and more rapidly in time.
-
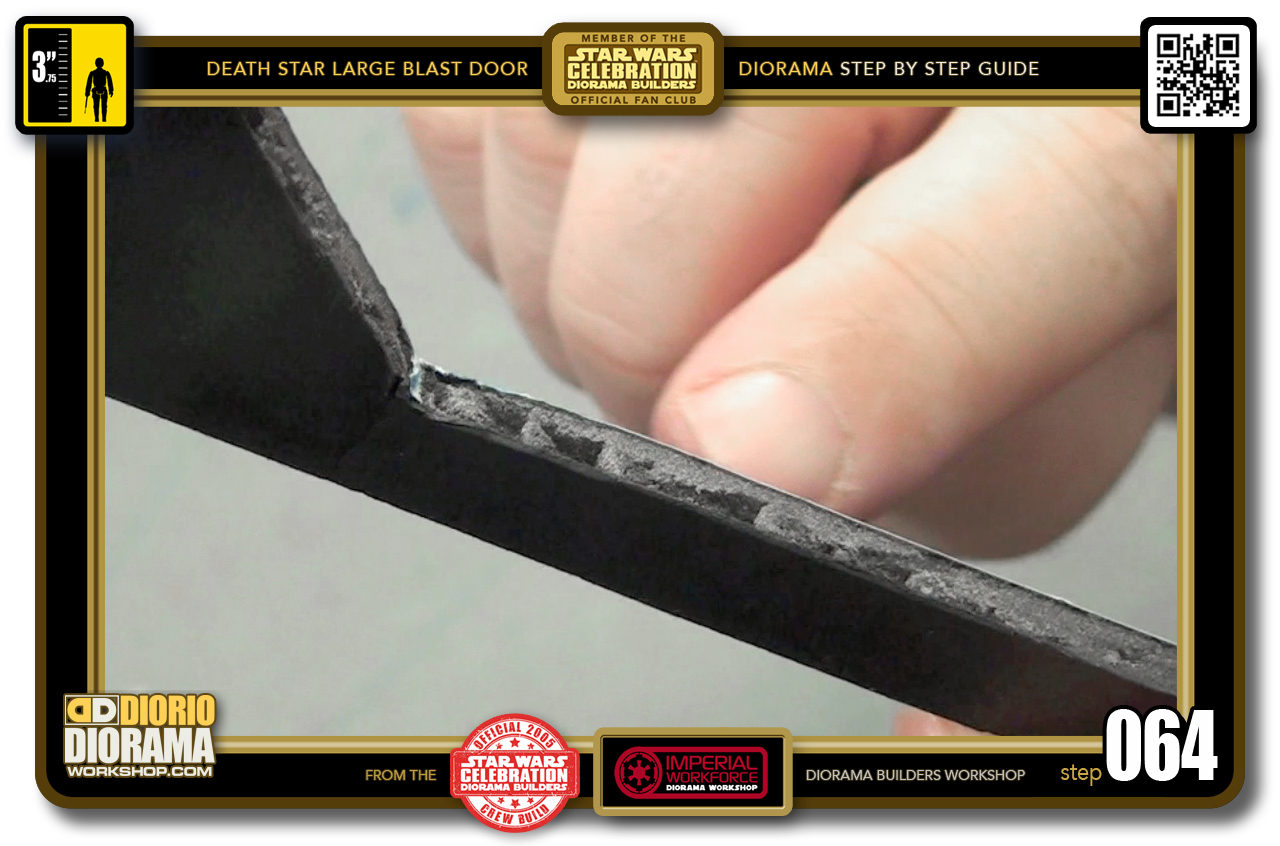
- STEP 064 > Here is an example of what happens when your blade starts to dull. It rips the centre of the foamcore sheet and creates these tiny bubbles. you DON'T WANT THAT. So when you see this simply change or snap your blade. Remember foamcore is the enemy of the blade.
-
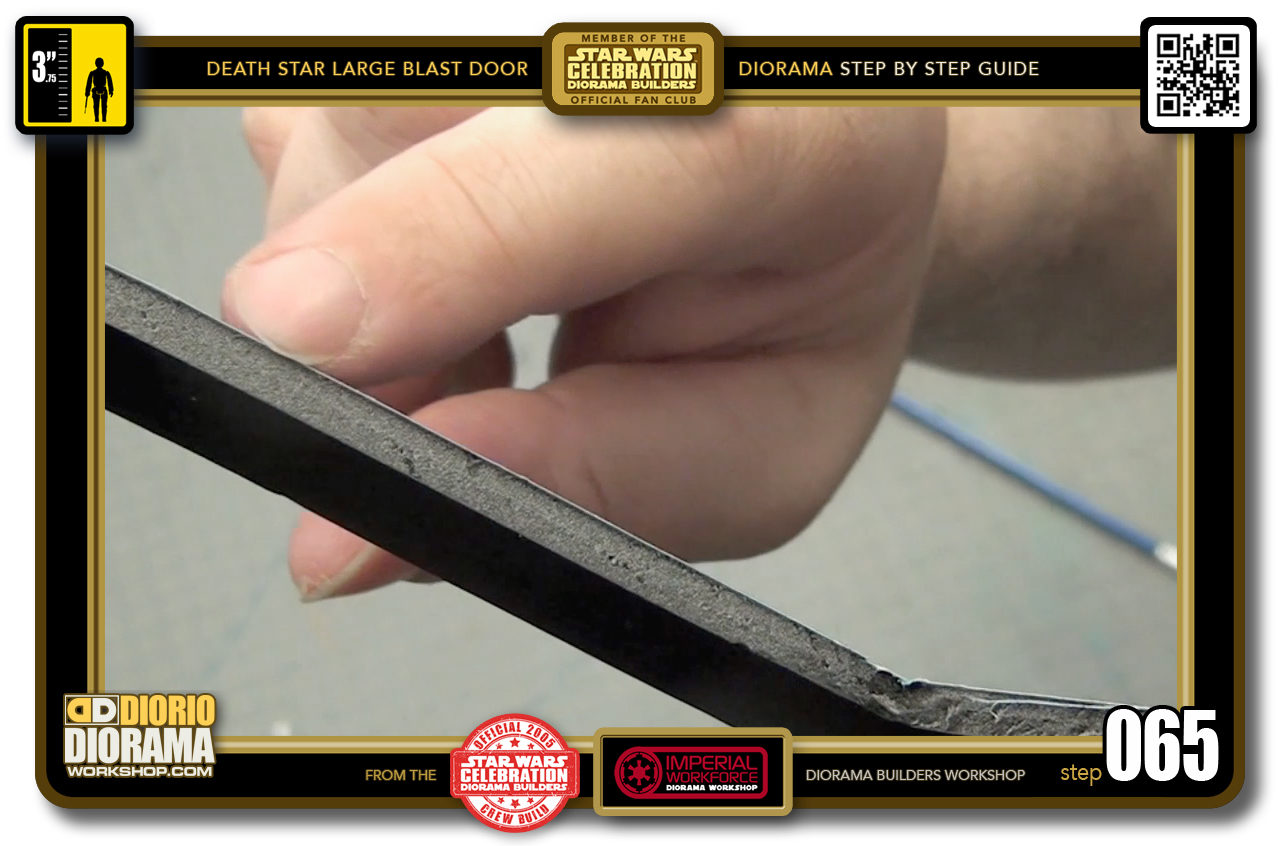
- STEP 065 > This is what you are aiming for, nice clean cuts every time. Not always possible in curves but it's what we want to try and achieve to get the best look.
-
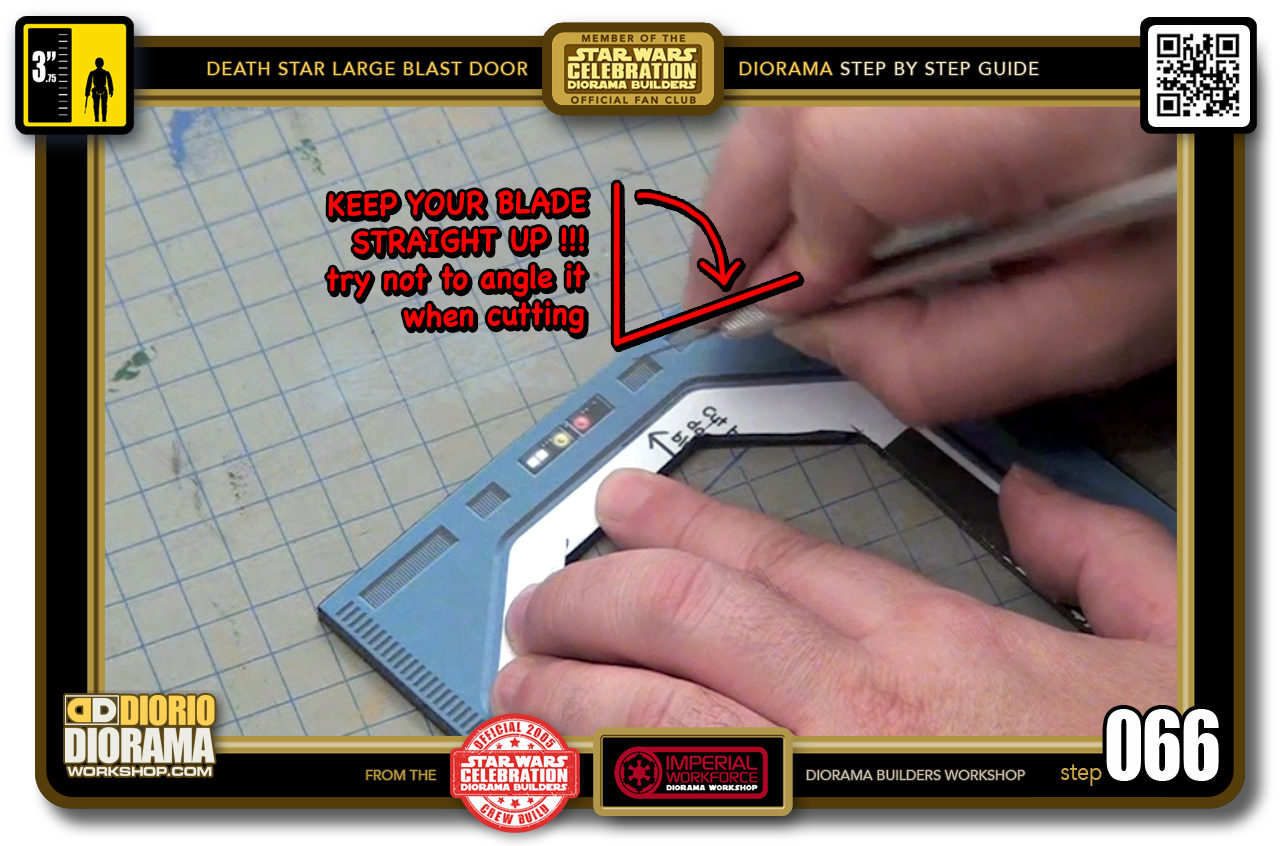
- STEP 066 > Now if you don't own a hole puncher, here is the POINTY X-ACTO PEN technique. What you always want to make sure when cutting is the angle of your wrist. try and always keep a 90 degree angle when you slice the foamcore (unless of course, you have a project that needs a specific angle cut).
-
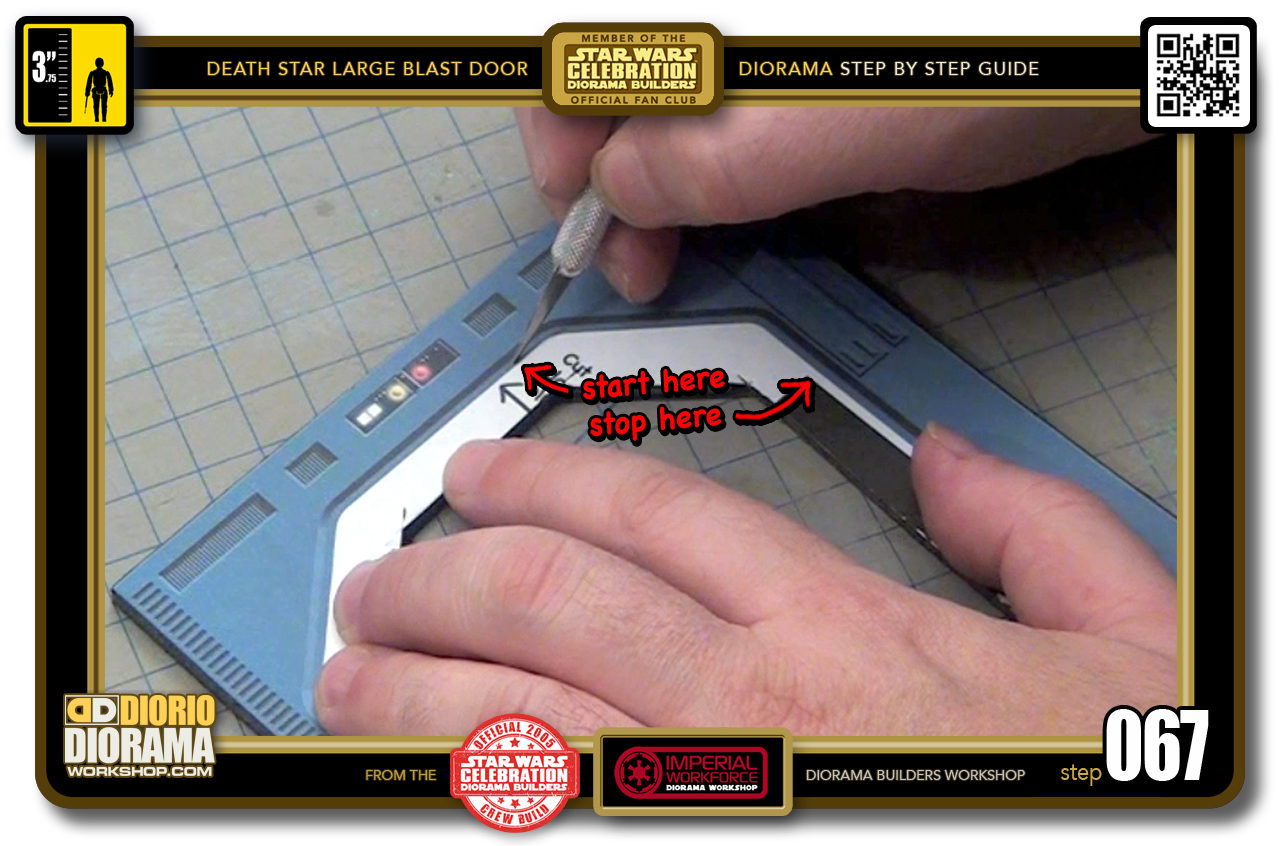
- STEP 067 > What you want to slice is just the end parts of the curves, the long straight lines can be cut with the long blade of your X-Acto Utility Knife. So gently POKE and press down with the tip of your pointy blade, and carefully make your way to the corner. You don't have to press so hard as to slice all the way through in the first pass, it's better to take your time and try use maximum control to follow the bleed line of the decal.
-
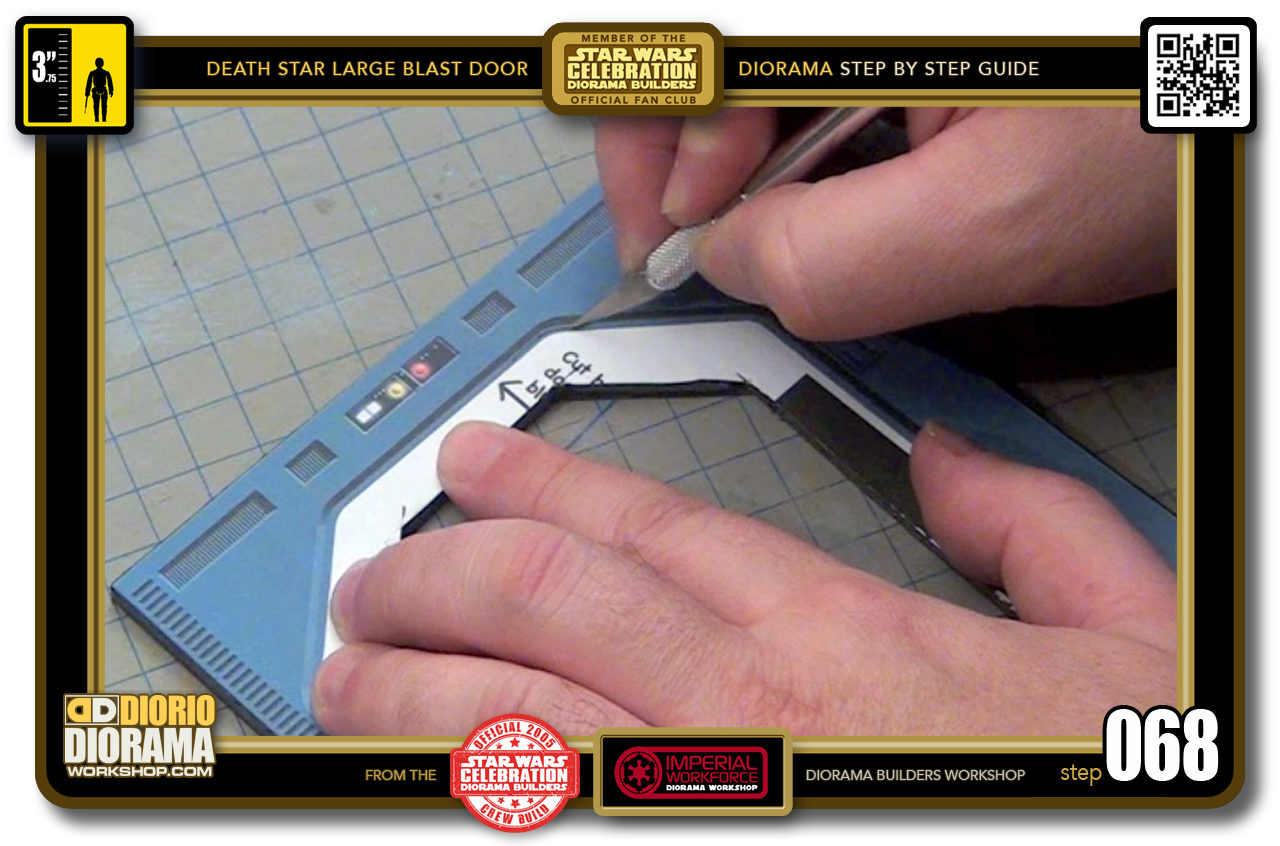
- STEP 068 > Carefully and slowly round the corner - remember to keep your wrist, the blade at 90 degrees. when you finish the first curve I like to stop and spin the frame a little to a position that feels more natural for your writs to move. You aren't playing twister 🙂 and you want to try avoid a cut in the wrong place because your hand got all cramped up.
-
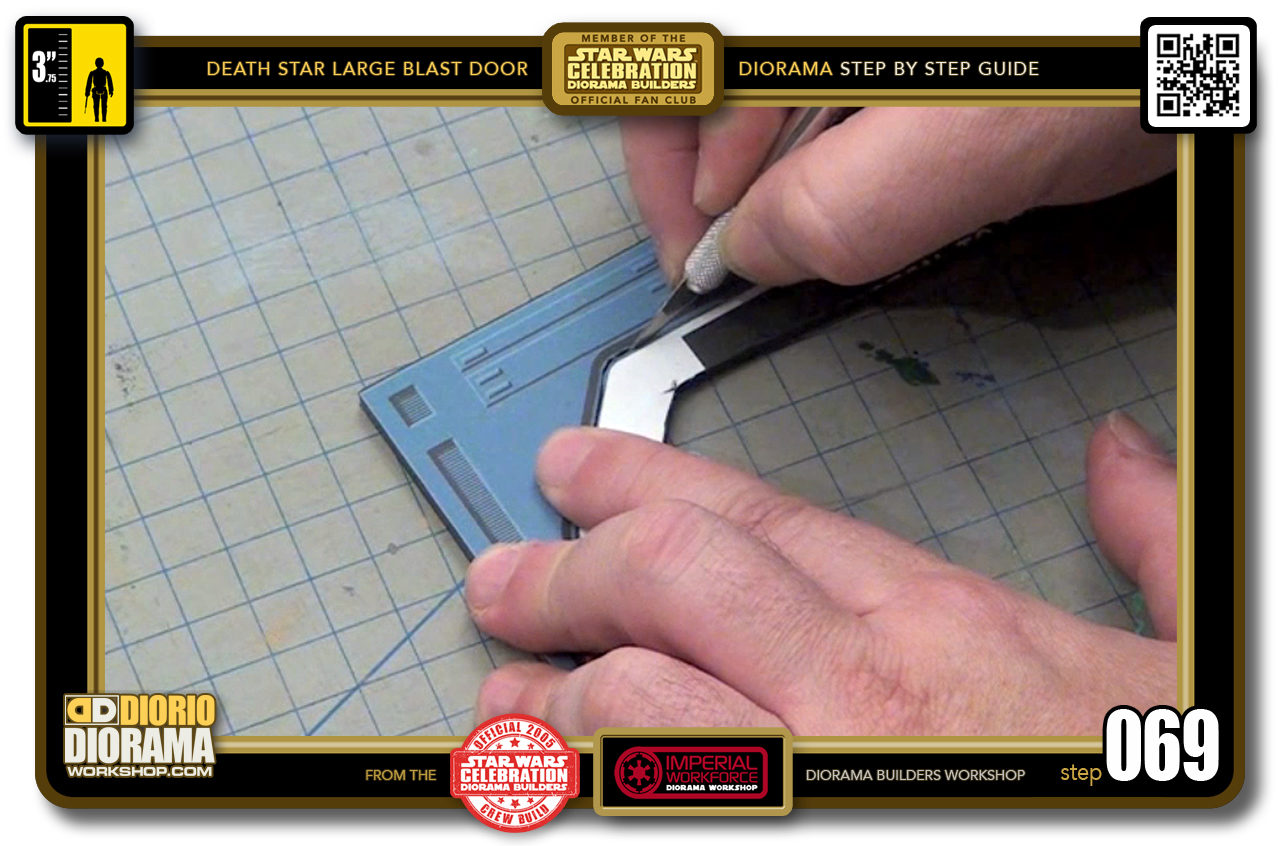
- STEP 069 > After you spin your frame, place the blade back in the groove where you stopped, and continue to carefully follow the bleed line as you reach the next curve and corner your cut then go straight a little bit more. Enough so that when you switch to your long blade, you wont damage the curves you just made.
-
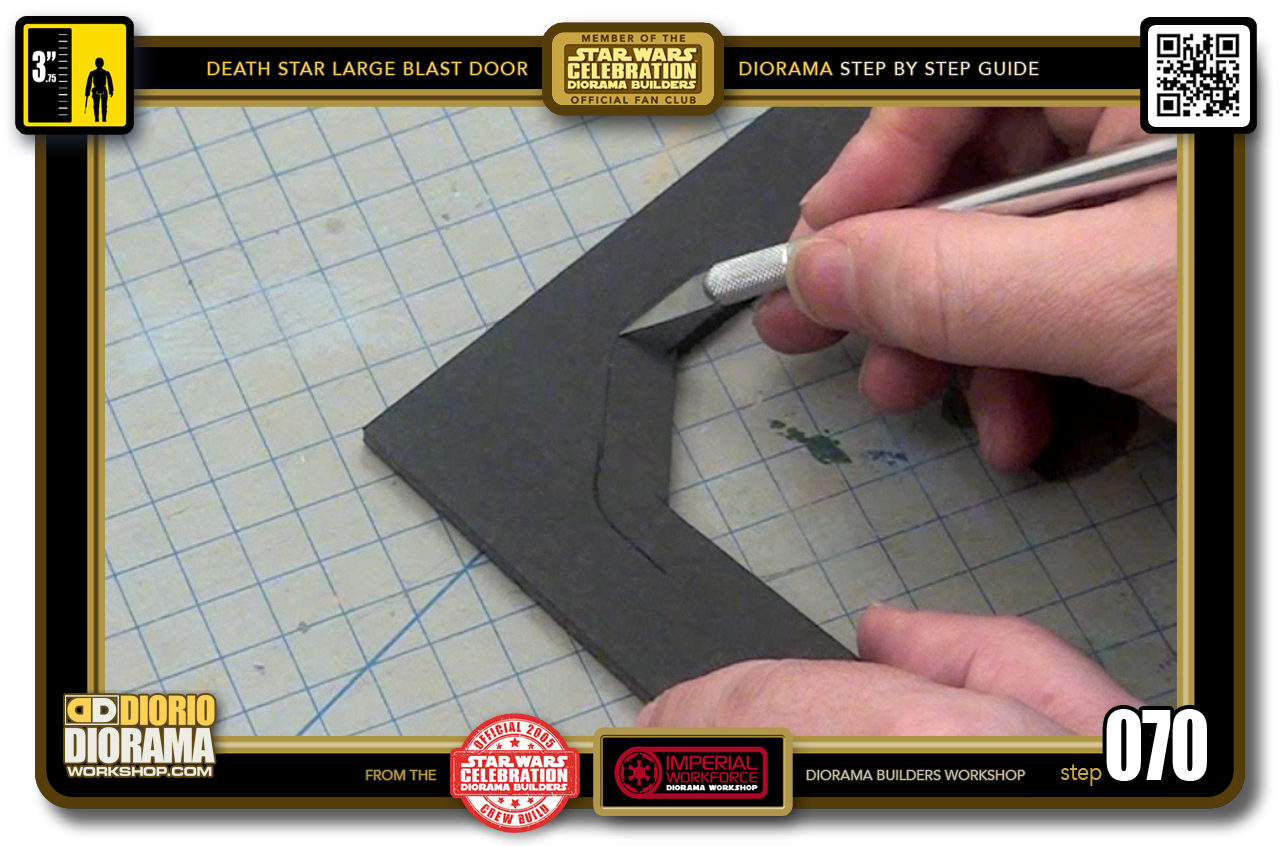
- STEP 070 > Flip your frame around to the other side to examine and see if there are missing connections in the corners.
-
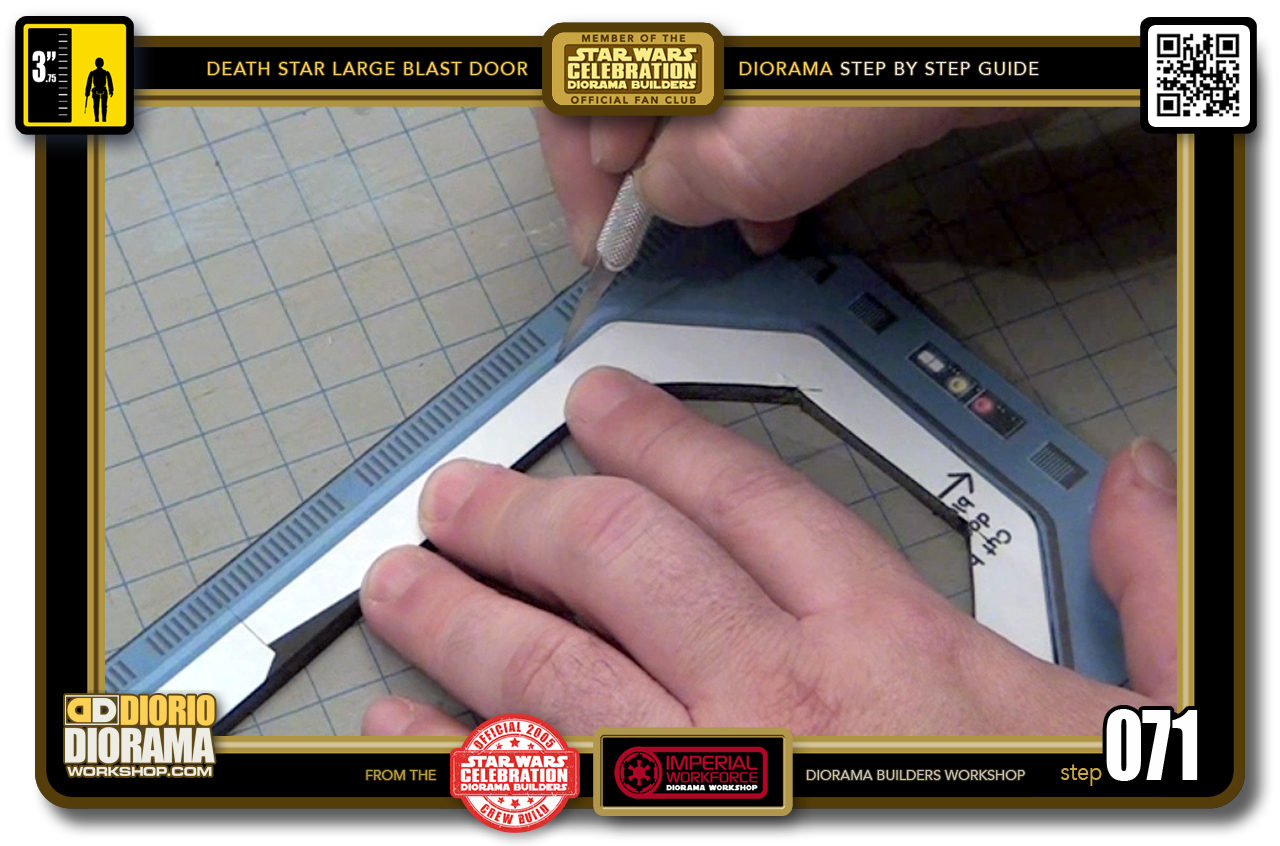
- STEP 071 > Now repeat the same technique on the other end of your door frame.
-
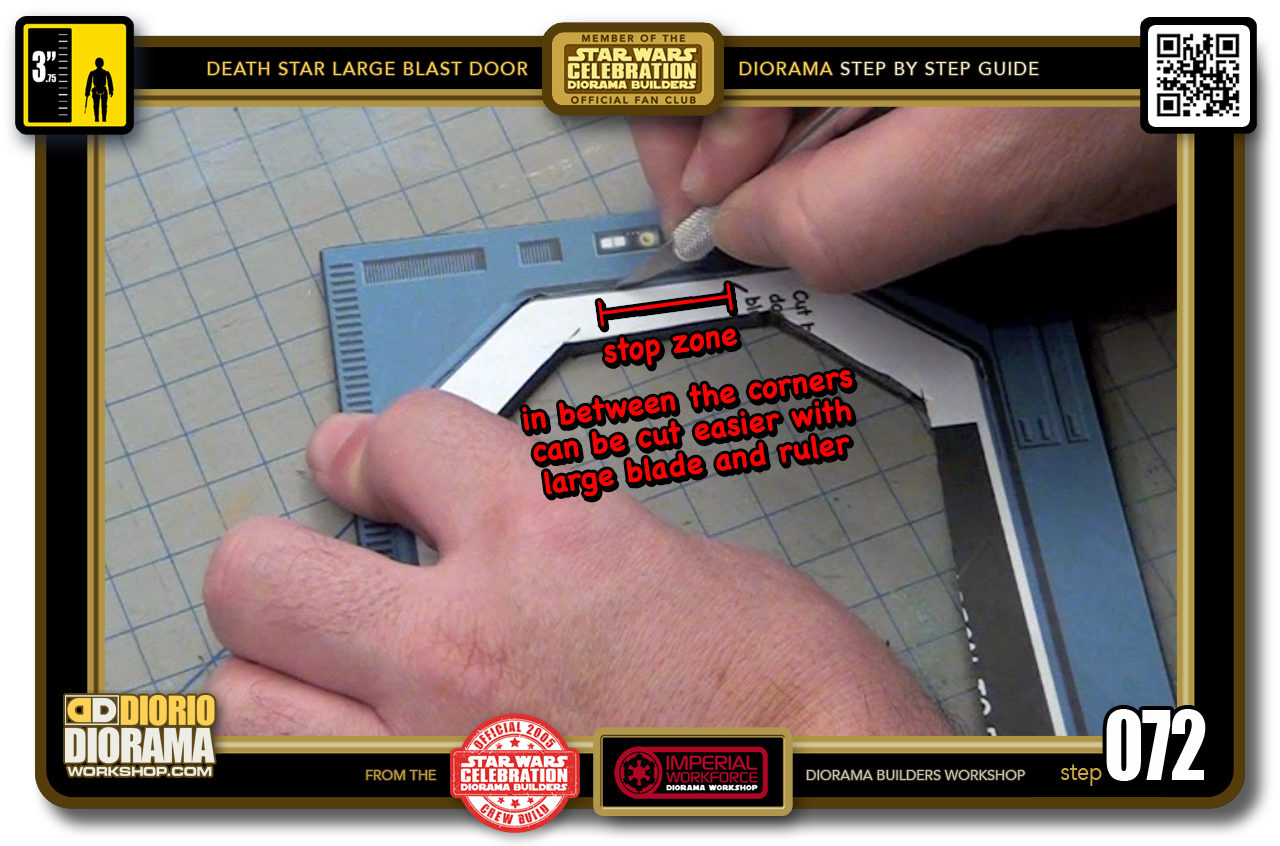
- STEP 072 > If your hands feel a little shaky and you find it hard to do this small straight line between the 2 curved corners, you can stop cutting your corners at the stop zone and switch to a ruler and long blade later.
-
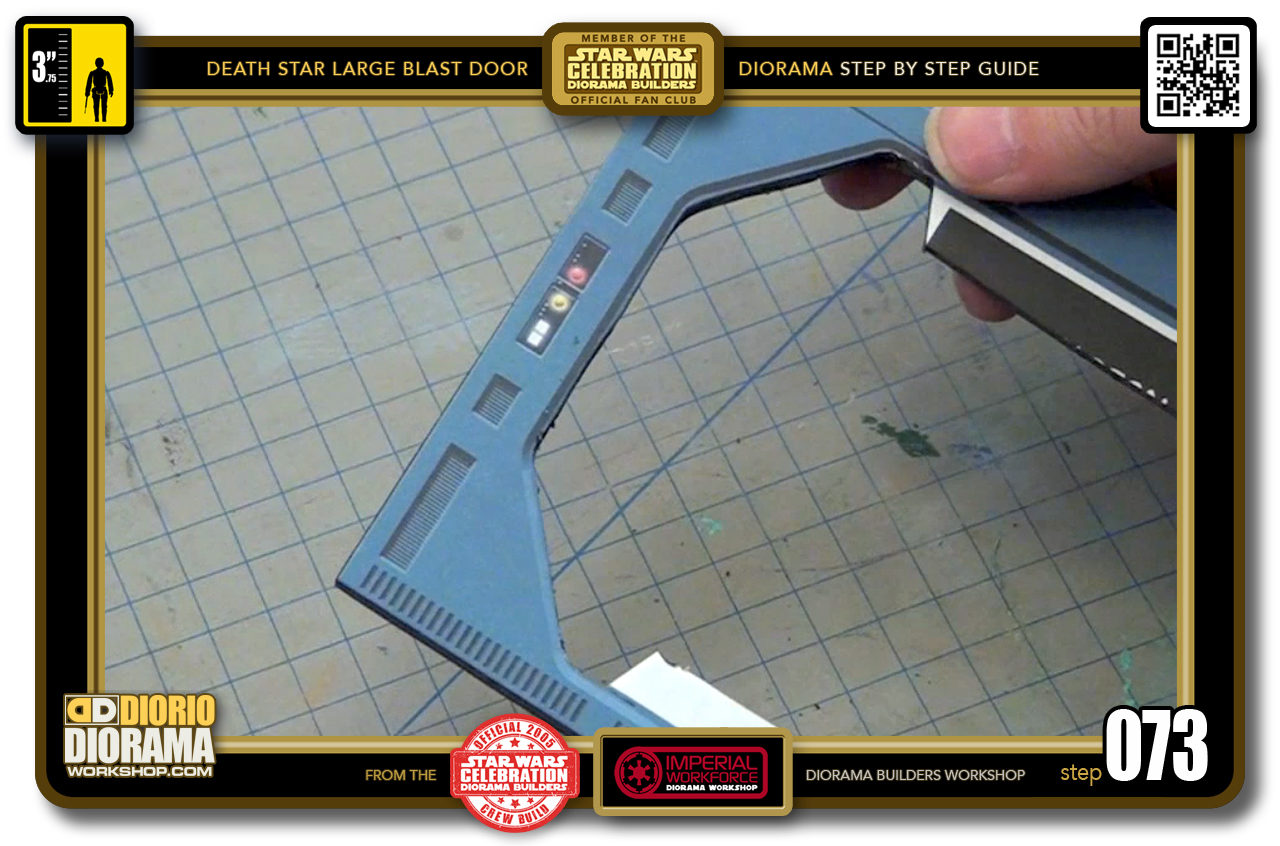
- STEP 073 > When your corners are cut and you joined them with the straight slice, your piece will fall out just like this.
-
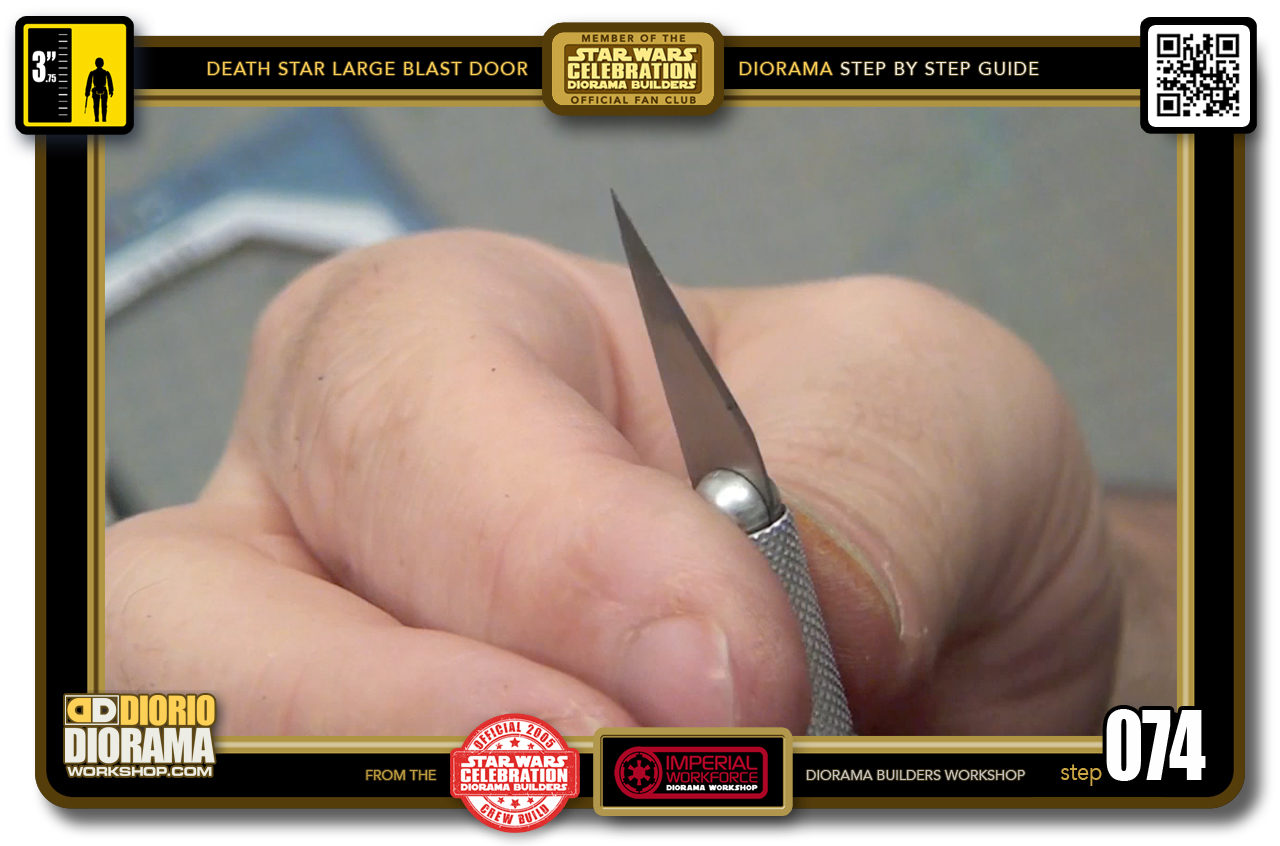
- STEP 074 > Remember to also replace your pointy Xacto Pen blades when they start to create those air pockets in your slices.
-
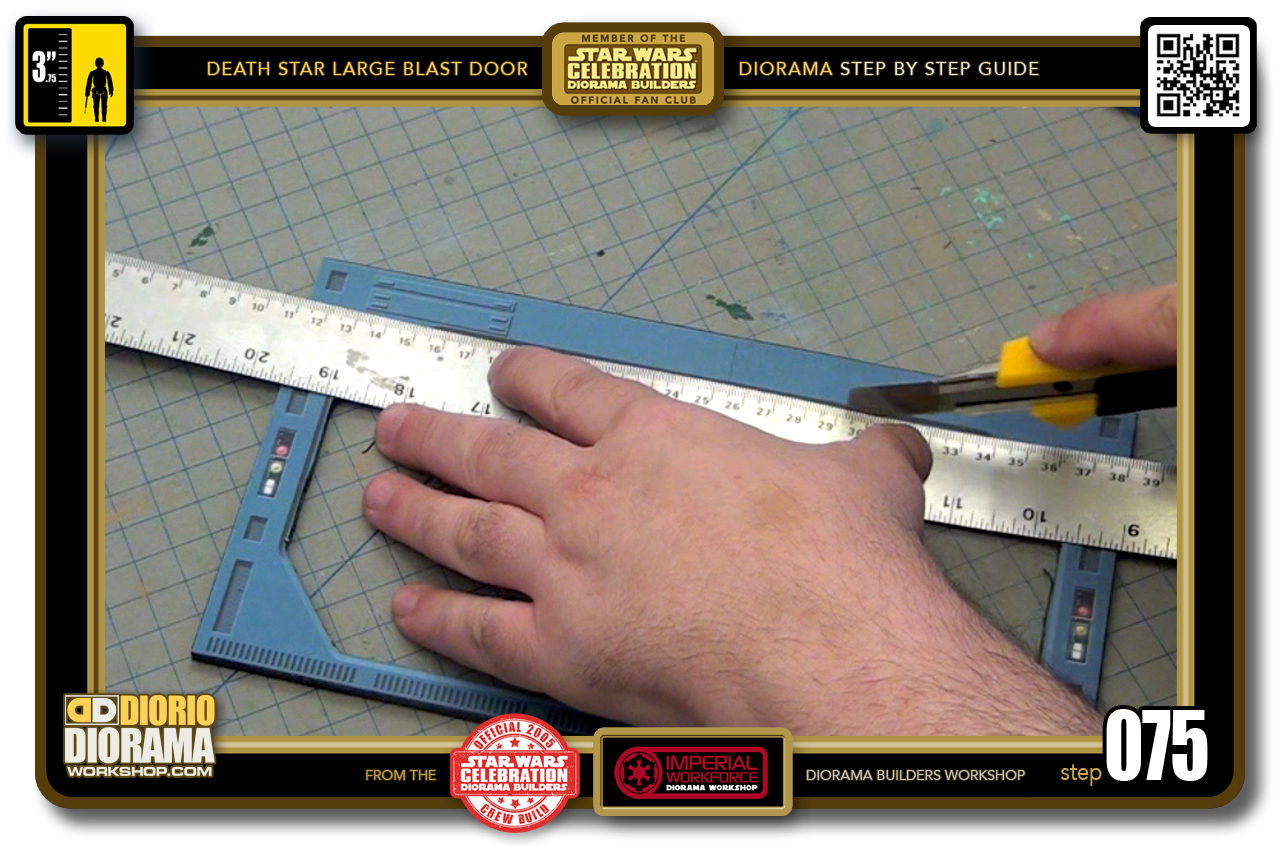
- STEP 075 > For the top and bottom long straight lines, I fin it easier to grab your ruler and the long Xacto Utility Knife and just connect your corner slices.
-
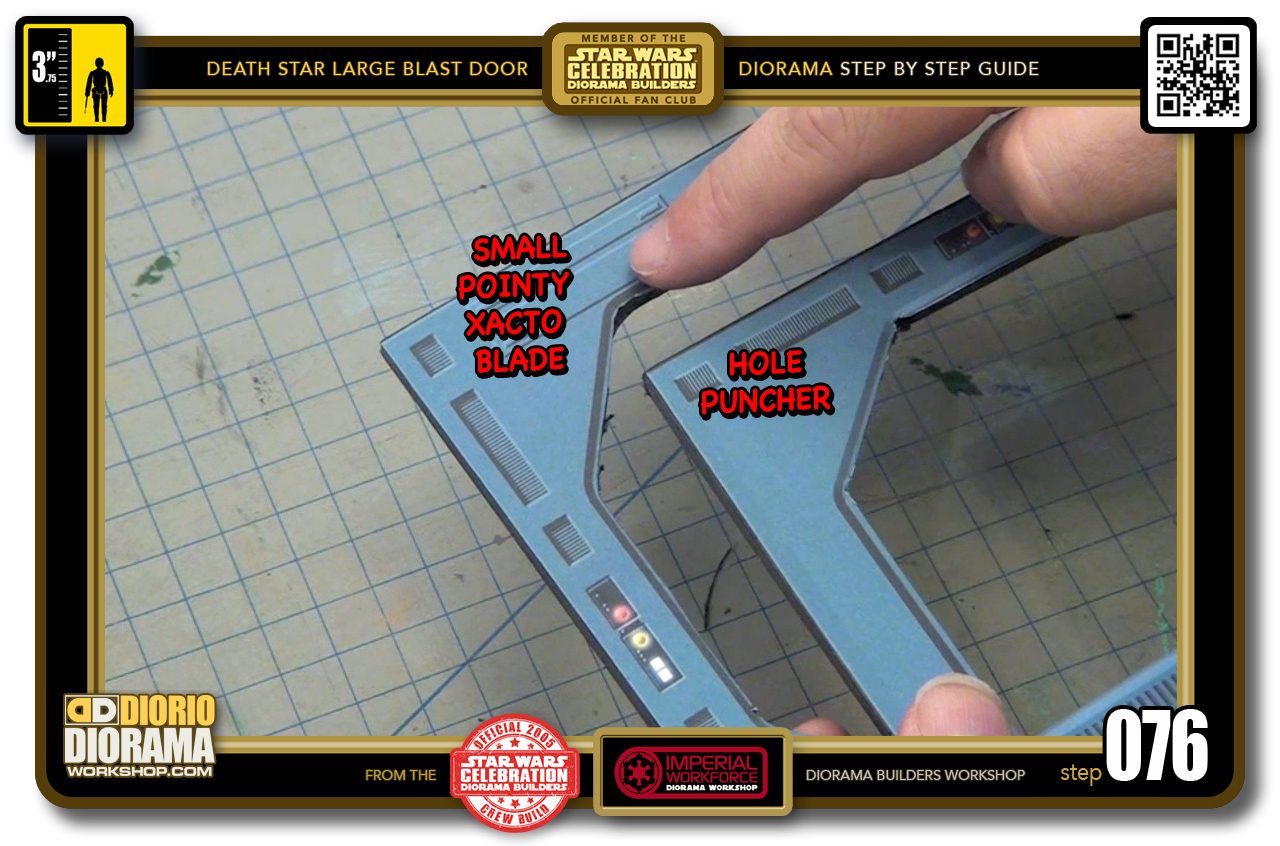
- STEP 076 > So here you can see the difference between the 2 cutting techniques. The downside of the hole puncher is that it sometimes crushes and smooshes the foamcore but gives you real circular round corners to join up with the blades. the downside of the pointy Xacto Pen is that is it trickier to hand cut and spin around the corners (but you do get better and better with practice) but it does cleaner cuts and doesn't smoosh.
-
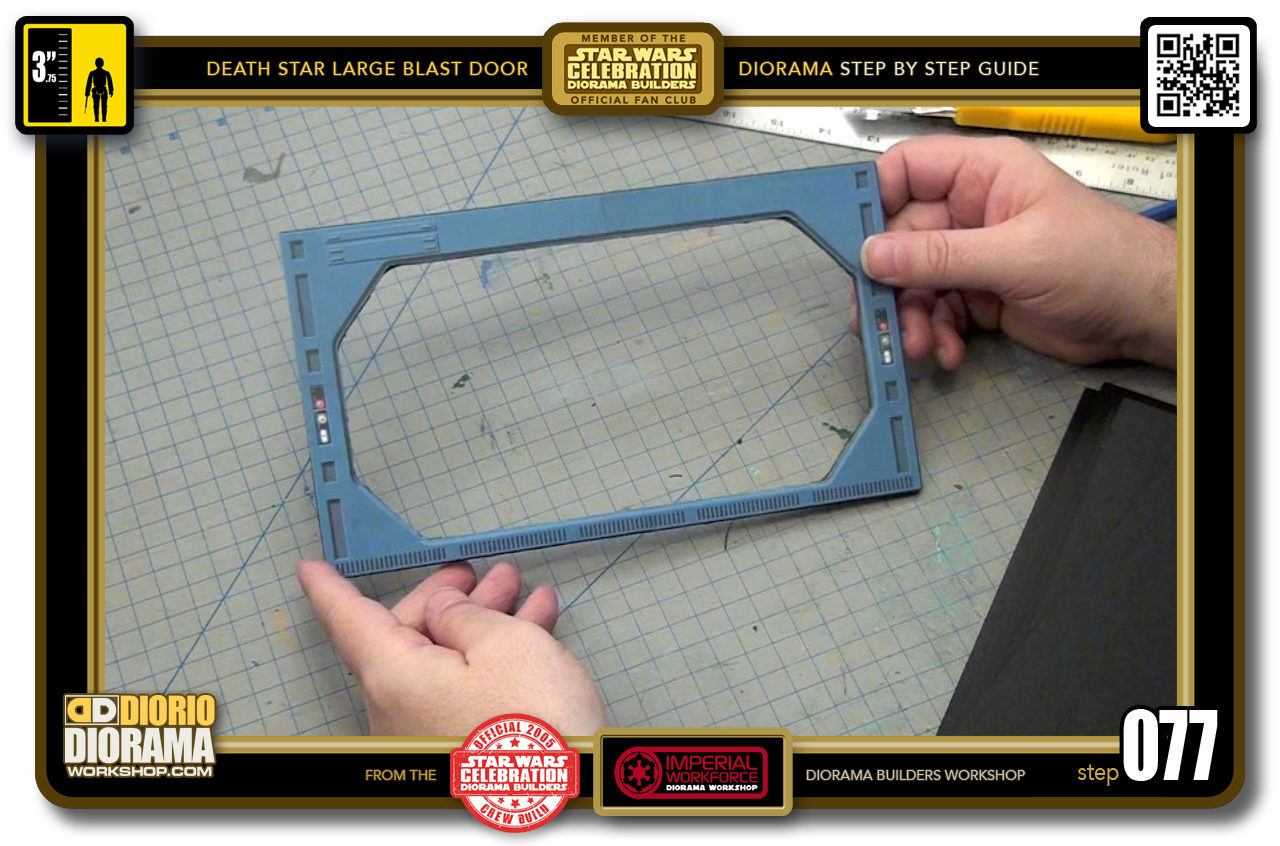
- STEP 077 > Your front and rear door frames are now completed and should look like this.
-
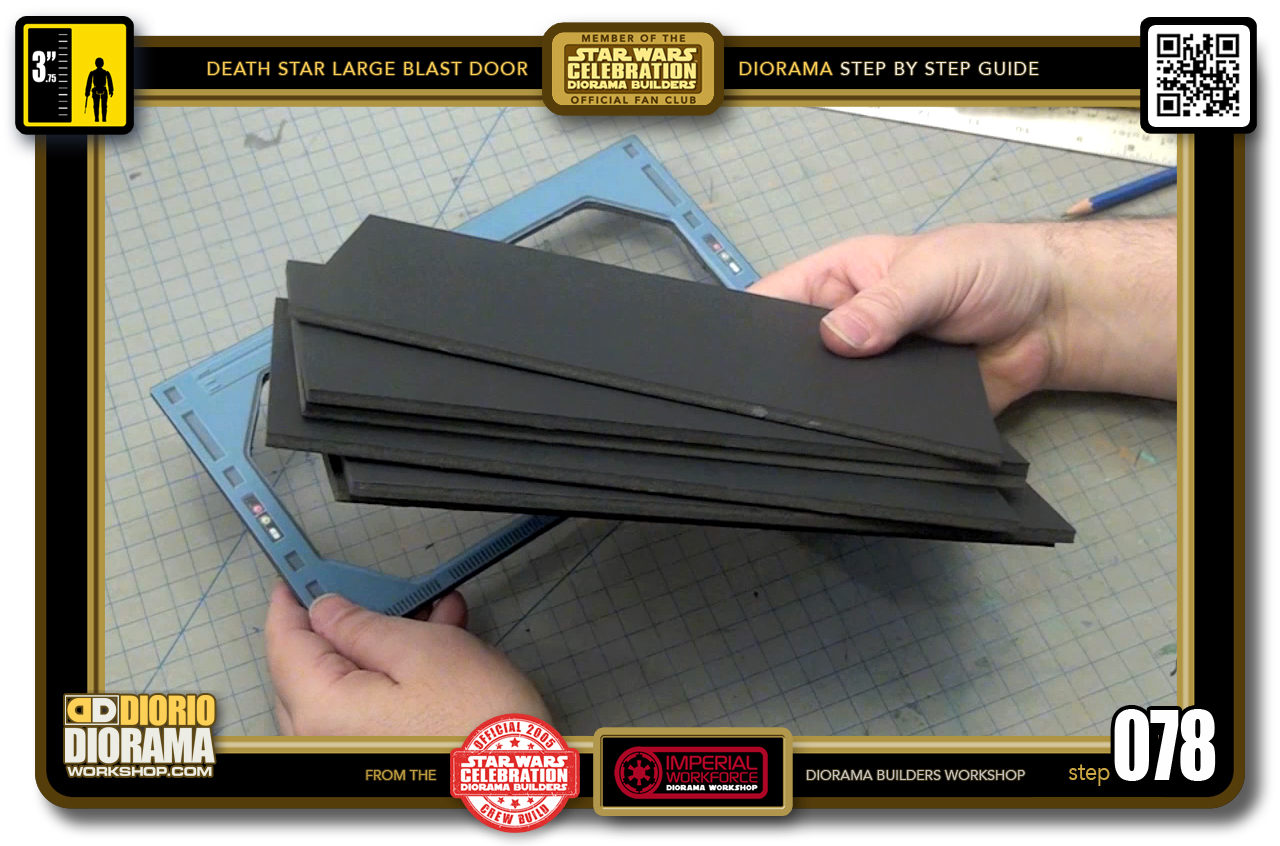
- STEP 078 > Now it's time to use all those other identical rectangles yo cut earlier.
-
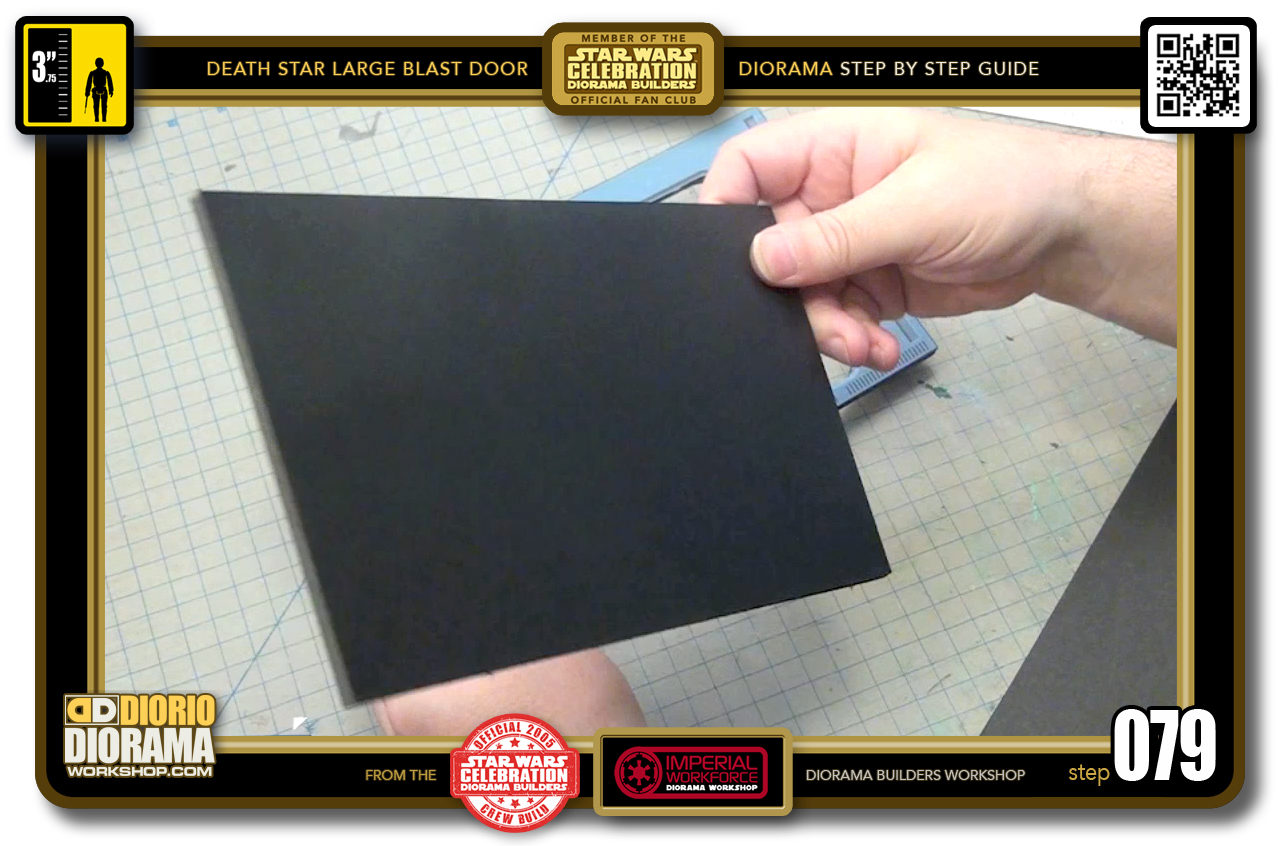
- STEP 079 > Grab one of your rectangles.
-
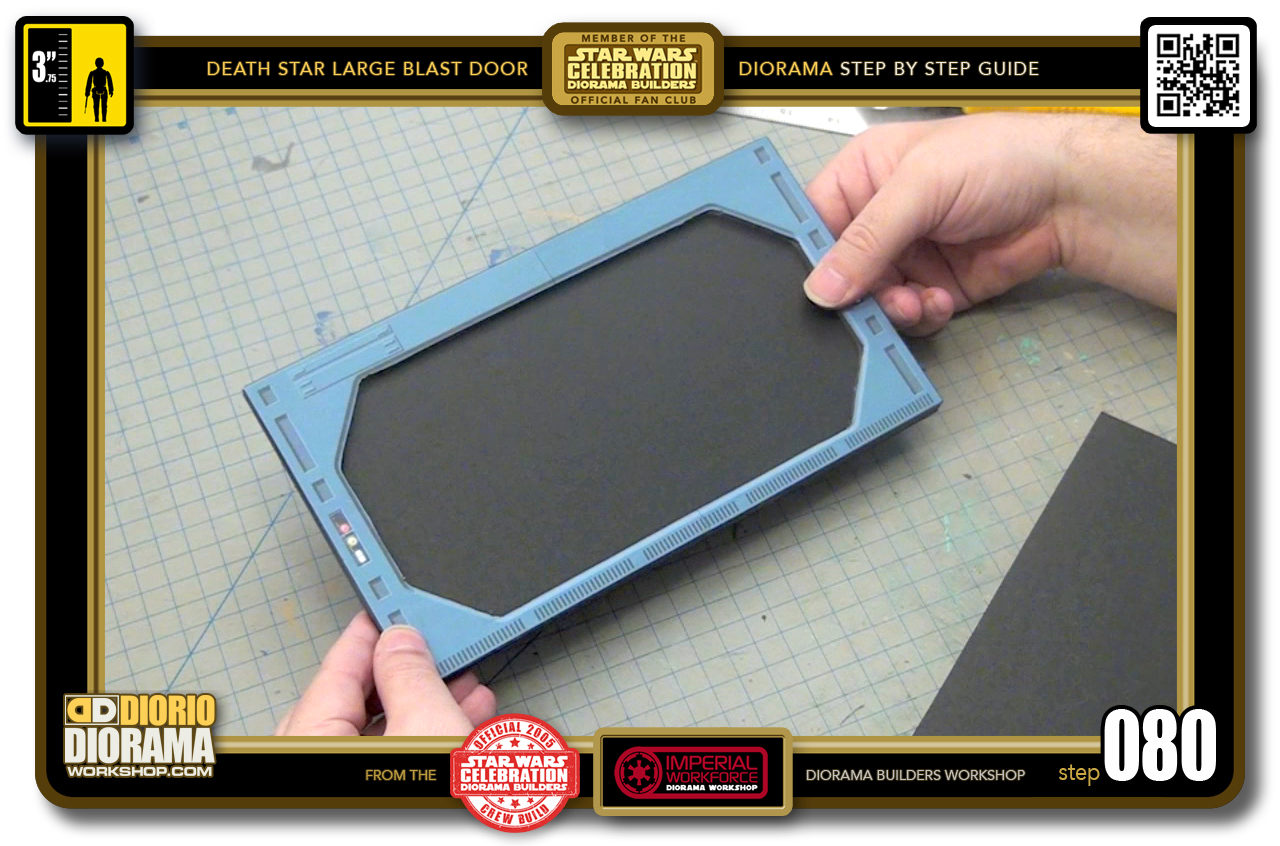
- STEP 080 > You are going to want to place your front frame right on top, and align the outside edges to make sure the 2 frames match up pretty close if not exactly.

.
Did you already build this Diorama ? At home or at our Star Wars Celebration Diorama Builders workshop ? Would you like to show it in the site’s GALLERY VISITORS DIORAMAS section, YES ? That is Awesome !!! You can find out all the details on how to email me your photos on the VISITORS SUBMISSIONS INFO page … When I get your photos, I will create your very own page just like this one. You may not realize it but work does inspire others to join in the fun of making Action Figure Dioramas.
.
NOT FOR RESALE ALL Decals, tutorials and artwork are ©FrankDiorio (dioramaworkshop.com) and offered FOR FREE to the fans – that would be you ? so you can build and display my diorama designs in your very own home. I realize I cannot control what one does with my graphics once I place them on the web, I can only ask you as one fan to another, please respect the artist and do not be that jerk who uses my designs and tutorials to build a copy of my work only to sell it on EBAY or trade/sale groups and forums. Thank You. Frank.
.
.
If you have a facebook account, why not join the Official Diorama Builders Fan Club today, simply click the logo link below.
 .
.
Catch up with fellow visitors and exchange stories, read cool interviews with the crew, exchange photos, fun surprises and grab some FAN ONLY merchandise next year at actual future conventions ?
.
©2018 Frank Diorio DioramaWorkshop.Com
.
IF YOU LIKE WHAT YOU SEE, PLEASE SHARE WITH YOUR FRIENDS
USING THE SOCIAL MEDIA BUTTONS BELOW