


-
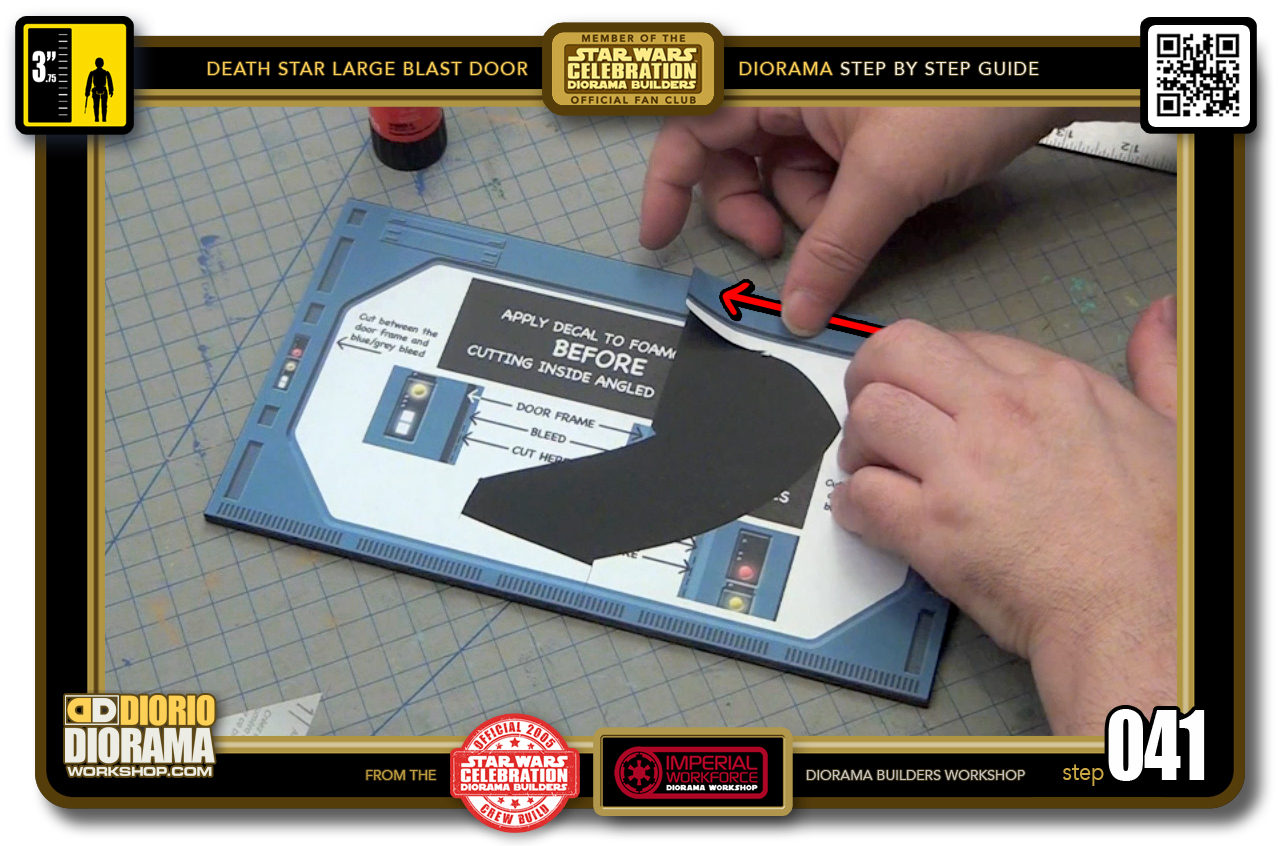
- STEP 041 > Gently and slowly move your finger up the right side of the decal until the end connects with the first decal. DO NOT PRESS DOWN HARD YET !!!
-
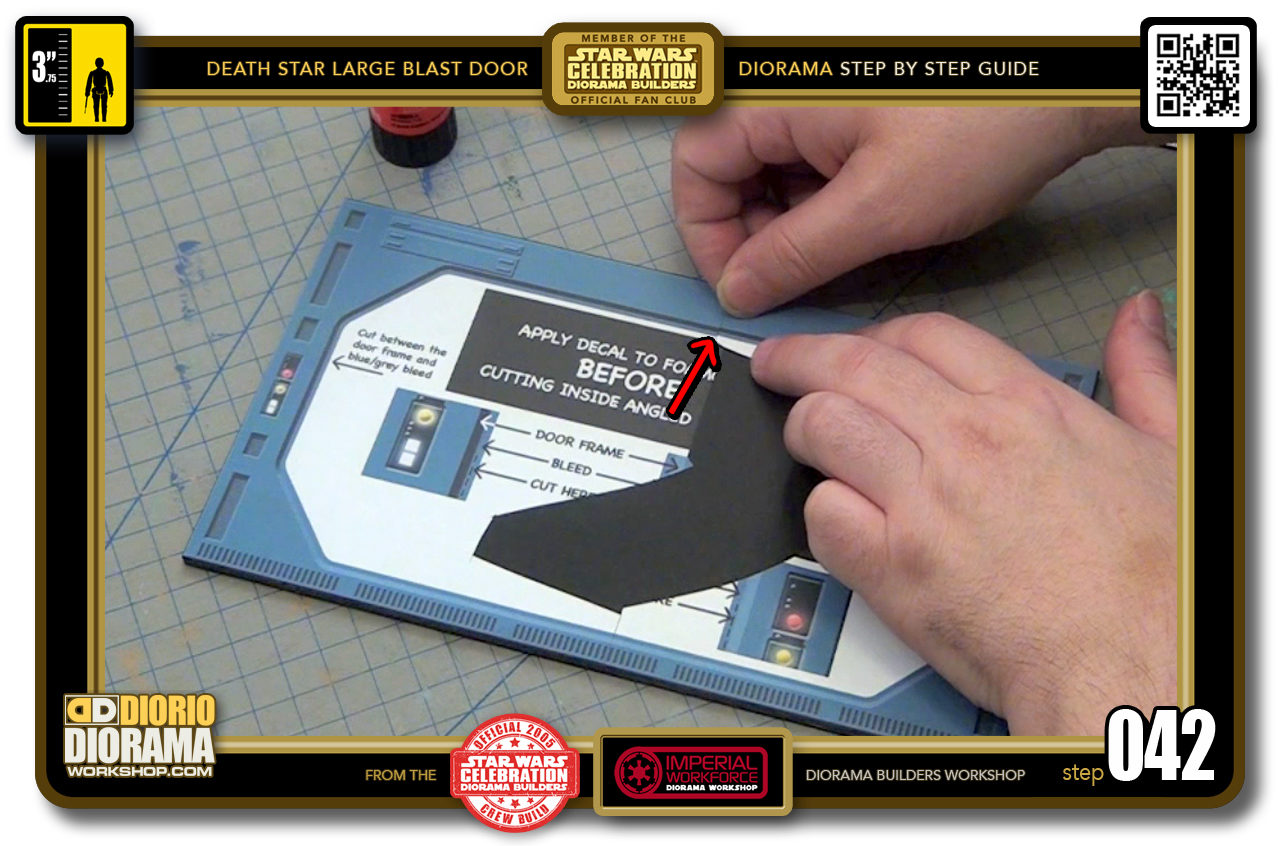
- STEP 042 > Examine the overlap and make sure it aligns just right. If not, you can still lift it, giggle, reposition and place it back down. When you are happy with the fit, now you can press lightly and as before, repeat the motion with harder pressure.
-
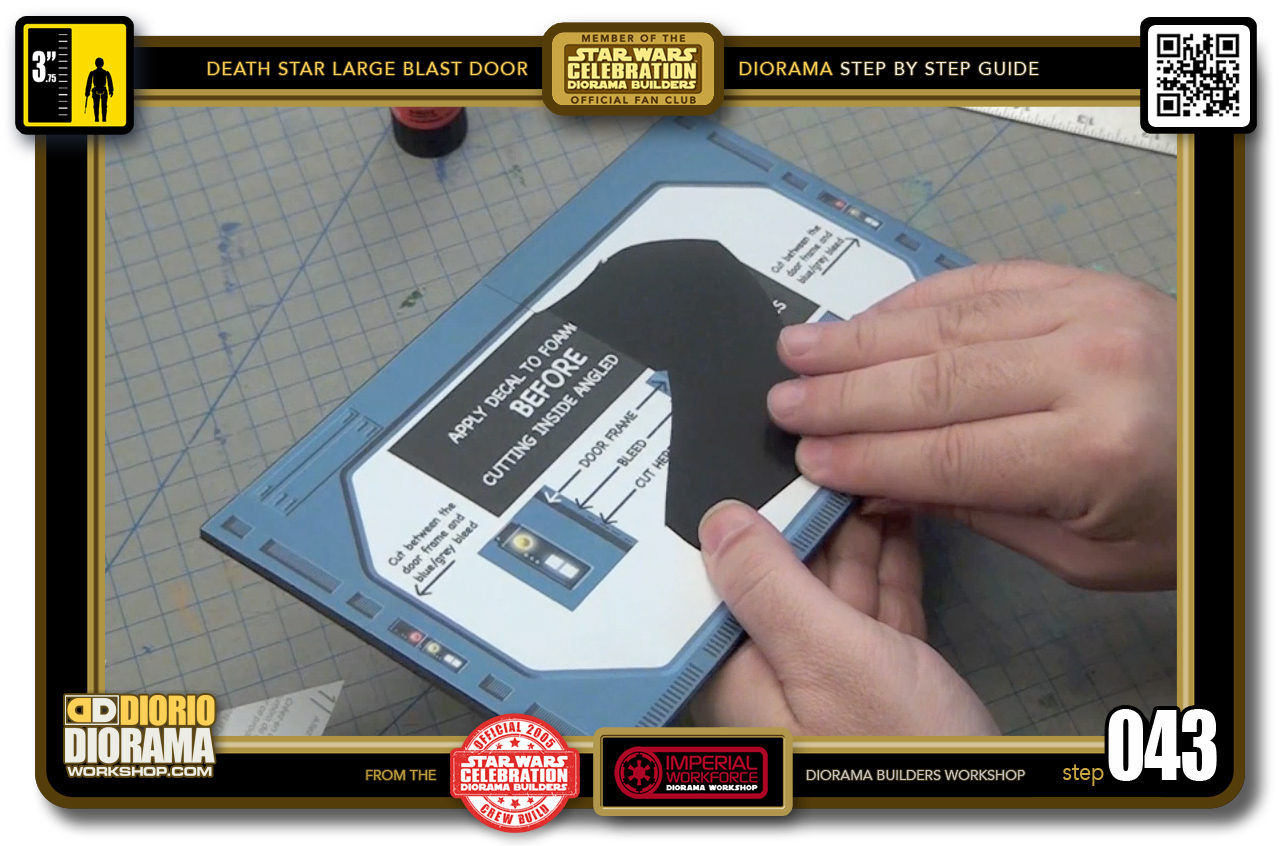
- STEP 043 > once your edges are pressed hard in place, you can rub the inside of the decal to make sure everything is applied and secure and ready to cut. If you used Gluestick, wait a couple of minutes before the next step, if not, you risk getting glue all over your blade and it will start to cut really bad.
-
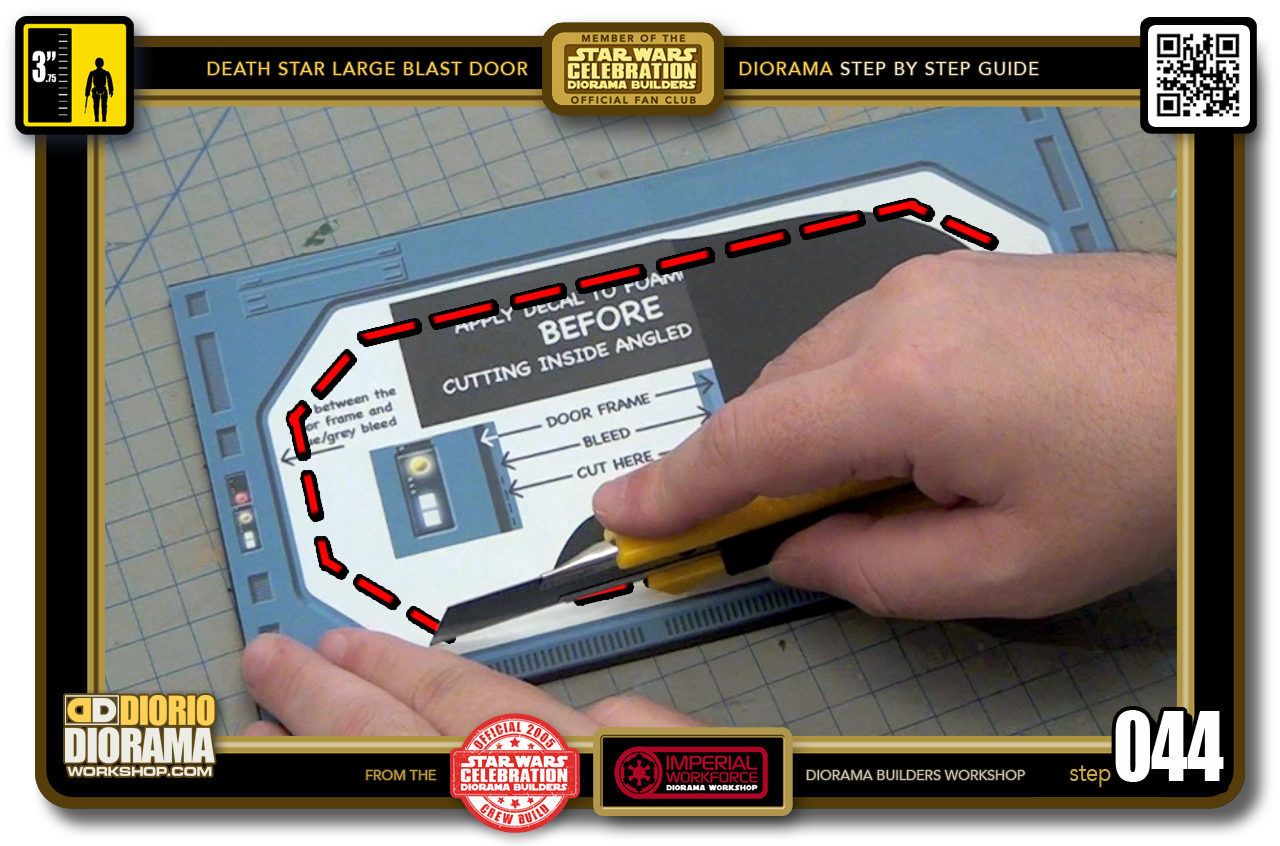
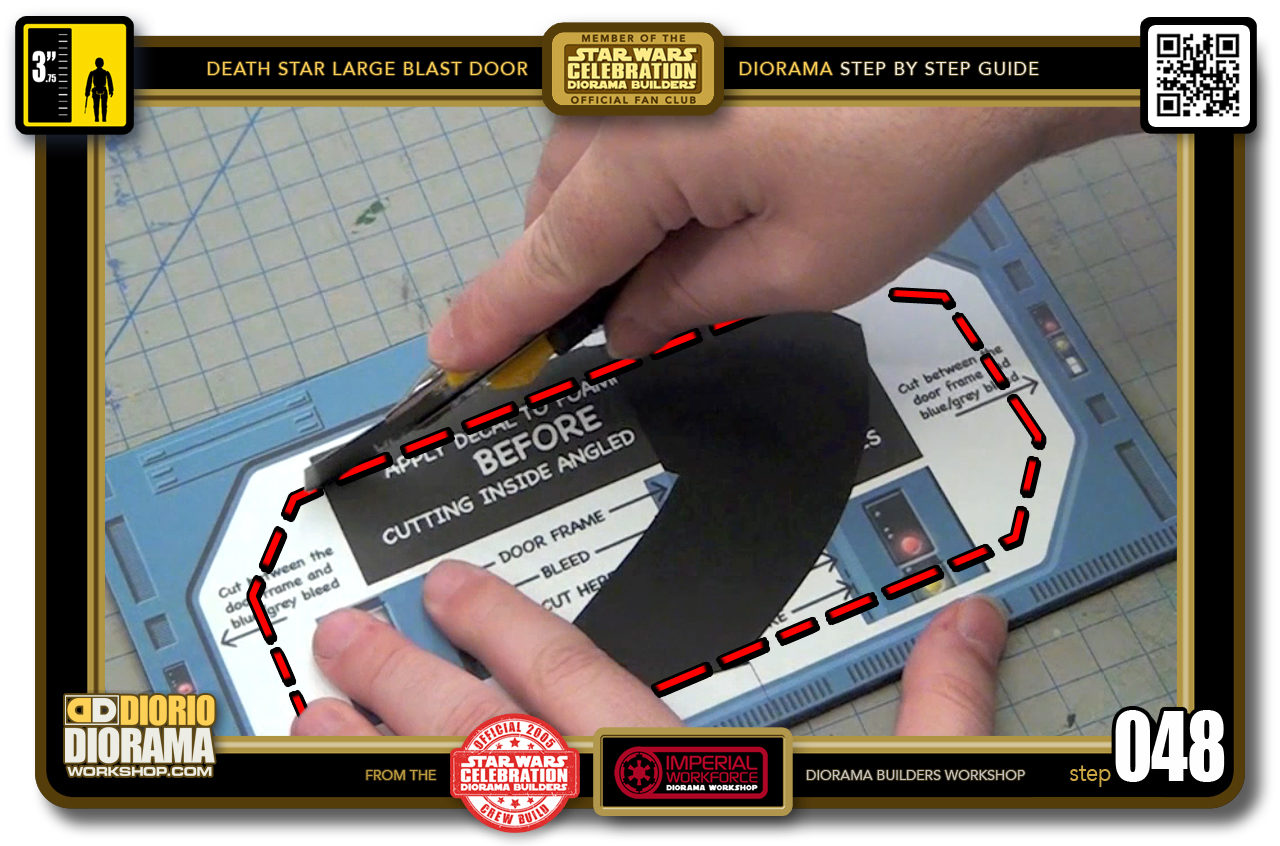
- STEP 044 > We now want to do a LOOSE CUTTING to remove the majority of the centre foamcore. Carefully use your Xacto Utility Knife to go all the way around approximately following the red dotted lines. DO NOT CUT ALONG THE COLUR LINES YET !!!
-
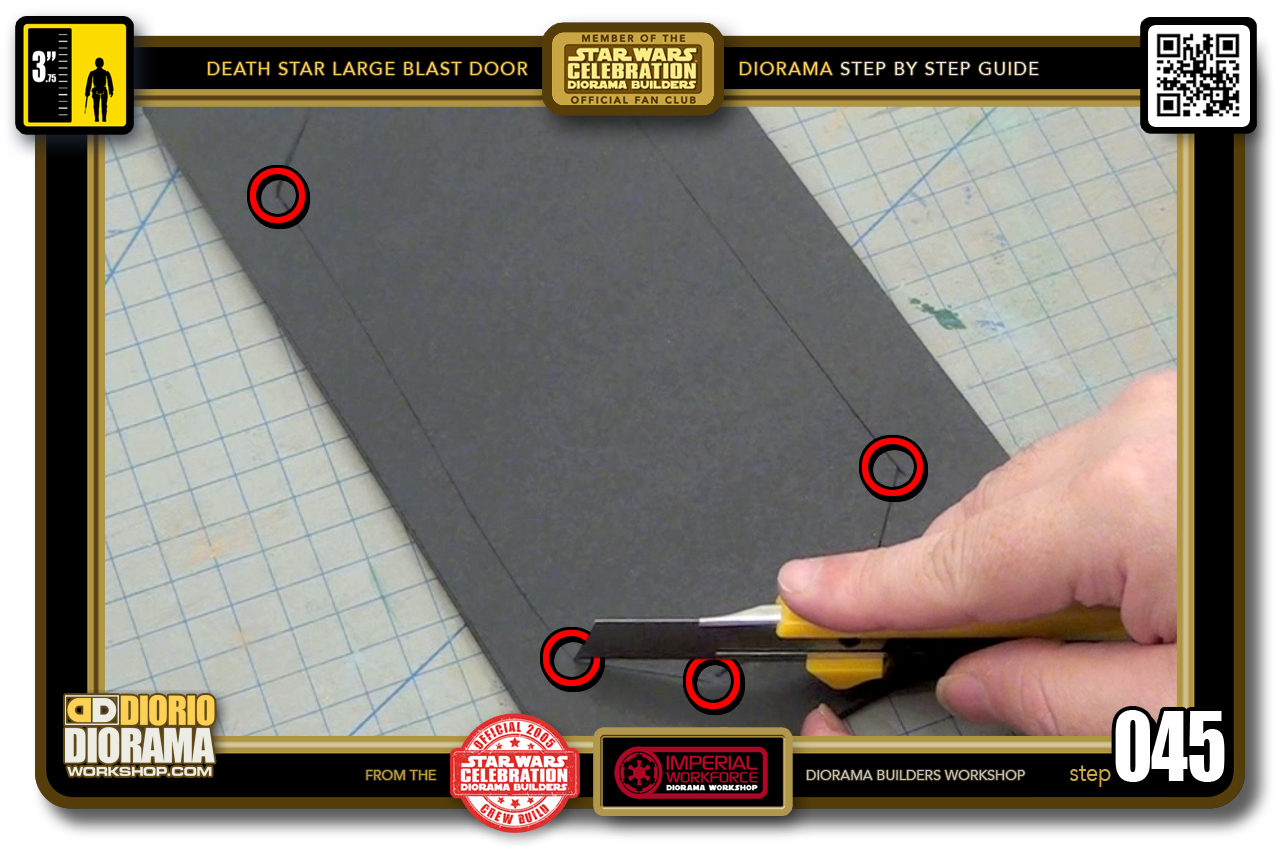
- STEP 045 > After you cut all the way around, turn over your rectangle and examine the conections of your cuts (inside the red circles). If you see that they are not touching use your blade to join the corner cuts so that you will be able to pop out your centre.
-
- STEP 046 > When all the connections are made your piece should easily just POP out from the frame. Keep this piece for scraps or another project.
-
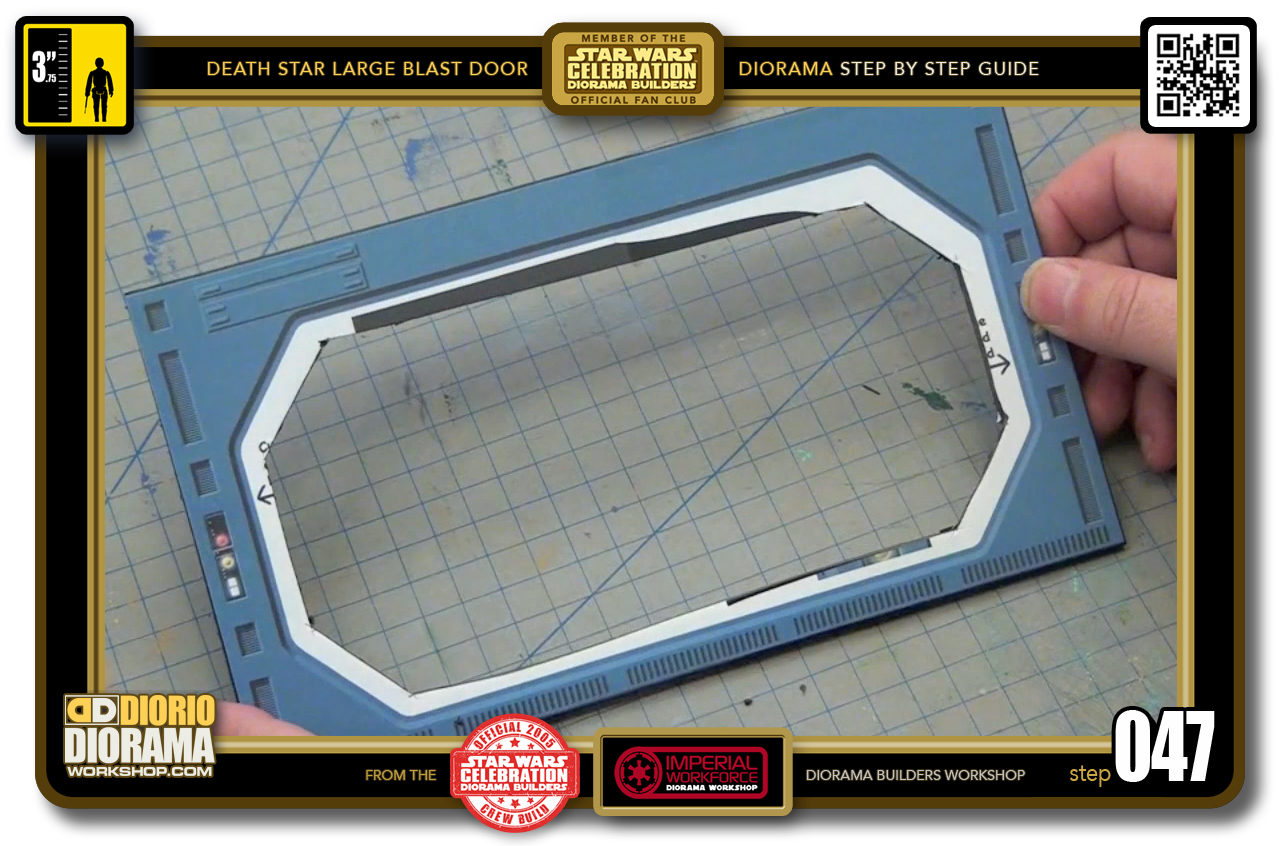
- STEP 047 > You should now have a loose Layer 1 Front Frame just like this one.
-
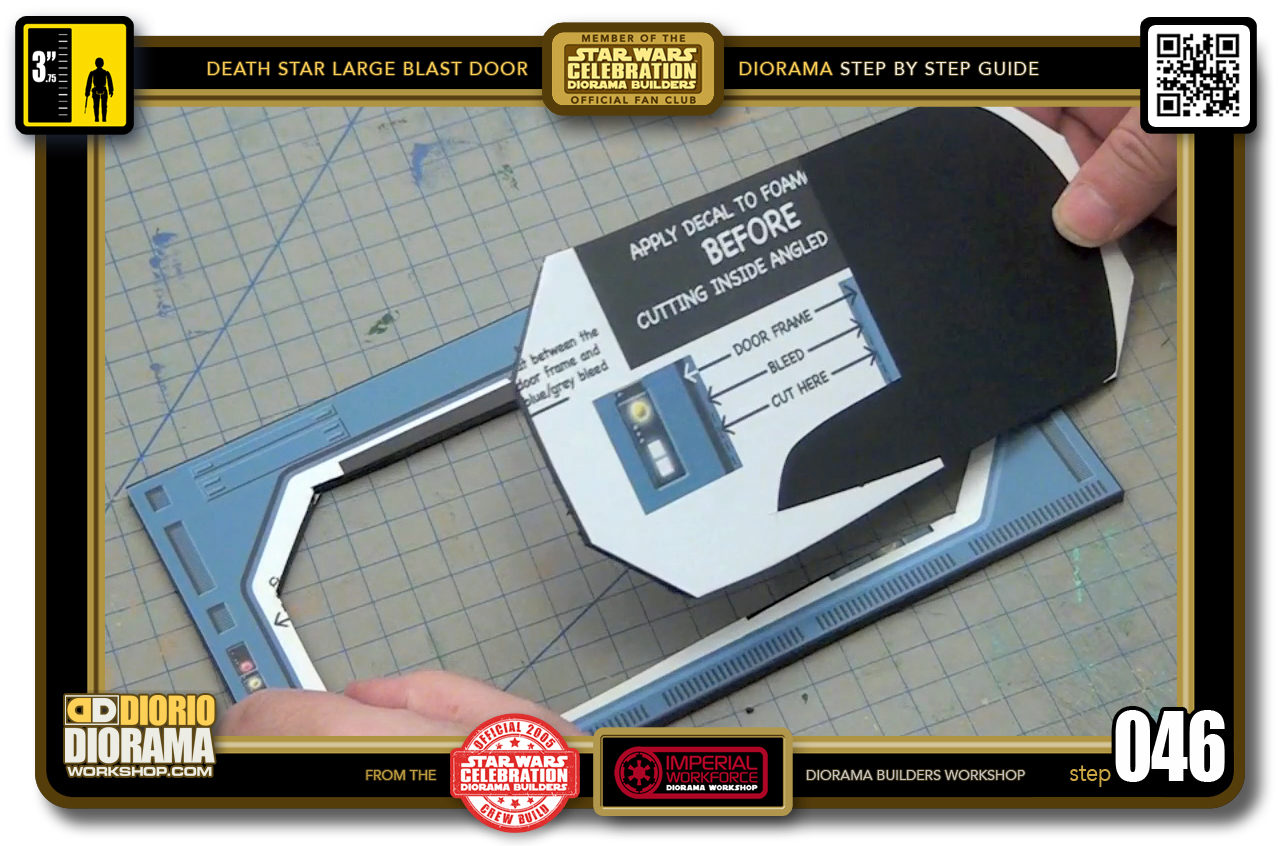
- STEP 048 > Move on to the Rear Frame and as before, simply cut along the centre close to where you see the dotted lines. You don't have to match exactly, you just want to keep a inch or so gap between the cut and the inside colour of your door.
-
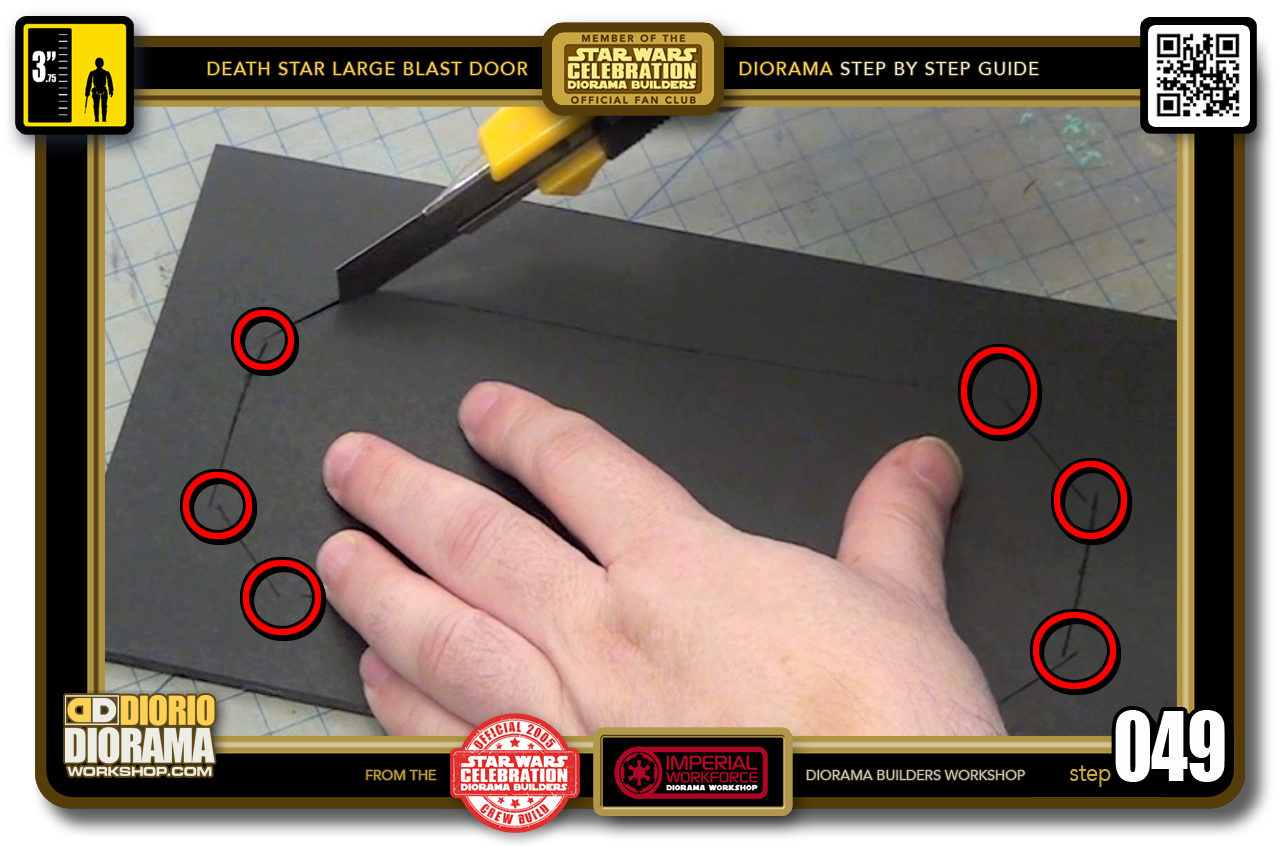
- STEP 049 > Flip your rectangle and check to see if any cuts did not connect together. Use you blade to connect those shorter cuts until everything connects in 1 line.
-
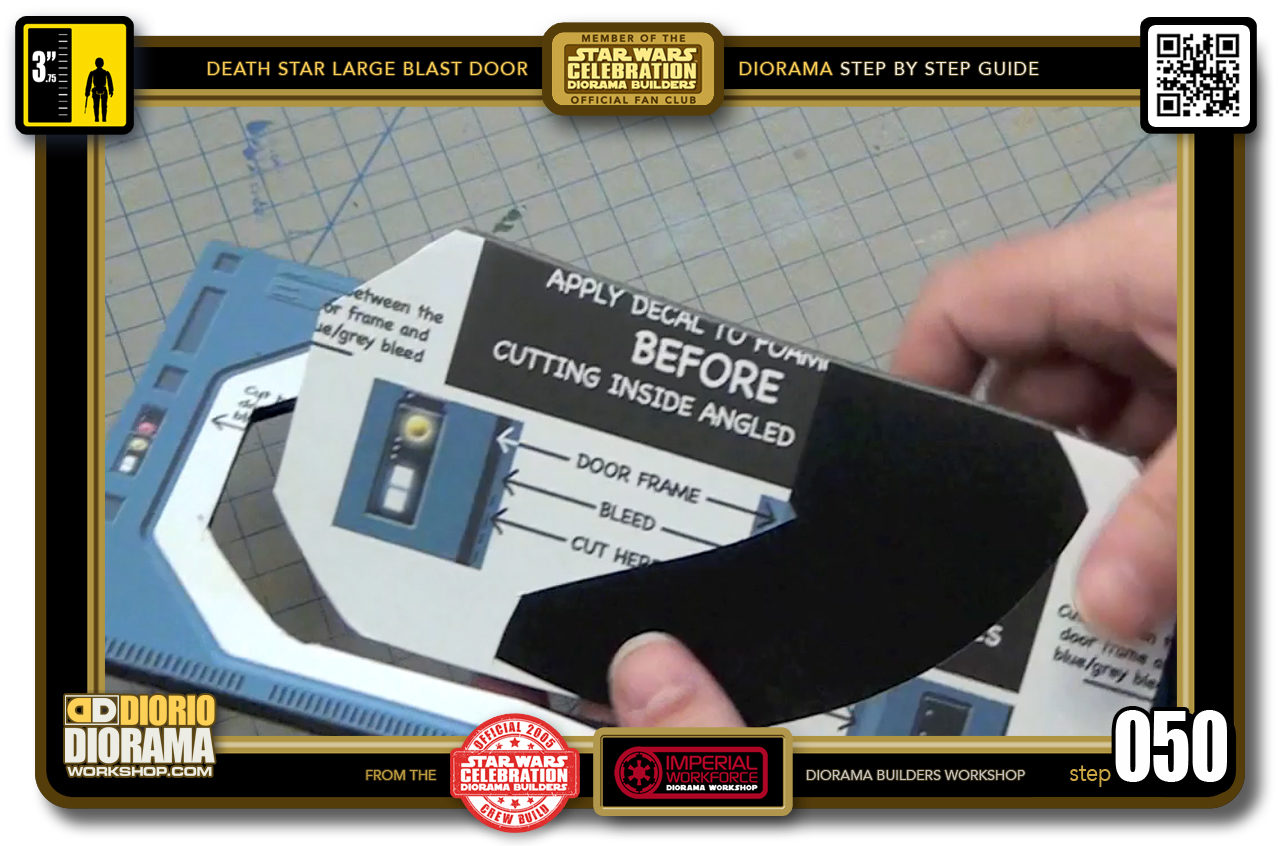
- STEP 050 > Pop out the centre just like that. If you have to struggle, it's because some cuts are still not connecting. Just repeat step 049 until your centre comes out easily.
-
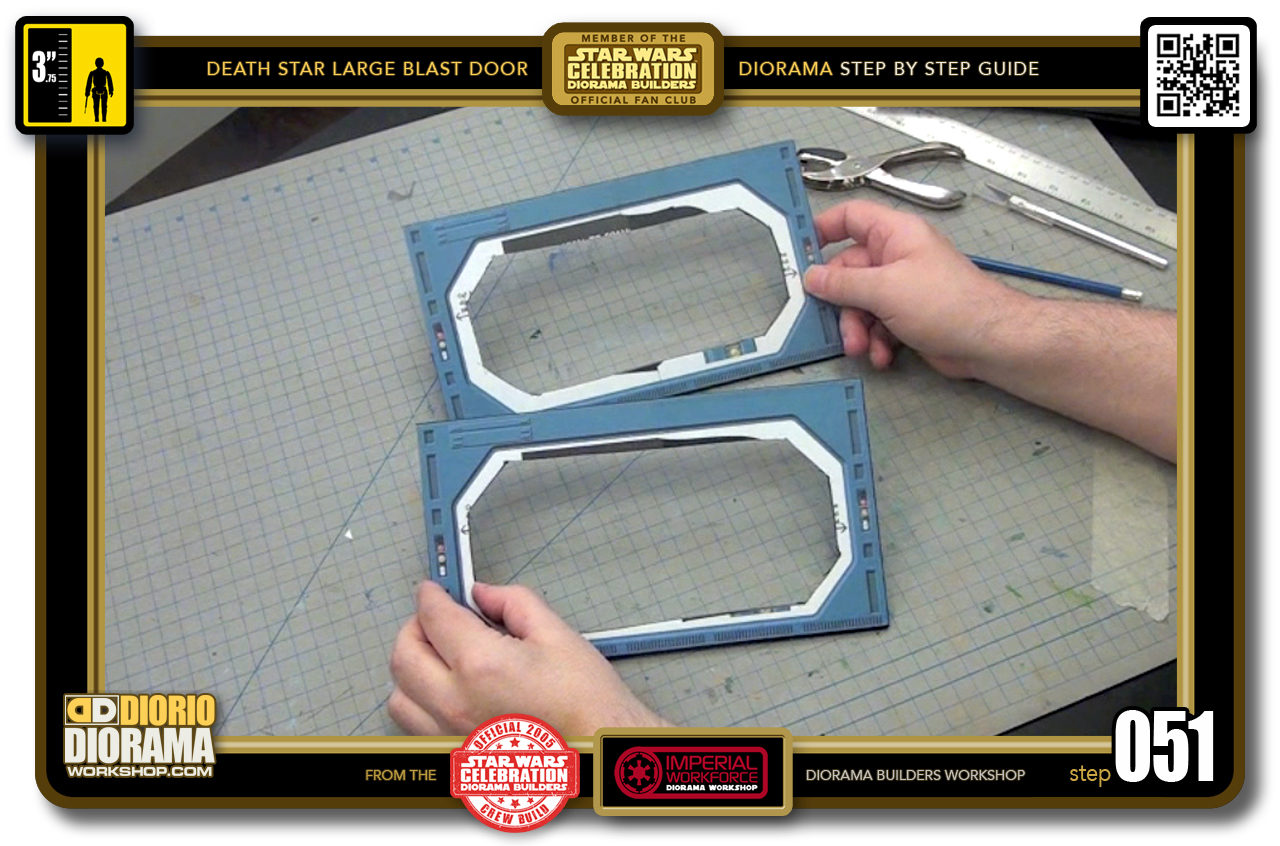
- STEP 051 > You now have your 2 rough cut frames. One for the front and one for the rear of the large blast door.
-
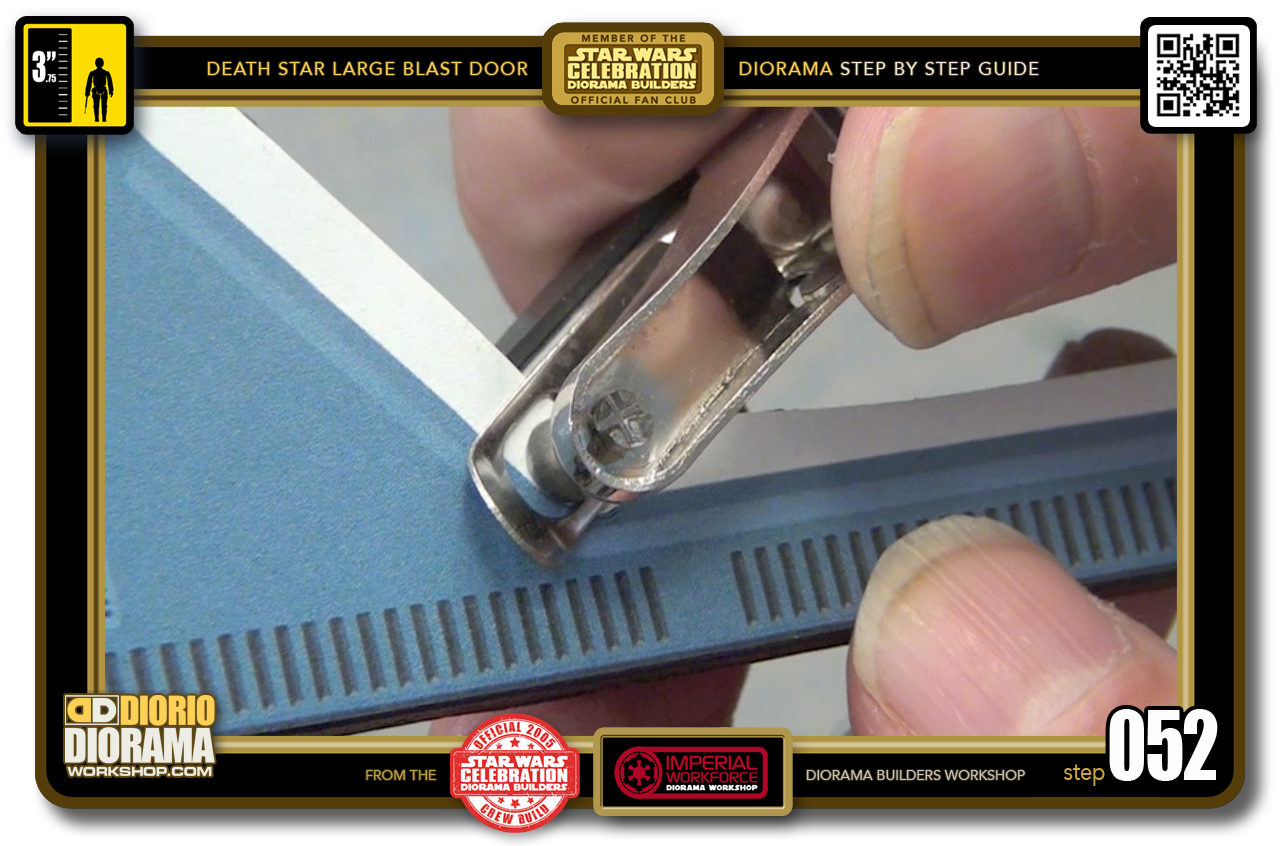
- STEP 052 > I will show you TWO TECHNIQUES to cut around the curves of your door frame corners. The FIRST is using a HOLE PUNCHER. Simply align it with a corner and press hard. It will take some extra pressure than paper as the foamcore is way thicker.
-
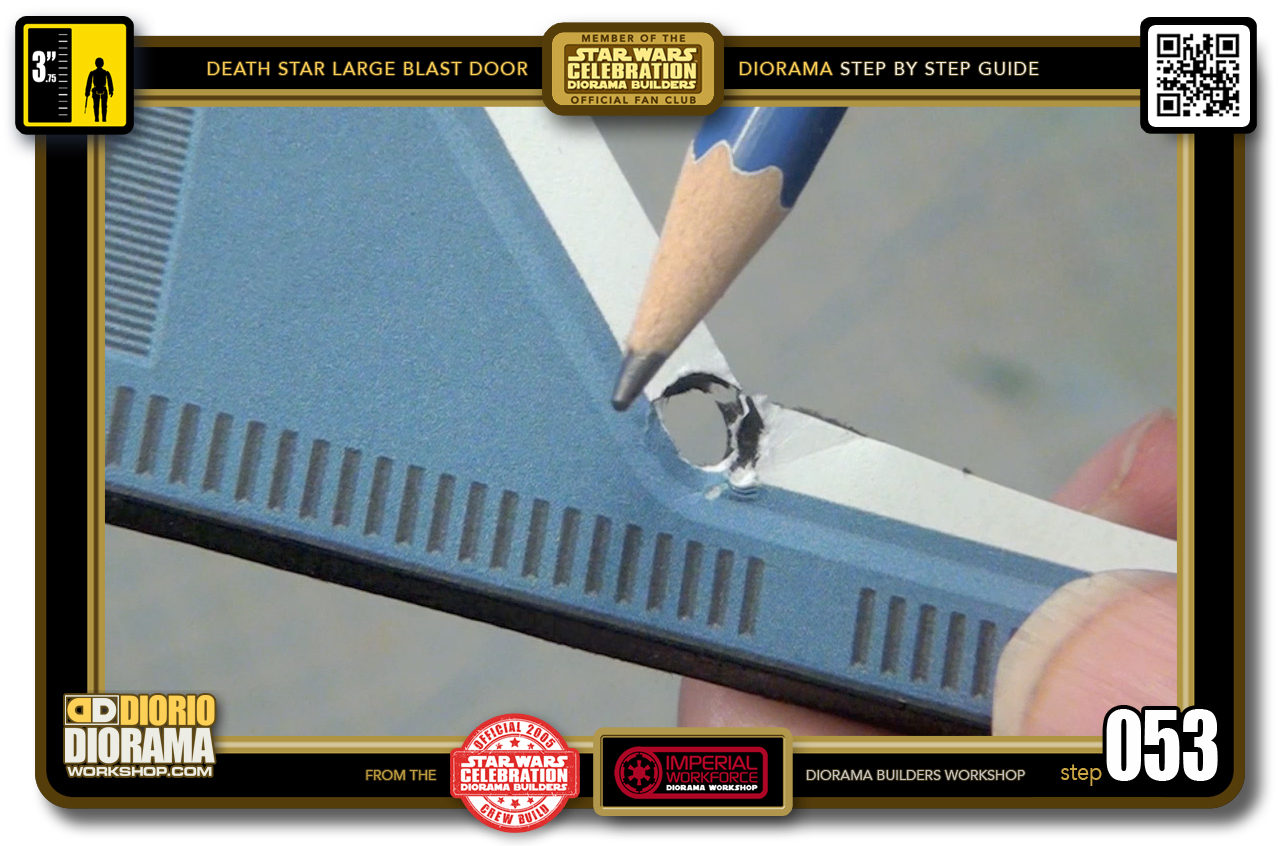
- STEP 053 > You will notice that there can be some creases that appear because the pressure of the cut actually smooshes sometimes the foamcore along the rim of the hole punch.
-
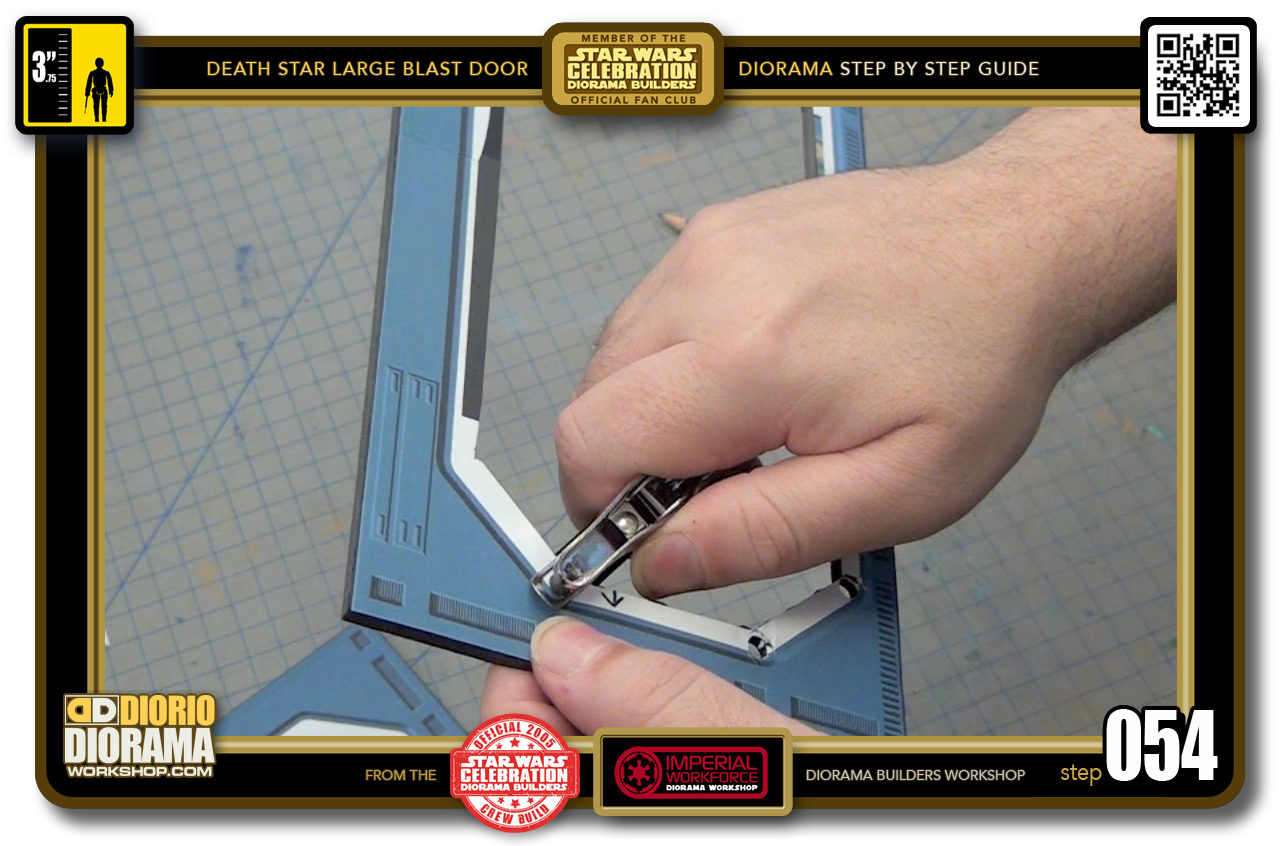
- STEP 054 > Continue punching along every corner of the frame.
-
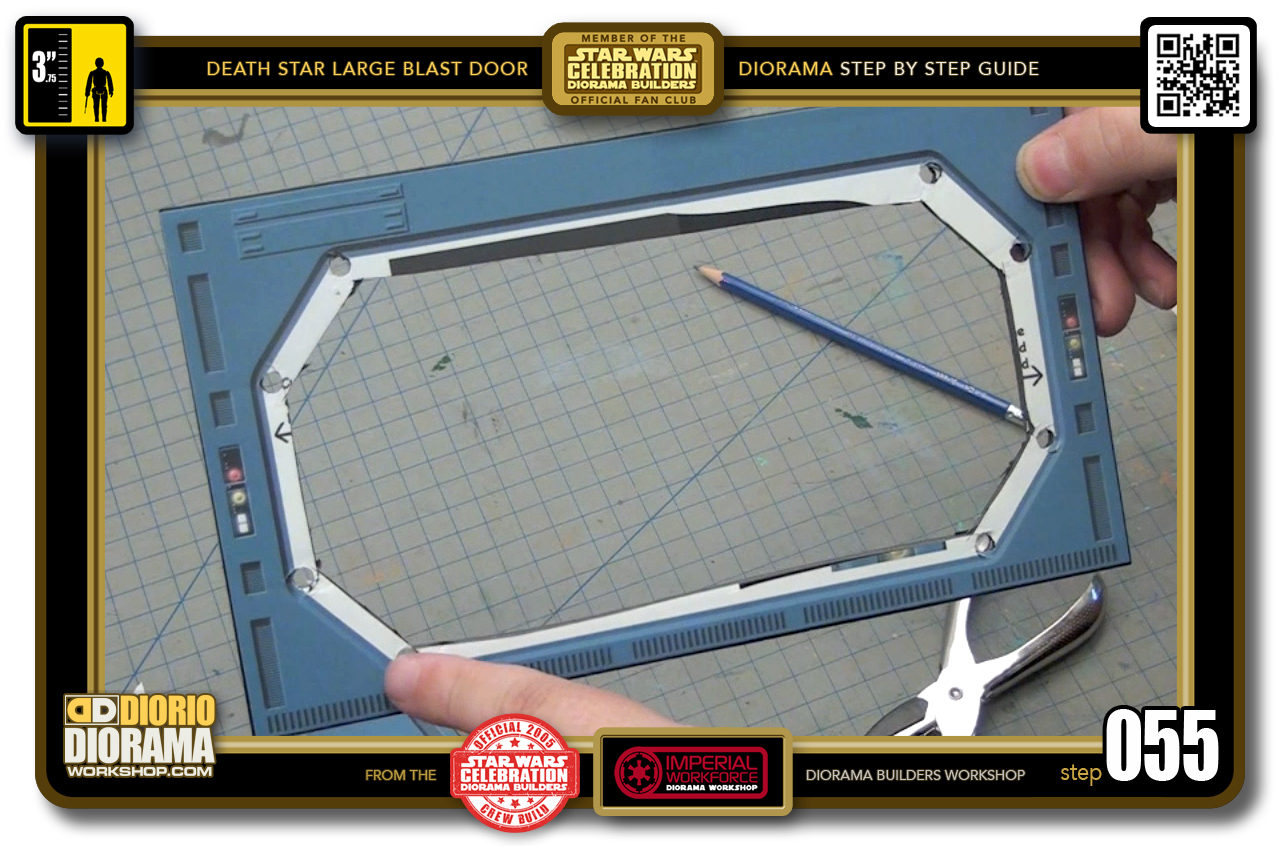
- STEP 055 > Your piece should now look like this.
-
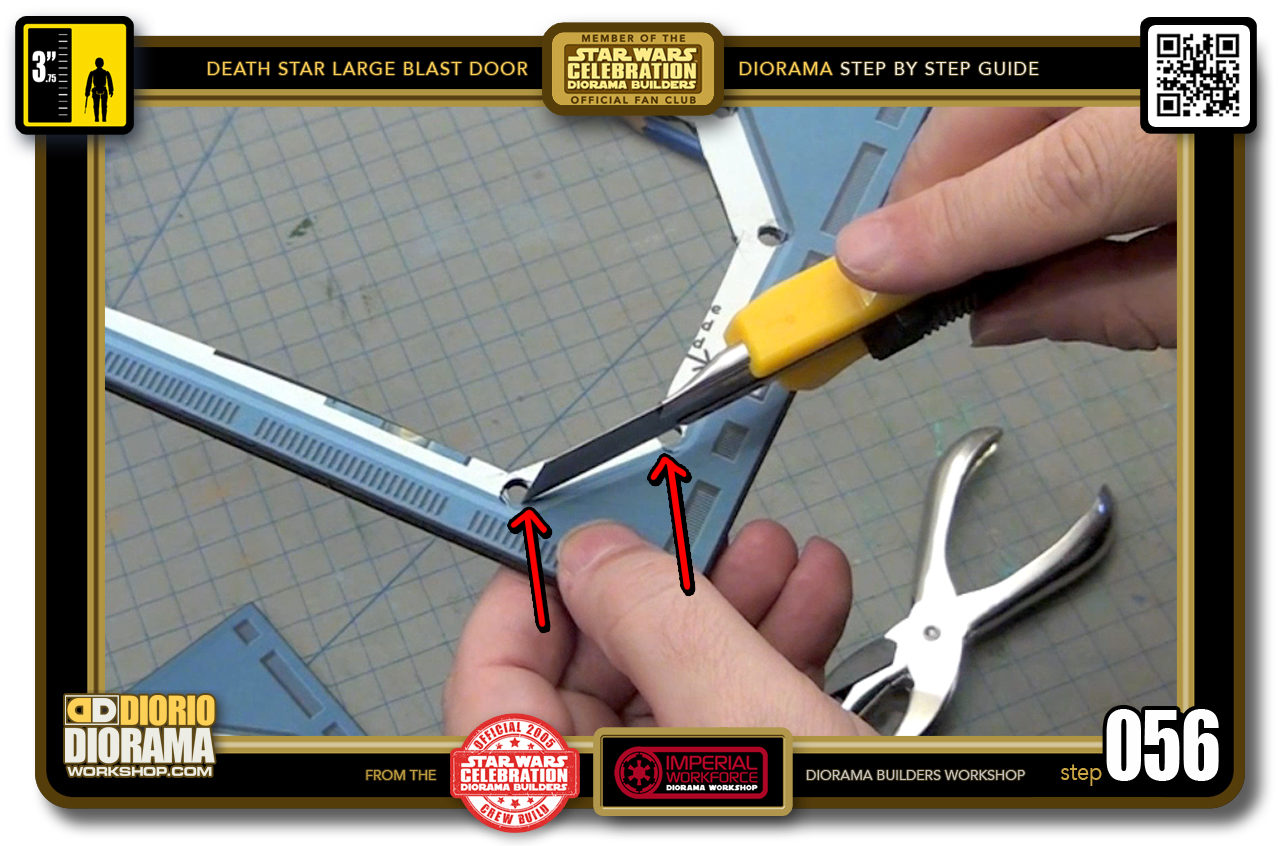
- STEP 056 > Now you can "connect the dots" of your hole punches using your Xacto Utility Knife. Make sure your blade is SHARP which means, be EXTRA SAFE - you don't want to cut your fingers. Trust me on that one. The bleeding never stops and hopefully you don't cut it right off.
-
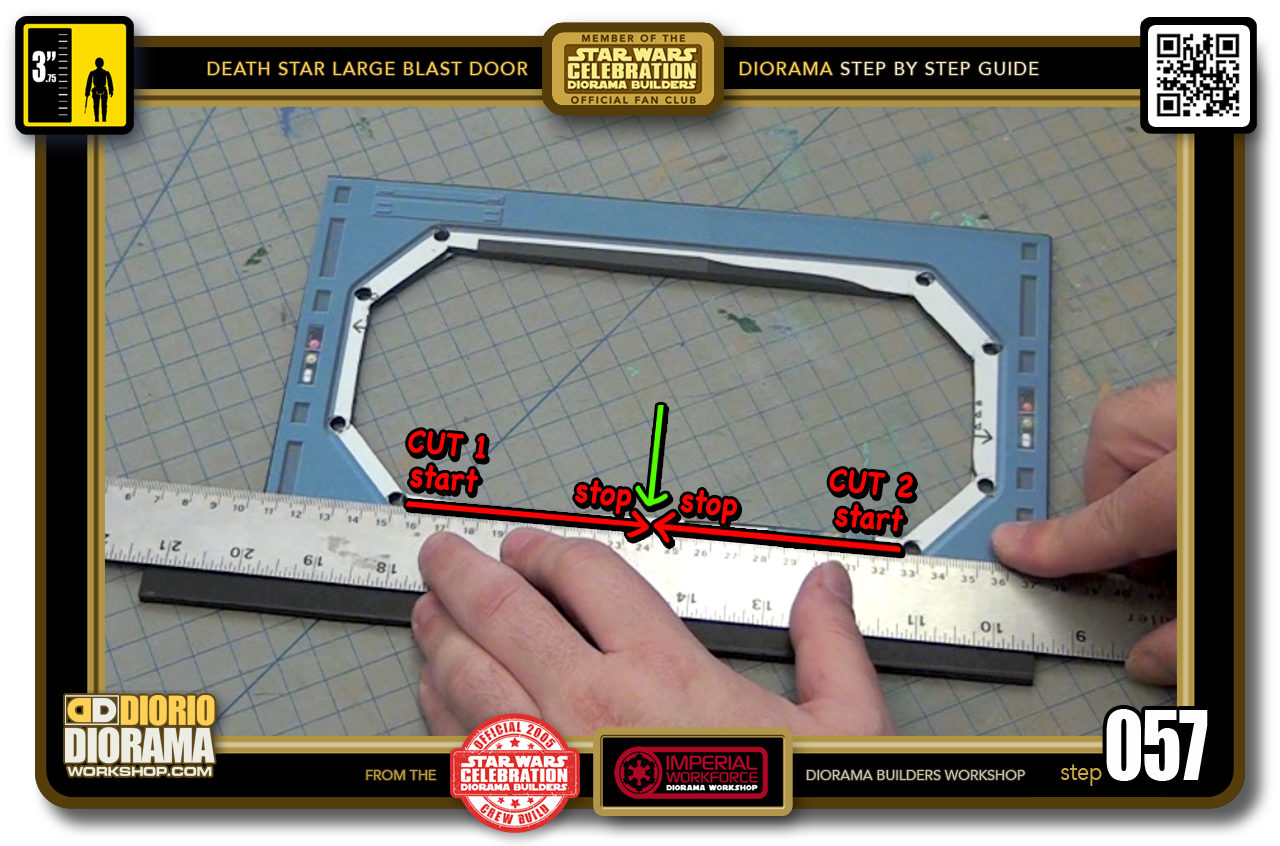
- STEP 057 > What you want to do is start at one circle and slice towards the centre and STOP. Then flip your rectangle, and start at the other circle and move your way towards the centre as to connect with the first slice. This way, you prevent the risk of your blade to get too close to the frame curved corner that you DON'T WANT CUT. Does this make sense ?
-
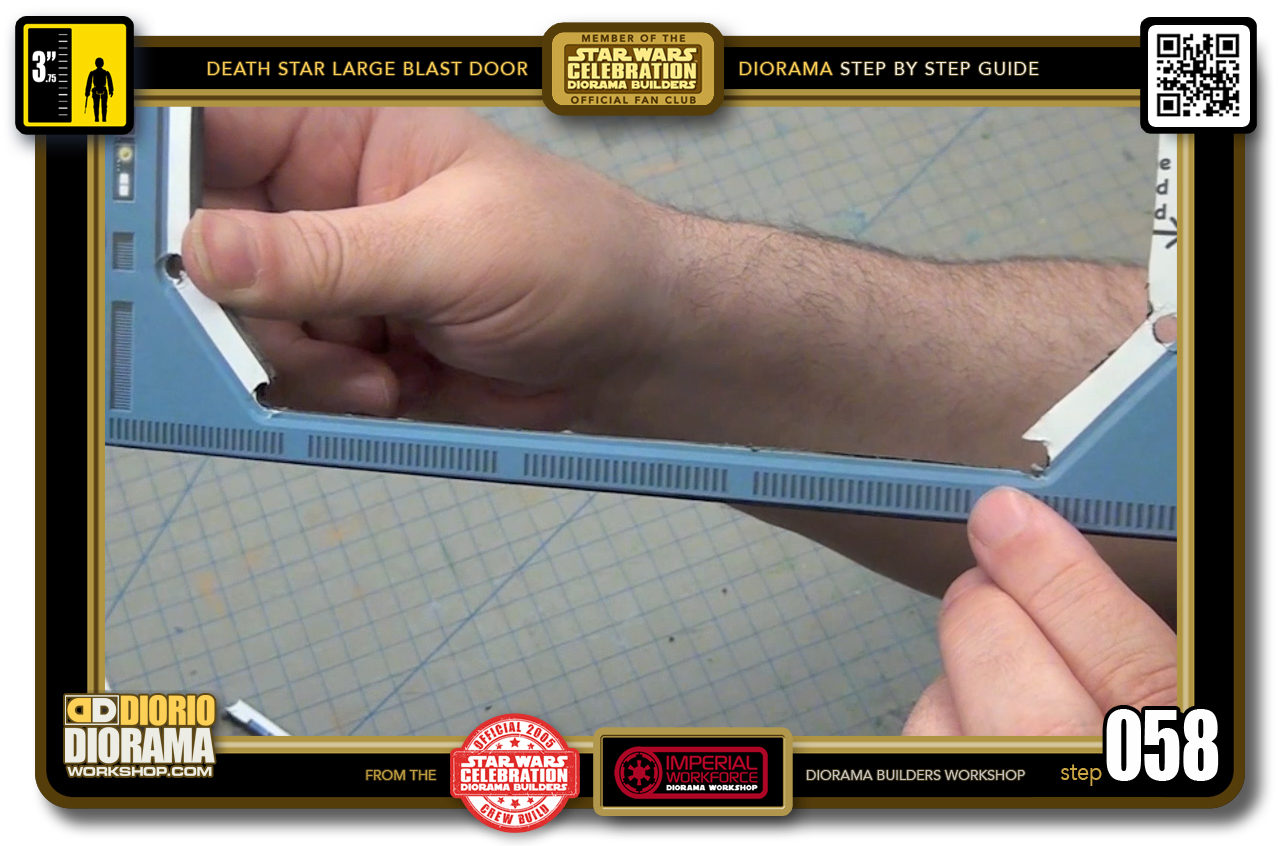
- STEP 058 > Your strip should just pop out and you now get the close clean cut that you want for your diorama.
-
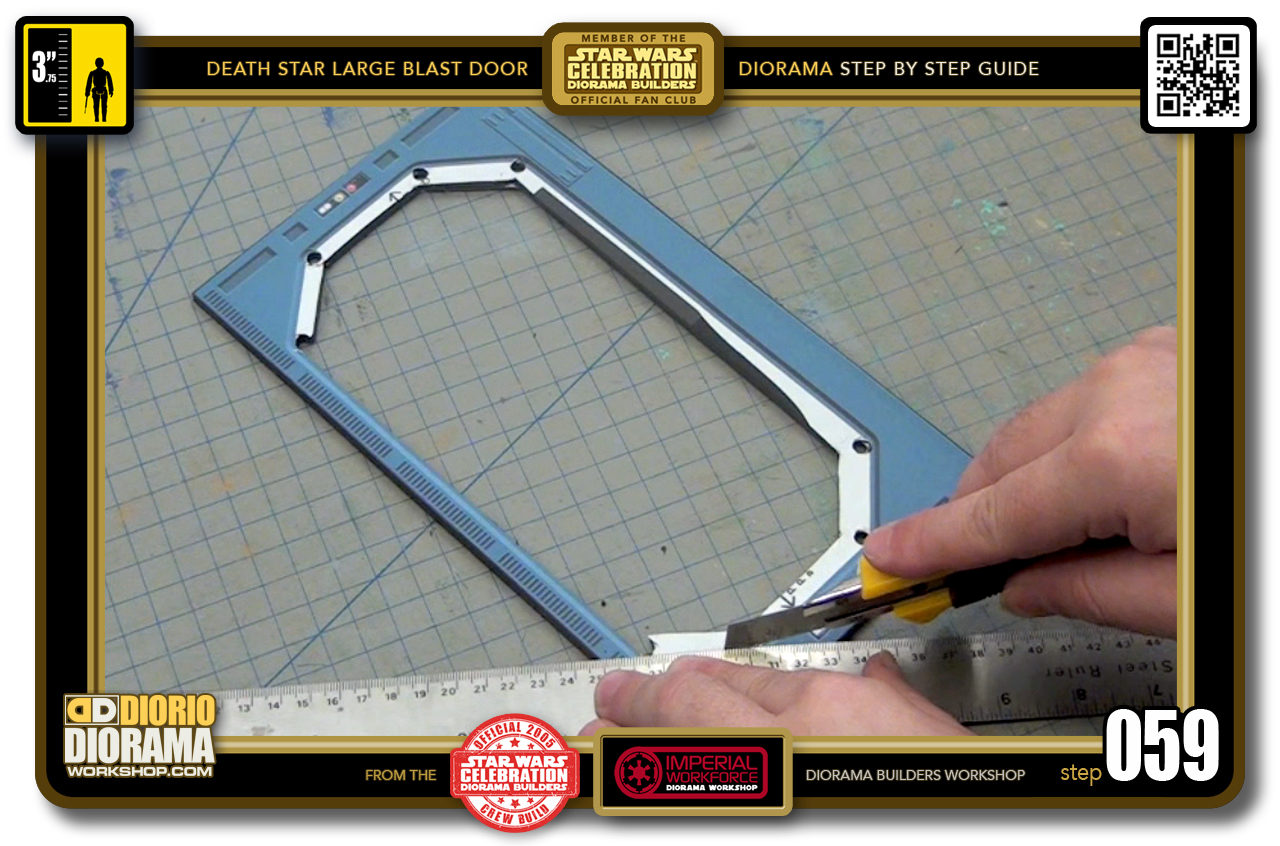
- STEP 059 > Continue cutting all the way around. Remember to start at one circle towards the centre and then start again at the opposite circle and work your way to the centre where your 2 slices connect and cut off the excess part.
-
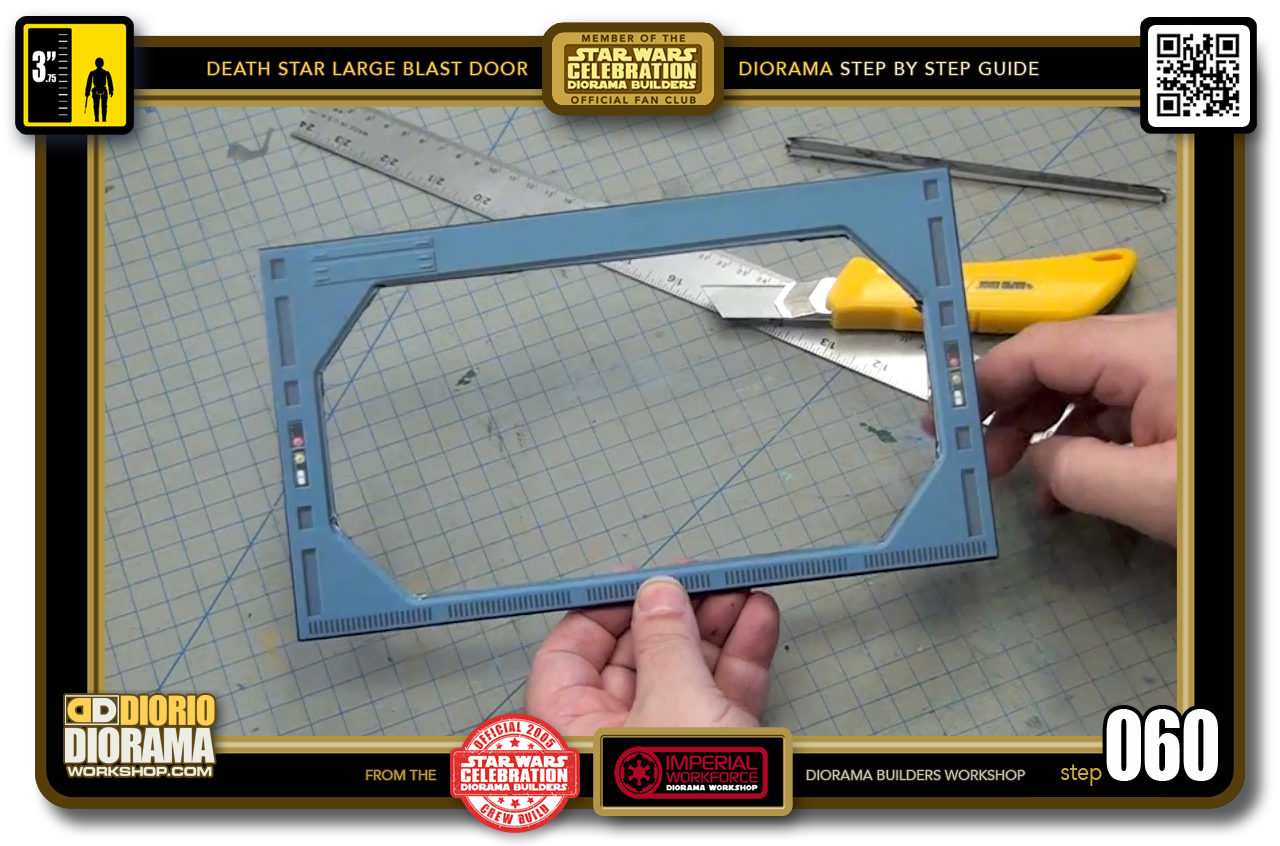
- STEP 060 > You should now have a clean final frame. Don't worry if your round corners are not perfect - they never will be - to do so you would need a machine laser cut or 3D printer. This is the arts and crafts technique and shows the love that you put into making it the harder way 🙂

.
Did you already build this Diorama ? At home or at our Star Wars Celebration Diorama Builders workshop ? Would you like to show it in the site’s GALLERY VISITORS DIORAMAS section, YES ? That is Awesome !!! You can find out all the details on how to email me your photos on the VISITORS SUBMISSIONS INFO page … When I get your photos, I will create your very own page just like this one. You may not realize it but work does inspire others to join in the fun of making Action Figure Dioramas.
.
NOT FOR RESALE ALL Decals, tutorials and artwork are ©FrankDiorio (dioramaworkshop.com) and offered FOR FREE to the fans – that would be you ? so you can build and display my diorama designs in your very own home. I realize I cannot control what one does with my graphics once I place them on the web, I can only ask you as one fan to another, please respect the artist and do not be that jerk who uses my designs and tutorials to build a copy of my work only to sell it on EBAY or trade/sale groups and forums. Thank You. Frank.
.
.
If you have a facebook account, why not join the Official Diorama Builders Fan Club today, simply click the logo link below.
 .
.
Catch up with fellow visitors and exchange stories, read cool interviews with the crew, exchange photos, fun surprises and grab some FAN ONLY merchandise next year at actual future conventions ?
.
©2018 Frank Diorio DioramaWorkshop.Com
.
IF YOU LIKE WHAT YOU SEE, PLEASE SHARE WITH YOUR FRIENDS
USING THE SOCIAL MEDIA BUTTONS BELOW