


-
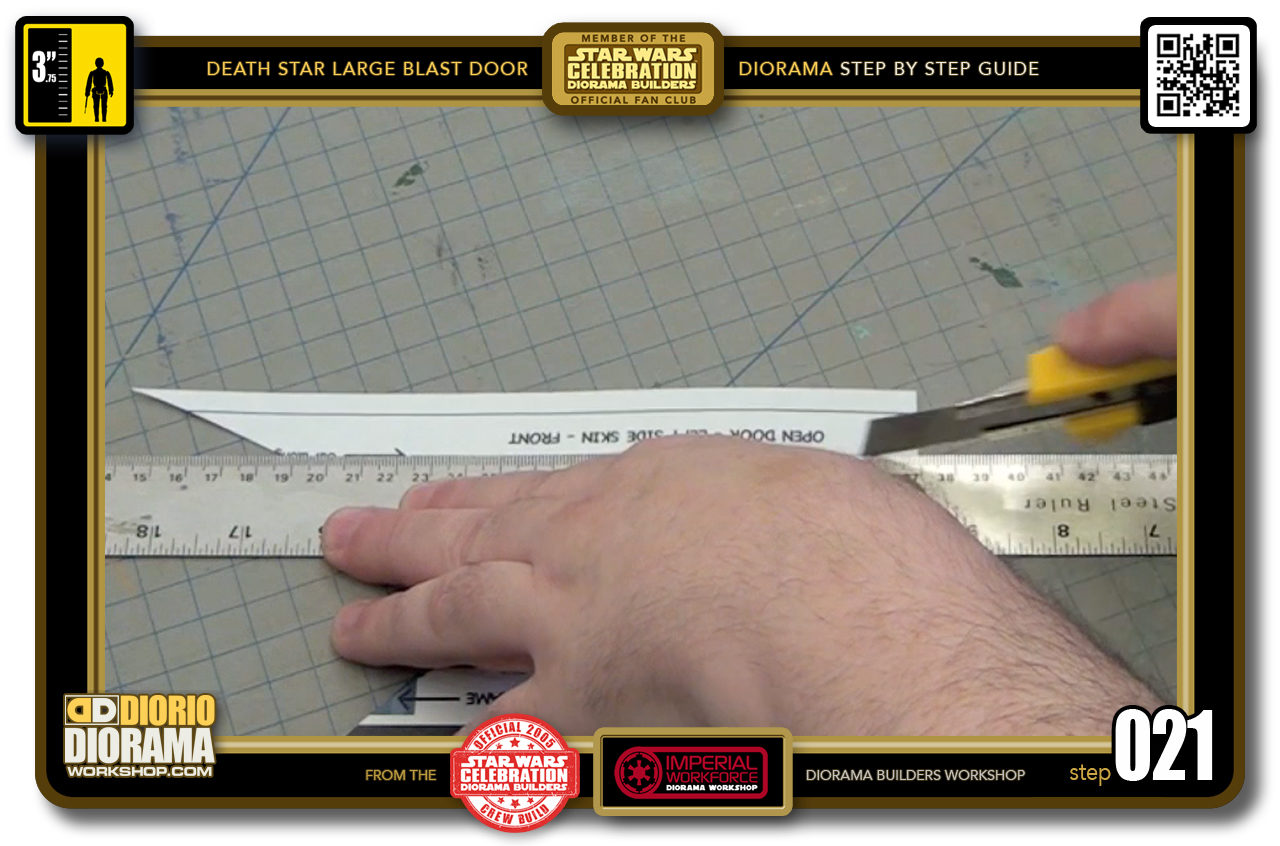
- STEP 021 > Cut around the outer edges as you did the last piece. Remember to NOT cut any of the inside edges yet.
-
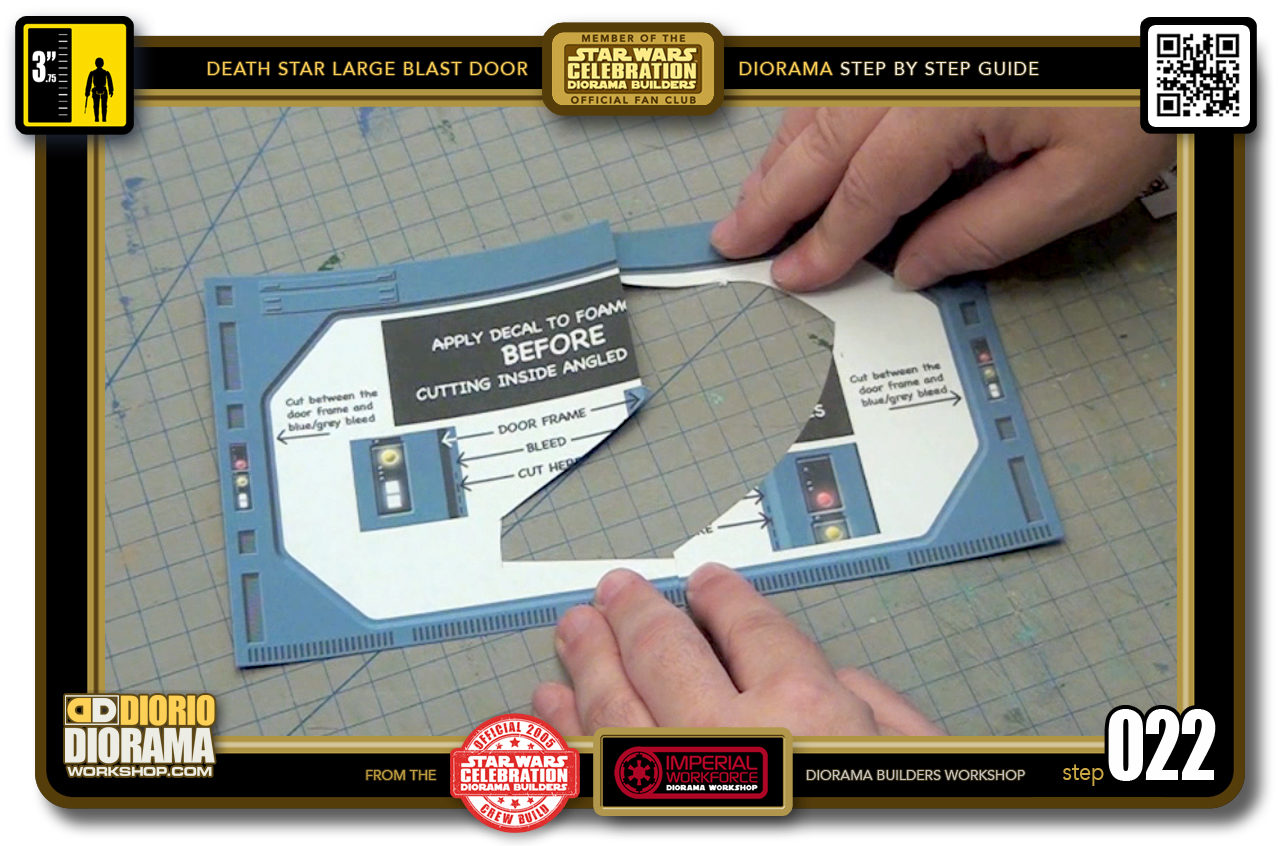
- STEP 022 > You should now have your 2 halves ready for application to one of your rectangles.
-
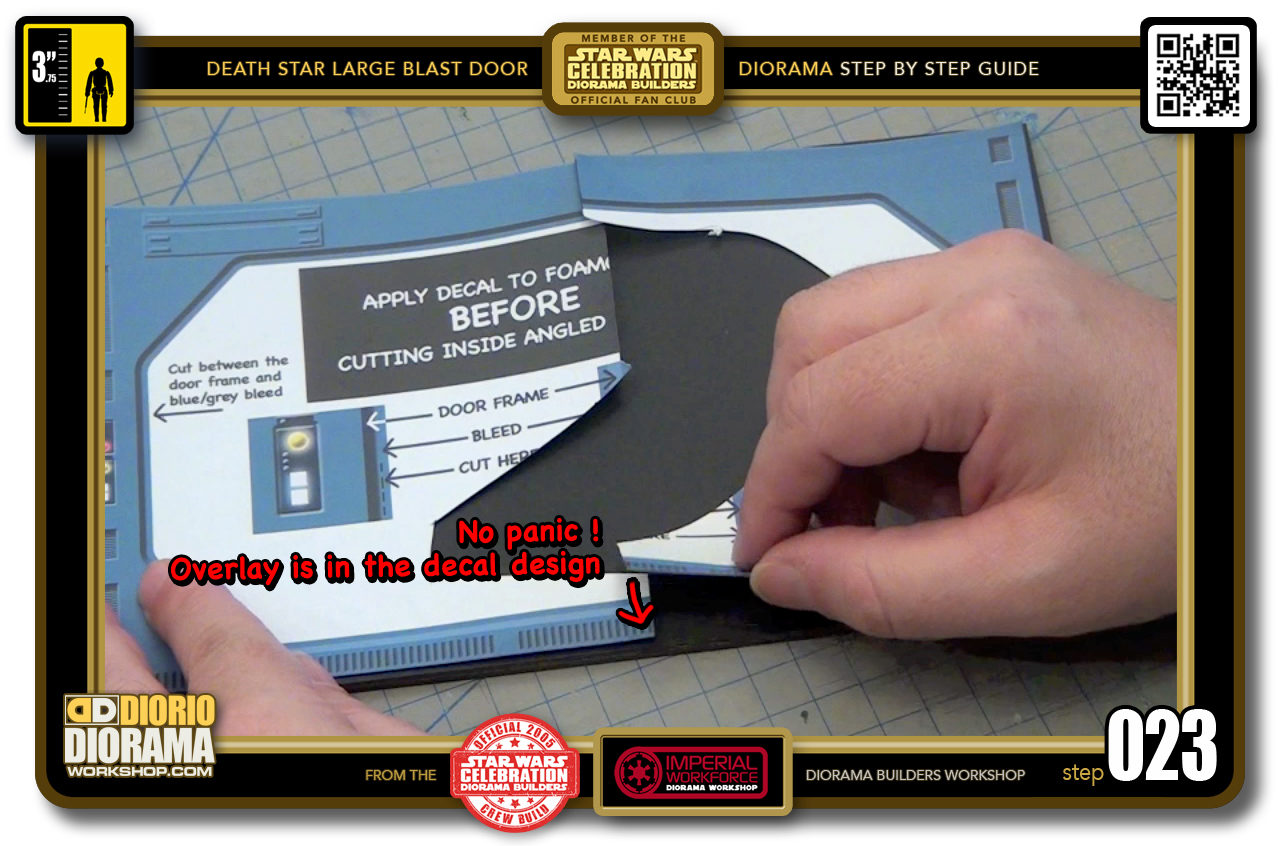
- STEP 023 > You will also notice how the ends overlap each other as was the case for the CLOSED Large Blast Doors decal halves. This should give you both a seamless joint and also allow for slight imperfections.
-
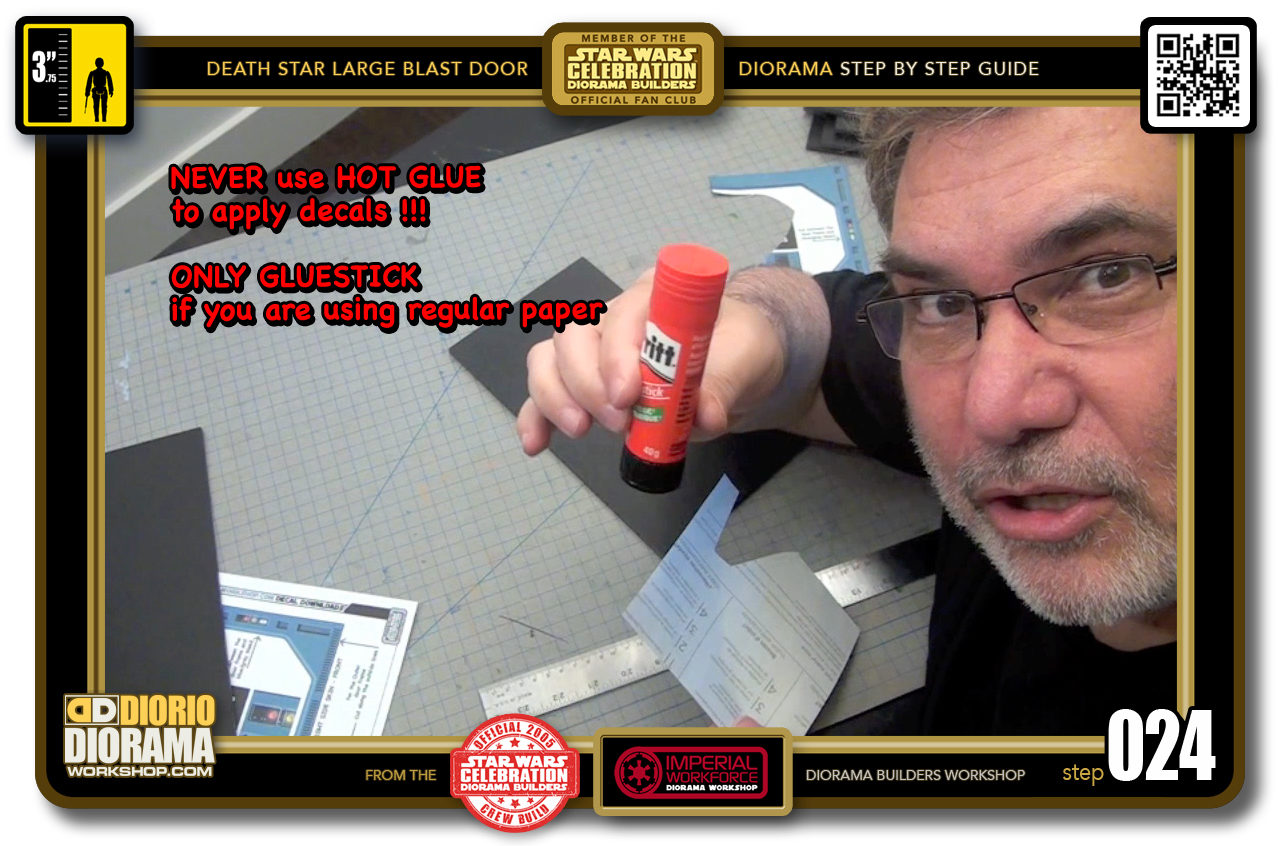
- STEP 024 > If you didn't print on Full Size Label sheets as I did, you can use regular GLUESTICK to apply your decals to the foamcore. NEVER EVER USE HOT GLUE on decals.
-
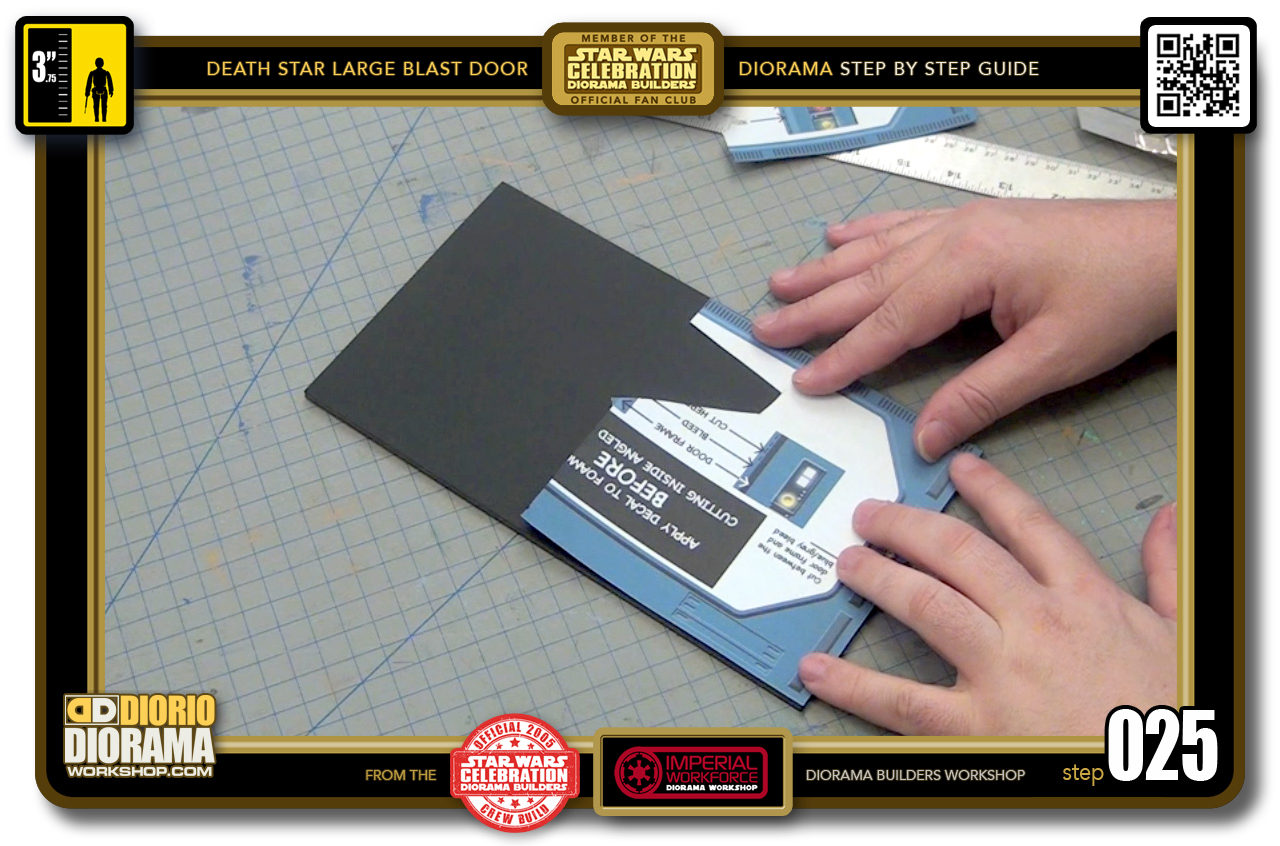
- STEP 025 > ALWAYS do a DRY RUN FIRST. Place your decal on your surface to make sure it will fit just right and allow you to know how and where it fits once it is sticky and ready for application.
-
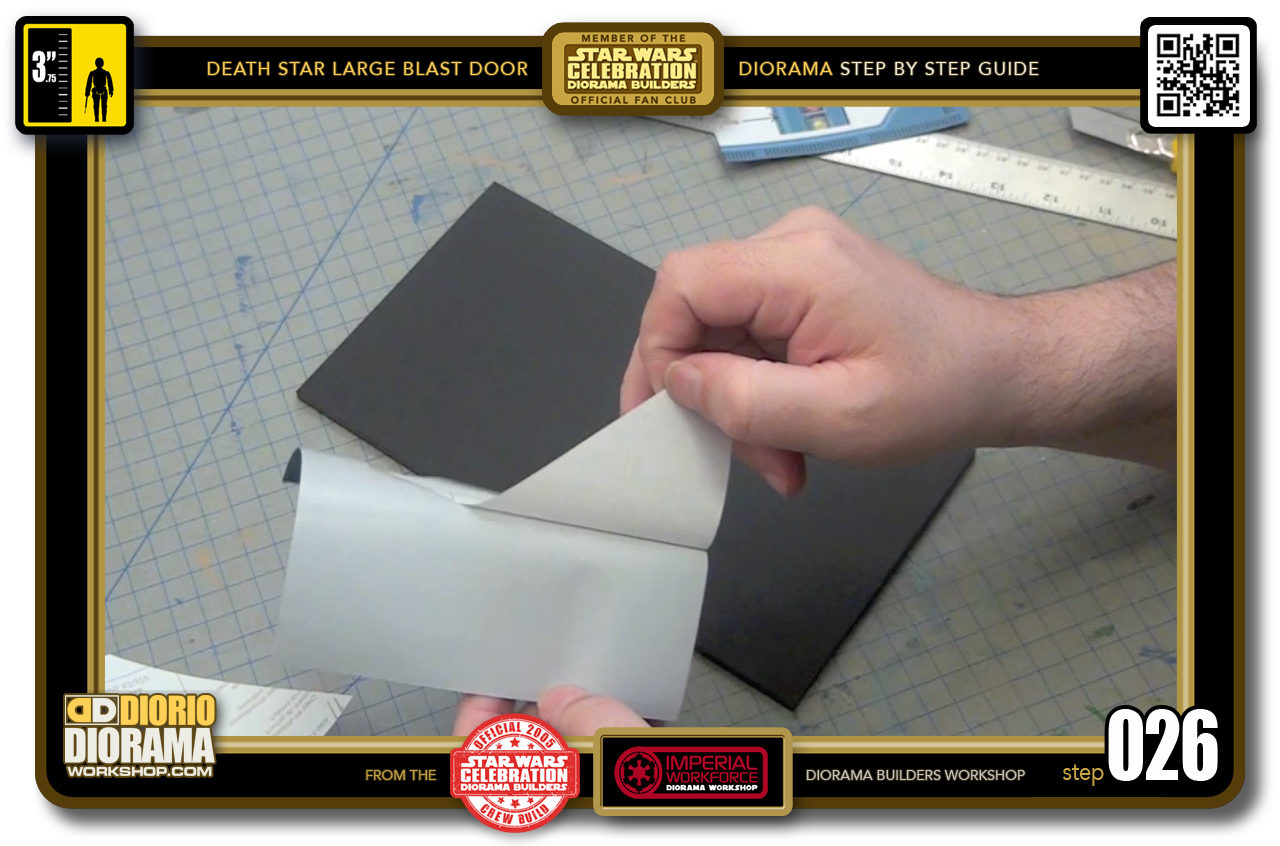
- STEP 026 > Peel the back of your Label Paper or apply Gluestick if that is the way you are going.
-
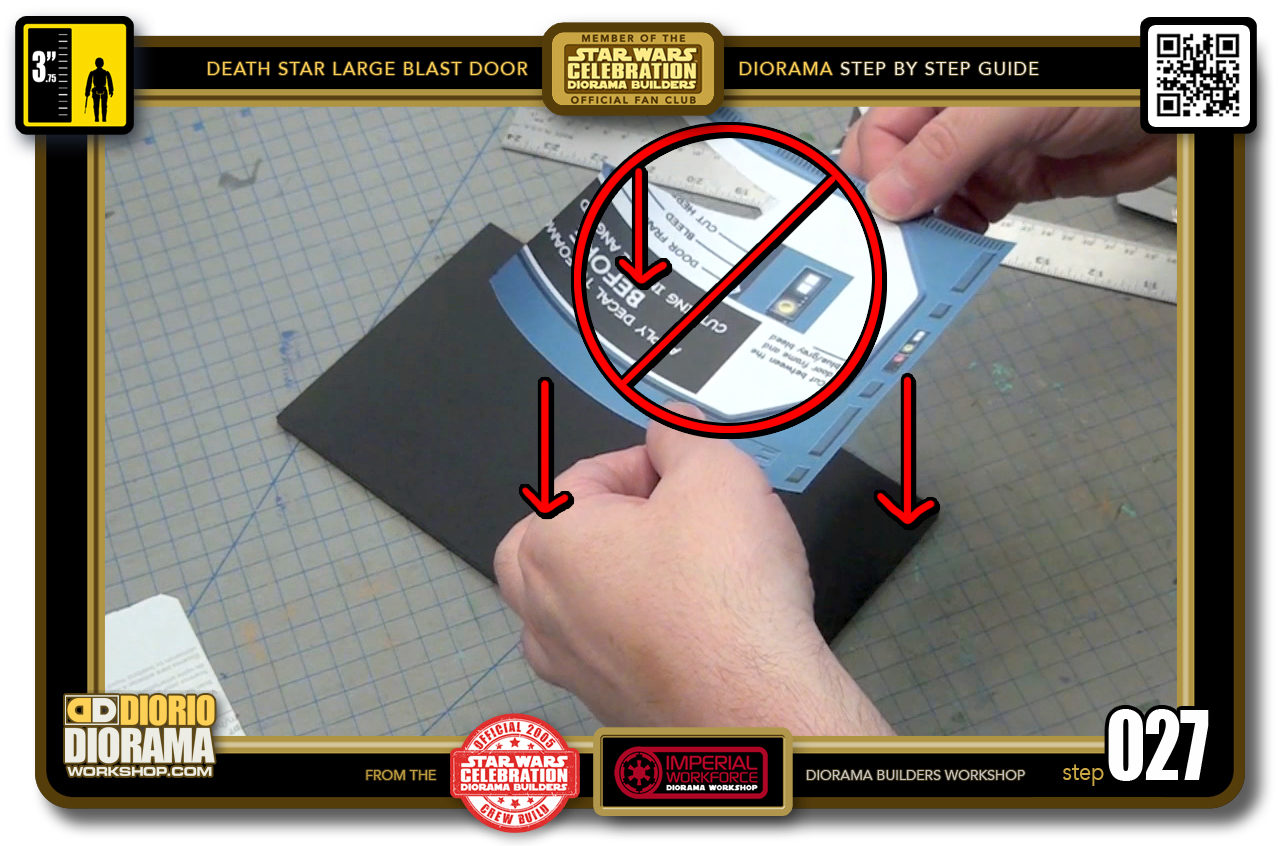
- STEP 027 > DO NOT place your decal fully from the top down. If you make an error you will be screwed and very highly likely not able to lift it off without folding or worse, tearing the papaer.
-
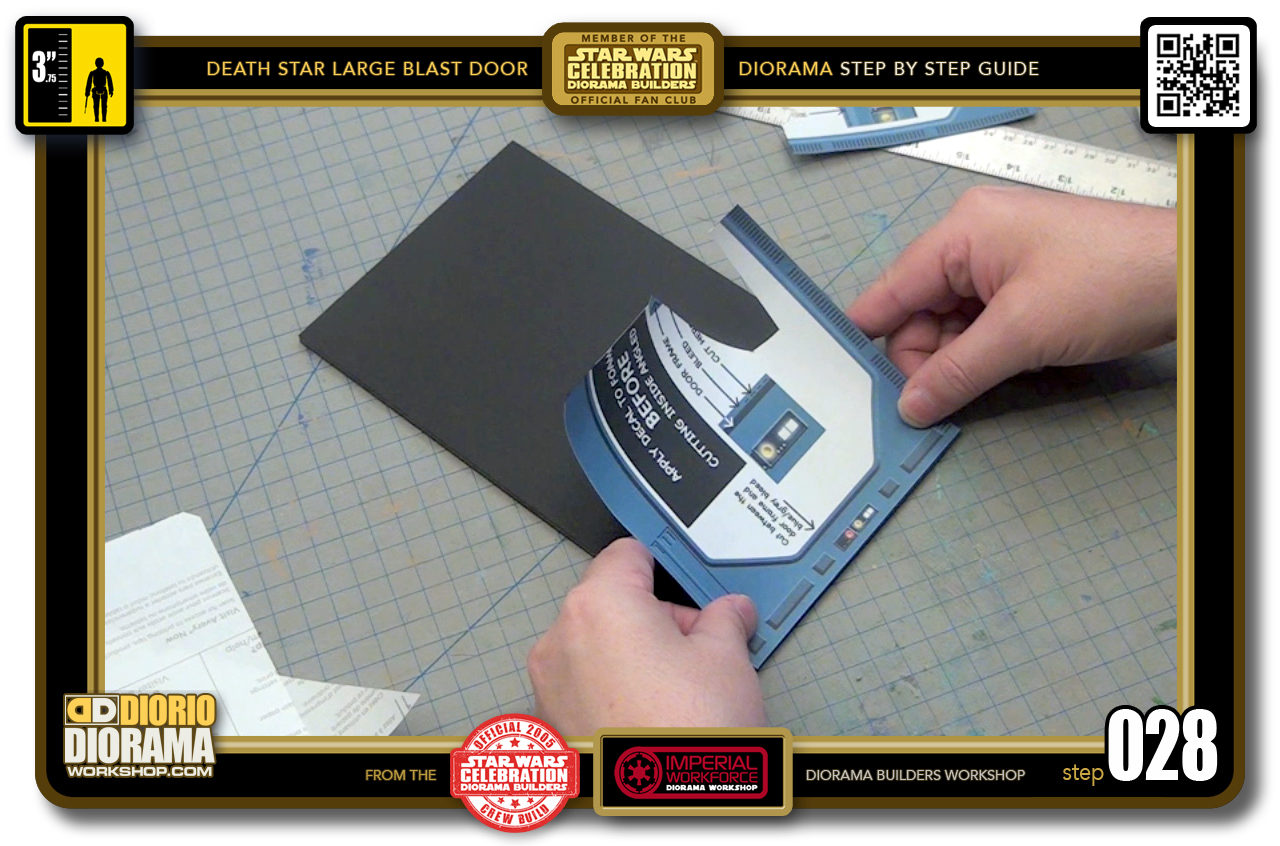
- STEP 028 > Start by carefully aligning and lowering your decal to the corner edge of your foamcore rectangle until the 2 touch each other lightly.
-
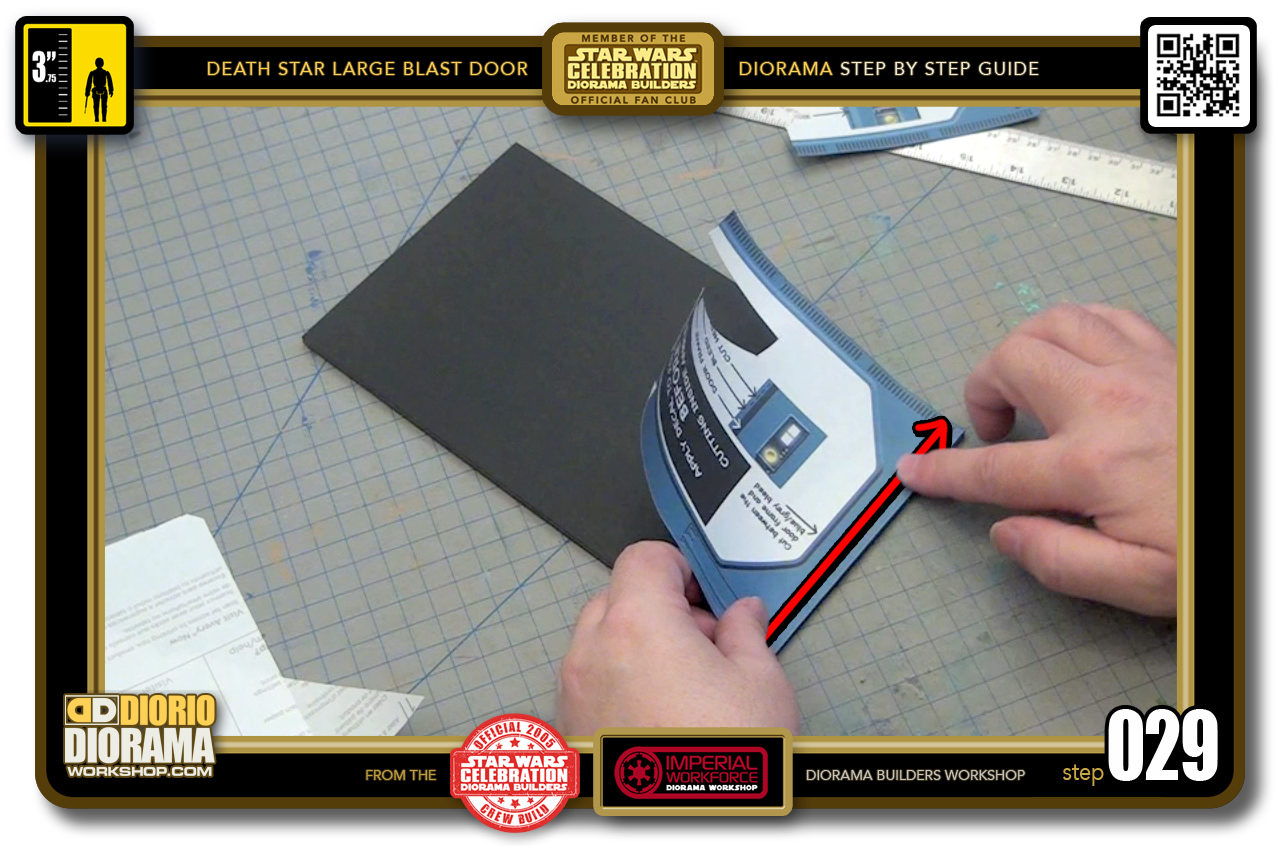
- STEP 029 > When its placed just right, gently put pressure and move your finger across from one corner to the other. After repeat the motion with MORE pressure to make sure it won't move around.
-
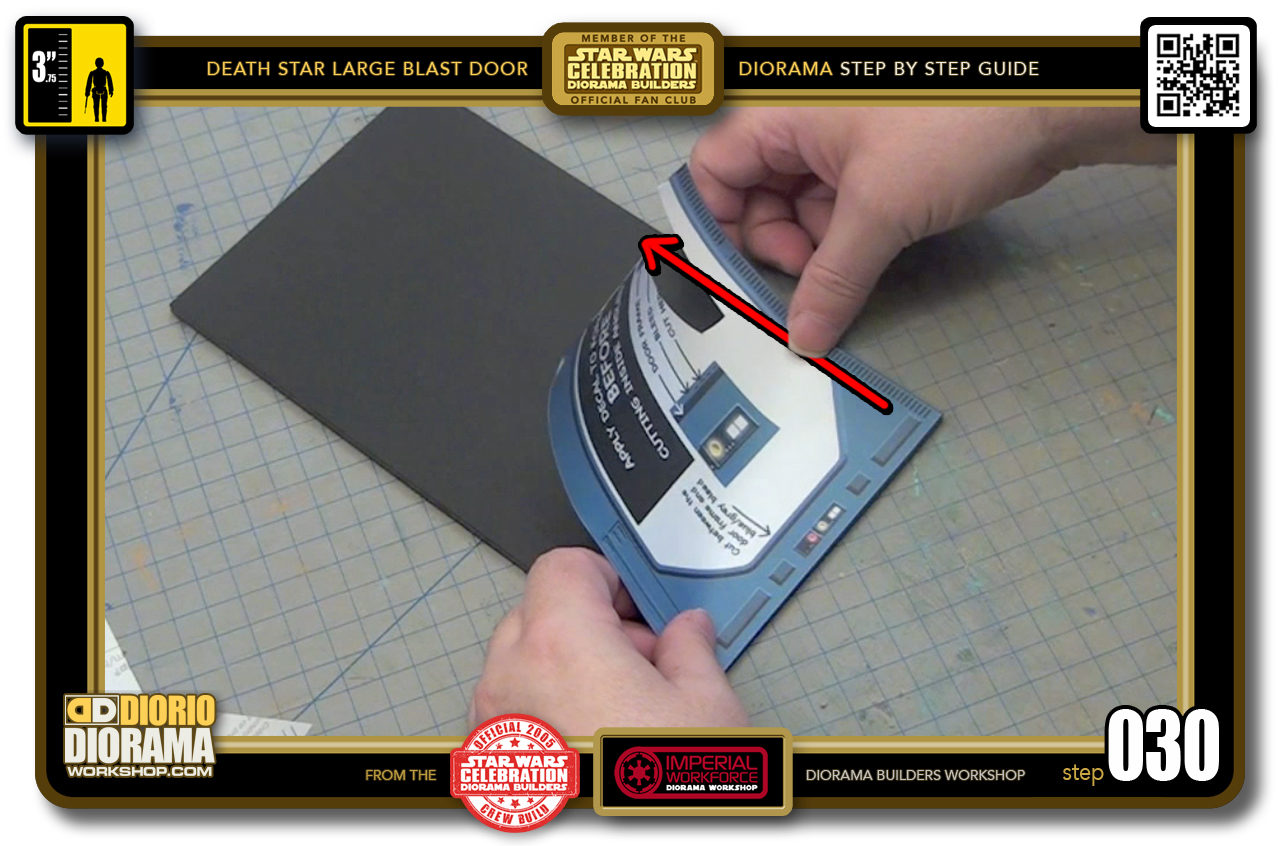
- STEP 030 > Now keep the left side up, you don't want it touching the surface yet, from the right bottom of the decal, move your finger or thumb gently upwards until the end of the decal contacts the foamcore. If it is a little off the edge, you can lift it , reposition and place it down gently again. When you are happy with it's position, repeat the motion but press down harder this time to make sure there is full contact.
-
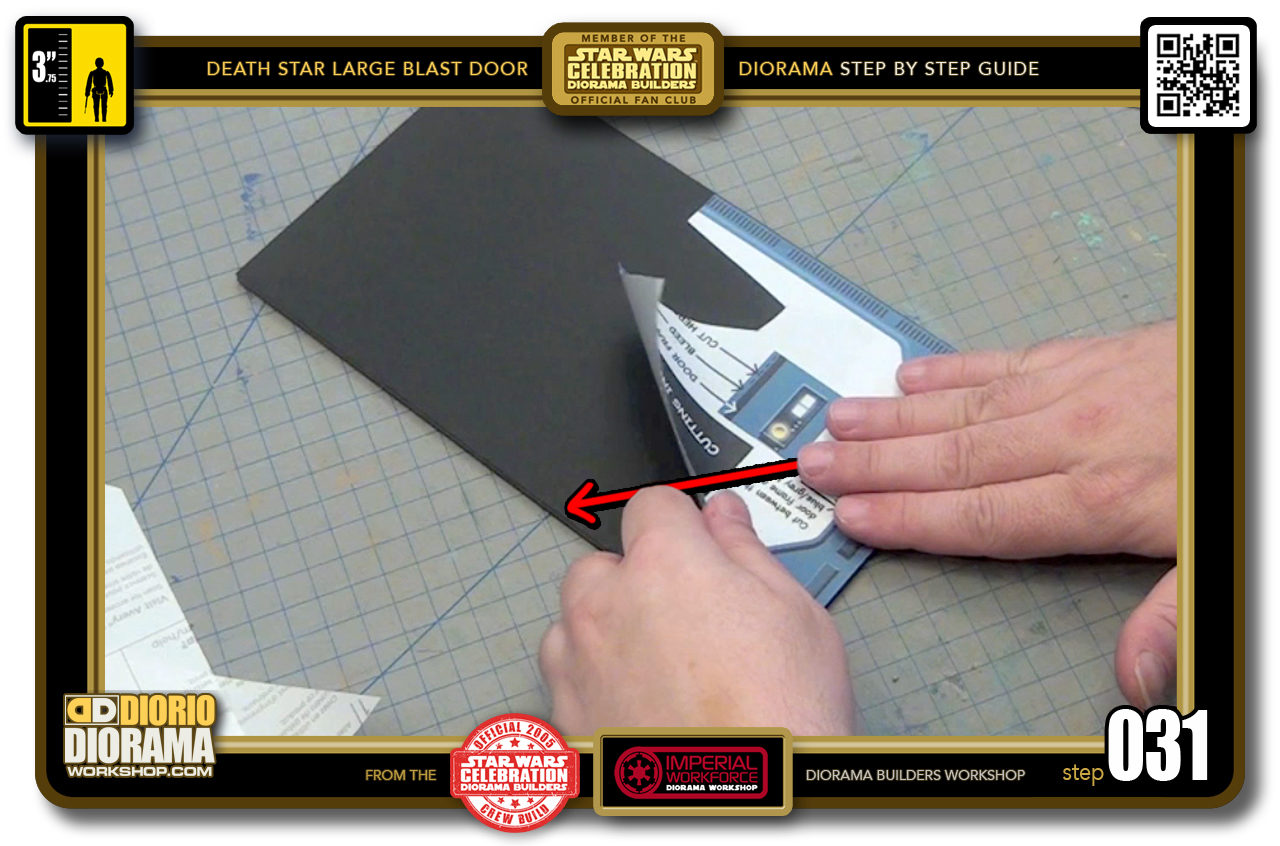
- STEP 031 > Now from the centre bottom of the decal, move your hand gently towards the left side to have the left corner in position. When you see it is placed correctly, just press down harder again.
-
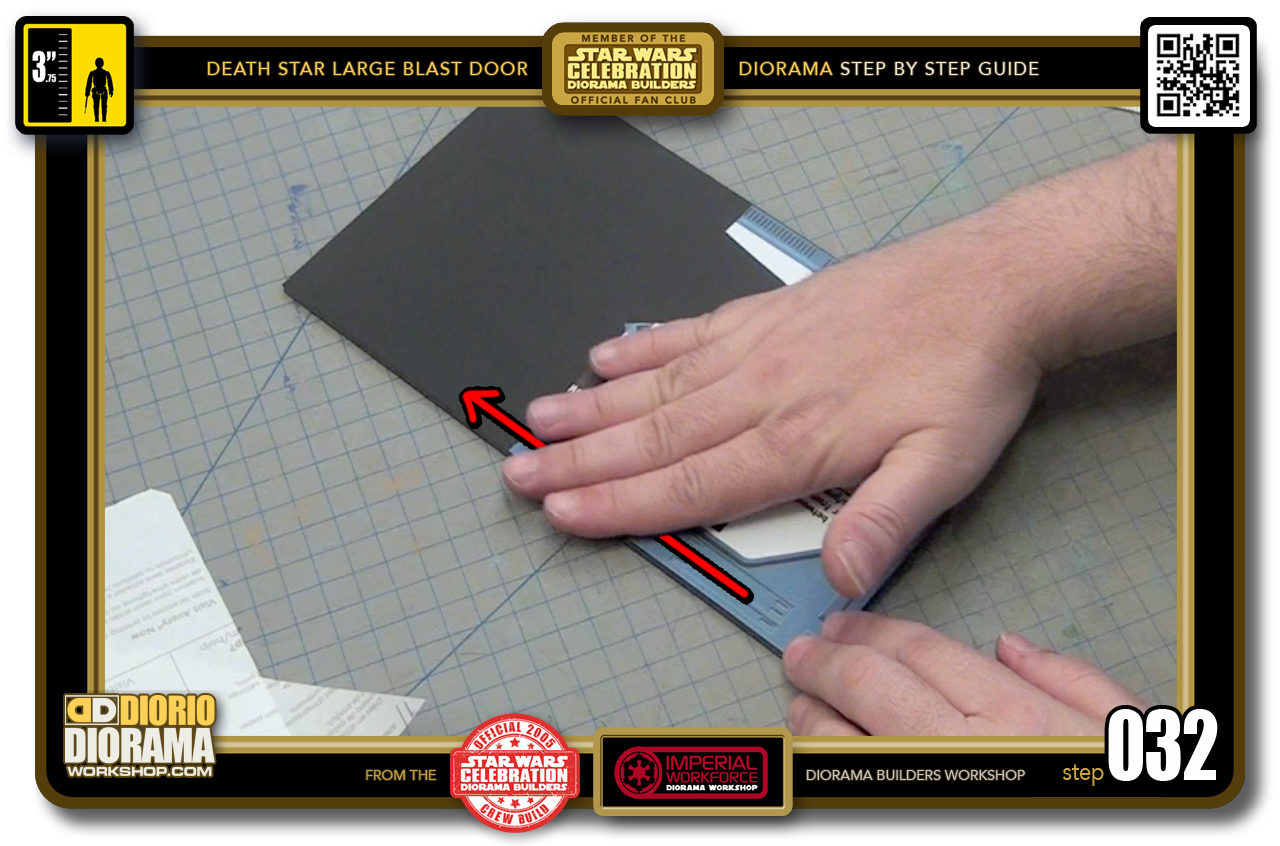
- STEP 032 > Last, gently and slowly press from the bottom left corner upwards to the end of the decal.
-
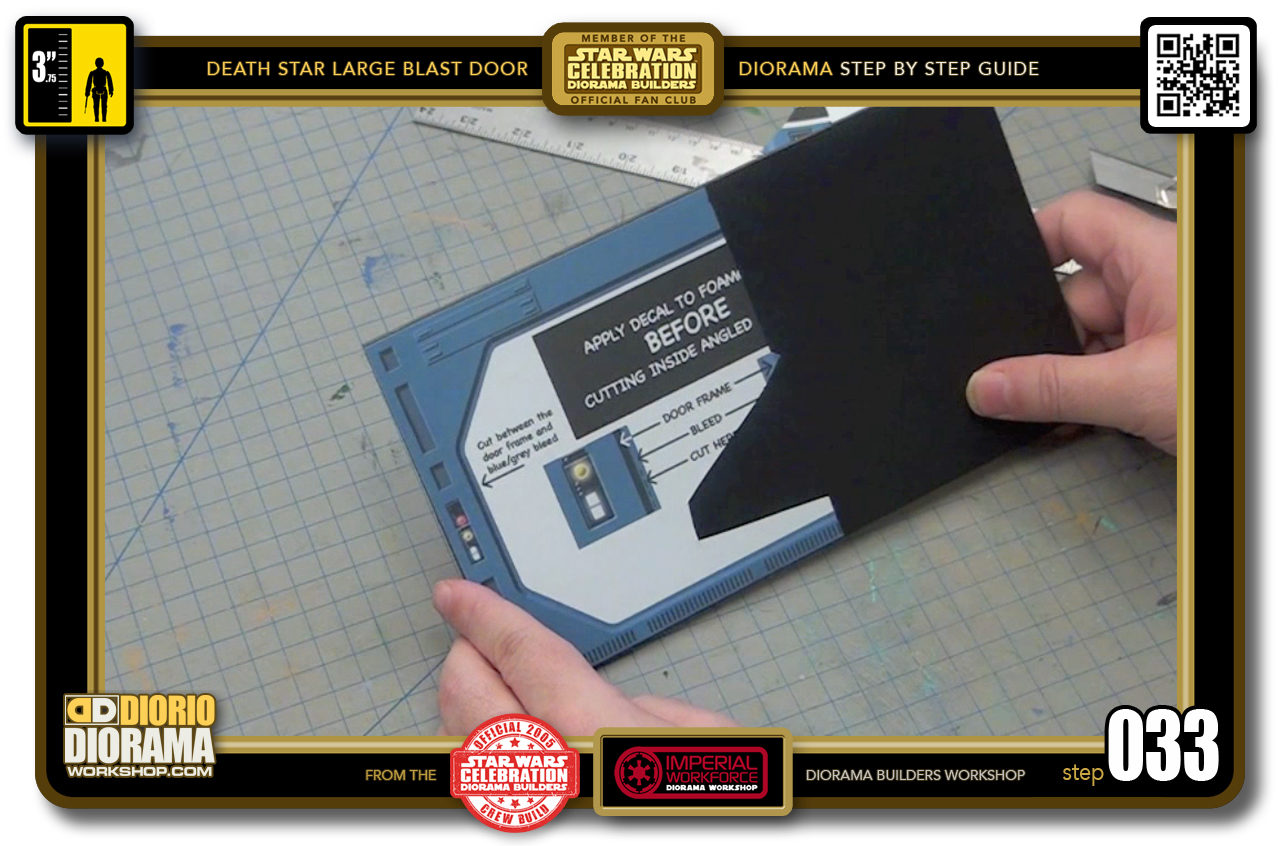
- STEP 033 > Your left side is now securely applied to your first rectangle piece. If you used Gluestick, let that dry a little before moving on to the right side.
-
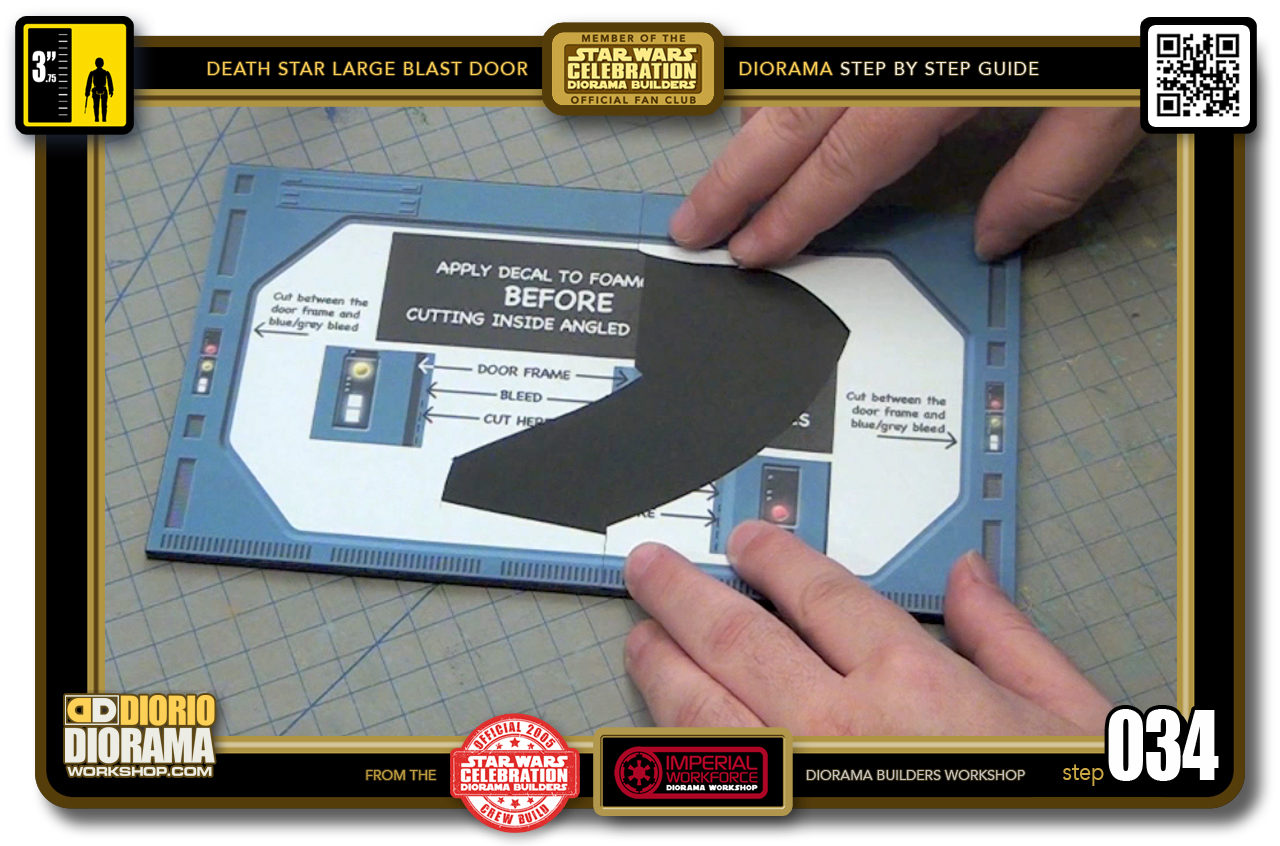
- STEP 034 > Time for a DRY RUN. Place your decal against the right edge and bottom edge. You should see that the ovelaps fit well and blend the 2 decals together.
-
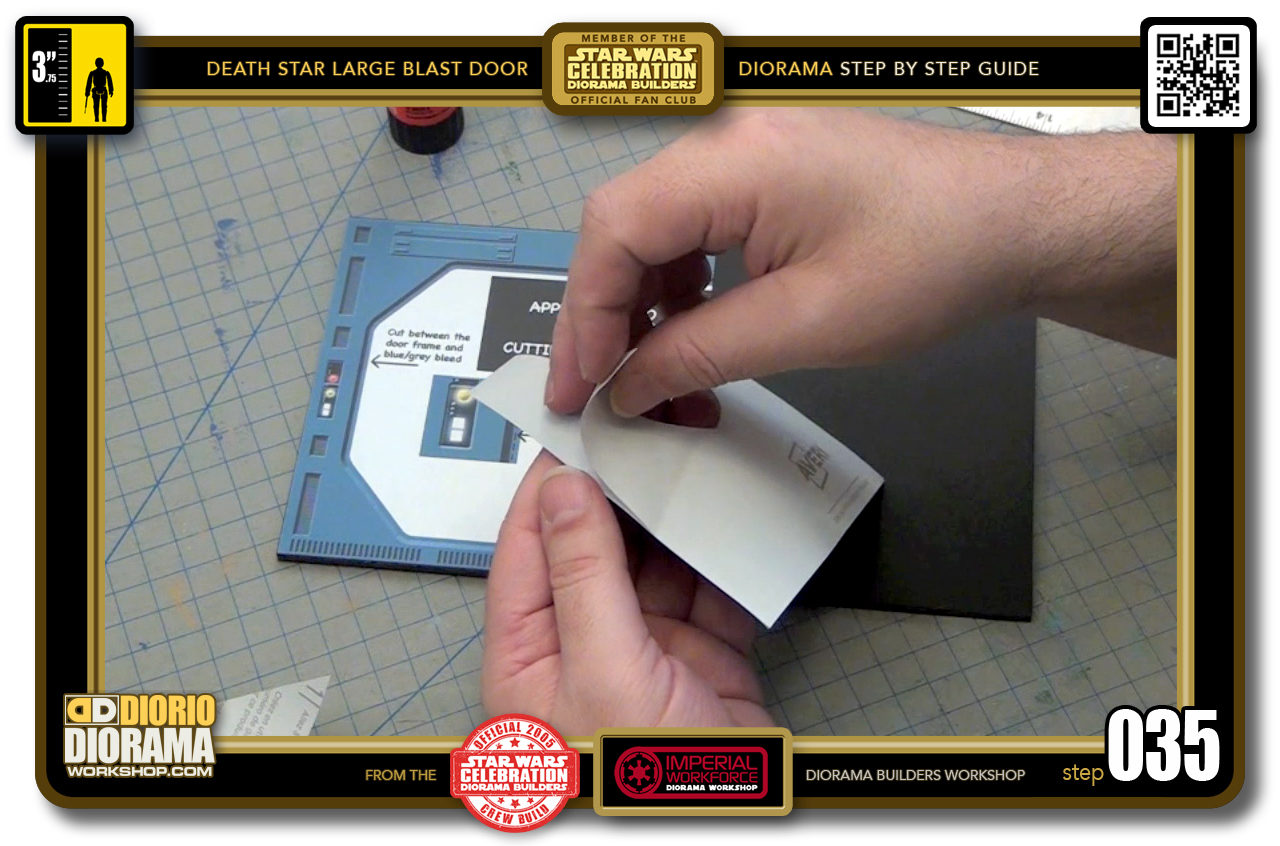
- STEP 035 > Peel the backing off the right decal, or use Gluestick as you did the other when not printing on label sheets.
-
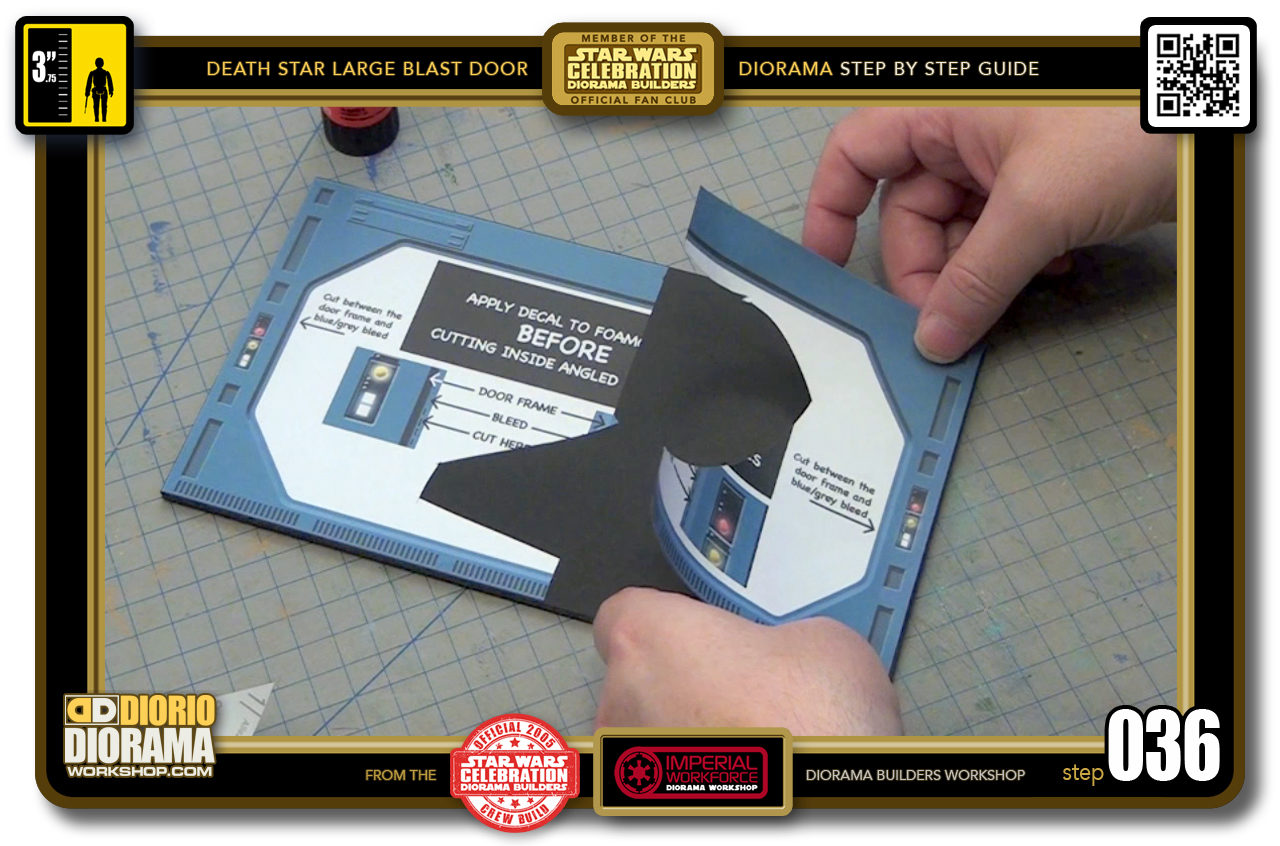
- STEP 036 > Just as you did in Step 028, carefully and gently align the edge and lower until it barely touches. DO NOT PRESS DOWN HARD YET.
-
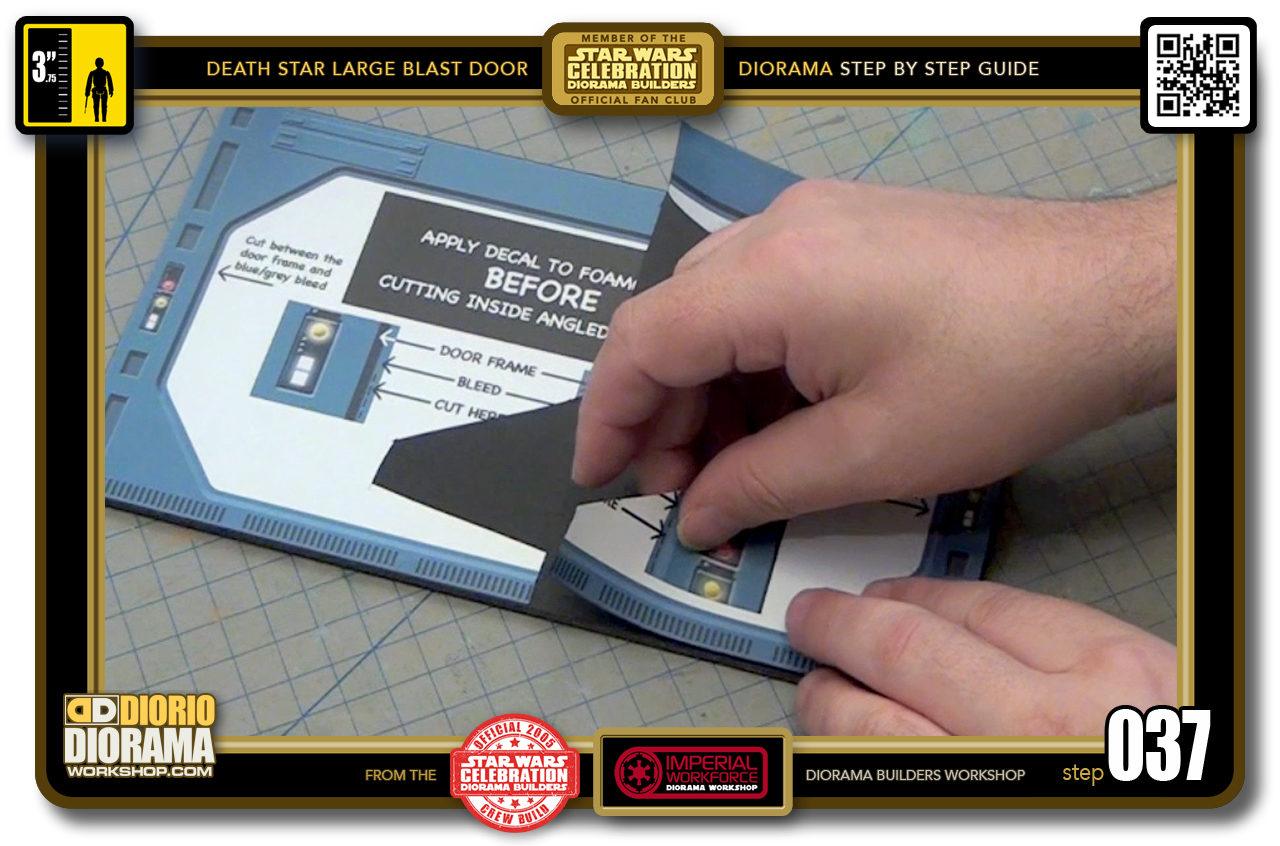
- STEP 037 > Now gently lower the left side of the decal, the bottom area where the grids are found. TRY and AVOID PRESSING HARD along the edge, you want that still loosely touching in case you need to wiggle the decal in the next step.
-

- STEP 038 > Examine to see if your decal is aligning perfectly with the first one. If you see the grids matching up - then press gently with your finger at the seam.
-
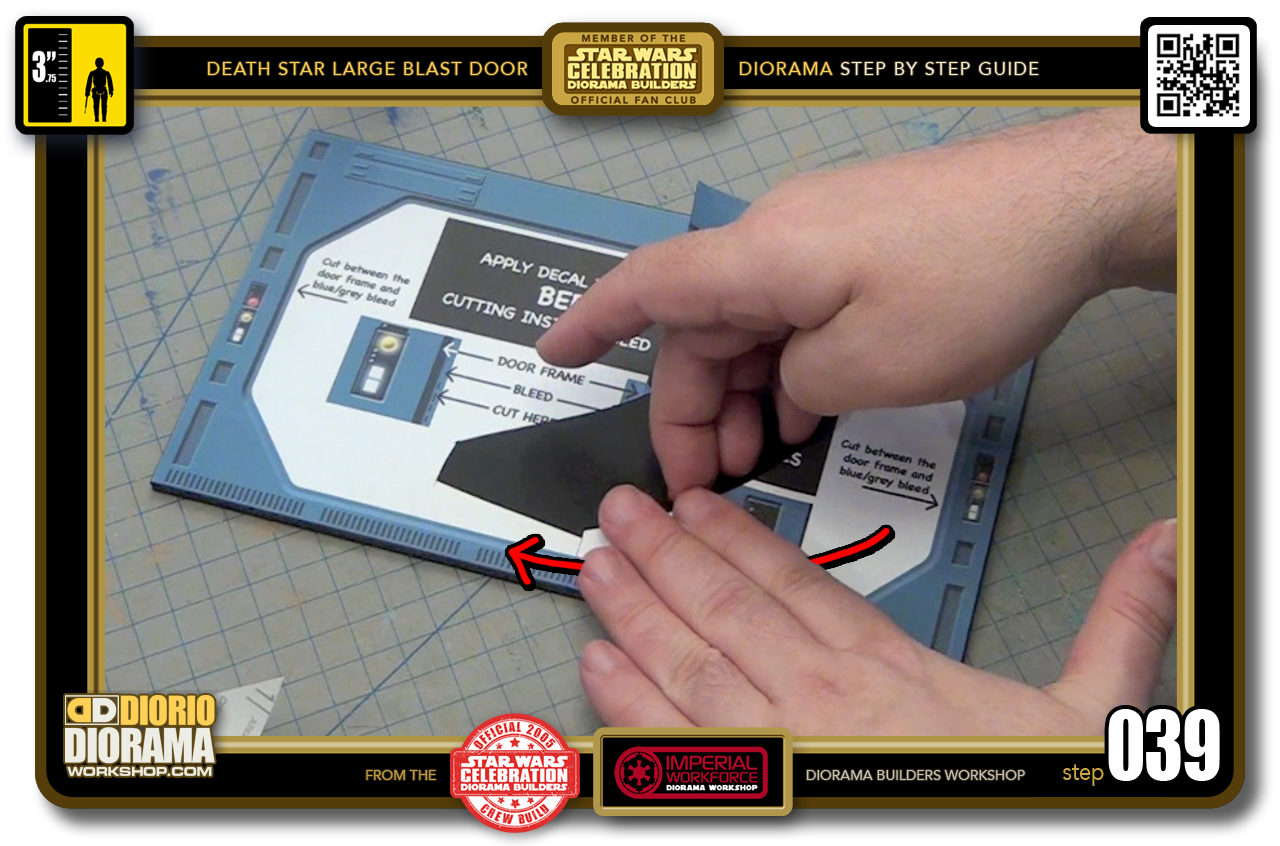
- STEP 039 > Now return to the bottom center edge and press down with your hand and slowly move it towards the left and then up to the connection of the gaps. then repeat with a little more pressure.
-
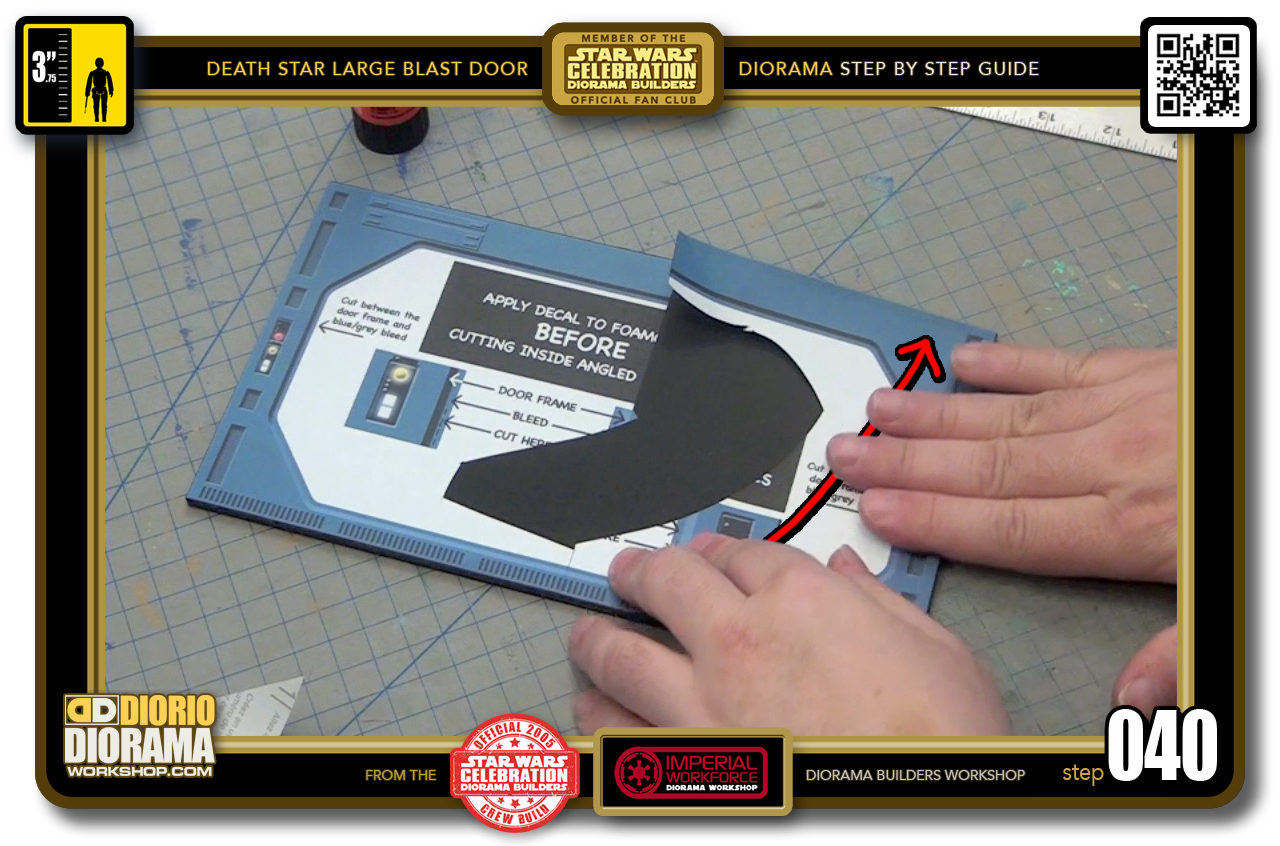
- STEP 040 > Go back to the center bottom edge and slowly use your hand to move towards the right side bottom corner. Repeat with a little more pressure.

.
Did you already build this Diorama ? At home or at our Star Wars Celebration Diorama Builders workshop ? Would you like to show it in the site’s GALLERY VISITORS DIORAMAS section, YES ? That is Awesome !!! You can find out all the details on how to email me your photos on the VISITORS SUBMISSIONS INFO page … When I get your photos, I will create your very own page just like this one. You may not realize it but work does inspire others to join in the fun of making Action Figure Dioramas.
.
NOT FOR RESALE ALL Decals, tutorials and artwork are ©FrankDiorio (dioramaworkshop.com) and offered FOR FREE to the fans – that would be you ? so you can build and display my diorama designs in your very own home. I realize I cannot control what one does with my graphics once I place them on the web, I can only ask you as one fan to another, please respect the artist and do not be that jerk who uses my designs and tutorials to build a copy of my work only to sell it on EBAY or trade/sale groups and forums. Thank You. Frank.
.
.
If you have a facebook account, why not join the Official Diorama Builders Fan Club today, simply click the logo link below.
 .
.
Catch up with fellow visitors and exchange stories, read cool interviews with the crew, exchange photos, fun surprises and grab some FAN ONLY merchandise next year at actual future conventions ?
.
©2018 Frank Diorio DioramaWorkshop.Com
.
IF YOU LIKE WHAT YOU SEE, PLEASE SHARE WITH YOUR FRIENDS
USING THE SOCIAL MEDIA BUTTONS BELOW