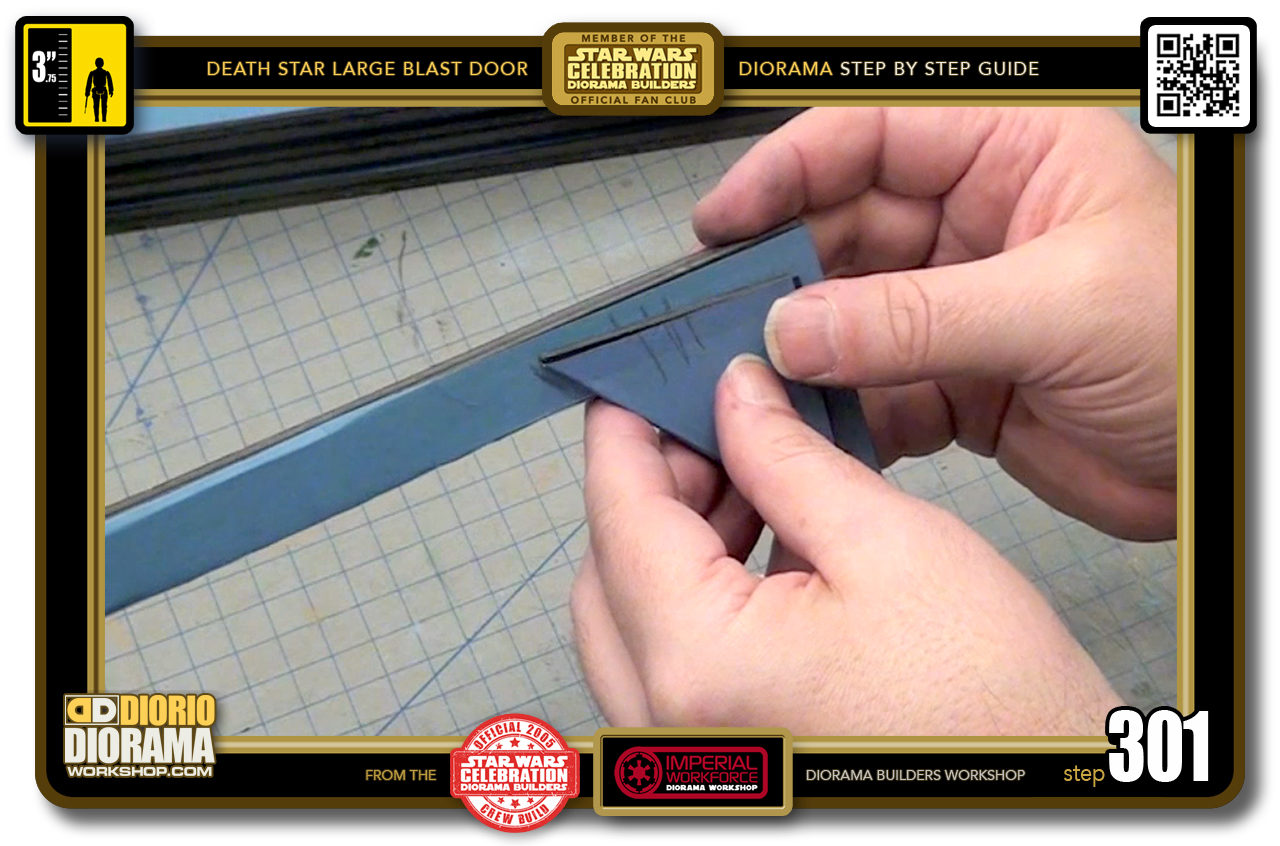
- STEP 301 > Quickly press the Doritos aligned with your pencil guide lines.
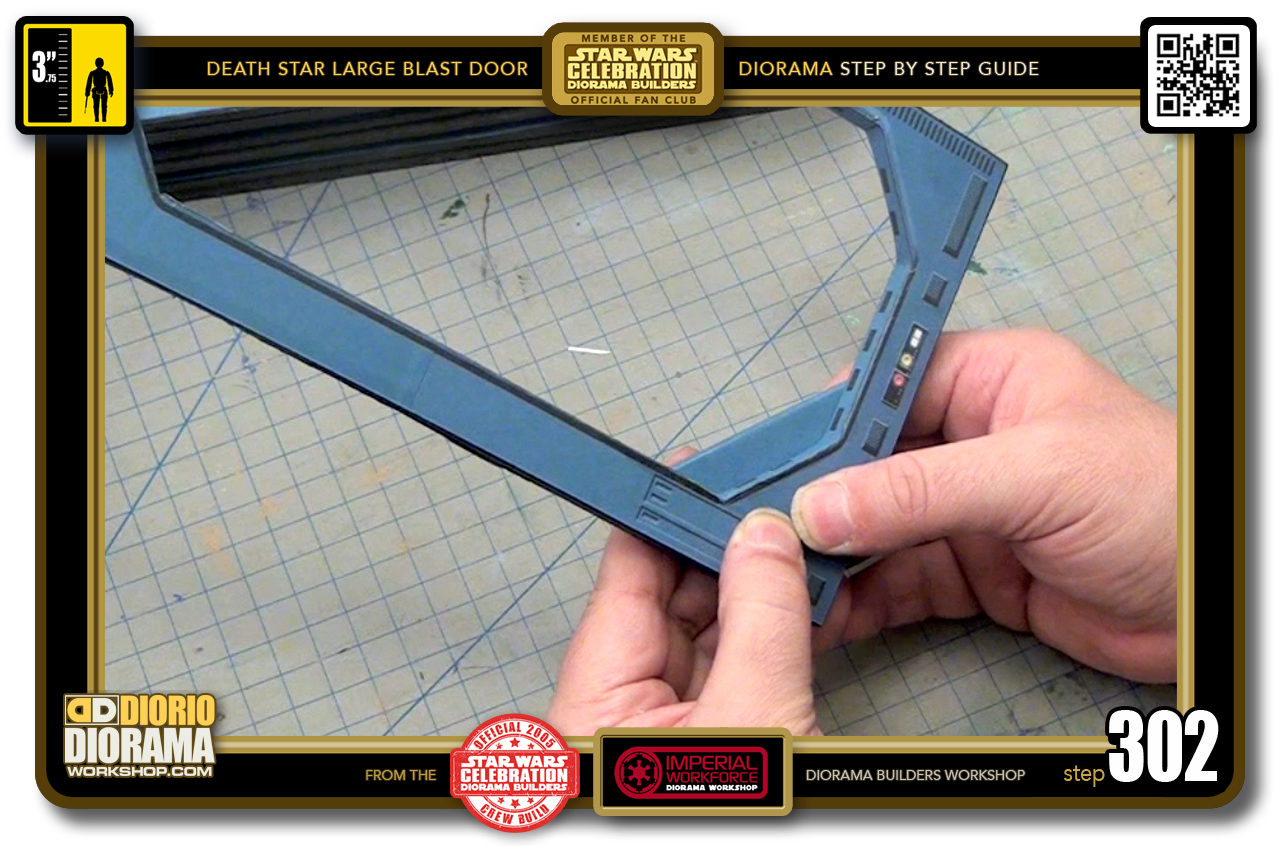
- STEP 302 > Align the PARALLEL if you need to then keep pressure for about 30 seconds until the Hot Glue cools off.
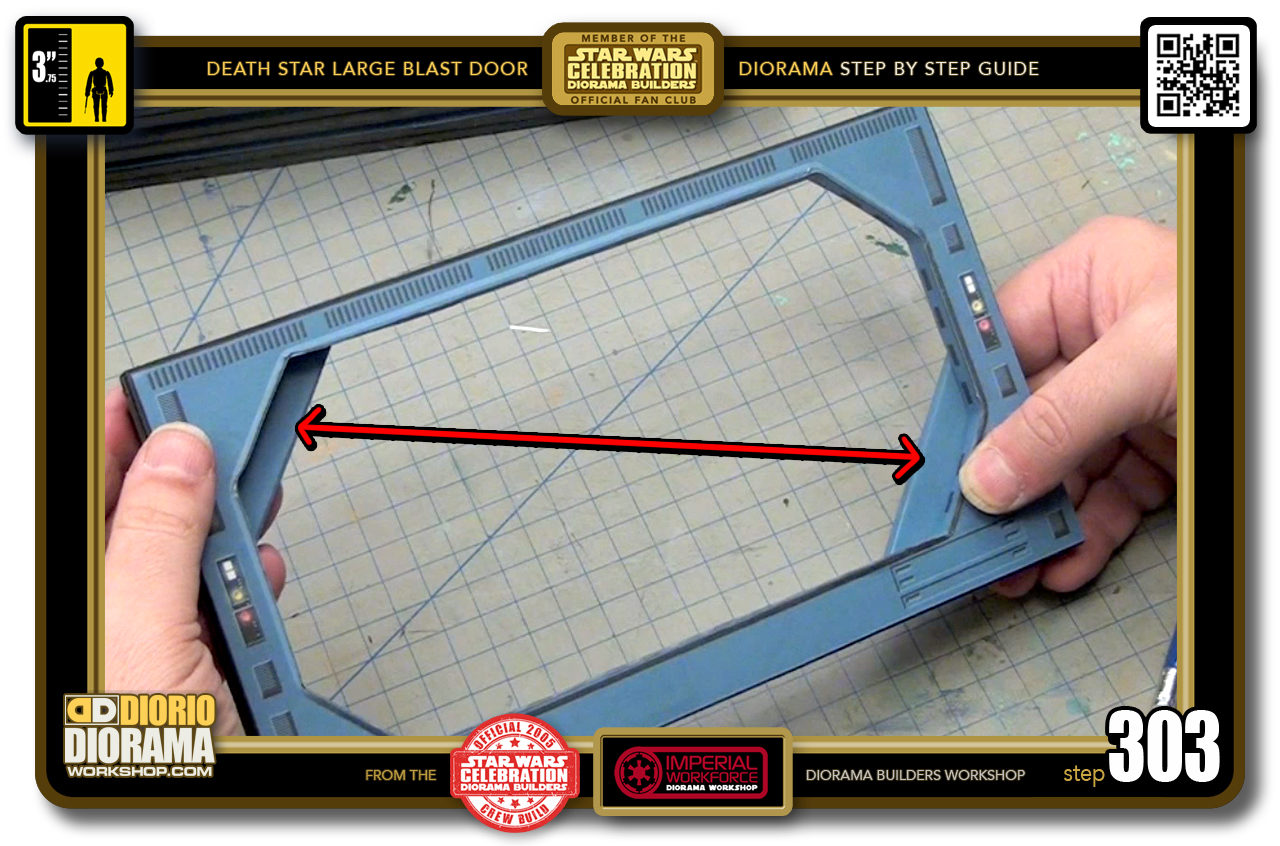
- STEP 303 > As we did the very first frame, we want to place the last Doritos triangle in the opposite corner from the one we just glued. The Door is upside down in the photo, the Bottom of the Blast Door is on top meaning you will be attaching the LAST DORITOS to the BOTTOM RIGHT of layer 4 octagonal frame.
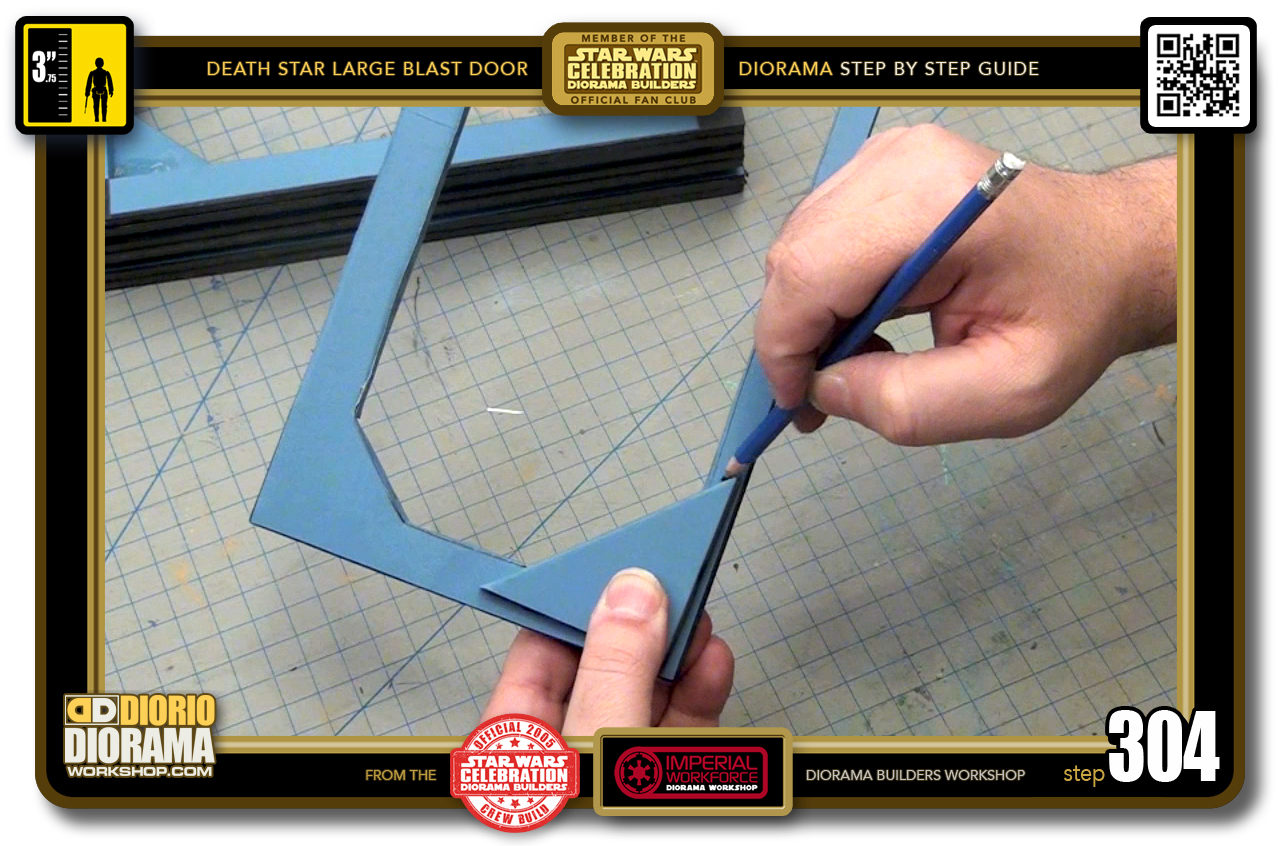
- STEP 304 > Once you put the 1cm gap and PARALLEL angle, flip the frame around and with your pencil, as before, trace around the outside of your Doritos.
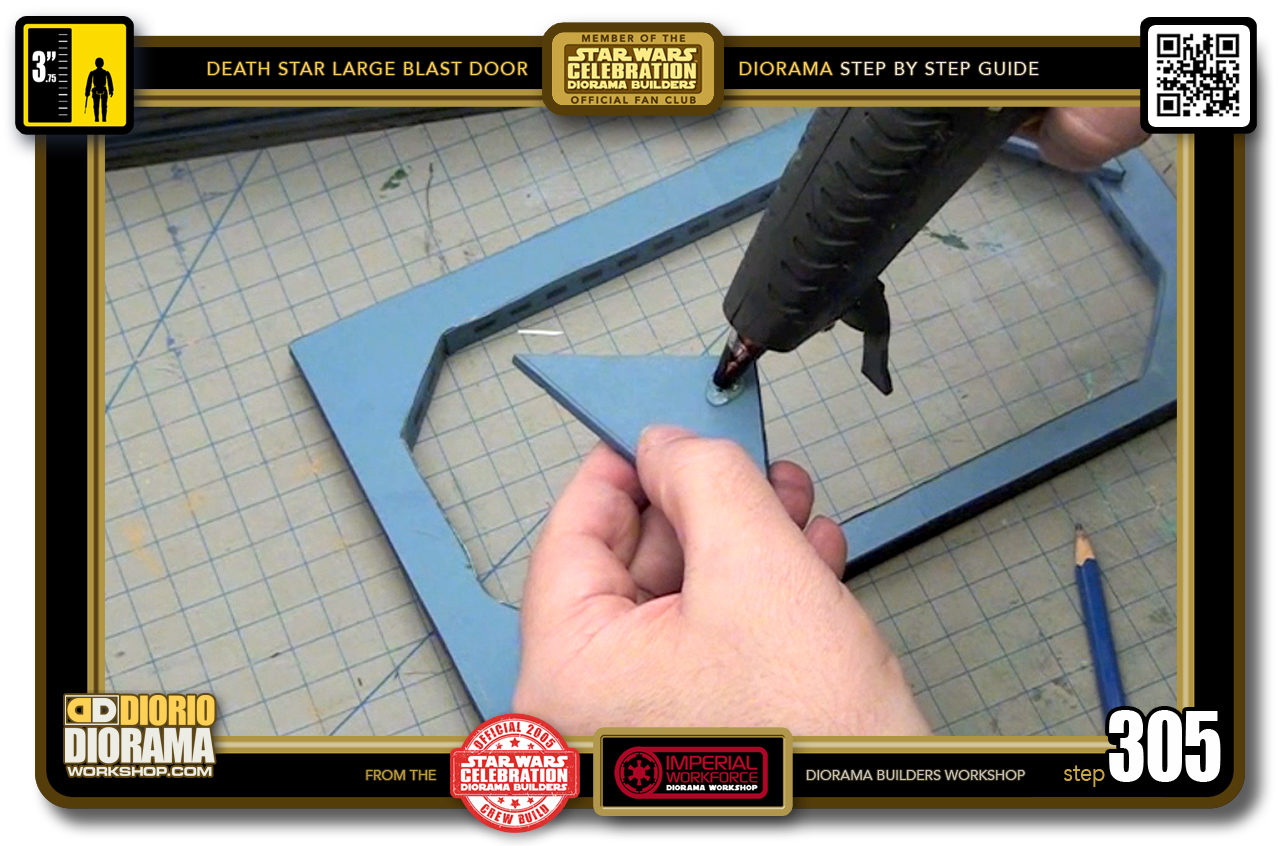
- STEP 305 > Quick drop of the Hot Glue.
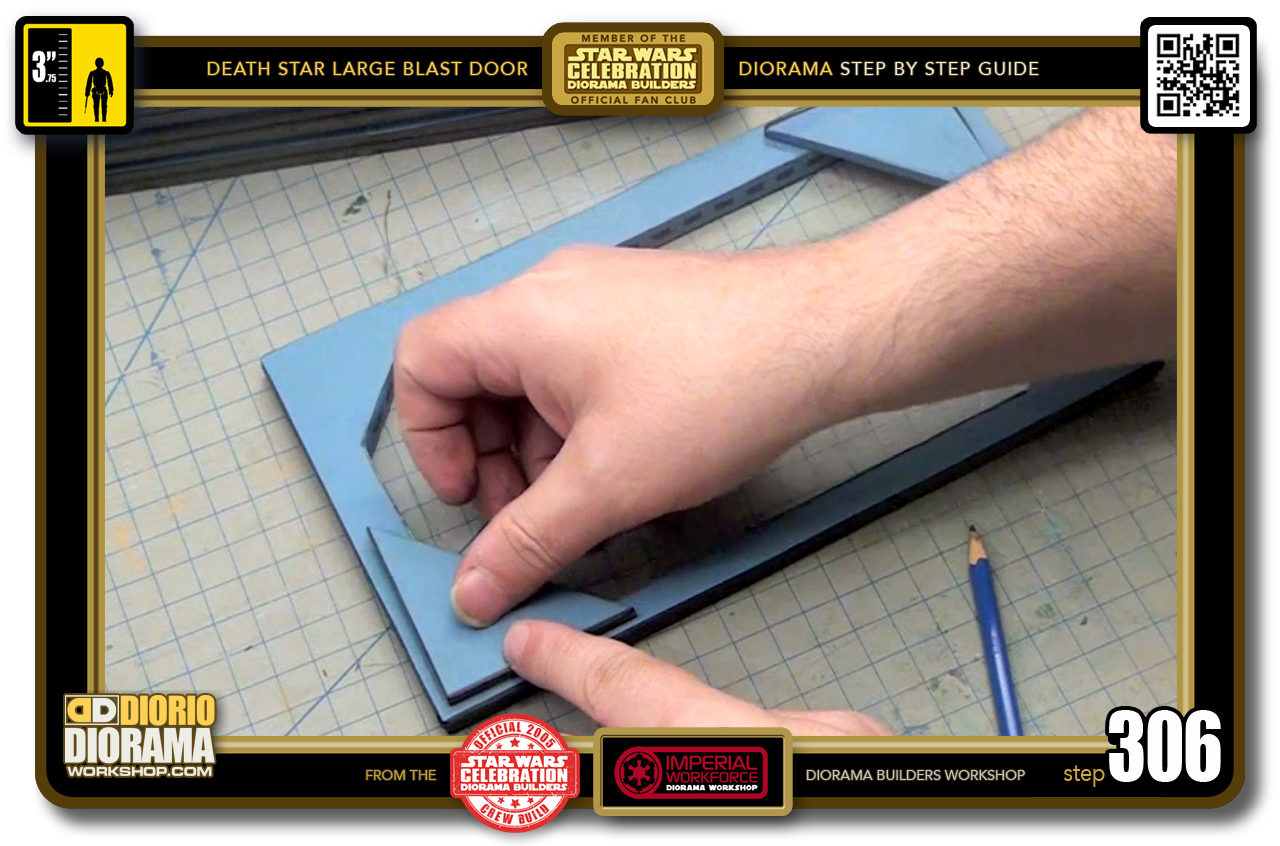
- STEP 306 > Quickly position your Doritos between your pencil guide lines.
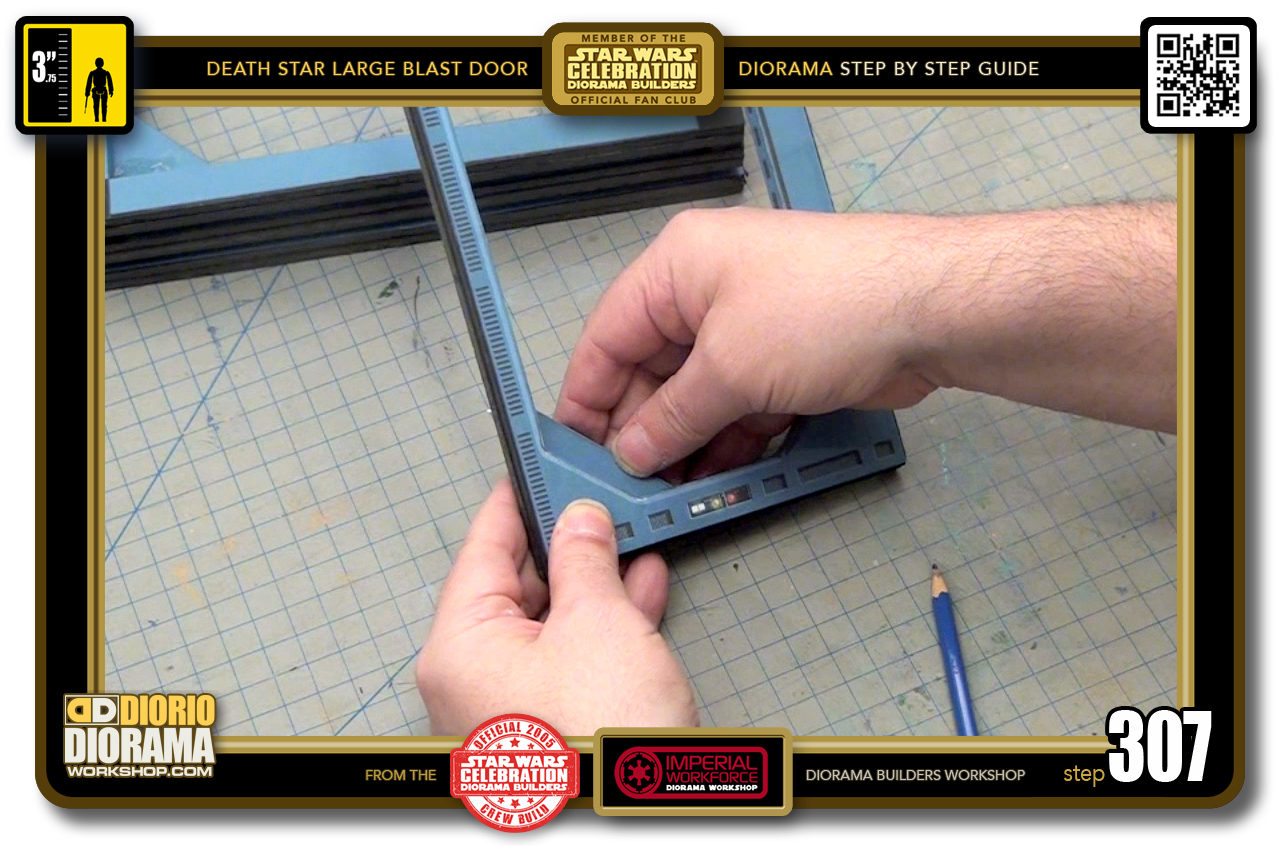
- STEP 307 > Quickly turn your frame around to adjust your PARALLEL if need be.
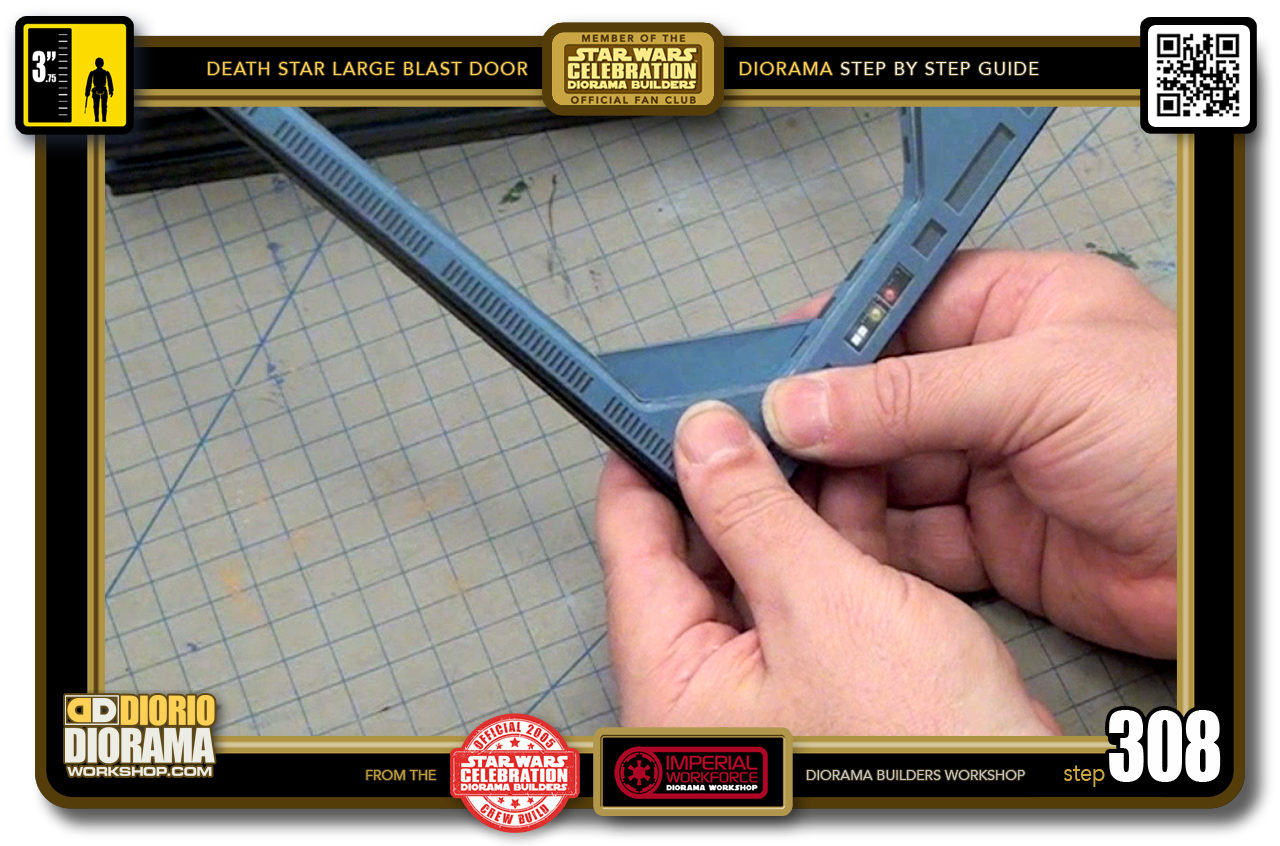
- STEP 308 > Now press with your fingers for about 30 seconds until the Hot Glue cools down.
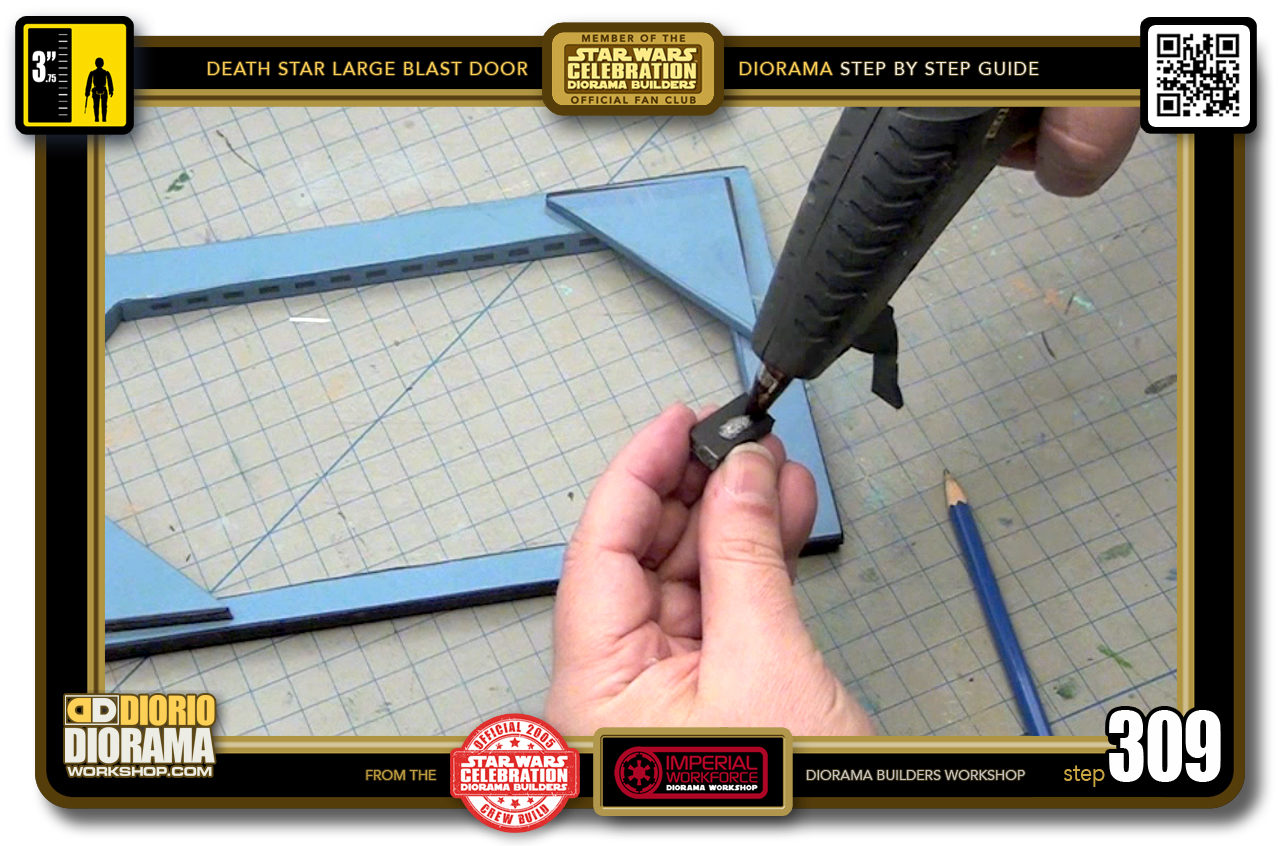
- STEP 309 > Take a corner spacer and put a drop of Hot Glue onto it.
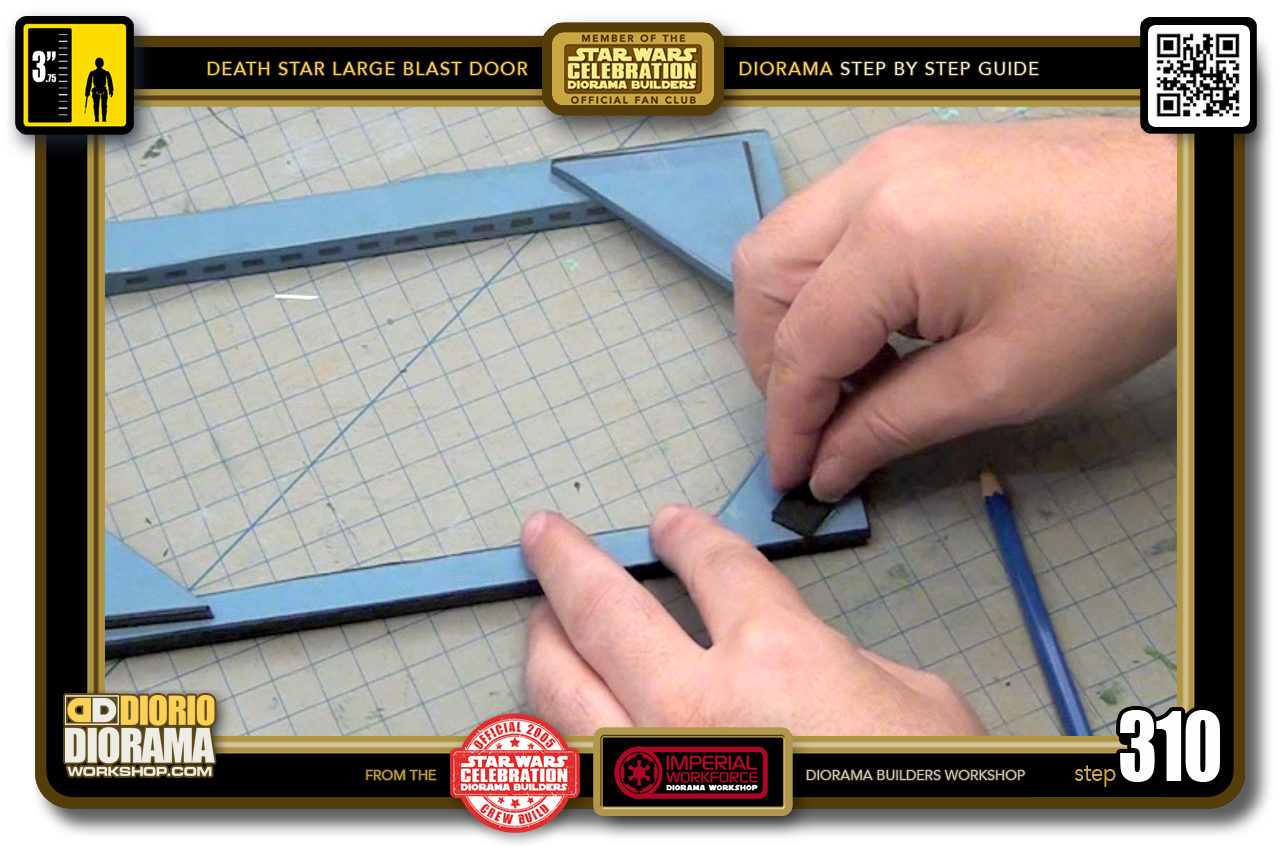
- STEP 310 > Place it in the corner as close to the frame's outside edge as possible.
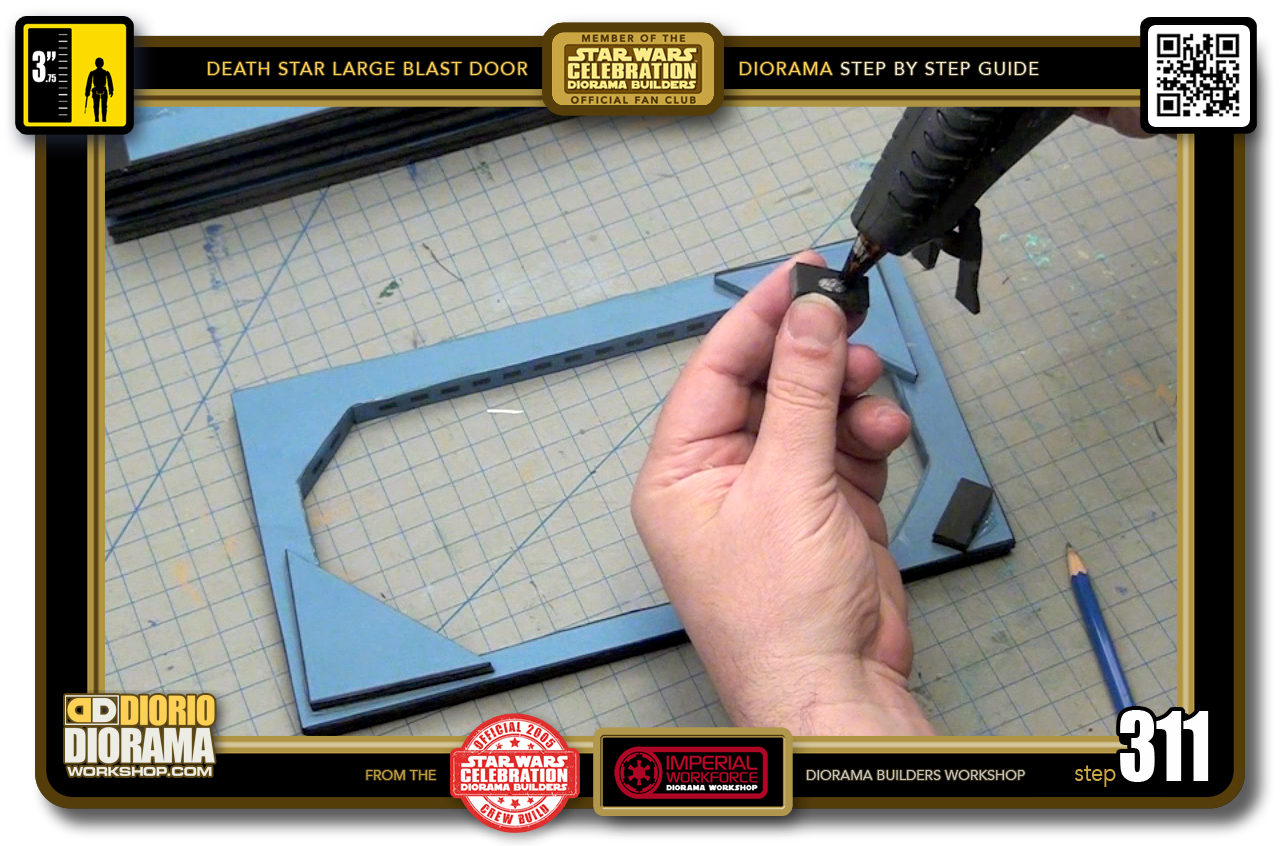
- STEP 311 > Grab your last corner spacer and put a drop of Hot Glue on it.
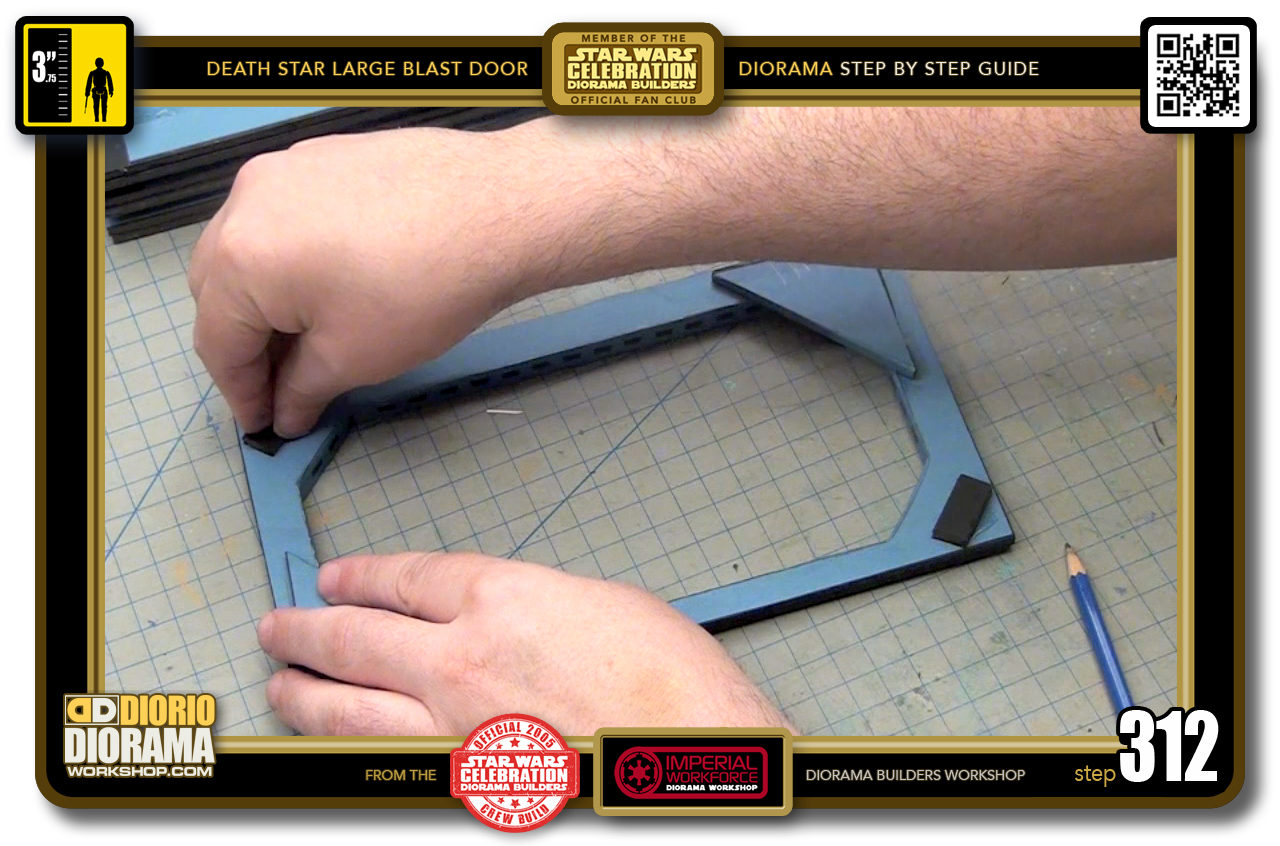
- STEP 312 > Position the spacer in the last available corner, again keep as close to the frame's outside edges as possible.
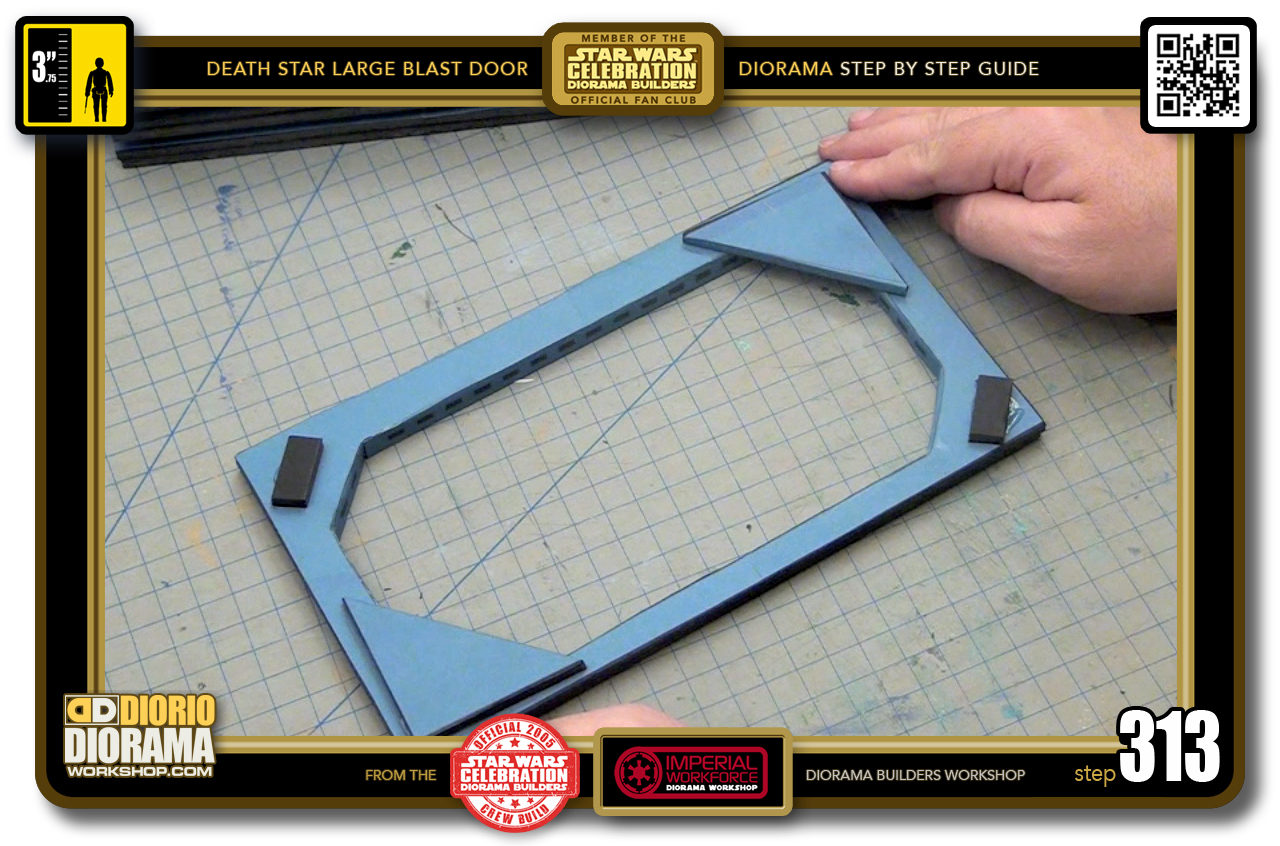
- STEP 313 > This is what your layer 4 frame now looks like, let it cool a couple of seconds.
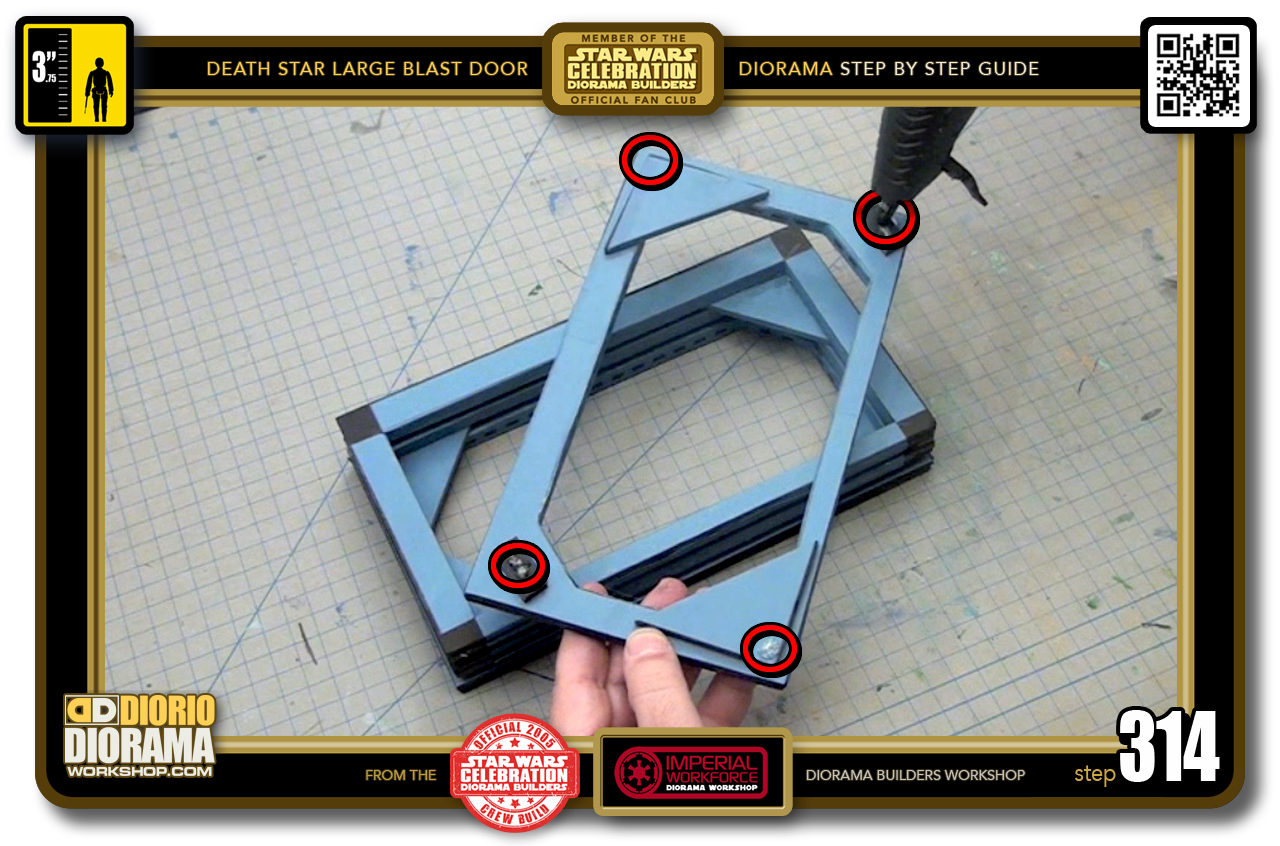
- STEP 314 > Put 4 drops of Hot Glue on each of the elevated corners - inside the red circles.
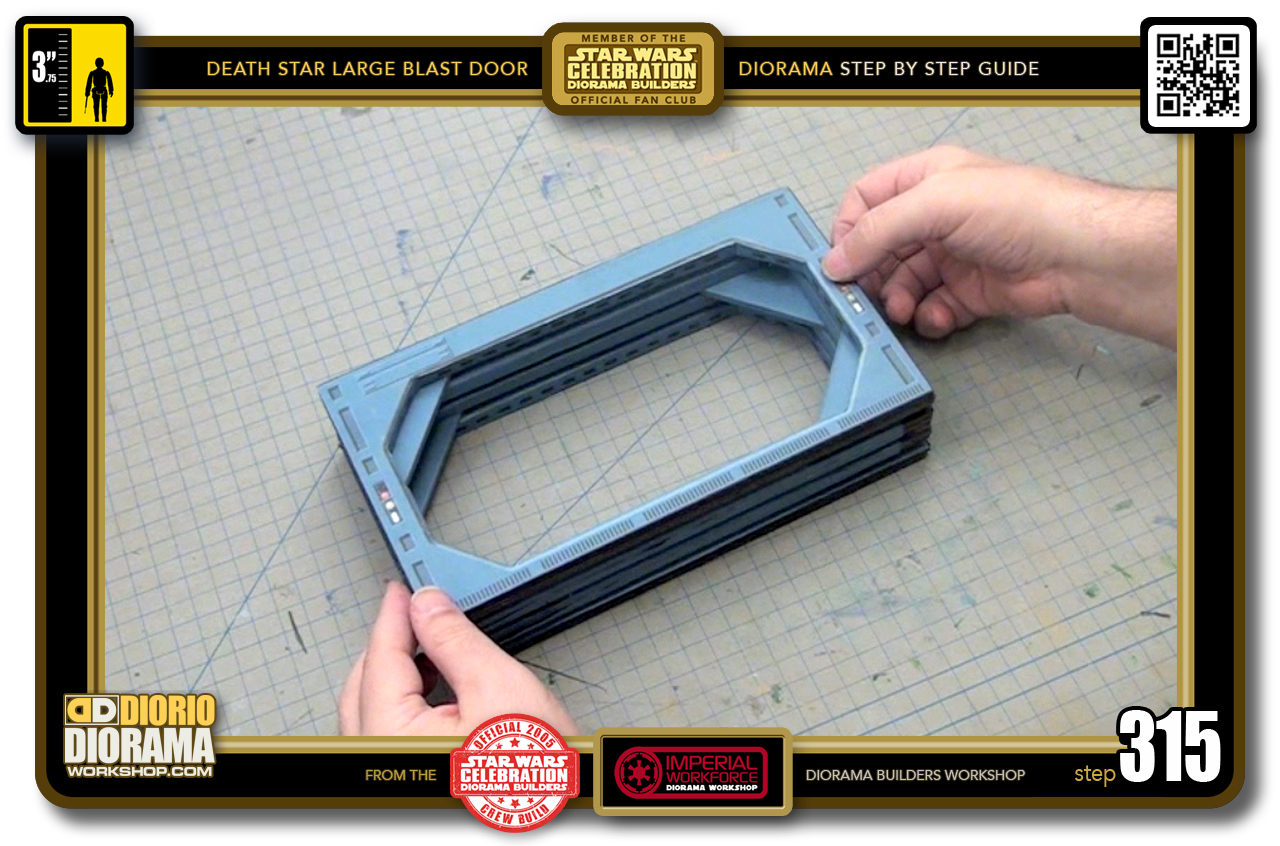
- STEP 315 > Carefully align then place your layer 4 on top of the layer 3 frame.
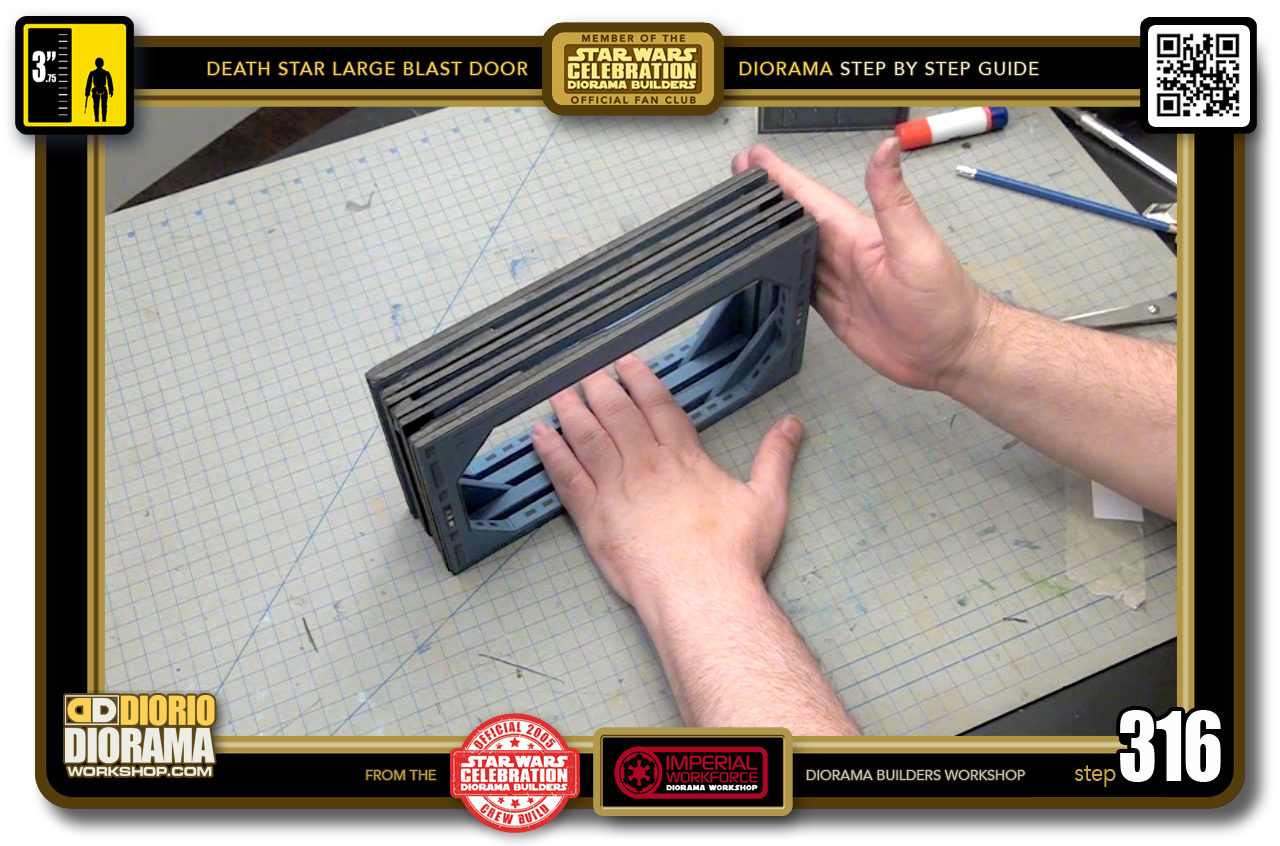
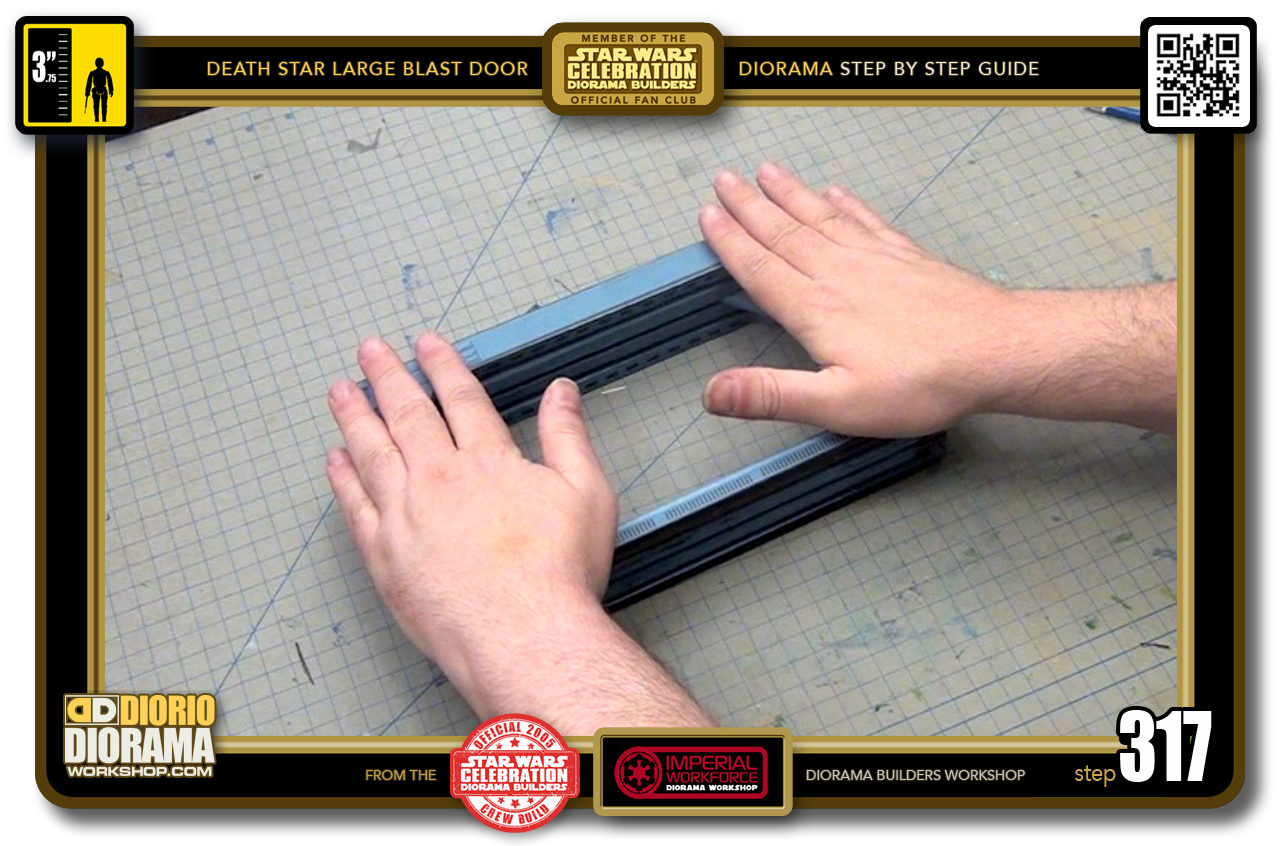
- STEP 316 > One last time, flip the door frame bottoms onto the table. Press with your hand to make certain everything is aligned and flat and make sure the sides line up as well.
- STEP 317 > Carefully press the corners for about 30 seconds until the Hot Glue cools down.
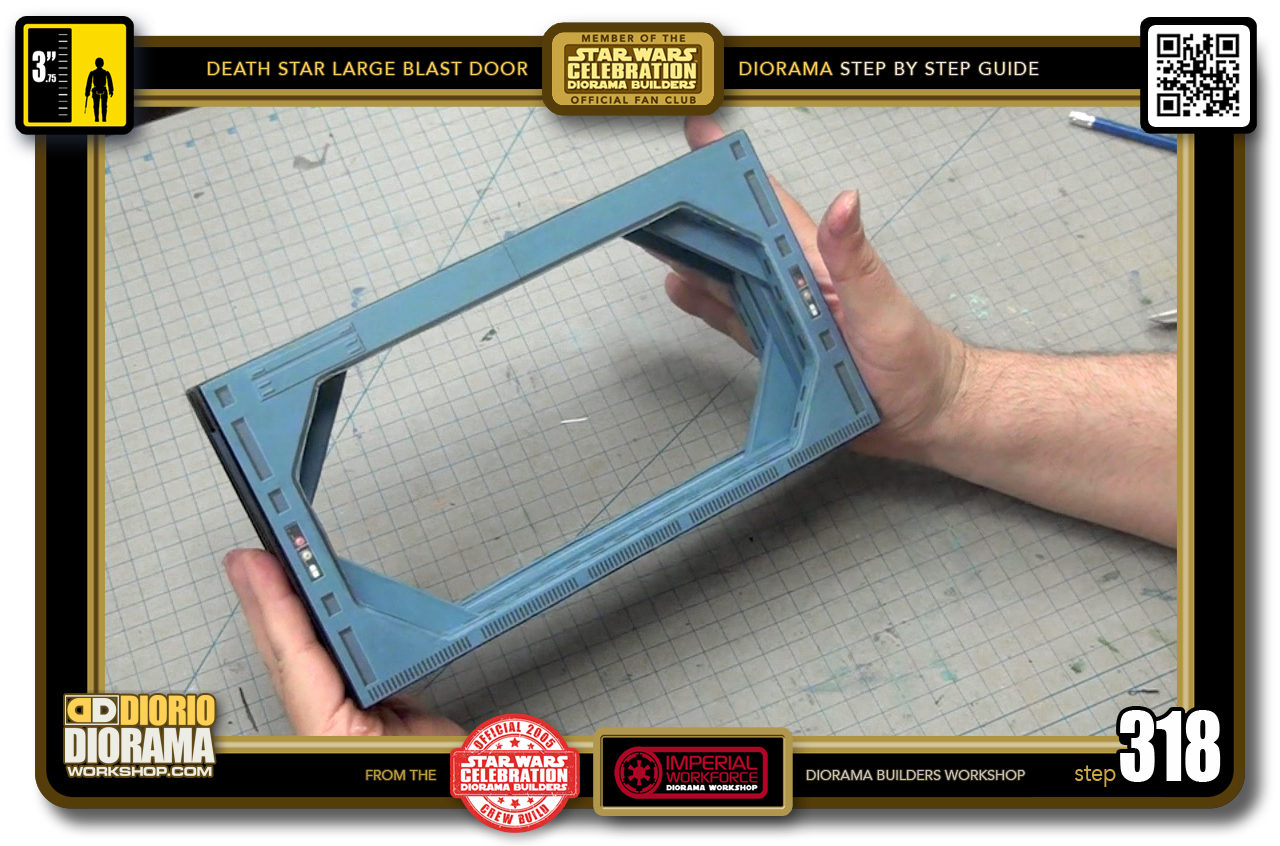
- STEP 318 > Congratulations, your LARGE BLAST DOOR is now complete 🙂
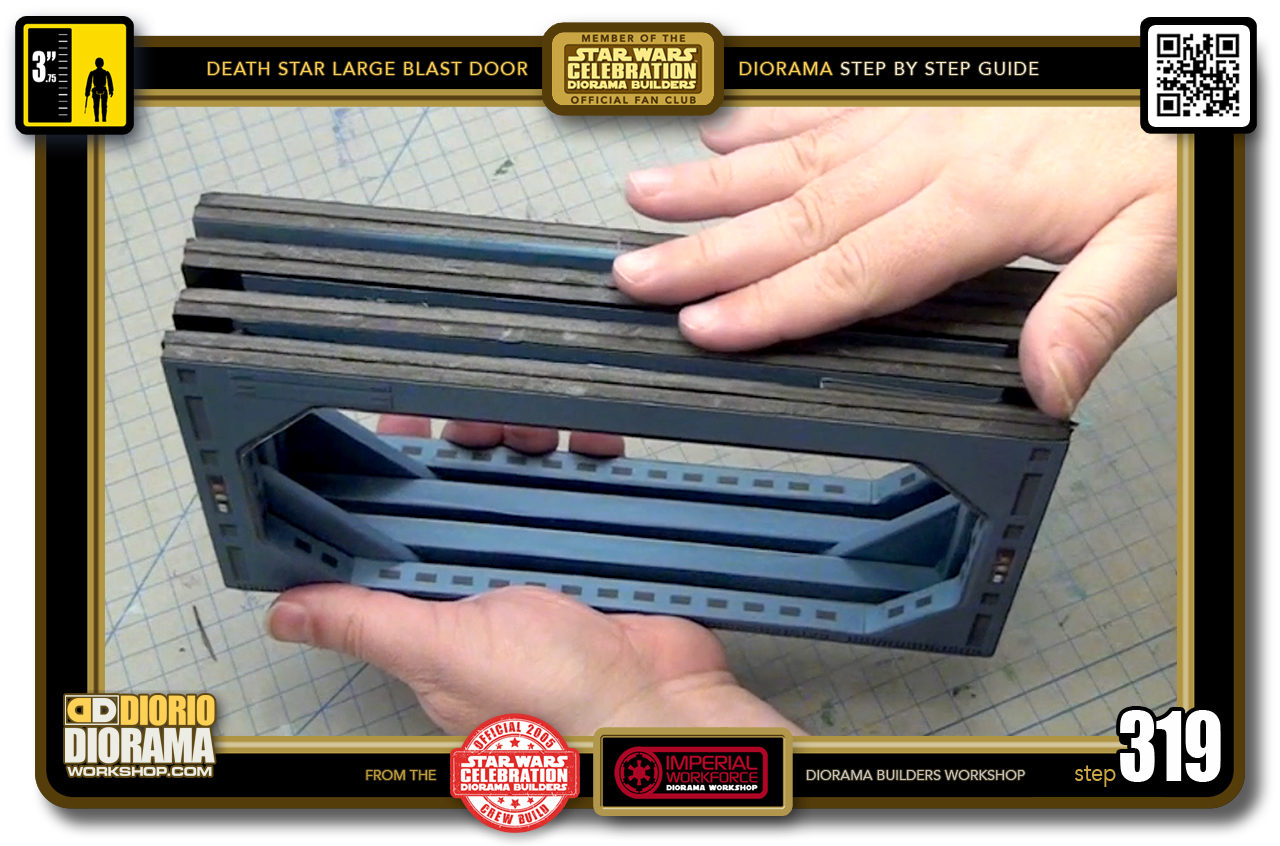
- STEP 319 > It doesn't really matter if the top of your door looks like this as it is likely you will be placing a Death Star Ceiling on top of it, thus hiding all the exposed layers. If you are just placing this on a shelf, you can just apply a plain colour decal on the top. You will be able to find the full size skin sheet in the Tutorial menu's BASIC HALLWAY WALLS decals PDF.
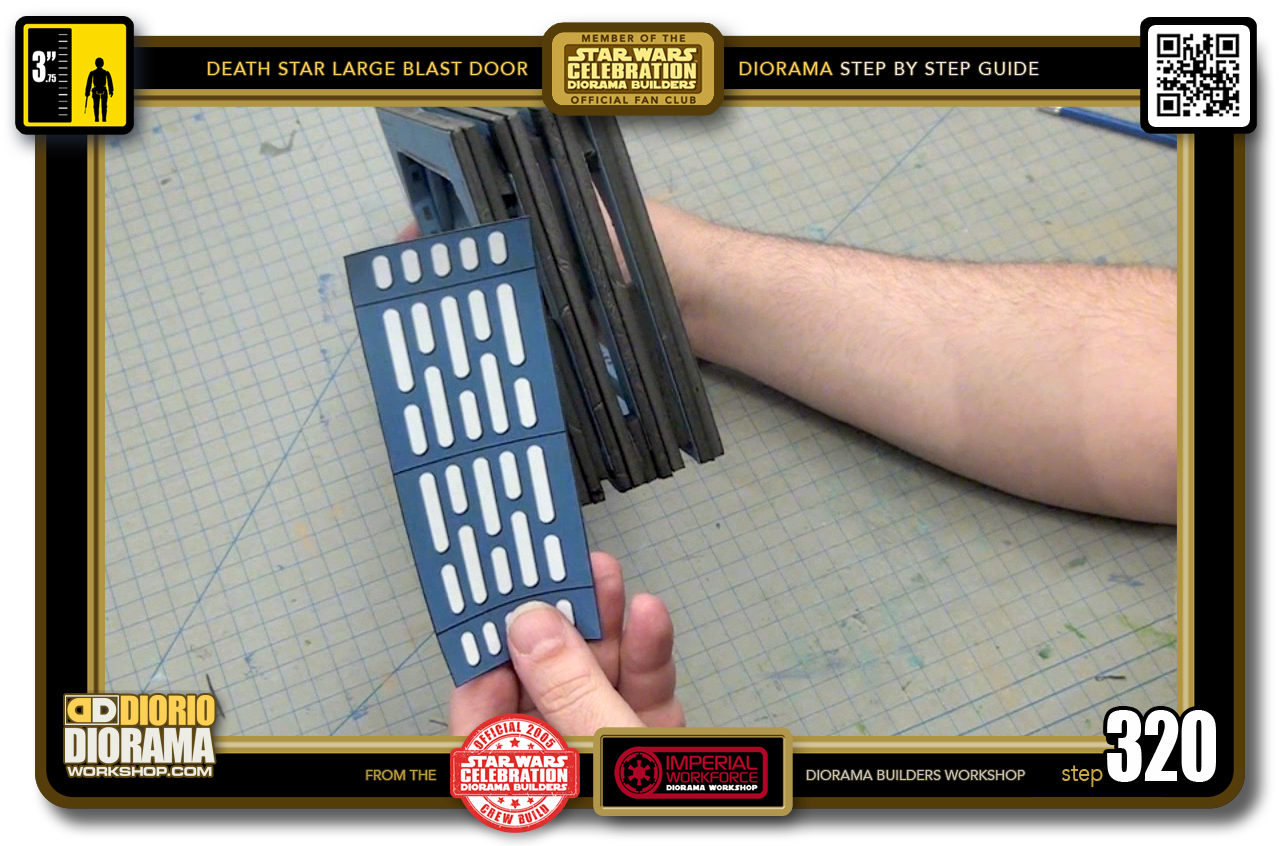
- STEP 320 > Same goes for the sides. If you are not putting your door facing front - where you don't see the back or sides - but instead, sideways as a ceiling support for your shelf diorama then you can grab any of the BASIC HALLWAY WALLS available on site.
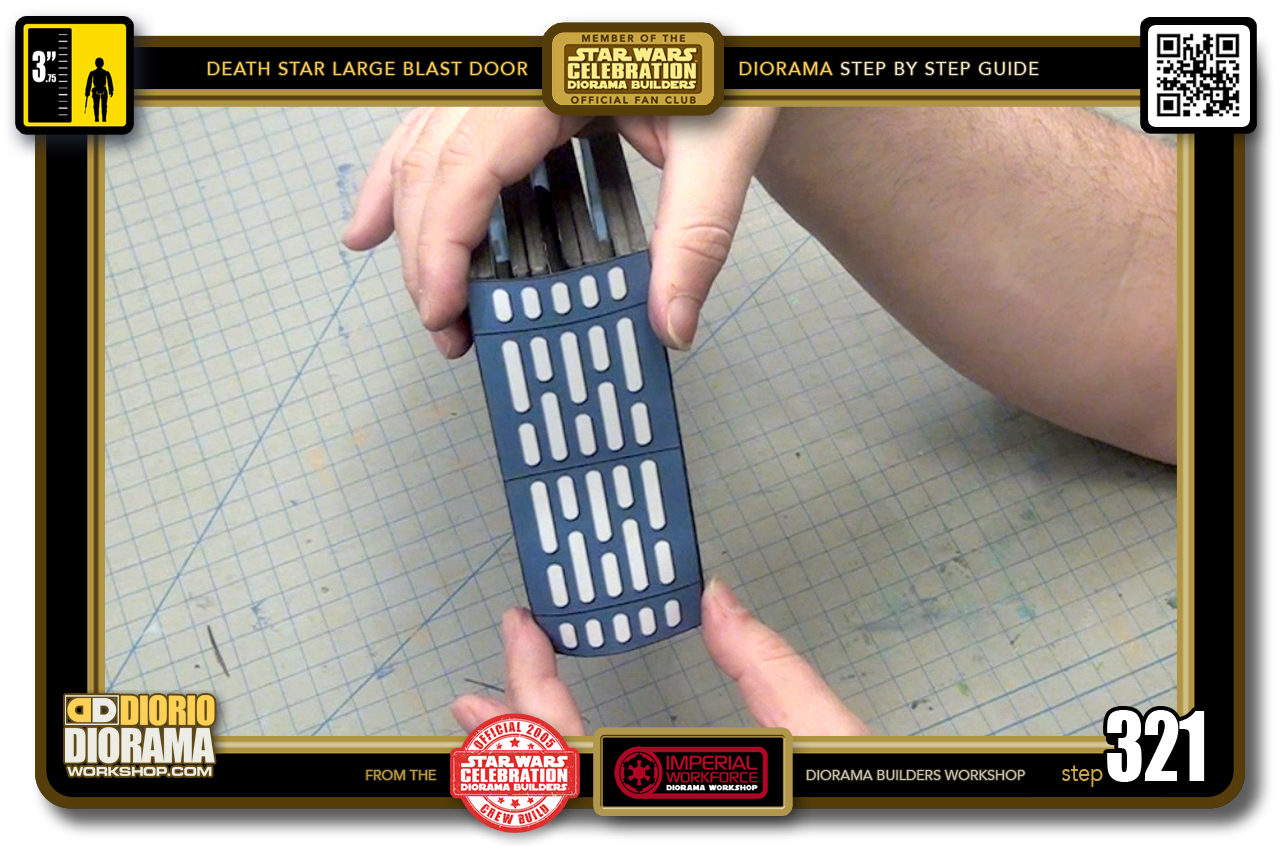
- STEP 321 > And simply glue it in place. SUGGESTION : FOR END DECORATION - I would suggest glueing the decal to a thin cardboard first, and then glue that to your Large Blast Door foamcore. You will get a cleaner effect and not se any folds if your side alignment is just a little off in the layer assembly stage.
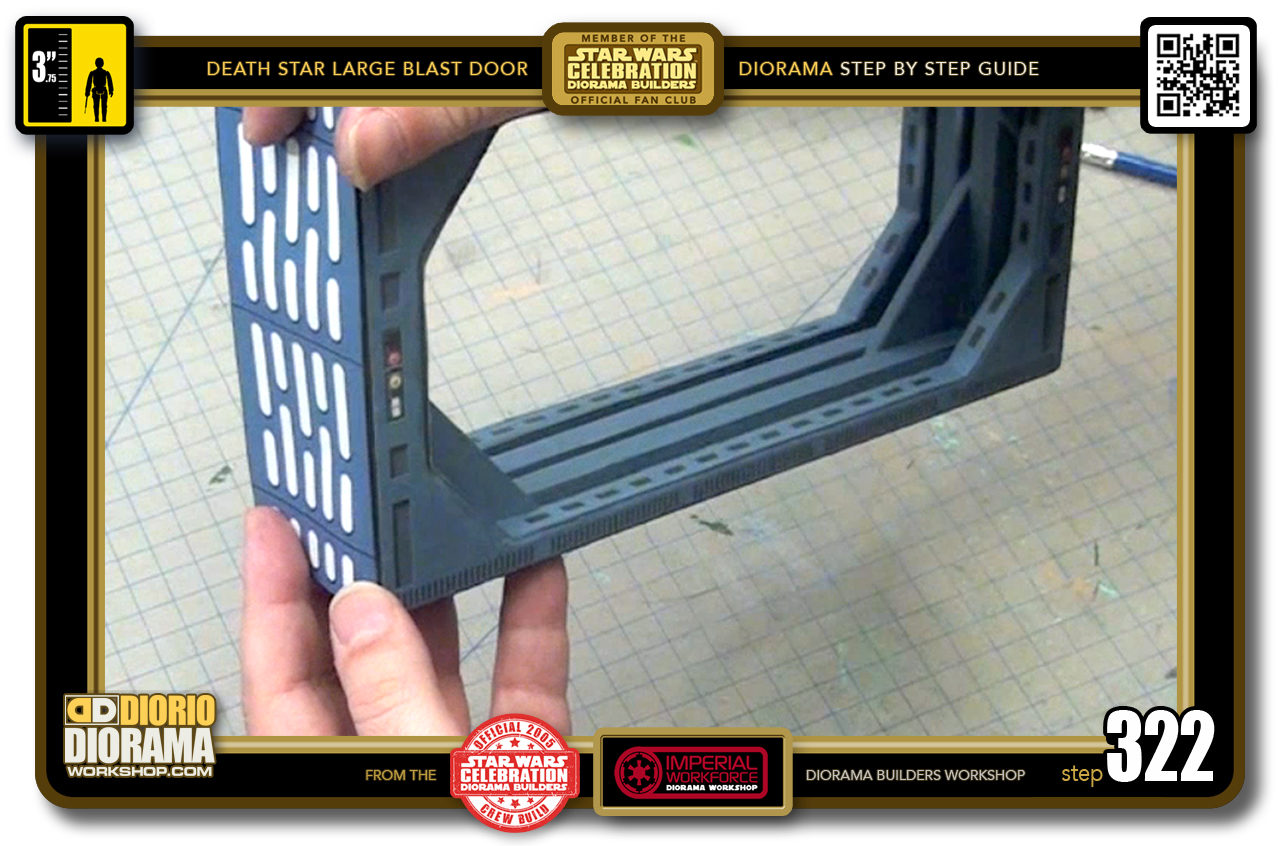
- STEP 322 > Added to the 2020 deluxe version that was NOT found in the actual Celebration 3 version, are the inner thickness skins, including the groove details of layer 1 and 4, the bottom grids and the light panels on each side of the door.
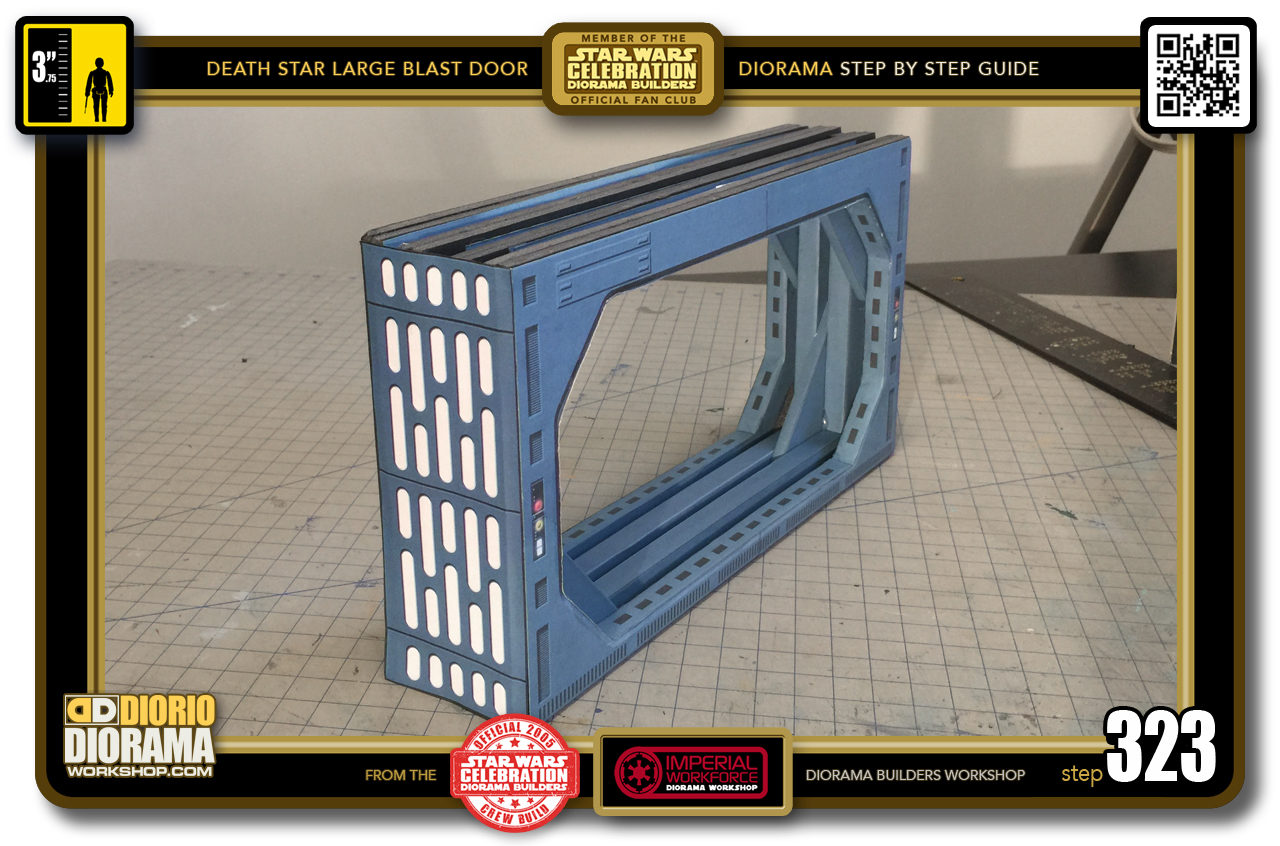
- STEP 323 > Your Large Blast Door is a ACCESSORY OPTIONAL BUILD for the Mega Death Star diorama. It makes a great separator and support for the ceilings and in some specific rooms, like Ben Vader duel, it is needed if you want screen accuracy. Now to the next build, what will you add to your diorama ?

.
Did you already build this Diorama ? At home or at our Star Wars Celebration Diorama Builders workshop ? Would you like to show it in the site’s GALLERY VISITORS DIORAMAS section, YES ? That is Awesome !!! You can find out all the details on how to email me your photos on the VISITORS SUBMISSIONS INFO page … When I get your photos, I will create your very own page just like this one. You may not realize it but work does inspire others to join in the fun of making Action Figure Dioramas.
.
NOT FOR RESALE ALL Decals, tutorials and artwork are ©FrankDiorio (dioramaworkshop.com) and offered FOR FREE to the fans – that would be you ? so you can build and display my diorama designs in your very own home. I realize I cannot control what one does with my graphics once I place them on the web, I can only ask you as one fan to another, please respect the artist and do not be that jerk who uses my designs and tutorials to build a copy of my work only to sell it on EBAY or trade/sale groups and forums. Thank You. Frank.
.
.
If you have a facebook account, why not join the Official Diorama Builders Fan Club today, simply click the logo link below.
 .
.
Catch up with fellow visitors and exchange stories, read cool interviews with the crew, exchange photos, fun surprises and grab some FAN ONLY merchandise next year at actual future conventions ?
.
©2018 Frank Diorio DioramaWorkshop.Com
.
IF YOU LIKE WHAT YOU SEE, PLEASE SHARE WITH YOUR FRIENDS
USING THE SOCIAL MEDIA BUTTONS BELOW


