


-
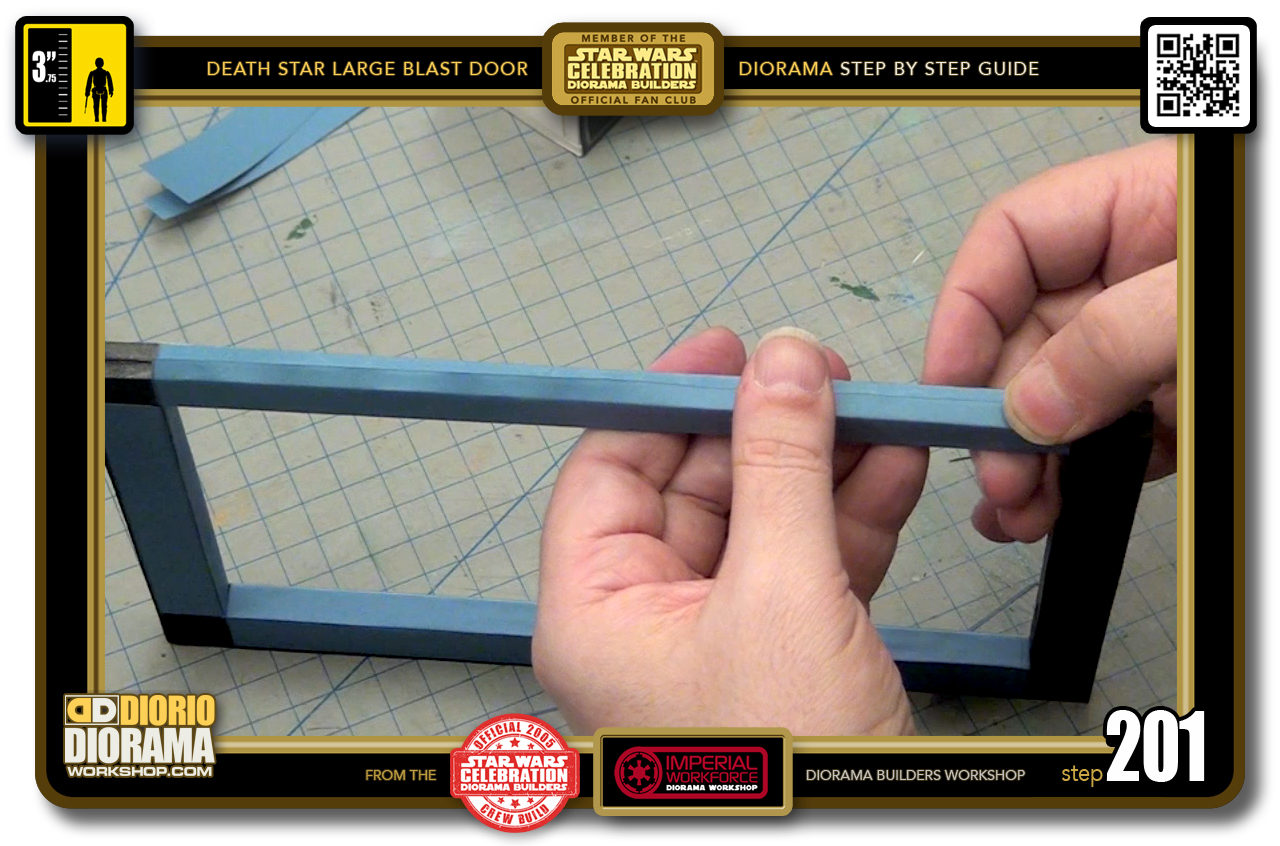
- STEP 201 > When both sides are folded over, press down hard to make sure it is secure. it will tend to go back straight so keep pressing until the fold memory sticks 🙂
-
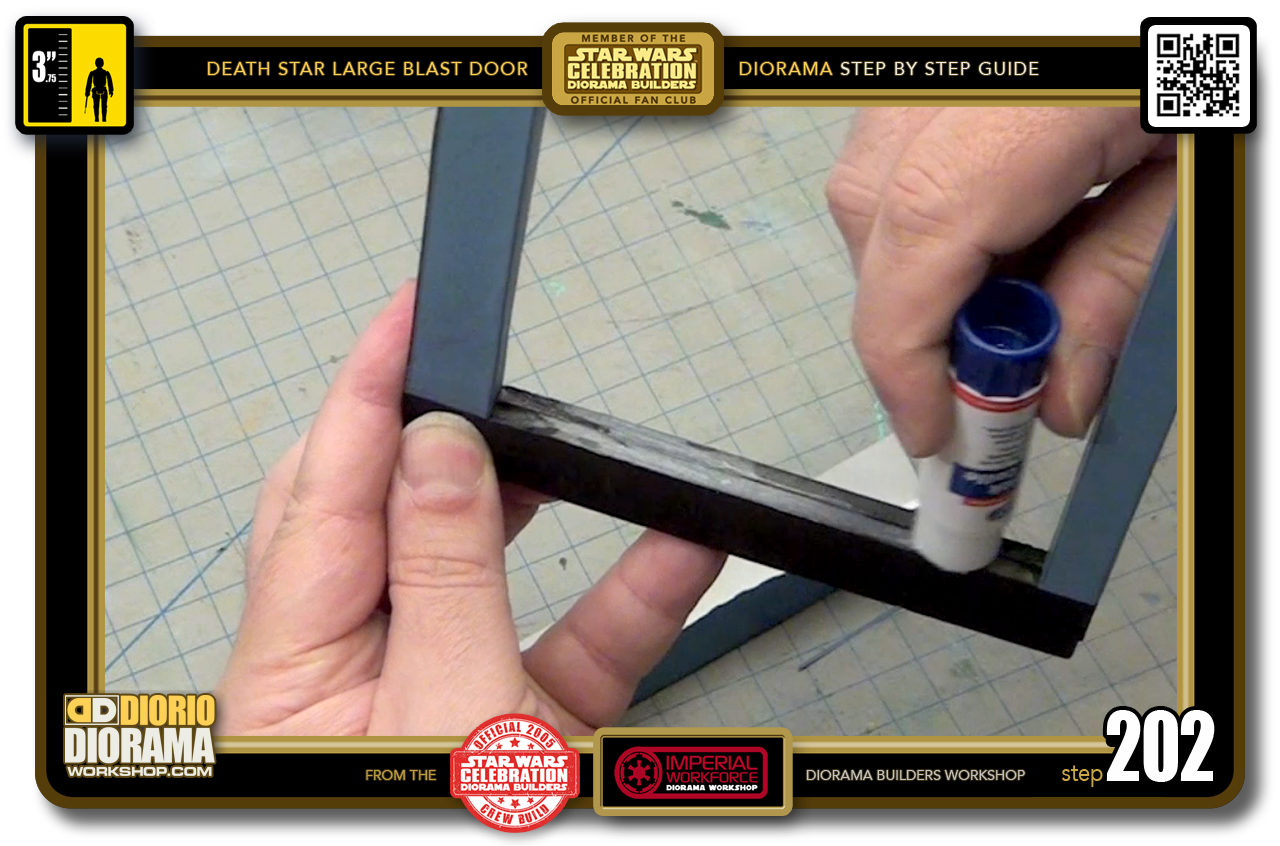
- STEP 202 > Side #2, after your measuring, trimming and dry run, apply your gluestick as before. Don't forget the sides.
-
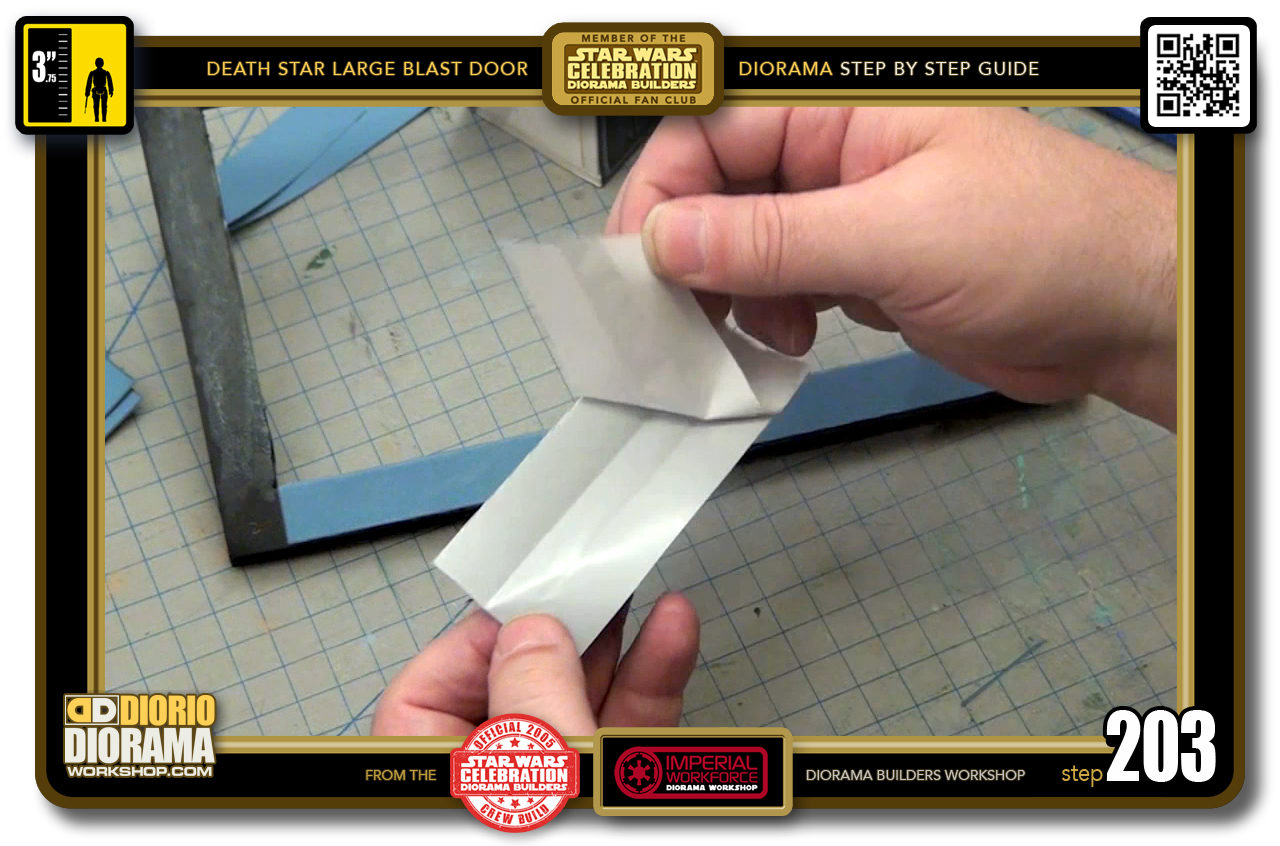
- STEP 203 > Peel your decal.
-
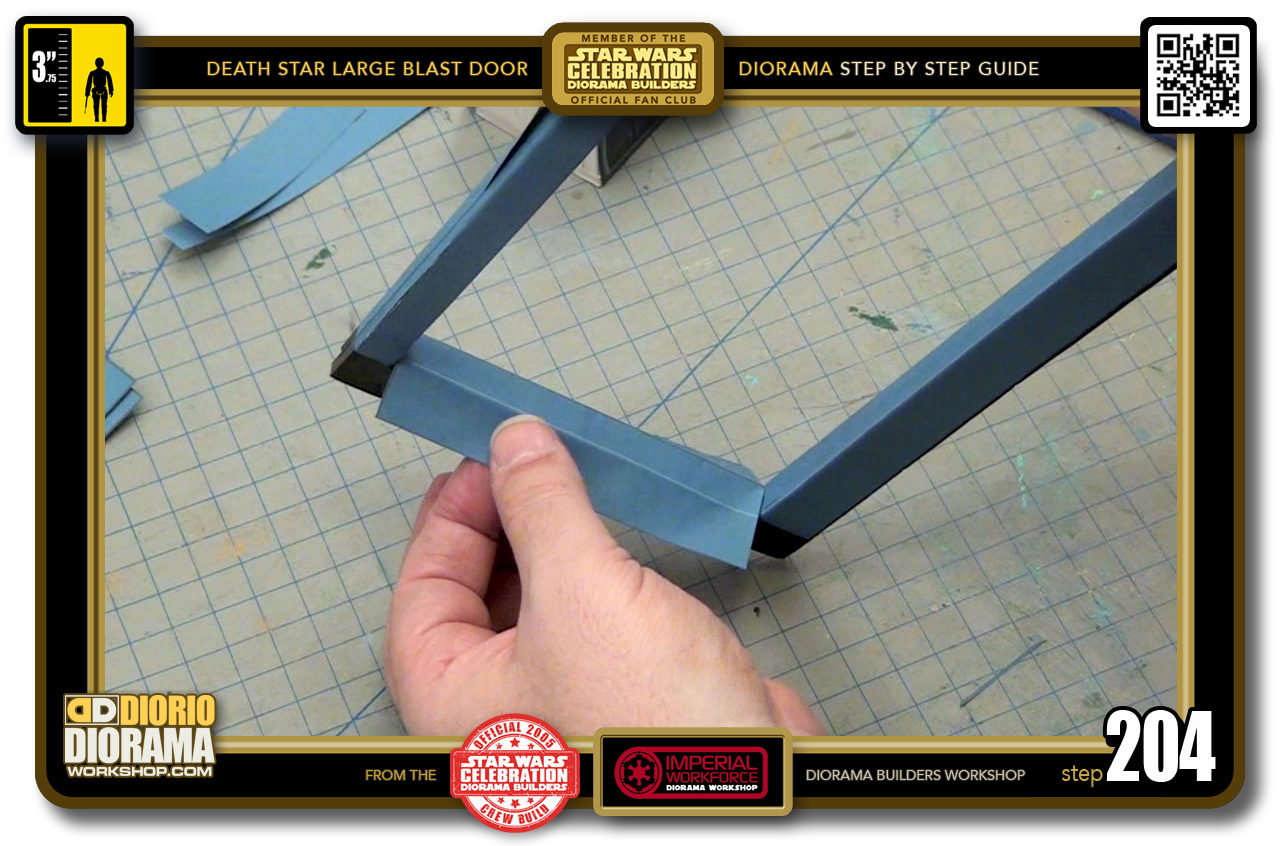
- STEP 204 > Place it, tug it, fold it over.
-
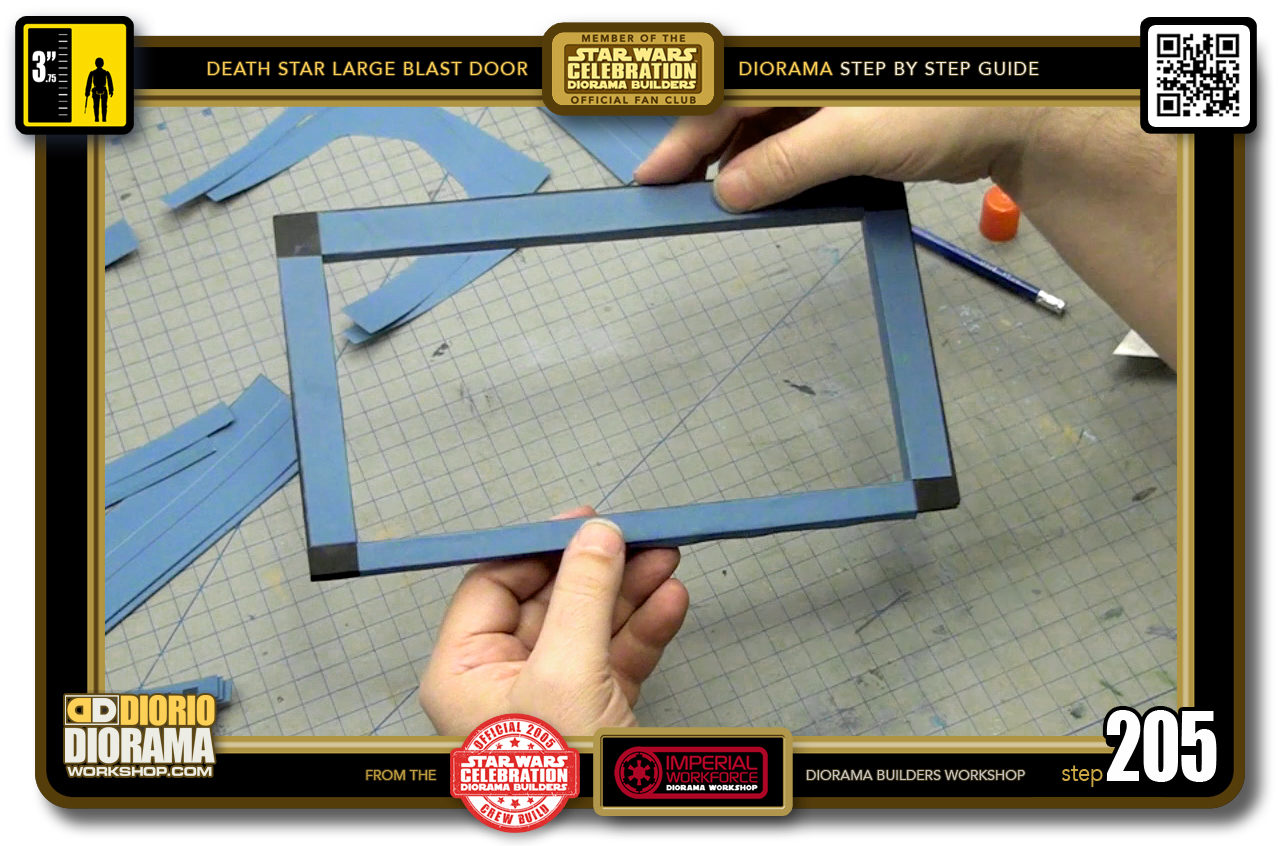
- STEP 205 > Your layer 2 frame is completed. Now repeat the same steps for your frame 3.
-
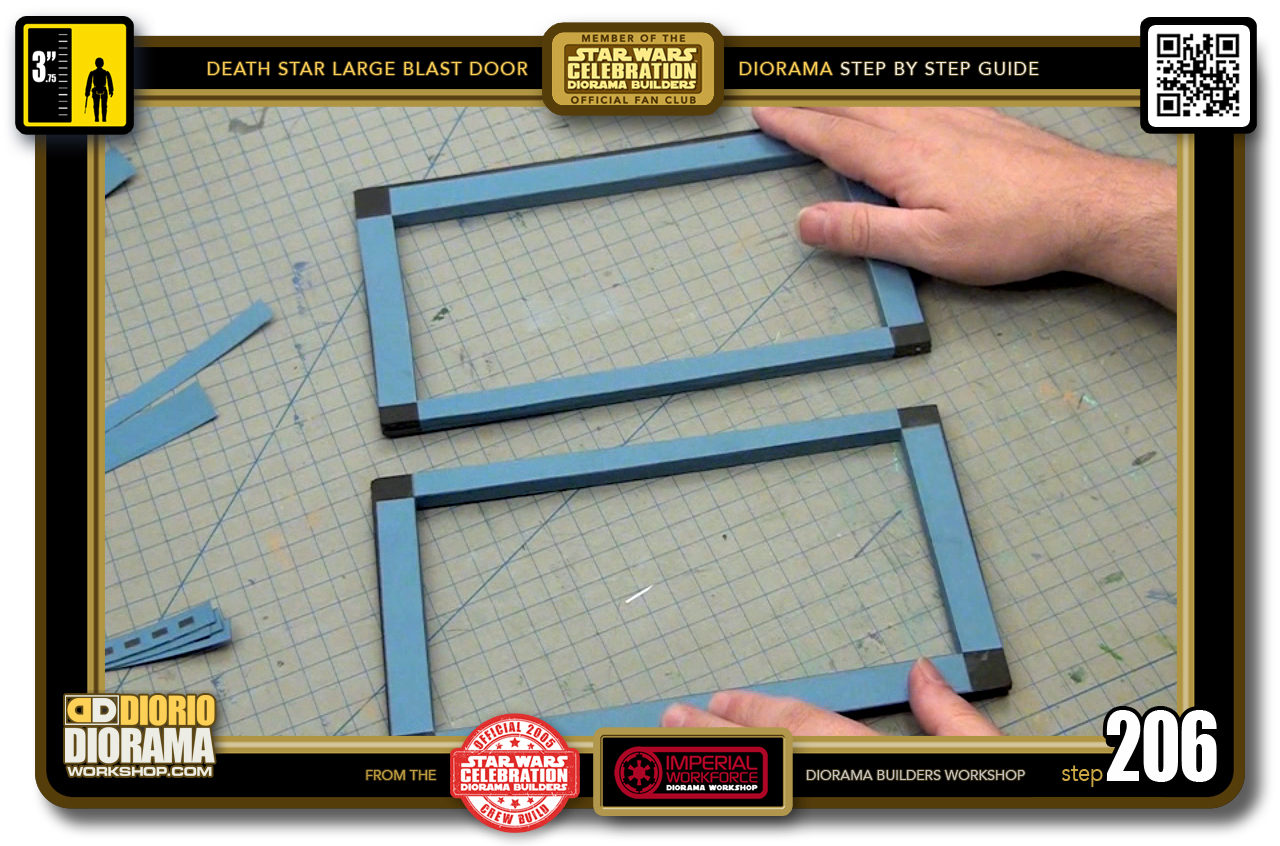
- STEP 206 > You should now have both layers 2 and 3 frames completed. Put these aside for now and move on to the front layer 1 frame.
-
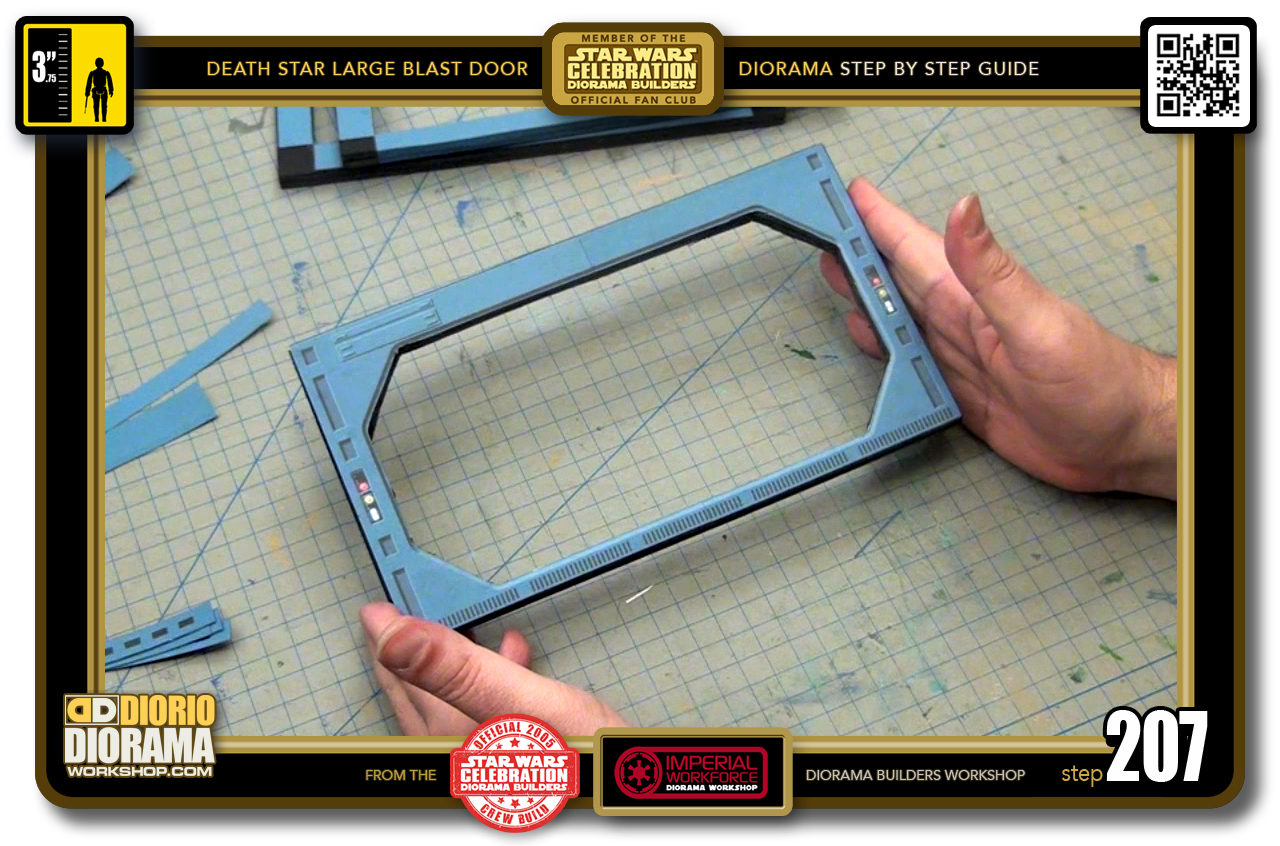
- STEP 207 > If you are looking at your Large Blast Door only from the front, and never see the rear of it in your diorama, then you don't really need to apply the back skins unless you want to be a perfectionist 🙂 NOTE: If you do change your mind down the road after assembly it will be too late.
-
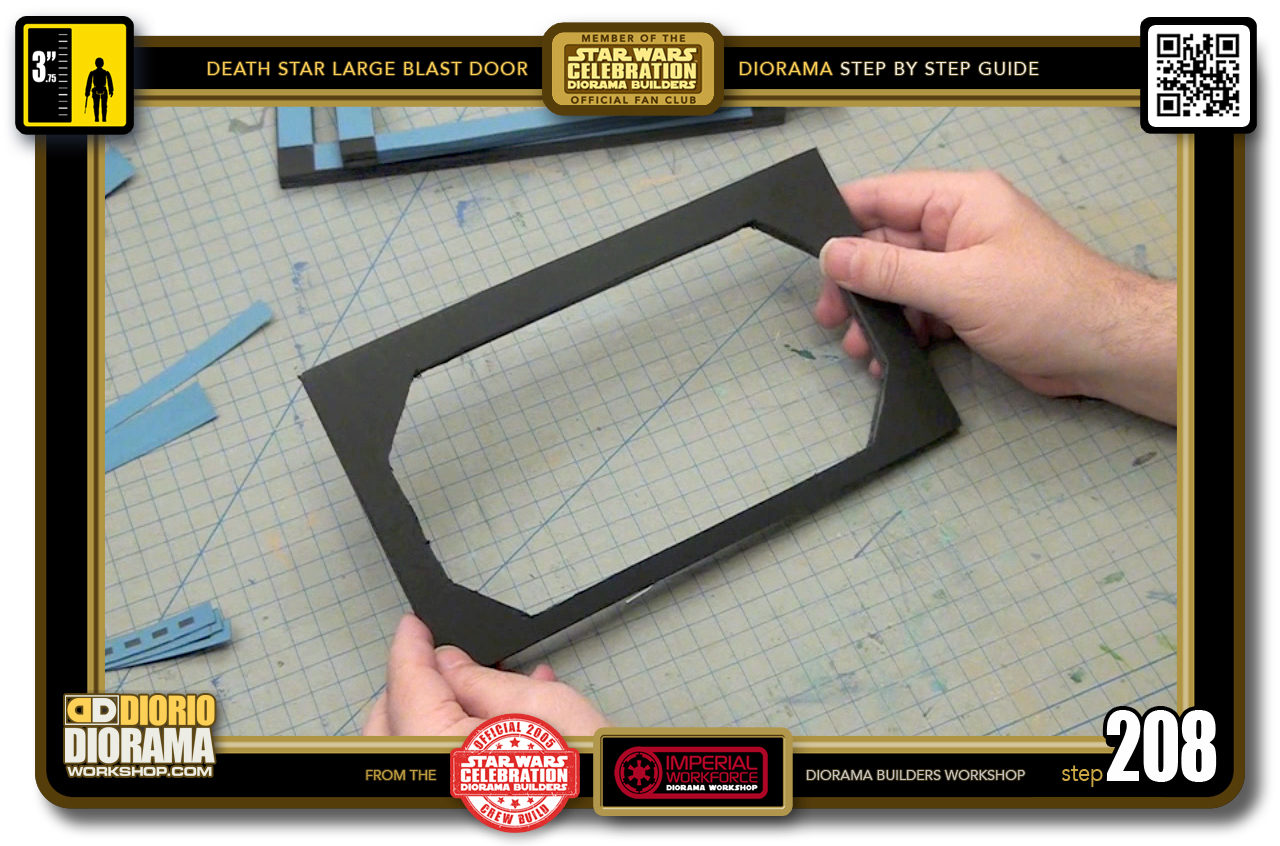
- STEP 208 > Flip your frame around, this is where you will glue the back skins so that the colour matches the front and the doritos door corner decals.
-
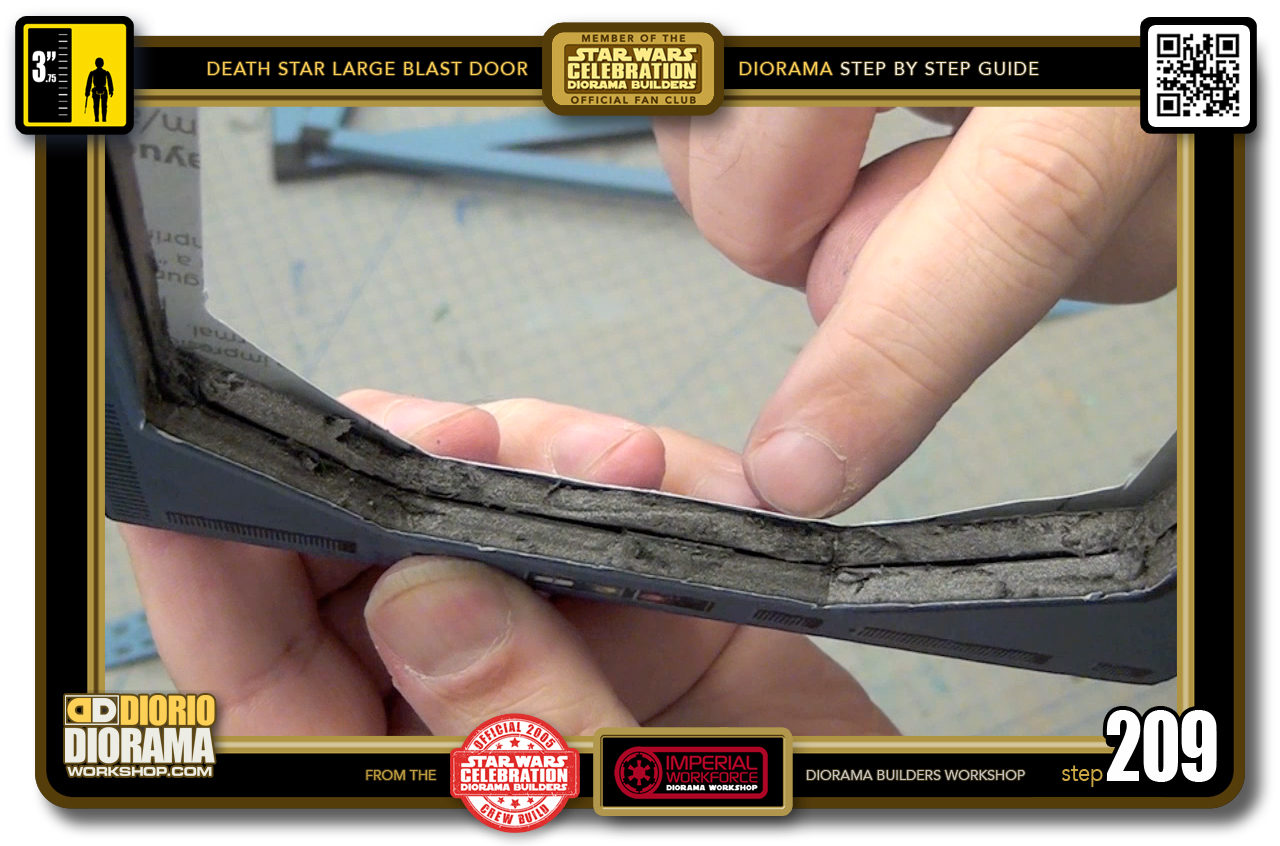
- STEP 209 > Because you are applying to black foamcore, you want to limit the edges of the skins to stand out like a sore thumb, so you want to turn the side thicknesses of your decal from white paper to black.
-
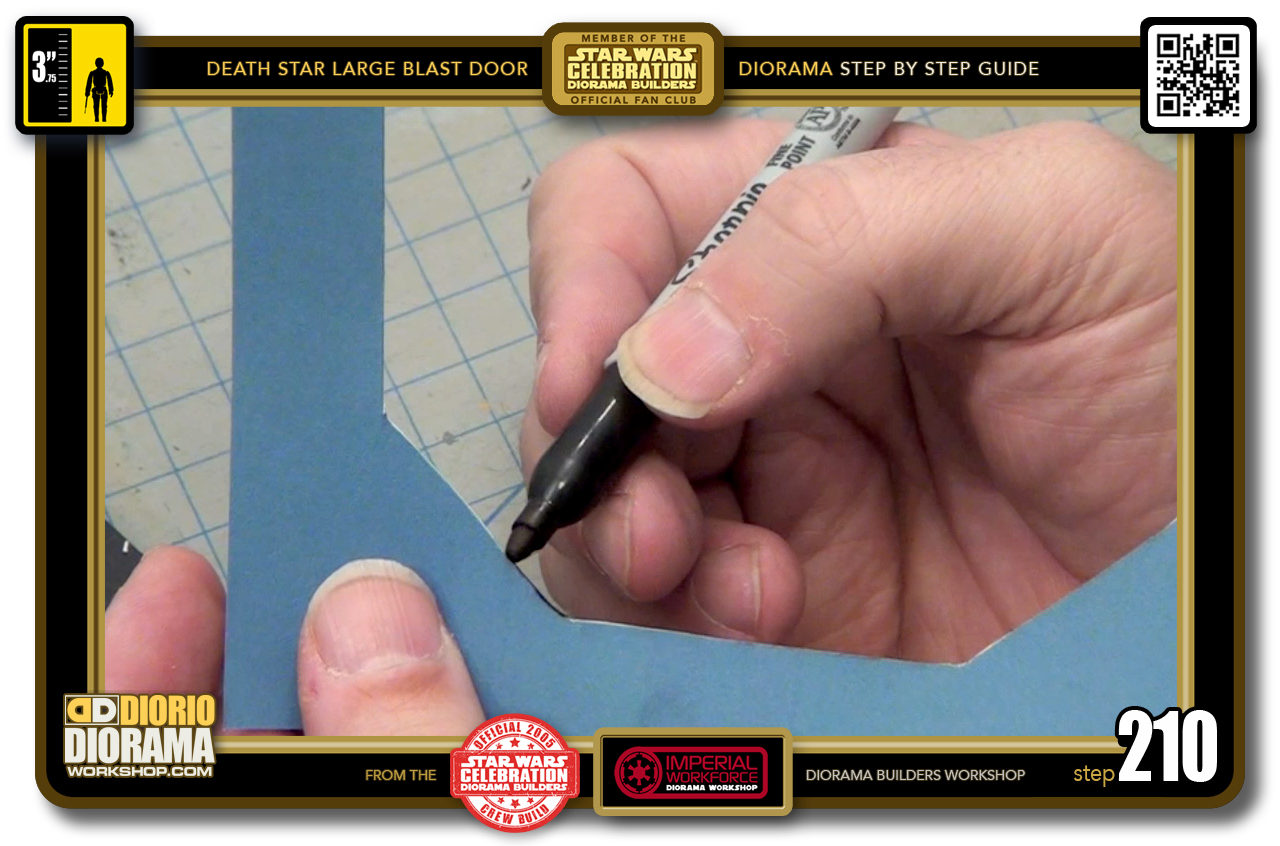
- STEP 210 > To do this, grab a black Sharpie pen and carefully use the sides of the pen tip to touch the cut edges of your decal sheet.
-
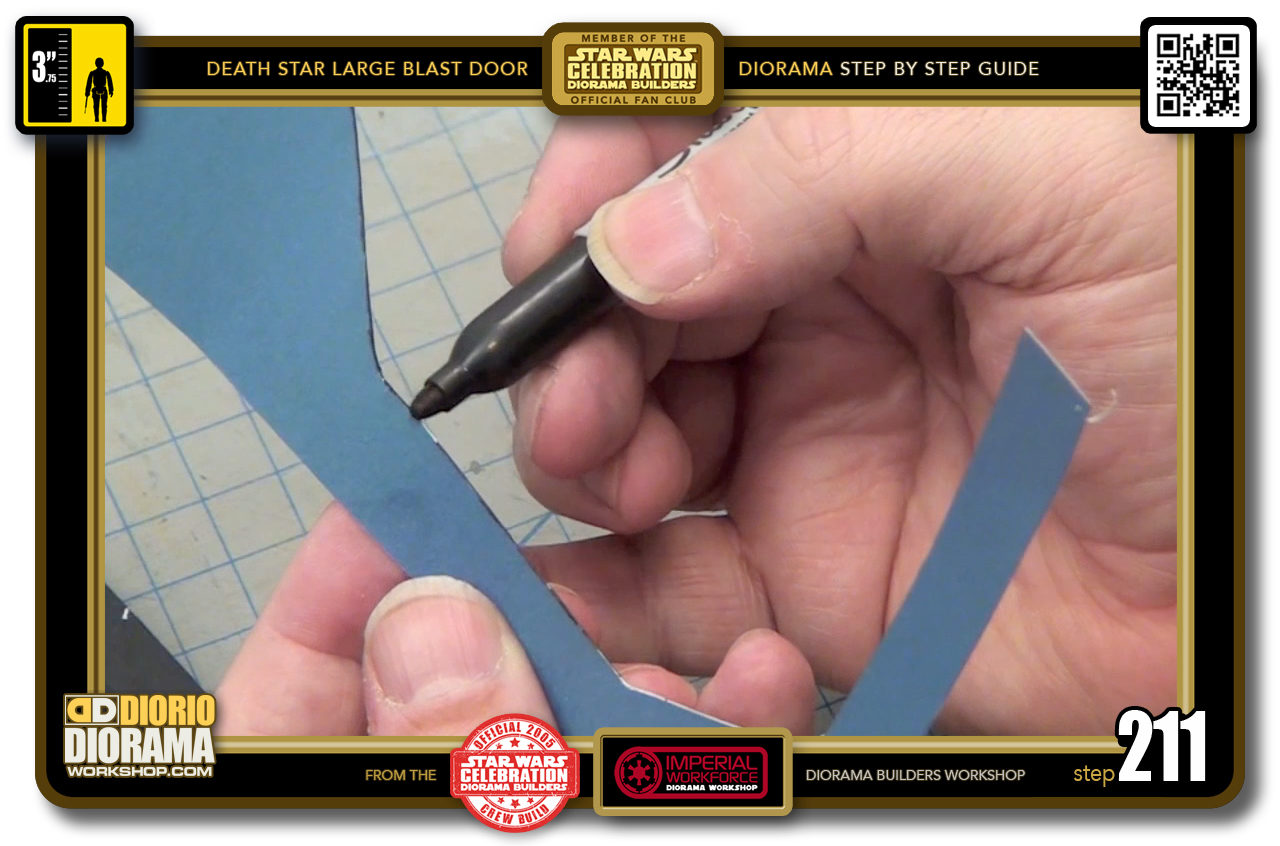
- STEP 211 > Doing this all around the inside will give you a nicer blend when you gluestick the skin on the frame.
-
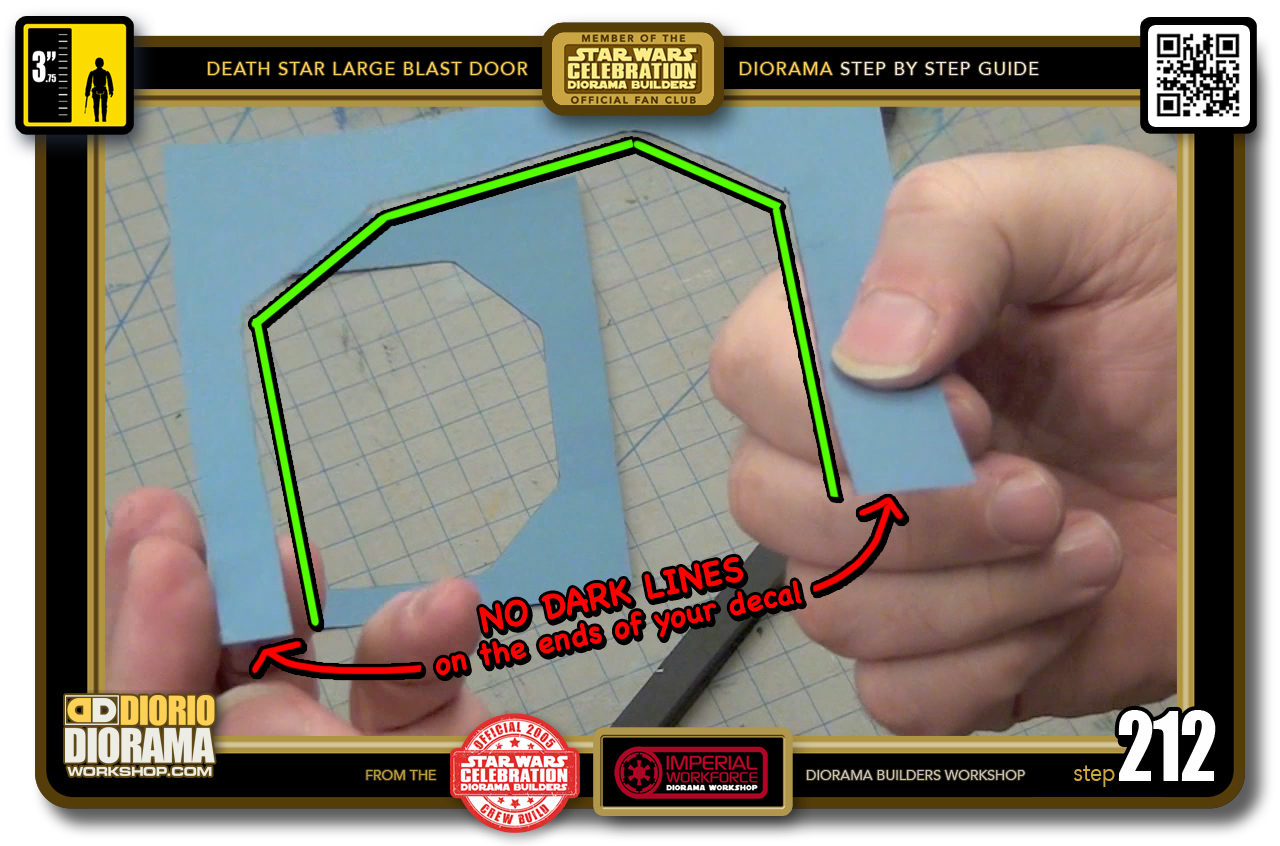
- STEP 212 > STOP at the ENDS !!! You only want to put black Sharpie along the green edges. DON'T COLOR THE RED ZONES
-
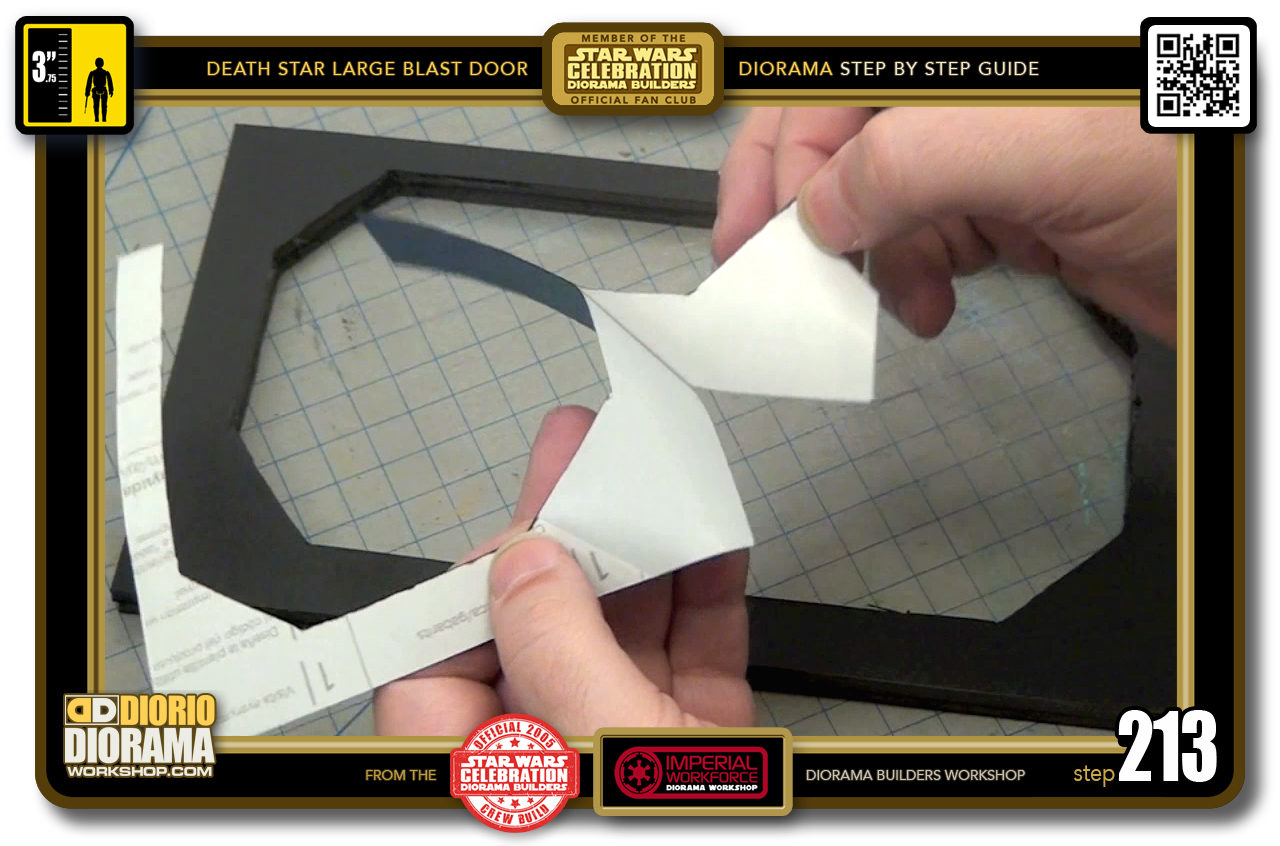
- STEP 213 > Peel your left side decal.
-
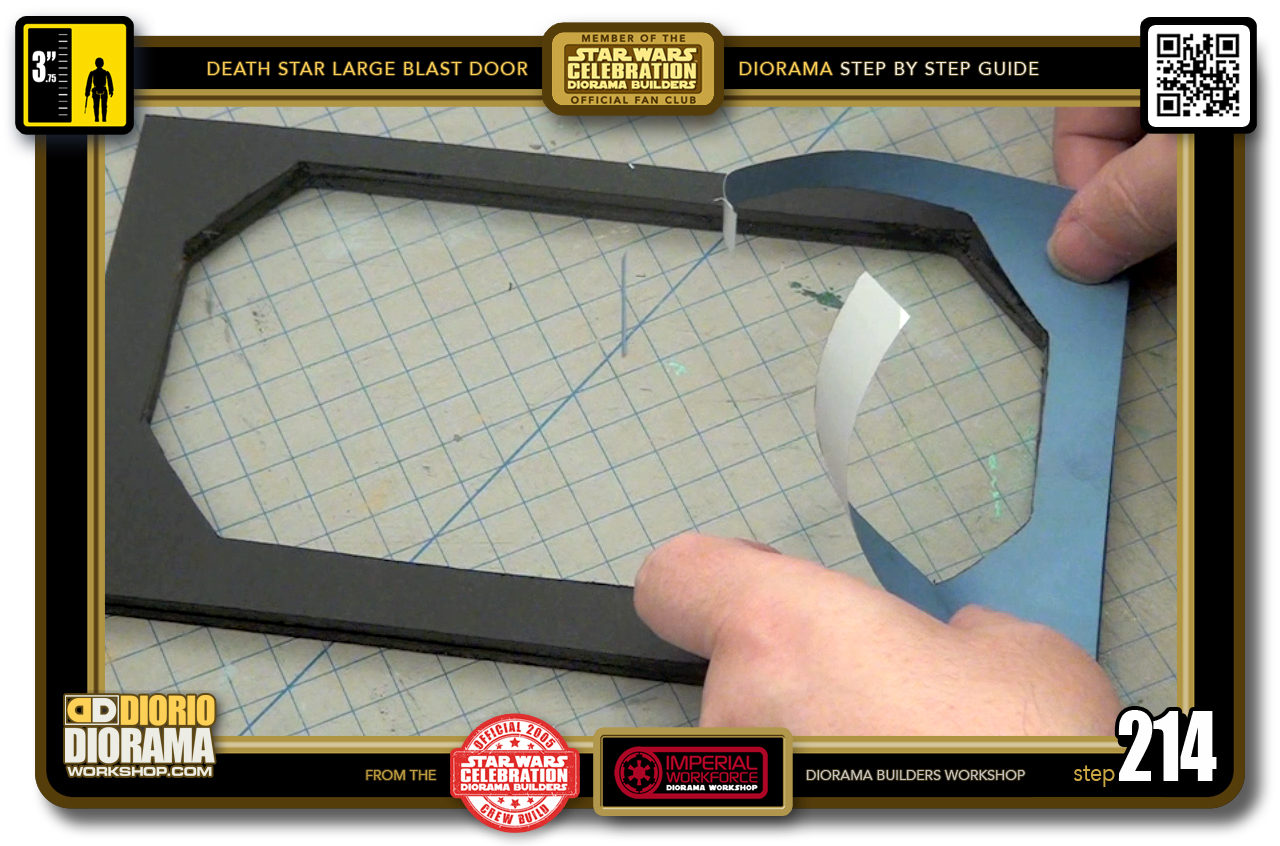
- STEP 214 > Looks like we are placing the right decal, but the frame is upside down in the photo. The 1cm of the frame is at the bottom of the door and at the top of this photo. Carefully and slowly place the decal along the edge of the frame. When you see it fits perfectly, start pressing down in the centre first and then from centre towards the left and centre towards the right.
-
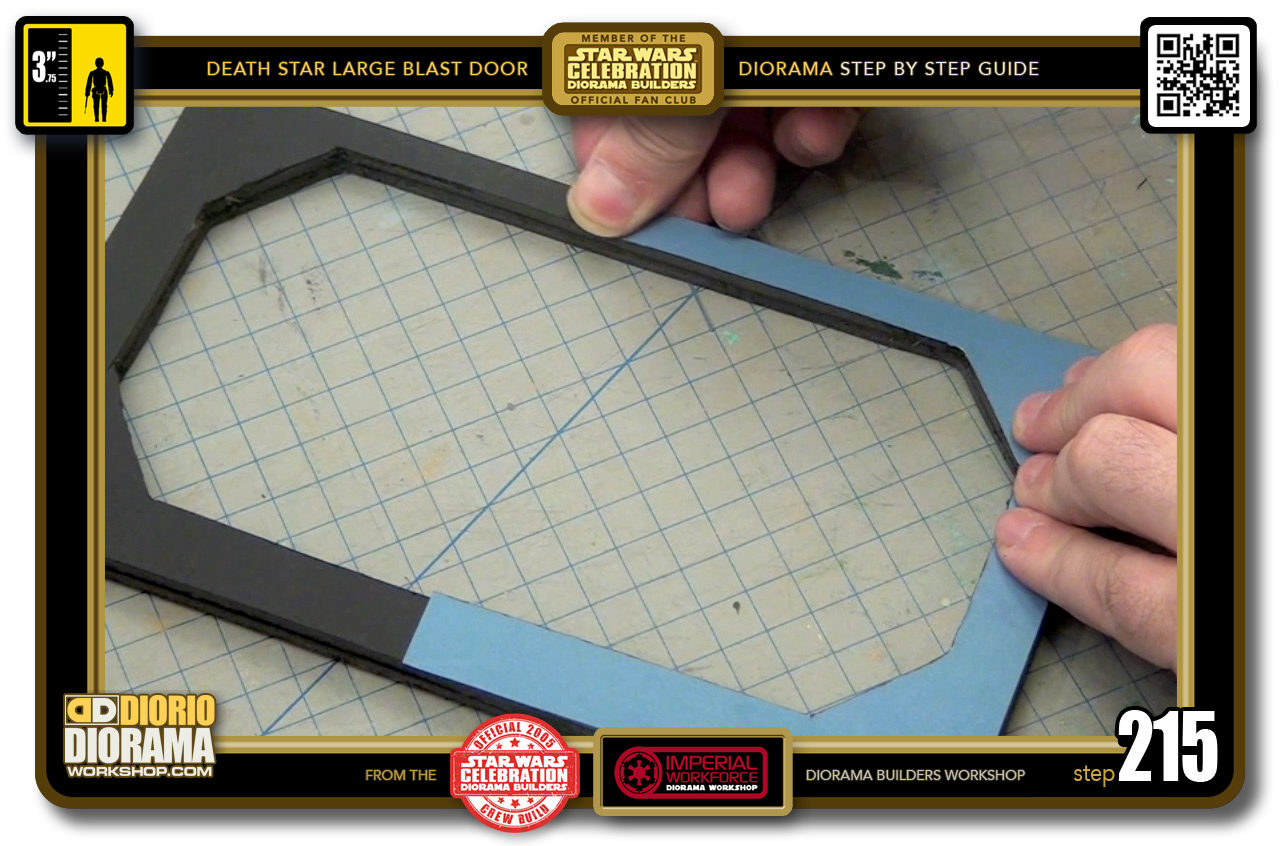
- STEP 215 > Once the side edge is applied, carefully let the top of the decal unfold from your hands onto the frame. Press firmly after it lays flat against the foamcore frame. Now move to the bottom, unfold from your hands onto the frame. Press firmly after it lays flat against the foamcore frame.
-
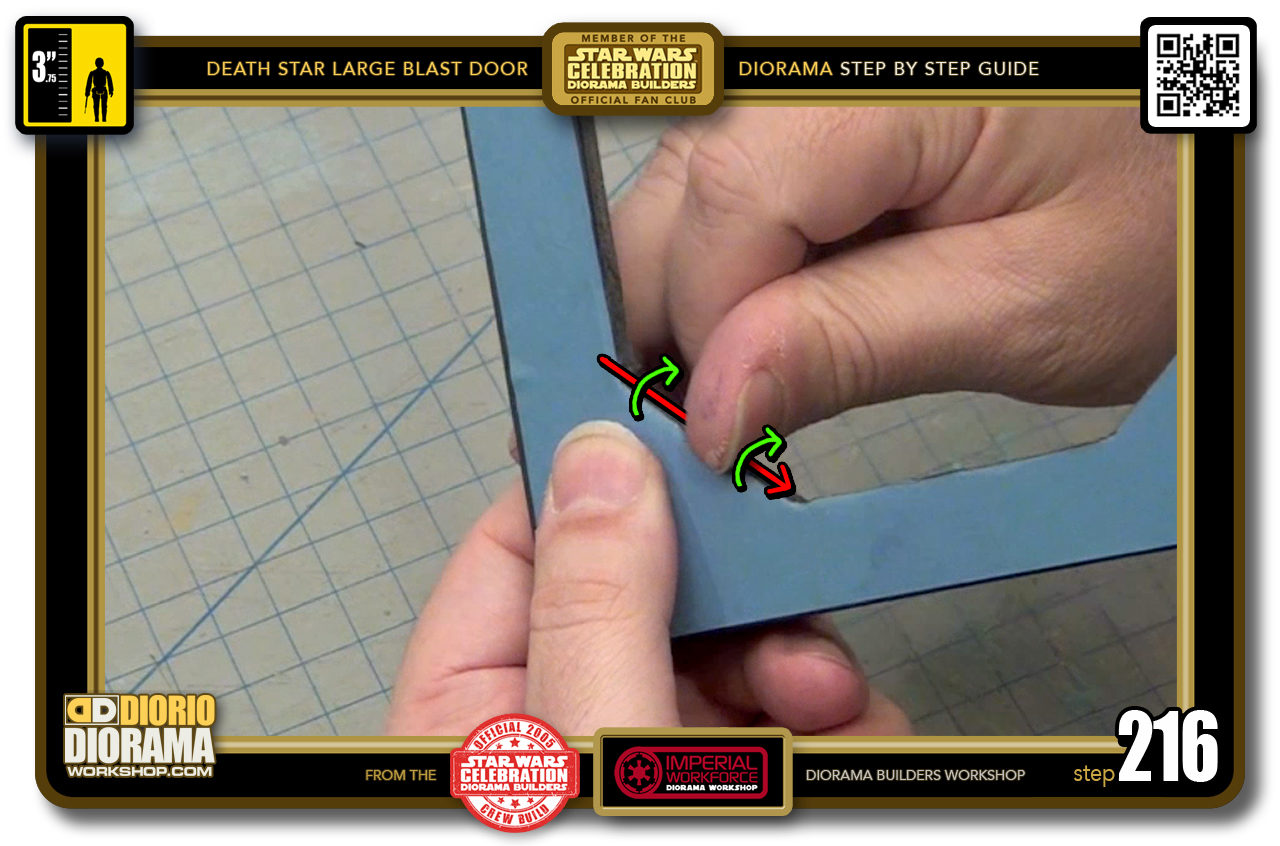
- STEP 216 > You will notice that some of the skin sticks out past the frame. You now can bend it over to wrap around the backside edges of the frame. I find the best way to do this is to use your thumb's nail. Start at a corner and move your way across the edge (red arrow) all at the same time rotating your thumb slightly so that it presses the decal skin towards the thickness of your frame (green arrows).
-
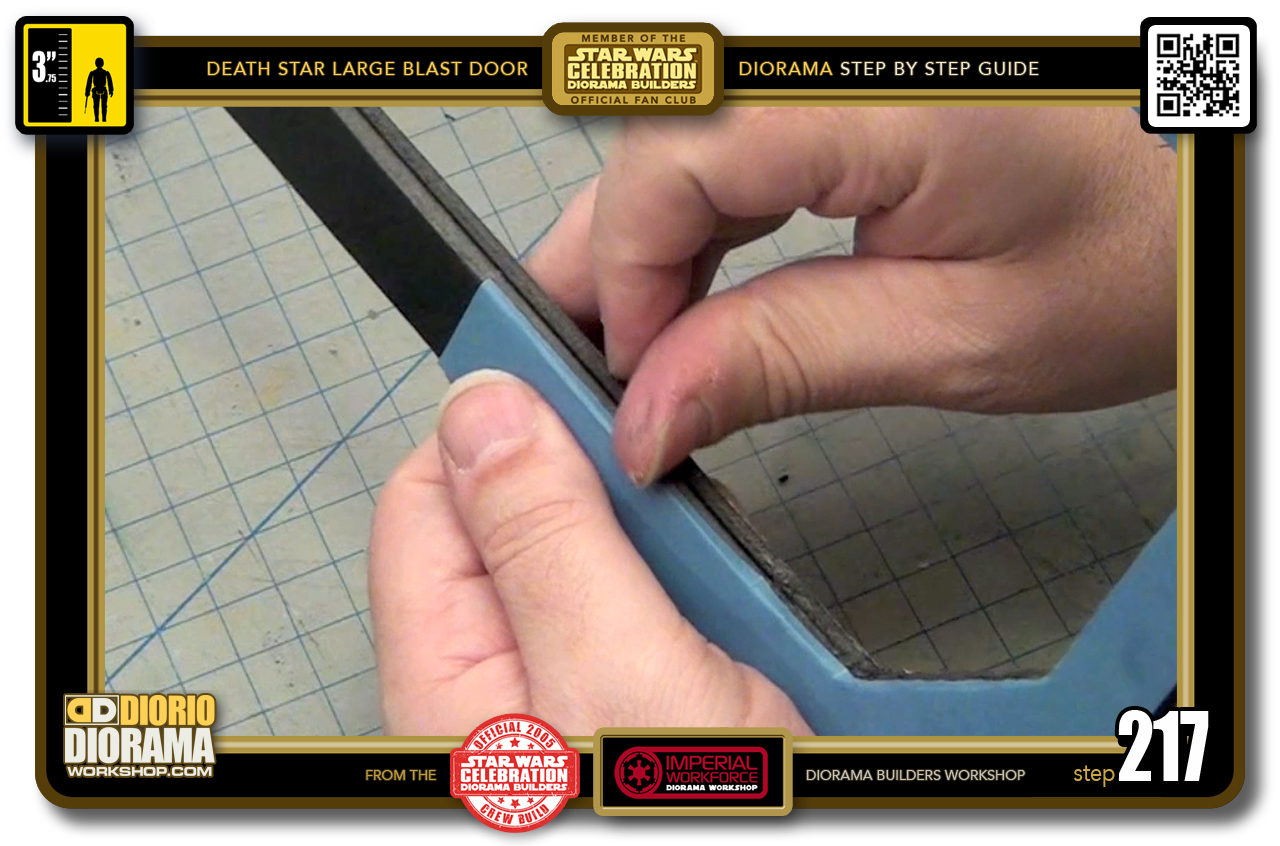
- STEP 217 > Do the same thing on the other sides if need be. Move your thumb as your slowly angle it inwards, causing the skin to bend towards the inside edges and giving a slight rounded feel.
-
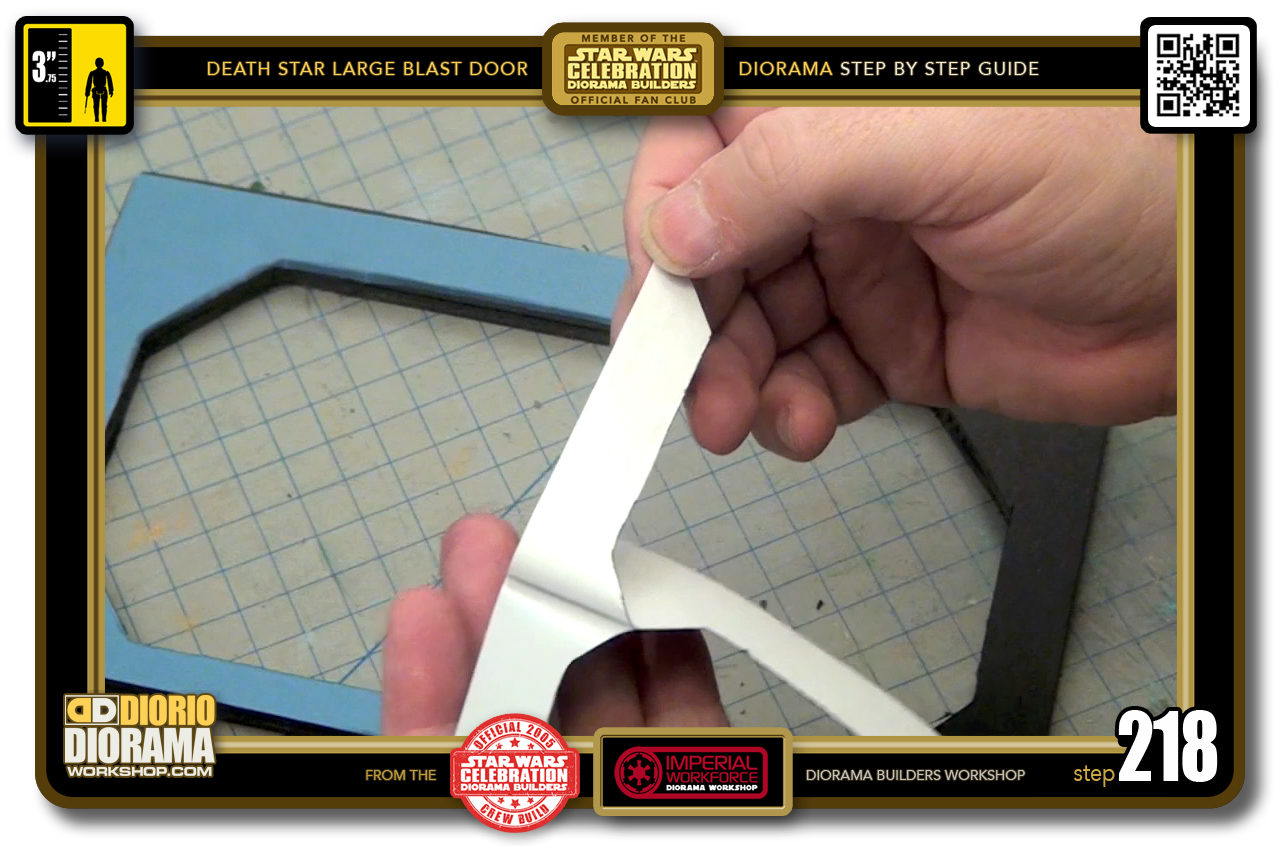
- STEP 218 > Peel the other side's decal.
-
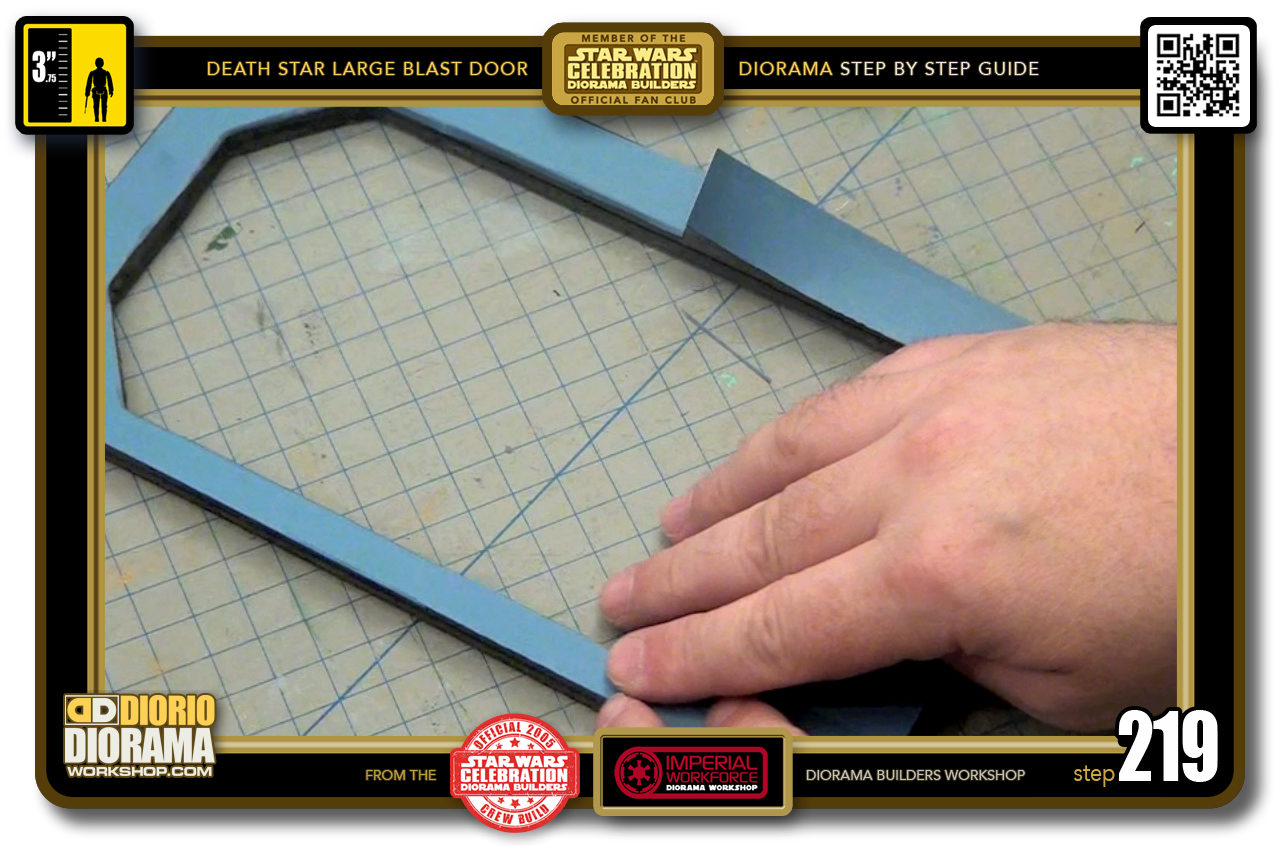
- STEP 219> As you did in steps 036-043, carefully align, place, unfold, press down your decal skin.
-
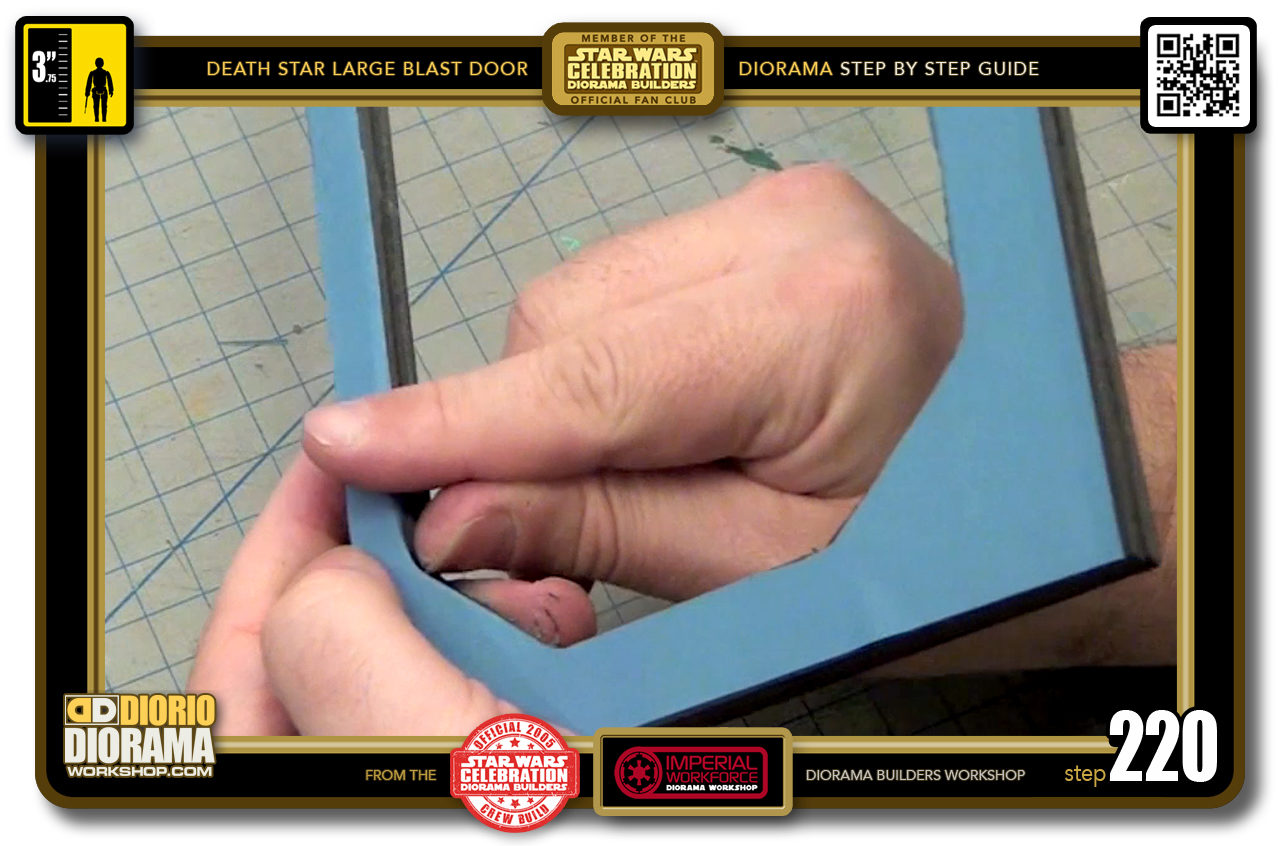
- STEP 220 > Now press down and around the excess with your fingers and thumb like in step 216-217 all around the edges.

.
Did you already build this Diorama ? At home or at our Star Wars Celebration Diorama Builders workshop ? Would you like to show it in the site’s GALLERY VISITORS DIORAMAS section, YES ? That is Awesome !!! You can find out all the details on how to email me your photos on the VISITORS SUBMISSIONS INFO page … When I get your photos, I will create your very own page just like this one. You may not realize it but work does inspire others to join in the fun of making Action Figure Dioramas.
.
NOT FOR RESALE ALL Decals, tutorials and artwork are ©FrankDiorio (dioramaworkshop.com) and offered FOR FREE to the fans – that would be you ? so you can build and display my diorama designs in your very own home. I realize I cannot control what one does with my graphics once I place them on the web, I can only ask you as one fan to another, please respect the artist and do not be that jerk who uses my designs and tutorials to build a copy of my work only to sell it on EBAY or trade/sale groups and forums. Thank You. Frank.
.
.
If you have a facebook account, why not join the Official Diorama Builders Fan Club today, simply click the logo link below.
 .
.
Catch up with fellow visitors and exchange stories, read cool interviews with the crew, exchange photos, fun surprises and grab some FAN ONLY merchandise next year at actual future conventions ?
.
©2018 Frank Diorio DioramaWorkshop.Com
.
IF YOU LIKE WHAT YOU SEE, PLEASE SHARE WITH YOUR FRIENDS
USING THE SOCIAL MEDIA BUTTONS BELOW