


-
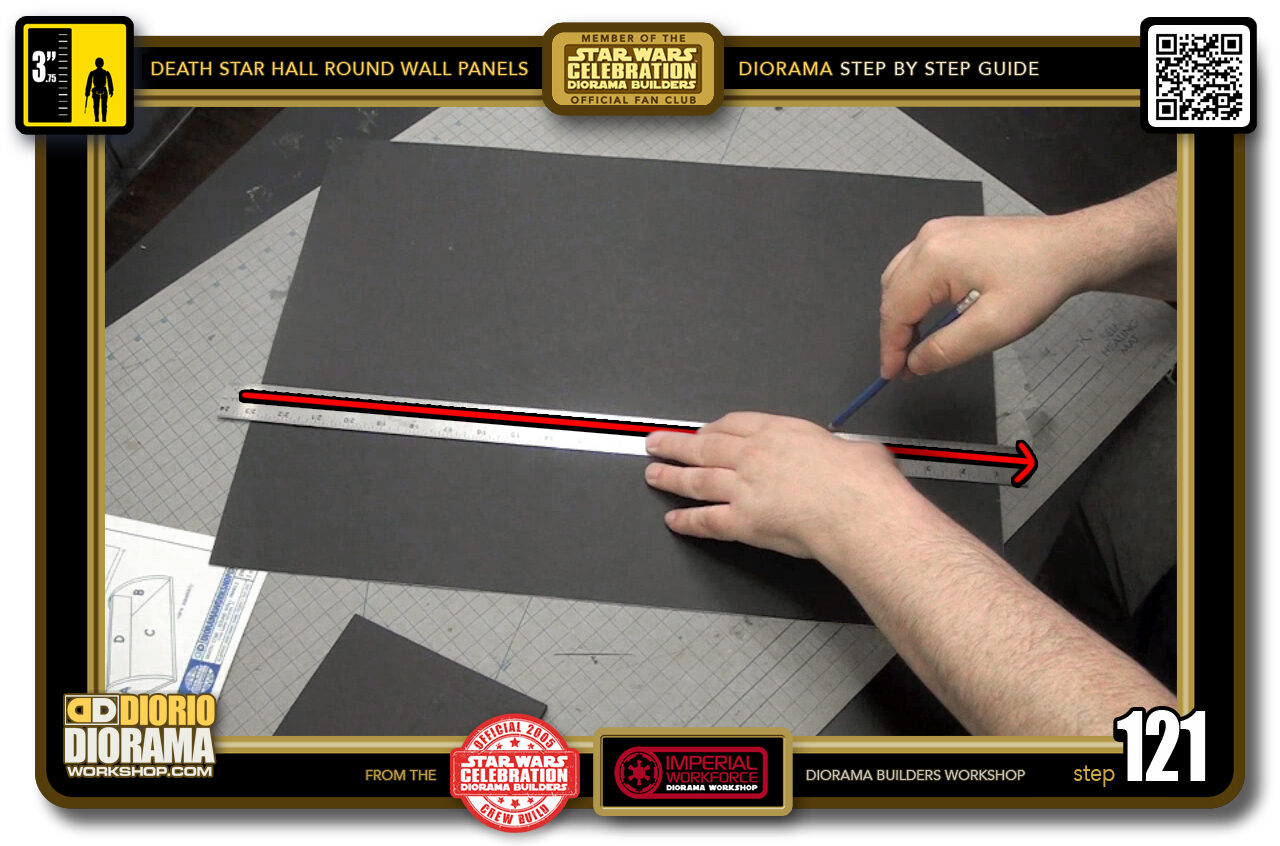
- STEP 121 > Align your ruler with the 2 marks and draw a line with your pencil all the way across your foamcore surface.
-
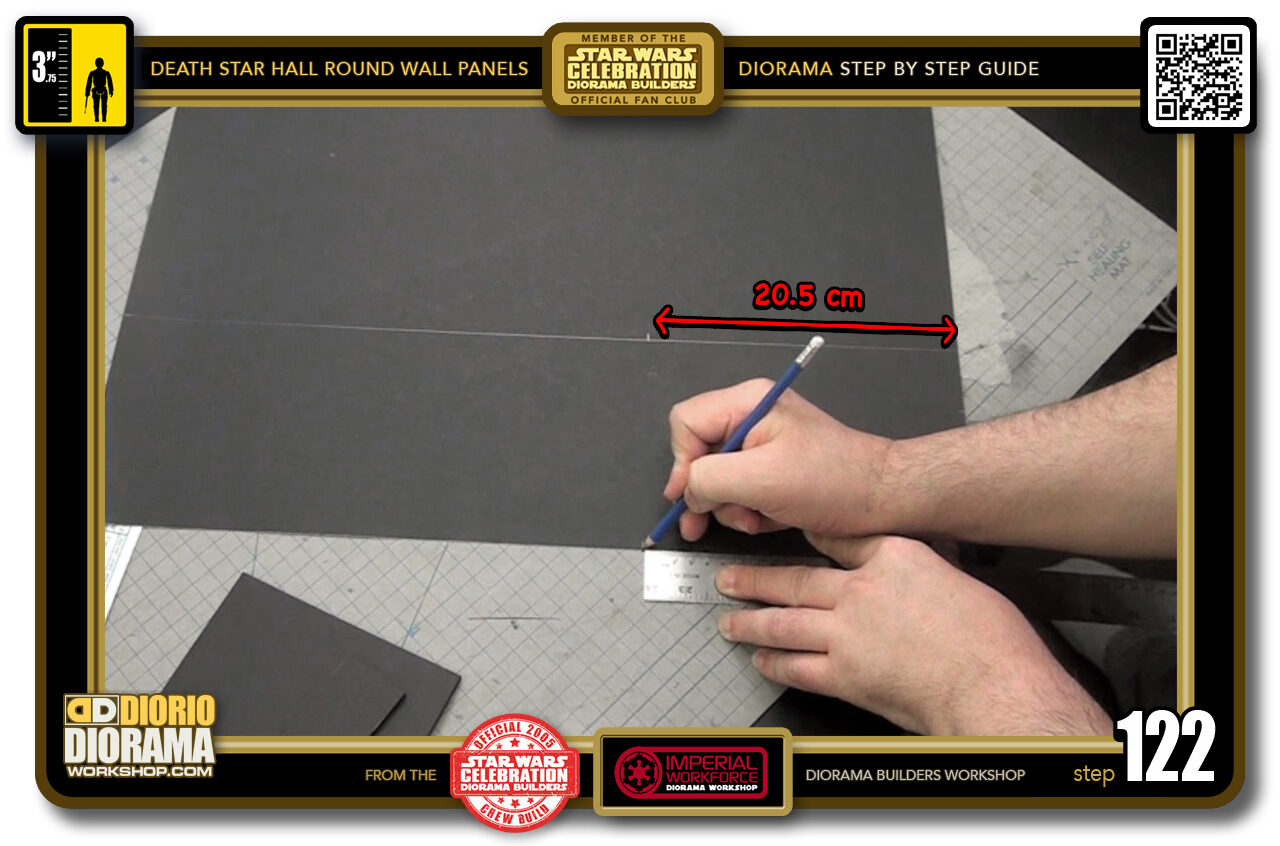
- STEP 122 > Now you want to measure 20.5 cm on the top and bottom of your 15 cm strip.
-
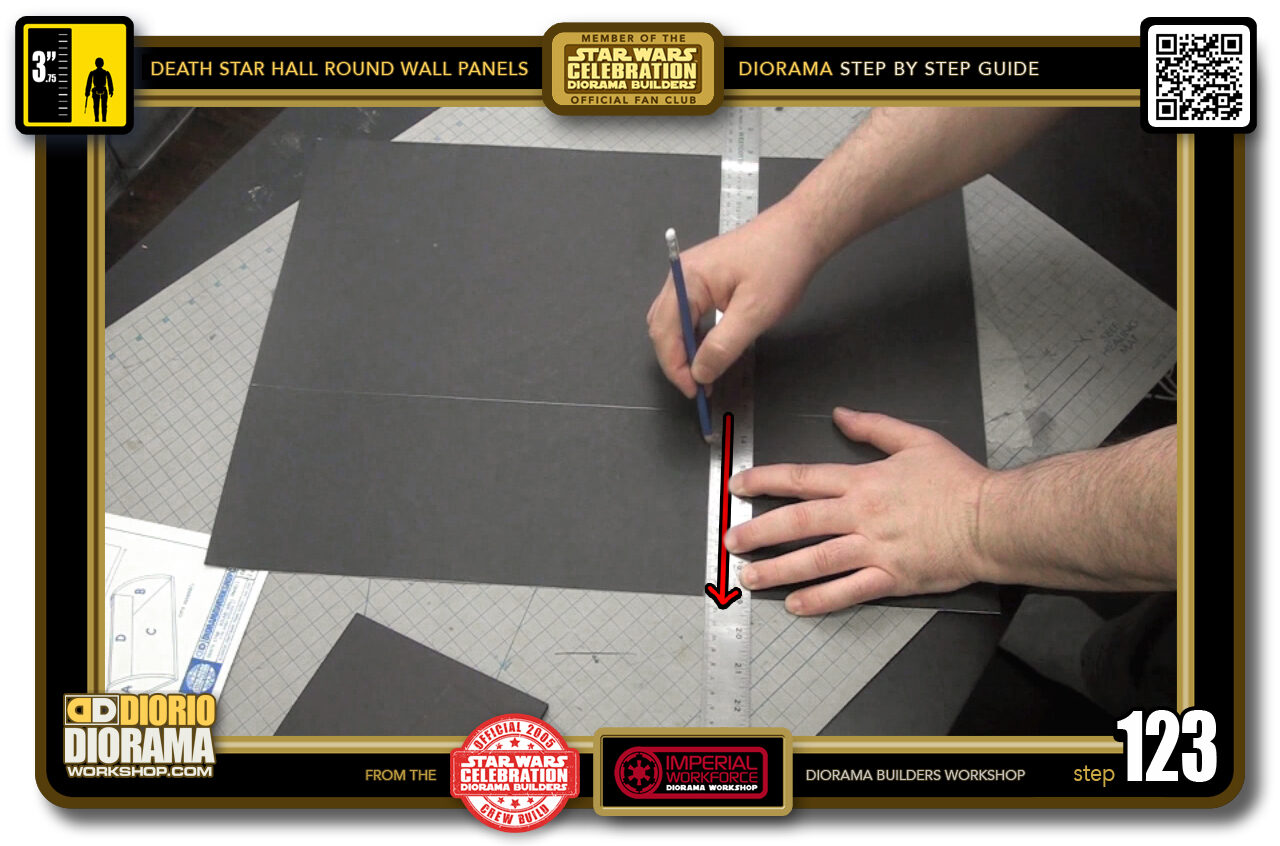
- STEP 123 > Use your ruler to align your 2 markings and trace a line with your pencil.
-
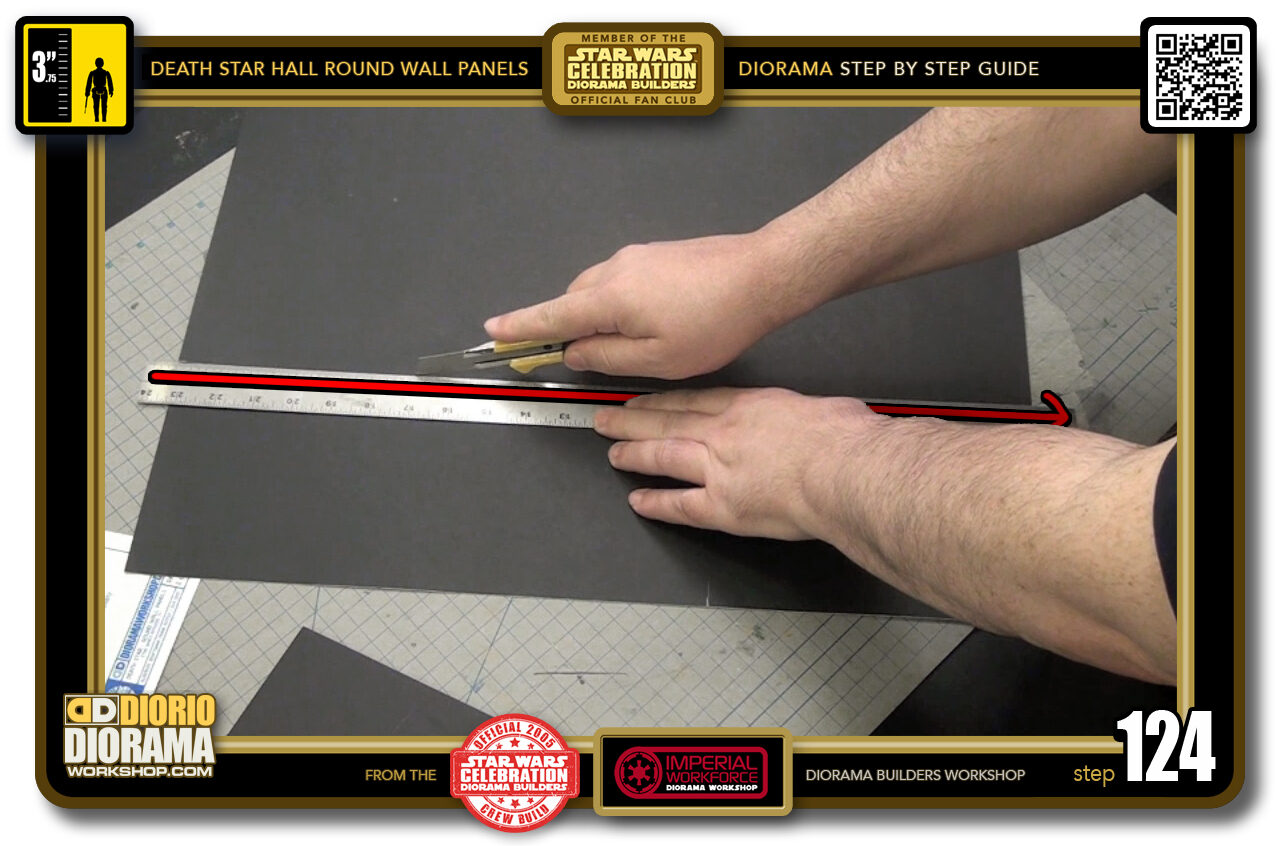
- STEP 124 > Time to cut, align your ruler with the first cutting guide line, if you plan making more than 1 then cut ALL the way through like I did. If you are just making the 1, then you can just cut only your 20.5 cm portion.
-
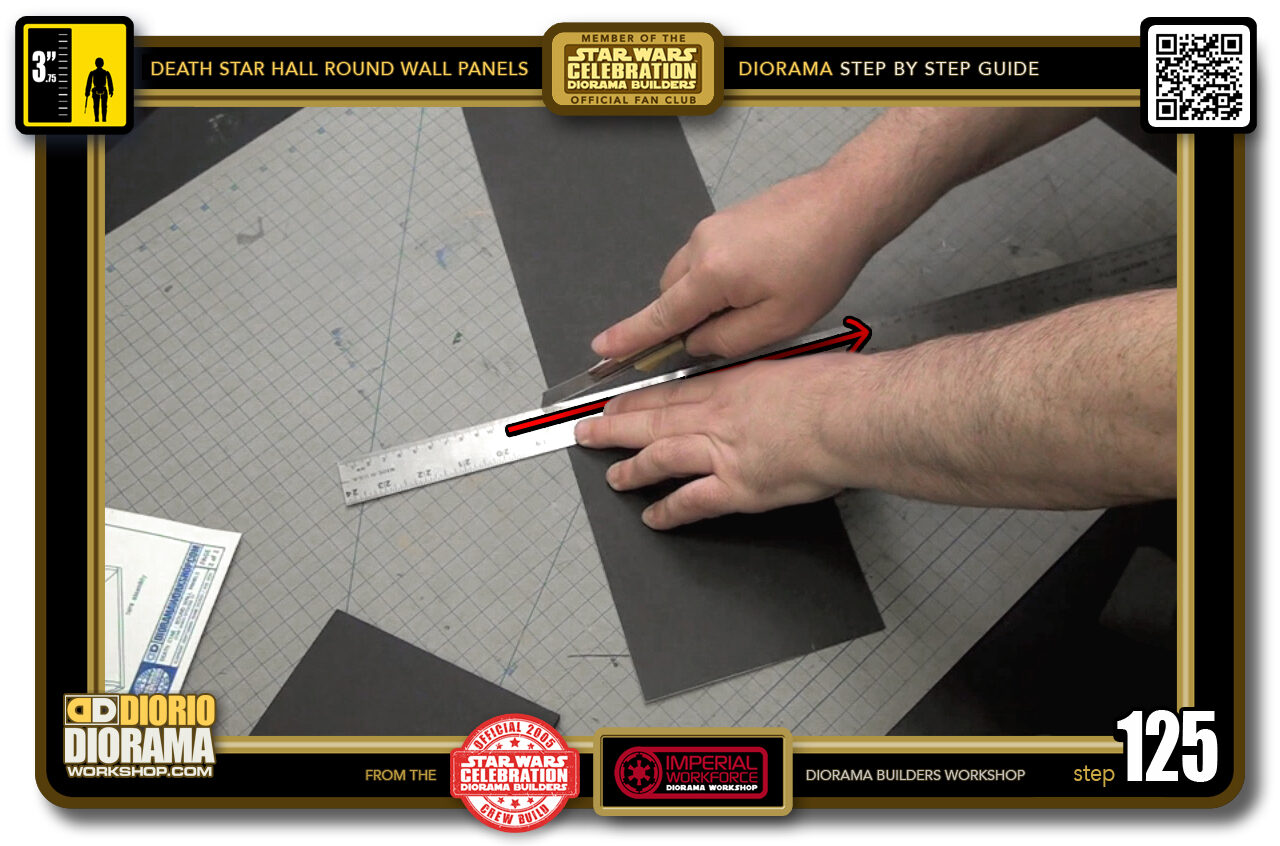
- STEP 125 > After your 15 cm strip is cut, you can aligh your ruler with the 2nd cutting guide line and cut all the way trhough with your X-acto knife
-
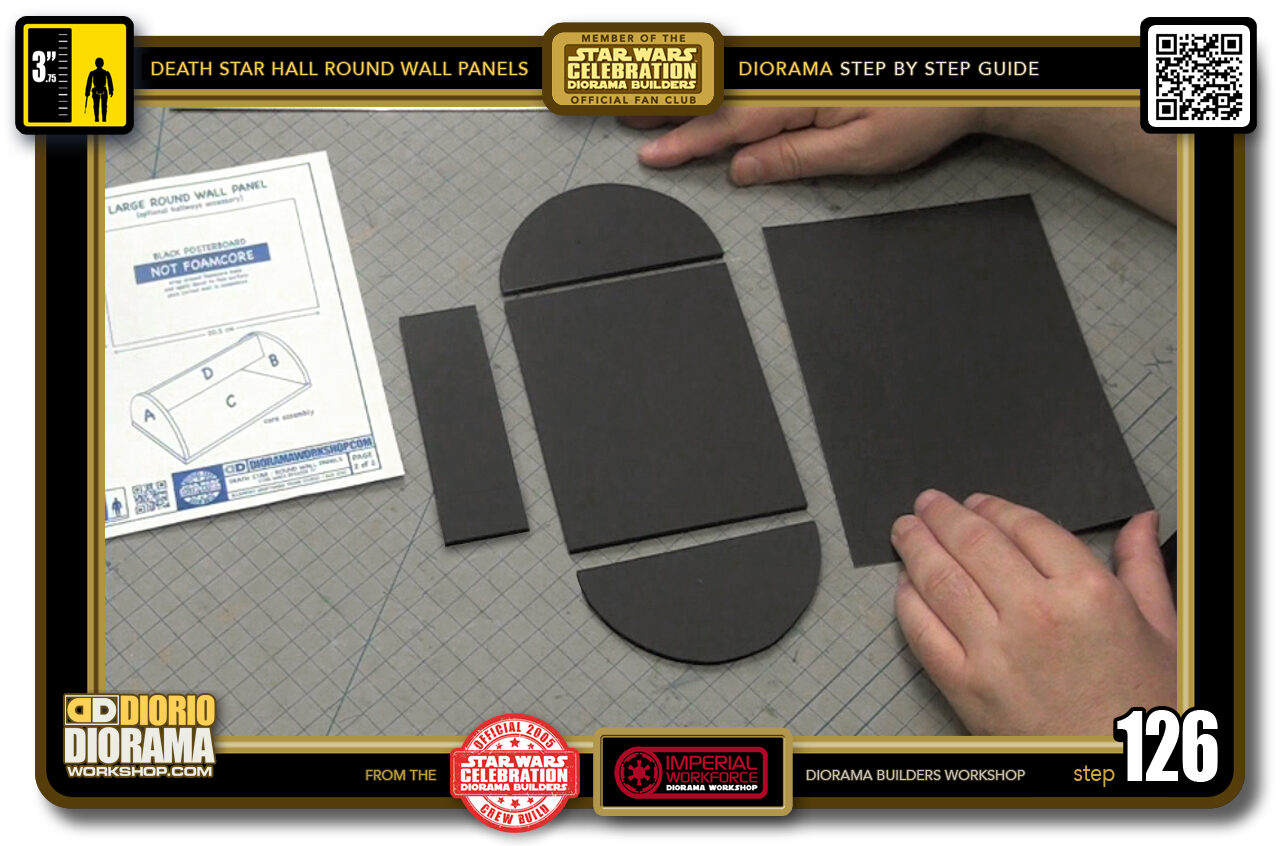
- STEP 126 > All the pieces you need are now cut.
-

- STEP 127 > Just as we did with the Small Round Wall Panel - you want your half circles to be glues on the TOP of your base as you see on the left, NOT on the side like in the right image.
-
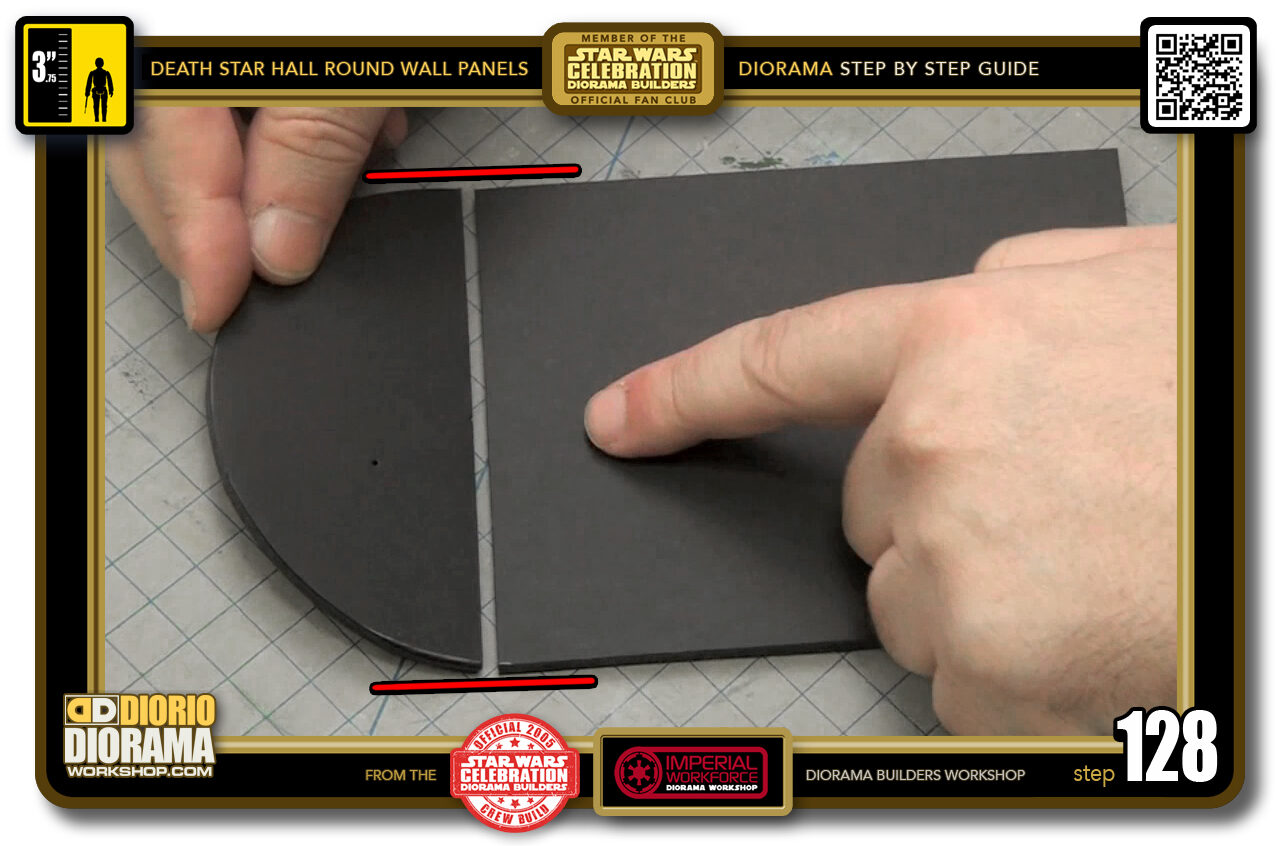
- STEP 128 > Also BEFORE YOU GLUE - FIND YOUR CORRECT SIDE. The half circle aligns perfectly with the 15 cm top and bottom.
-
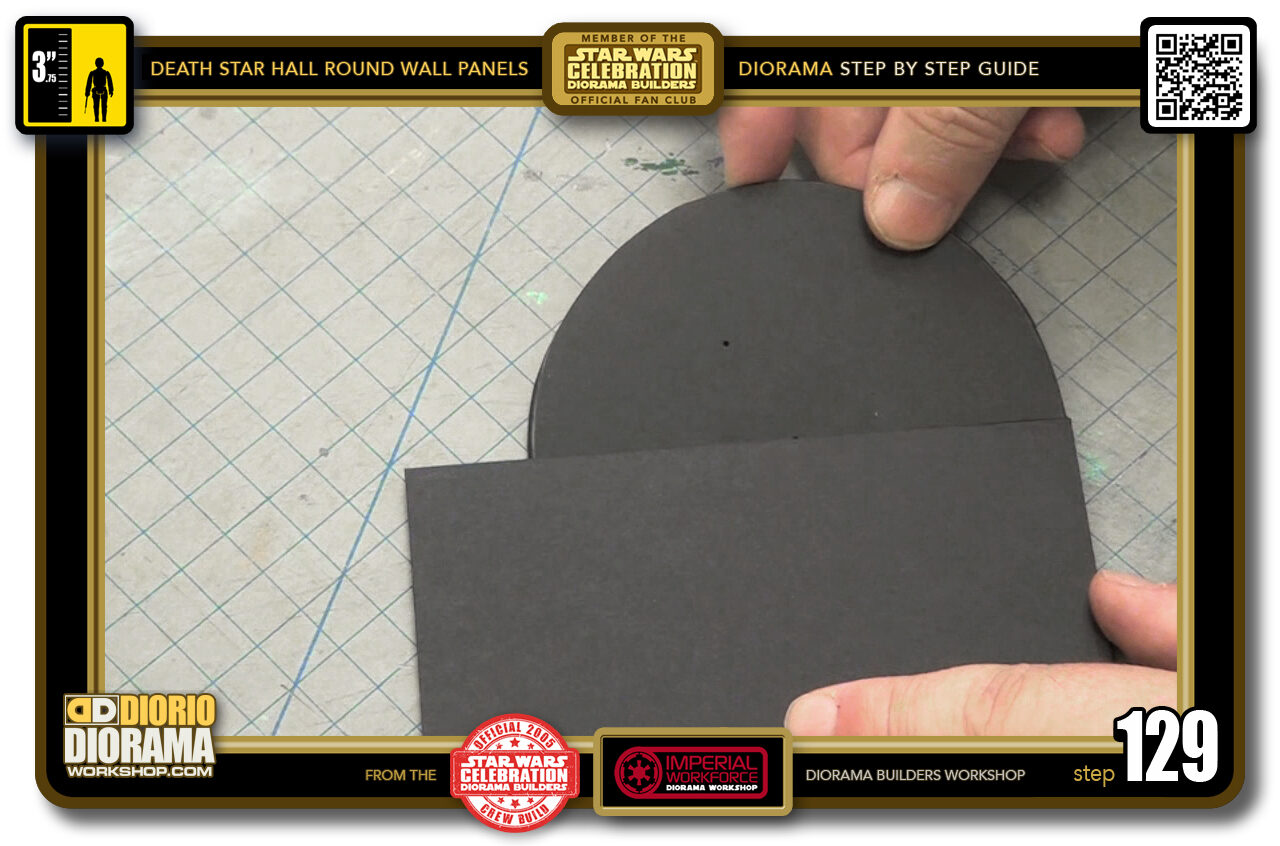
- STEP 129 > If you go to glue it to the wrong side, you will see there is a huge gap there. You DON'T want to glue here by mistake.
-
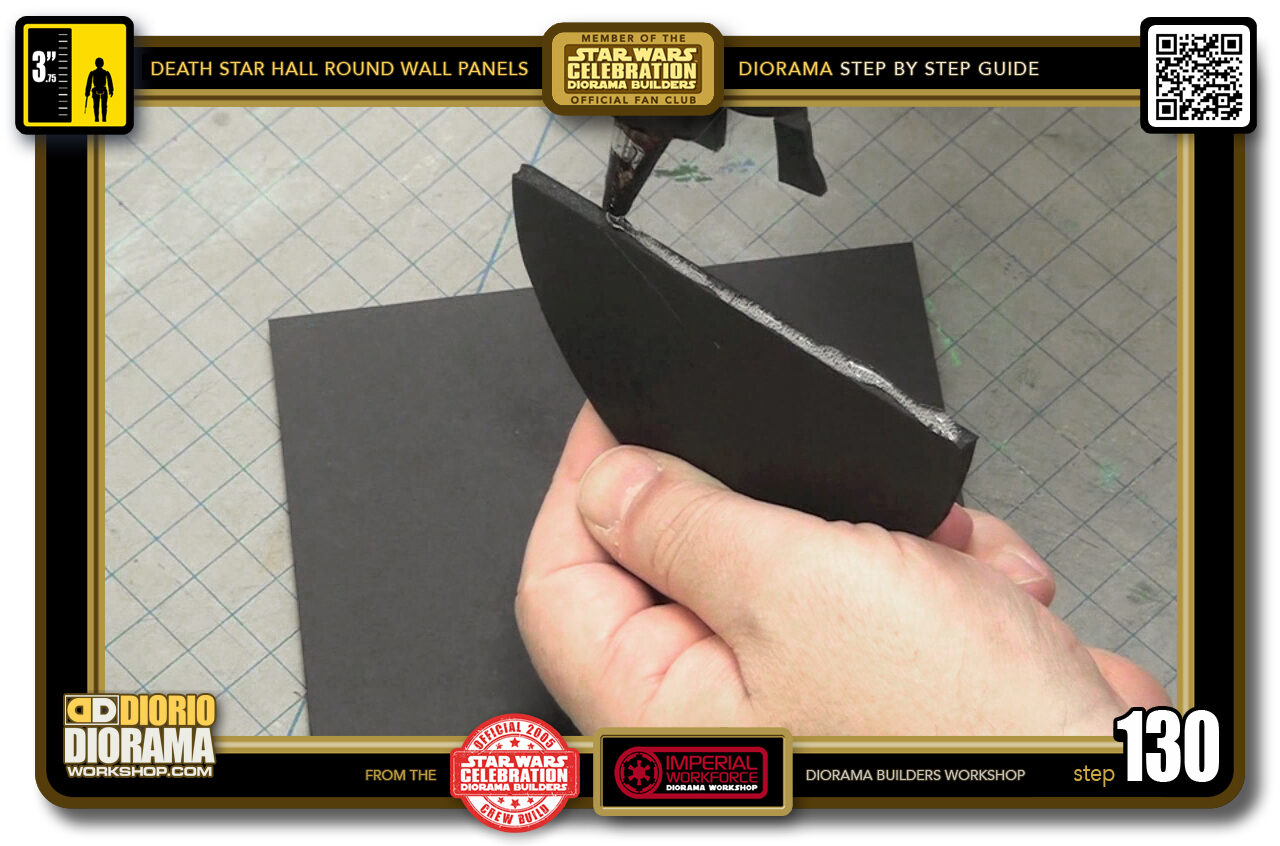
- STEP 130 > When ready apply a line of hot glue at the bottom edge of one of your half circles.
-
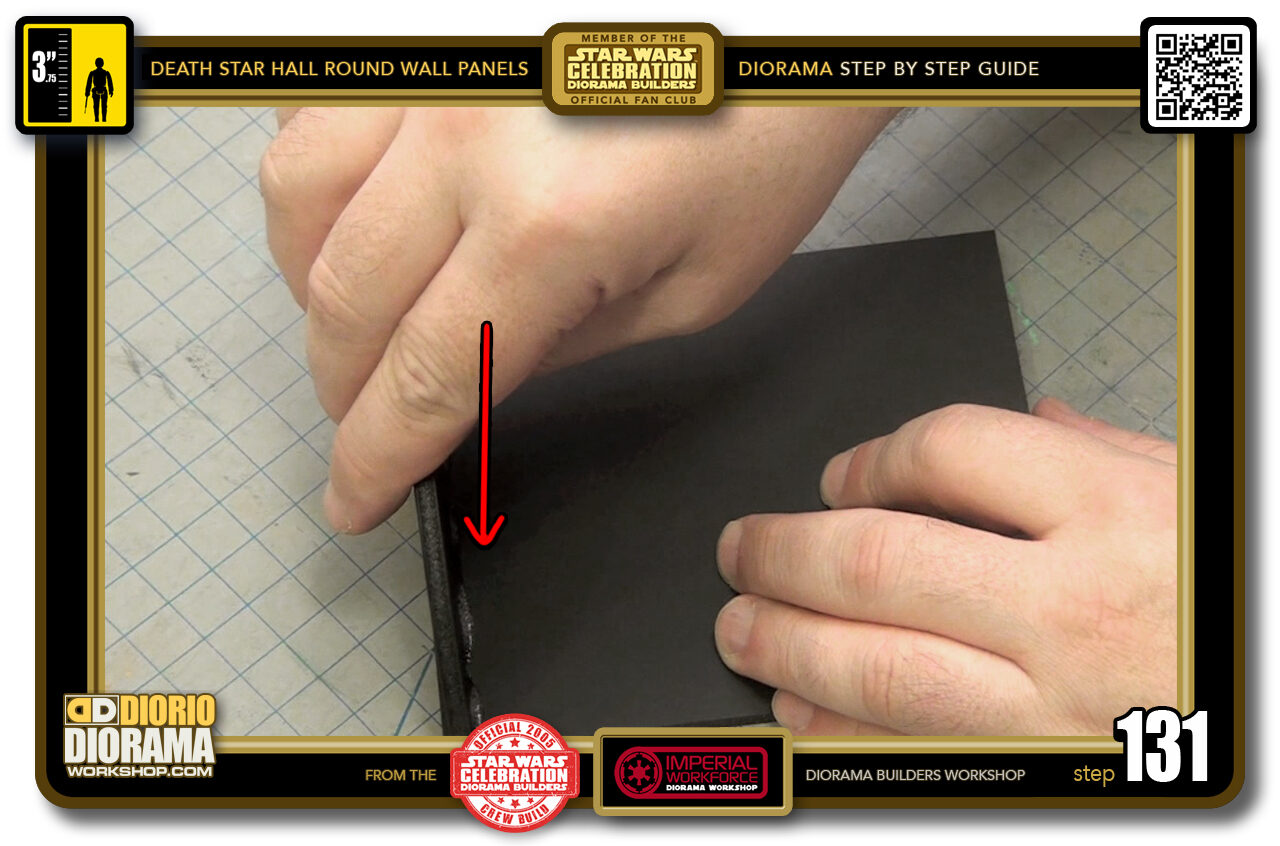
- STEP 131 > Align it with the edge of the base as much as possible and press down.
-
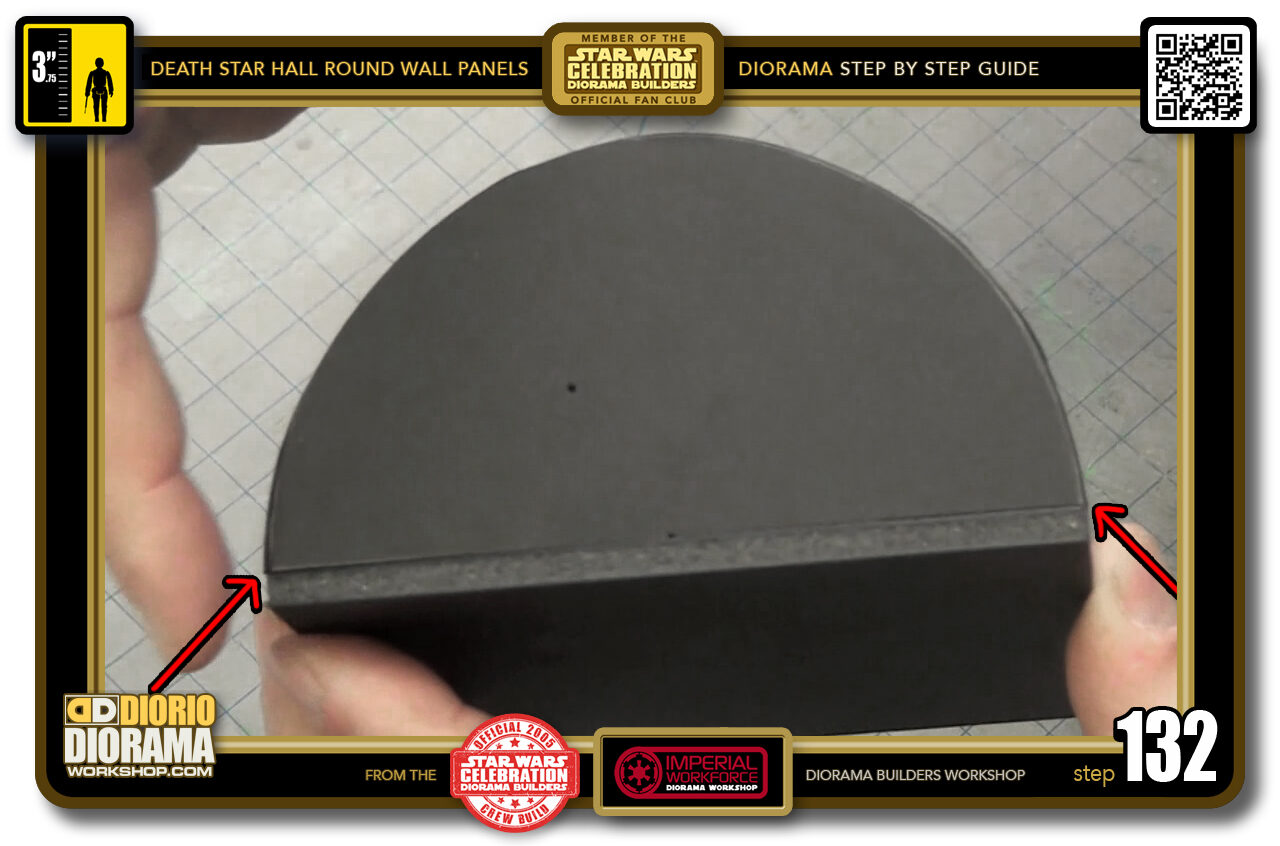
- STEP 132 > Before the hot glue cools down and hardens, flip your piece and make sure the half circle is aligned properly - centered - on both sides.
-
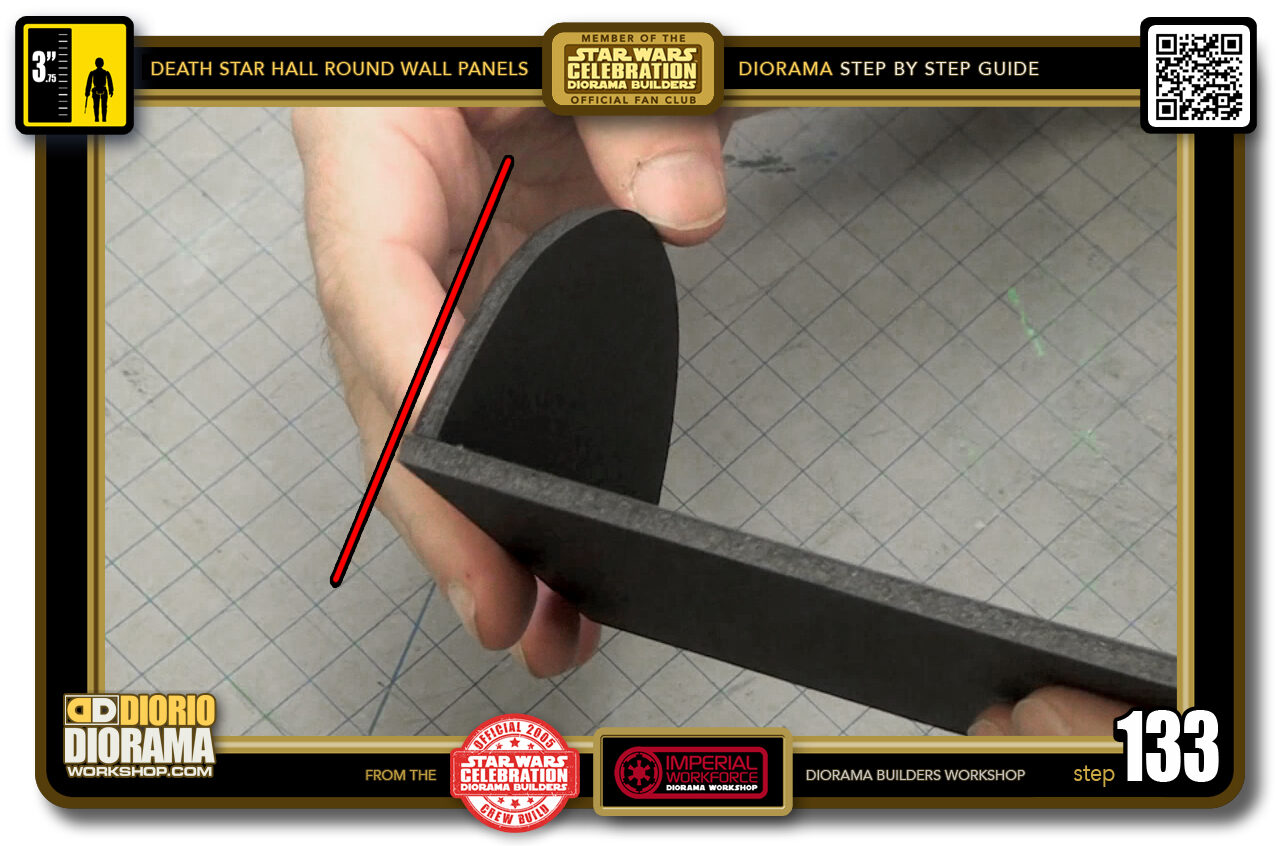
- STEP 133 > As well as flush to the edge as possible so that when you move your finger from the top to the bottom you don't feel a bump at the seam.
-
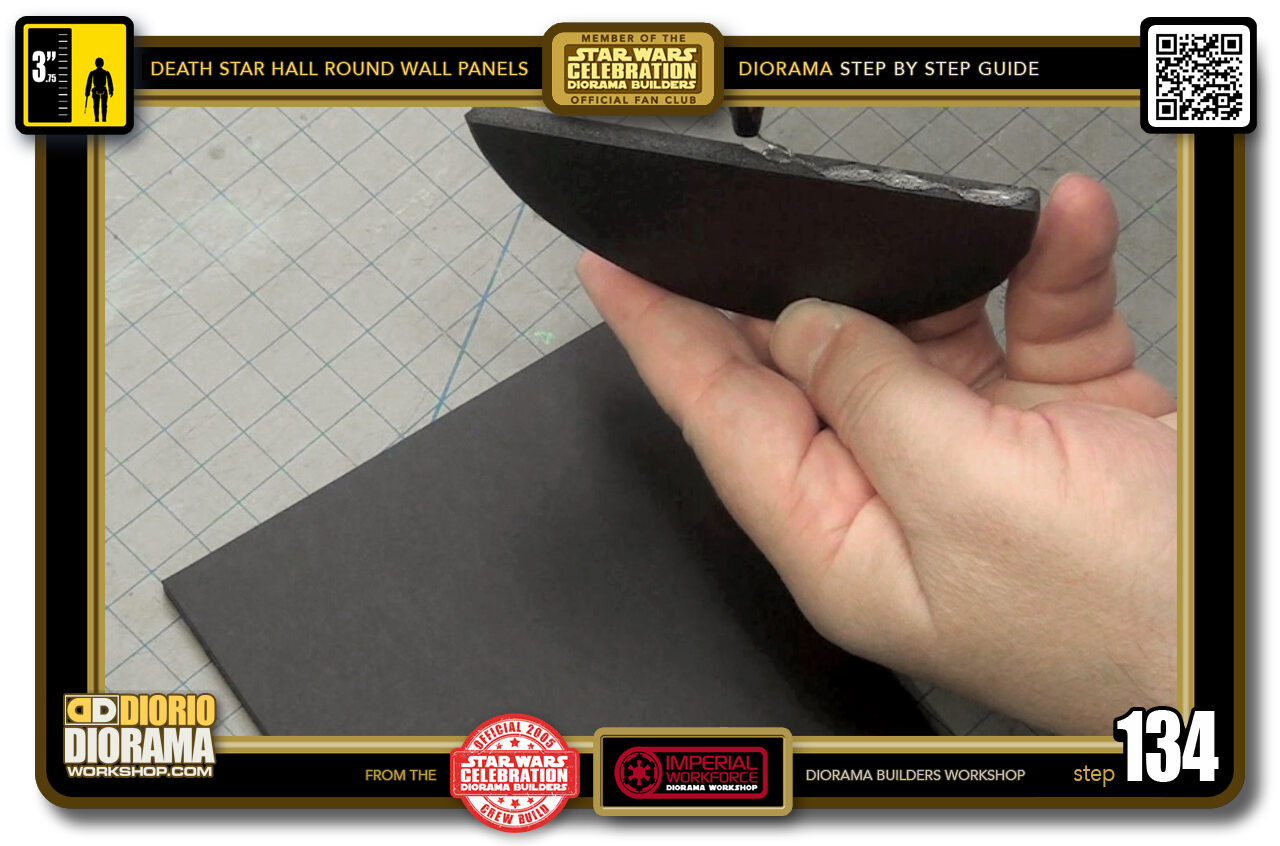
- STEP 134 > Once the hot glue has hardened you can move on to the other half circle and repeat the same steps.... Line of hot glue along the flat edge.
-
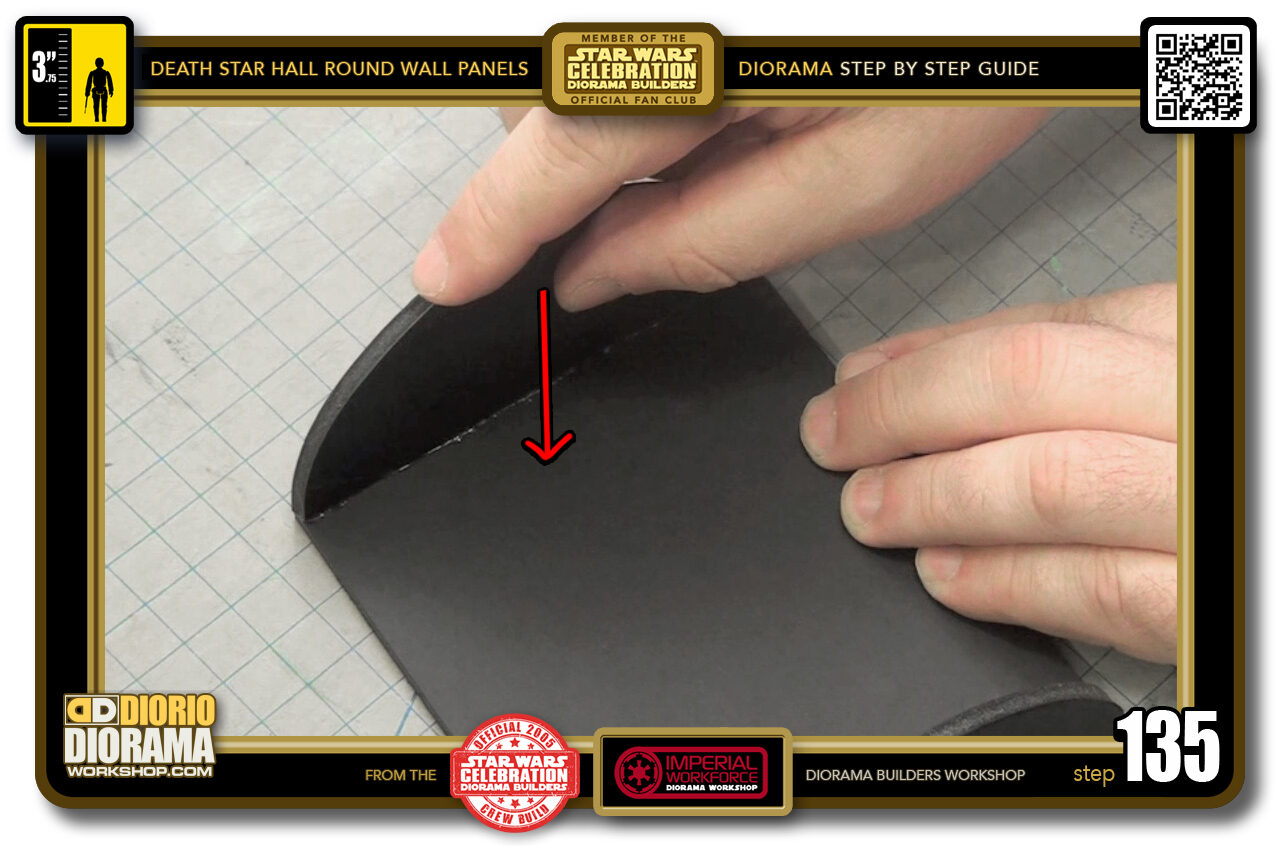
- STEP 135 > Carefully press down.
-
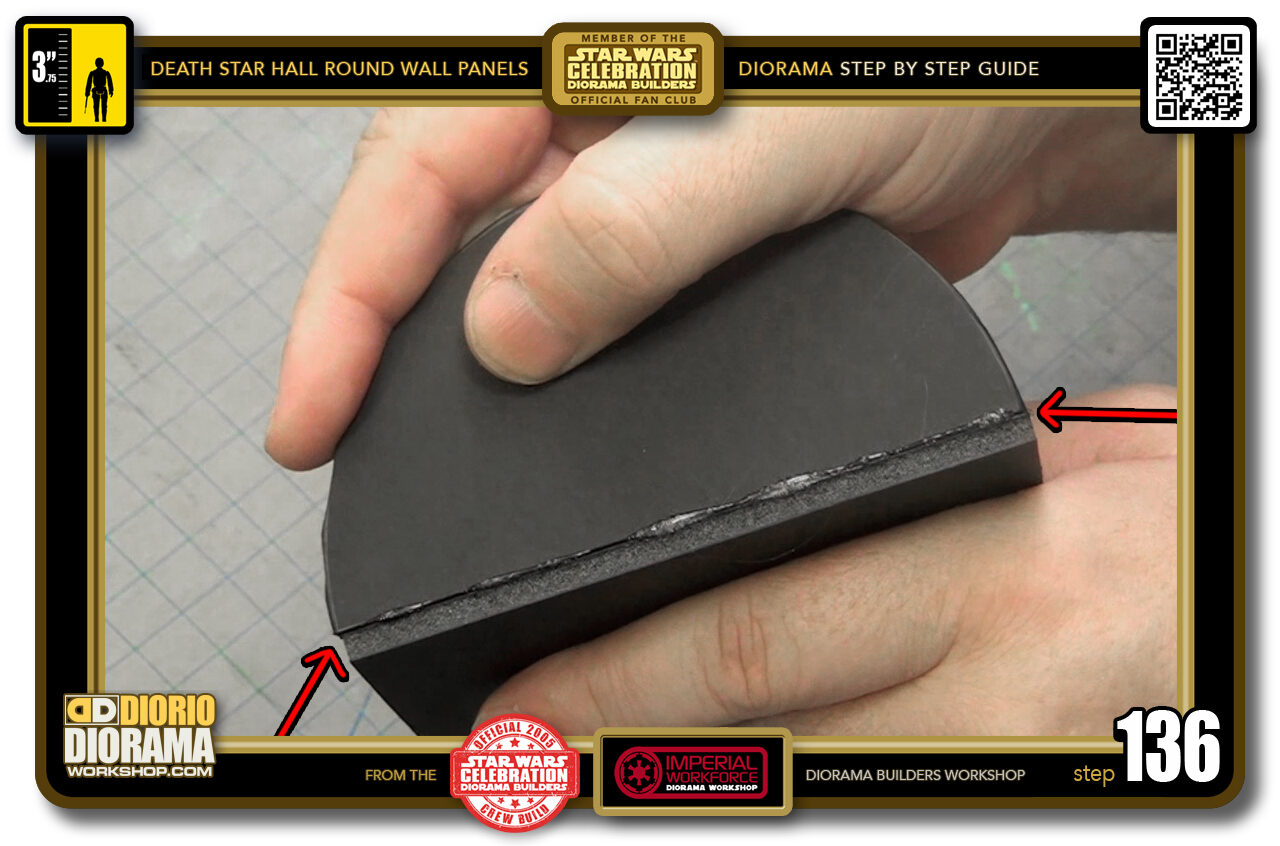
- STEP 136 > Make sure it is centered and flush with the base edge.
-
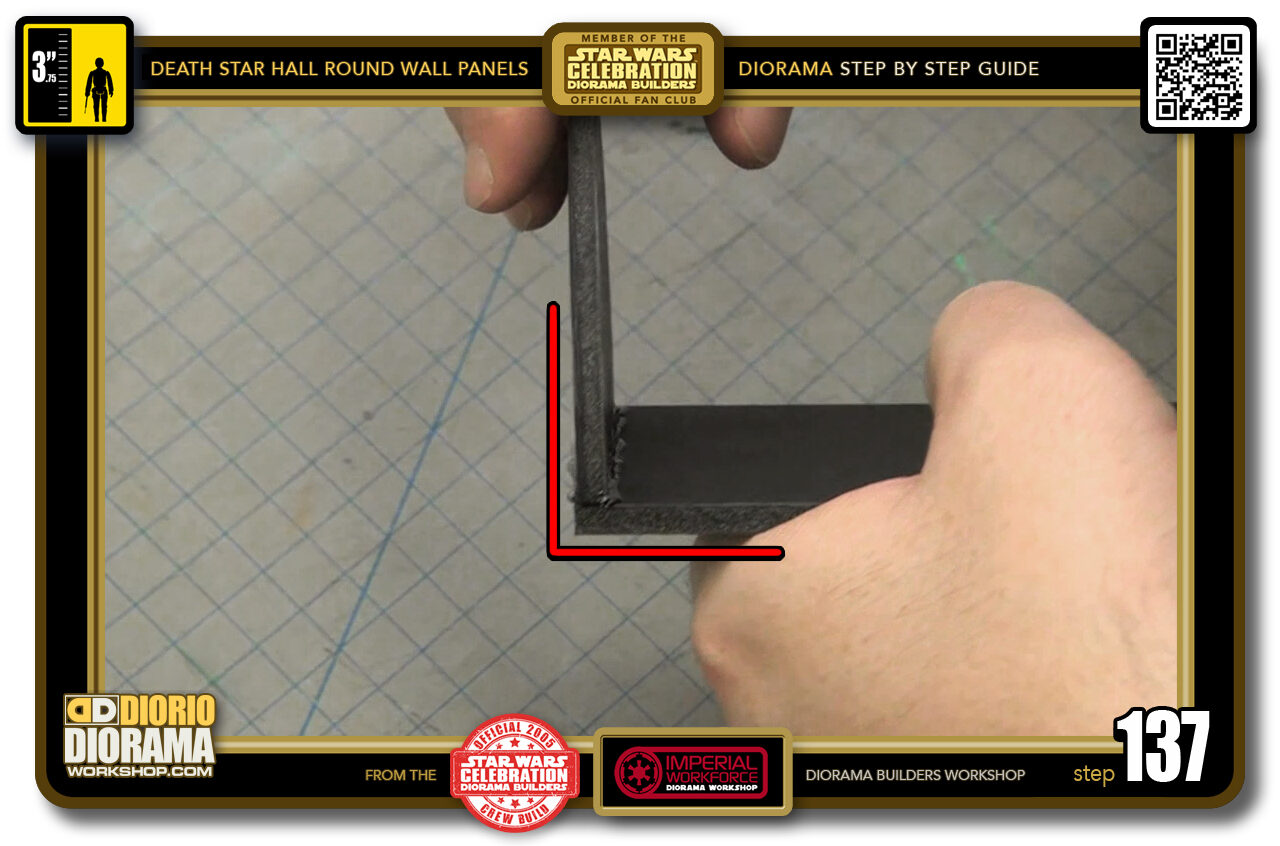
- STEP 137 > And 90 degrees or as close as possible. At this point when the hot glue is completely cooled down - 30 or 40 seconds, you can flip your shape upside down and rock the half circles back and forth as you did the small ones to smooth out your circle cut edges.
-
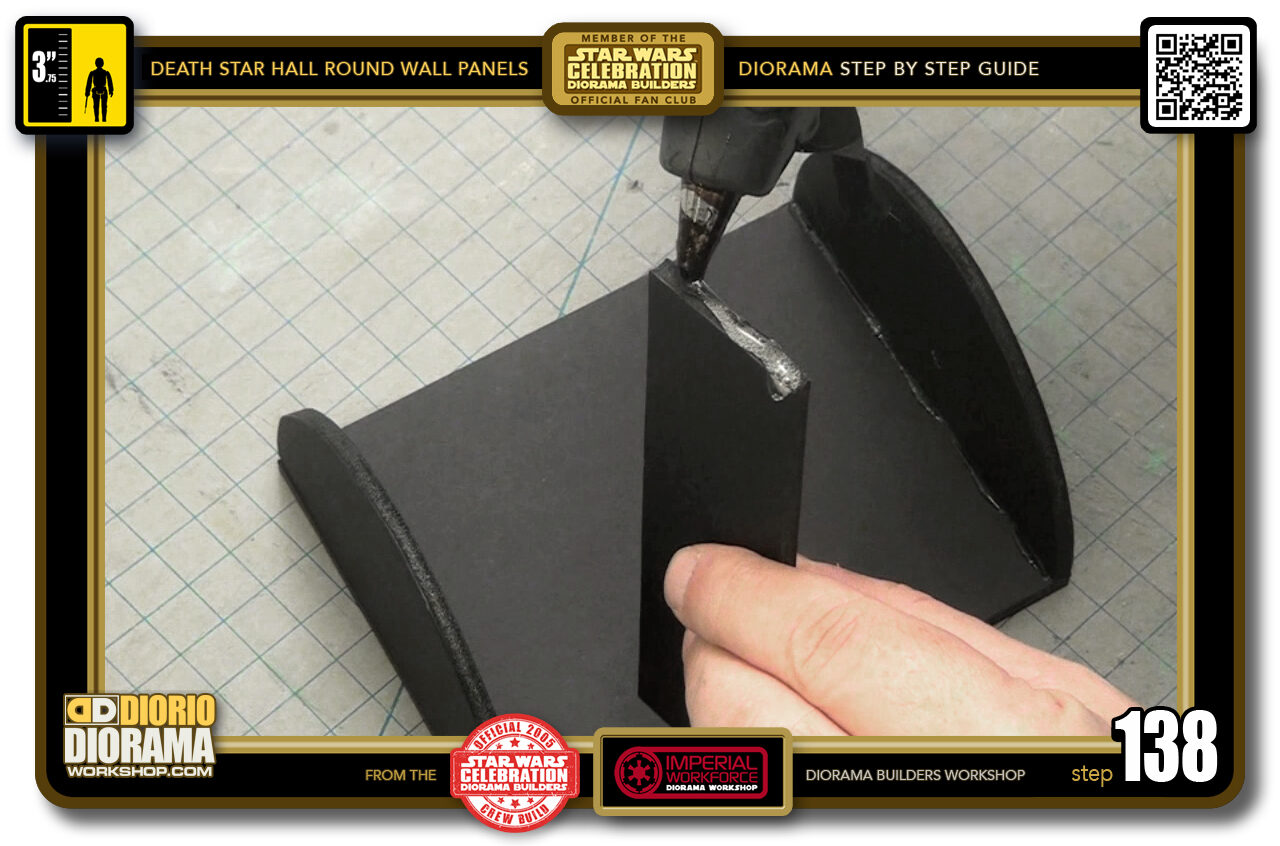
- STEP 138 > Now to attach the beam support. Squeez a small amount of hot glue on BOTH SIDES of your beam.
-
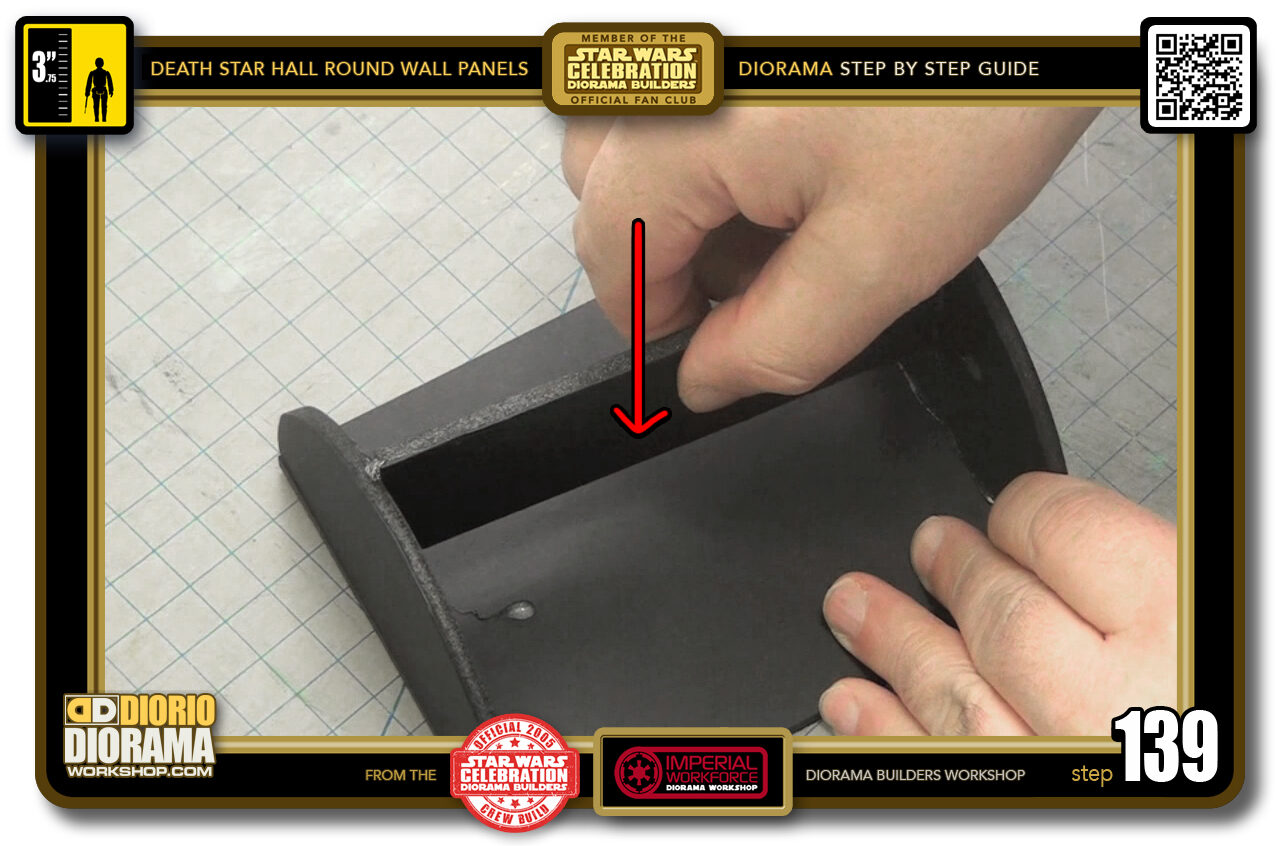
- STEP 139 > Insert it between your 2 half circles. You may want to angle it slightly as you push down and then turn it like a door key until it reaches it's proper position.
-
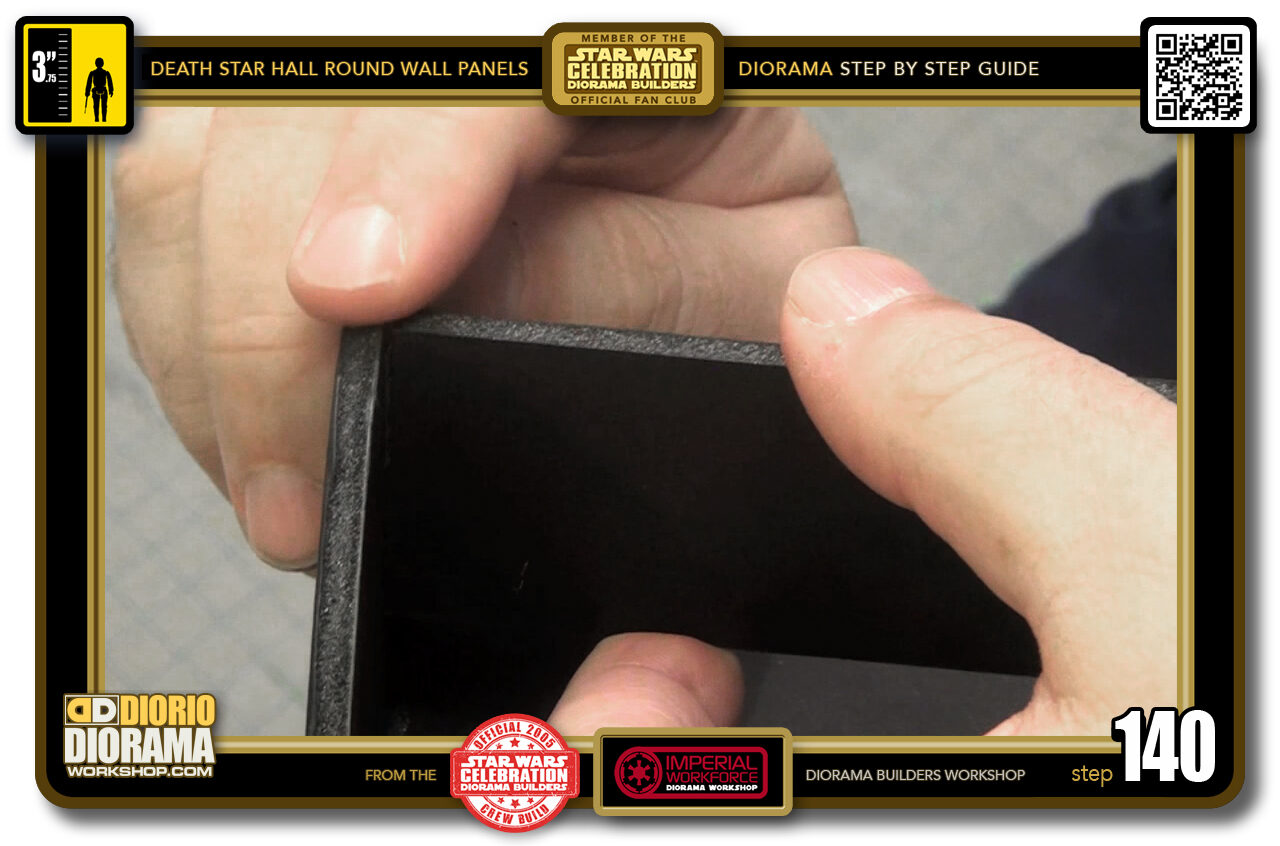
- STEP 140 > Make sure the ends are centered and flush at the top.

.
Did you already build this Diorama ? At home or at our Star Wars Celebration Diorama Builders workshop ? Would you like to show it in the site’s GALLERY VISITORS DIORAMAS section, YES ? That is Awesome !!! You can find out all the details on how to email me your photos on the VISITORS SUBMISSIONS INFO page … When I get your photos, I will create your very own page just like this one. You may not realize it but work does inspire others to join in the fun of making Action Figure Dioramas.
.
NOT FOR RESALE ALL Decals, tutorials and artwork are ©FrankDiorio (dioramaworkshop.com) and offered FOR FREE to the fans – that would be you ? so you can build and display my diorama designs in your very own home. I realize I cannot control what one does with my graphics once I place them on the web, I can only ask you as one fan to another, please respect the artist and do not be that jerk who uses my designs and tutorials to build a copy of my work only to sell it on EBAY or trade/sale groups and forums. Thank You. Frank.
.
.
If you have a facebook account, why not join the Official Diorama Builders Fan Club today, simply click the logo link below.
 .
.
Catch up with fellow visitors and exchange stories, read cool interviews with the crew, exchange photos, fun surprises and grab some FAN ONLY merchandise next year at actual future conventions ?
.
©2018 Frank Diorio DioramaWorkshop.Com
.
IF YOU LIKE WHAT YOU SEE, PLEASE SHARE WITH YOUR FRIENDS
USING THE SOCIAL MEDIA BUTTONS BELOW