


-
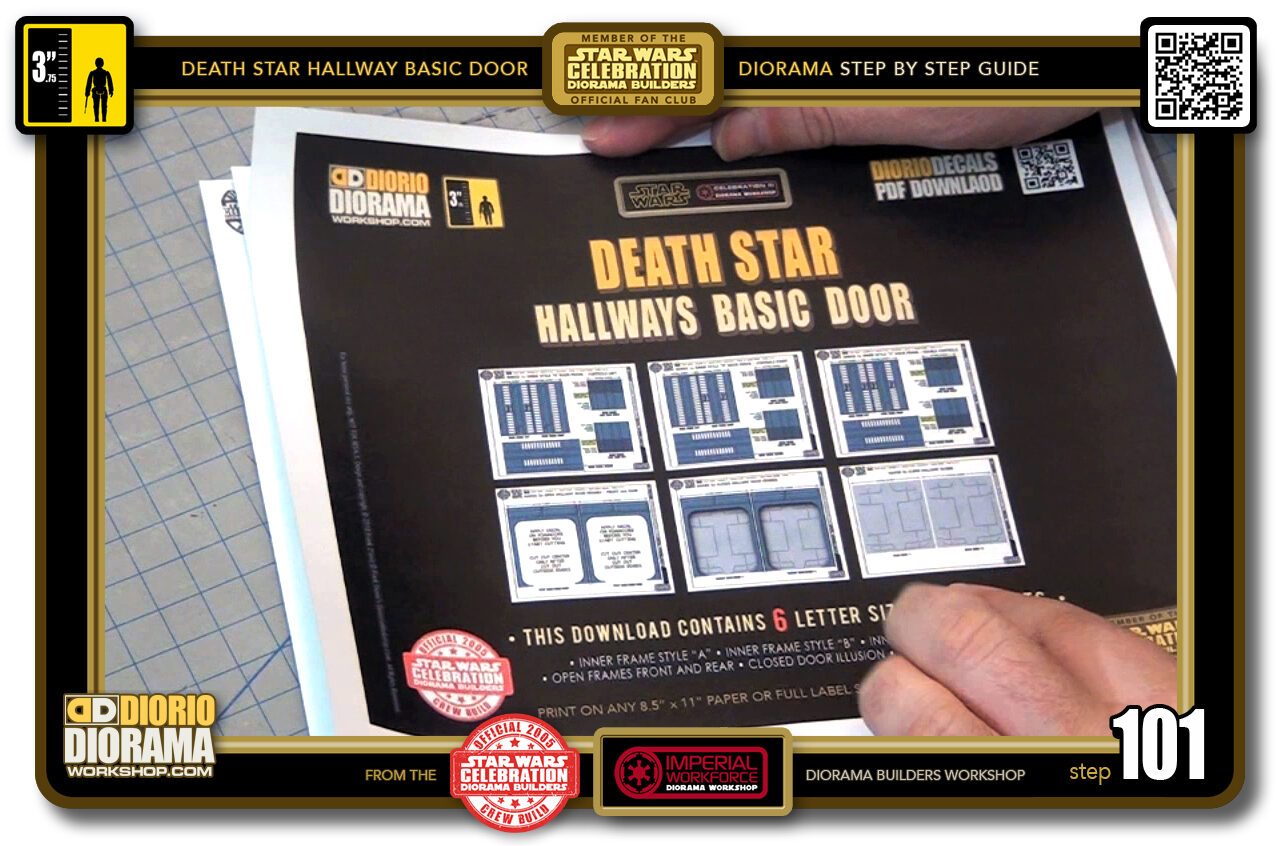
- STEP 101 > Time to prep the decals. There are 3 variation of door frames for you to select, Control Panels left side, Right side and Double sided Control Panels. The "A" Left side are the ones you see most often in the movie but the variations allow you to create the diorama just the way you want to.
-
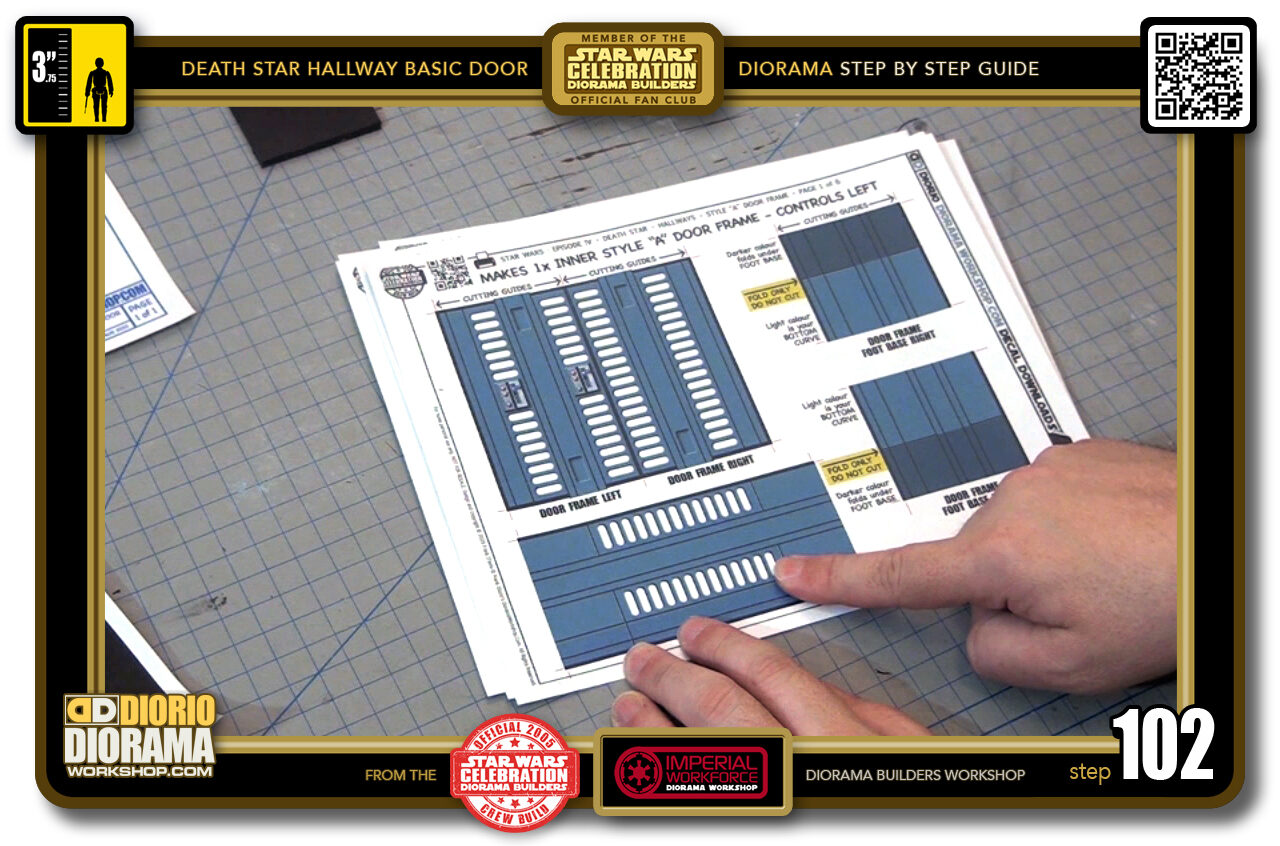
- STEP 102 > I am using Style "A" for my door.
-

- STEP 103 > Now if you don't want to spend 30 minutes making the real thing you can skip all of this and just use the decal on a piece of foamcore.
-
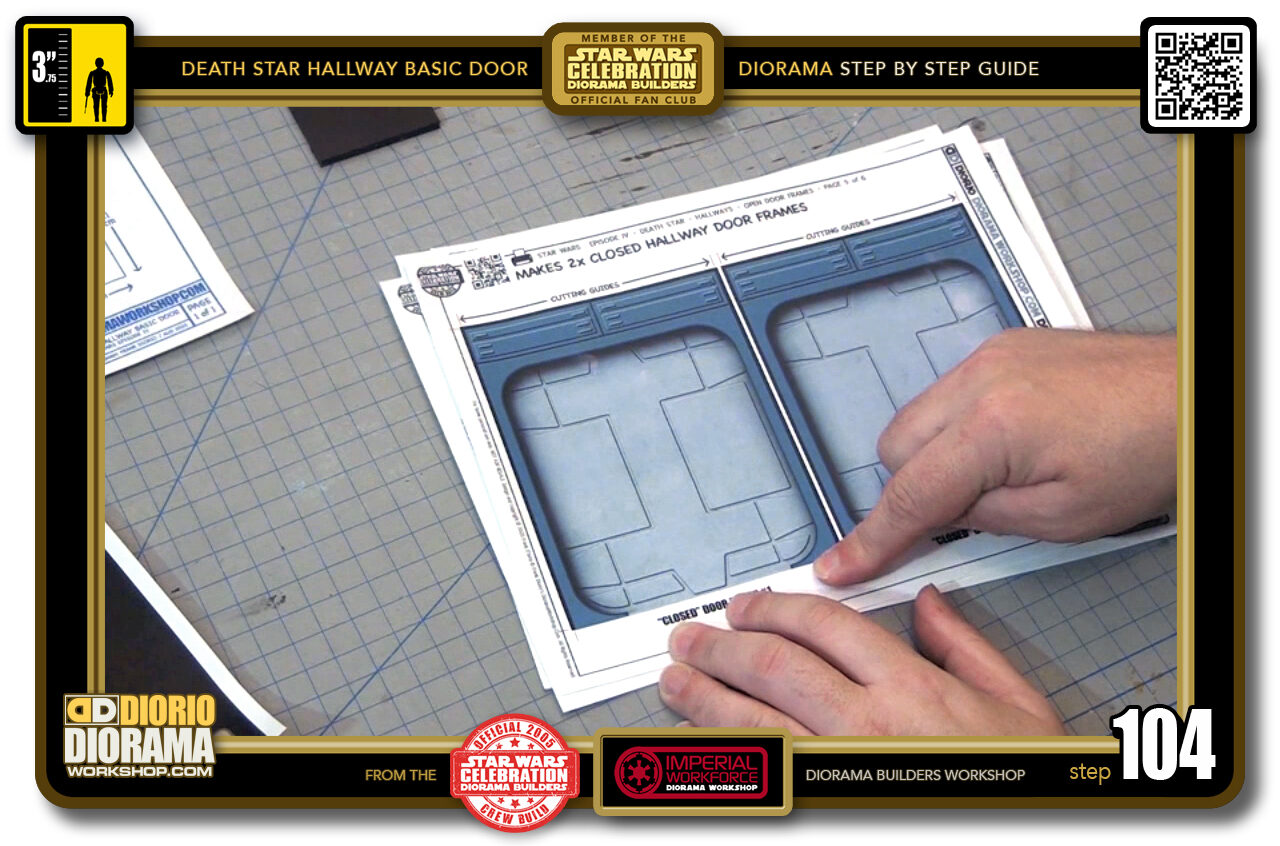
- STEP 104 > The closed door print option allows you to just stick this sheet on a plain foamcore and it will give you the illusion that it is 3D with the door shadow incorporated into the graphic.
-
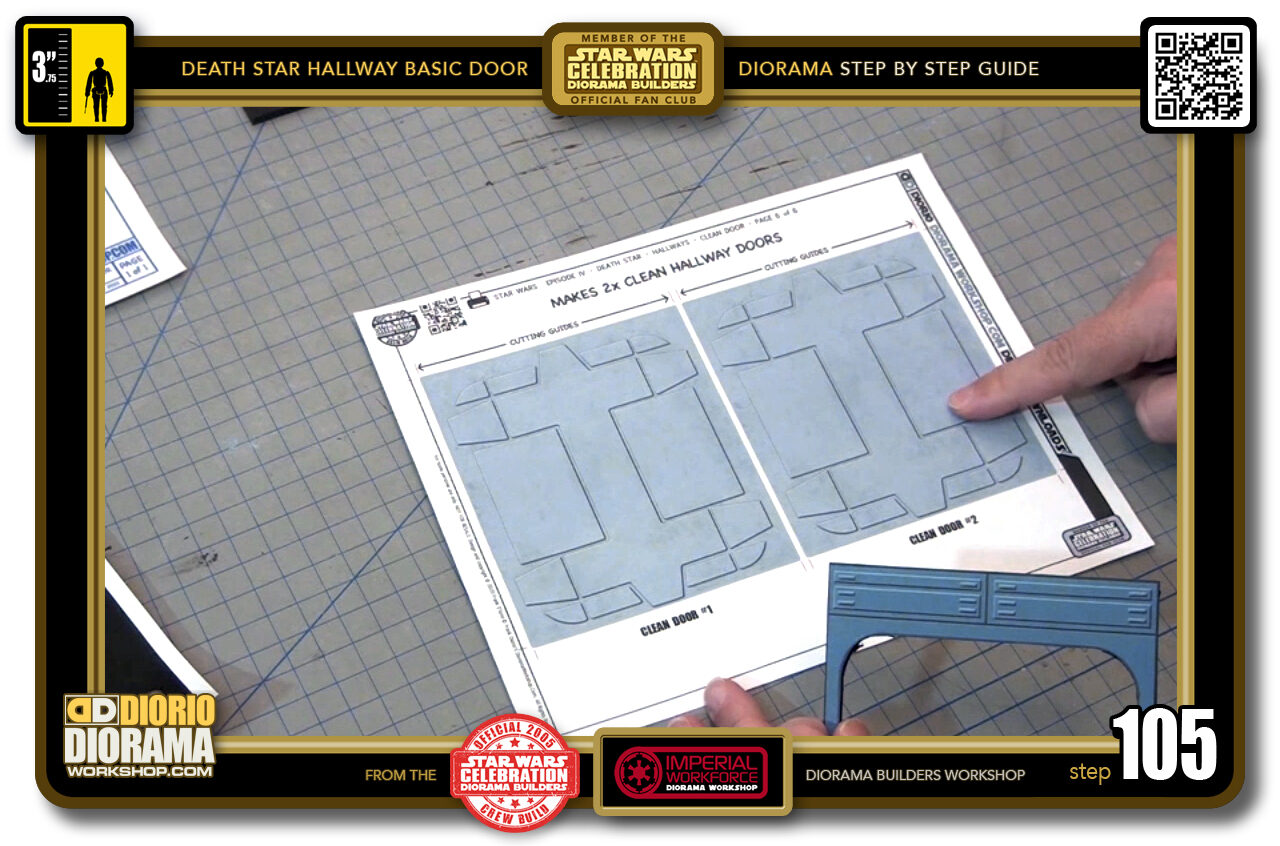
- STEP 105 > When you are making the real thing like I am you will be using the FULL DOOR decals. At the time I took the photos I realized that the door thickness skin was not created, So I made that and replaced this page in the FINAL PDF to include the 2 layers of door thickness at the bottom of the page.
-
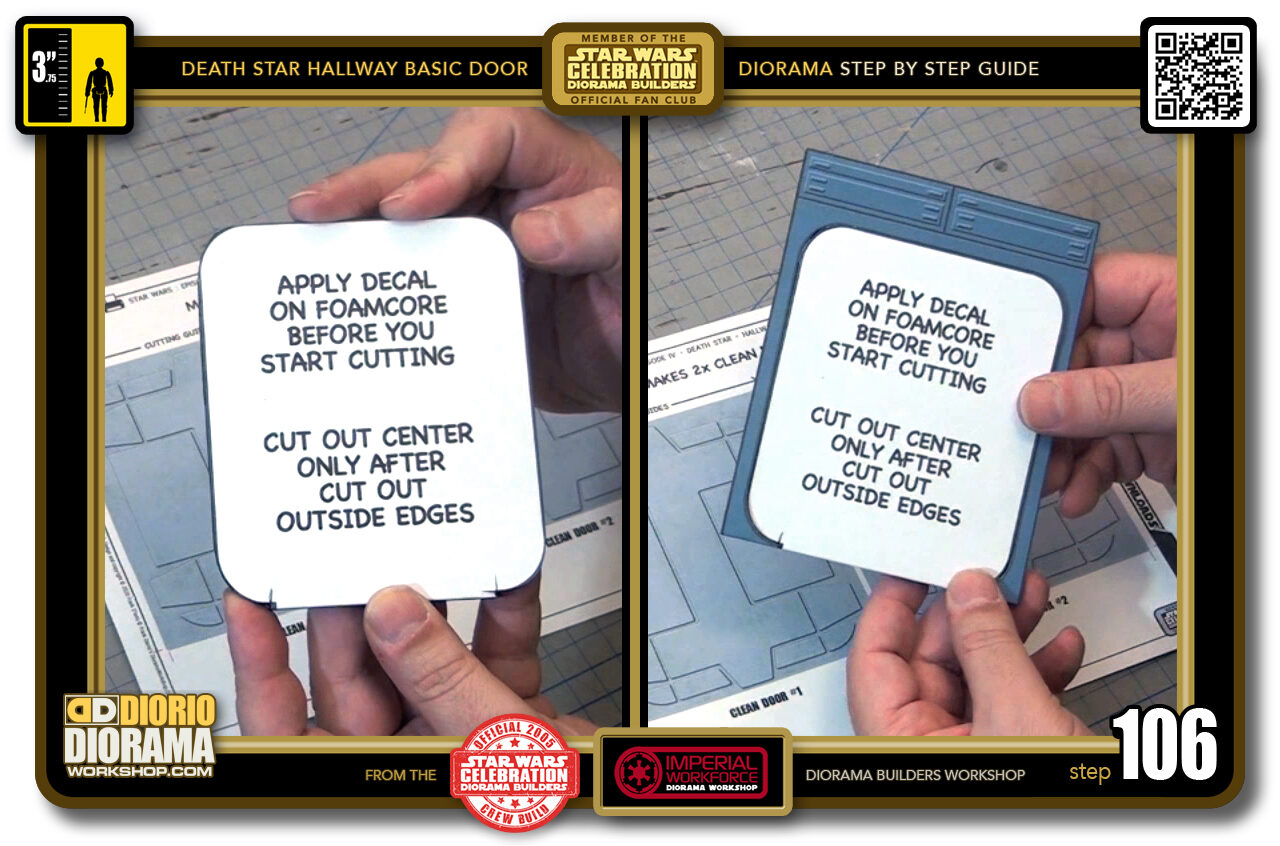
- STEP 106 > Now remember these door centres you cut out ? well this is where we will be applying the full door decals and then placing it back into it's frame for a perfect fit.
-
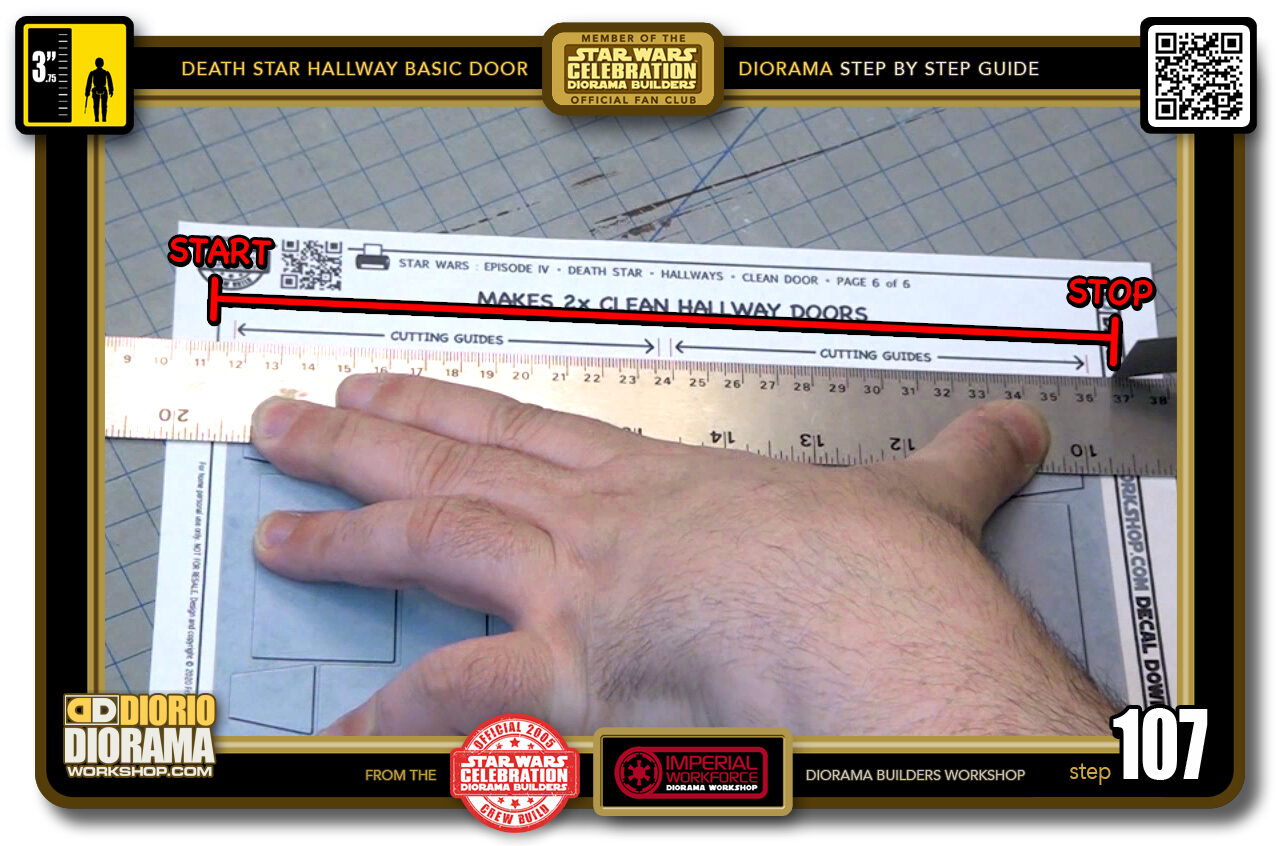
- STEP 107 > First thing to cut out is the horizontal lines. 2 important things in this step... 1) Align your ruler with the RED CUTTING GUIDES and 2) DO NOT SLICE across THE ENTIRE DECAL. You want to start just a little before the decal left edge and stop just a little passed the decal right edge.
-
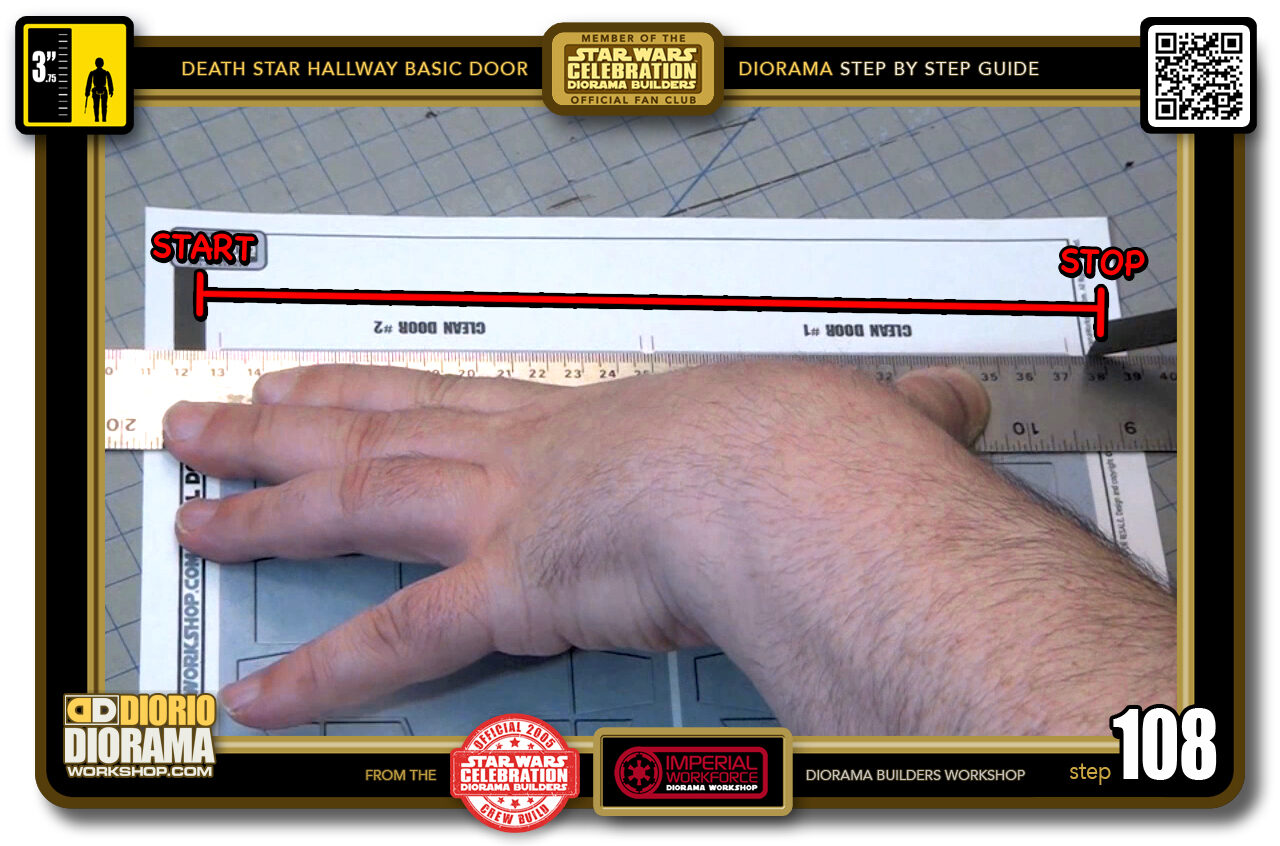
- STEP 108 > Flip your decal around and do the same thing, make sure to start and stop approximately where you see I did in the photo red zone.
-
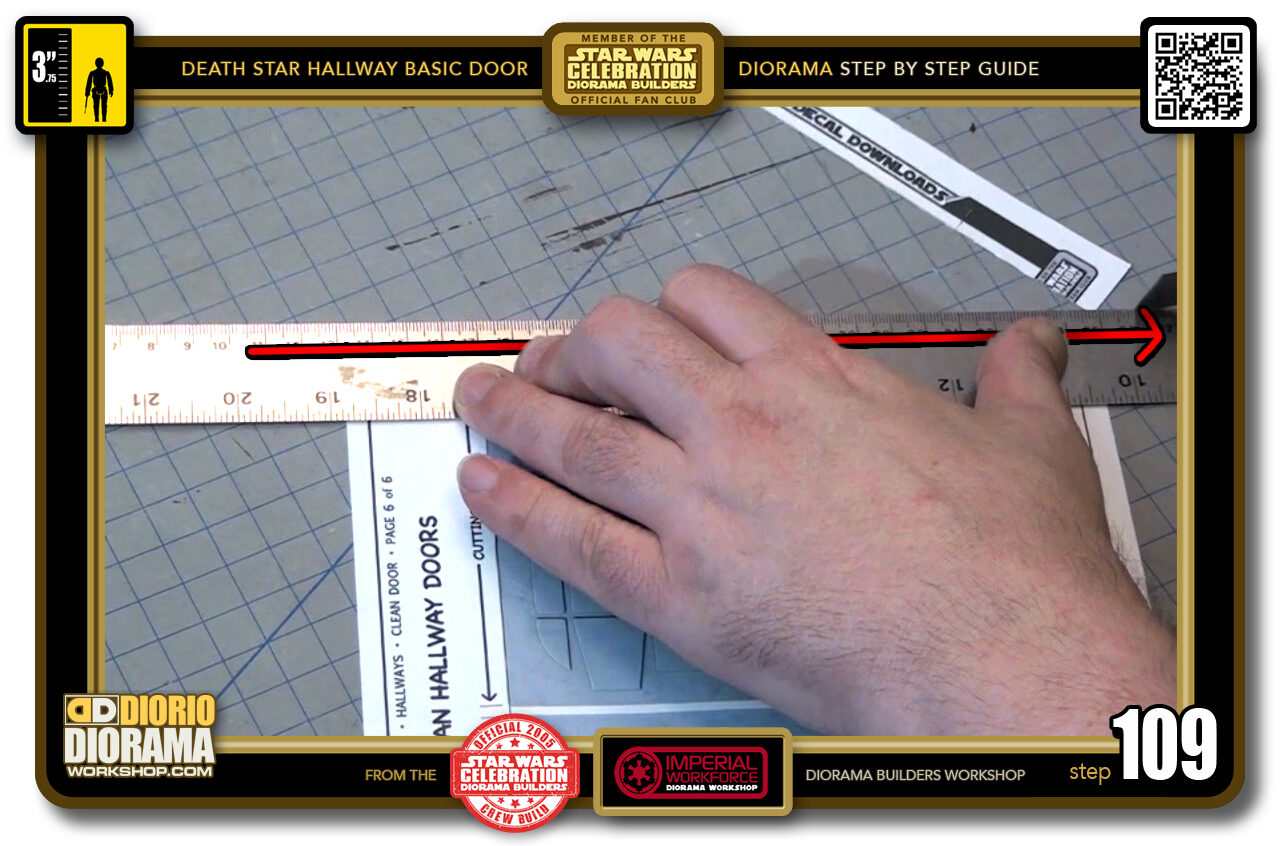
- STEP 109 > Now that the horizontal slices are done, we can start cutting all the way across if you want to. Just make sure to have your ruler align with the RED CUTTING GUIDES before slicing with your X-Acto knife.
-
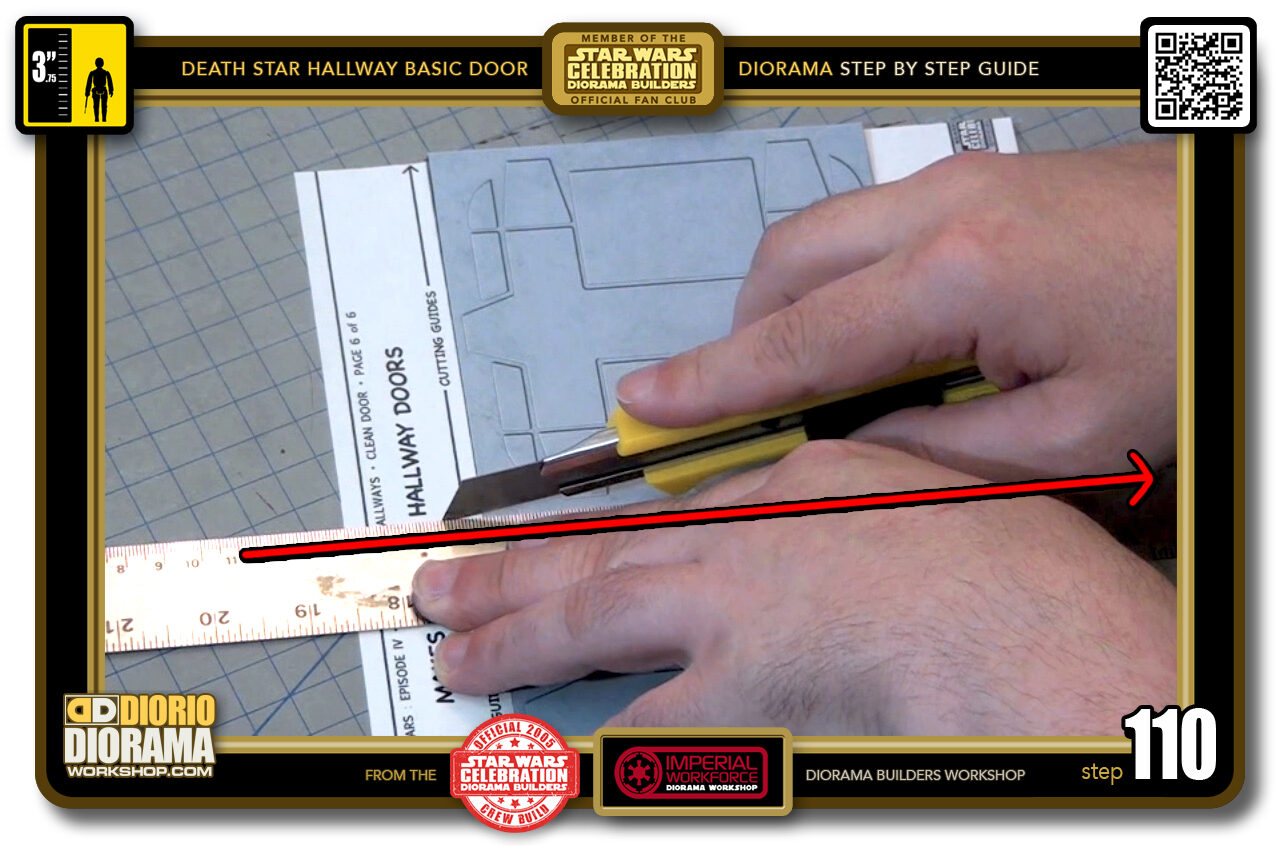
- STEP 110 > Do the same thing on the other side of the door.
-
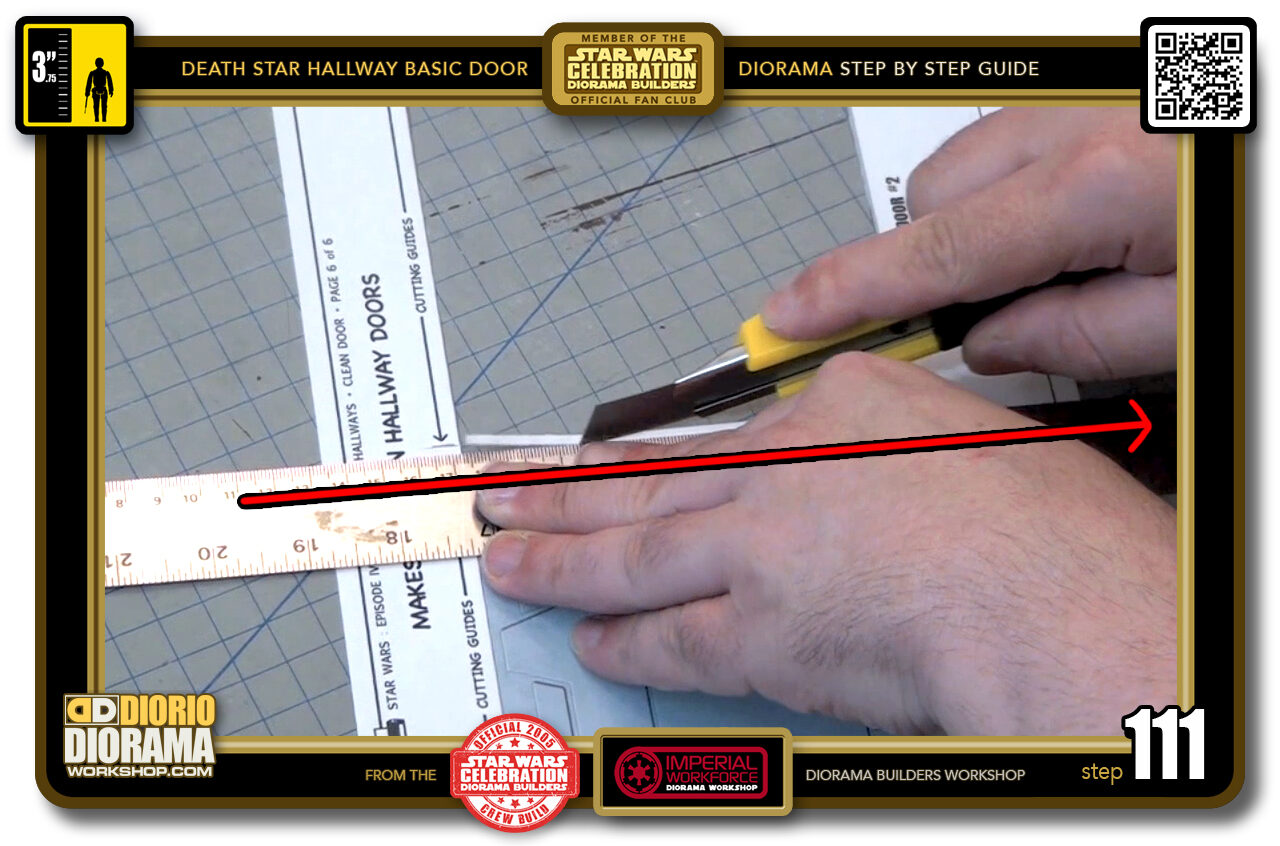
- STEP 111 > Move to Door #2, first cut on the right side.
-
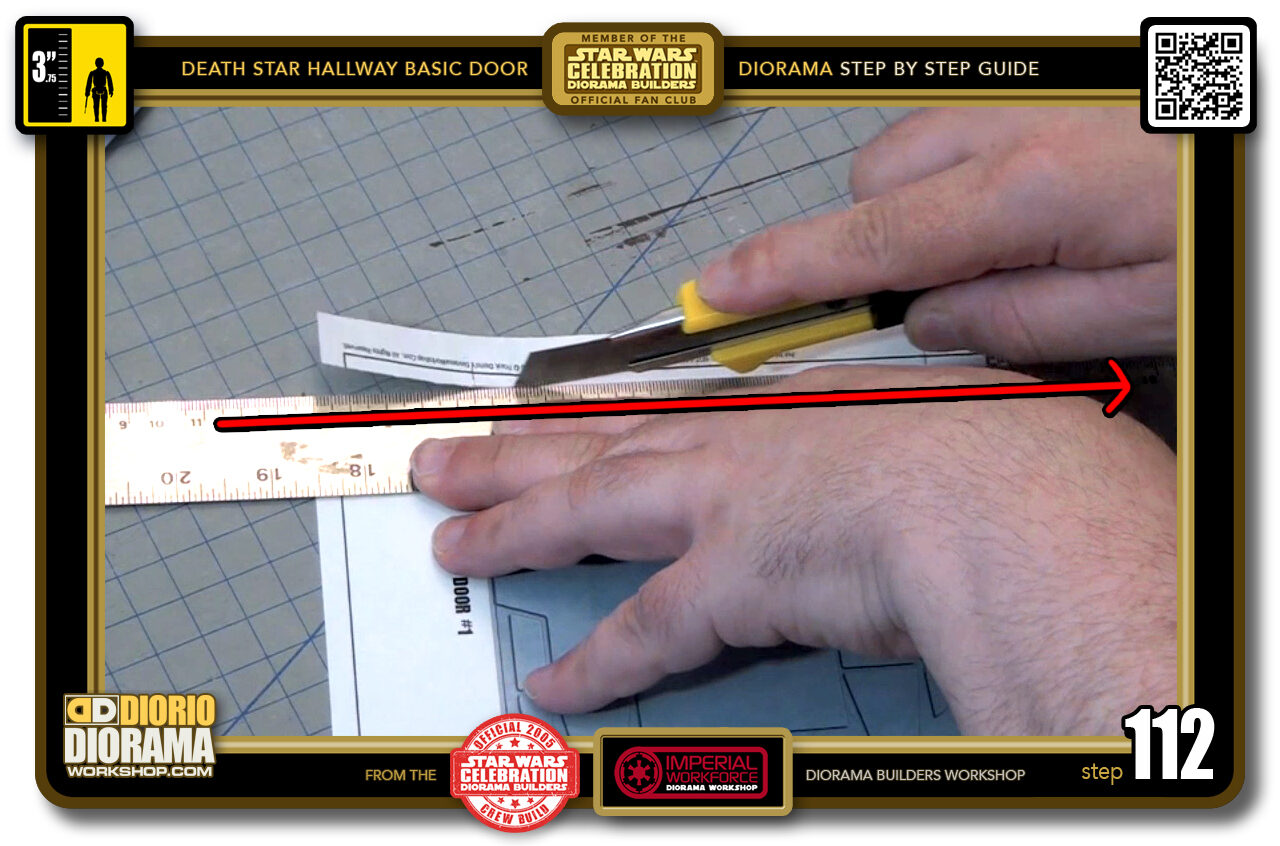
- STEP 112 > And one last cut on the remaining door side.
-
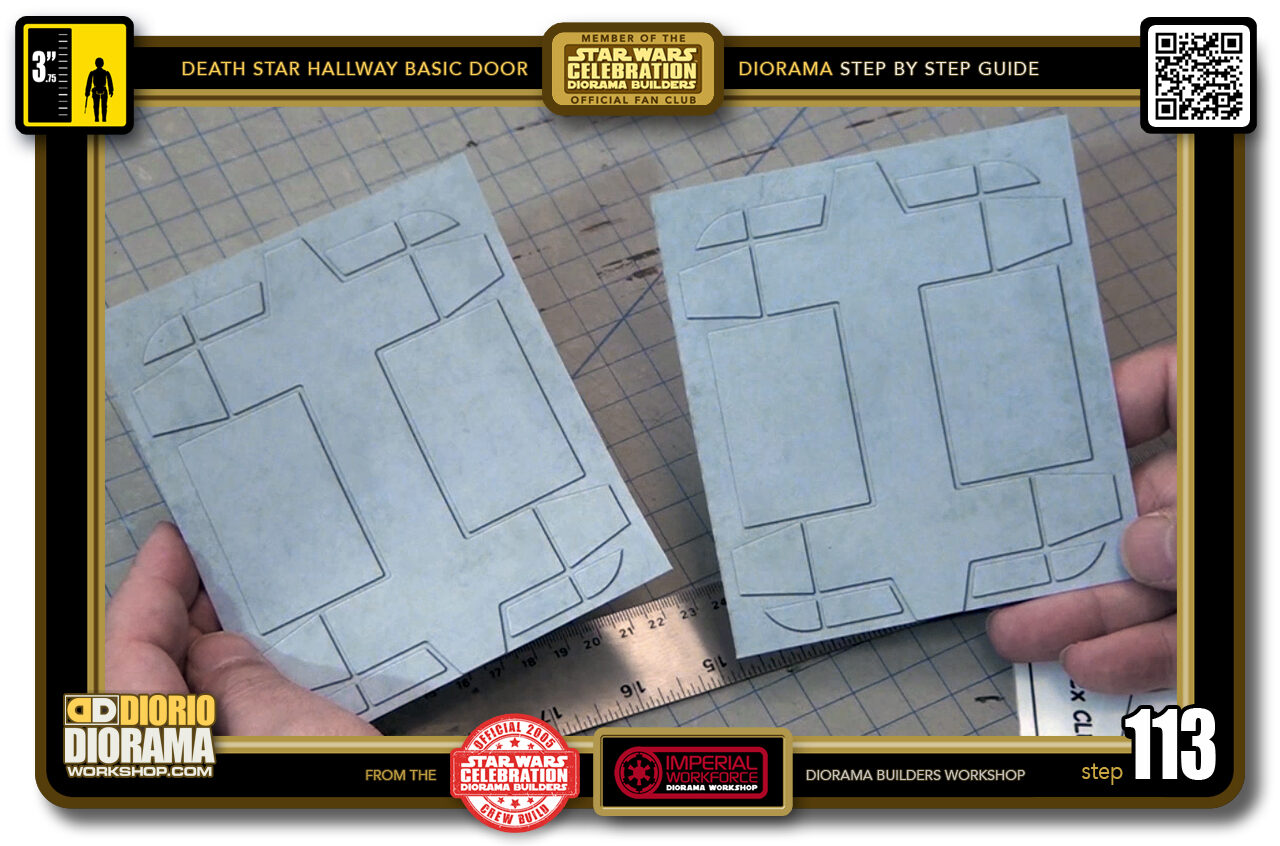
- STEP 113 > You now have 2 perfect full door decals.
-
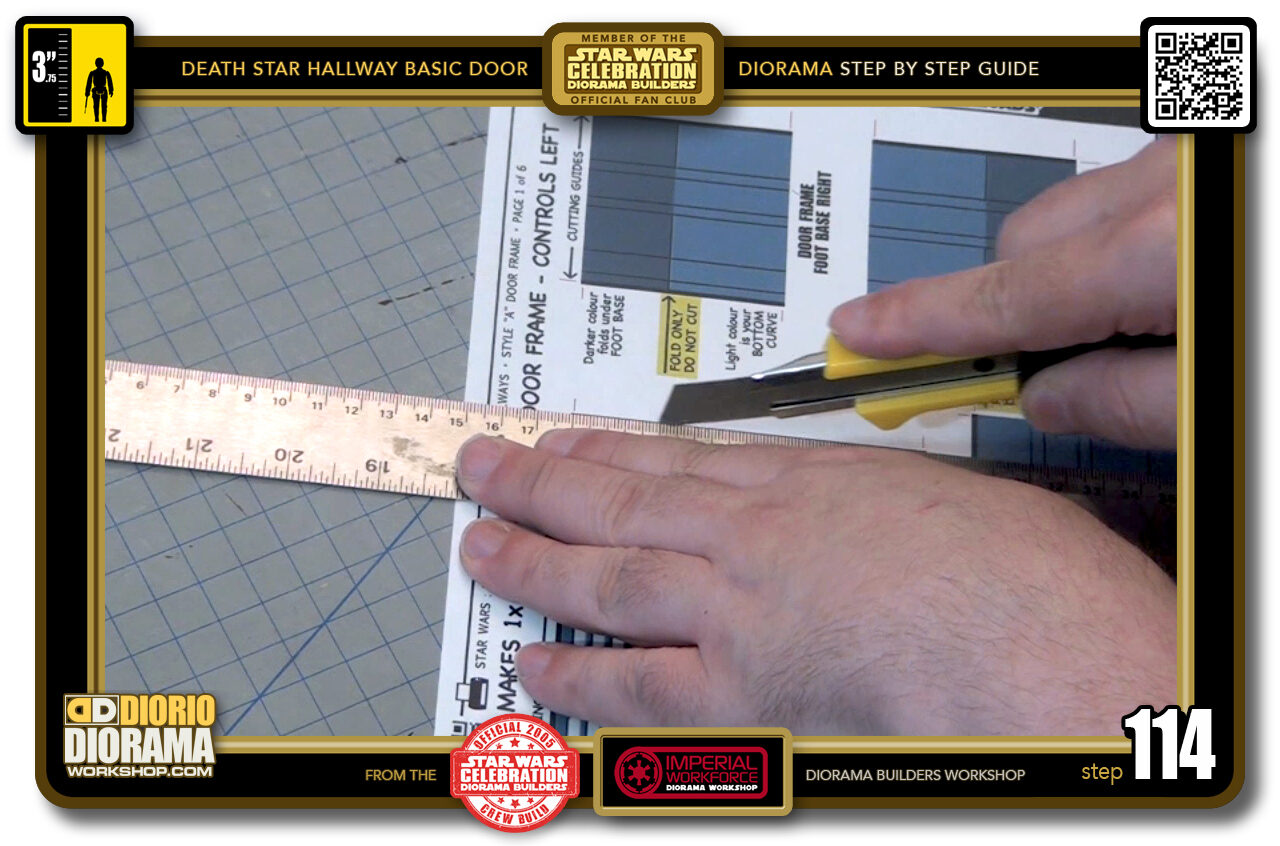
- STEP 114 > For the main page and inner skins, FOLLOW the RED CUTTING LINES and because there are multiple decals on the sheet, start and stop just beyond each of the actual decals area.
-
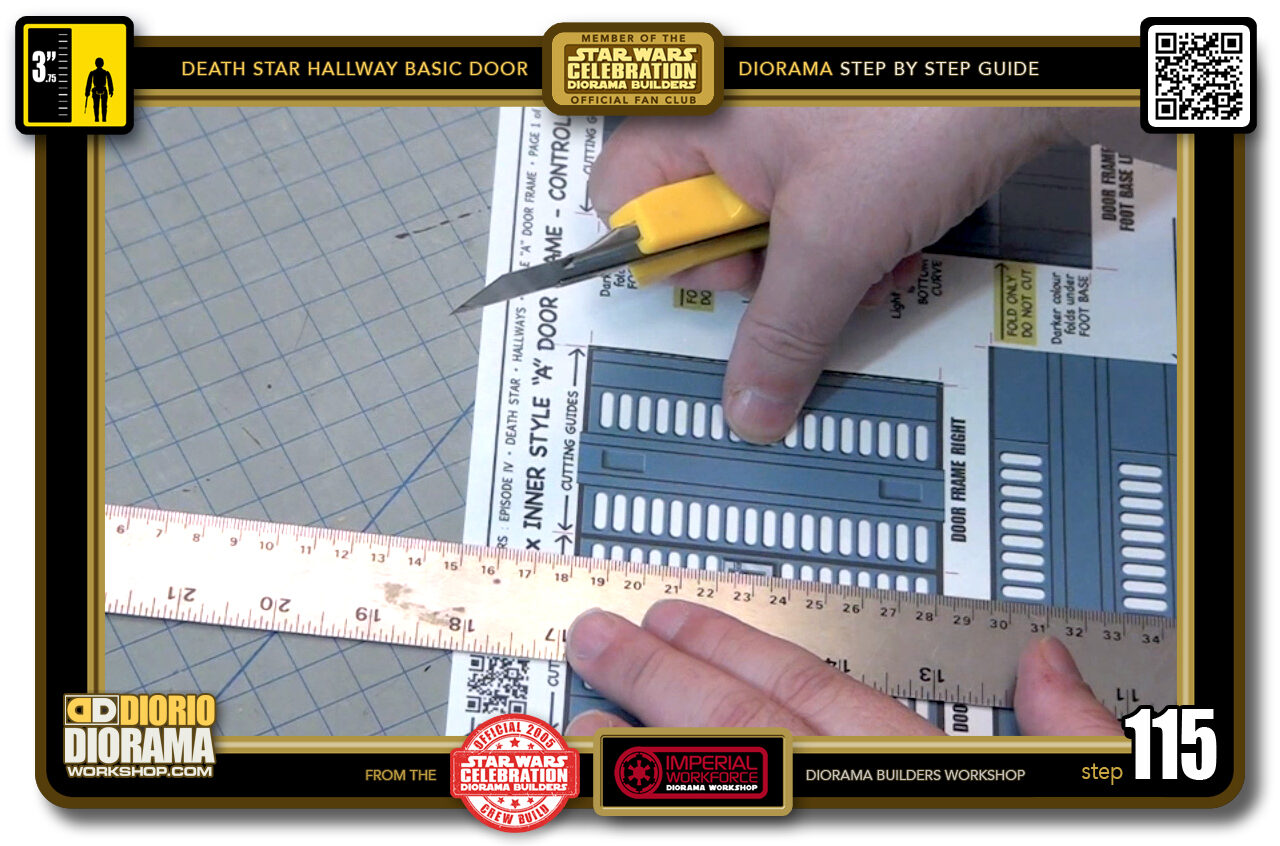
- STEP 115 > Some decals like the sides here have LINE DETAILS - you DON'T want to slice off these. STAY WITH the RED CUTTING GUIDES.
-
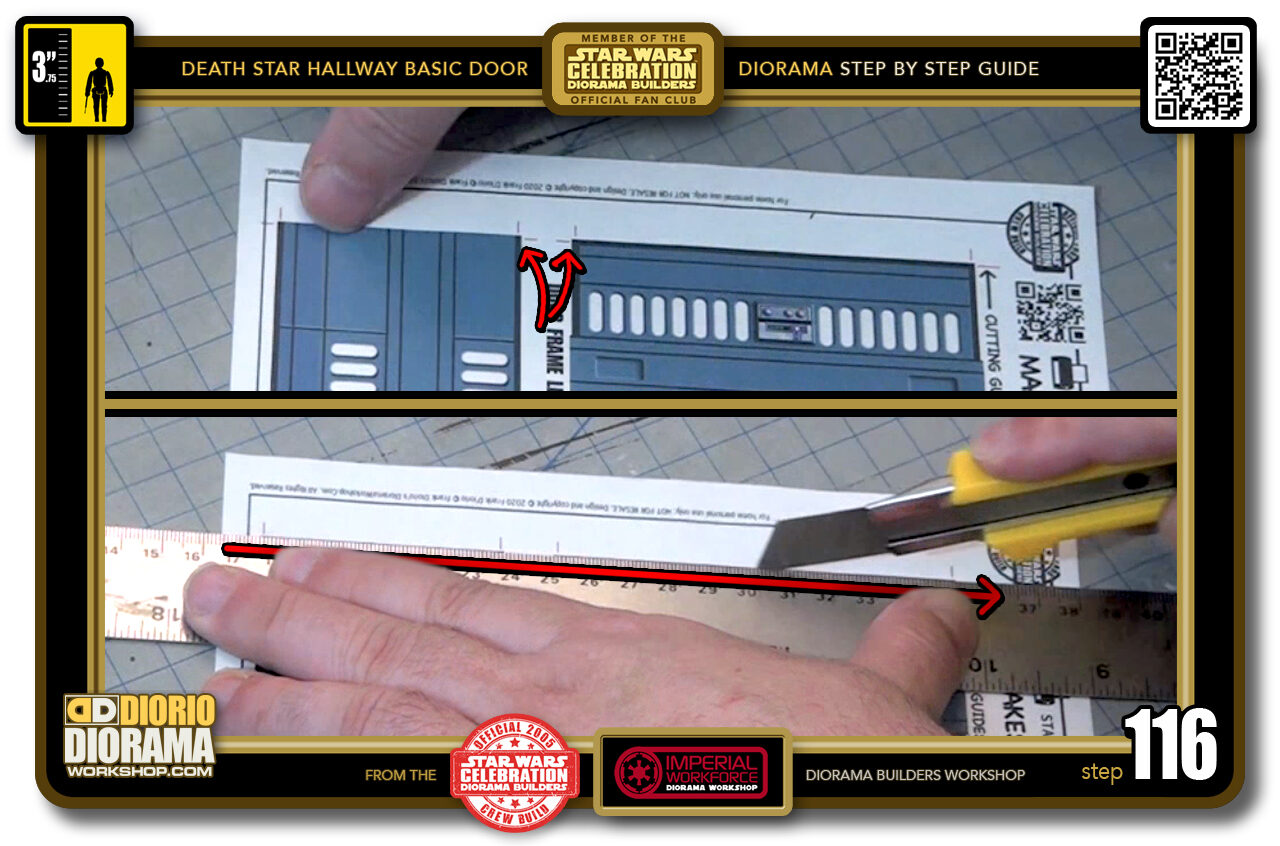
- STEP 116 > For this side of the page I did it on purpose to align the 2 decals so that your ruler will connect with both at the same time, allowing you to make 1 slice instead of 2.
-

- STEP 117 > When all your vertical lines (if you started with horizontal, you would be moving on to vertical) are done move on to the horizontal sides.
-
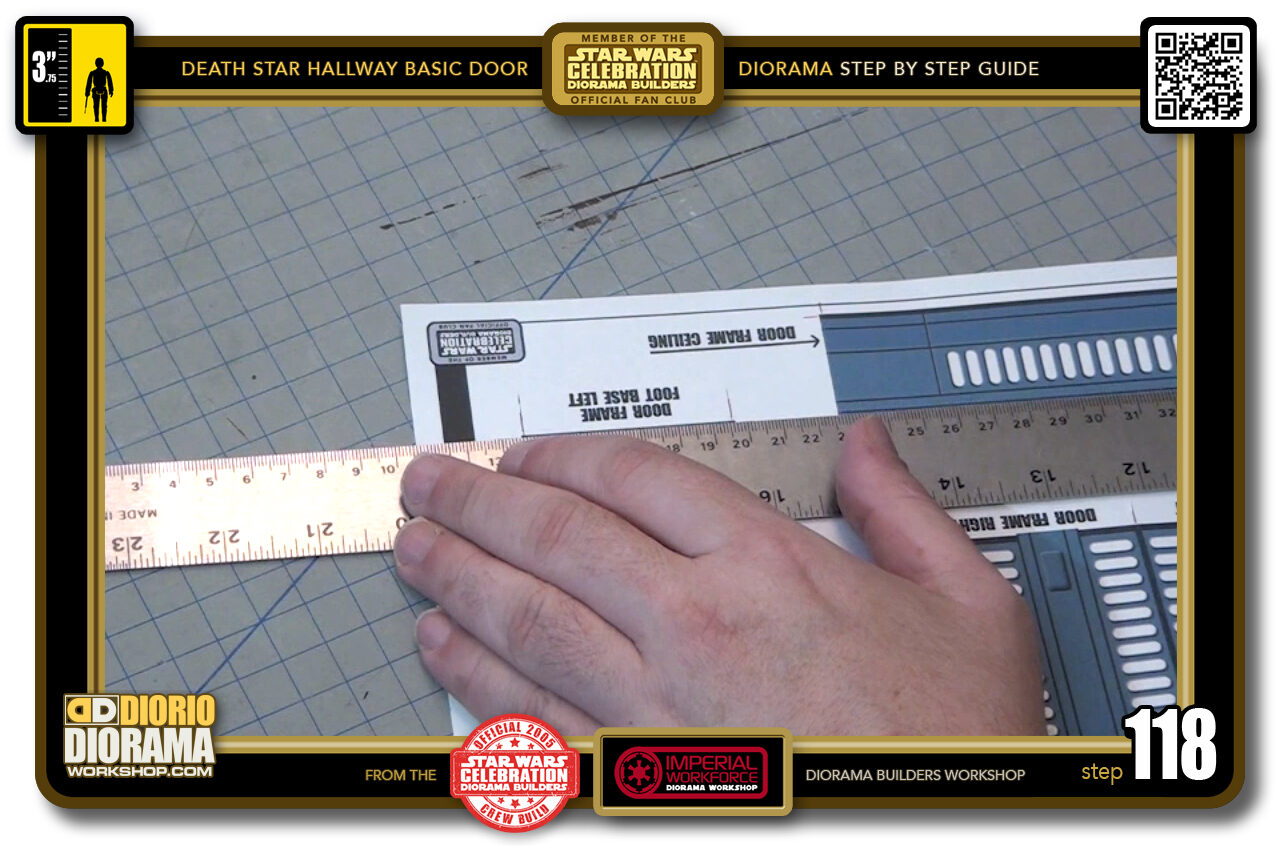
- STEP 118 > Continue to align those RED CUTTING GUIDES that is what is most important.
-
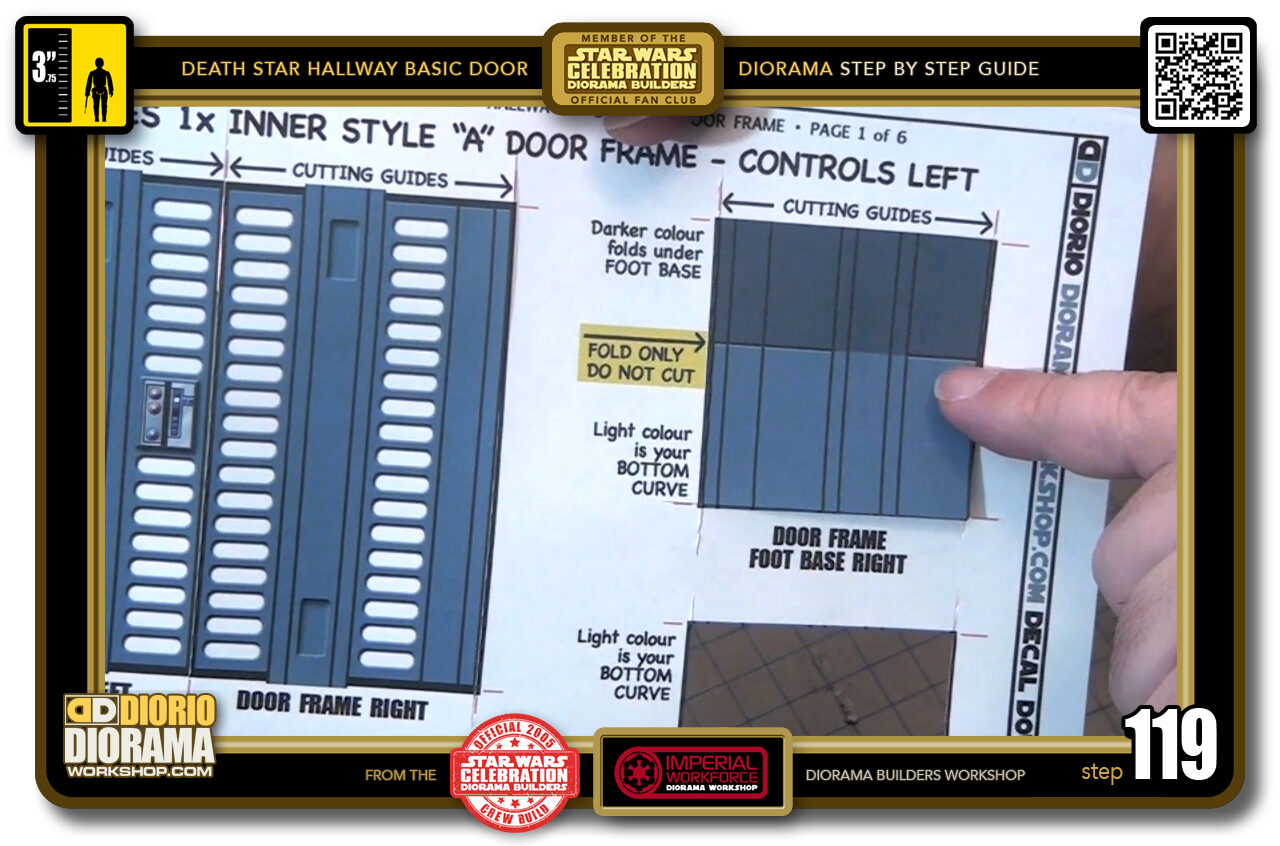
- STEP 119 > Now for these 2 "FEET" skins, you will notice how there is a light and dark colour. This is your FOLDING GUIDE LINE - DO NOT CUT here, CUT ONLY where your 2 RED CUTTING GUIDES connect.
-
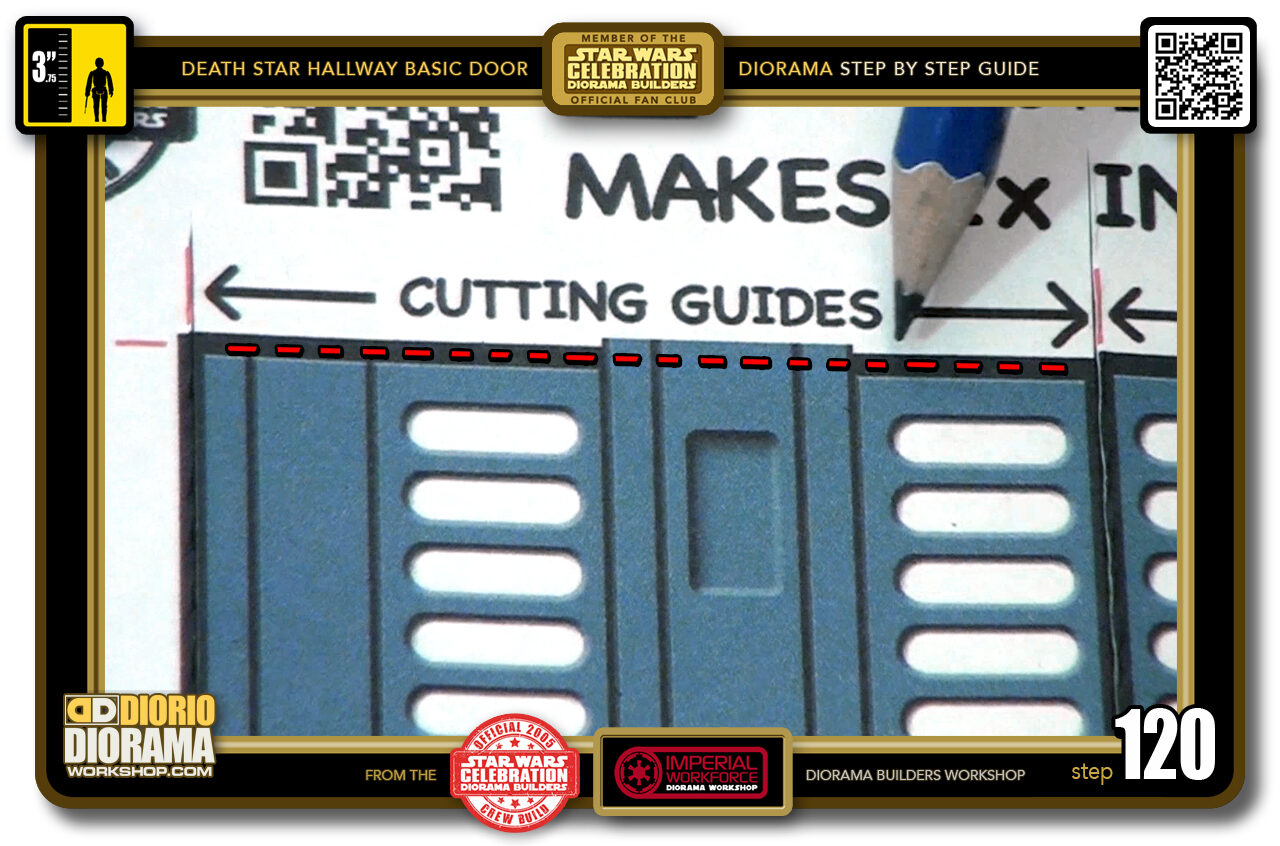
- STEP 120 > As for the side wall skins, you will see how the centre part where the door slides up and down in the movie, is slightly higher. This is normal to give you a clean connection later on. When you align both of your RED CUTTING GUIDES, the slice will cut across just as you see along the dotted lines. That is what you want.

.
Did you already build this Diorama ? At home or at our Star Wars Celebration Diorama Builders workshop ? Would you like to show it in the site’s GALLERY VISITORS DIORAMAS section, YES ? That is Awesome !!! You can find out all the details on how to email me your photos on the VISITORS SUBMISSIONS INFO page … When I get your photos, I will create your very own page just like this one. You may not realize it but work does inspire others to join in the fun of making Action Figure Dioramas.
.
NOT FOR RESALE ALL Decals, tutorials and artwork are ©FrankDiorio (dioramaworkshop.com) and offered FOR FREE to the fans – that would be you ? so you can build and display my diorama designs in your very own home. I realize I cannot control what one does with my graphics once I place them on the web, I can only ask you as one fan to another, please respect the artist and do not be that jerk who uses my designs and tutorials to build a copy of my work only to sell it on EBAY or trade/sale groups and forums. Thank You. Frank.
.
.
If you have a facebook account, why not join the Official Diorama Builders Fan Club today, simply click the logo link below.
 .
.
Catch up with fellow visitors and exchange stories, read cool interviews with the crew, exchange photos, fun surprises and grab some FAN ONLY merchandise next year at actual future conventions ?
.
©2018 Frank Diorio DioramaWorkshop.Com
.
IF YOU LIKE WHAT YOU SEE, PLEASE SHARE WITH YOUR FRIENDS
USING THE SOCIAL MEDIA BUTTONS BELOW