


-

- STEP 301 > Because you used the same centre that you cut it should fit just like a puzzle piece. What we want to do is push it deeper past the original foamcore frame until it reaches the emboss effect lines you see in the movie.
-
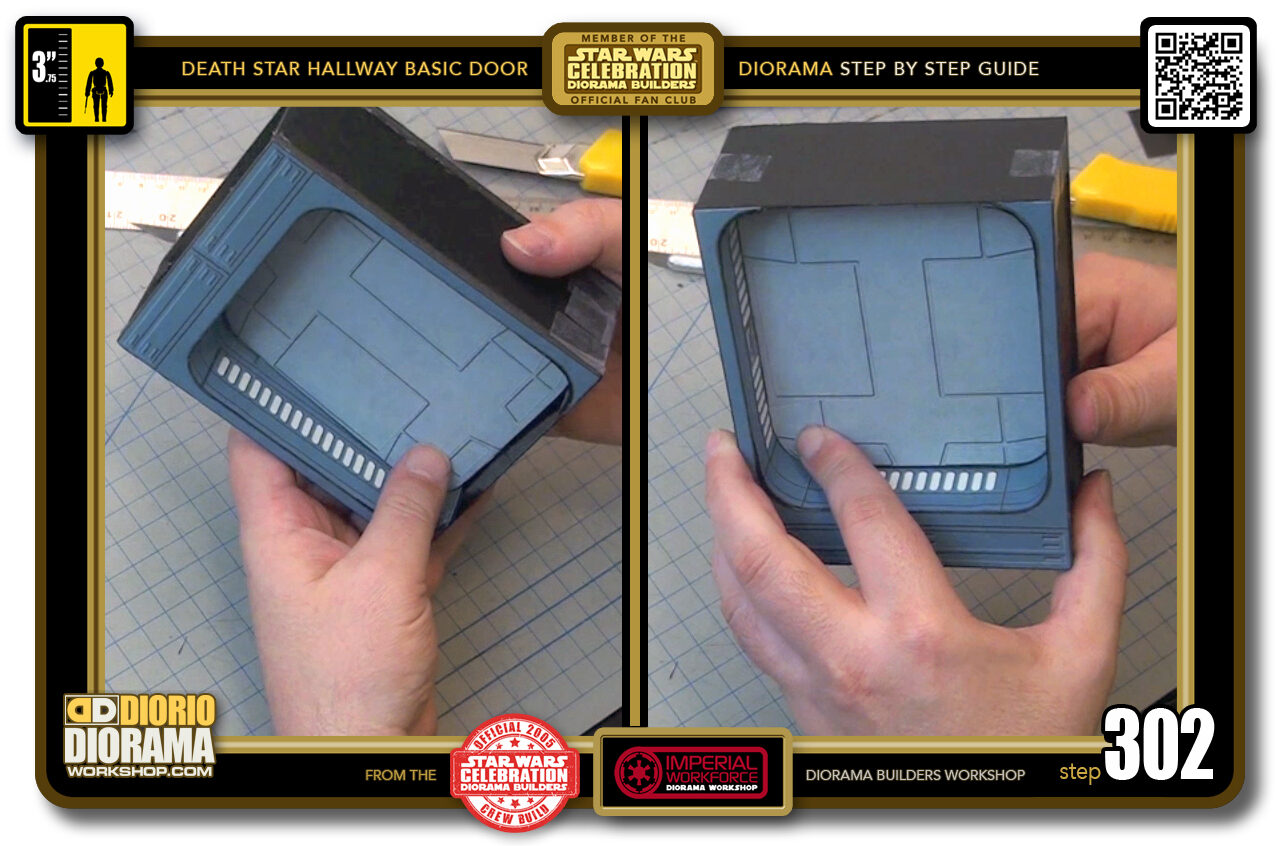
- STEP 302 > So wiggle it around, angle it, push it deeper, oops too deep, bush it back towards the top...
-

- STEP 303 > See these guide lines, this is exactly where you want each edge of the door to line up with.
-

- STEP 304 > All the way around, it's really not that hard and when in place, it might give you a BIG SMILE like I got 😀
-

- STEP 305 > Now if you look at the other side of the door, you will see the guide line does NOT line up. This is because when you select to display the FULL CLOSED DOOR as in this case, you only need ONE thickness of foamcore, as you will never see the other side.
-

- STEP 306 > Now if you are doing an OPEN DOOR, then you will need to DOUBLE it to the proper thickness. More on this later.
-

- STEP 307 > SO for your CLOSED DOOR Diorama displays you are DONE - FINITO - BRAVO. Insert it in between your basic Hallway Panels and you will instantly capture the feel of the Star Wars Death Star movie set.
-
-
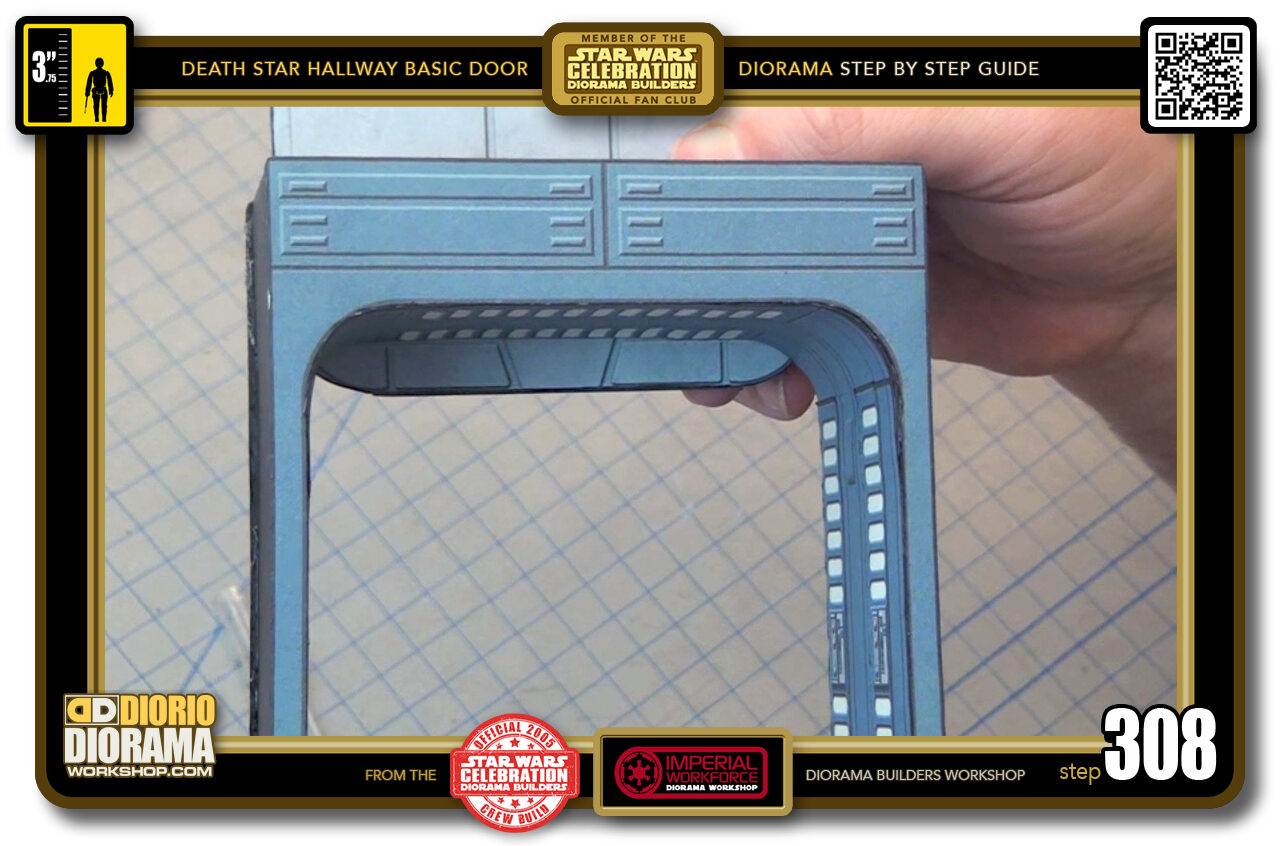
STEP 308 > Now if you want to have it OPEN and use it as a frame to see past it and add depth to your diorama then you will need to thicken it.
There are really 2 positions in the movie.. the OPEN DOOR you see here... 95% of the time a little peeks out just like this, though other times there is nothing, thus for OPEN DOORS you can just stop here as well and just not put any door inside the frame.
-

- STEP 309 > If you want it to peek out just a little, you would slice it aprox this dotted line here just at the first emboss effect.
-
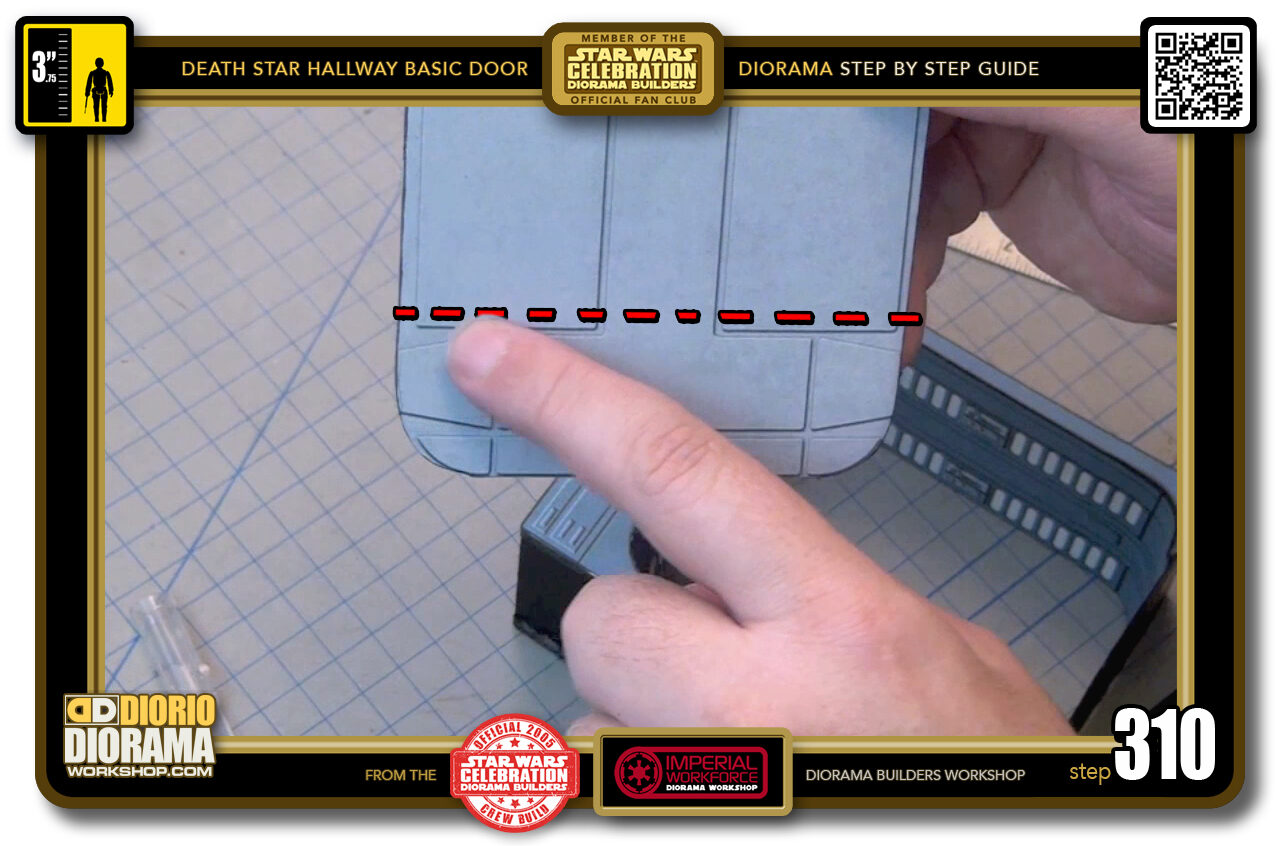
- STEP 310 > Now if you want to have some fun in your display and recreate the easter egg of the stormtrooper actorentering the Red Room and slaming his head in the door because he was too tall - LOL - then you would use this height. The red dotted line matches up to where the 2nd emboss effect is located.
-

- STEP 311 > So let me show you how to do the joke door for your diorama. Start with your 2nd full door decal. Align the ruler at the 2nd emboss line.
-
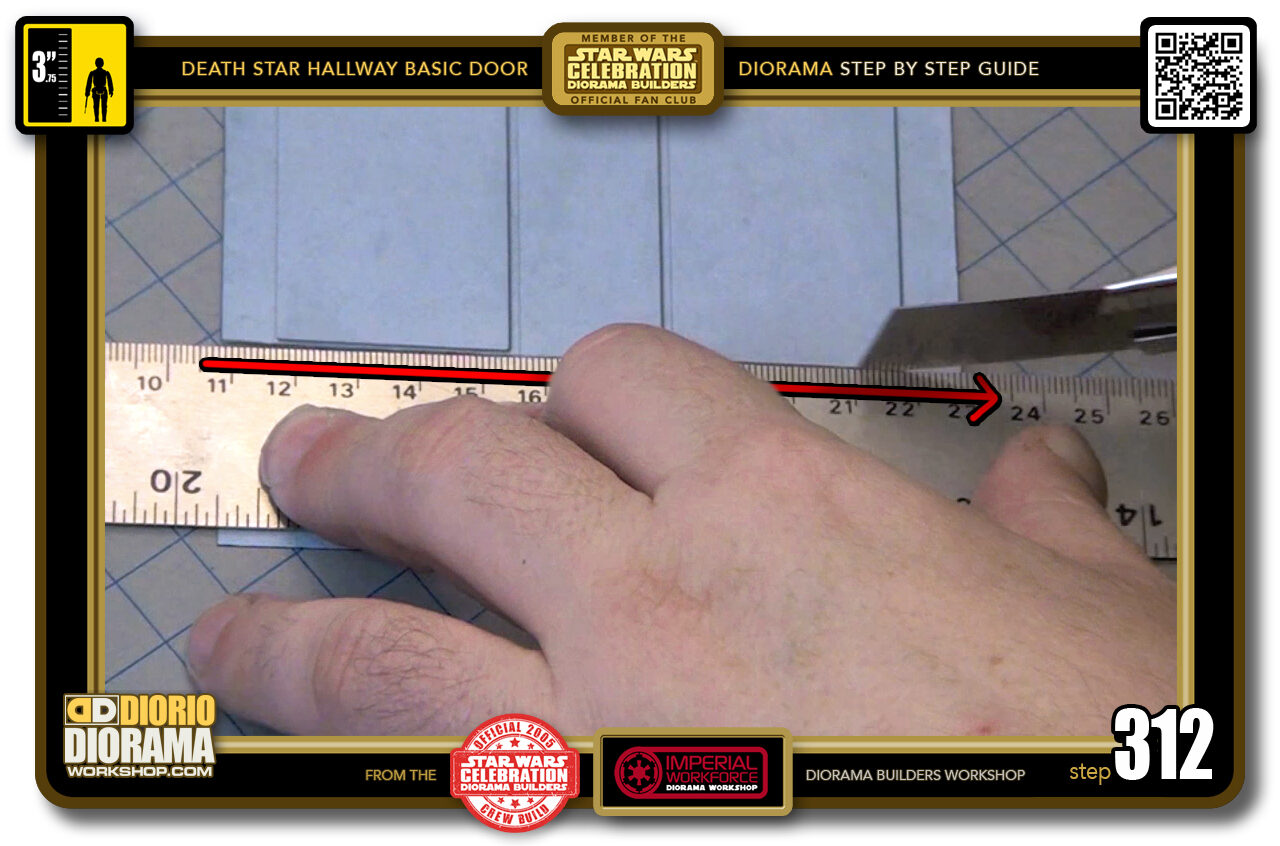
- STEP 312 > Hold your ruler secure in place and slice all the way across.
-

-
STEP 313 > Now we are gonna use the 2nd foamcore door you popped out when doing your 2nd door frame.
It is IMPORTANT TO NOTE : In the movie, when the door lifts up, the bottom is FLAT at the ends, NOT CURVED as we did when doing the FULL CLOSED DOOR version. Because of this, we don't want to apply the decal to the bottom edge which is missing the tips. So place your gluestick all across the door but high enough to bypass the curves. Somewhere in the area of the dotted red lines.
-

- STEP 314 > Peel back the bottom door decal.
-
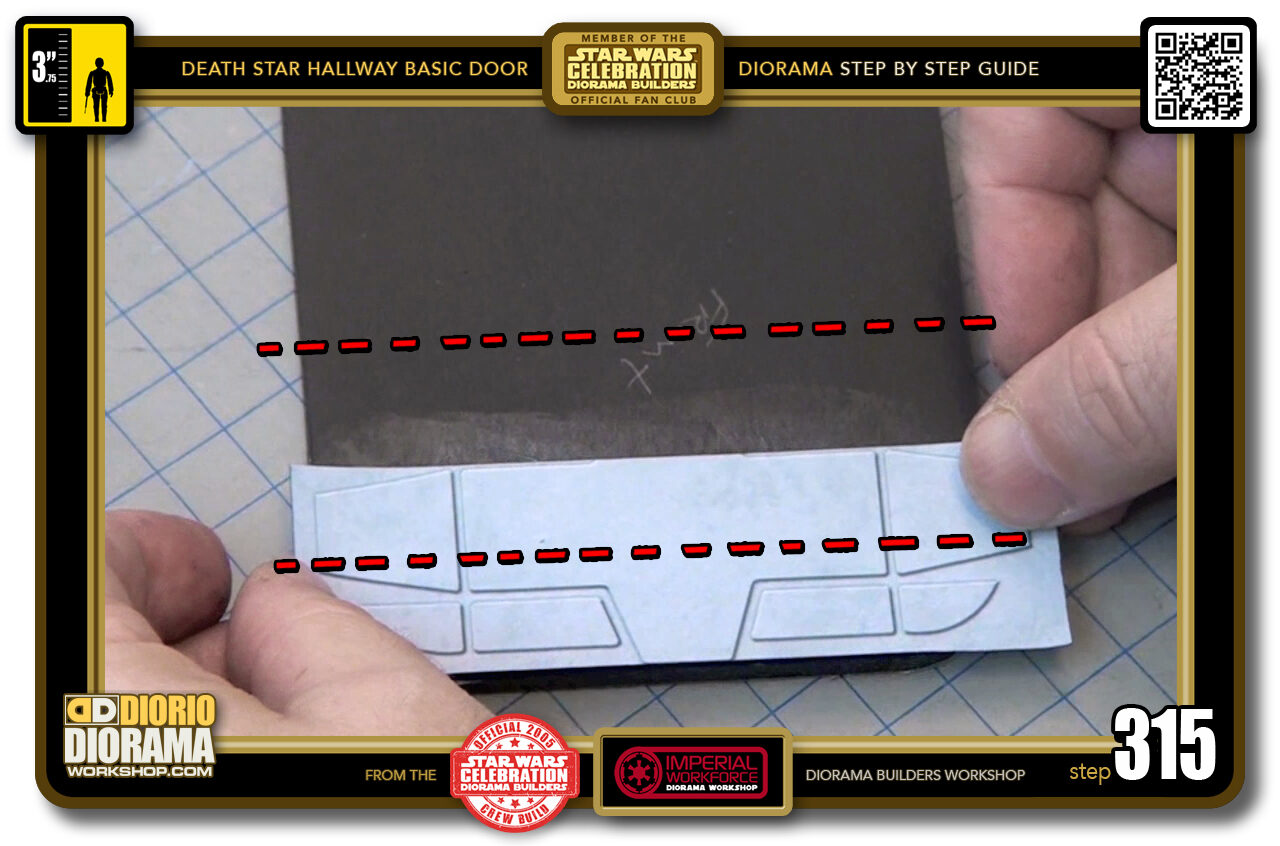
- STEP 315 > Now DO NOT ALIGN IT LIKE THE PHOTO !!! This is where you DON'T want to place it. RAISE IT till you get into the red dotted line zone.
-

- STEP 316 > Now flip the door over, and slice off and decal that is peeking out from the sides.
-
-
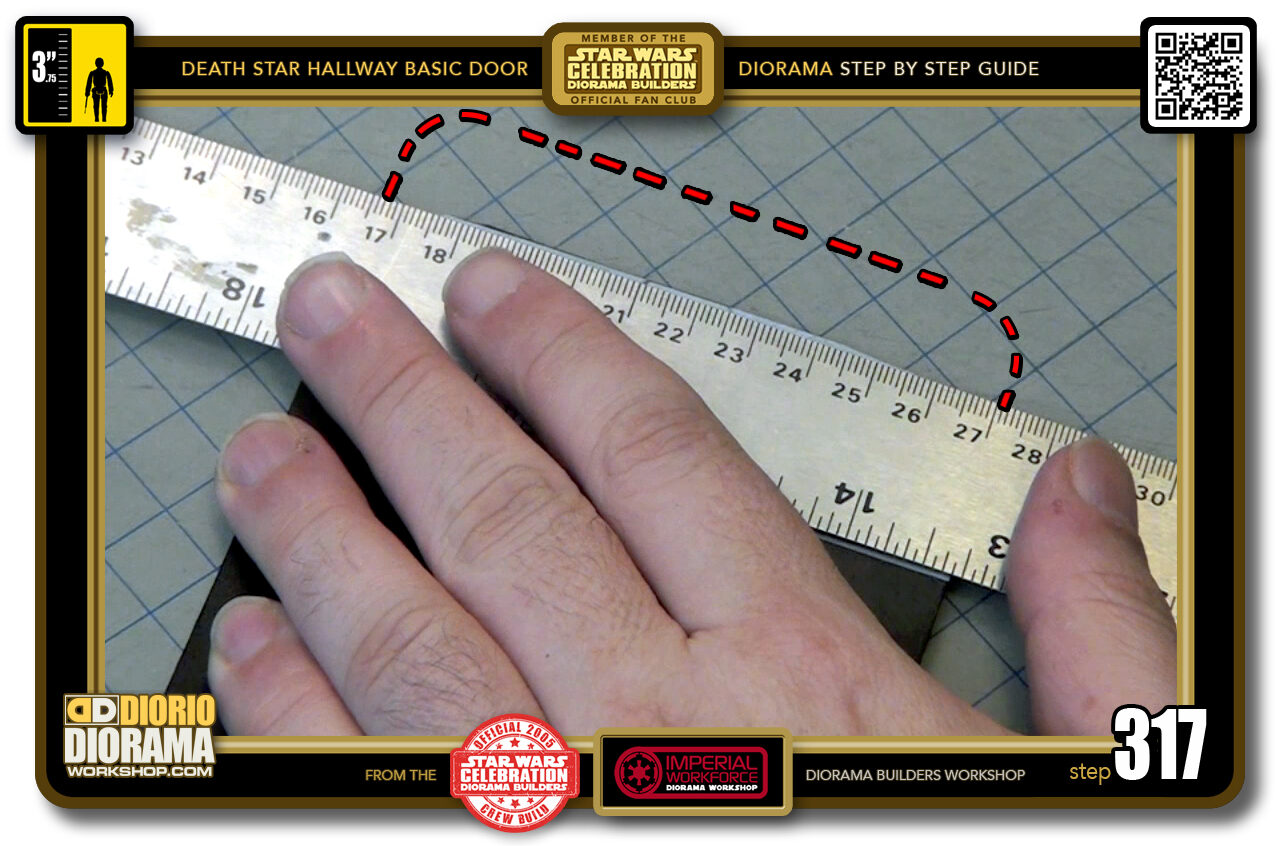
STEP 317 > Now this photo maybe confusing because I took it when I placed my decal at in the wrong area at first before realizing it. So let me explain, the red dotted line is what your shape would look like now with you having raised the decal up to avoid it being on top of the cut corners as you see here.
SO the ruler is lined up with the sticking out "V" emboss shape at the very bottom of the door decal. Just trim this so that you get a cleaner bottom edge. SEE STEP 319 TO BETTER UNERSTAND WHERE YOU ARE CUTTING.
-

- STEP 318 > So slice off that excess bottom, in YOUR CUT, you will NOT have a simple sliver like in the photo, but more like a 1 inch piece since you raised the decal past the original curved bottom. Does this make sense ?
-
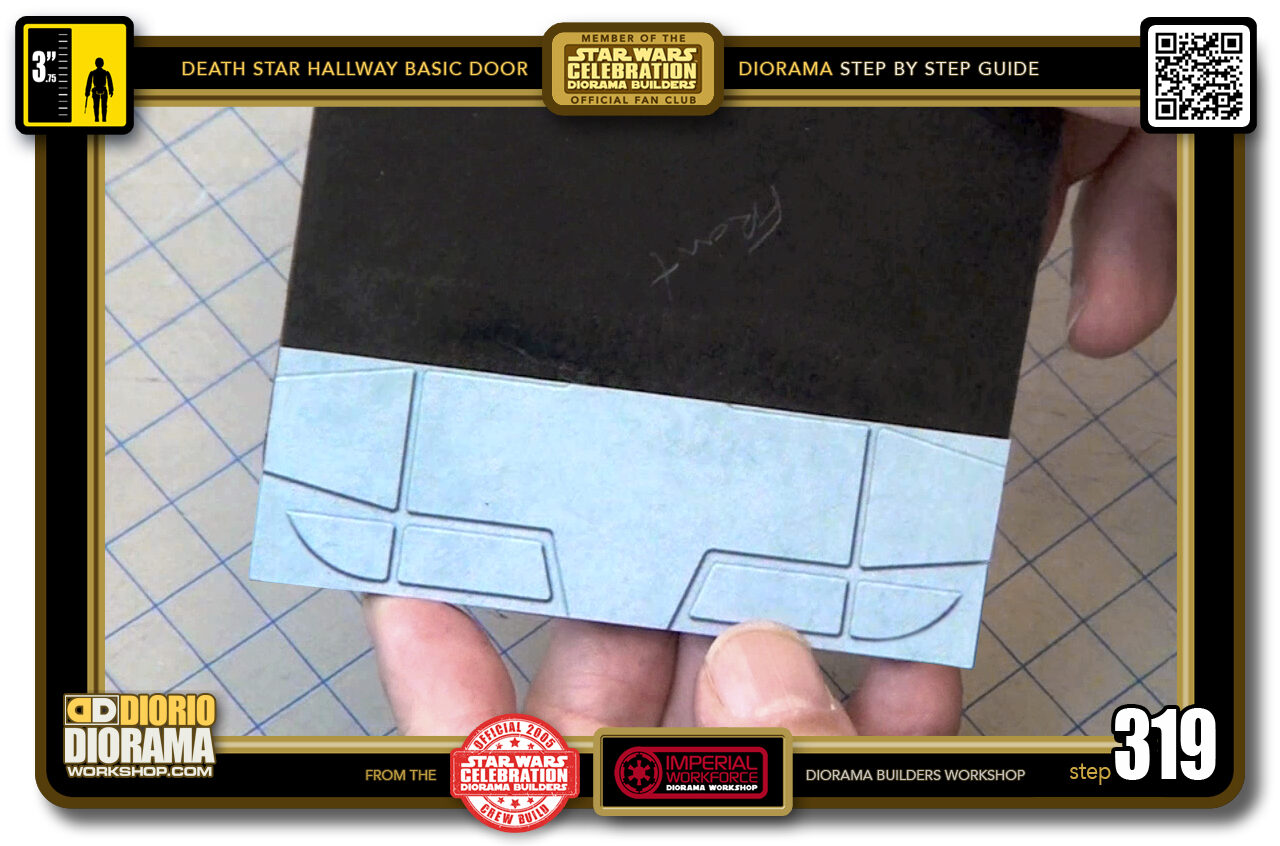
- STEP 319 > So this is what your door shape should look like at this point. Having raised the decal avove the cut end curves, the bottom of your door is NOW FLAT ALL THE WAY with 90 degree CORNERS.
-

- STEP 320 > Now we want the door to appear as if it's lowered from the top, so to create this illusion, place your door frame on top of your door. The top of your decal should just be touching the edge of the door frame ceiling.

.
Did you already build this Diorama ? At home or at our Star Wars Celebration Diorama Builders workshop ? Would you like to show it in the site’s GALLERY VISITORS DIORAMAS section, YES ? That is Awesome !!! You can find out all the details on how to email me your photos on the VISITORS SUBMISSIONS INFO page … When I get your photos, I will create your very own page just like this one. You may not realize it but work does inspire others to join in the fun of making Action Figure Dioramas.
.
NOT FOR RESALE ALL Decals, tutorials and artwork are ©FrankDiorio (dioramaworkshop.com) and offered FOR FREE to the fans – that would be you ? so you can build and display my diorama designs in your very own home. I realize I cannot control what one does with my graphics once I place them on the web, I can only ask you as one fan to another, please respect the artist and do not be that jerk who uses my designs and tutorials to build a copy of my work only to sell it on EBAY or trade/sale groups and forums. Thank You. Frank.
.
.
If you have a facebook account, why not join the Official Diorama Builders Fan Club today, simply click the logo link below.
 .
.
Catch up with fellow visitors and exchange stories, read cool interviews with the crew, exchange photos, fun surprises and grab some FAN ONLY merchandise next year at actual future conventions ?
.
©2018 Frank Diorio DioramaWorkshop.Com
.
IF YOU LIKE WHAT YOU SEE, PLEASE SHARE WITH YOUR FRIENDS
USING THE SOCIAL MEDIA BUTTONS BELOW