


-

- STEP 241 > Place a good amount of gluestick all over the exposed posterboard.
-
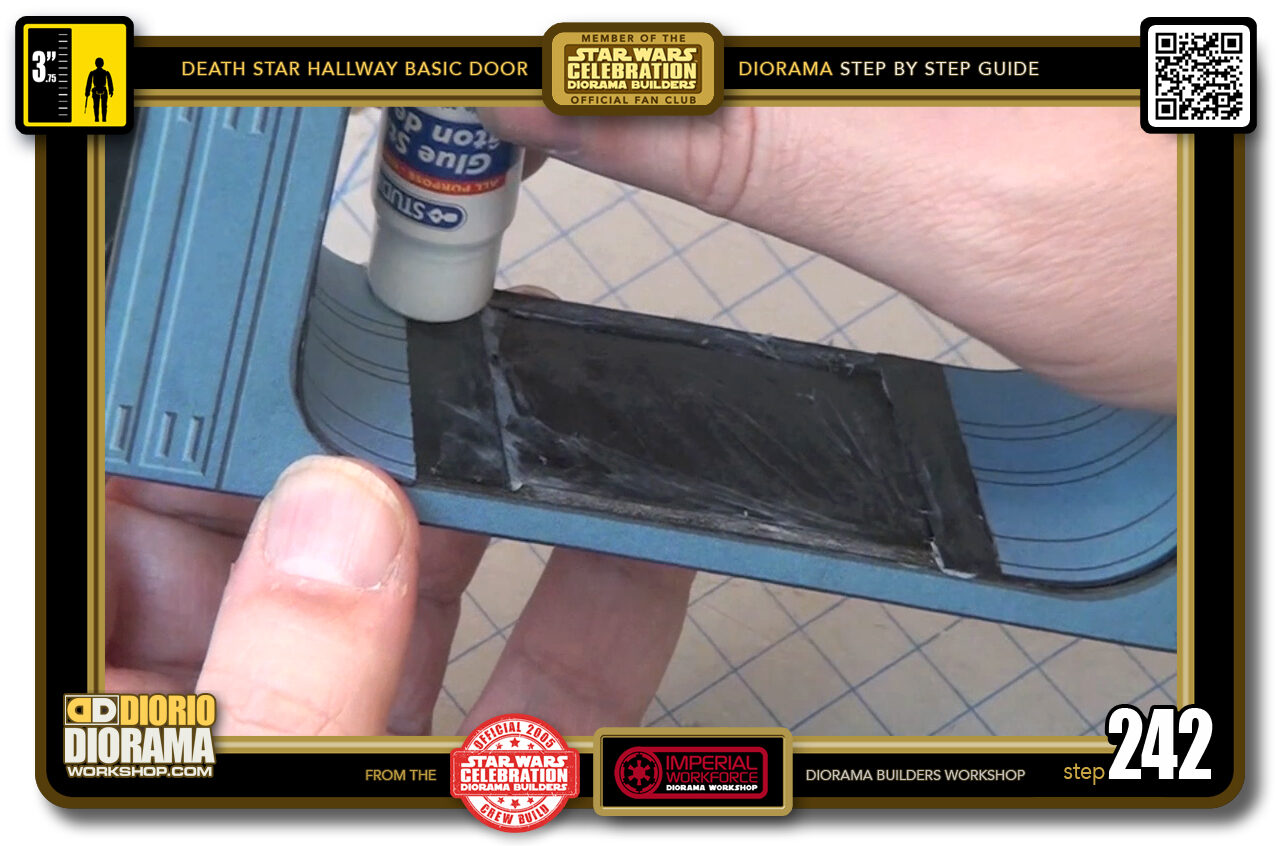
- STEP 242 > Make sure to go a little past it on the foot and ceiling decals for the overlap to stick properly.
-
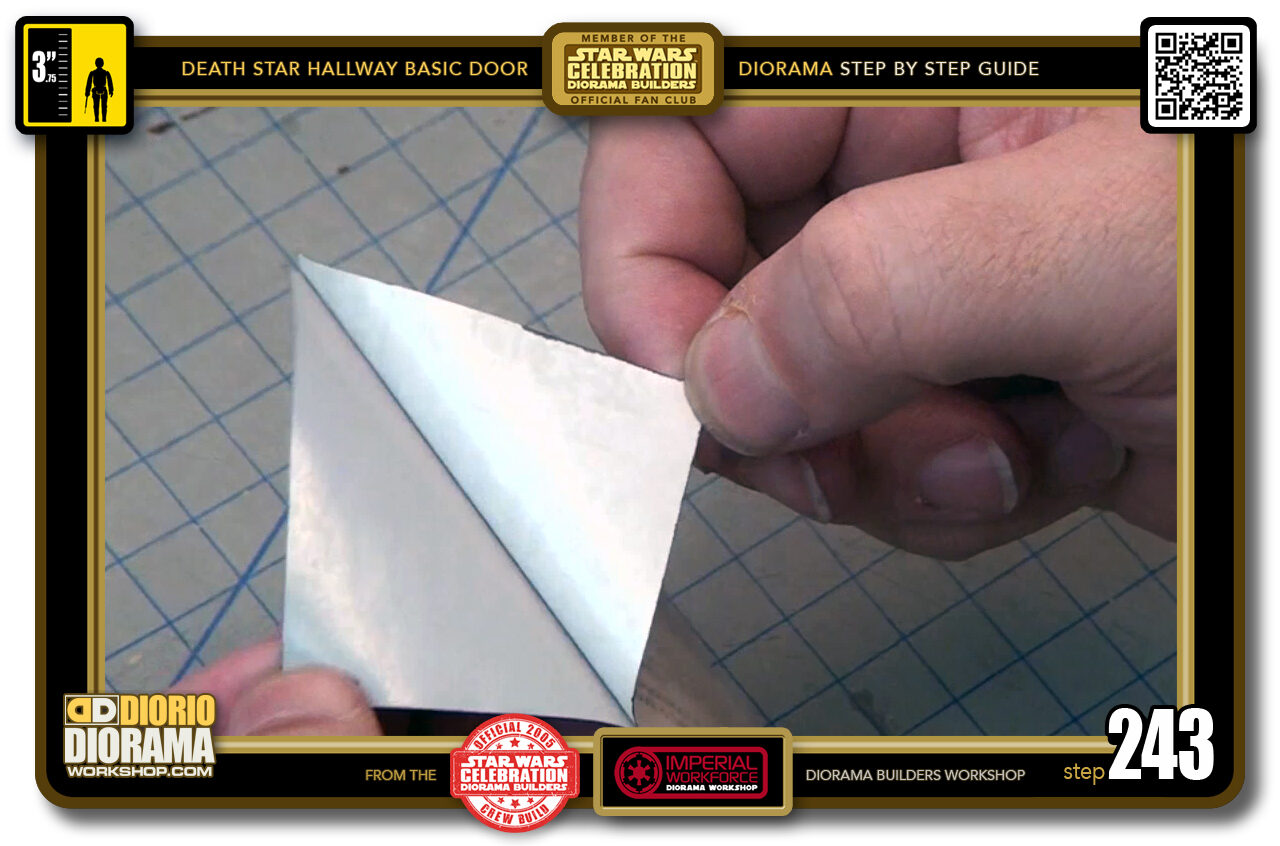
- STEP 243 > Peel back your decal.
-
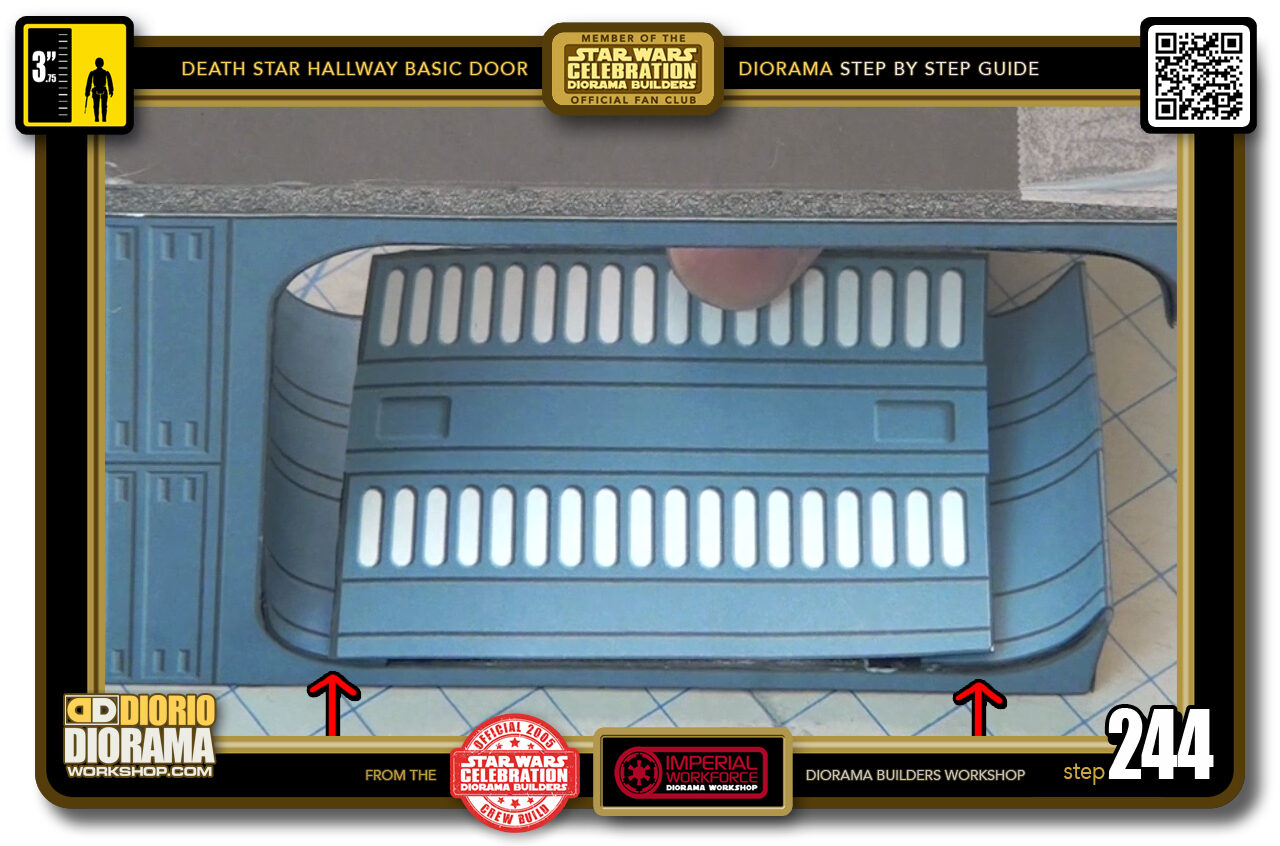
- STEP 244 > Grab you decal and hold it at 45 degrees so that ONLY the OUTSIDE EDGE touches the foamcore side. Make sure to ALIGN the ENDS with the start and stopping points of the respective cured corner (red arrows).
-
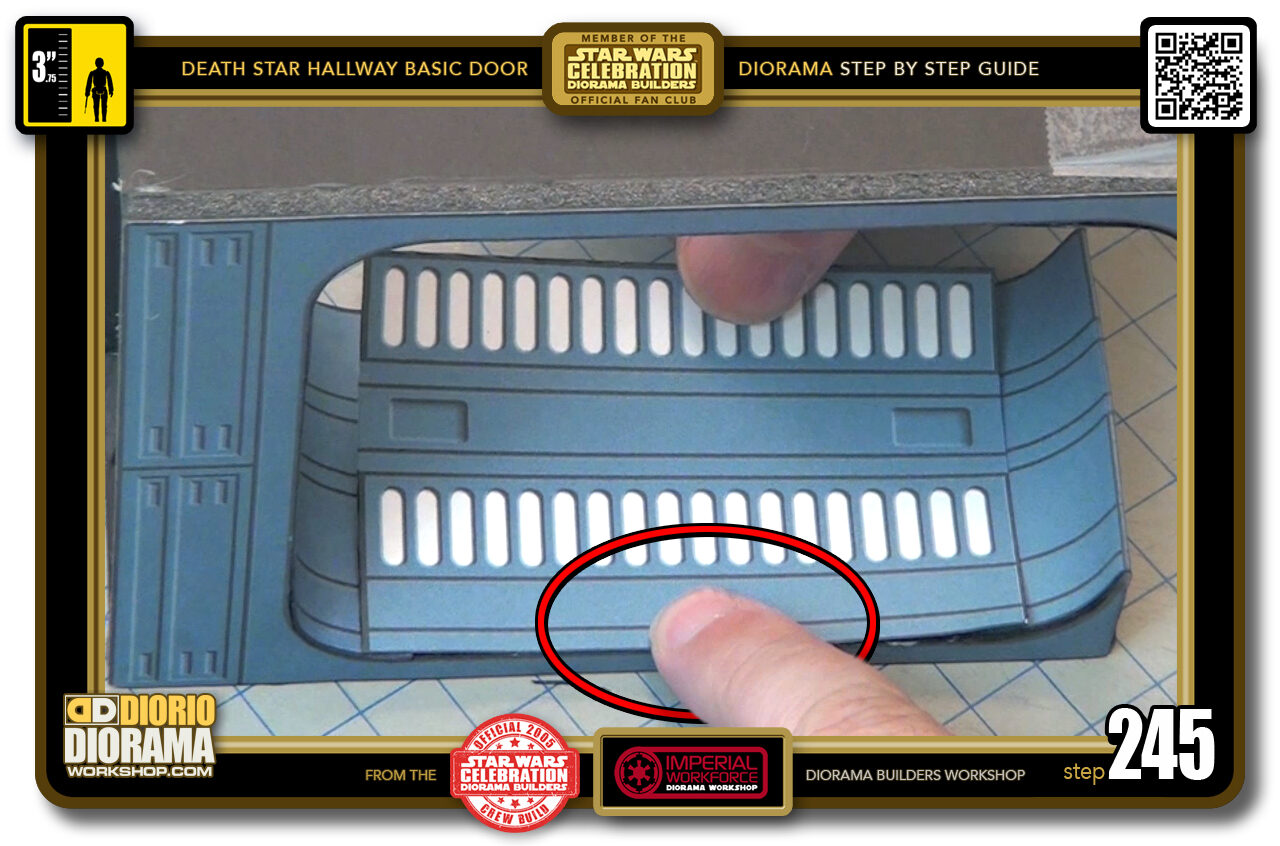
- STEP 245 > When you are aligned properly, place your index finger inside the red oval zone and put pressure so the decal doesn't move out of alignment.
-
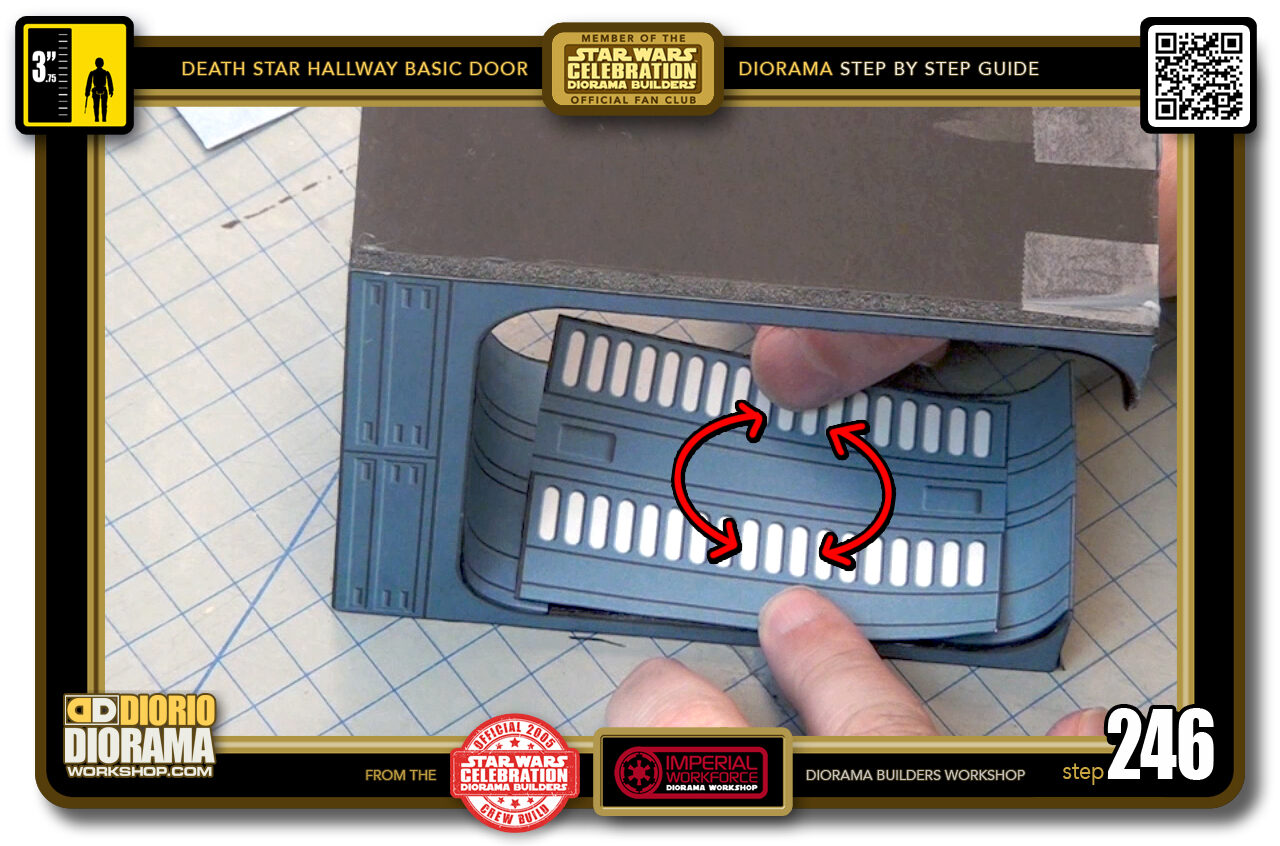
- STEP 246 > Now grabbing the opposite side's centre with your other hand, KEEPING THE PRESSURE ON THE FIRST INDEX ... Spin back and forth your decal until ALL the LINES line up just perfectly.
-
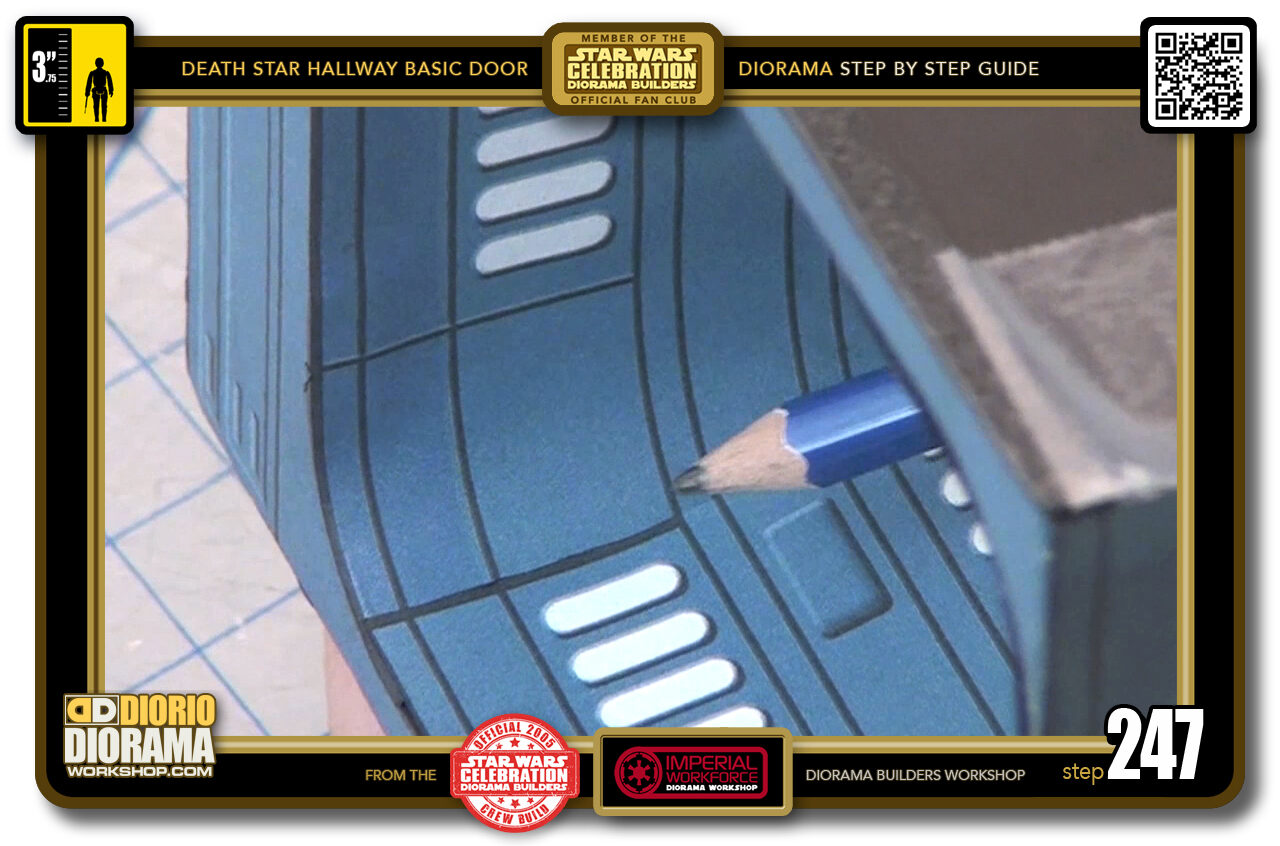
- STEP 247 > When everything looks like this you can start the complete bonding steps.
-
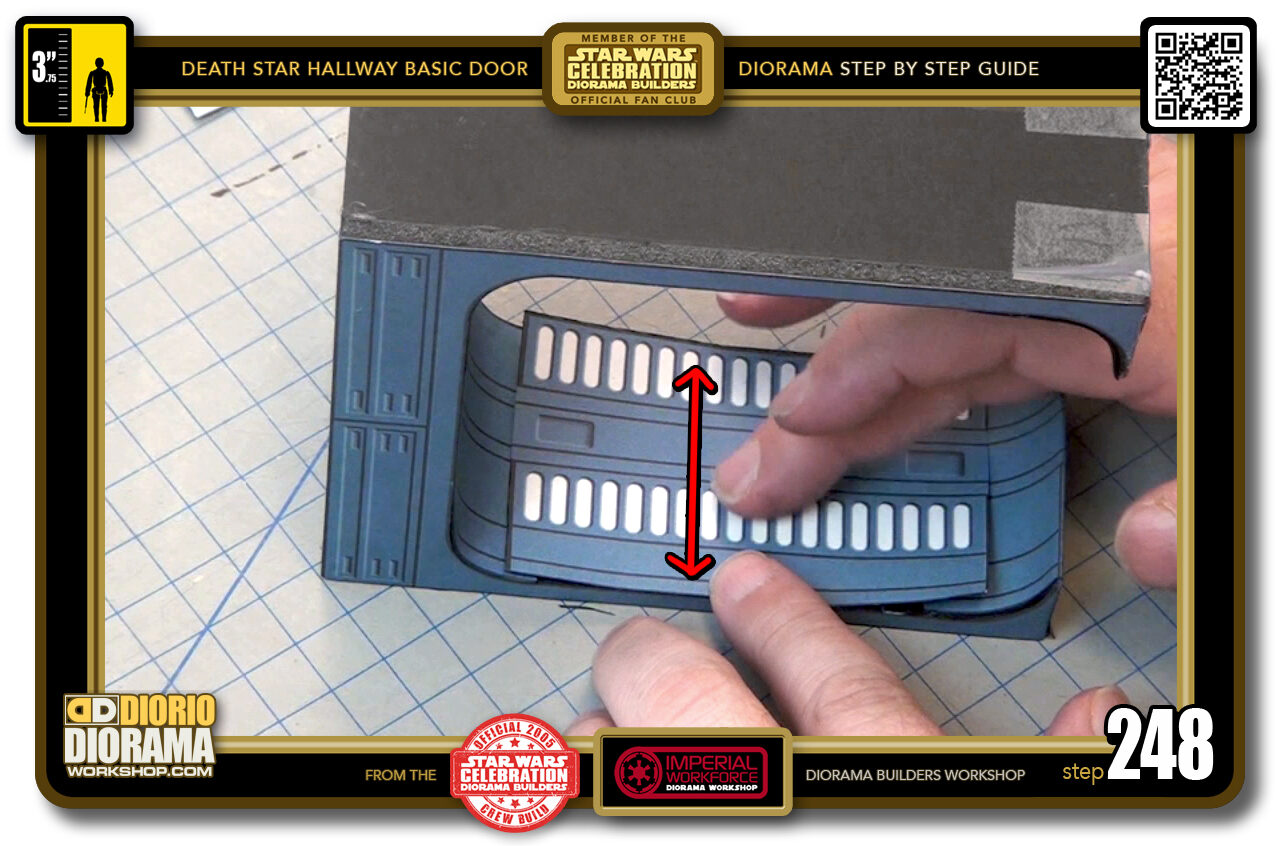
- STEP 248 > First KEEP your LEFT INDEX PRESSURE as you lower your right hand allowing the right side of the decal to touch the foamcore at the centre. Carefully let go the pressure of your left index and start moving your finger back and forth the CENTRE LINE ONLY.
-
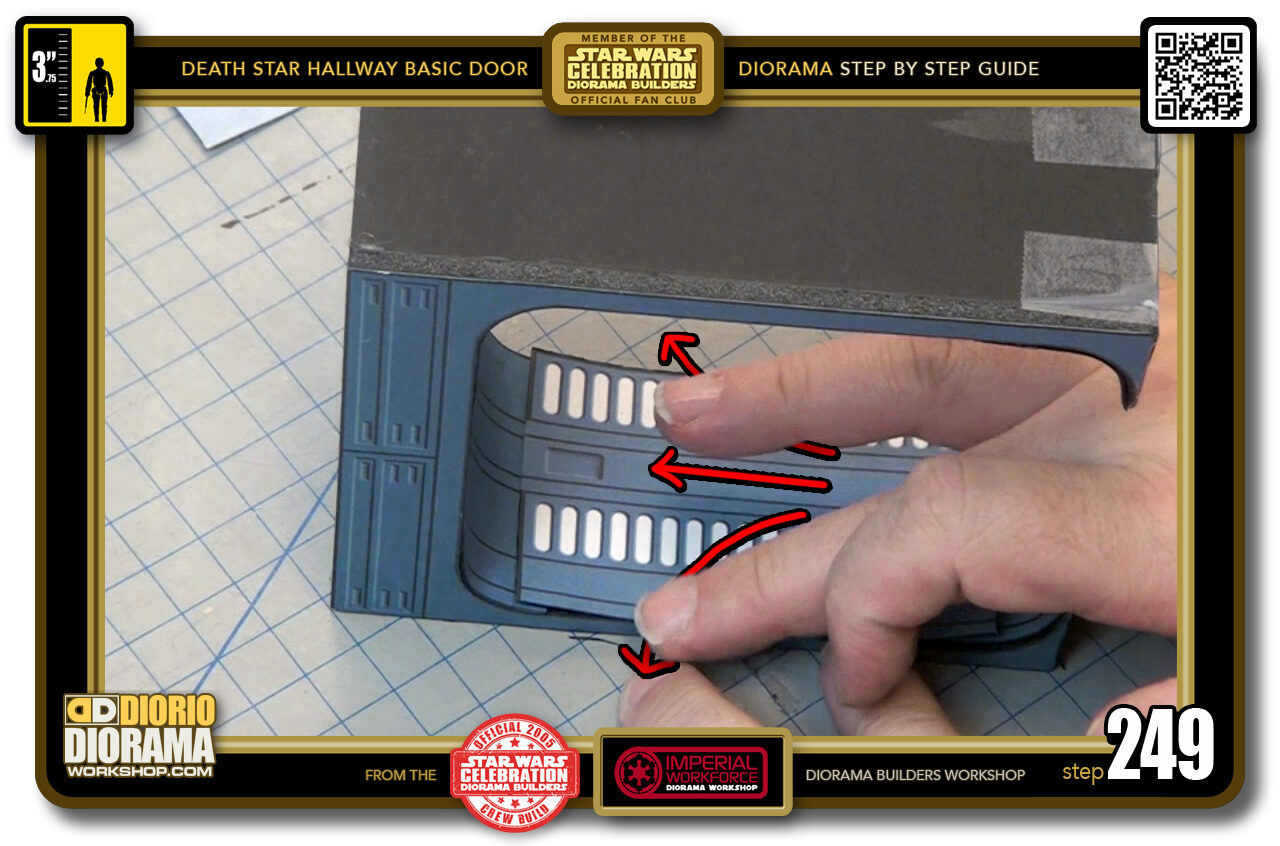
- STEP 249 > Now the REMOVE AIR BUBBLES technique. You know this by now. START centre move left staying in centre lane. Back to centre, move left as you angle towards centre left edge, back to start, move left centre out right...
-
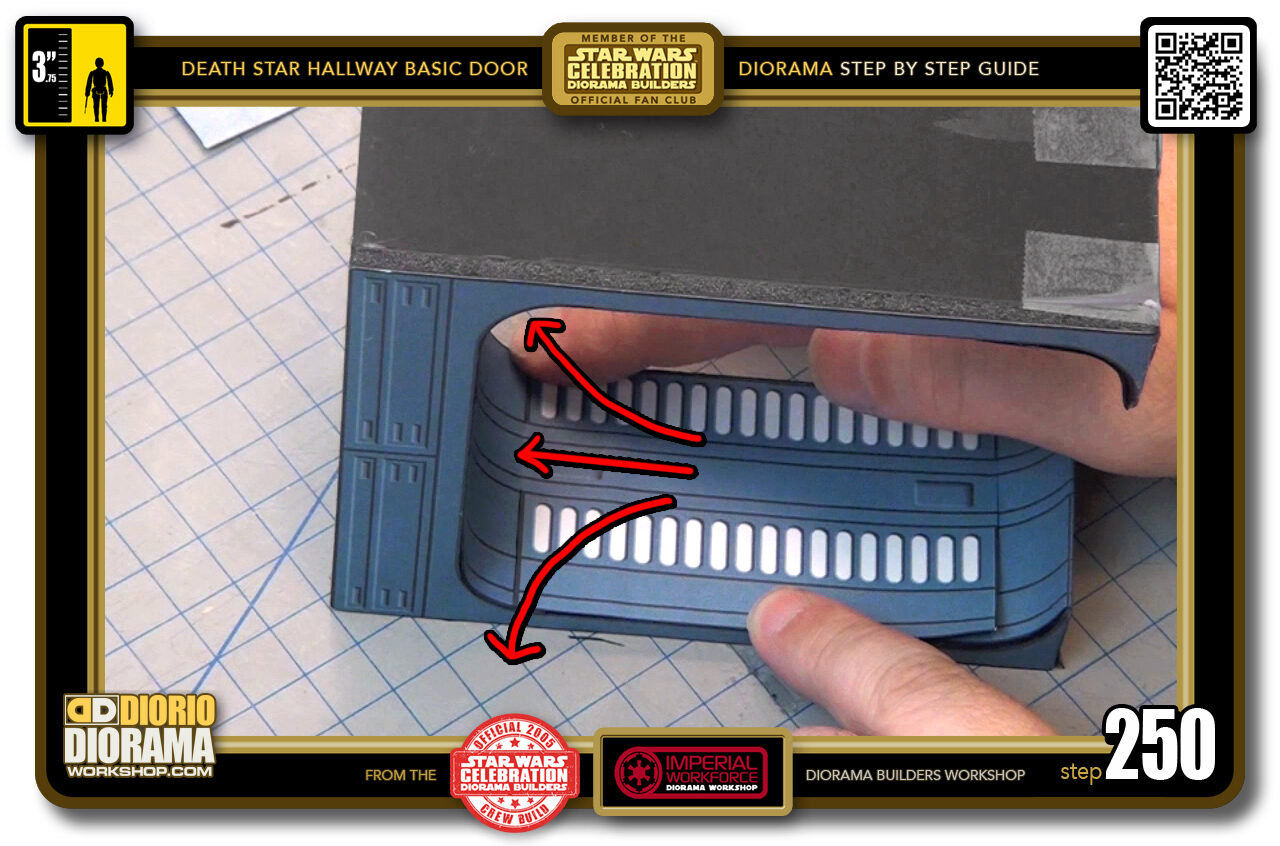
- STEP 250 > Inch your way to the ends of your decal. Centre move left to the end - STAY IN LANE - back to centre, move left to end of decal but towards bottom left now, then start position, centre right.
-
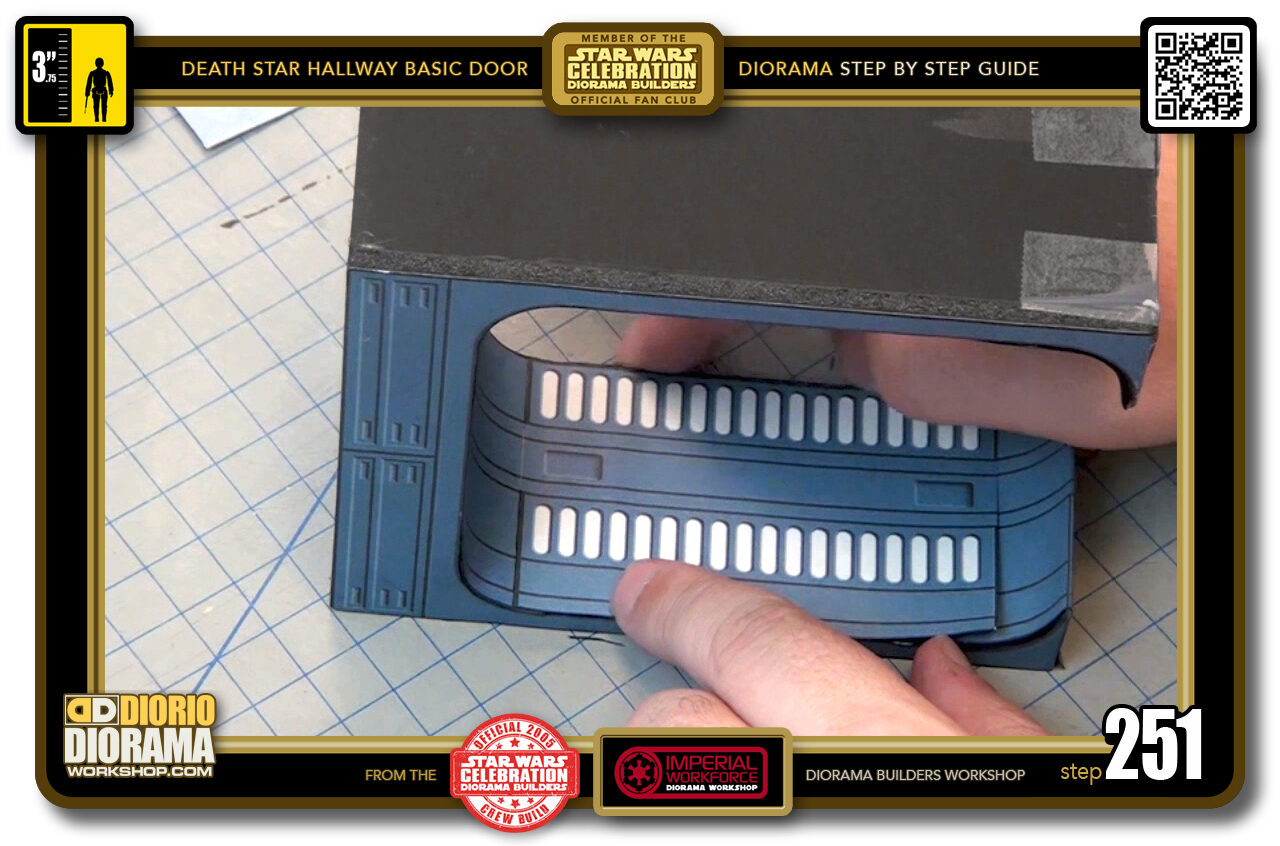
- STEP 251 > Spin your console 180 degrees and do the other side.
-
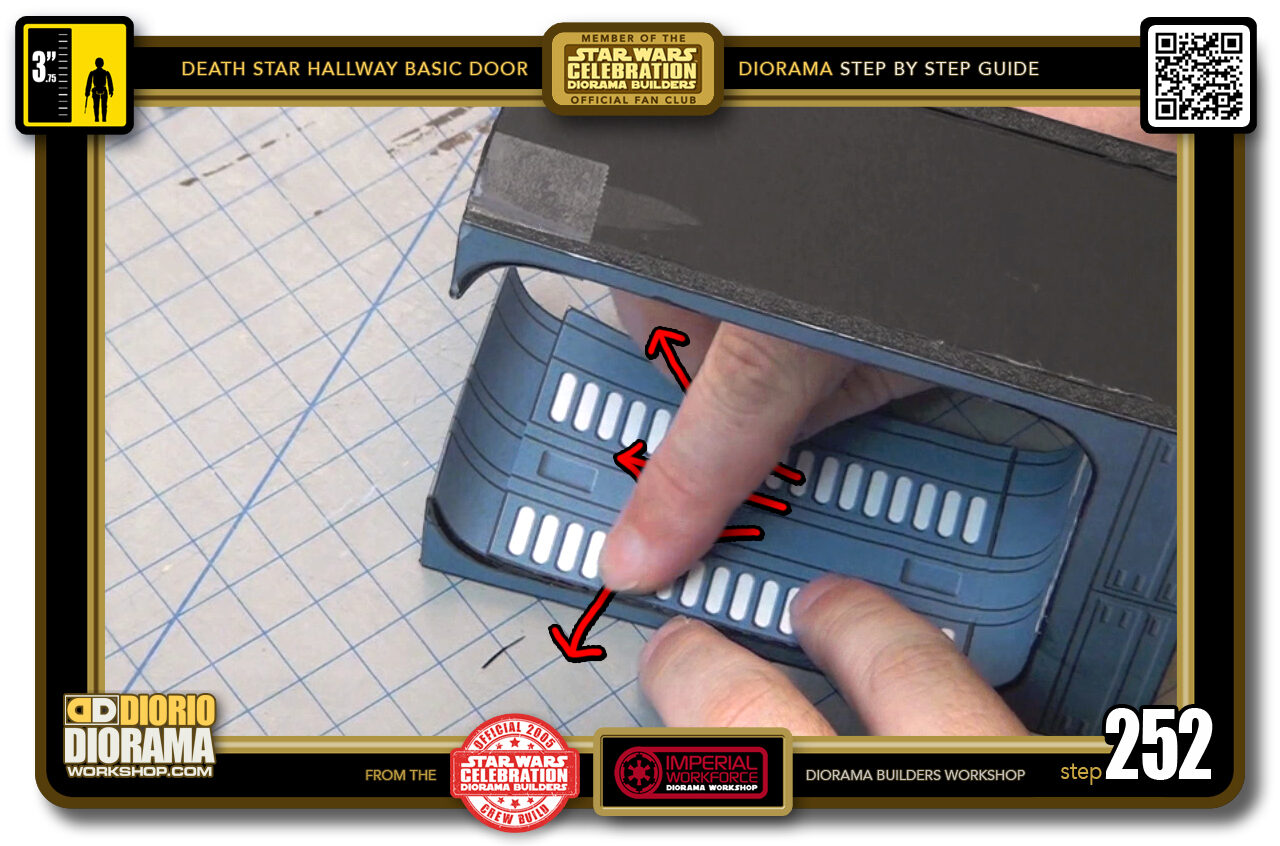
- STEP 252 > Centre up, left, right, up, centre, end right end left, you know the drill.
-
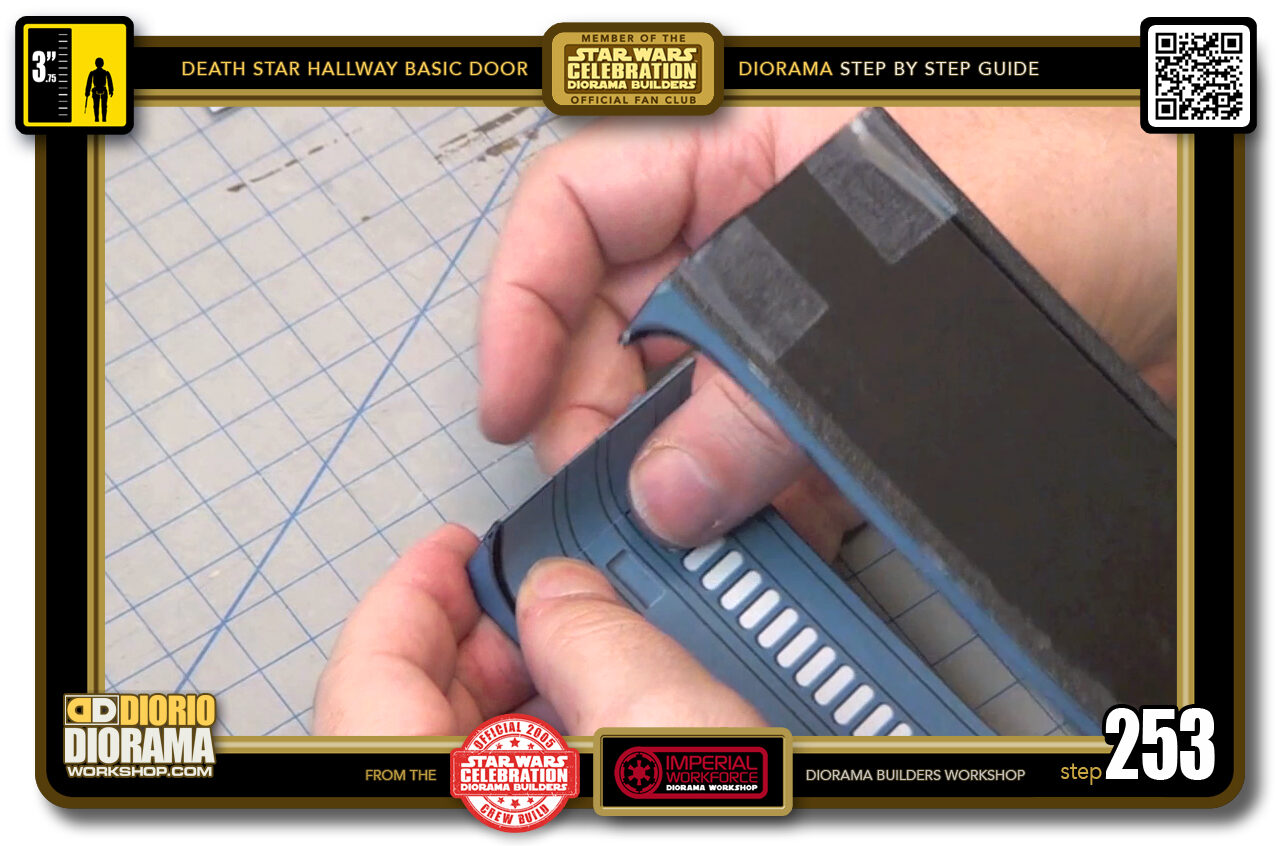
- STEP 253 > When you reach the foot, you can pinch with your thumbs to tweek any alignment issues and then press down hard to smoosh it all together once and for all.
-
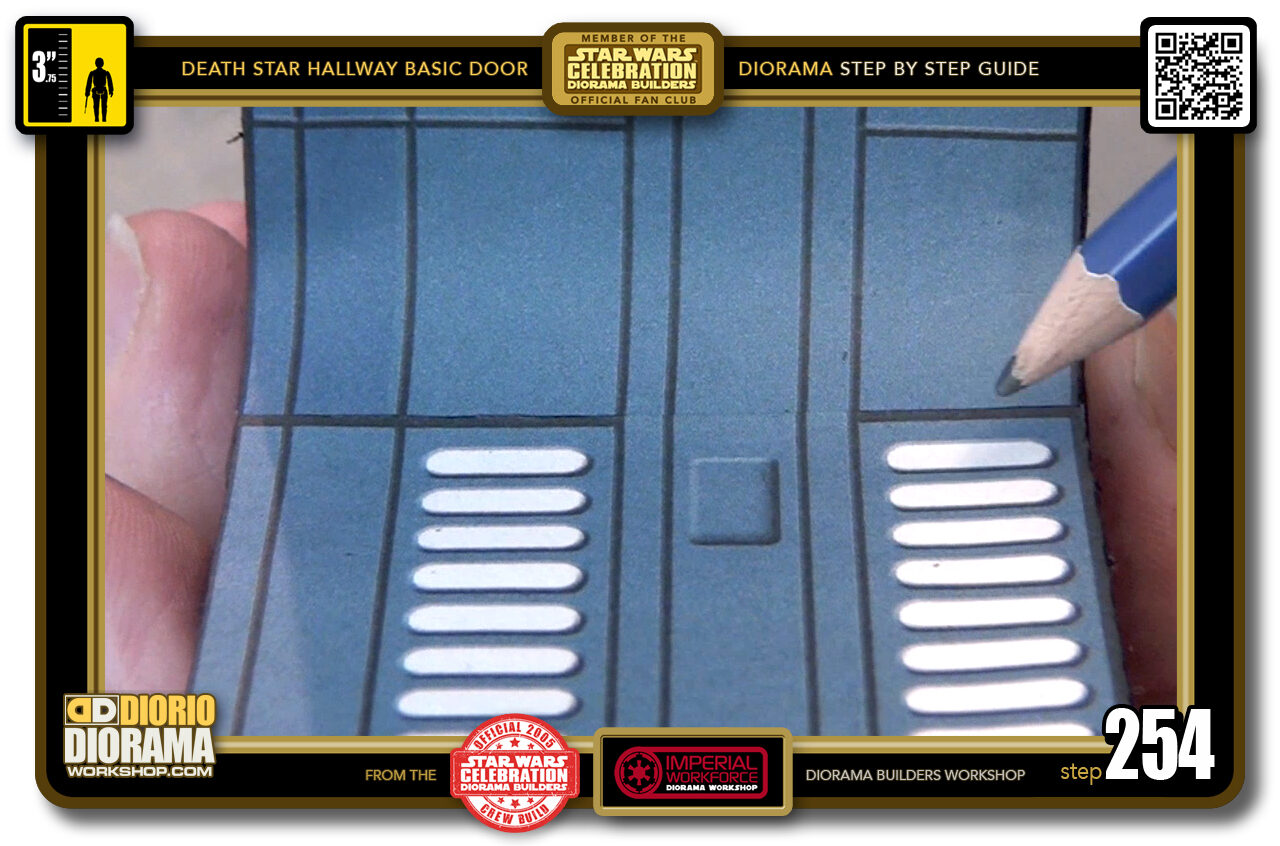
- STEP 254 > Notice now how NOT putting BLACK SHARPIE in that centre door zone helps the blending and illusion of one full sticker ?
-
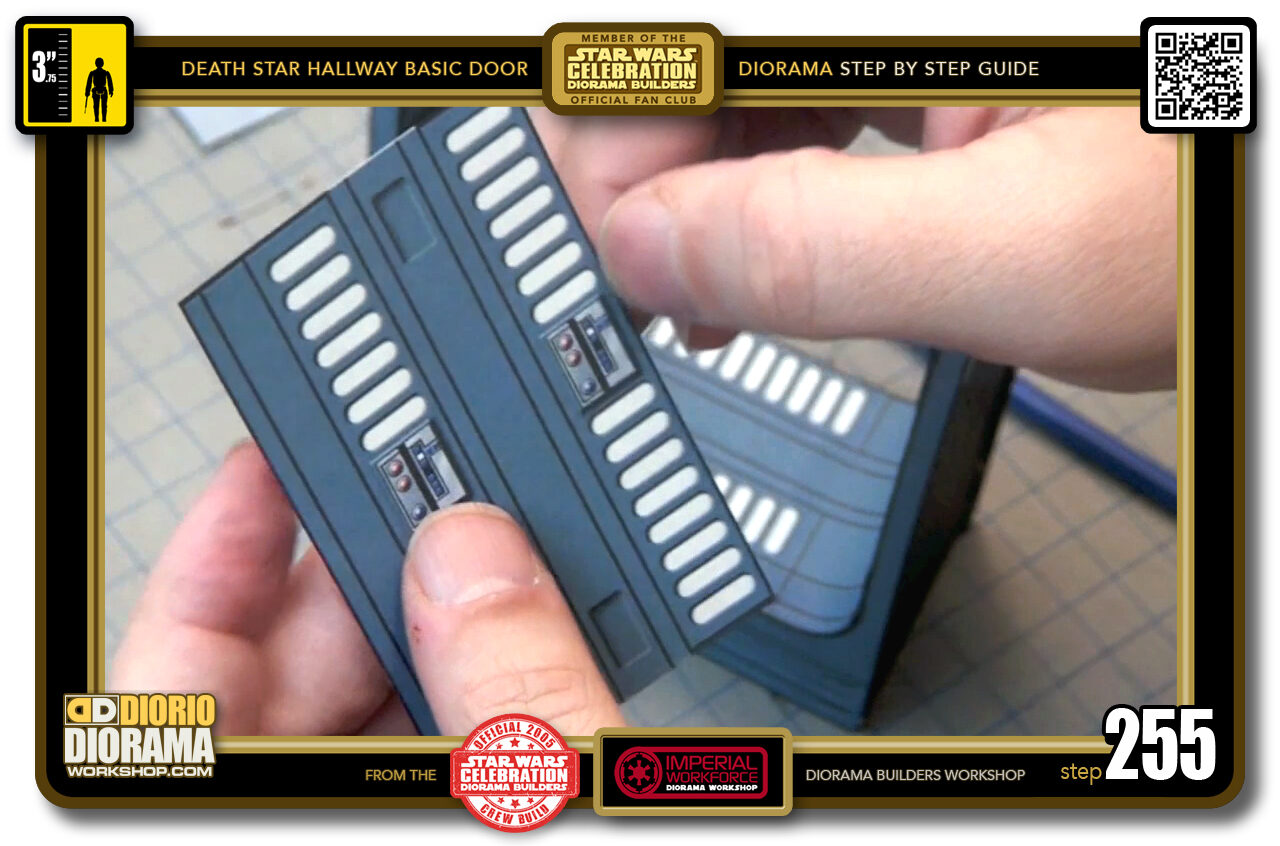
- STEP 255 > Now for the other side, it's all the same techniques. You should be able to do this blindfolded 🙂
-
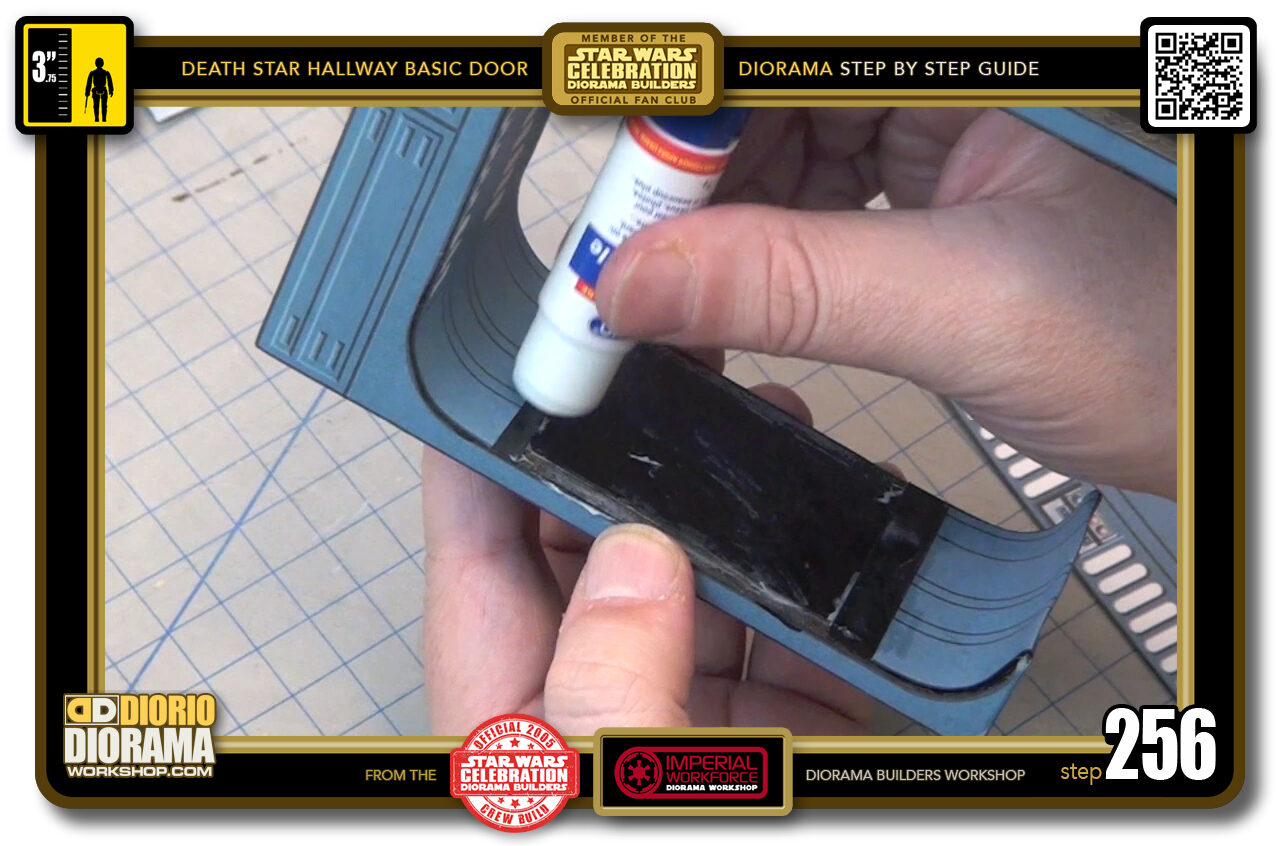
- STEP 256 > Gluestick on all the exposed posterboard and a little at the ceiling and foot zones for the overlap to stick properly. Any gluestick that peeks out, dries transparent, you won't see it. NEVER EVER USE HOT GLUE FOR DECALS !!!!
-
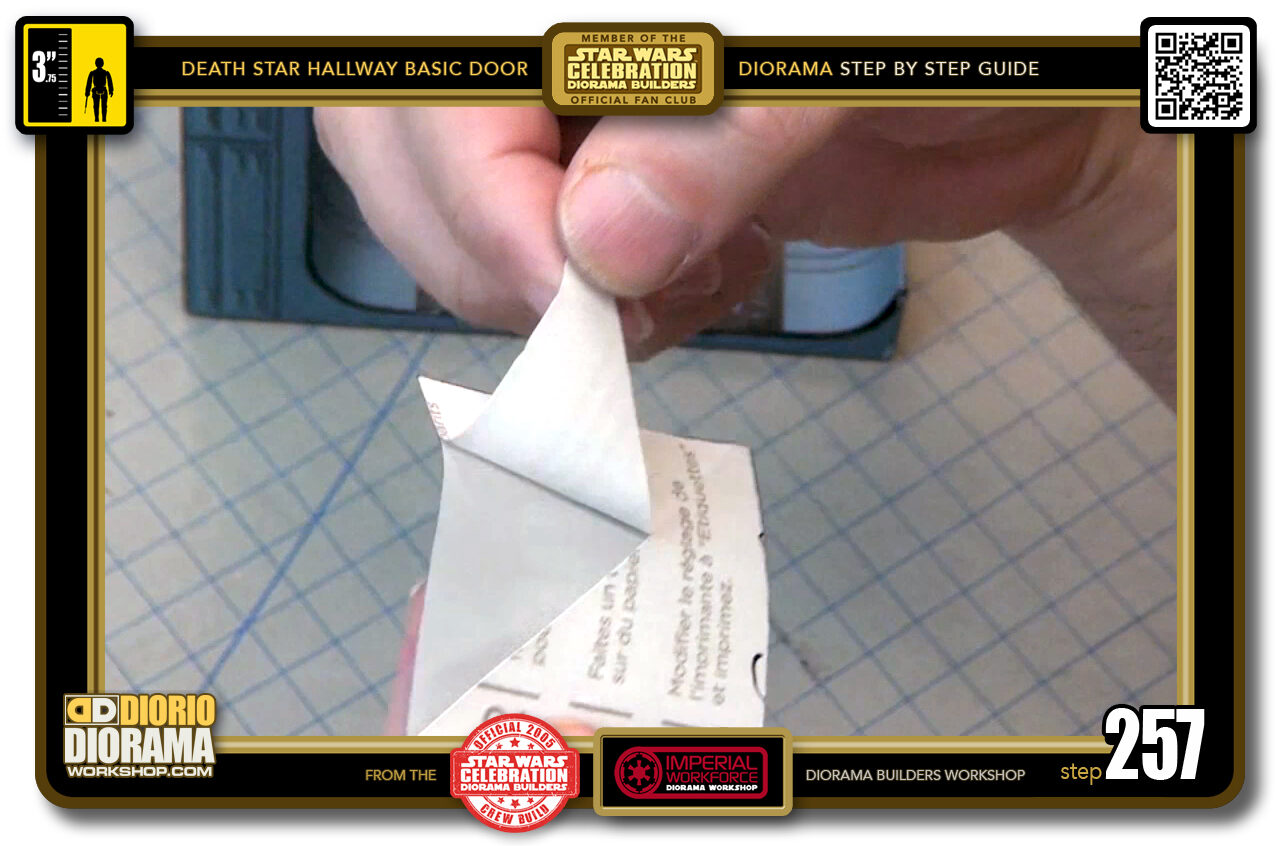
- STEP 257 > Peel back...
-

- STEP 258 > Align the green arrow ednds with the red line corner start and stop points and KEEP the DECAL at 45 degrees. DON'T let it TOUCH the other side yet.
-
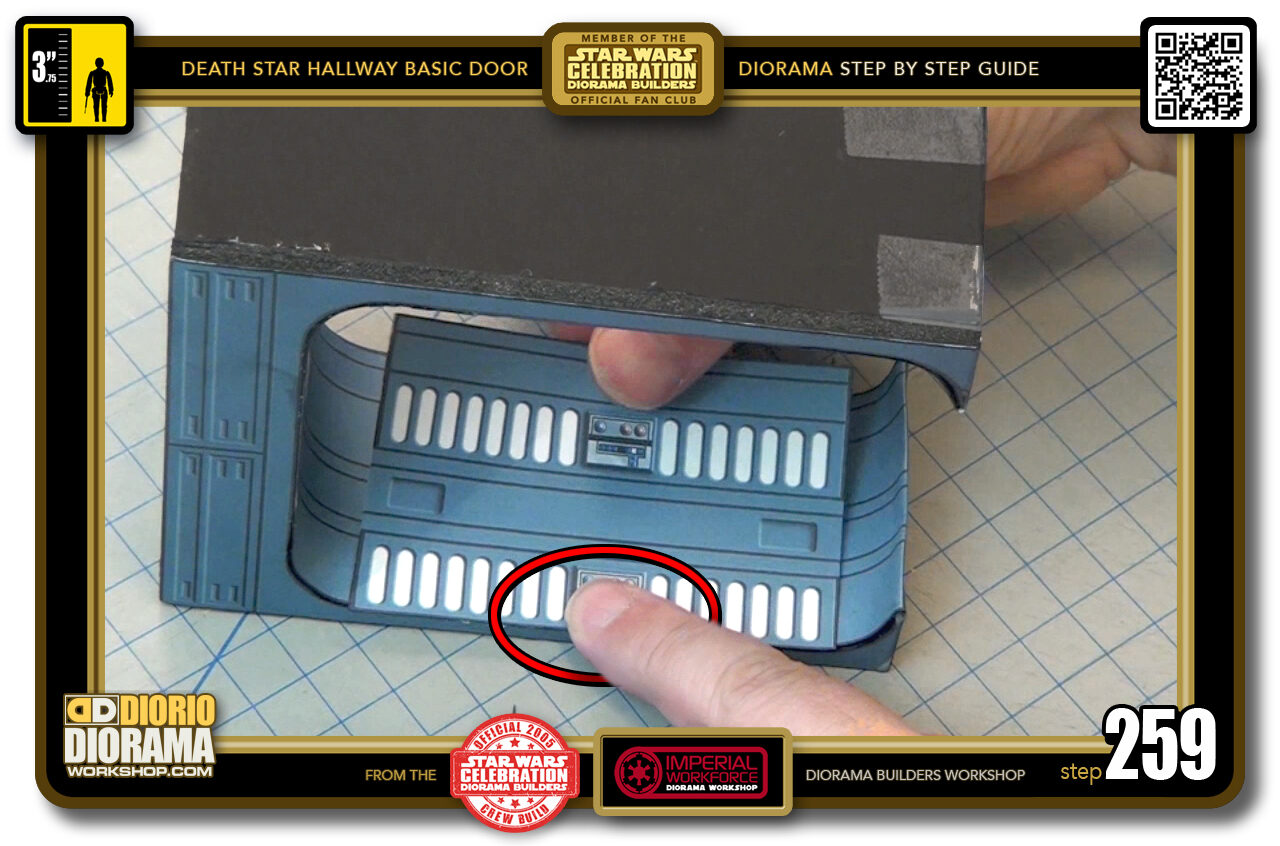
- STEP 259 > Place your index finder inside the red oval zone, apply pressure.
-
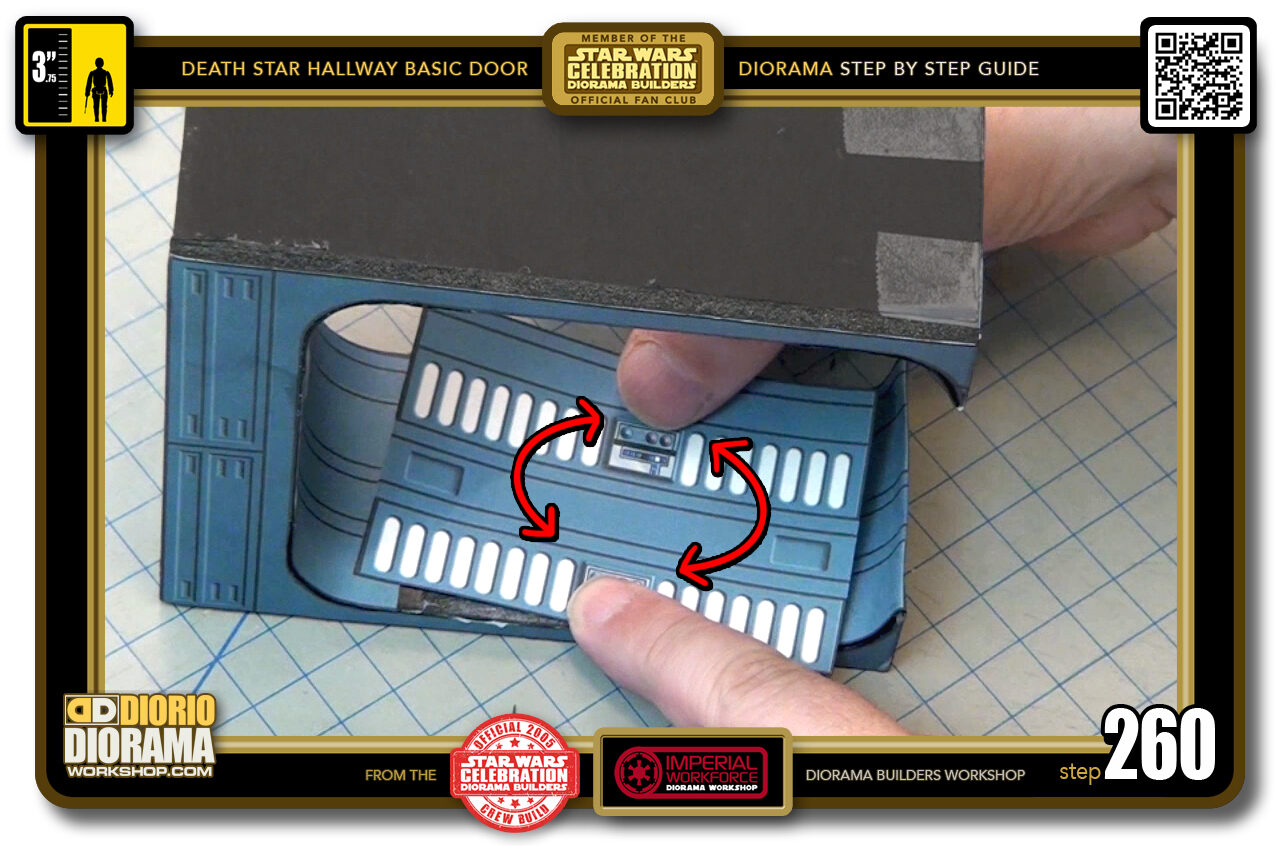
- STEP 260 > Grab with your other hands index and thumb and rotate until all the lines meet up.

.
Did you already build this Diorama ? At home or at our Star Wars Celebration Diorama Builders workshop ? Would you like to show it in the site’s GALLERY VISITORS DIORAMAS section, YES ? That is Awesome !!! You can find out all the details on how to email me your photos on the VISITORS SUBMISSIONS INFO page … When I get your photos, I will create your very own page just like this one. You may not realize it but work does inspire others to join in the fun of making Action Figure Dioramas.
.
NOT FOR RESALE ALL Decals, tutorials and artwork are ©FrankDiorio (dioramaworkshop.com) and offered FOR FREE to the fans – that would be you ? so you can build and display my diorama designs in your very own home. I realize I cannot control what one does with my graphics once I place them on the web, I can only ask you as one fan to another, please respect the artist and do not be that jerk who uses my designs and tutorials to build a copy of my work only to sell it on EBAY or trade/sale groups and forums. Thank You. Frank.
.
.
If you have a facebook account, why not join the Official Diorama Builders Fan Club today, simply click the logo link below.
 .
.
Catch up with fellow visitors and exchange stories, read cool interviews with the crew, exchange photos, fun surprises and grab some FAN ONLY merchandise next year at actual future conventions ?
.
©2018 Frank Diorio DioramaWorkshop.Com
.
IF YOU LIKE WHAT YOU SEE, PLEASE SHARE WITH YOUR FRIENDS
USING THE SOCIAL MEDIA BUTTONS BELOW