


-
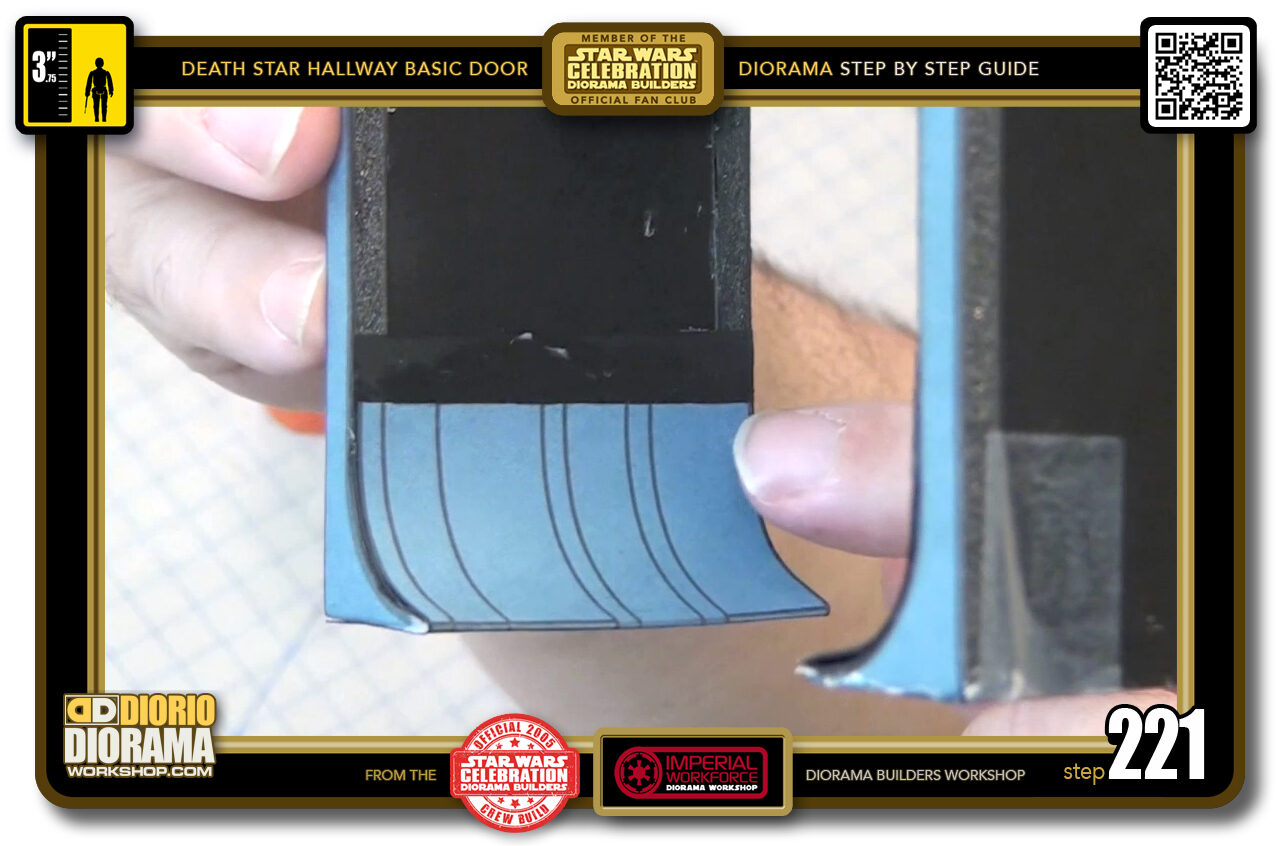
- STEP 221 > Now remember how I said it was SUPER IMPORTANT to be 100% SURE that you were putting the correct decal on the correct side ? It's all about these lines moving forwards.
-
-
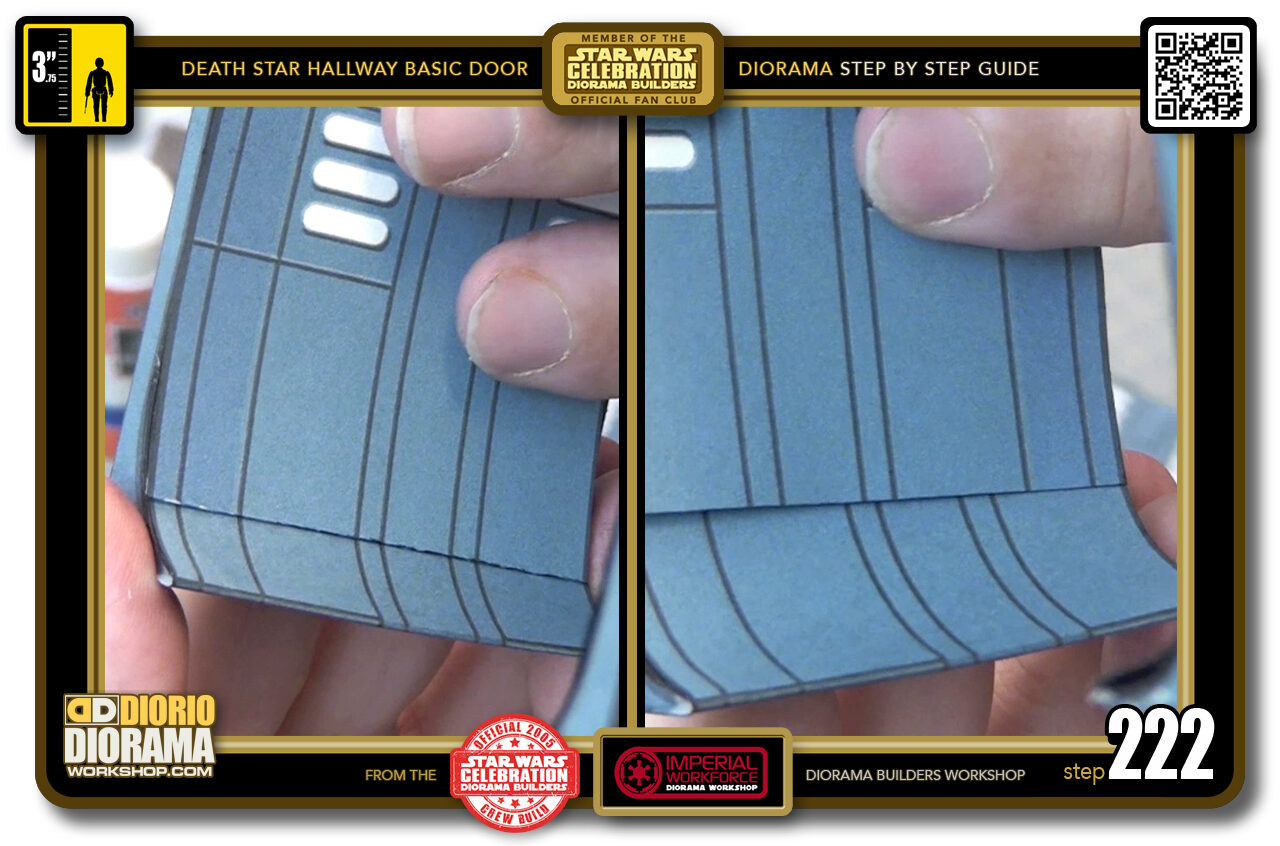
STEP 222 > You think after the feet the sides would be next - wrong 🙂 - Ceiling goes up first and in order to do that we have to ALIGN THE LINES !!!
On the left photo, the ceiling decal is facing the correct position. When you look on the right, the decal has been flipped 180 degrees to show you the wrong position and how all the lines no longer line up properly.
-
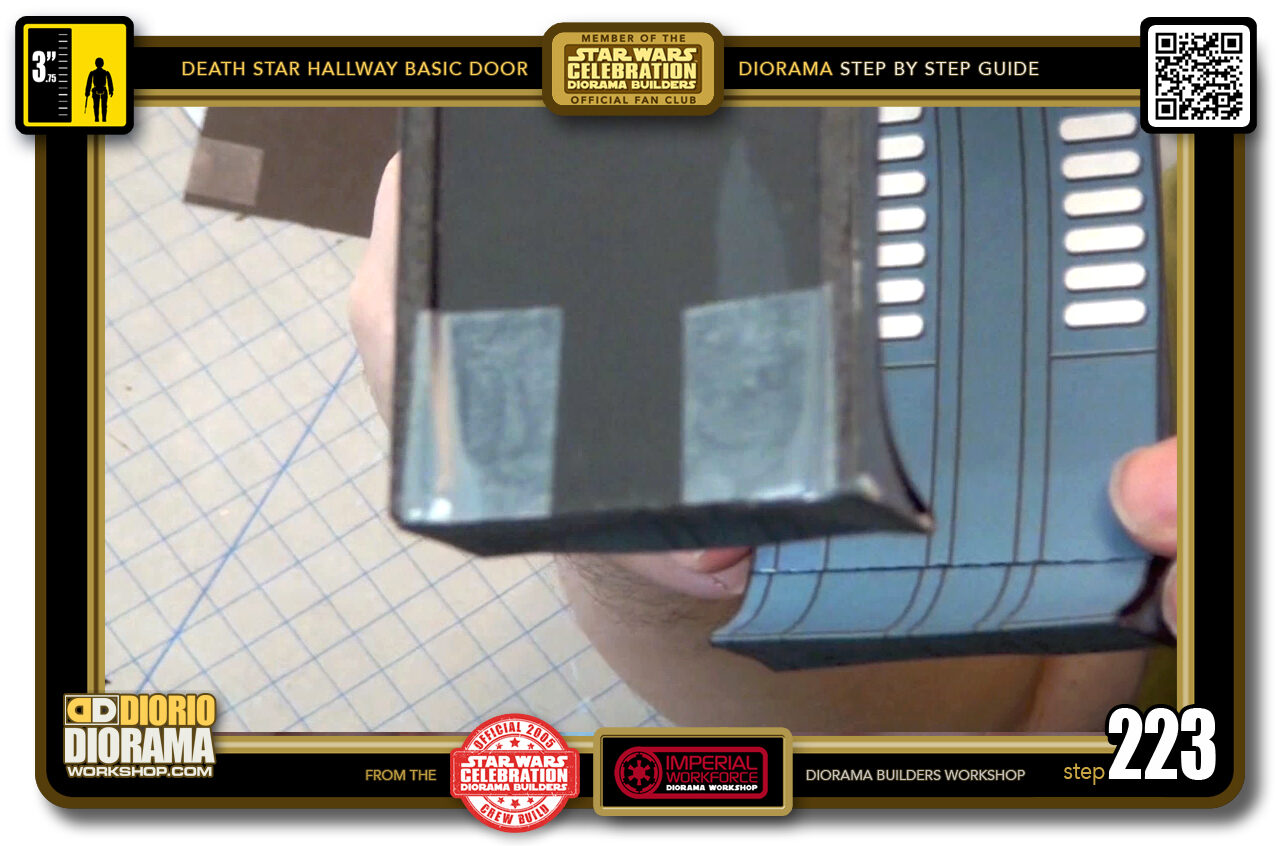
- STEP 223 > So to know where to place your ceiling, first go back to aligning the lines and slowly move the decal UP the wall towards the ceiling position.
-
-
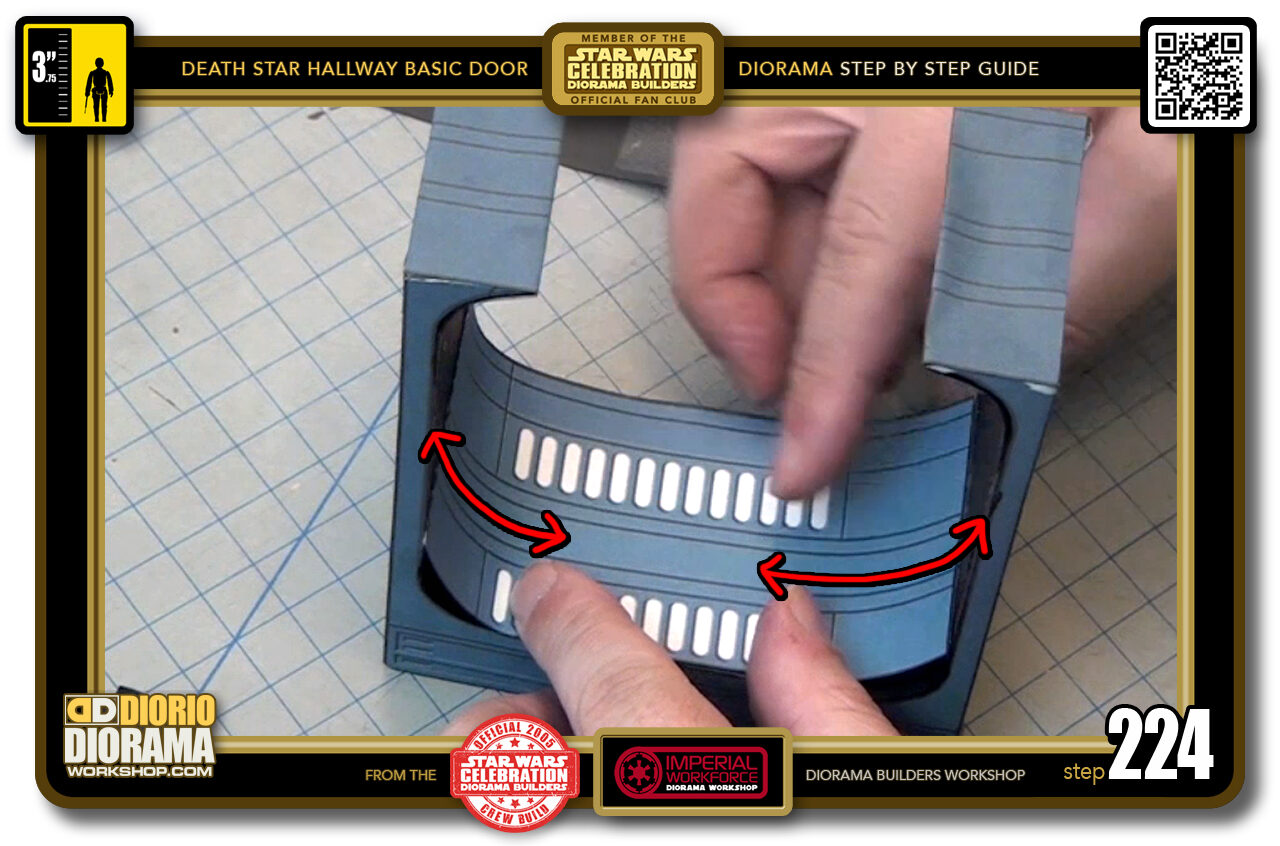
STEP 224 > The ceiling decal was designed to be centered with the curves and have excess that wraps onto the curve ends that will allow the sides to blend in perfectly later on.
So what you want to do is slide the decal back and forth until the neons are close to centre.
-
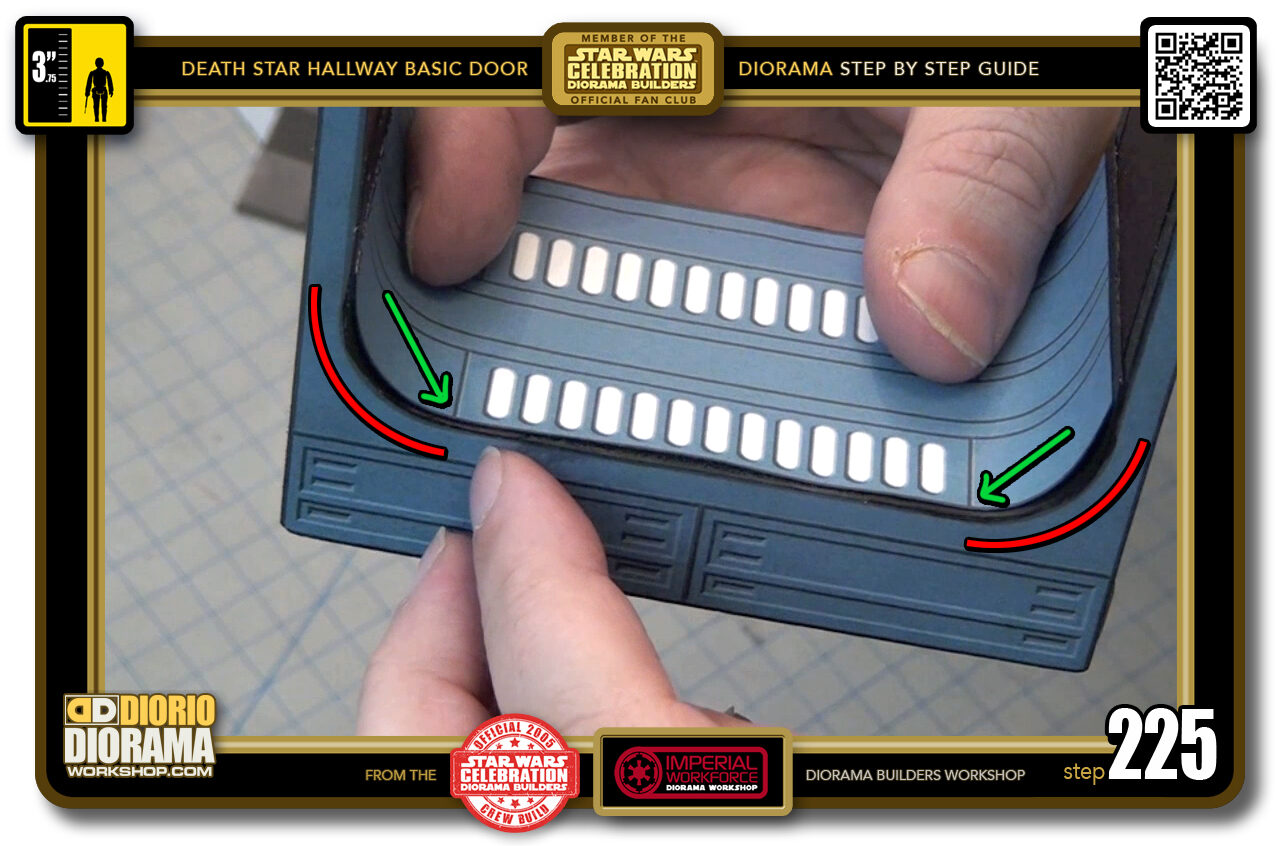
- STEP 225 > Here is a close up for you to better understand. The red lines represent where the corner curves start and stop. You want the ends of the 13 neons (green arrows) to fall equally in between the red lines.
-
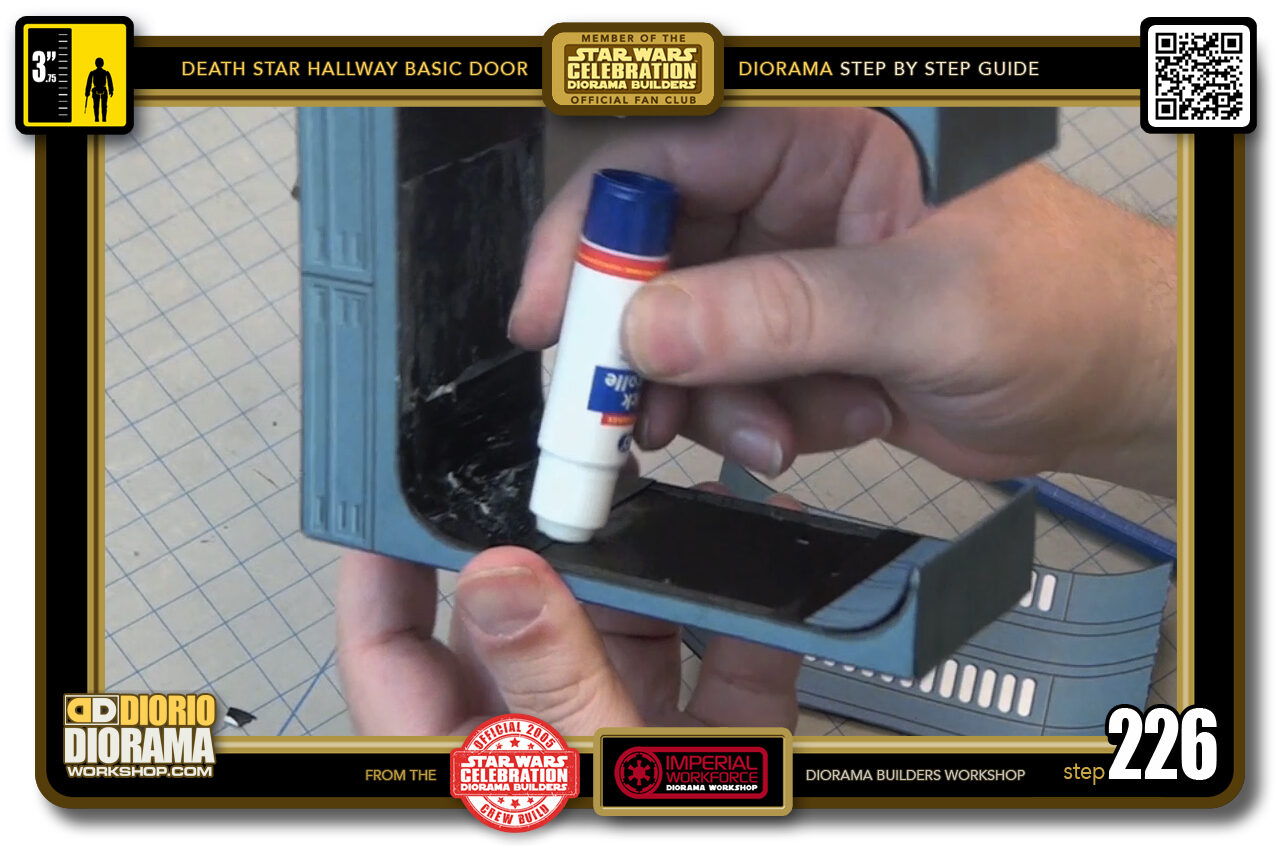
- STEP 226 > To start the application, grab your gluestick and start just past the top curve. If you go past where the decal will stop, that's ok, it will be covered later by the side decal.
-
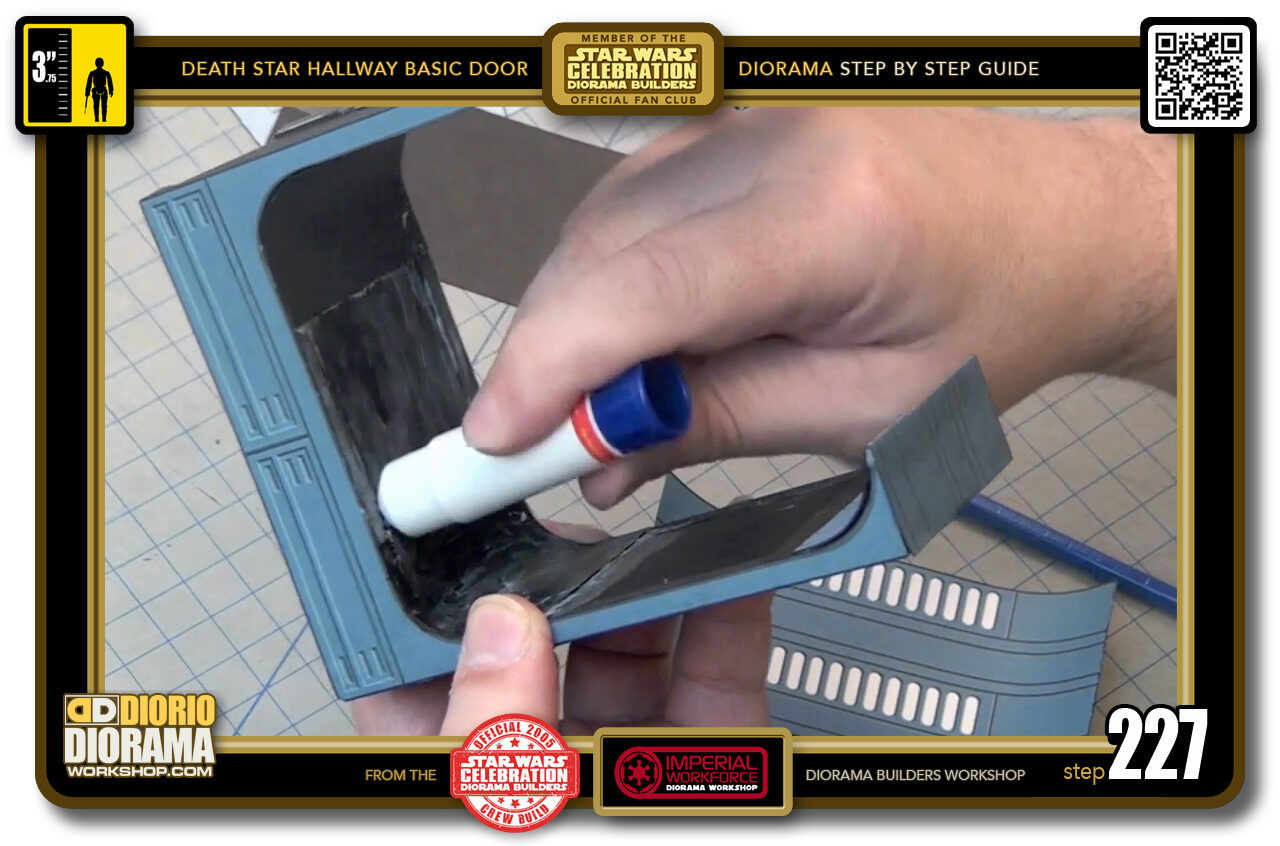
- STEP 227 > Move your way around the curve to the actual ceiling. Apply a generous amount but don't put GLOBS, you don't want the sticker to not lay flat because of it.
-
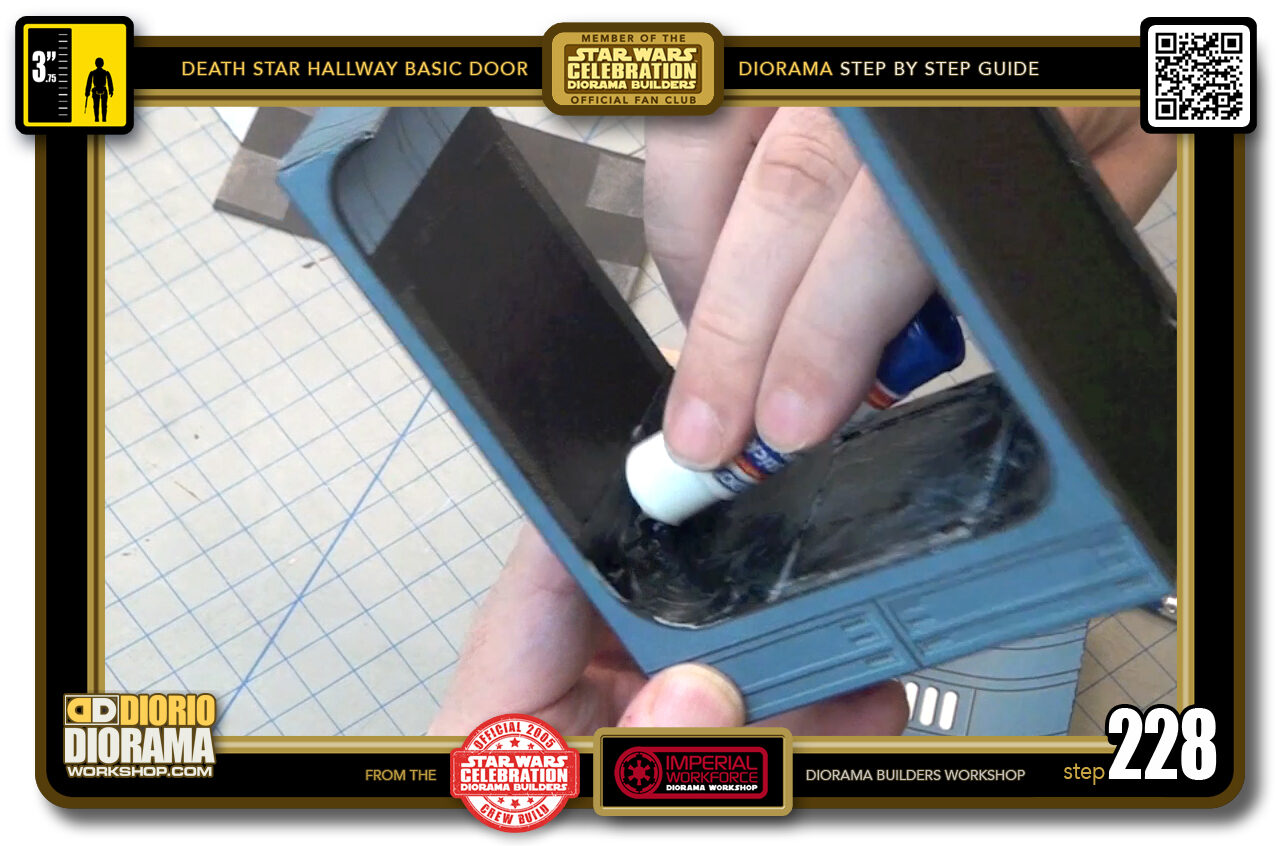
- STEP 228 > Then spin around to the opposite side and a little past where the decal will end.
-
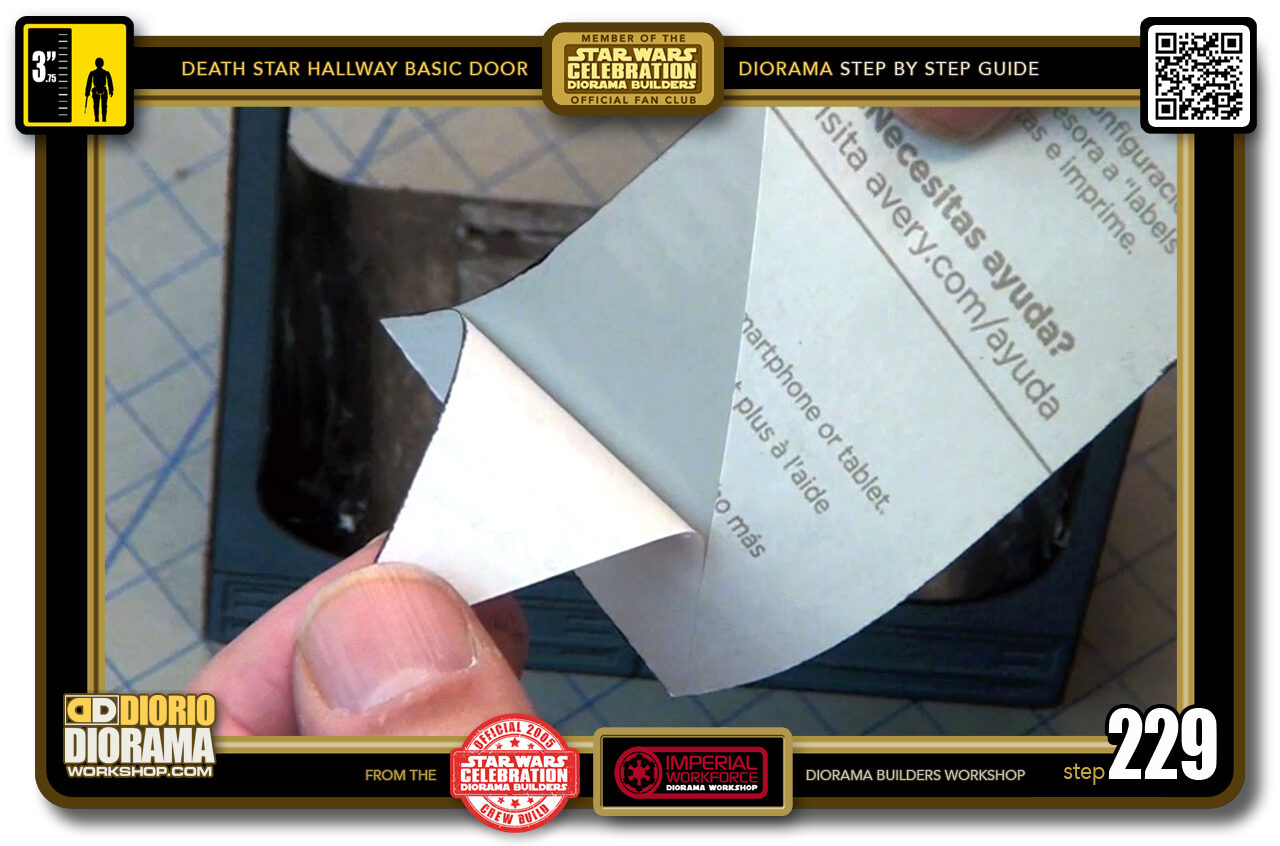
- STEP 229 > Peel your decal sheet.
-
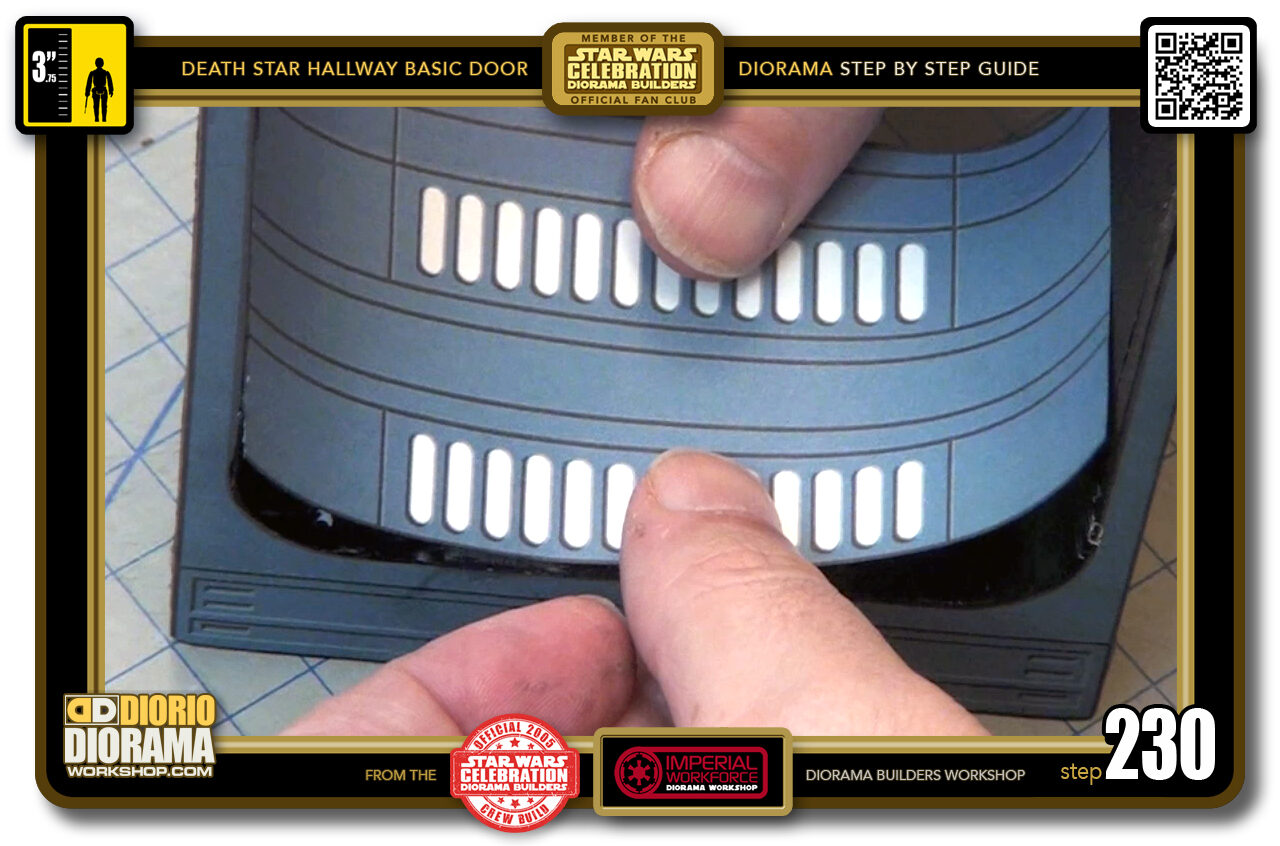
- STEP 230 > MAKE CERTAIN YOUR LINES ARE STILL IN CORRECT ALIGNMENT POSITION !!! Now carefully lower making sure it lines up with the outer edges AND Centre of each curve.
-
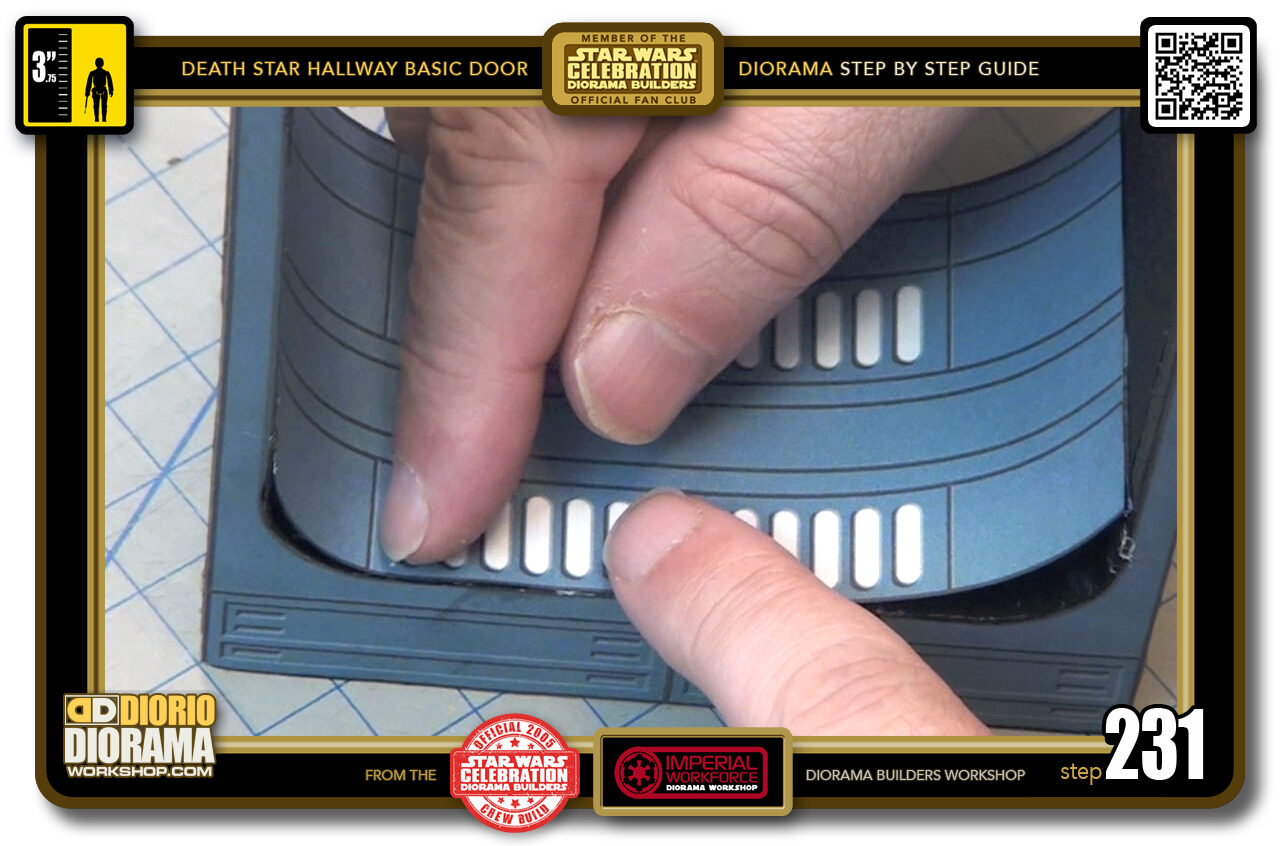
- STEP 231 > Gently put the SMALLEST OF PRESSURE from the centre towards the left.
-
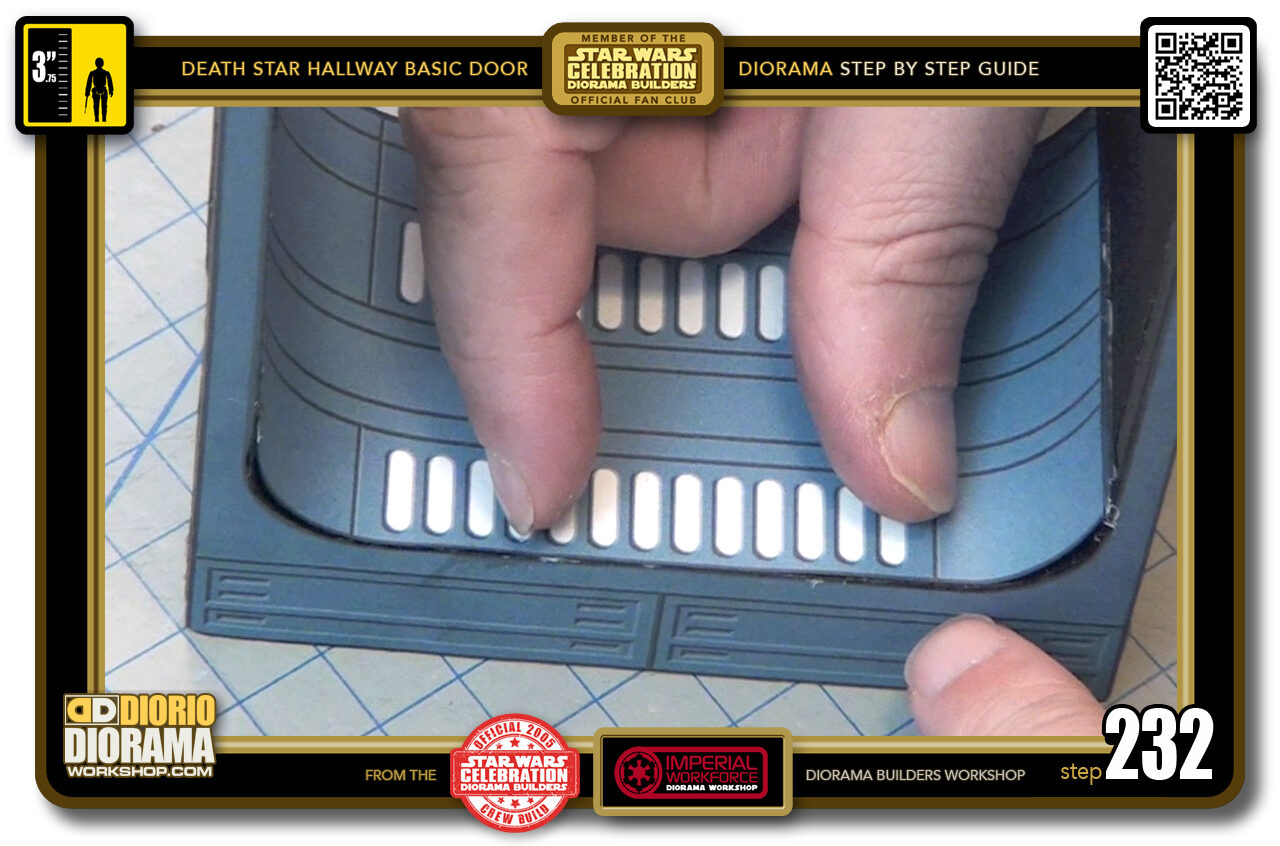
- STEP 232 > Then back to centre and SMALLEST PRESSURE towards the right.
-
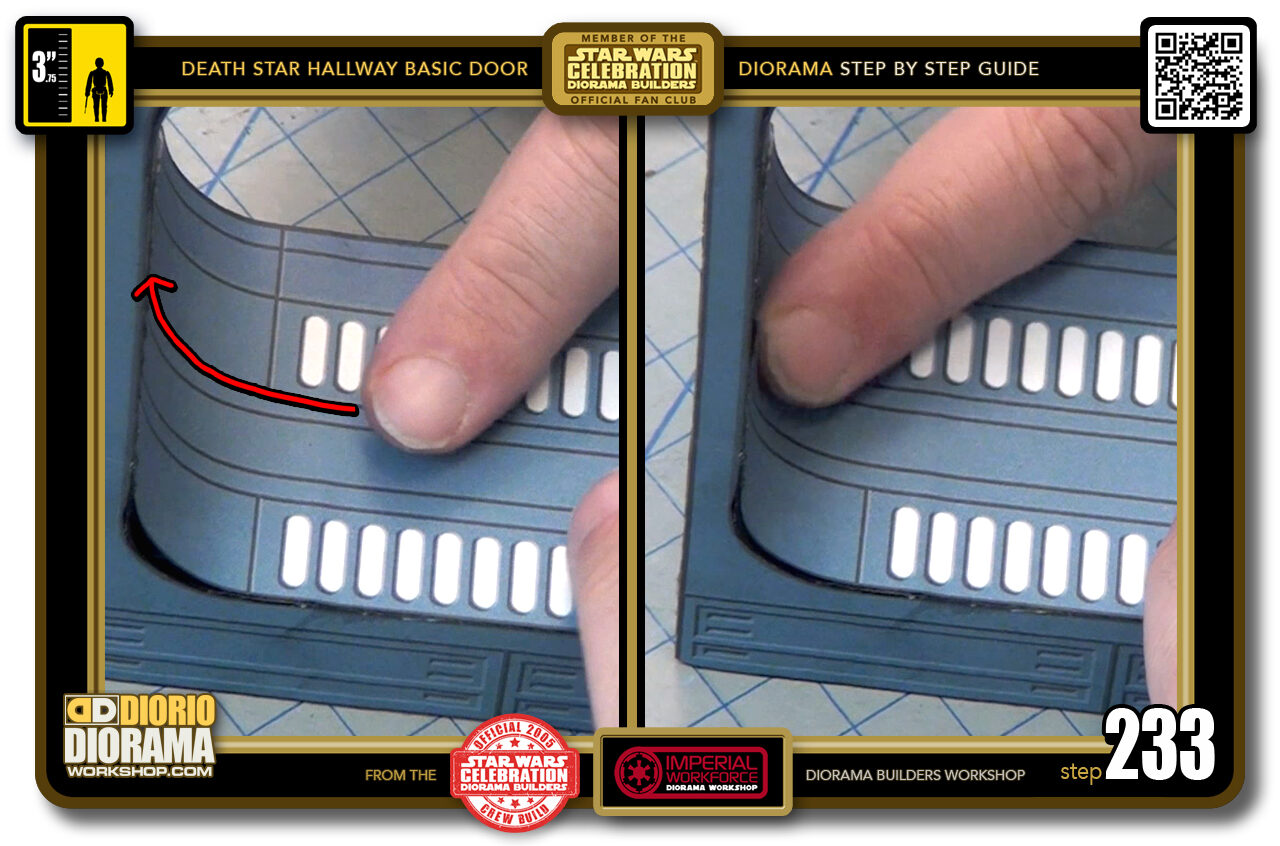
- STEP 233 > When you see that the outside alignment is perfect, go to the centre of the ceiling, centre of the decal (where the door slides open and closed in the movie) and gently LIGHT PRESSURE slide to the left and UP the curve like a skateboard. Back to the centre start position, move to the left this time working your way to the left corner as you go up the ramp - remember you are removing air bubbles by doing this. Back to the start, again towards the left but up the right side of the ramp now.
-
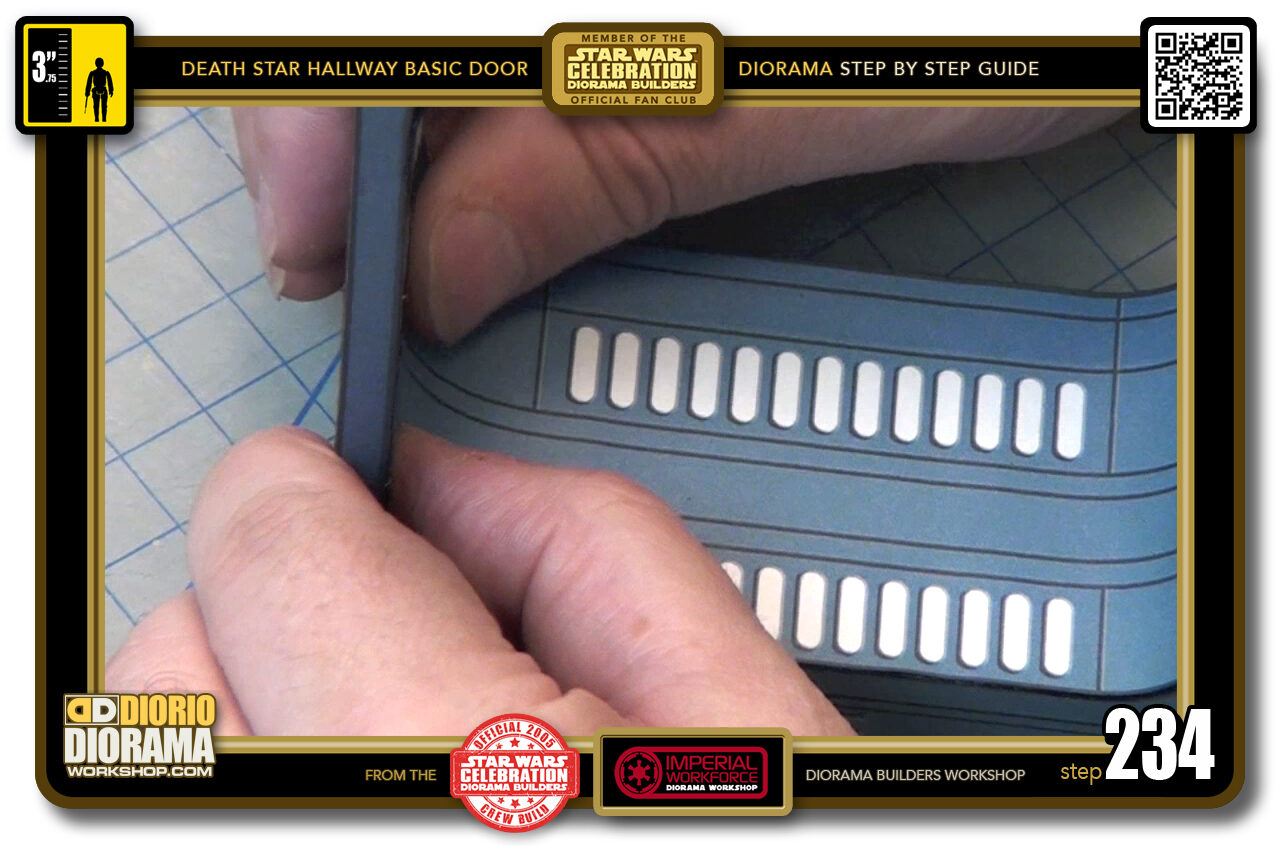
- STEP 234 > When you are certain there are NO AIR BUBBLES, you can start pressing from the curve start UP to the curve ends, from one side to the other, back and forth.
-
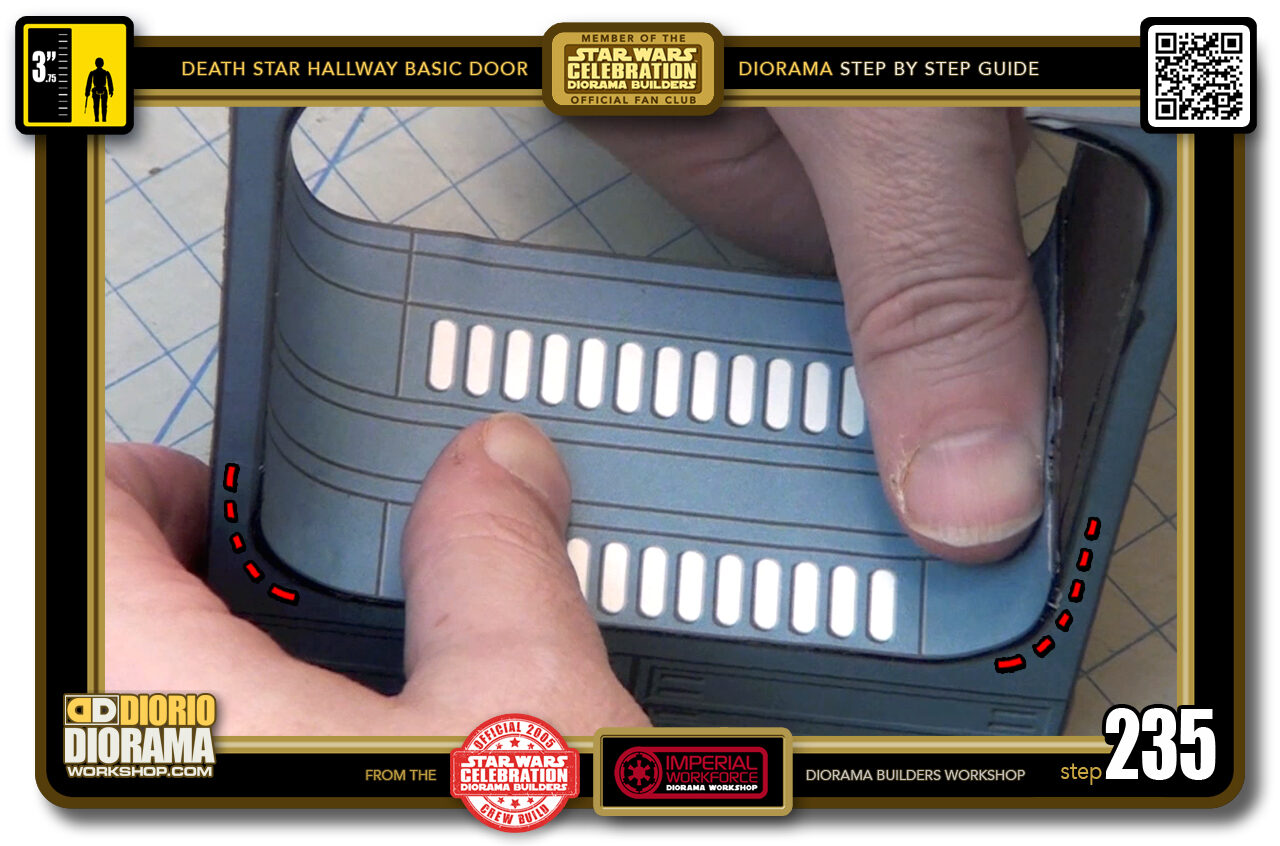
- STEP 235 > Now it's time for the other side, Do as you did before... CENTRE FIRST UP THE RAMP, back to centre, move right towards right corner, back to start, move right towards left corner.
-
-
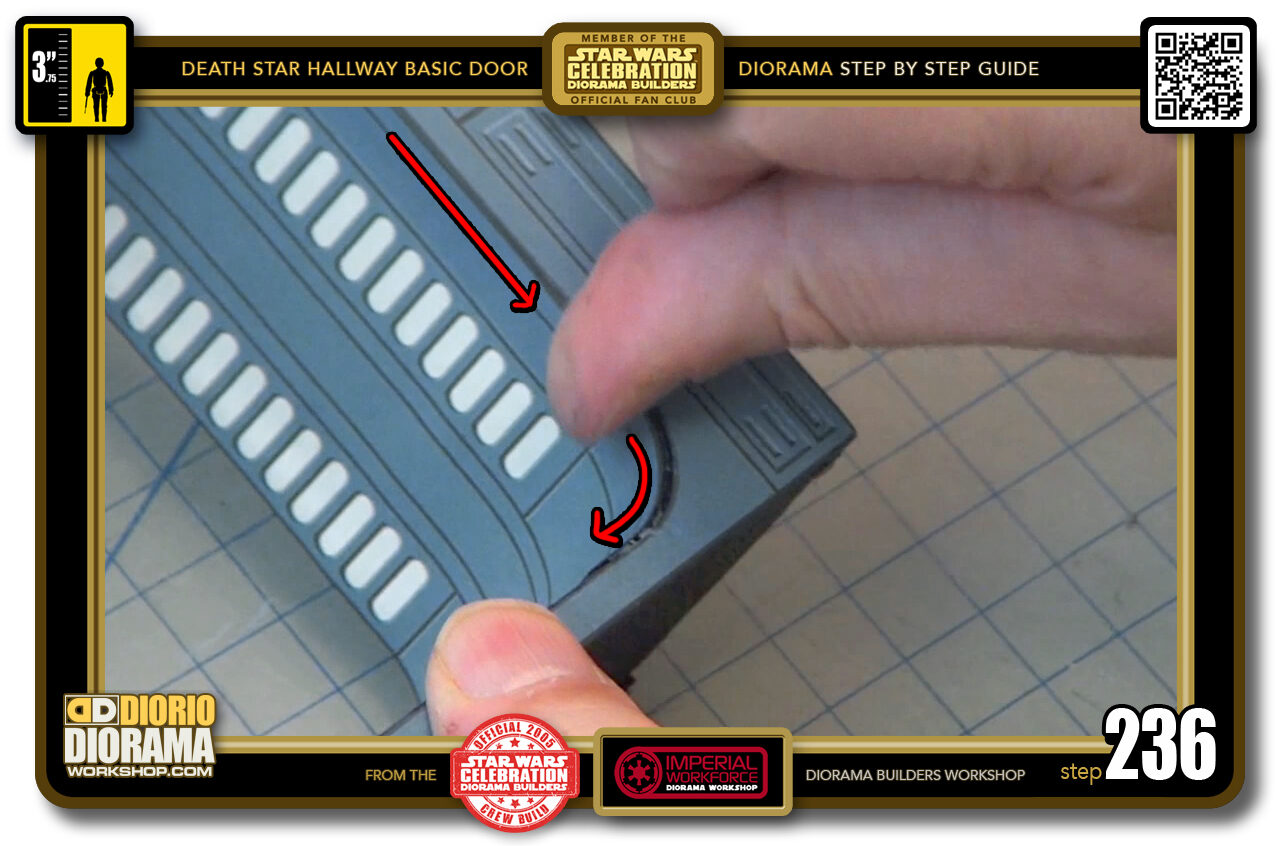
STEP 236 > Once pressure has been put all over and the decal secure in place, use the fingernail technique to blend the 2 touching decals together. Not only does this round the corners but it attches the decal to the door even more.
If you don't know the technique, you want to go down the sides with your fingernail while at the same time curve around it to the front of the door frame. So it's not ONE LONG movement but a series of small curve and down motions.
-
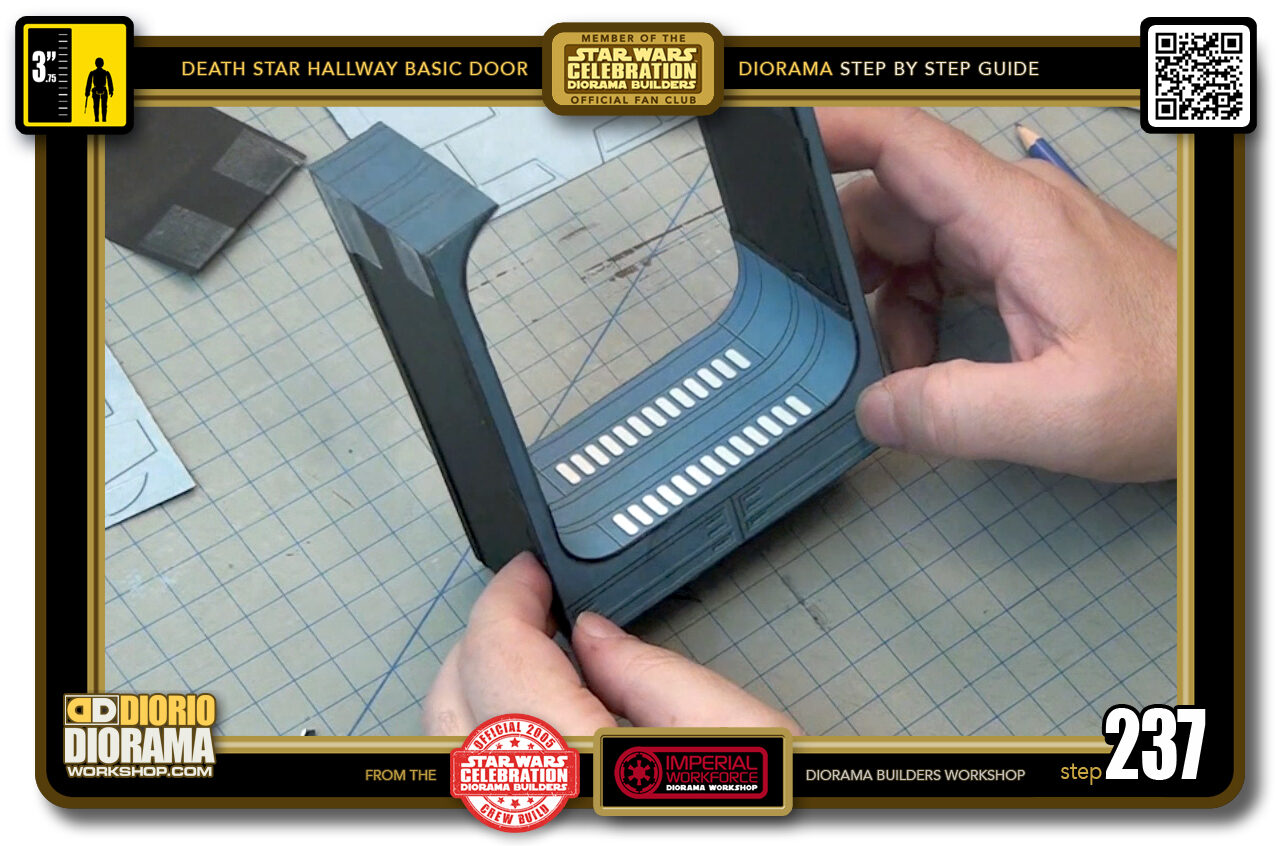
- STEP 237 > The ceiling decal is not set and looks soooo beautiful if I do say so myself 🙂
-
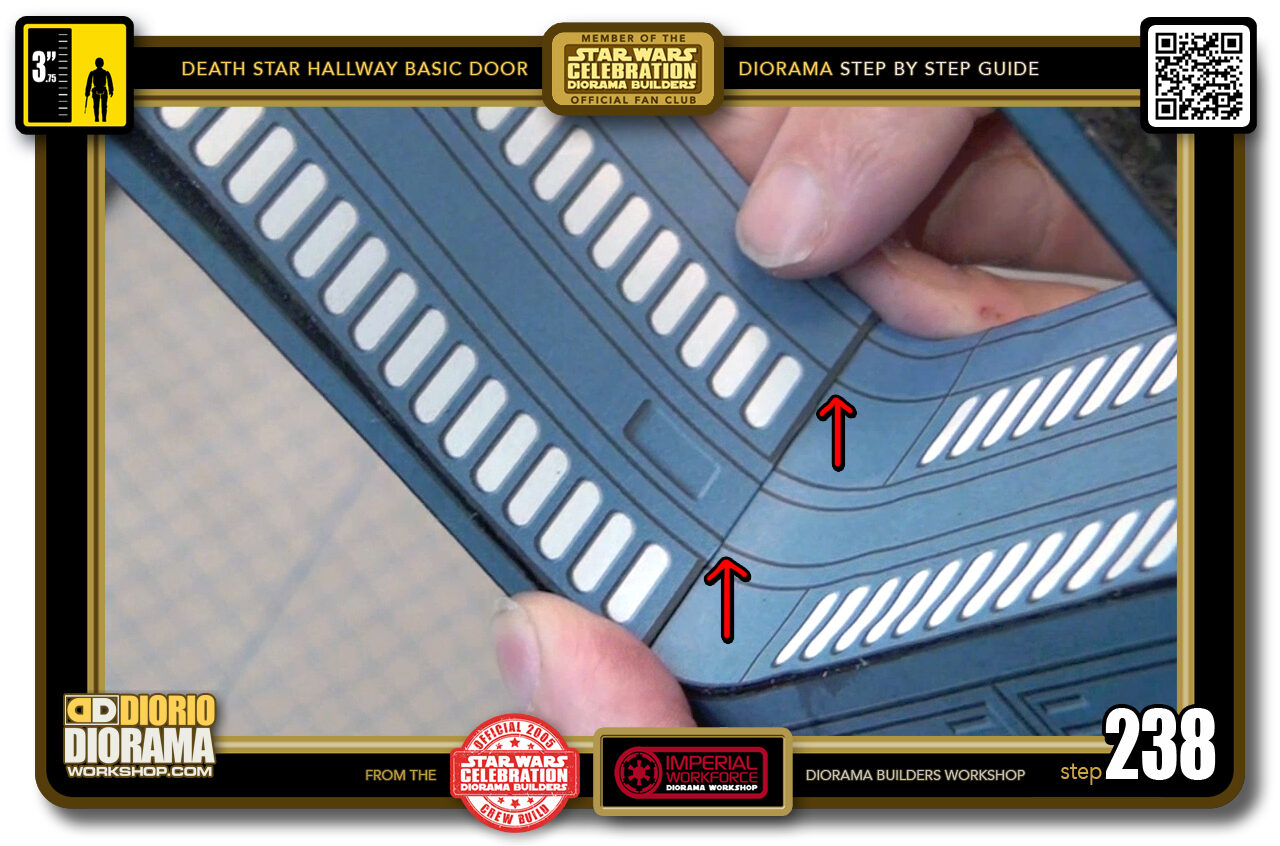
- STEP 238 > Now back to how all these lines are so important again. You have to make sure your sides are facing the correct way or you won't get this alignment (red arrows).
-
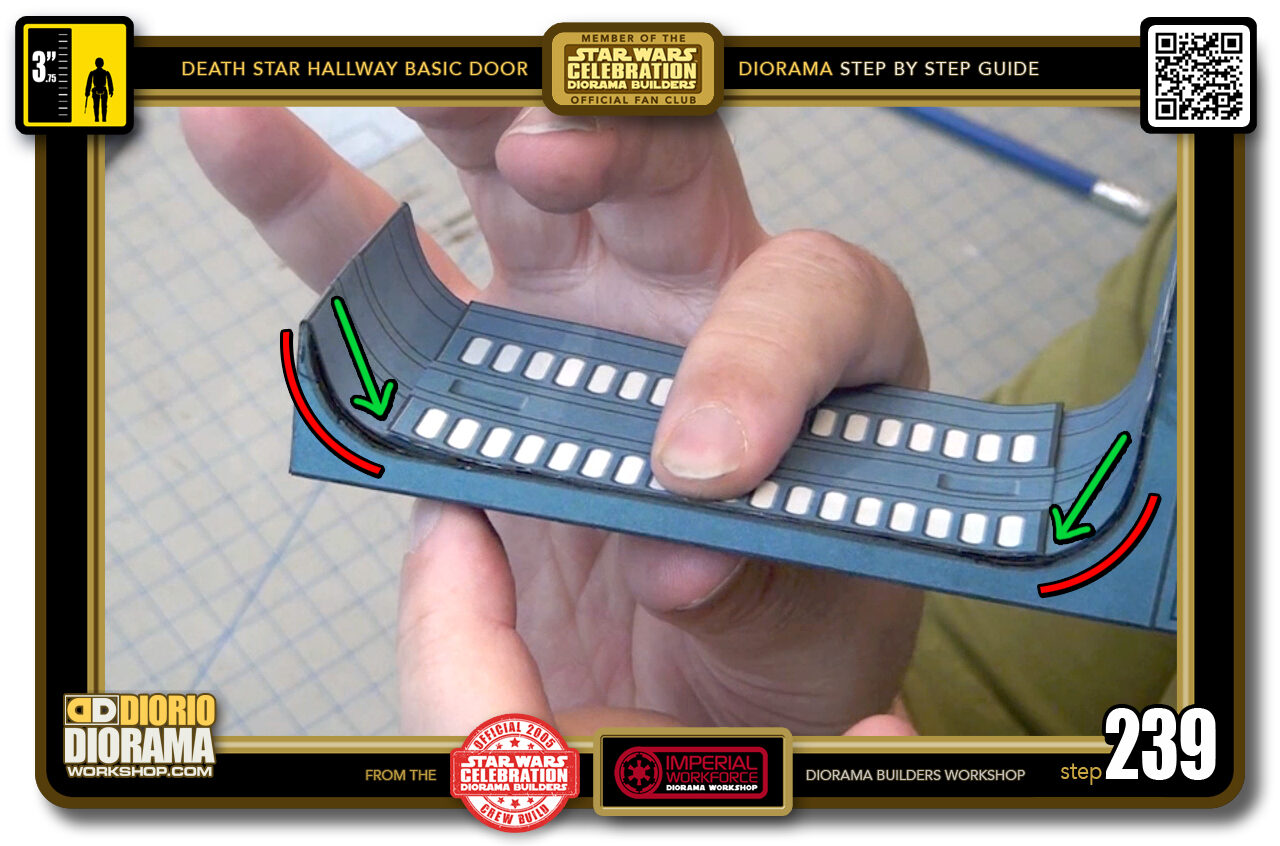
- STEP 239 > Like the ceiling, the sides are designed for the neons to be centered AND the ends of the decal (green arrows) this time starts and stops at the edges of the inner curves (red lines).
-

- STEP 240 > The cool thing you see now is when you will place the sides now, see how the lines follow each other from the bottom all the way to the ceiling and blend into each other to give the illusion of one long decal.

.
Did you already build this Diorama ? At home or at our Star Wars Celebration Diorama Builders workshop ? Would you like to show it in the site’s GALLERY VISITORS DIORAMAS section, YES ? That is Awesome !!! You can find out all the details on how to email me your photos on the VISITORS SUBMISSIONS INFO page … When I get your photos, I will create your very own page just like this one. You may not realize it but work does inspire others to join in the fun of making Action Figure Dioramas.
.
NOT FOR RESALE ALL Decals, tutorials and artwork are ©FrankDiorio (dioramaworkshop.com) and offered FOR FREE to the fans – that would be you ? so you can build and display my diorama designs in your very own home. I realize I cannot control what one does with my graphics once I place them on the web, I can only ask you as one fan to another, please respect the artist and do not be that jerk who uses my designs and tutorials to build a copy of my work only to sell it on EBAY or trade/sale groups and forums. Thank You. Frank.
.
.
If you have a facebook account, why not join the Official Diorama Builders Fan Club today, simply click the logo link below.
 .
.
Catch up with fellow visitors and exchange stories, read cool interviews with the crew, exchange photos, fun surprises and grab some FAN ONLY merchandise next year at actual future conventions ?
.
©2018 Frank Diorio DioramaWorkshop.Com
.
IF YOU LIKE WHAT YOU SEE, PLEASE SHARE WITH YOUR FRIENDS
USING THE SOCIAL MEDIA BUTTONS BELOW