


-

- STEP 201 > Put some gluestick on the RIGHT FOOT on the curve portion...
-
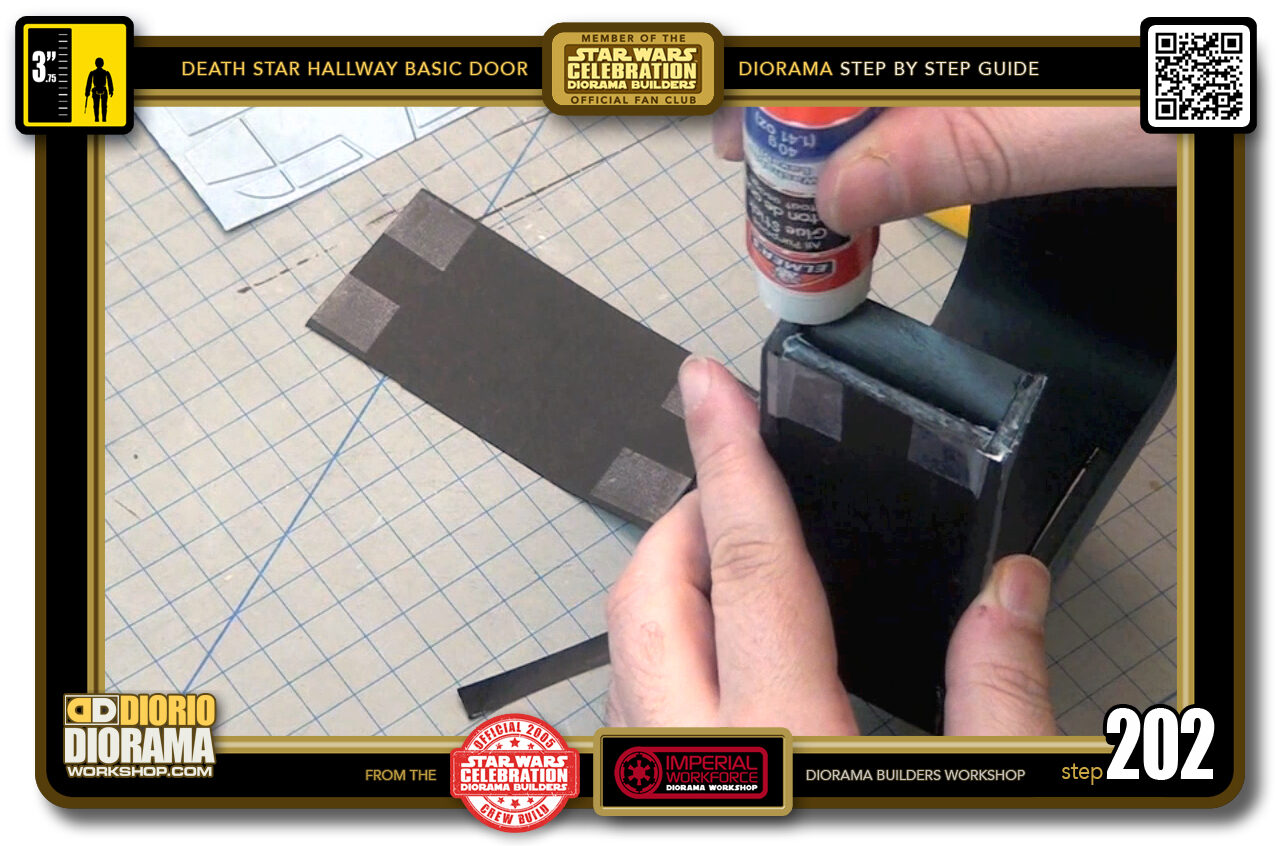
- STEP 202 > And all over the bottom of the RIGHT FOOT.
-
-
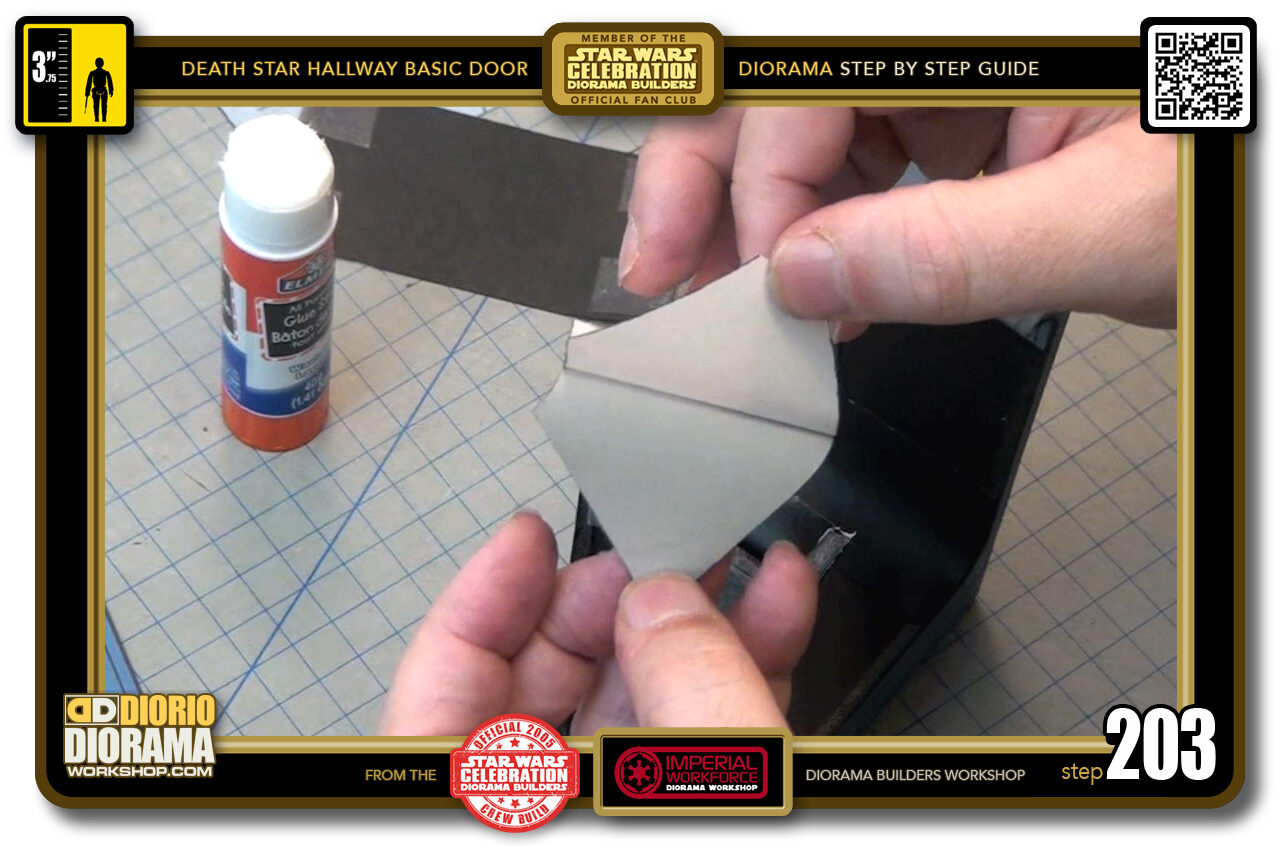
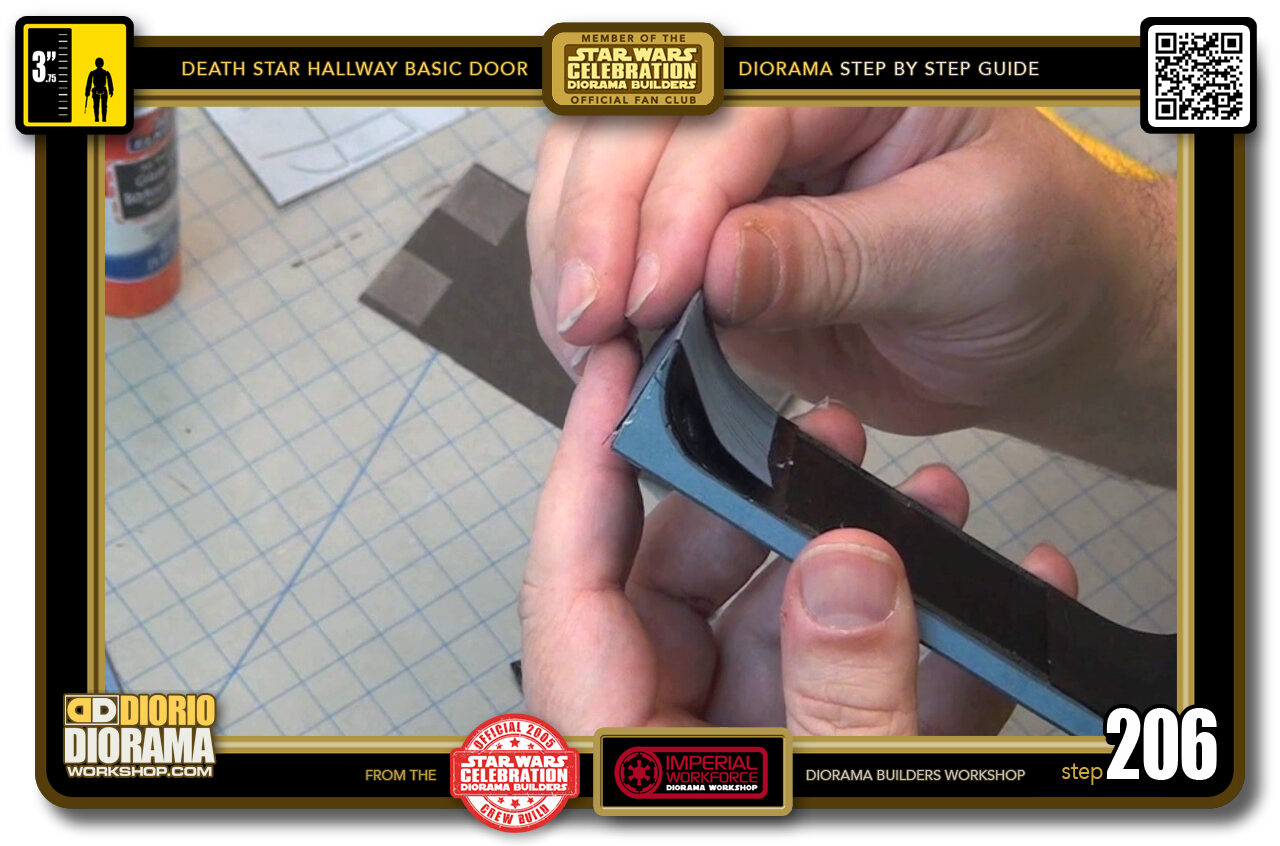
STEP 203 > NOW EXTREMELY IMPORTANT !!! You MUST MAKE CERTAIN that the first decal you are peeling is THE RIGHT FOOT DECAL. If you didn't identify it when cutting, go look at another print if you are making more than 1 door or look at the pdf sheets on the site.
RIGHT FEET VARY FROM STYLE "A" "B" and "C" it is MOST IMPORTANT you check this out NOW or else your end result will be all screwed up and not as intended, TRUST ME - it happened to me during filming the Video Tutorial 🙂
-
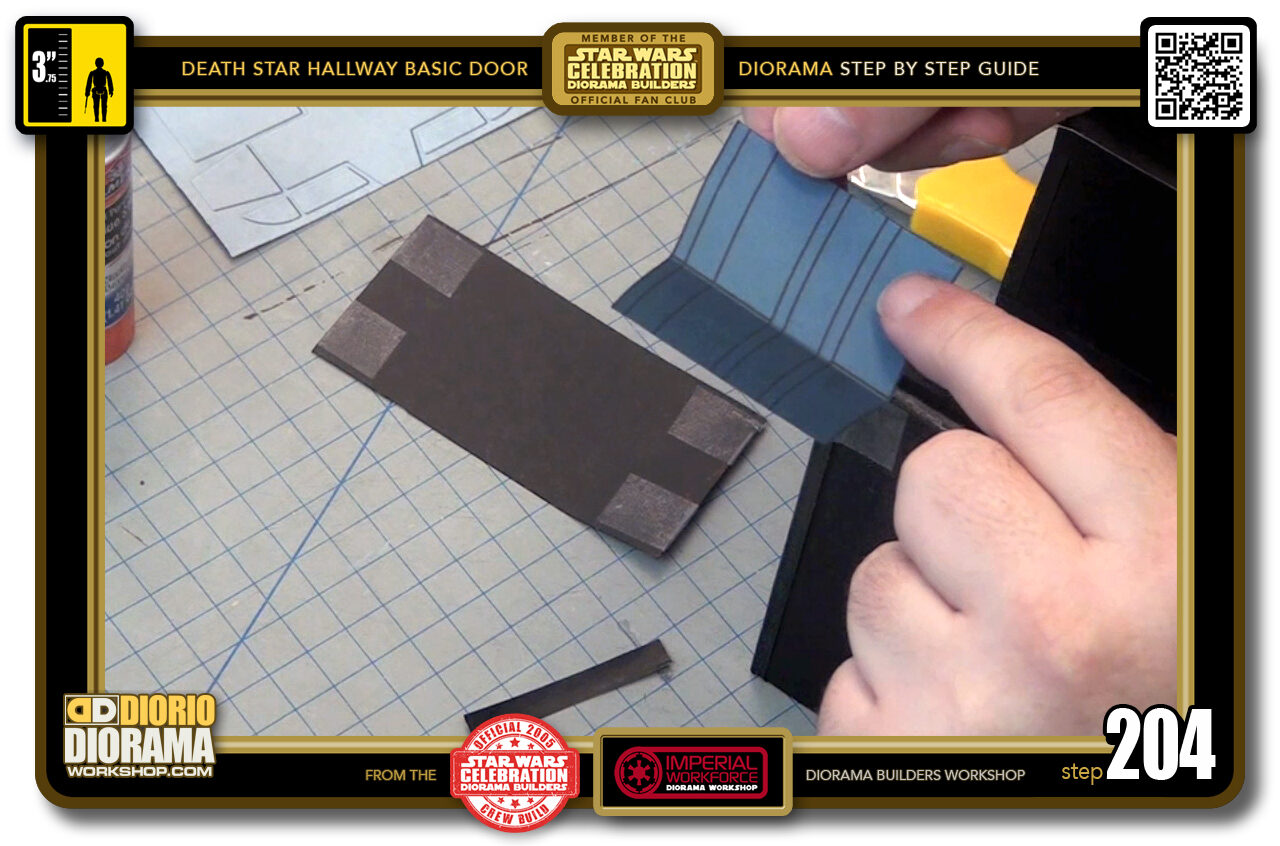
- STEP 204 > Now that you identified what decal is the RIGHT SIDE - remember those dark and light colours ? Well the dark goes UNDER the foot.
-
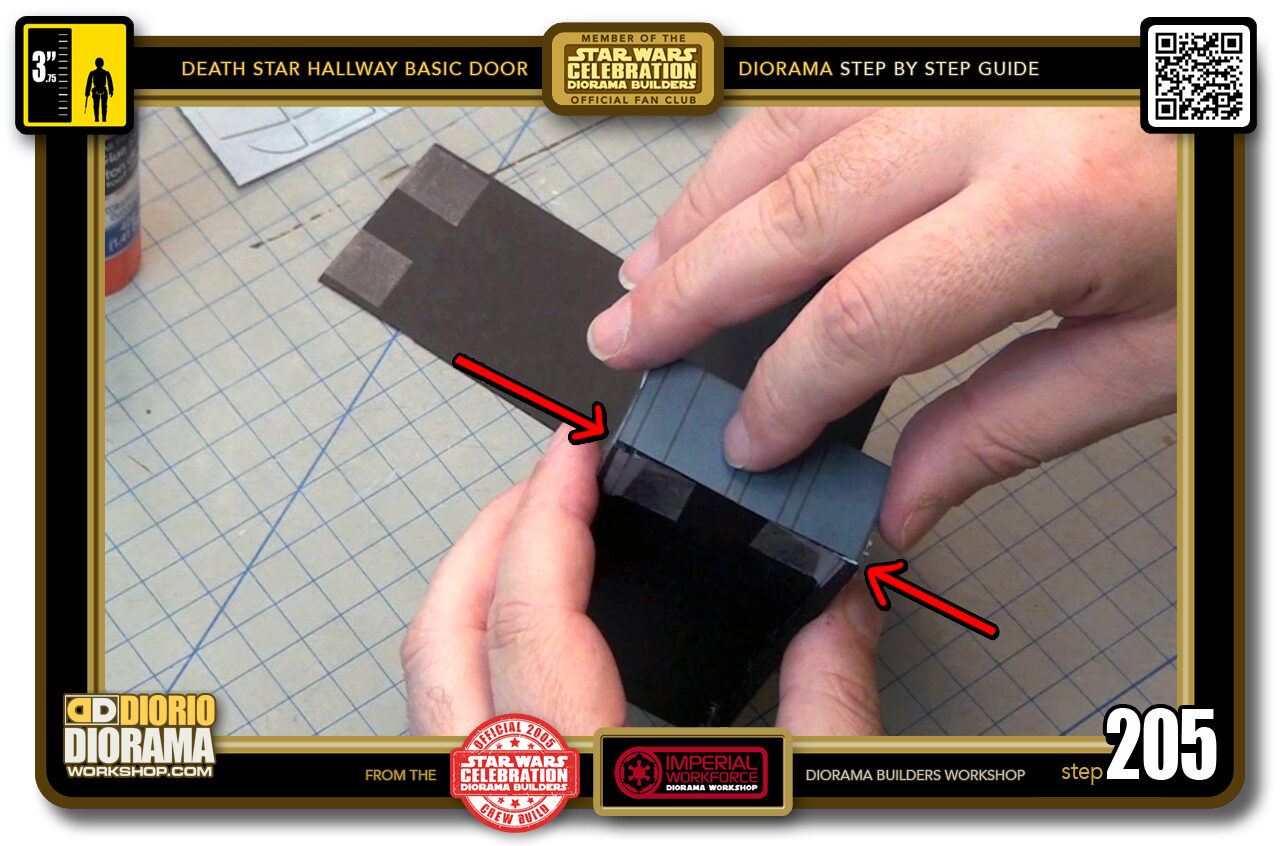
- STEP 205 > Carefully align the outer edge of the decal with the outer side edge of the door frame assembly.
-
- STEP 206 > Carefully pinch at the centre of your fold then pinch pinch pinch towards the right, back to centre, pinch pinch pinch towards the left.
-
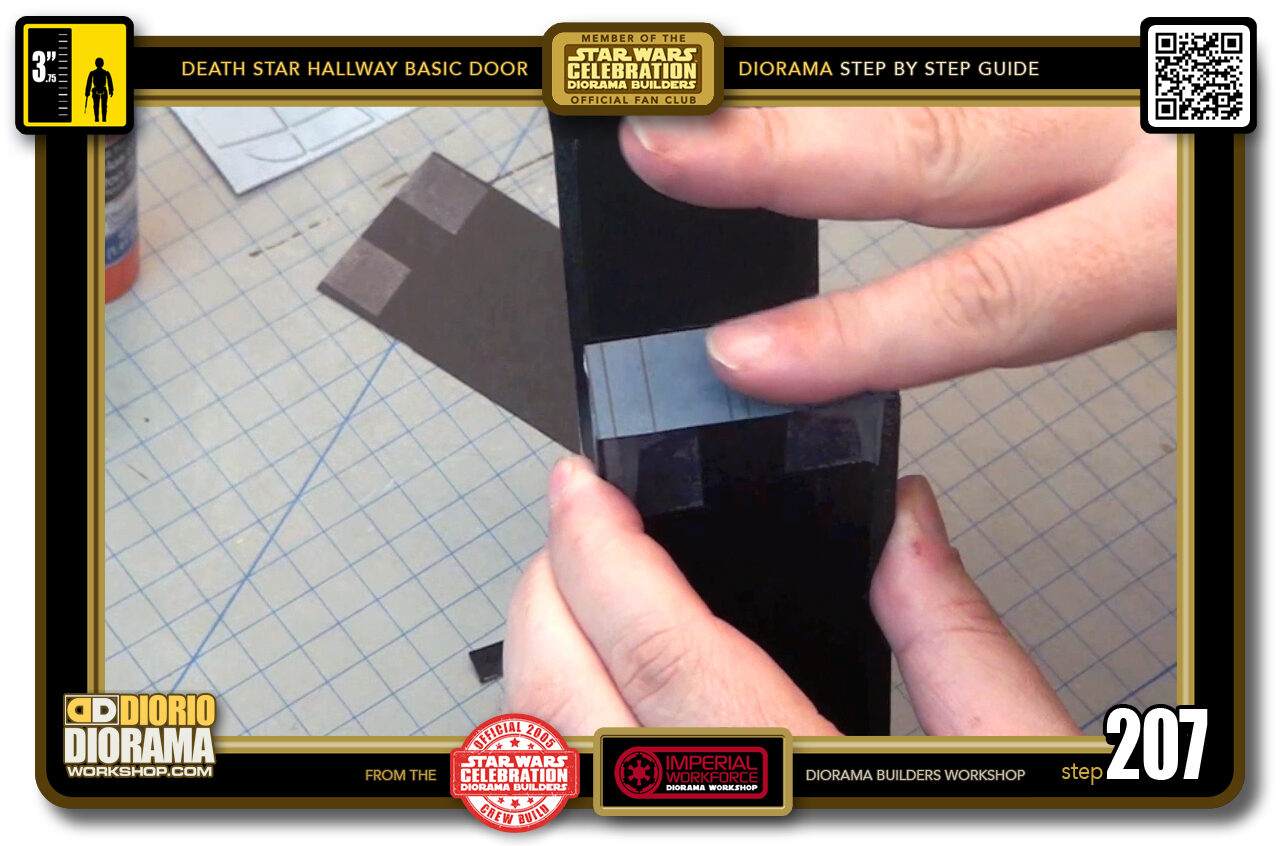
- STEP 207 > Now press all over the bottom of the decal to make sure all of the gluestick is being abosorbed into both surfaces.
-
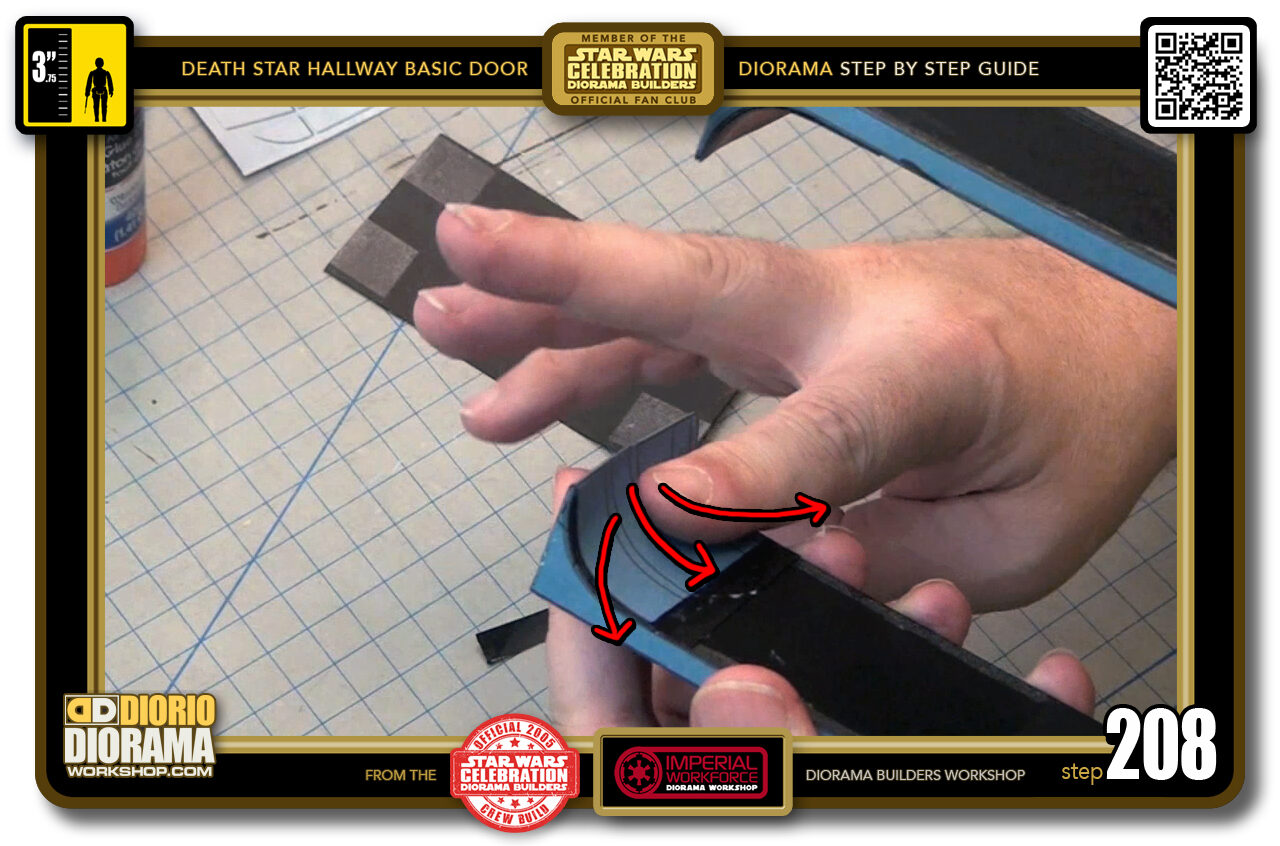
- STEP 208 > Now return to the inside of the frame. With your index finger start at the centre, slide down towards the top of the decal. Back to the top centre of the slide, now slide down while moving to the right edge at the same time. We are squeezing out any possible air bubbles to keep the surface nice flat and clean. Return to the centre top and slide down towards the left this time.
-
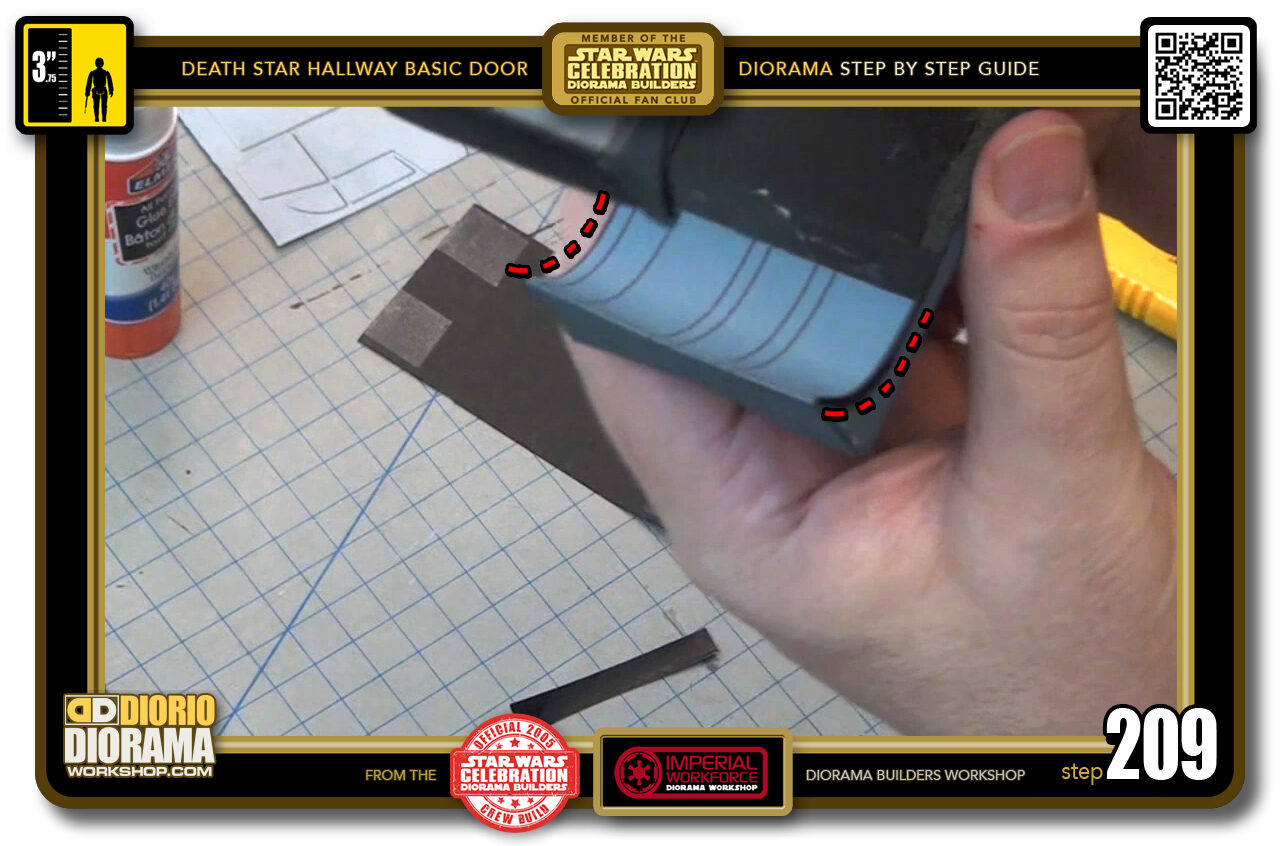
- STEP 209 > your foot decal is done and should align properly with both edges as you see in the dotted red lines.
-
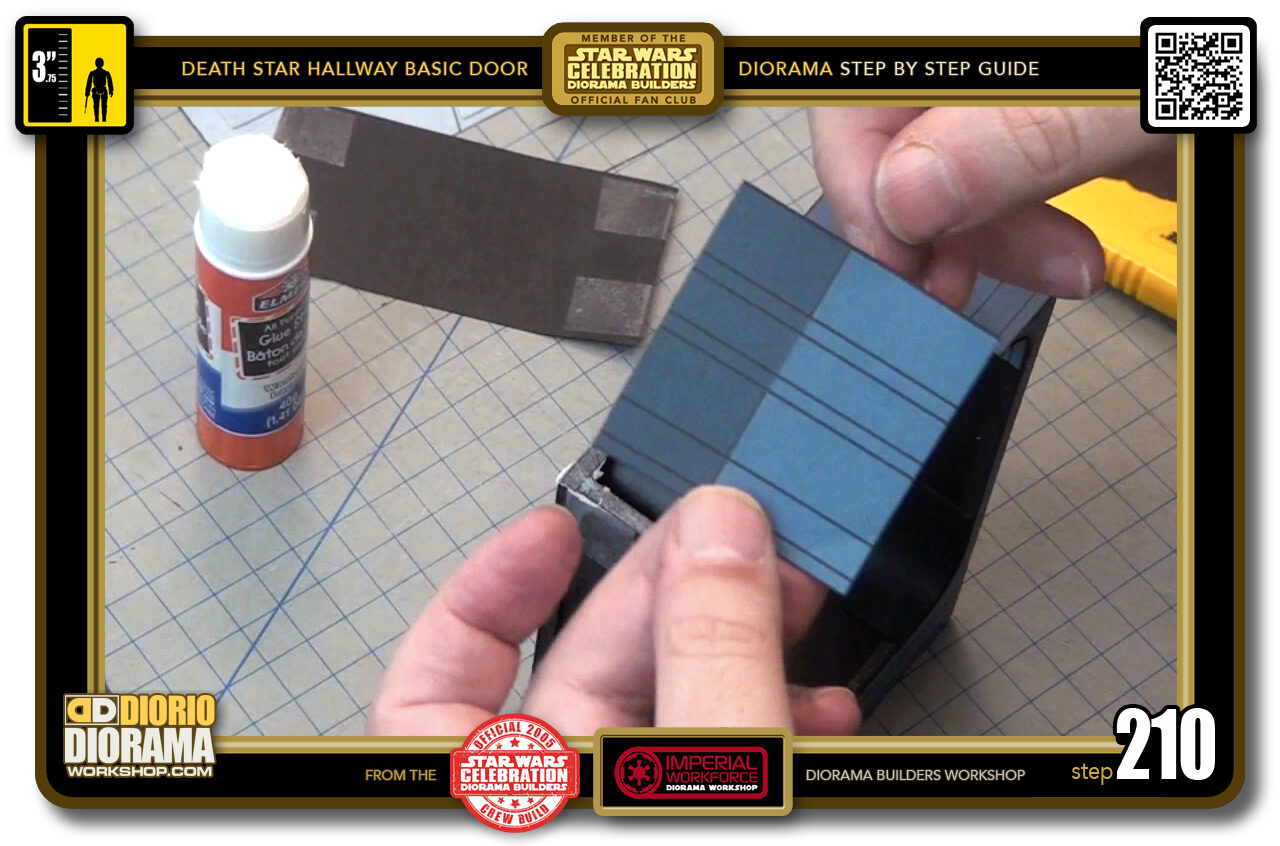
- STEP 210 > Time for the other side, technique is the same.
-
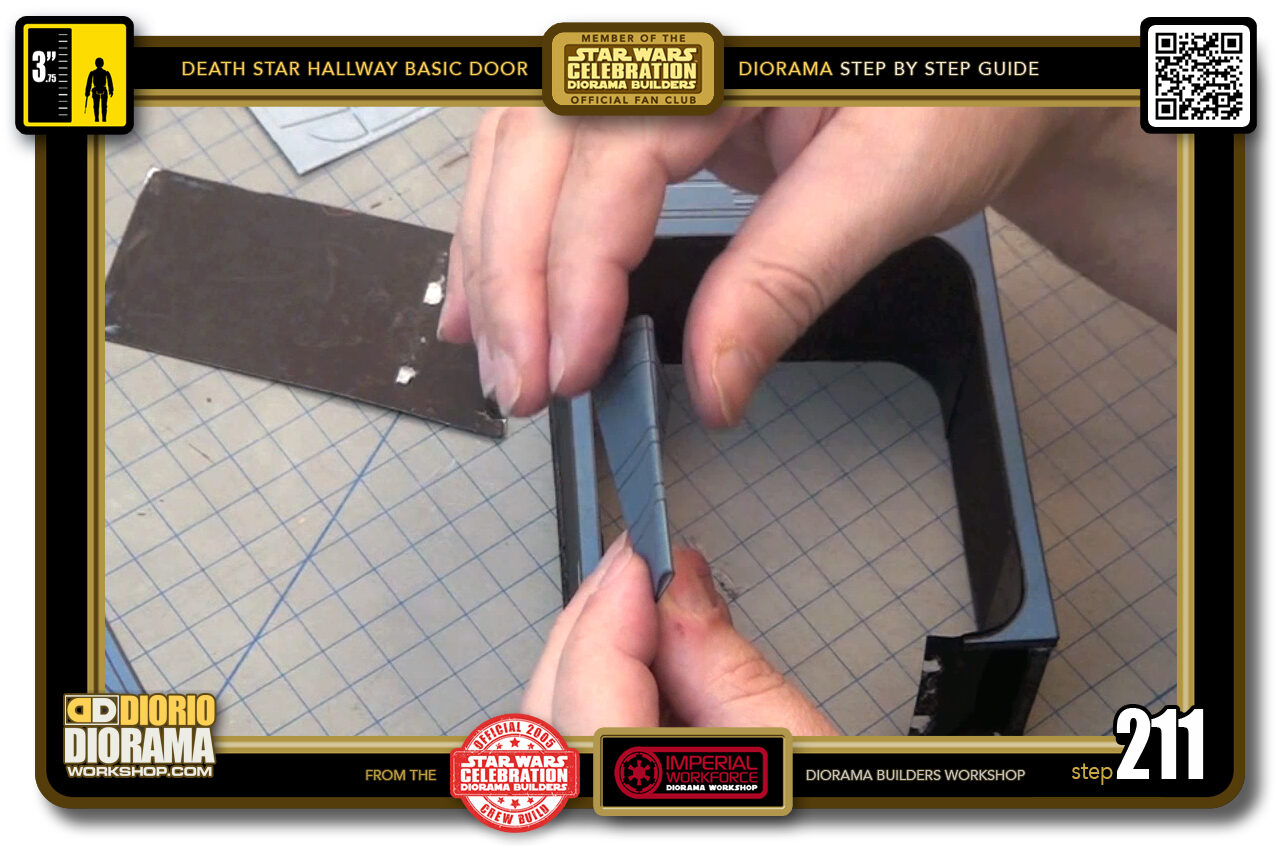
- STEP 211 > Prepare your decal by pinching at the folding guide line.
-
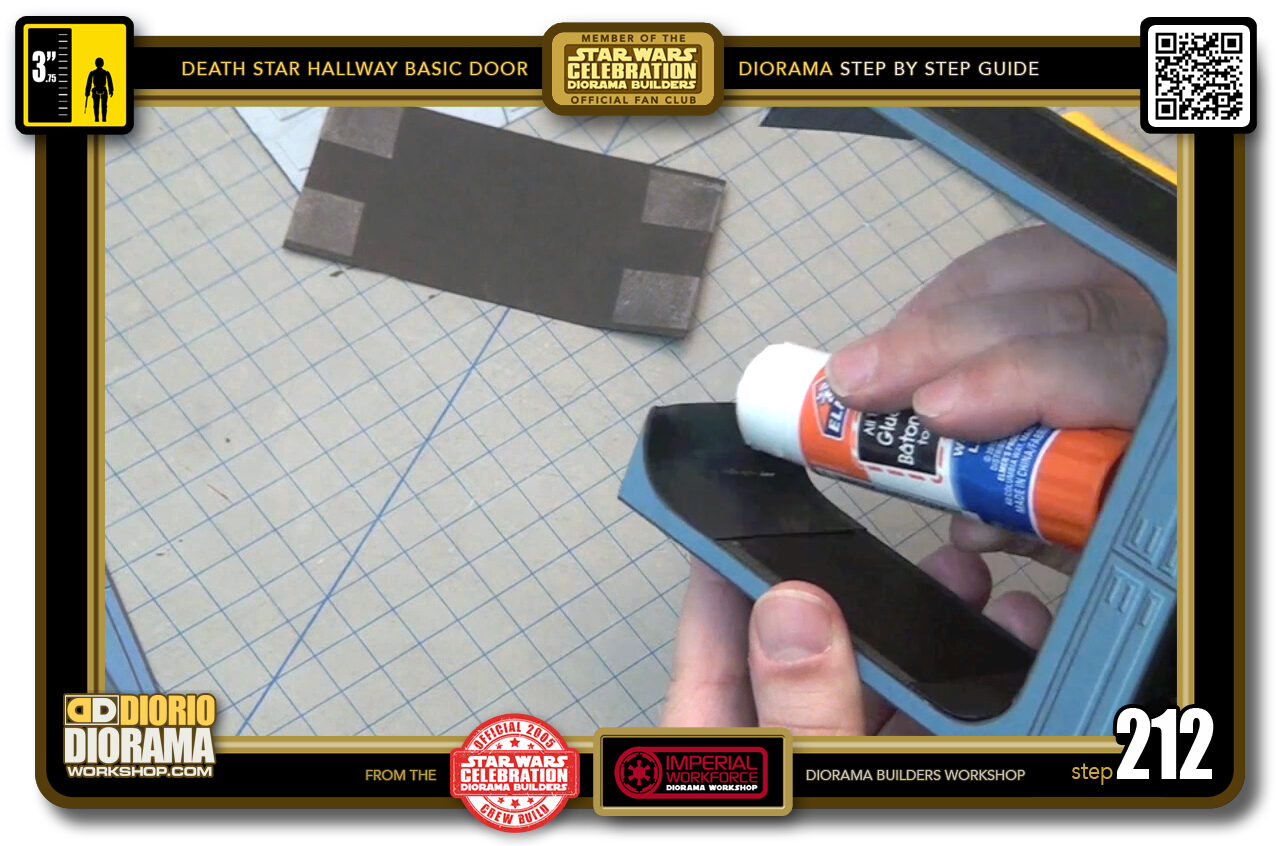
- STEP 212 > Good amount of gluestick in the curve zone
-
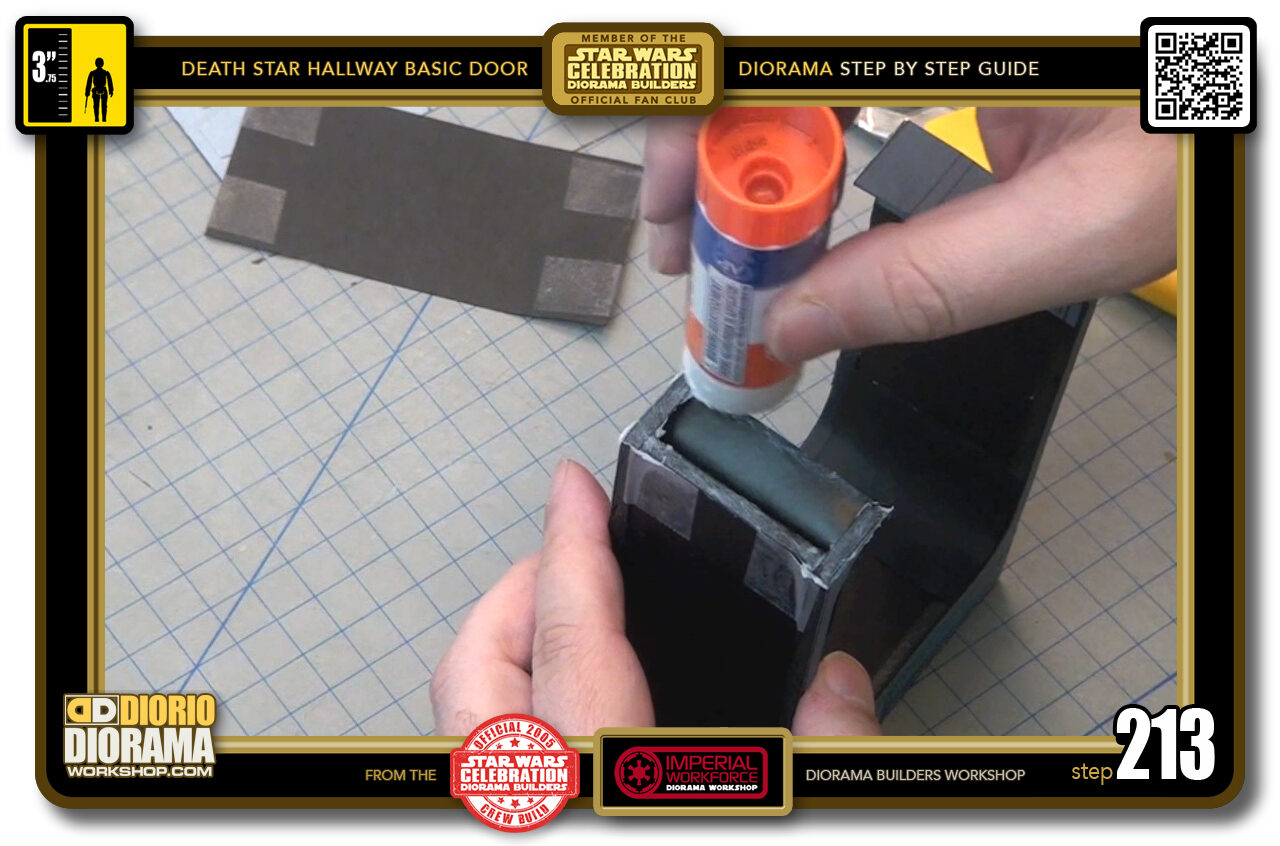
- STEP 213 > As well as the bottom of the foot.
-

- STEP 214 > Peel your decal, if you printed on regular paper, obviously skip this step 🙂
-
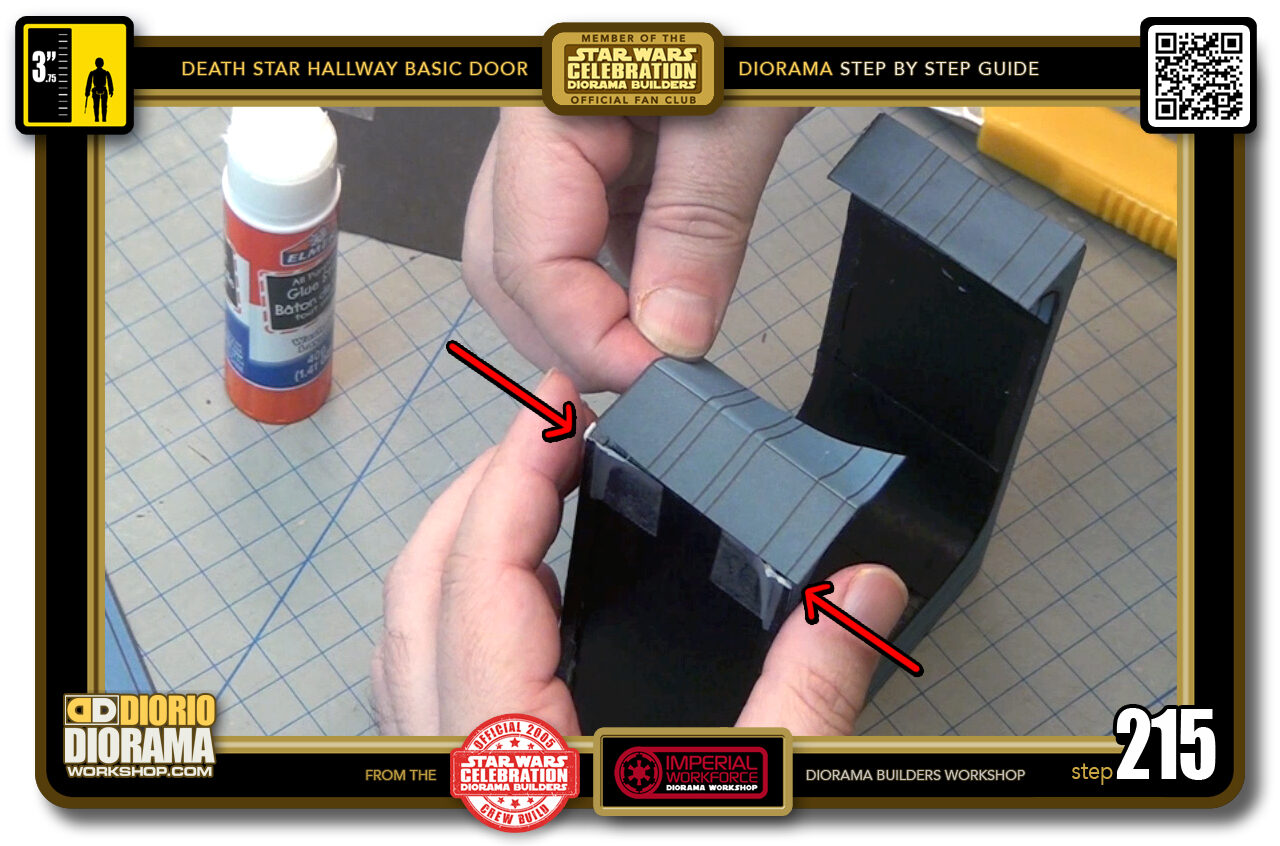
- STEP 215 > Align the corners with the foamcore edges.
-
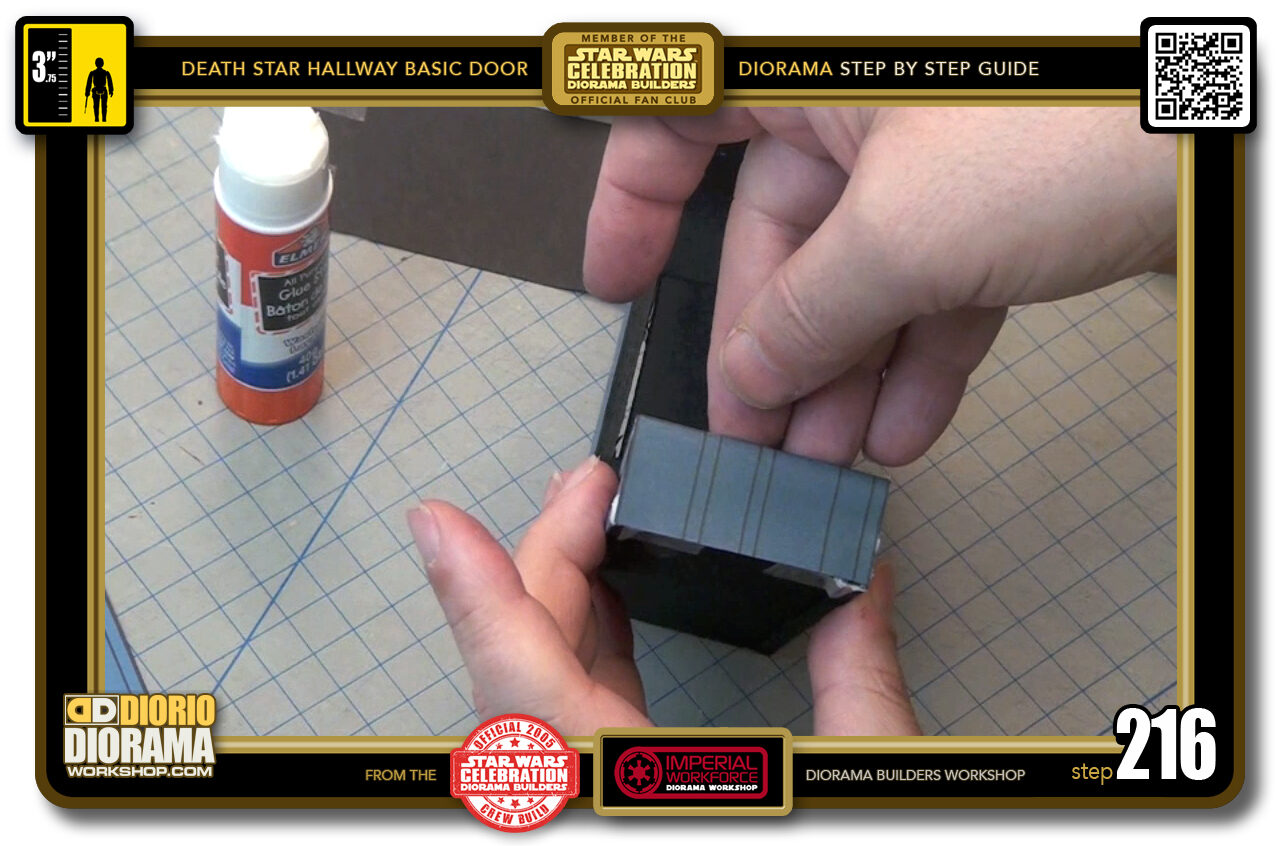
- STEP 216 > When all is aligned properly...
-
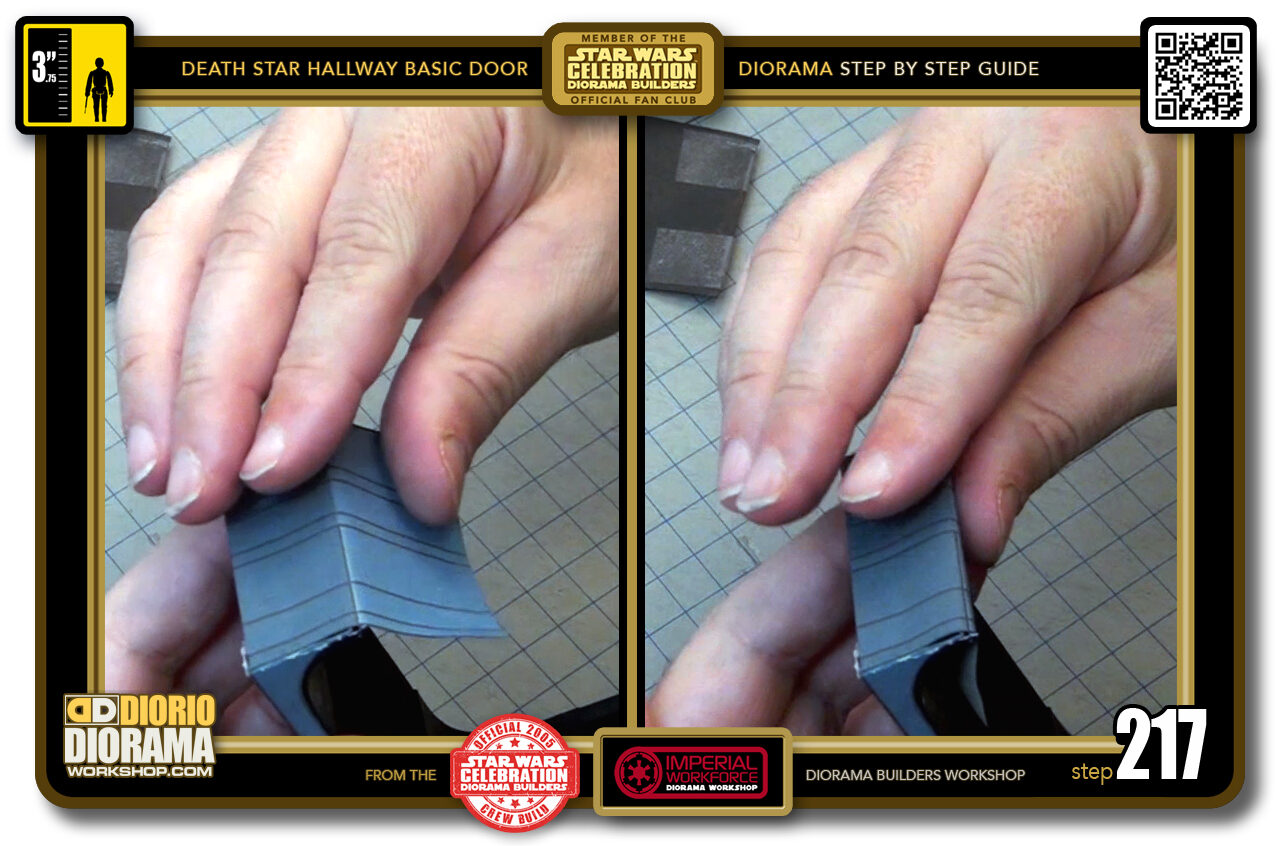
- STEP 217 > Carefully pinch over the top centre part first. Then pinch towards the left, back to centre and pinch to the right.
-
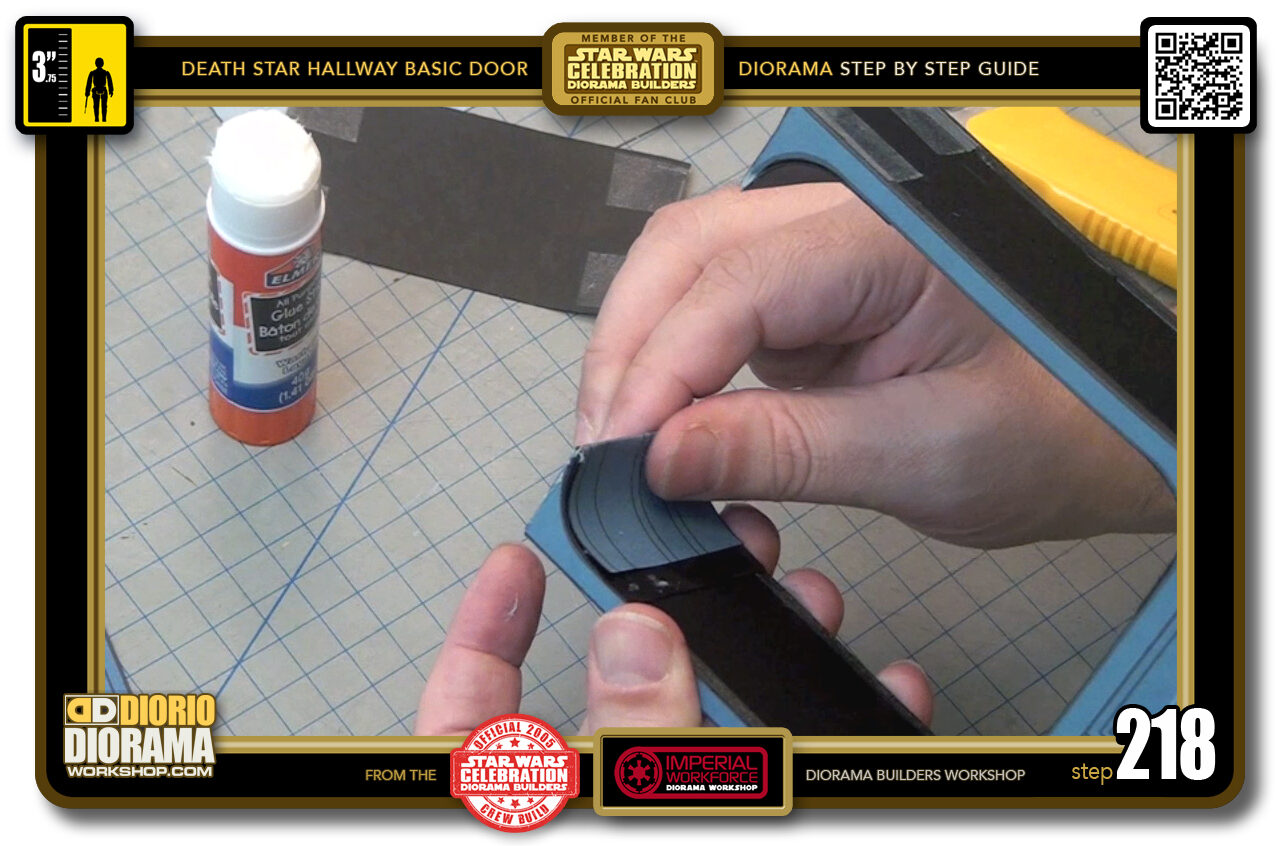
- STEP 218 > When the pinching is all done and tight...
-
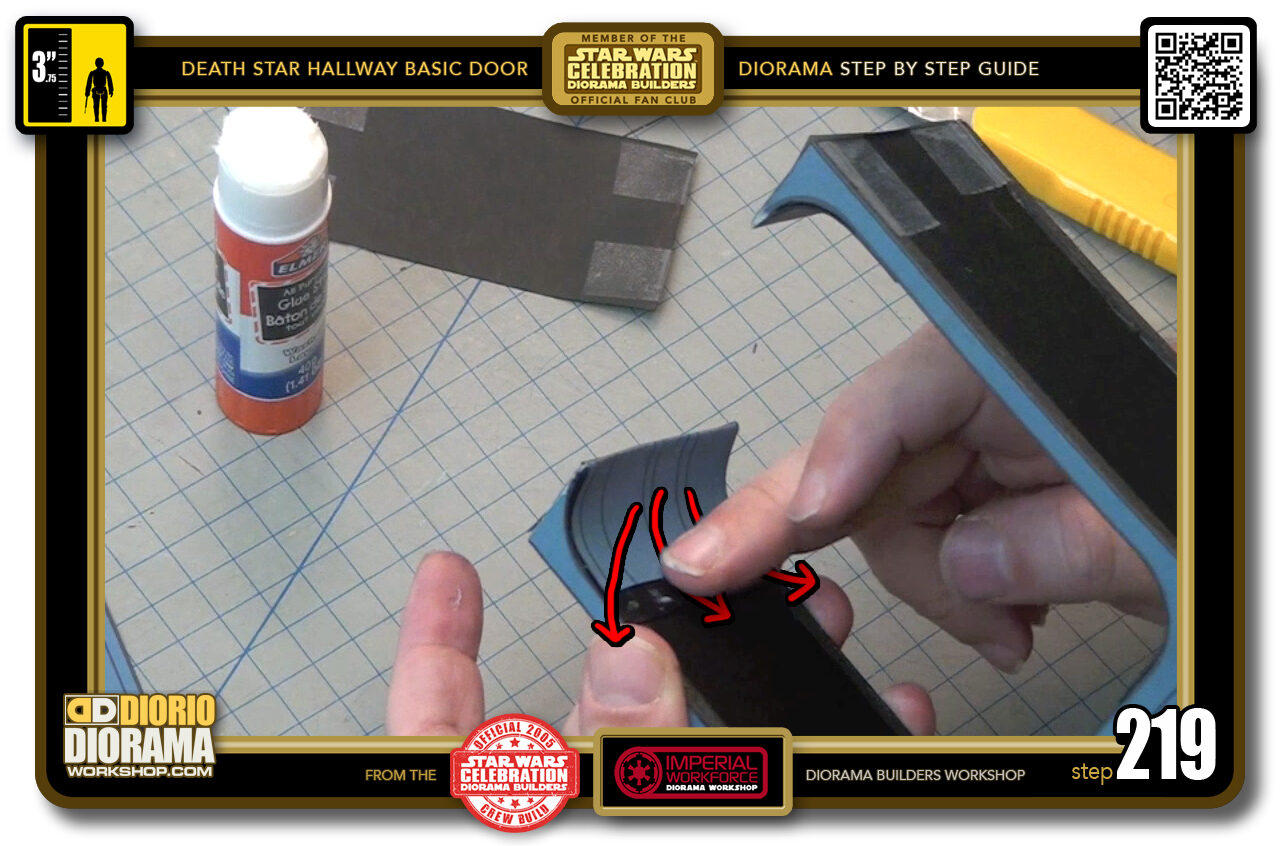
- STEP 219 > Move to the sliding technique. Centre slide, back to centre top, slide left, back to centre top, slide right.
-
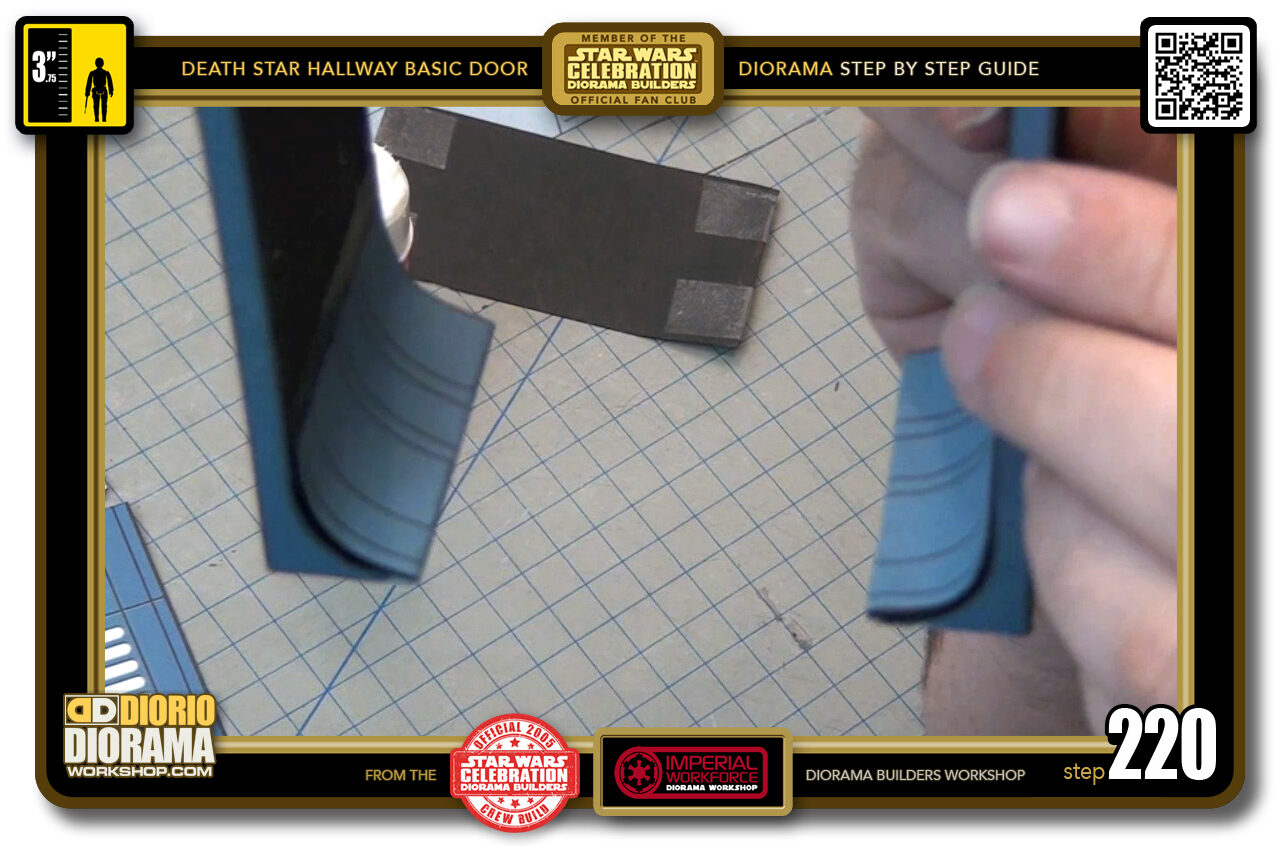
- STEP 220 > There you go, both feet decals in place, no bubbles, smooth as a baby bum as they say 🙂

.
Did you already build this Diorama ? At home or at our Star Wars Celebration Diorama Builders workshop ? Would you like to show it in the site’s GALLERY VISITORS DIORAMAS section, YES ? That is Awesome !!! You can find out all the details on how to email me your photos on the VISITORS SUBMISSIONS INFO page … When I get your photos, I will create your very own page just like this one. You may not realize it but work does inspire others to join in the fun of making Action Figure Dioramas.
.
NOT FOR RESALE ALL Decals, tutorials and artwork are ©FrankDiorio (dioramaworkshop.com) and offered FOR FREE to the fans – that would be you ? so you can build and display my diorama designs in your very own home. I realize I cannot control what one does with my graphics once I place them on the web, I can only ask you as one fan to another, please respect the artist and do not be that jerk who uses my designs and tutorials to build a copy of my work only to sell it on EBAY or trade/sale groups and forums. Thank You. Frank.
.
.
If you have a facebook account, why not join the Official Diorama Builders Fan Club today, simply click the logo link below.
 .
.
Catch up with fellow visitors and exchange stories, read cool interviews with the crew, exchange photos, fun surprises and grab some FAN ONLY merchandise next year at actual future conventions ?
.
©2018 Frank Diorio DioramaWorkshop.Com
.
IF YOU LIKE WHAT YOU SEE, PLEASE SHARE WITH YOUR FRIENDS
USING THE SOCIAL MEDIA BUTTONS BELOW