


-
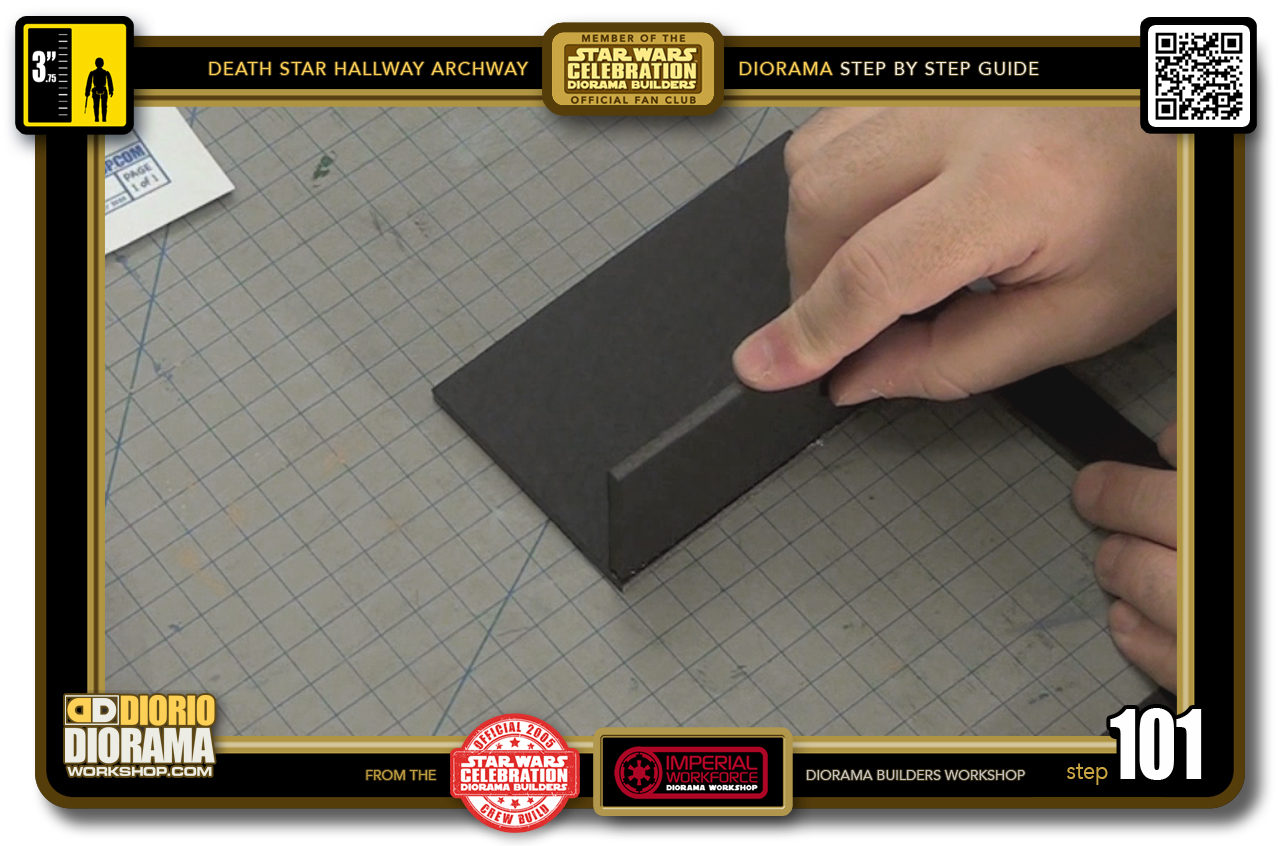
- STEP 101 > Carefully bring down your side wall and press it against the edge of the front foamcore.
-

- STEP 102 > You may notice a few bubbles pop out from the seem, don't worry about this, let it cool off maybe 20-30 seconds
-
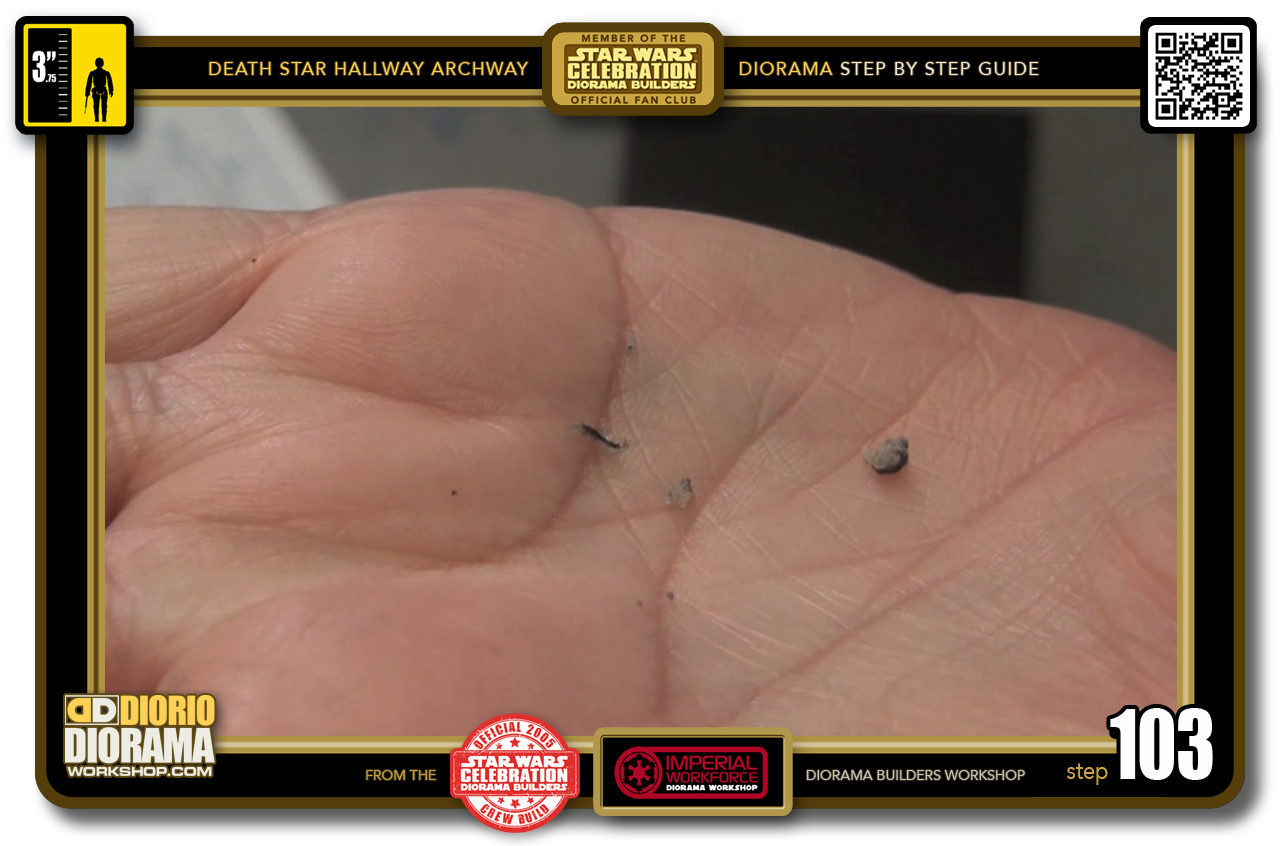
- STEP 103 > And you can scrape them with your nail and create these little nose boogers 🙂 Please DON'T EAT THEM - LOL. Just toss them in the trash.
-

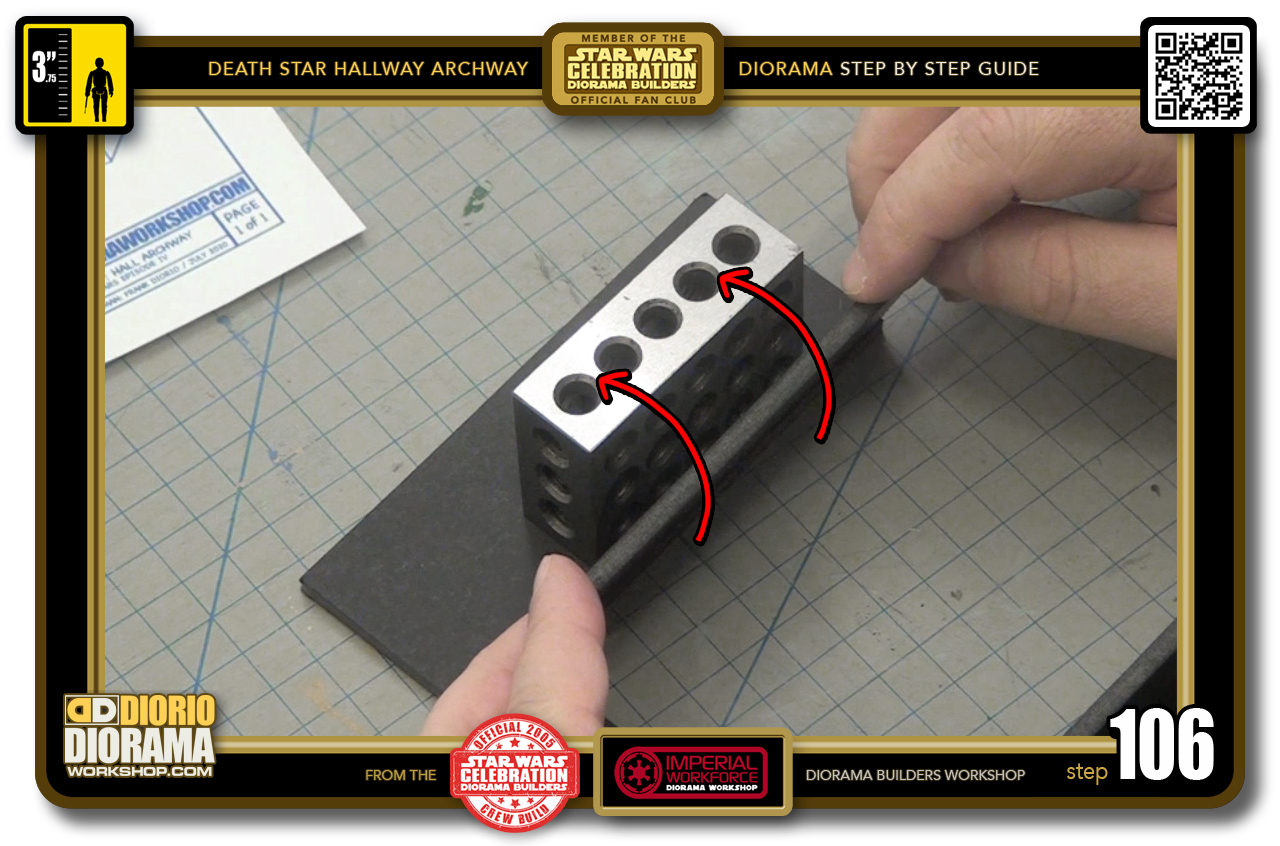
- STEP 104 > Here I am showing you an example of how the "1-2-3 blocks" are used. I aligned my foamcore inner piece with the front foamcore base and then gently pressed the 1-2-3 block against it. This way I can rely on the block as to where to place my hot glued side without using a pencil guide or my eye's estimation.
-

- STEP 105 > A quick line of Hot Glue along ONE side of the inner wall piece.
-
- STEP 106 > Carefully plave it on the foamcore base and tilt it upwards ( red arrows ) it will stop at a perfect 90 degrees when it reaches the block. What you can't see in the photos is that these blocks WEIGH A LOT, you have to really push hard to knock them over. REAL HARD.
-
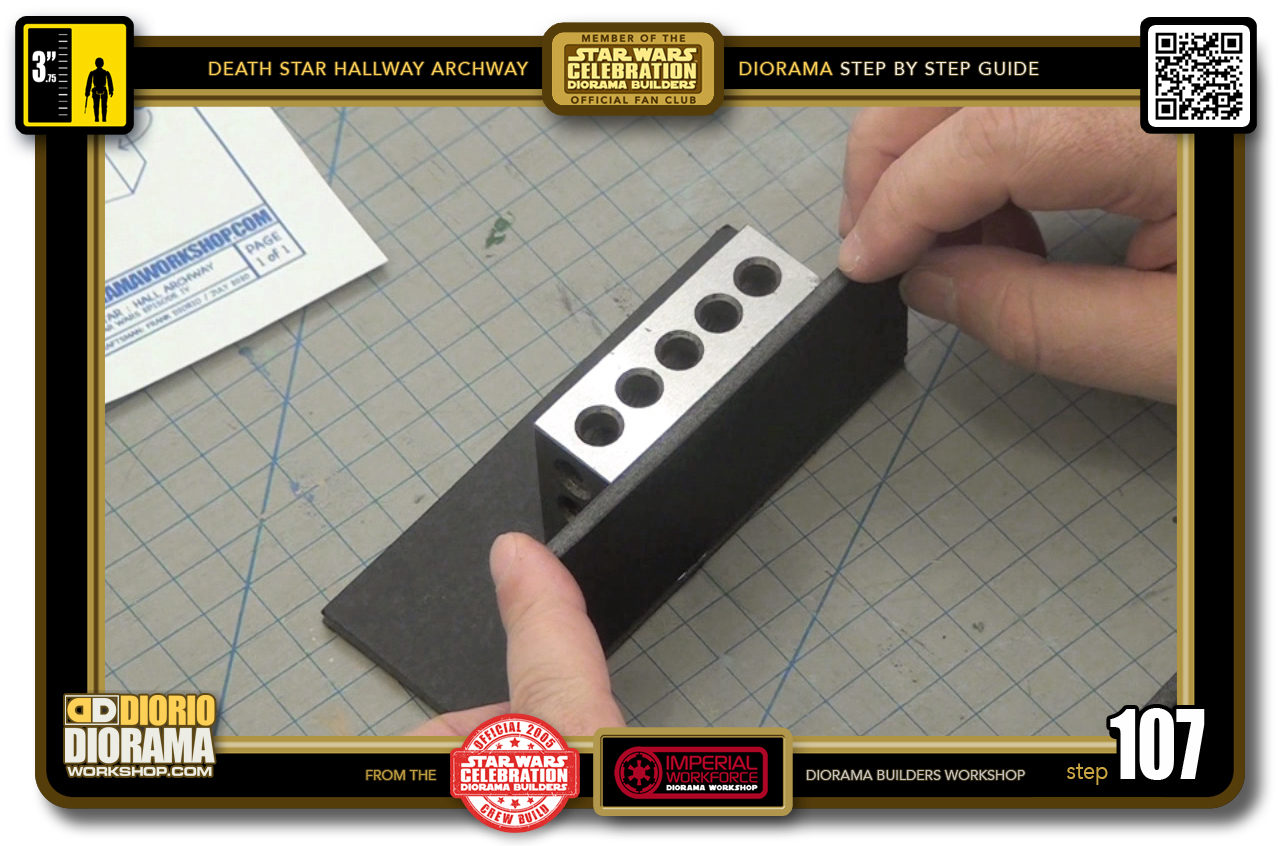
- STEP 107 > Now that you have the perfect 90 degree angle...
-
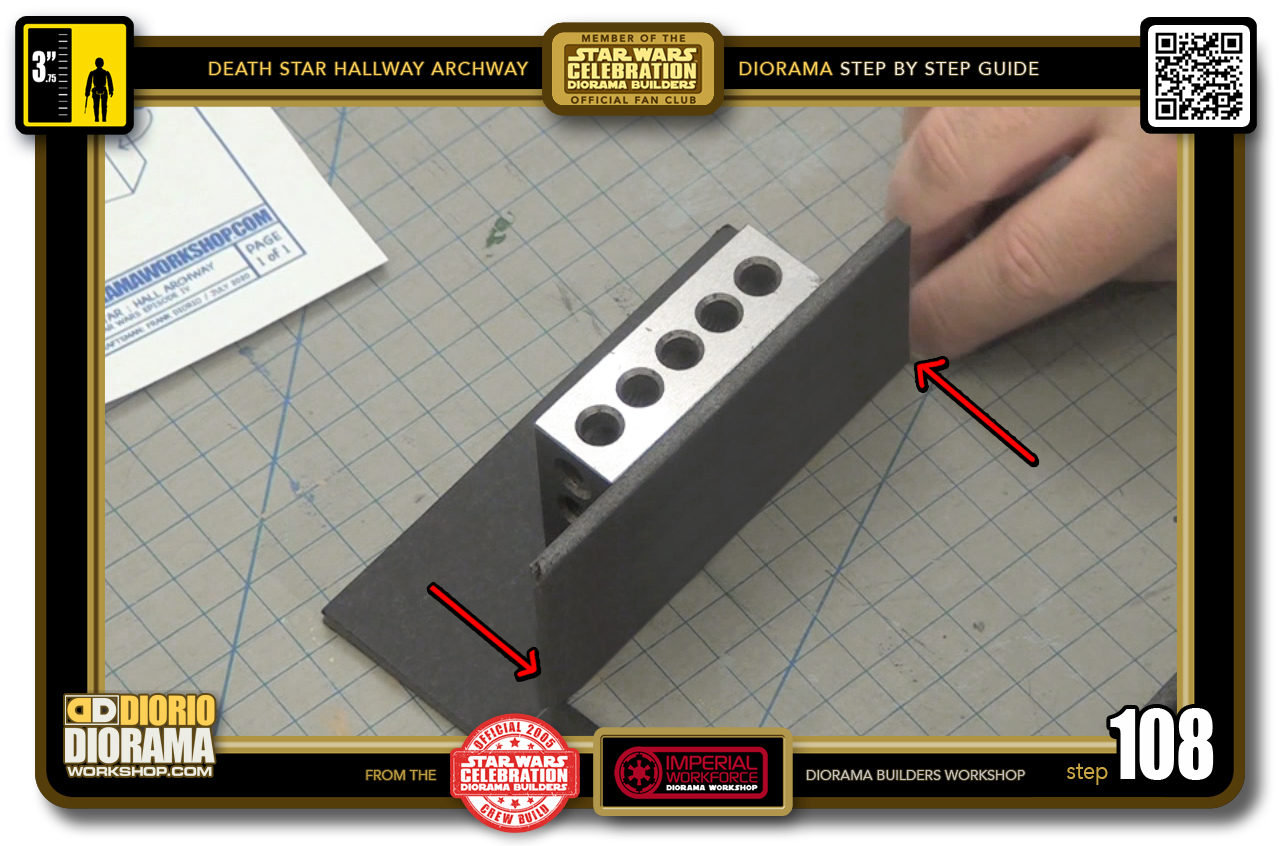
- STEP 108 > Make sure your ends are flush with the corners or your base's inner frame.
-
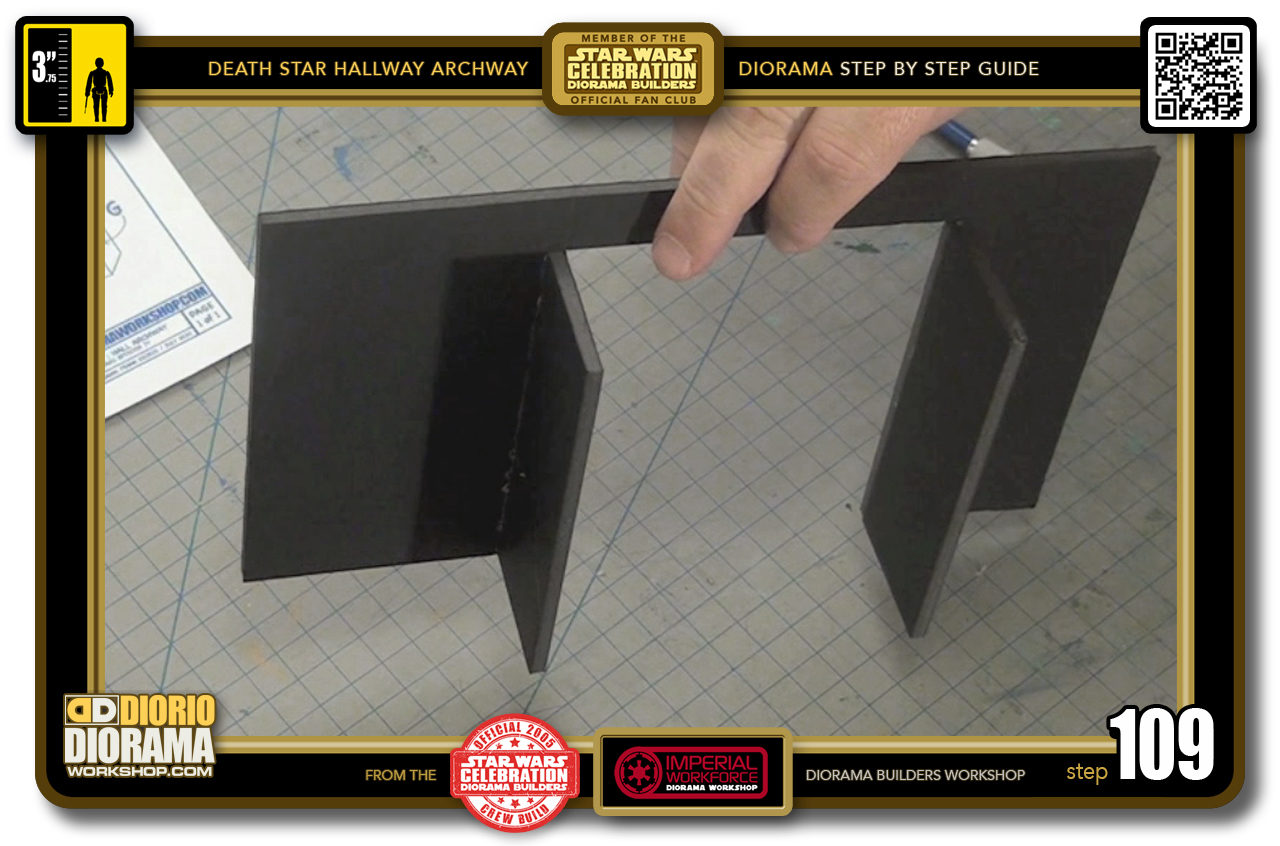
- STEP 109 > We now have both of our inner walls in place using 2 different techniques. Both are good and obviously, not eveyone has these blocks and I build 20+ years without them, so it's not a DO or DIE thing, but once you get them, they really are cool 🙂
-
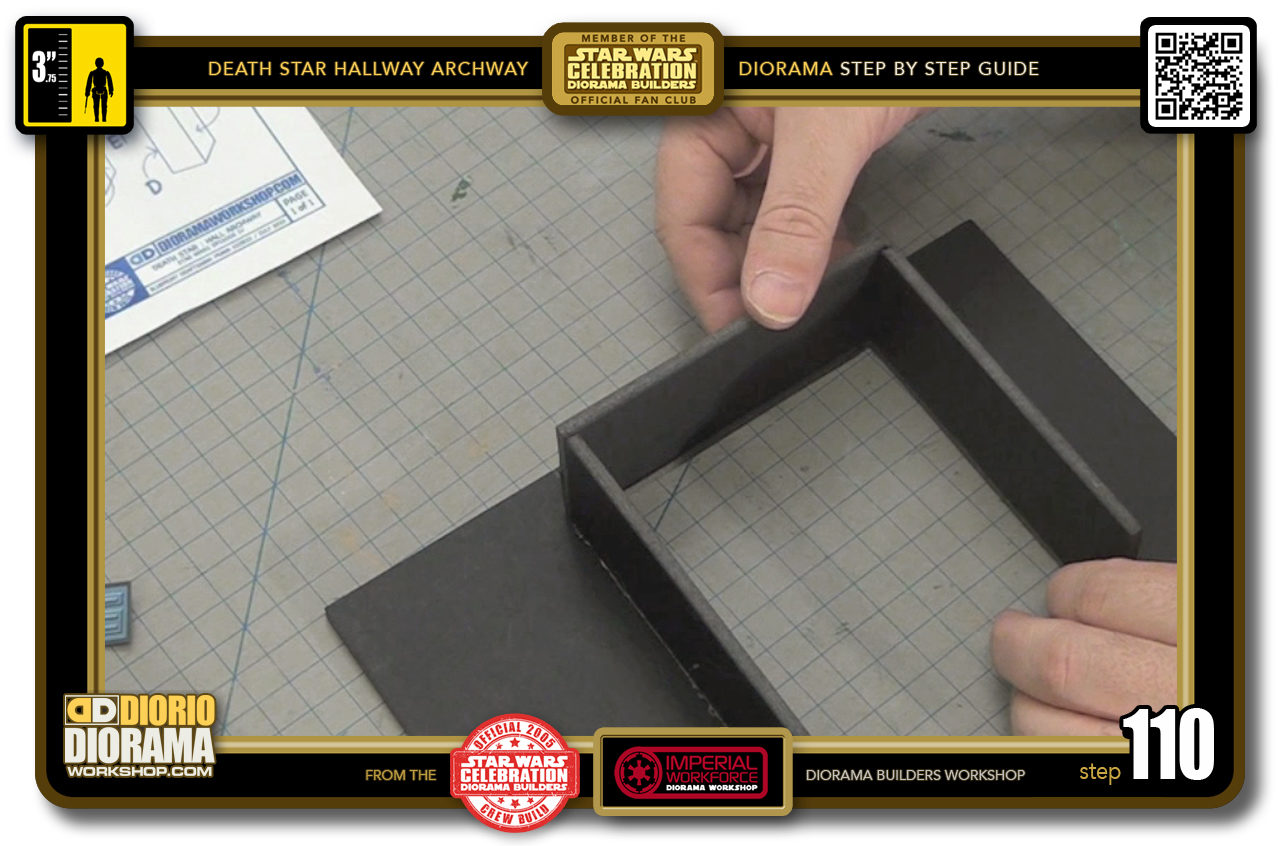
- STEP 110 > Time for the ceiling piece of your archway.
-
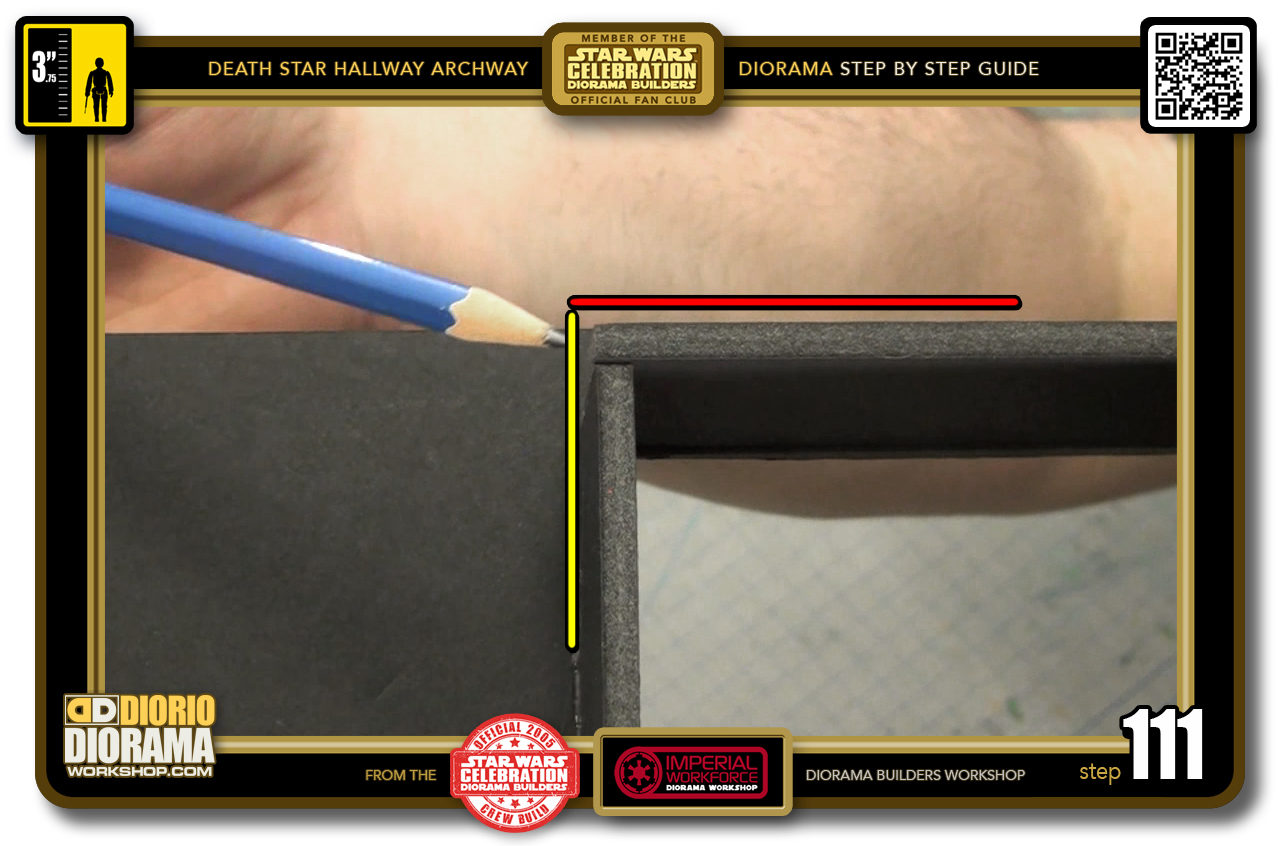
- STEP 111 > As before, you will want to try and make sure that the corners connect as perfect to 90 degrees as possible. Notice how by doing so, your top piece ( red line ) lays right on top of the side walls ( yellow line ) the side's thickness just lines up perfectly with the top measurements.
-
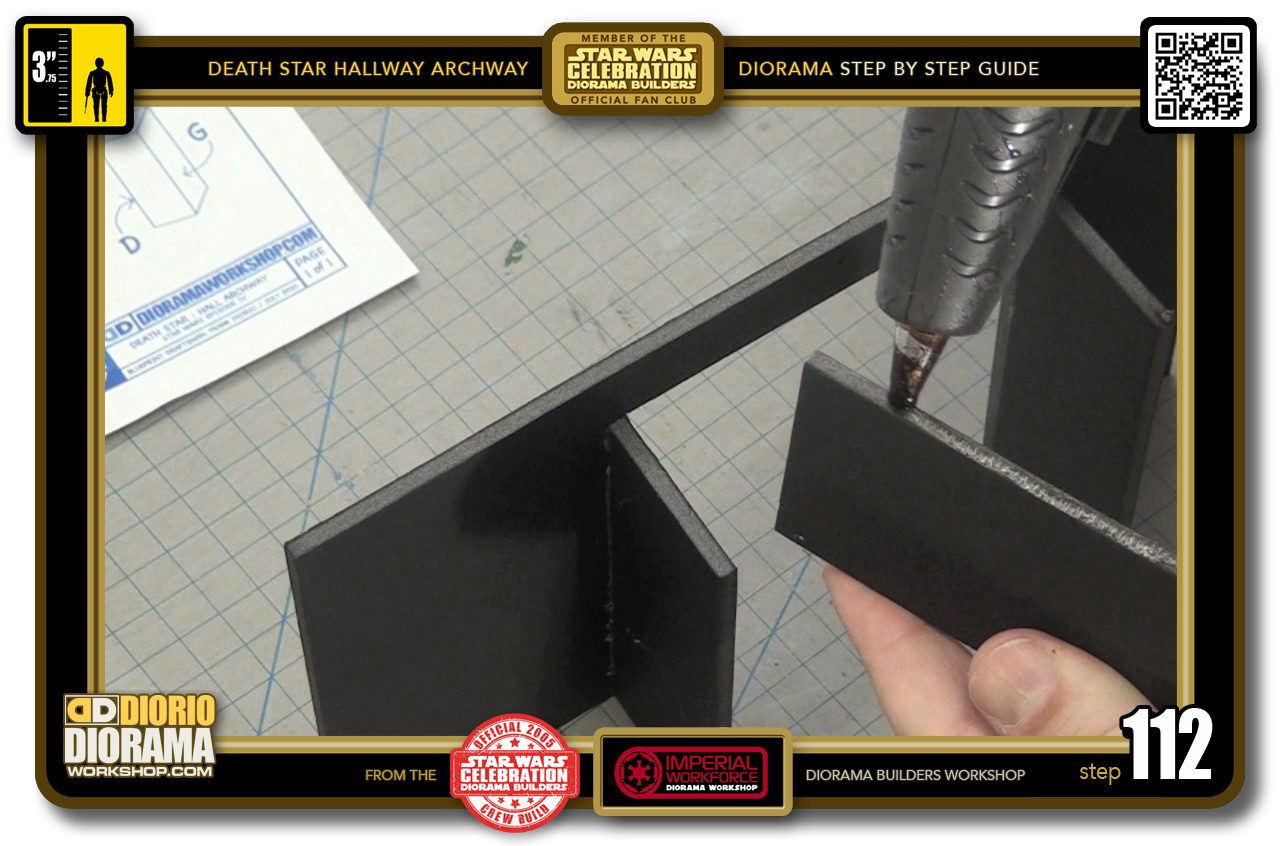
- STEP 112 > The next step has to be done FAST as Hot Glue doesn't stay warm for long when you just place a thin line, you don't want the glue to harden before you can place it. So start with a small line of Hot Glue on ONE SIDE of your ceiling piece.
-
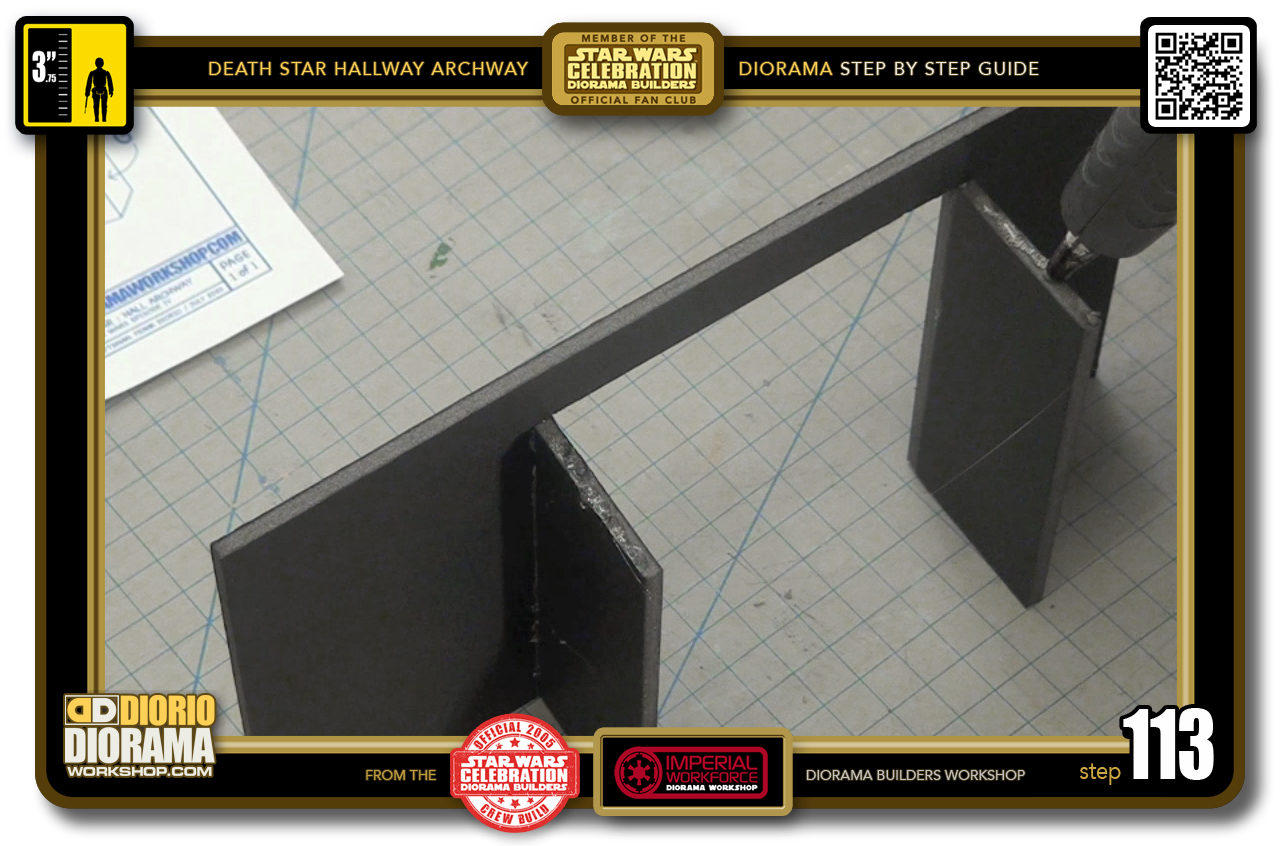
- STEP 113 > Then quickly place Hot Glue down the TOP of EACH SIDE piece.
-
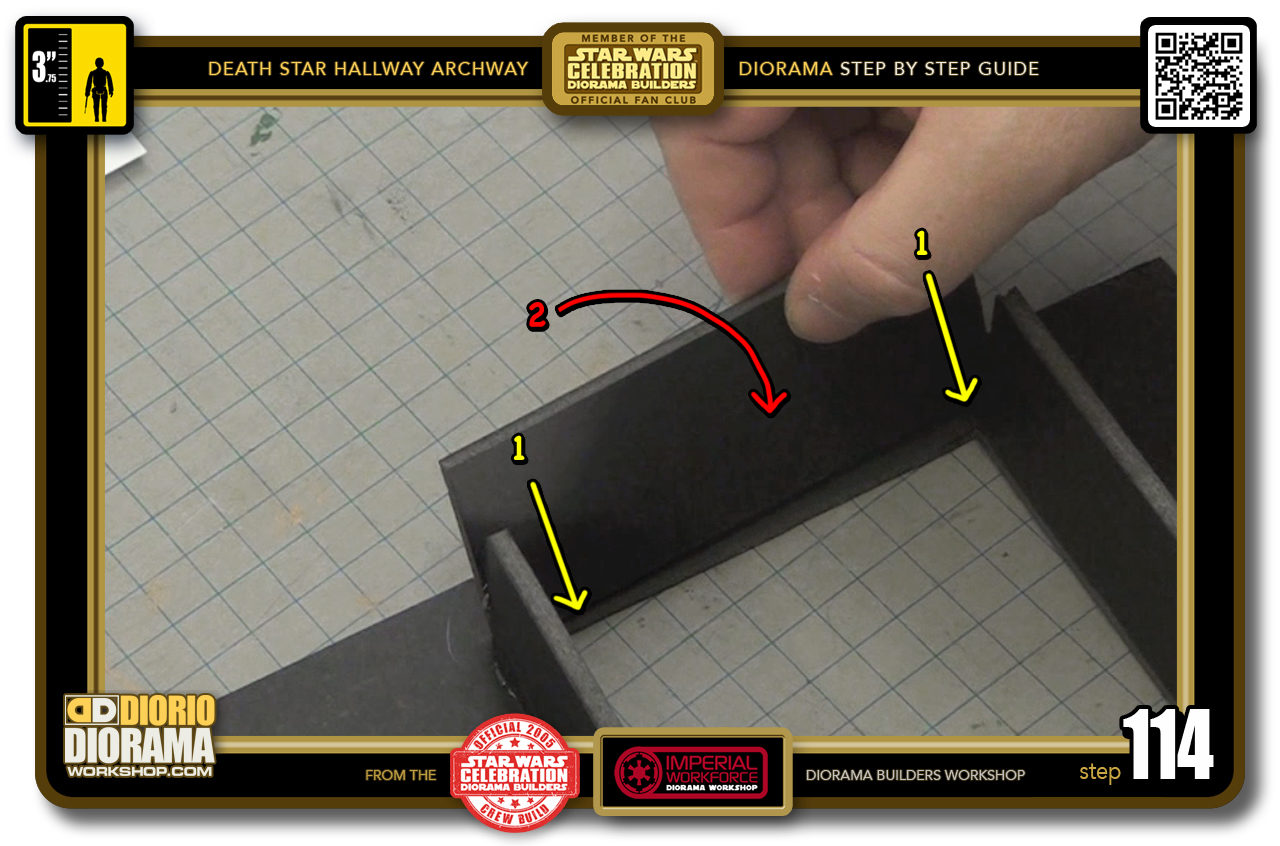
- STEP 114 > Carefully and quickly place and press down ( yellow arrows ) your ceiling so it touches the bottom foamcore frame piece and then, bring the ceiling towards a 90 degree angle ( red arrow ) until it connects with the side wall tops.
-
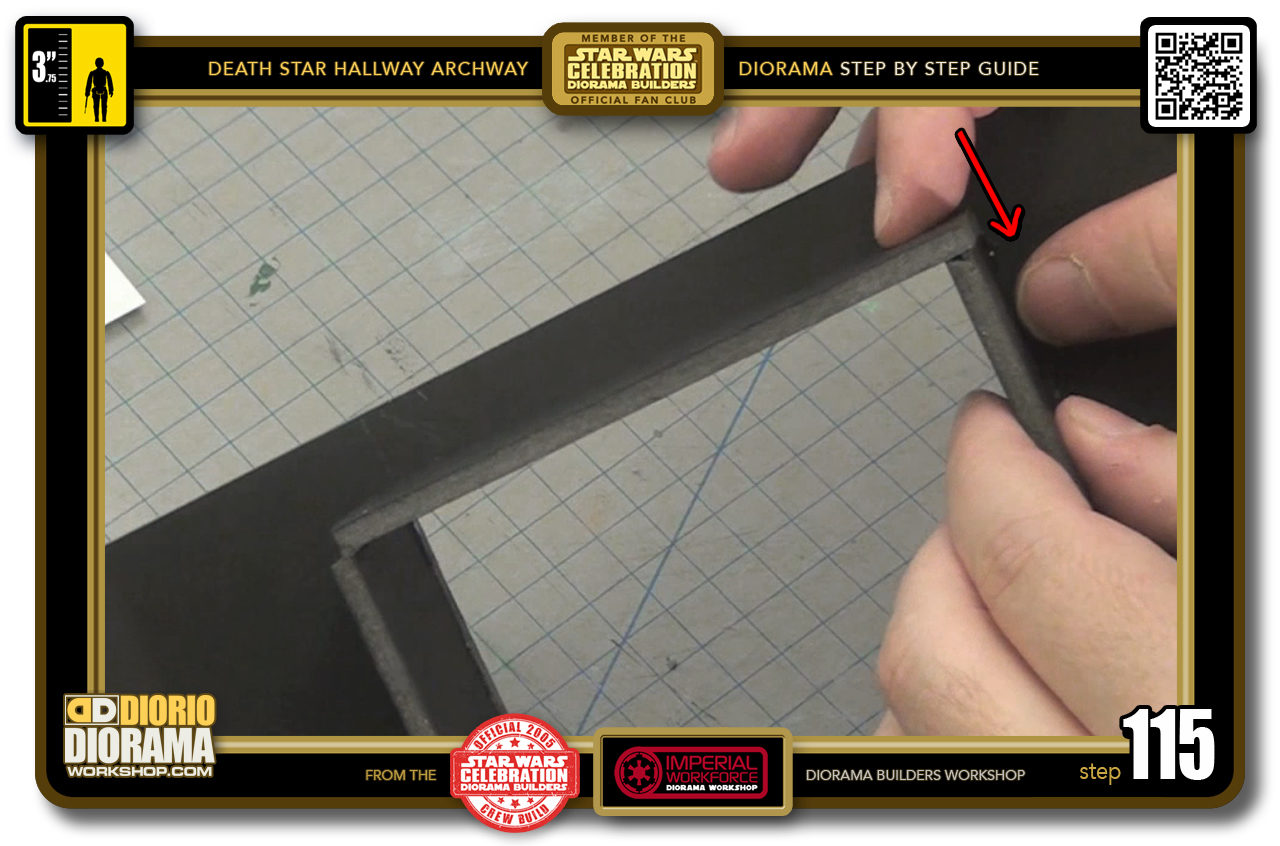
- STEP 115 > You still have a few seconds to ALIGN YOUR CORNERS !!! Make sure the conect as close to 90 degrees as possible and press down.
-
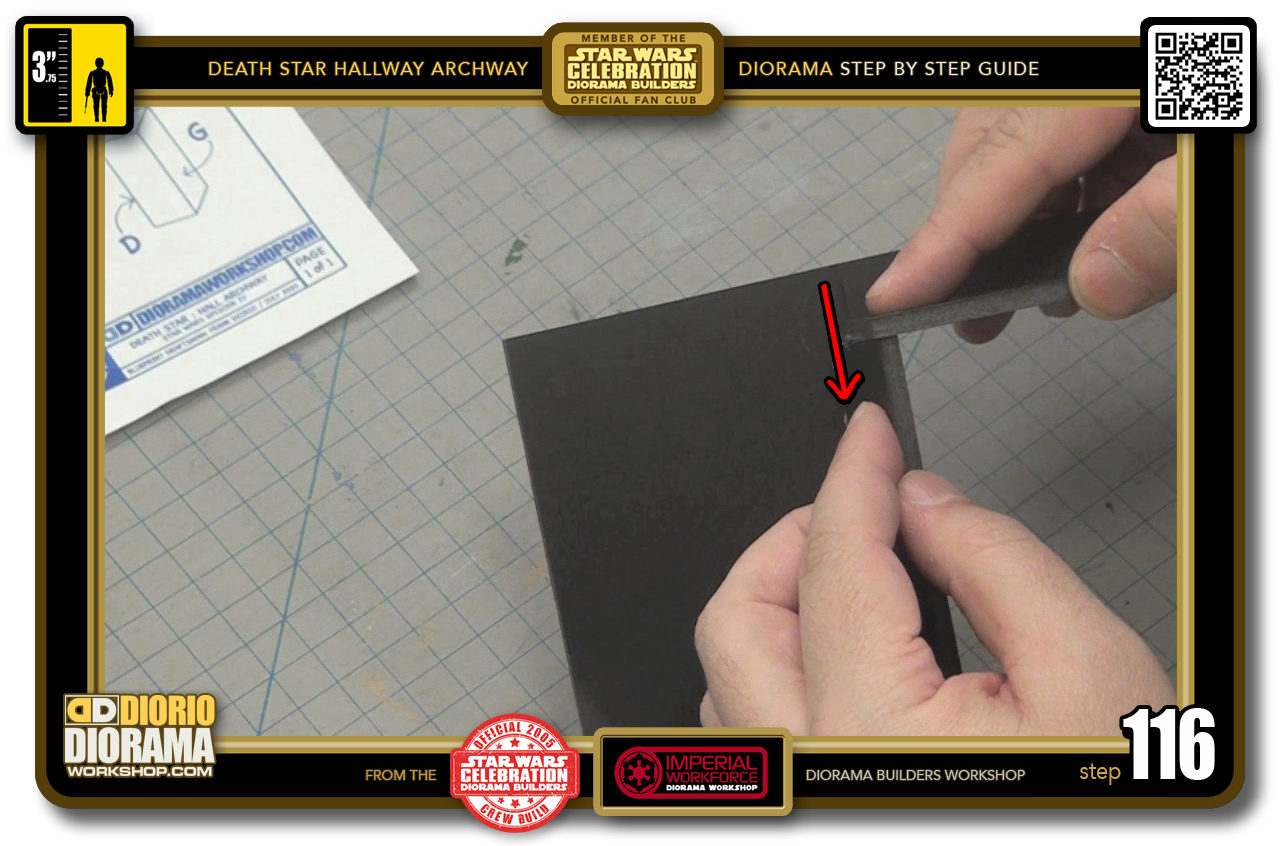
- STEP 116 > Do the same for the other side.
-
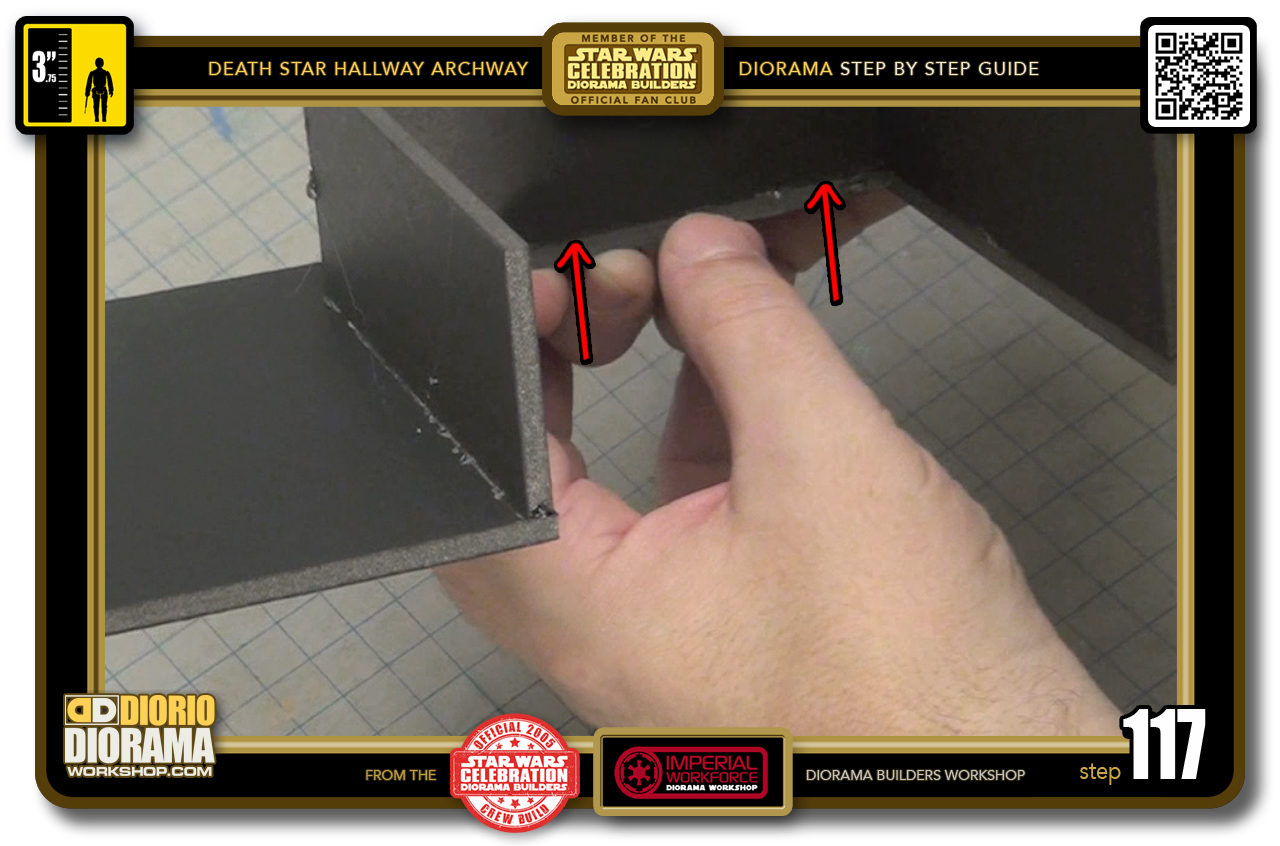
- STEP 117 > Last verification is making sure the long connection is FLUSH as can be to the foamcore base frame. Remove any glue bubble nose snots once everything has cooled down.
-

- STEP 118 > We have an archway now connected to our "B" wall. Now we need to align and connect the other side of your Hallway Archway.
-
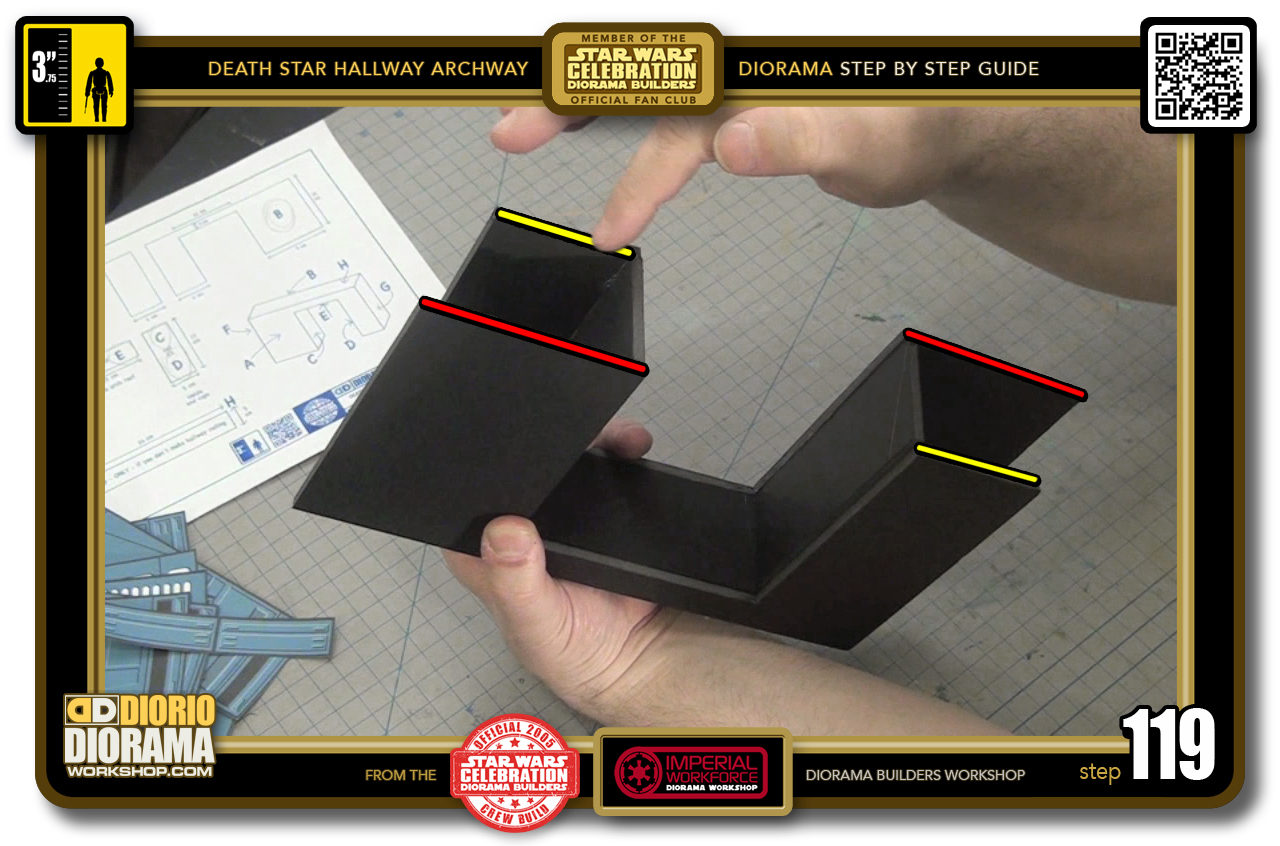
- STEP 119 > When doing so, FIRST LOOK to see if your walls are mirrored correctly. You don't want a 6 cm on one side and then 9 cm gap on the other.
-

- STEP 120 > This is what we want, both 6 cm on one side which means, 9 cm on the other.

.
Did you already build this Diorama ? At home or at our Star Wars Celebration Diorama Builders workshop ? Would you like to show it in the site’s GALLERY VISITORS DIORAMAS section, YES ? That is Awesome !!! You can find out all the details on how to email me your photos on the VISITORS SUBMISSIONS INFO page … When I get your photos, I will create your very own page just like this one. You may not realize it but work does inspire others to join in the fun of making Action Figure Dioramas.
.
NOT FOR RESALE ALL Decals, tutorials and artwork are ©FrankDiorio (dioramaworkshop.com) and offered FOR FREE to the fans – that would be you ? so you can build and display my diorama designs in your very own home. I realize I cannot control what one does with my graphics once I place them on the web, I can only ask you as one fan to another, please respect the artist and do not be that jerk who uses my designs and tutorials to build a copy of my work only to sell it on EBAY or trade/sale groups and forums. Thank You. Frank.
.
.
If you have a facebook account, why not join the Official Diorama Builders Fan Club today, simply click the logo link below.
 .
.
Catch up with fellow visitors and exchange stories, read cool interviews with the crew, exchange photos, fun surprises and grab some FAN ONLY merchandise next year at actual future conventions ?
.
©2018 Frank Diorio DioramaWorkshop.Com
.
IF YOU LIKE WHAT YOU SEE, PLEASE SHARE WITH YOUR FRIENDS
USING THE SOCIAL MEDIA BUTTONS BELOW