


-

- STEP 241 > Apply a good amount of glue stick to your foamcore surface.
-

- STEP 242 > Peel back your label sheet.
-

- STEP 243 > Carefully align the decal with one of the long edges first, the move it around until it is just right.
-
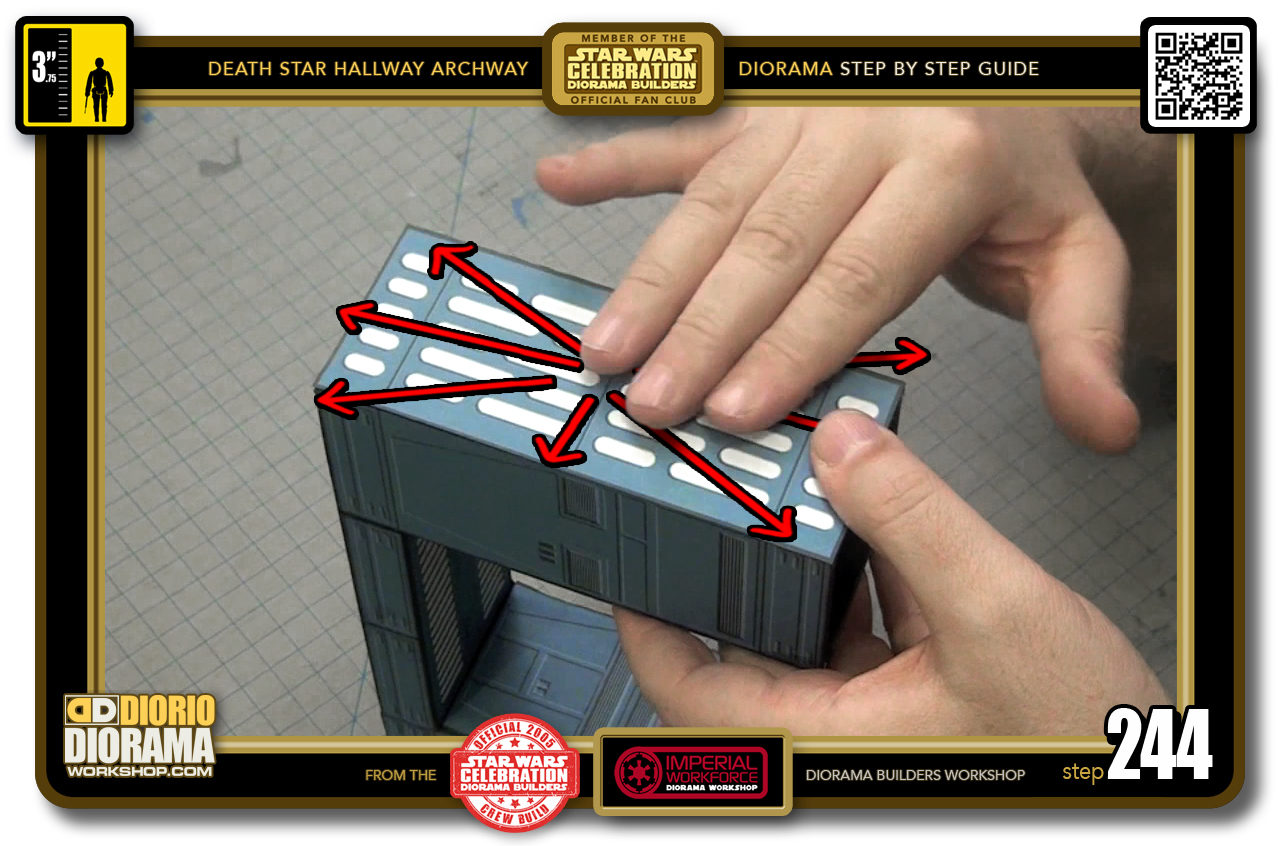
- STEP 244 > When you are happy with the final position, you can apply more pressure always from the centre outwards, centre out, centre out all the way around like a clock.
-
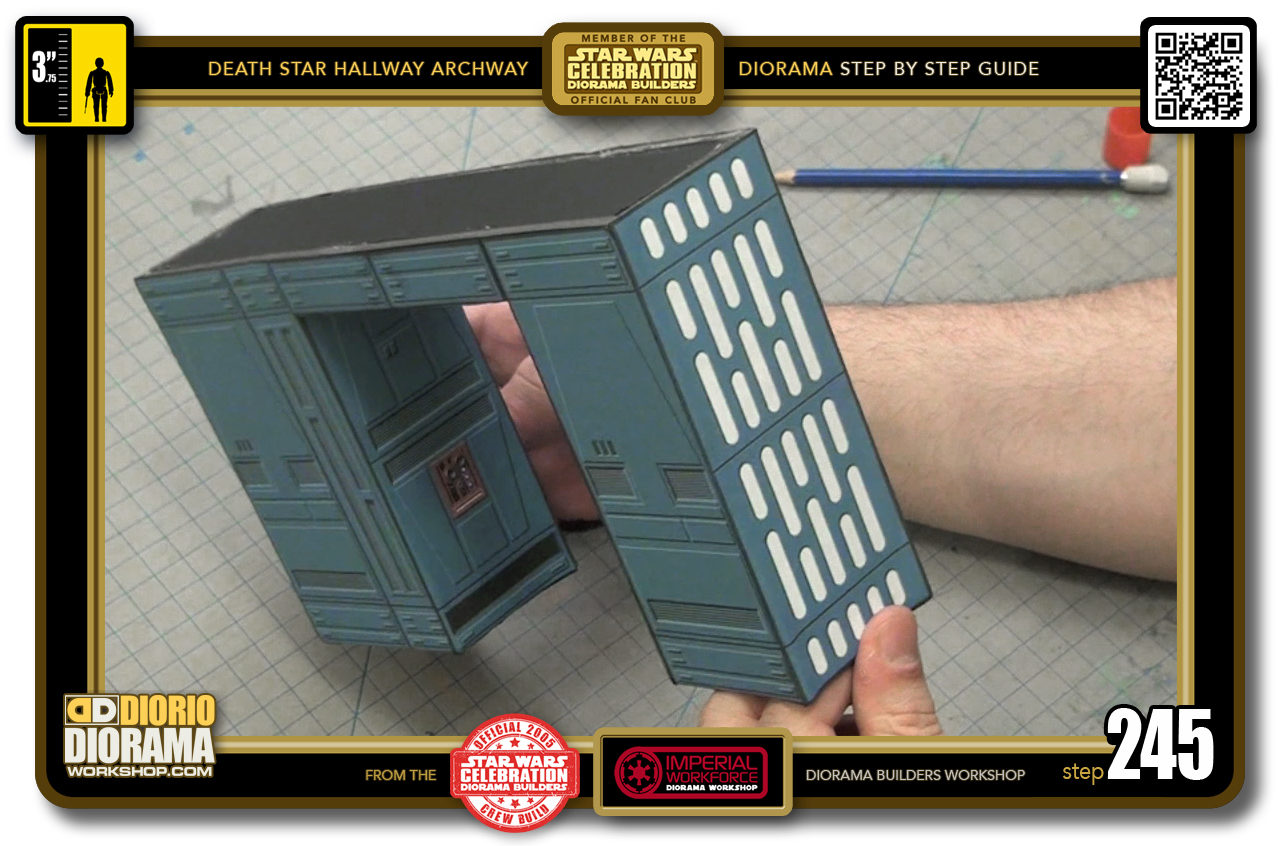
- STEP 245 > There you have it, a nice clean finish end to your archway. Time for the other side.
-
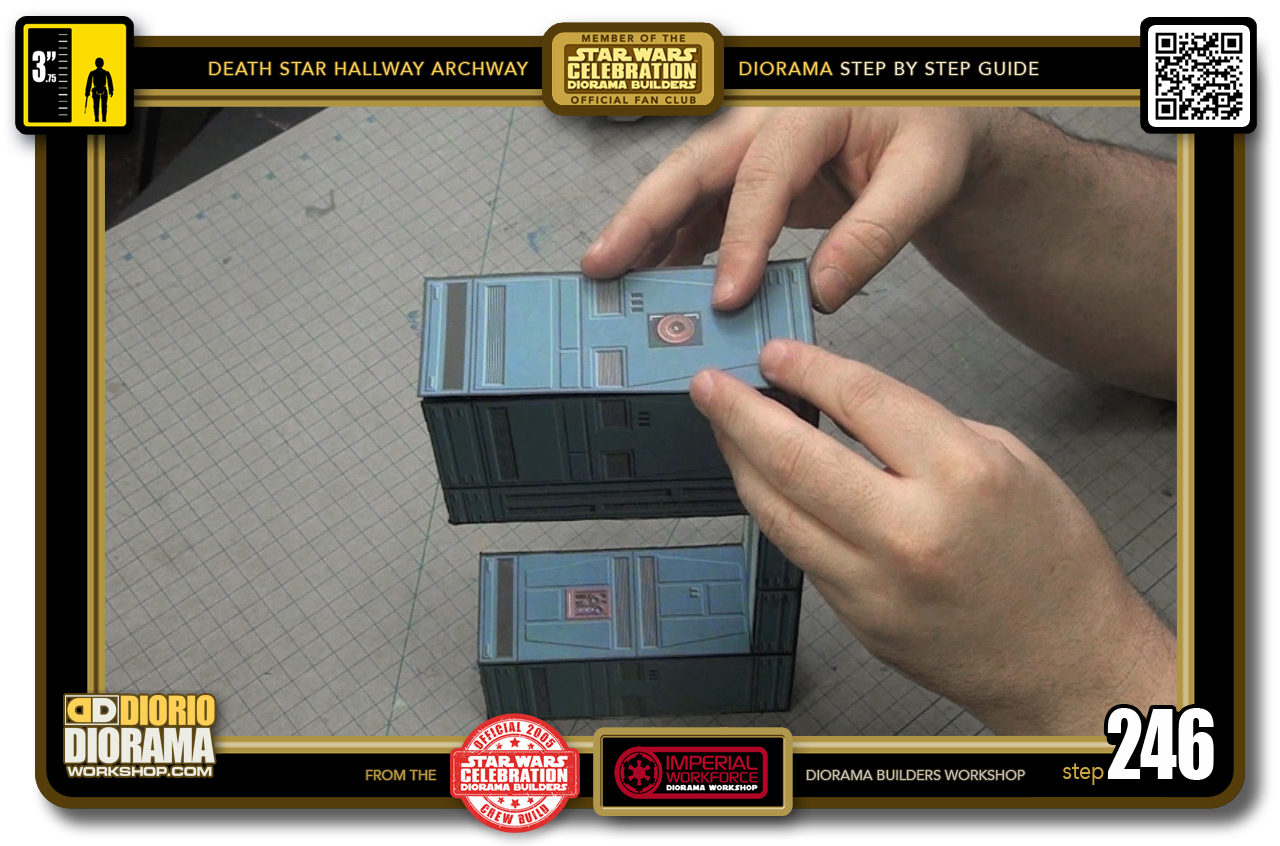
- STEP 246 > This was the decal I chose but as I said before it really is up to you, if you like another wall panel design feel free to use that one. You will just need to print it from the BASIC WALL PANEL pdf.
-
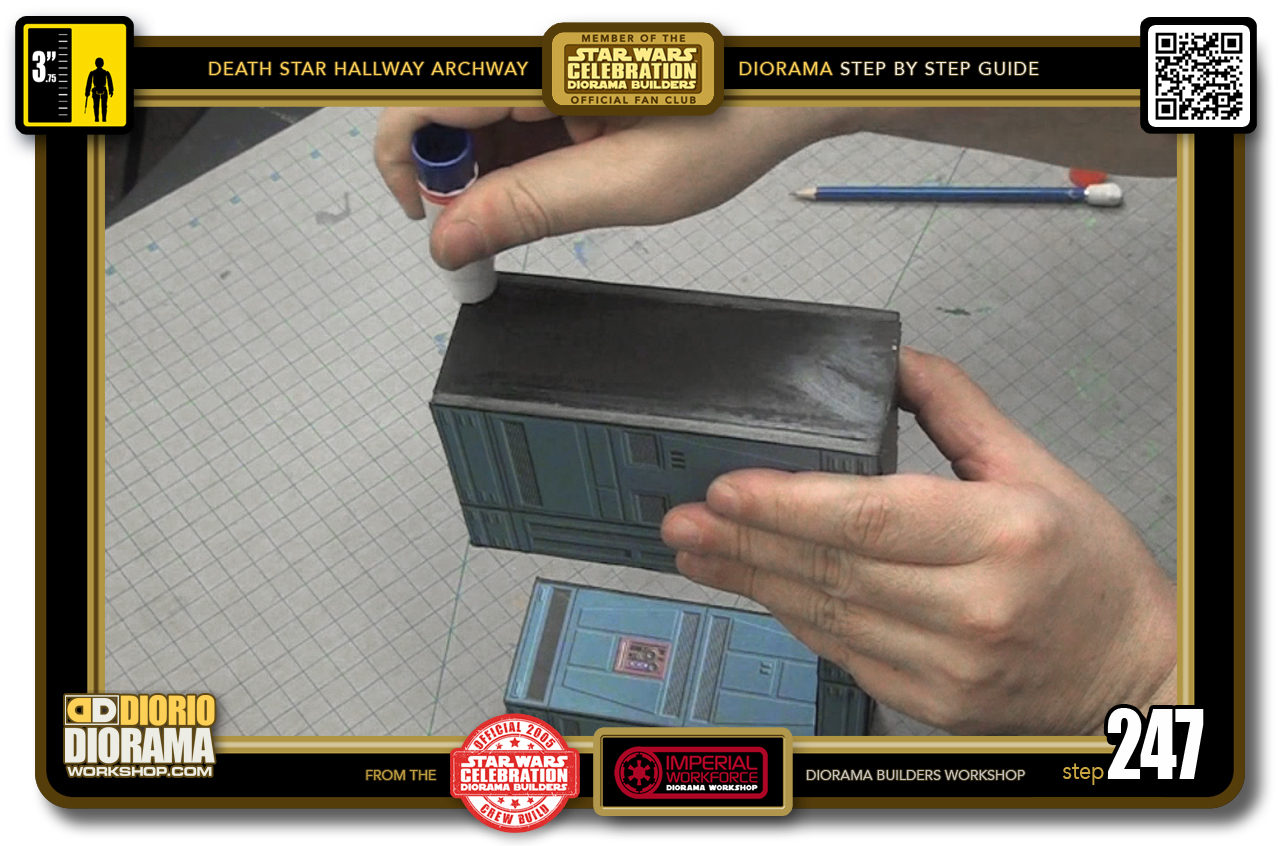
- STEP 247 > Some more gluestick.
-
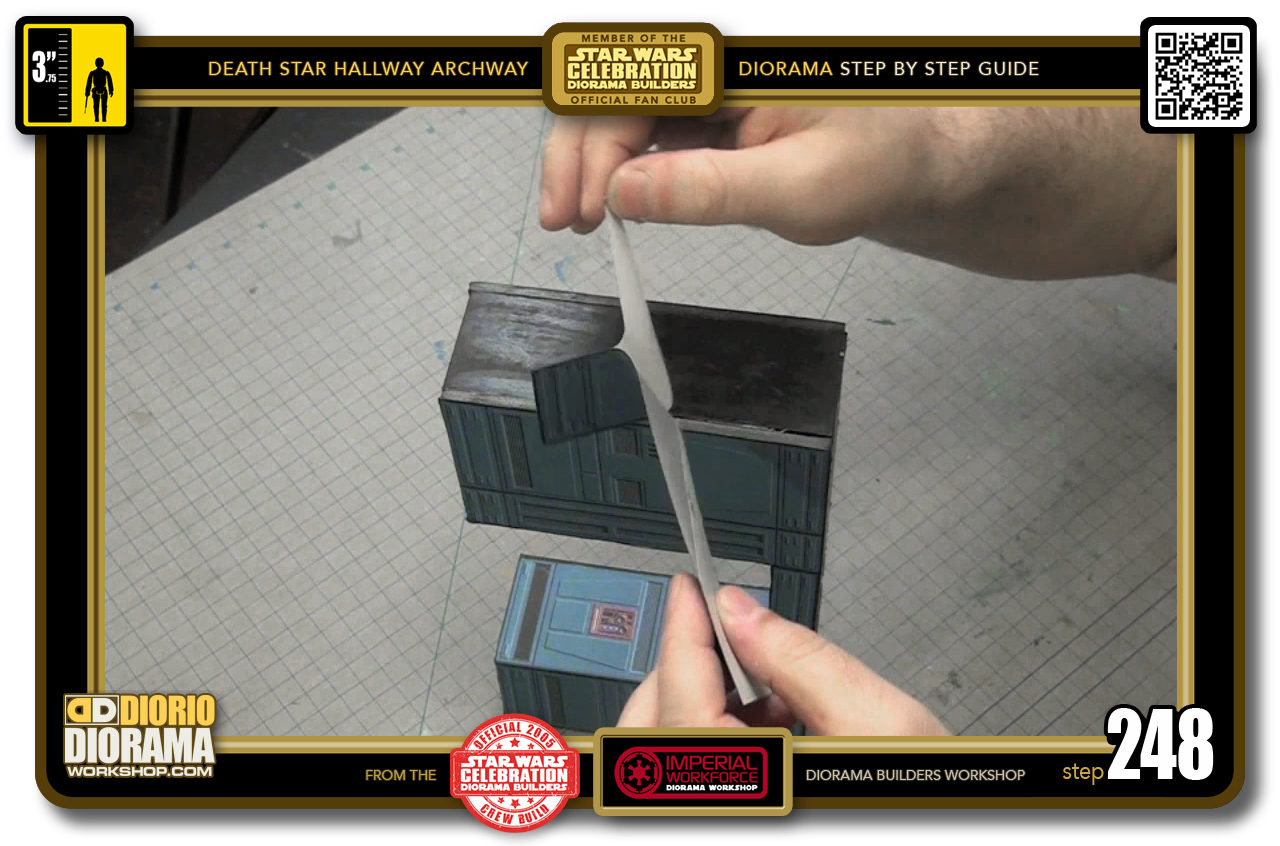
- STEP 248 > Peel your decal.
-

- STEP 249 > Gently place on the top or bottom edge, making sure to align the decals 2 cm slats design lines.
-
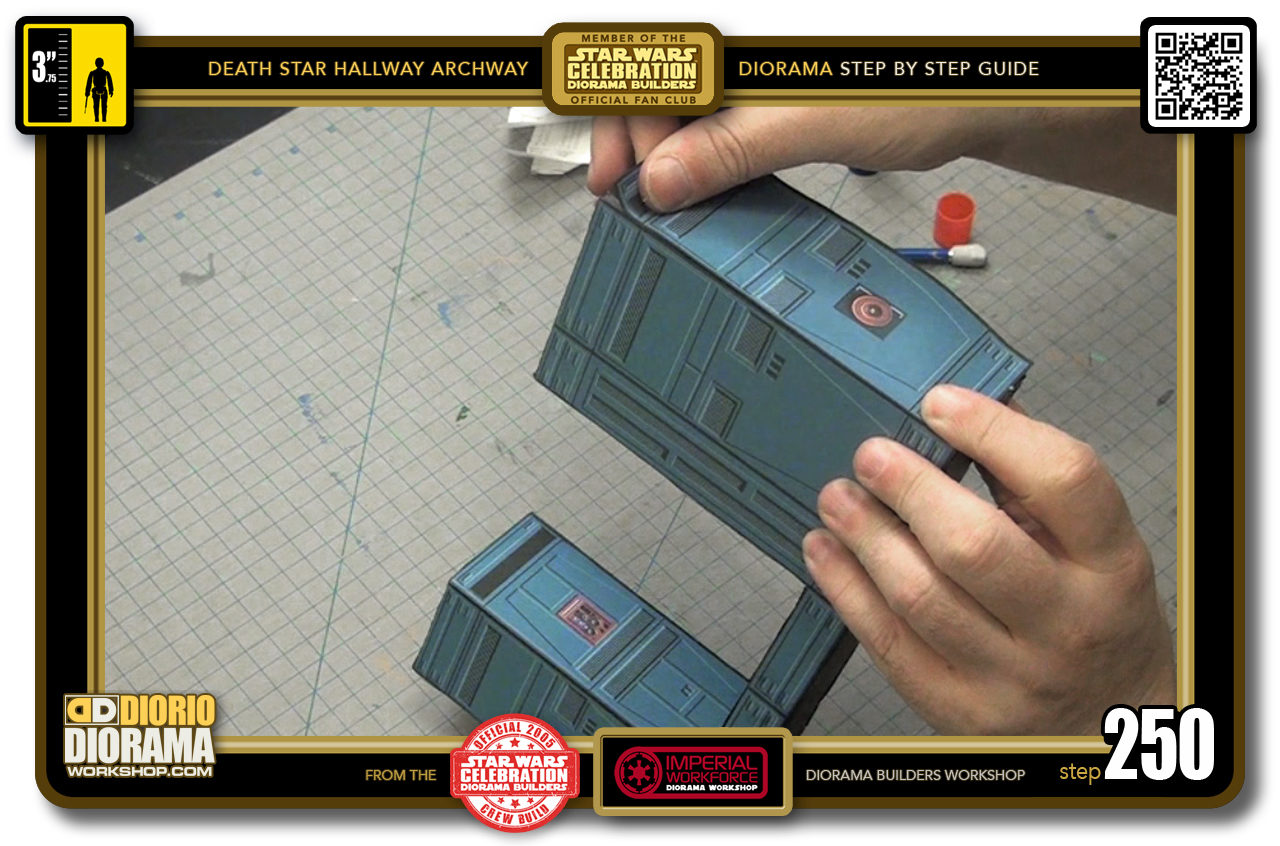
- STEP 250 > Wiggle it around if you need to until it is at the perfect position.
-
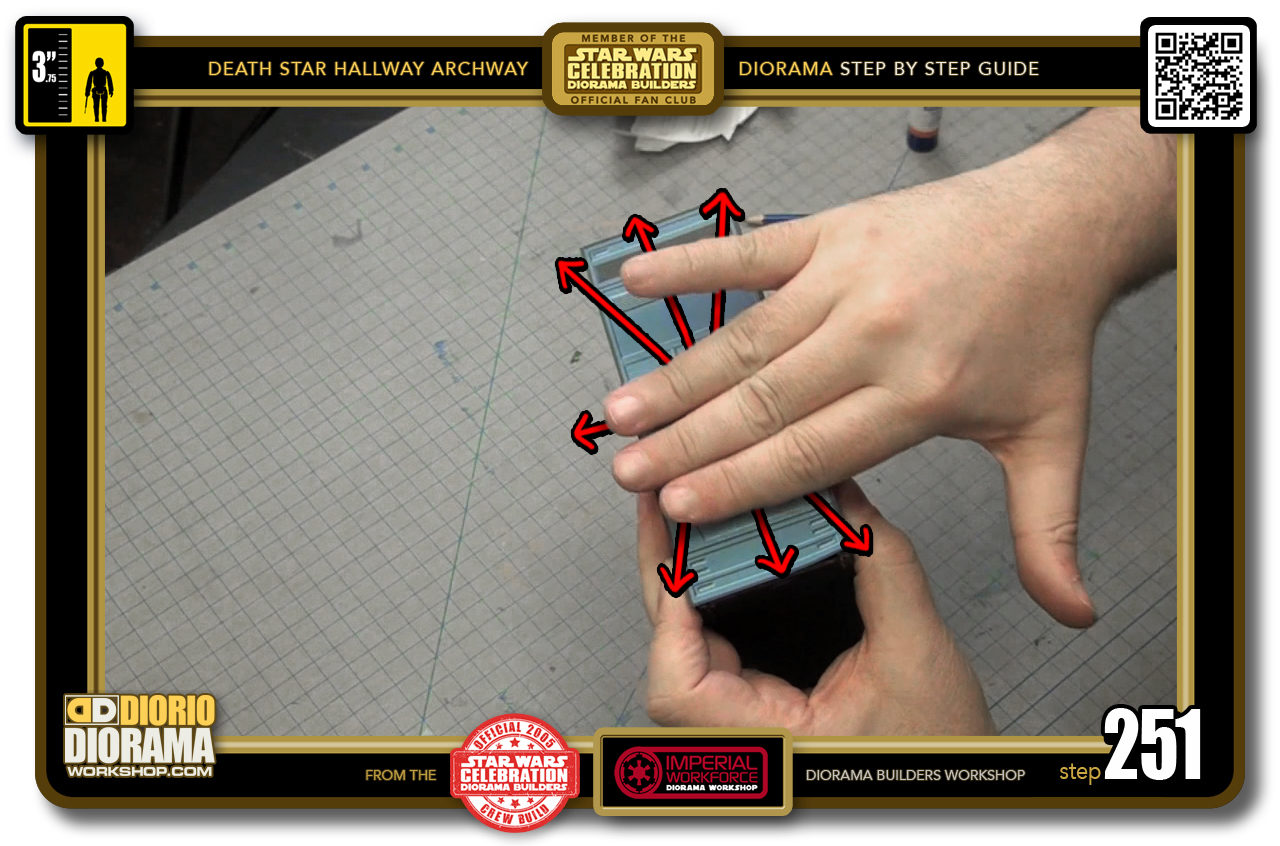
- STEP 251 > We can now apply more pressure with your fingers to make sure the glue is smooshed all over the decal.
-
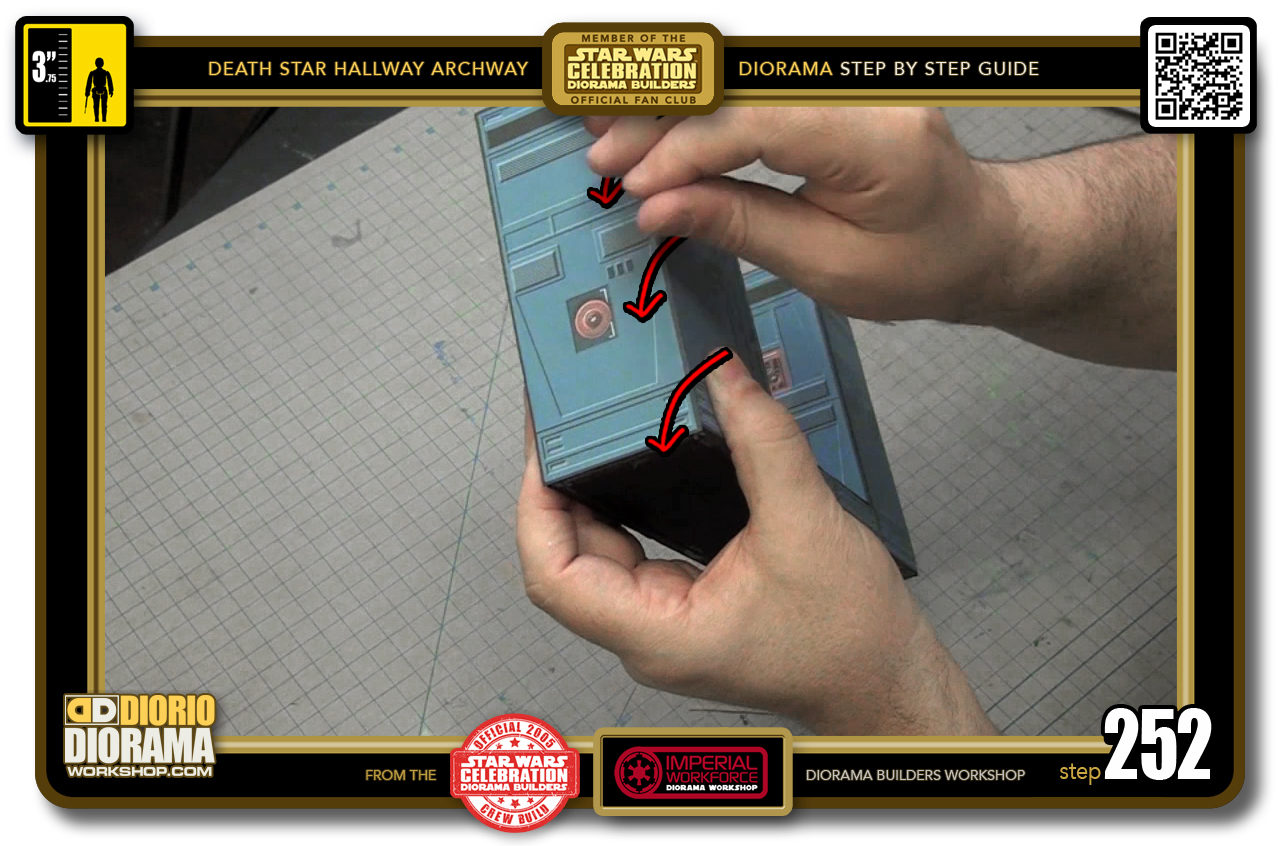
- STEP 252 > Last but not least the finger nail technique. You know this by now.
-
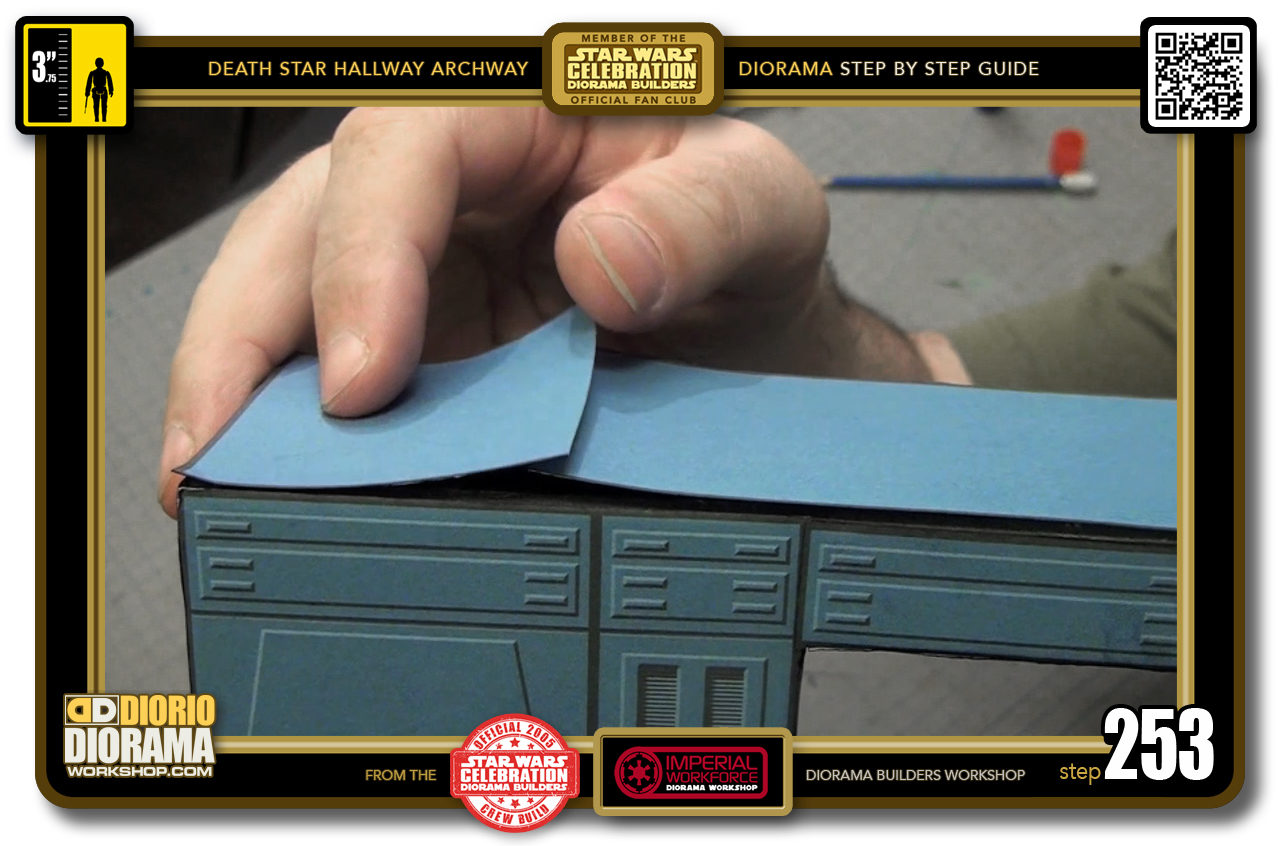
- STEP 253 > For your last decal, you can see how the 2 are just a little longer so that the overlap to give you a nice connection that create the illusion of one long decal.
-
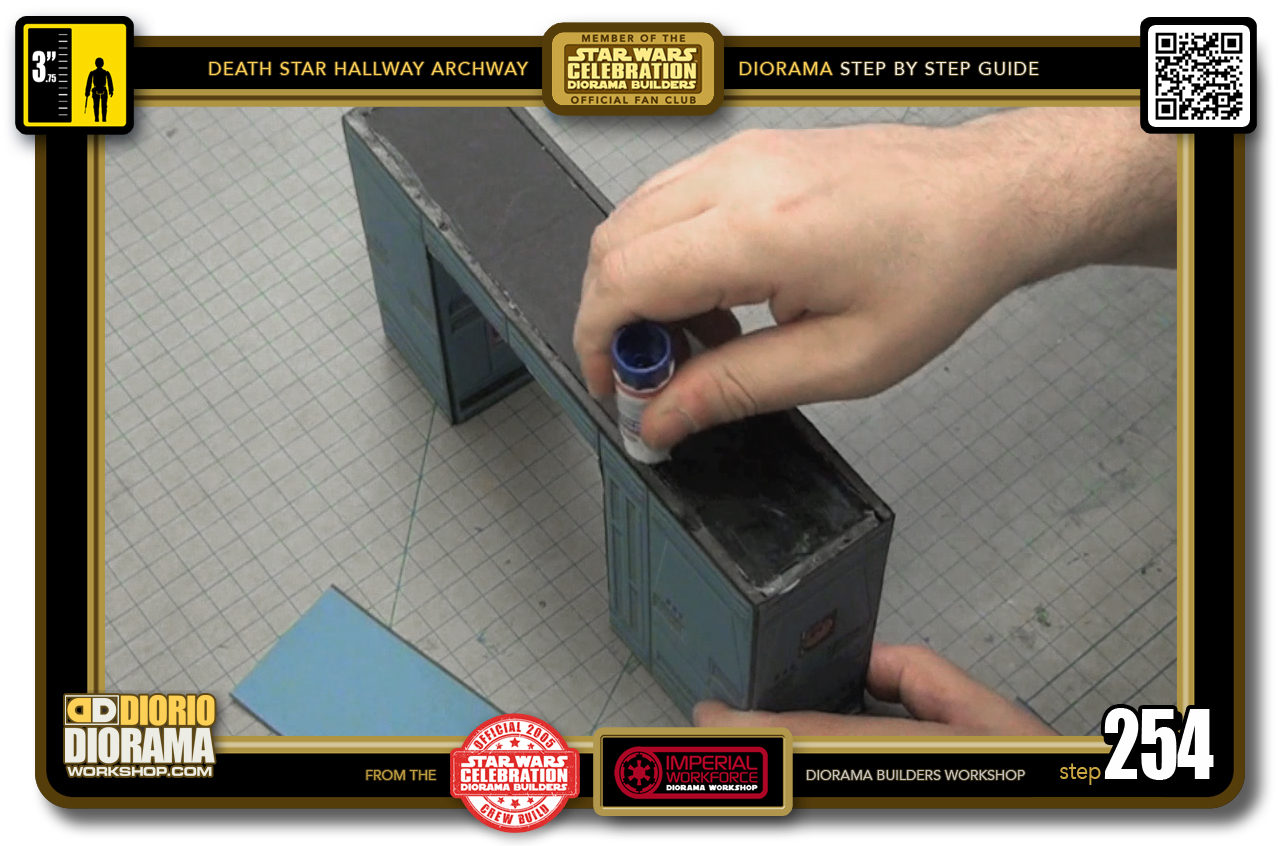
- STEP 254 > We start with the SMALL decal, so put enough glue stick on one end to cover that space, it can go a little past it but DO NOT GO ALL THE WAY TO THE END. Your glue will dry before you get the long decal on and you will have wasted your glue.
-
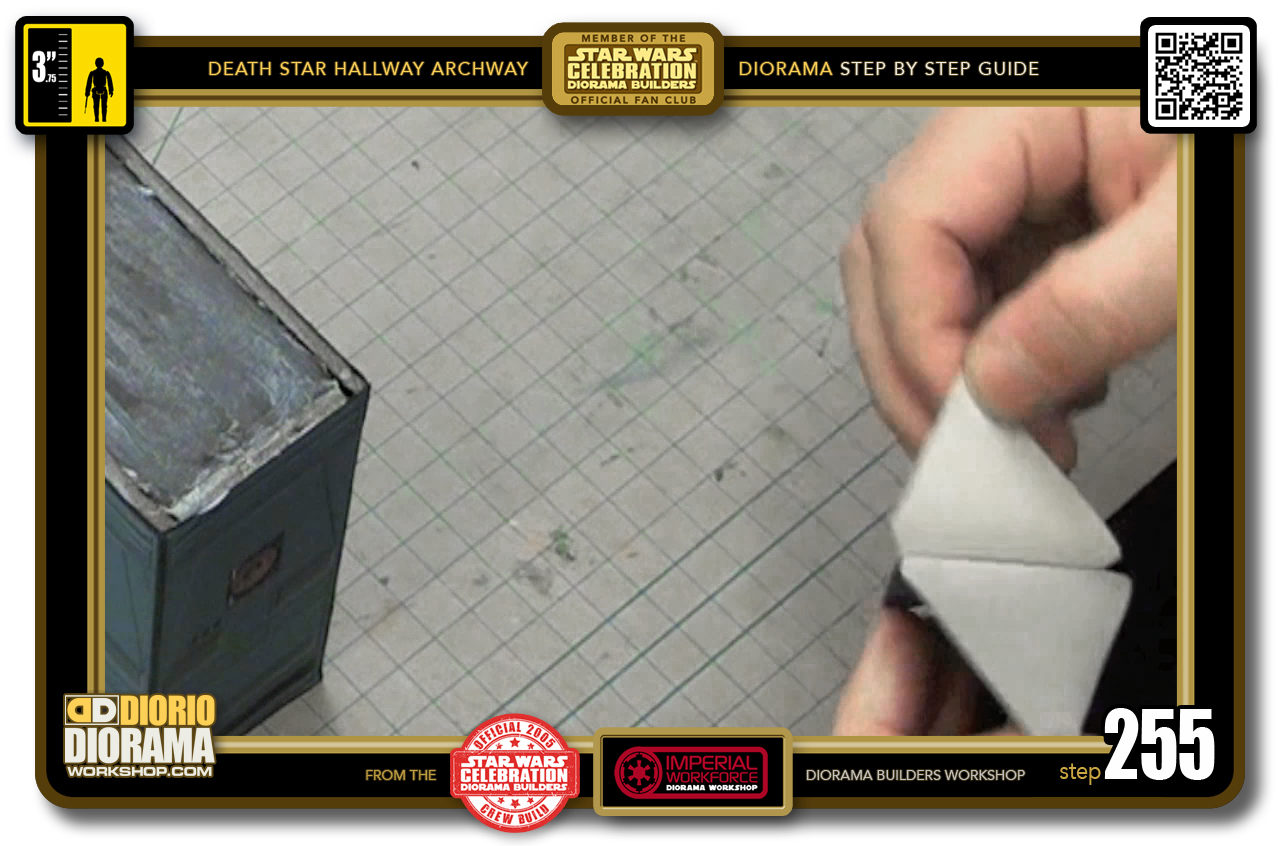
- STEP 255 > Peel back the small ceiling decal.
-
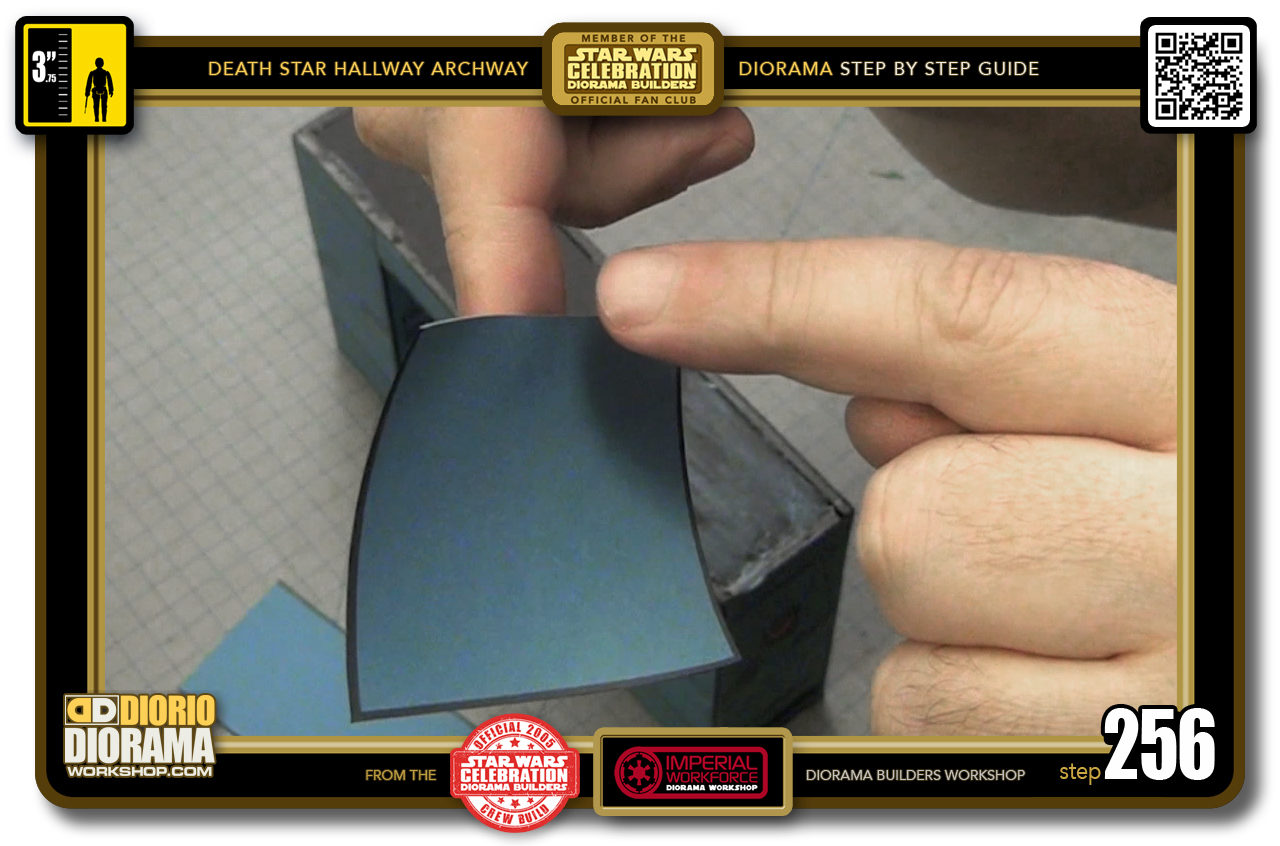
- STEP 256 > Remember this side ? the one that YOU DID NOT COLOR BLACK with your sharpie ? This is the side that goes accross the surface of "H" ceiling. THe 3 dark bleed edges fit along the 2 walls and end wall edges.
-
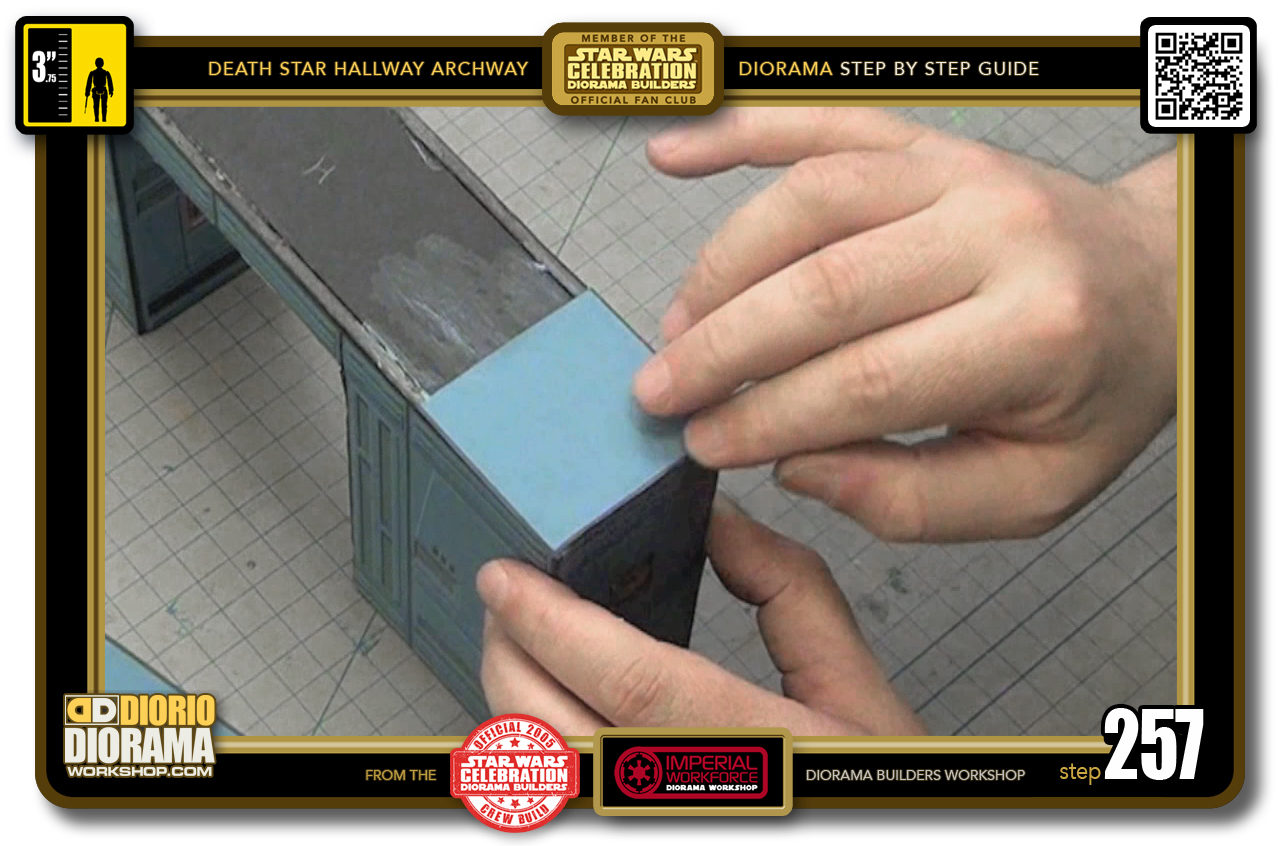
- STEP 257 > Carefully place your small "H" decal as close to the end edge as possible and centered with the "A" and "B" walls. it should fit pretty much perfect.
-

- STEP 258 > Now grab your glue stick and cover all the remaining exposed foamcore.
-
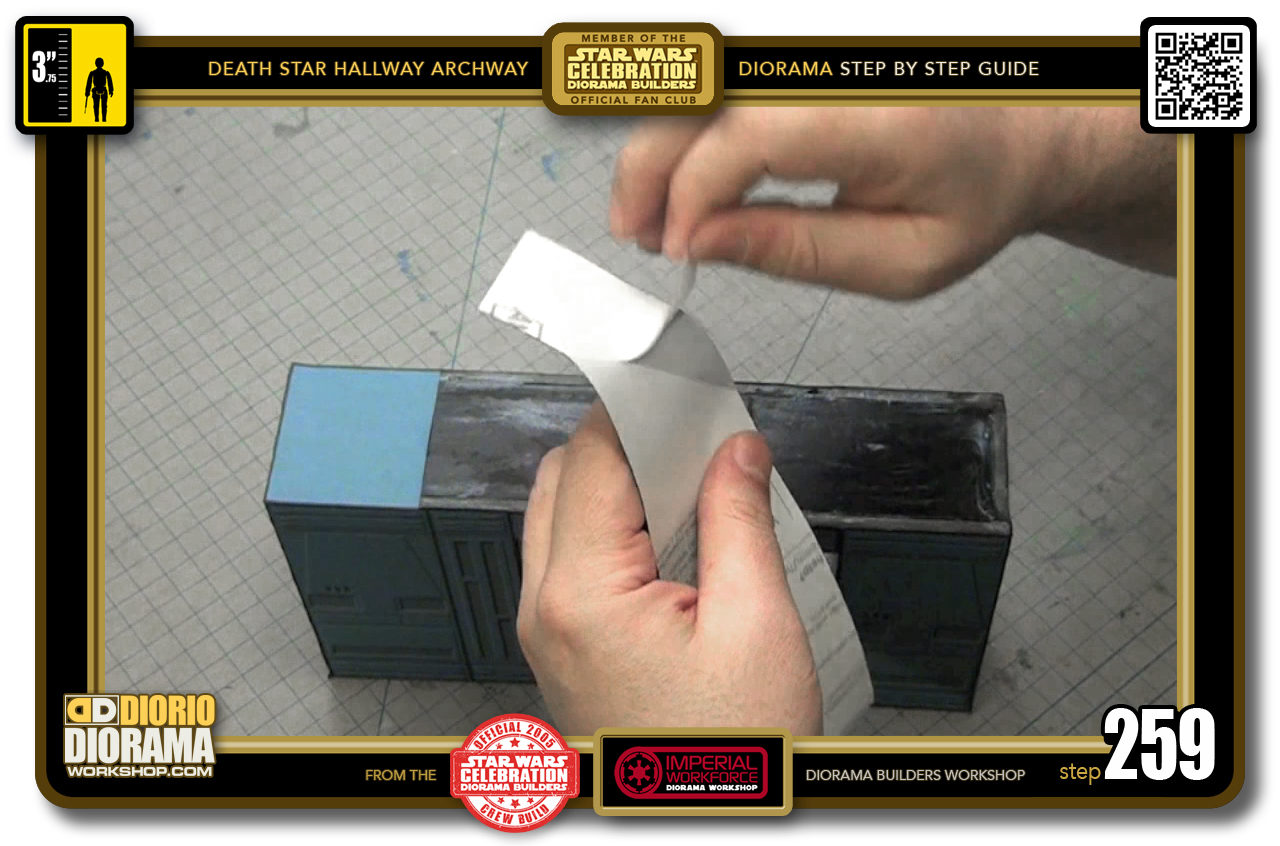
- STEP 259 > Peel back your LONG decal.
-

- STEP 260 > REMEMBER THE NON BLACK SHARPIE EDGE GOES ON TOP OF THE SMALL CEILING DECAL. You want to place it with the 3 bleed dark edges touching the "A" and "B" walls edges as well as the small decal's opposite end edge
-
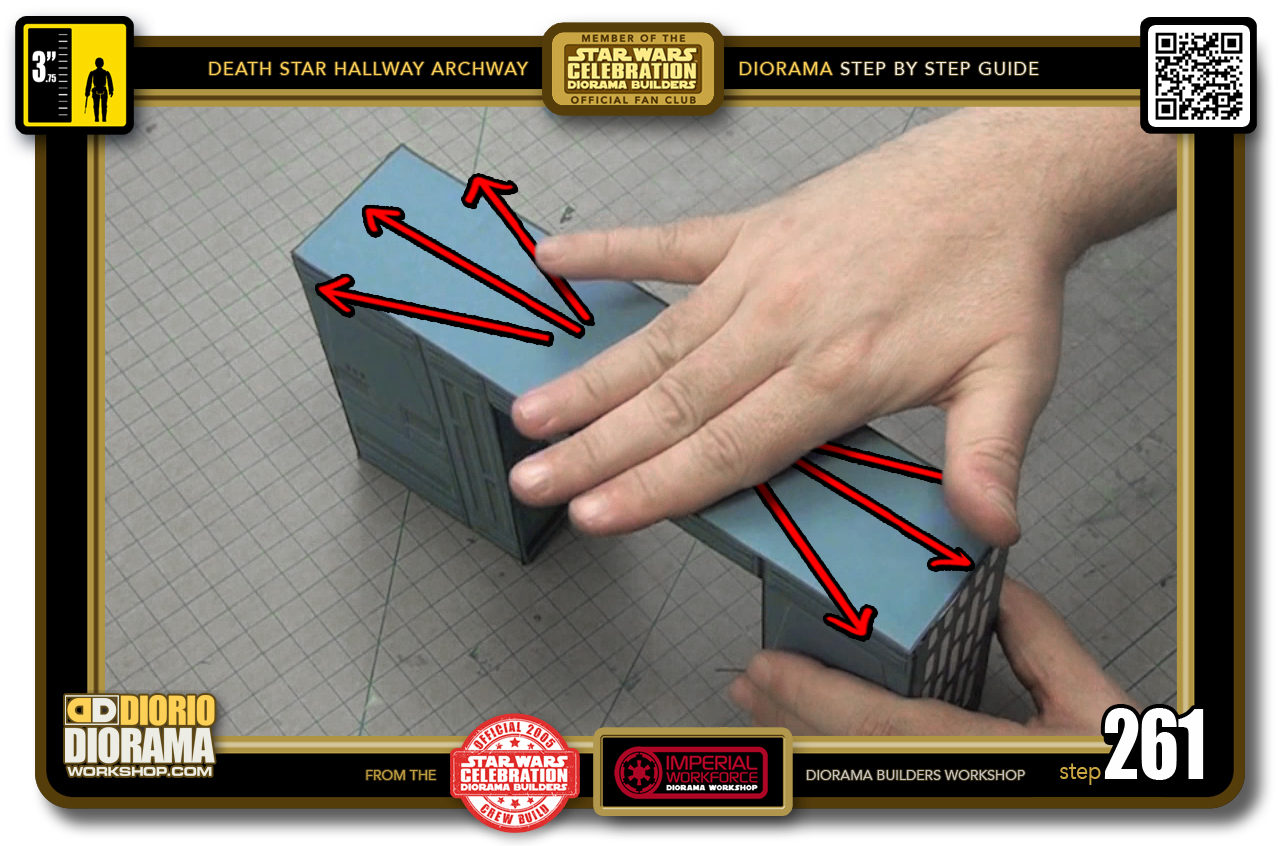
- STEP 261 > When you are happy with the position, put pressure from the centre on out until you have a nice flat smooth surface.
-
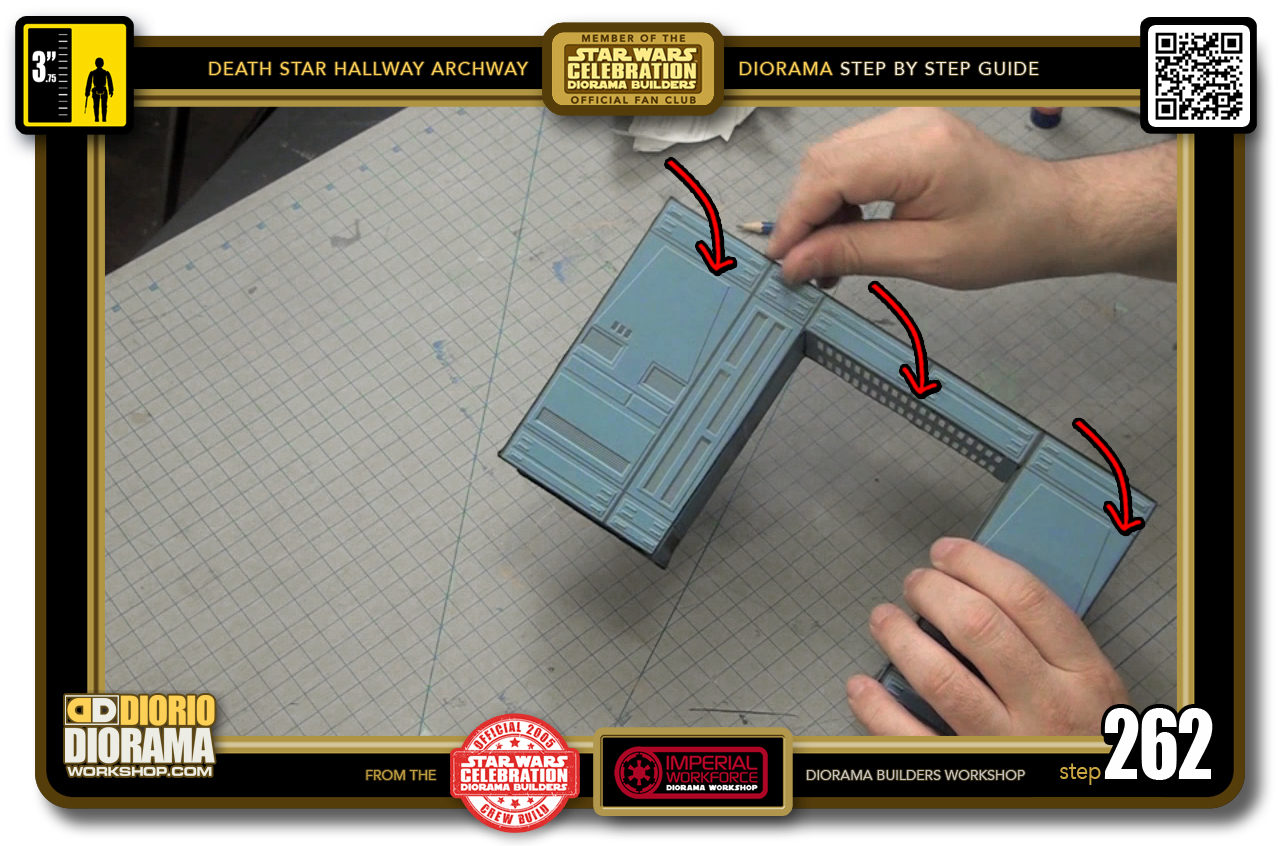
- STEP 262 > One last trick of the finger nail technique on all 3 corner edges, round them out and blend them with the wall panel decals.
-
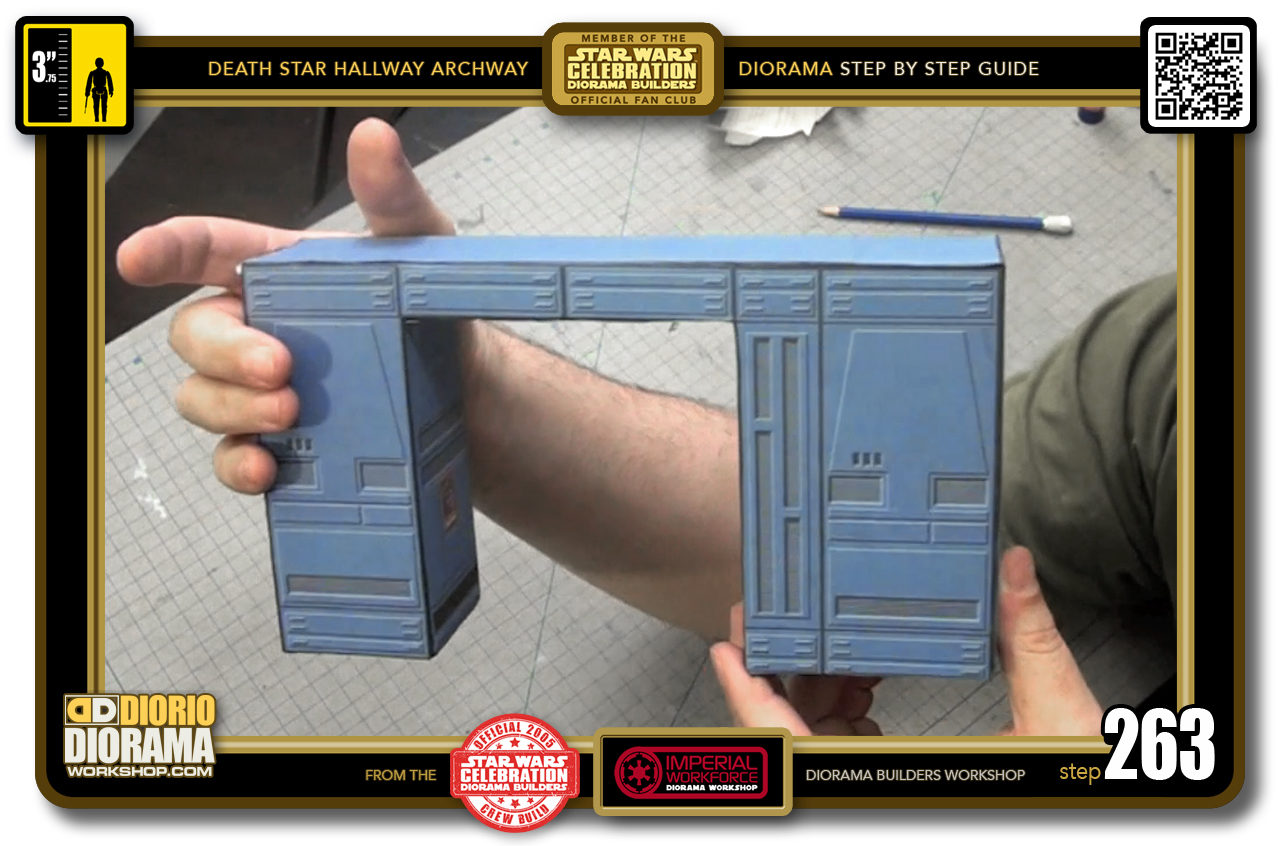
- STEP 263 > There you go, your Hallway Archway Death Star Accessory detail is ready for your MEGA Death Star diorama. You can build as many or as few as you wish, that is what is cool about the MEGA Death Star design, everything fits like Lego, and in so doing so, your imagination is the only limit ( well I guess shelf space too 🙂 to how it will look. You can now continue to build other optional accessories like the Blast Doors, Basic Door, Curved Hallways or go straight to one of the HALLWAY instructions. HAVE FUN !!! and send me photos of your creation when you are done. Frank.

.
Did you already build this Diorama ? At home or at our Star Wars Celebration Diorama Builders workshop ? Would you like to show it in the site’s GALLERY VISITORS DIORAMAS section, YES ? That is Awesome !!! You can find out all the details on how to email me your photos on the VISITORS SUBMISSIONS INFO page … When I get your photos, I will create your very own page just like this one. You may not realize it but work does inspire others to join in the fun of making Action Figure Dioramas.
.
NOT FOR RESALE ALL Decals, tutorials and artwork are ©FrankDiorio (dioramaworkshop.com) and offered FOR FREE to the fans – that would be you ? so you can build and display my diorama designs in your very own home. I realize I cannot control what one does with my graphics once I place them on the web, I can only ask you as one fan to another, please respect the artist and do not be that jerk who uses my designs and tutorials to build a copy of my work only to sell it on EBAY or trade/sale groups and forums. Thank You. Frank.
.
.
If you have a facebook account, why not join the Official Diorama Builders Fan Club today, simply click the logo link below.
 .
.
Catch up with fellow visitors and exchange stories, read cool interviews with the crew, exchange photos, fun surprises and grab some FAN ONLY merchandise next year at actual future conventions ?
.
©2018 Frank Diorio DioramaWorkshop.Com
.
IF YOU LIKE WHAT YOU SEE, PLEASE SHARE WITH YOUR FRIENDS
USING THE SOCIAL MEDIA BUTTONS BELOW