


-

- Step 041 >> The bed's pillow and mattress are not made yet but this gives you an idea of where Luke rested after coming out of the Bacta Tank. You can get a good glimpse of the bed in Empire Strikes Back, when 2-1B is wishing Luke good luck at his discharge.
-

- Step 042 >> This is what the room looks like with the "bed" wall removed from place. Of course the ceilings will add a lot of dimension and scale to the finished room.
-

- Step 043 >> One last look at all the pieces fitted together. Now it's time to finish the Diorama's Blueprints and start the Photoshop Wall Textures for you to Download.
-
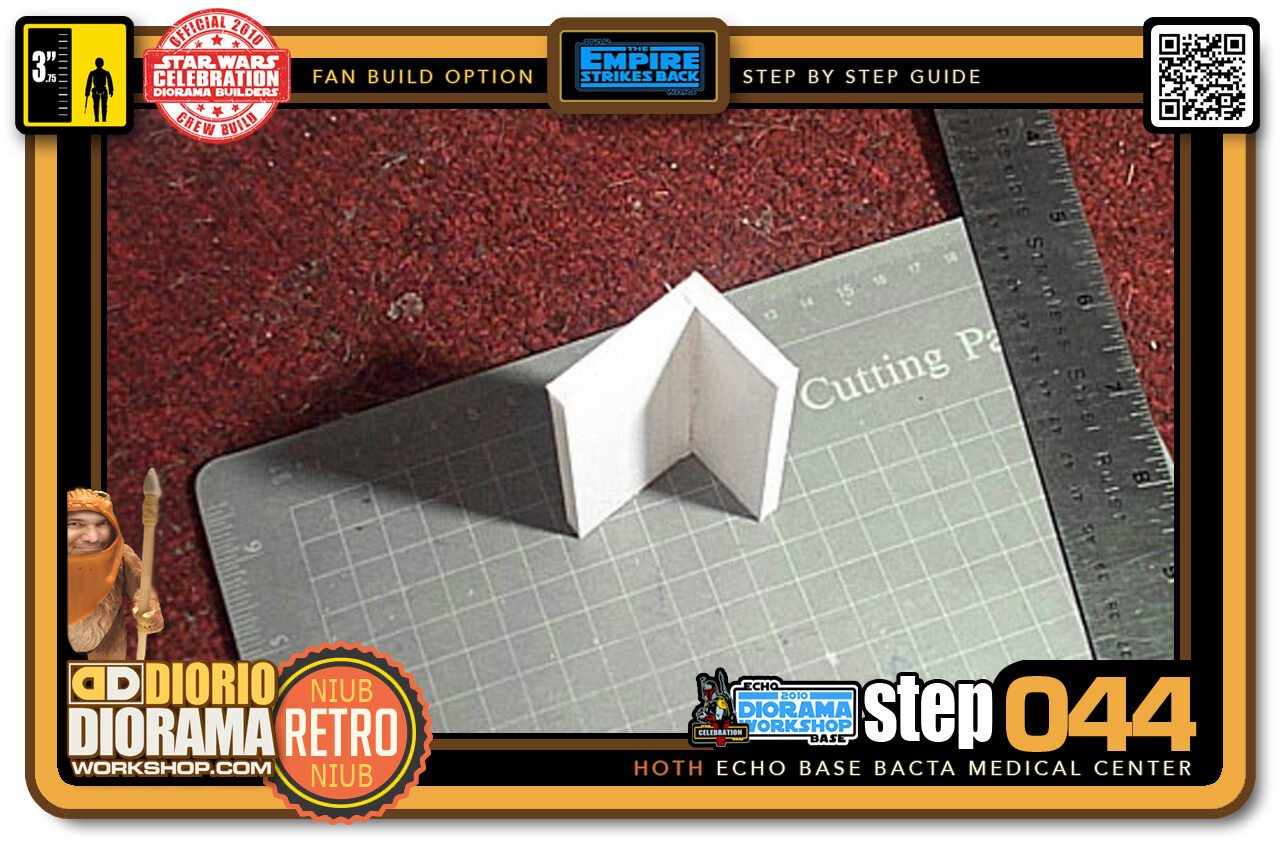
- Step 044 >> Using hot glue, I attached the 2 pieces together. This piece will mirror the left beam, giving a more aesthetic and accurate look to the room.
-
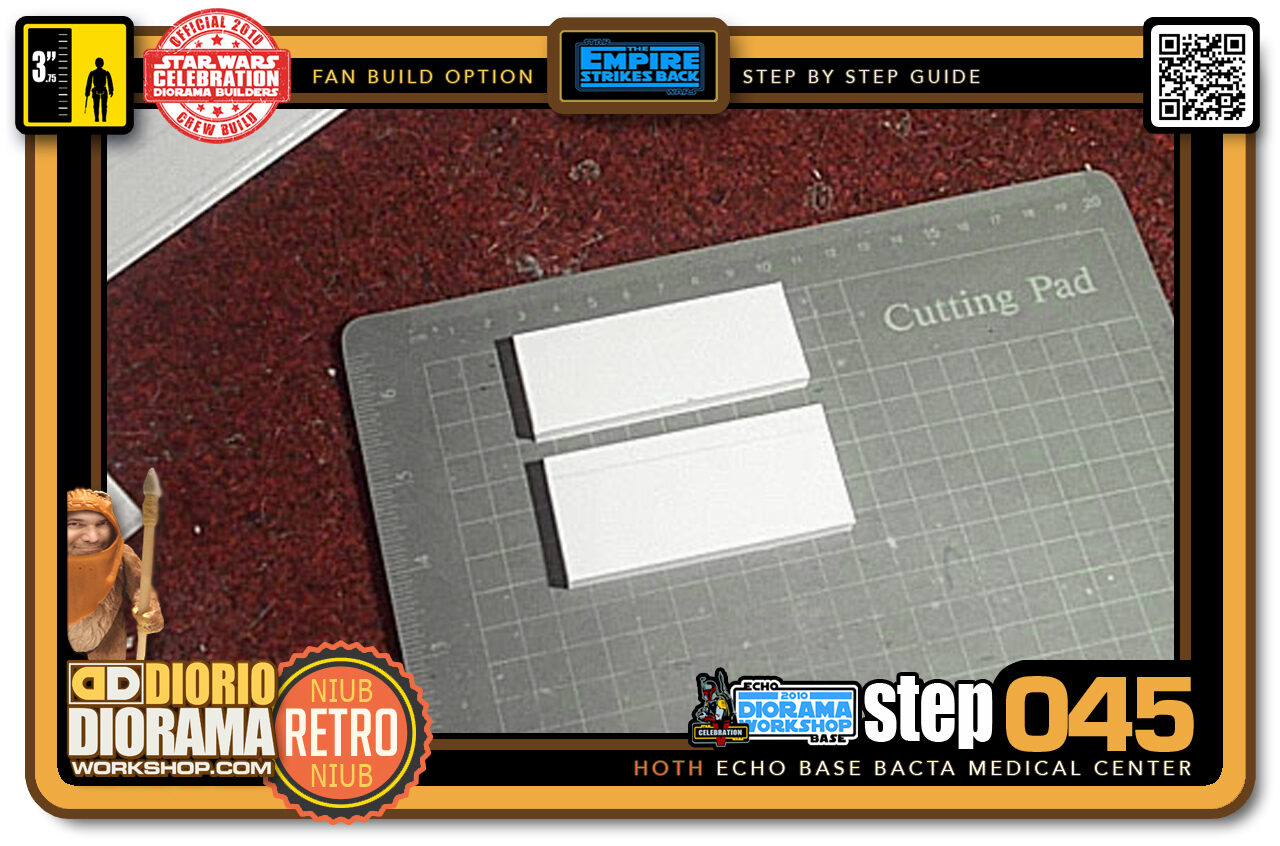
- Step 045 >> When it came time to make the decals, I decided to make a small change to the rooms design not found in the blueprints. I cut 2 shapes in Foamcore, 7.5cm X 3cm and 7.5cm X 3.5cm.
-
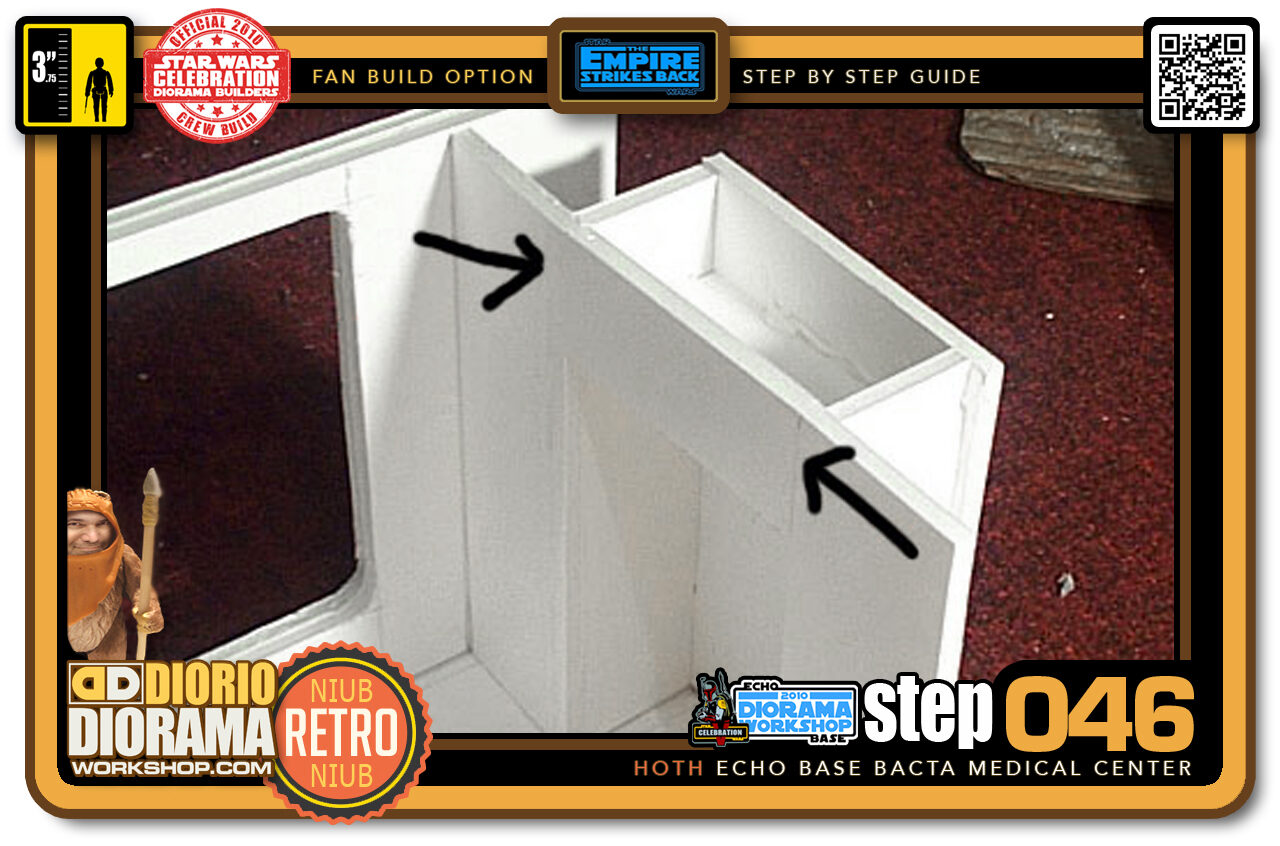
- Step 046 >> Here you can better see what I am talking about. The piece fits into the Right side Door Jam. When the decals are applied it will look like the Beam on the Left side of the room.
-
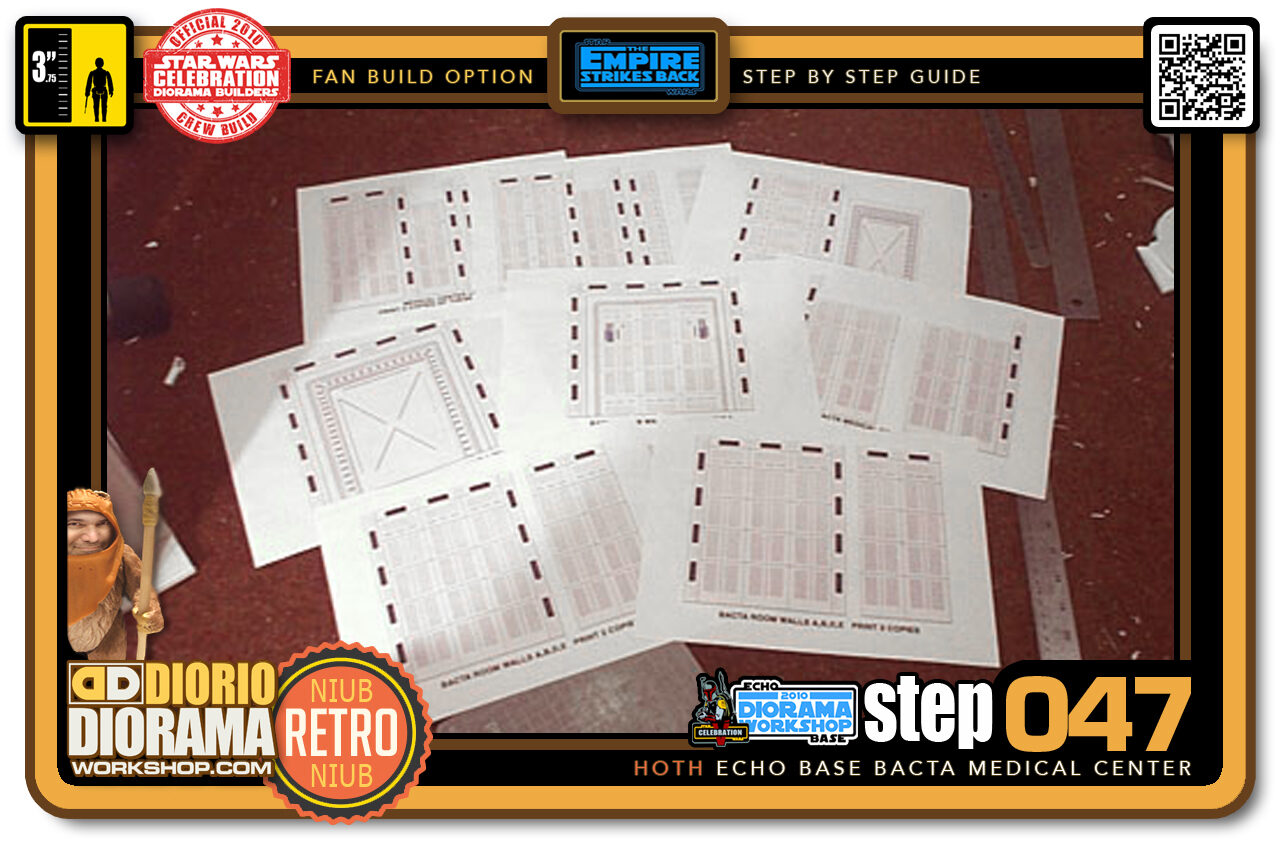
- Step 047 >> Well after 17 hours of Photoshop work, I printed all my Decals for the Bacta Room and 3 Walls of the Medical Center. I still have to create Luke's Medical Bed Decals that fit on the Rear wall. I will work on those next weekend.
-

- Step 048 >> Start by cutting out the decals for the Bacta Tank Room. You will need these 5 pieces. They are for the Walls A, B, C, D and E. You can use scissors or an Xacto blade with a ruler to get perfect straight cuts. Just make sure to be careful and not chop off your finger 🙂
-
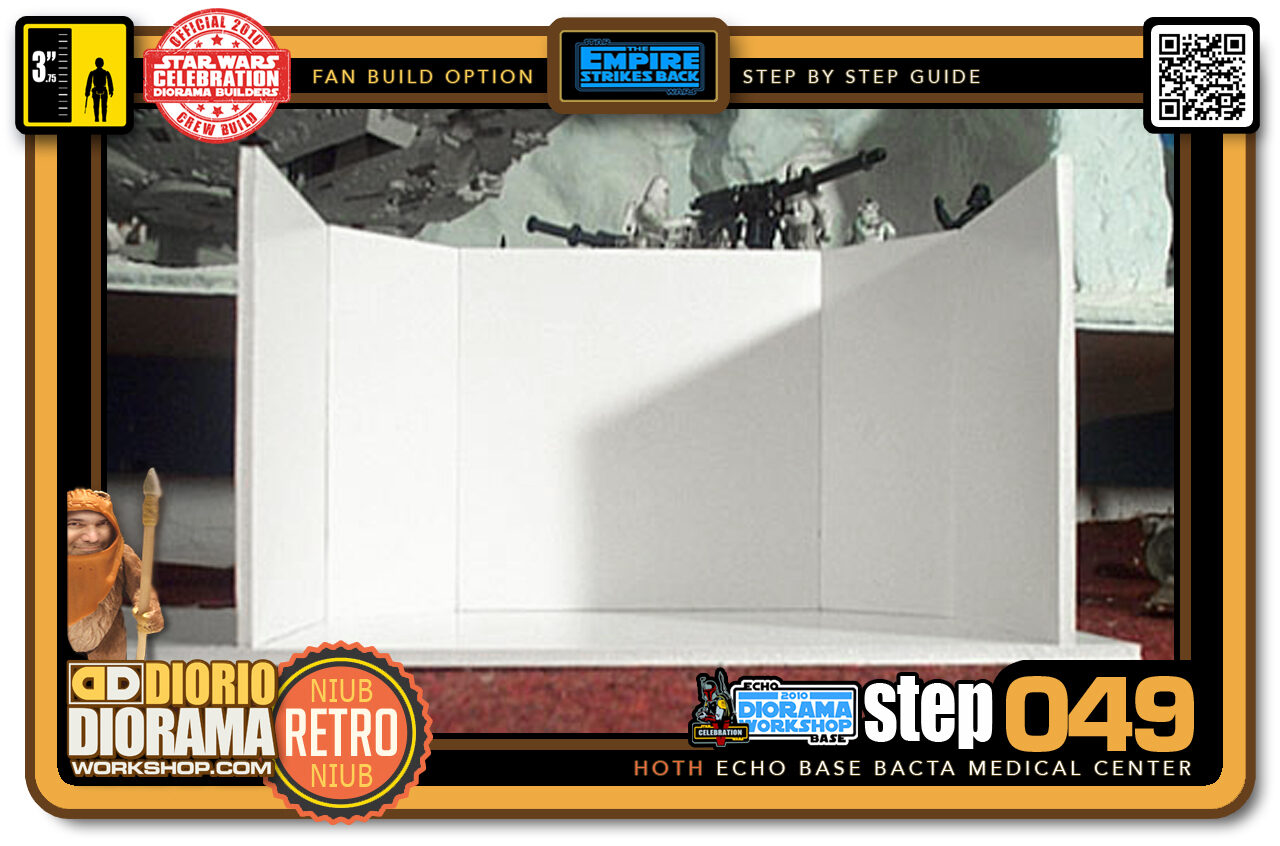
- Step 049 >> This is the Bacta Tank Room the above decals go into. The Walls are from left to right... A, B, C, D and E
-
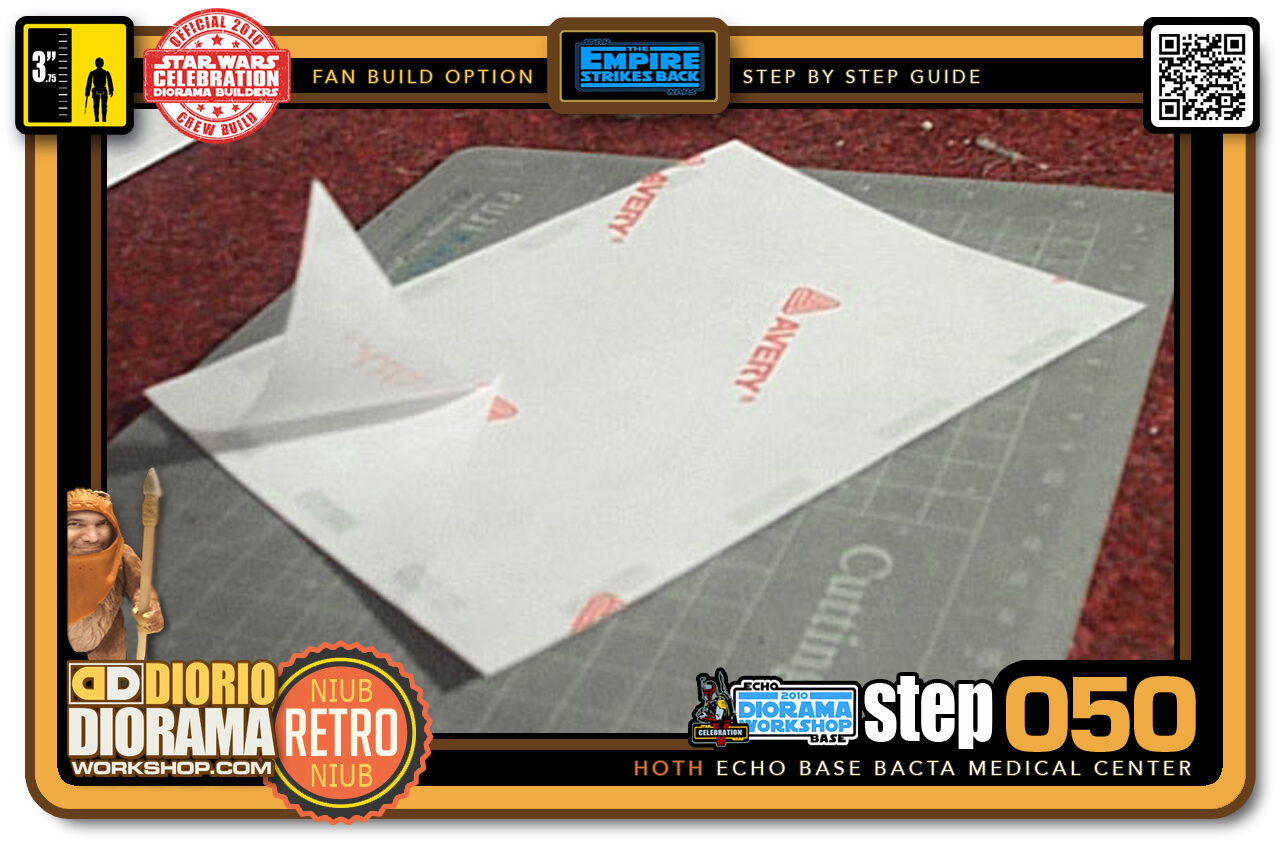
- Step 050 >> To save on glue and time, you can print the textures onto these cool Peel Back Full Sheet Decals, available at most Stationery Stores.
-
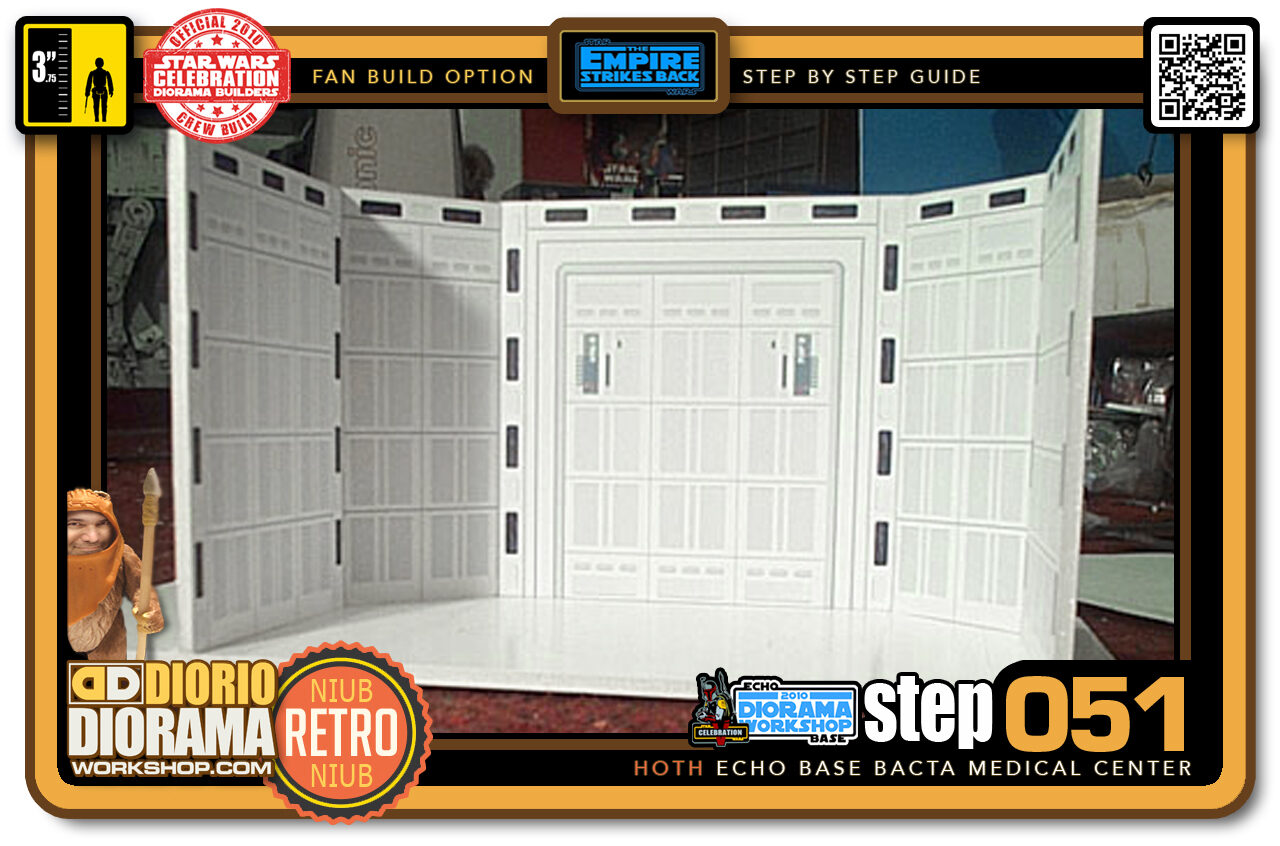
- Step 051 >> And this is how the Bacta Tank Room looks like after you apply all wall textures. All that is left, is to apply a Grey Glossy Cardboard on the floor surface.
-
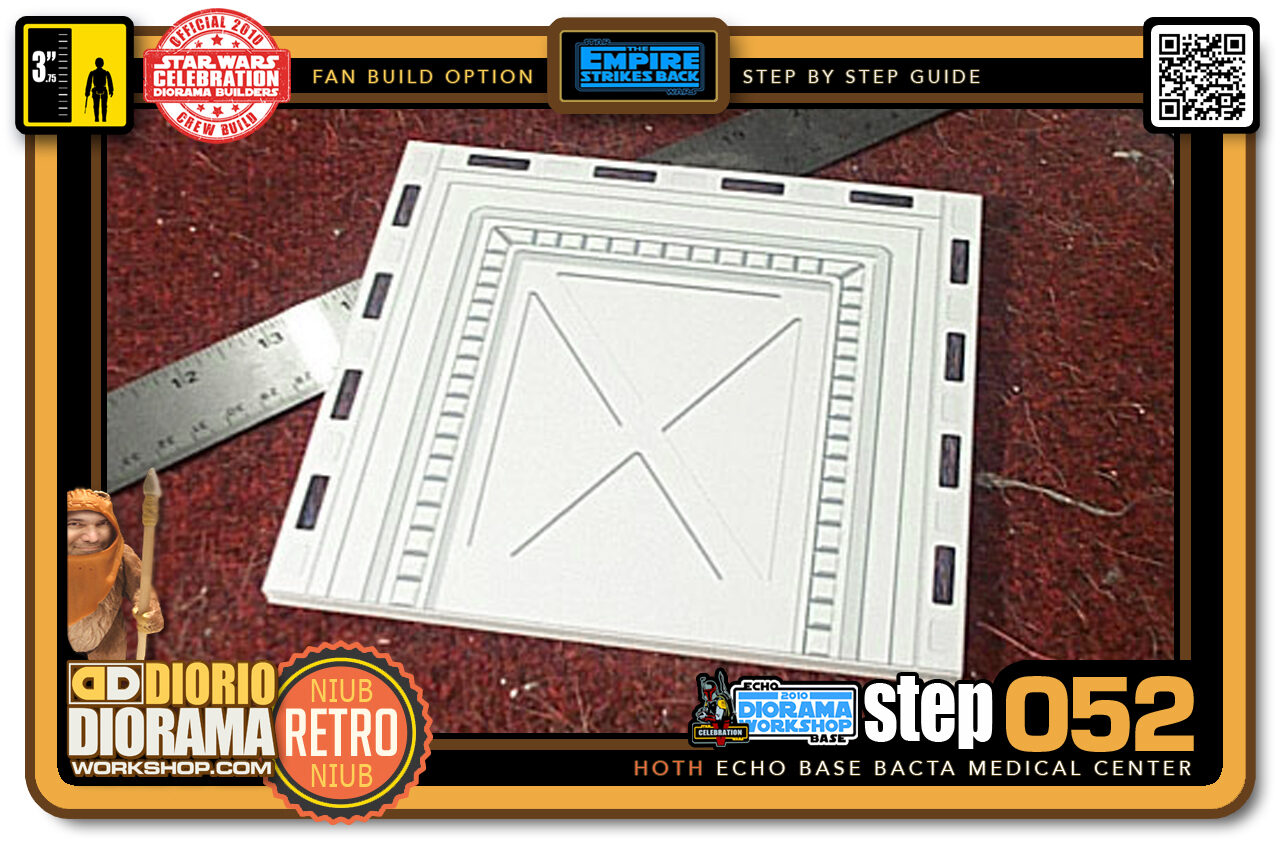
- Step 052 >> Next up, Cut out the decal for the Left Door and apply to your Foamcore cutout.
-
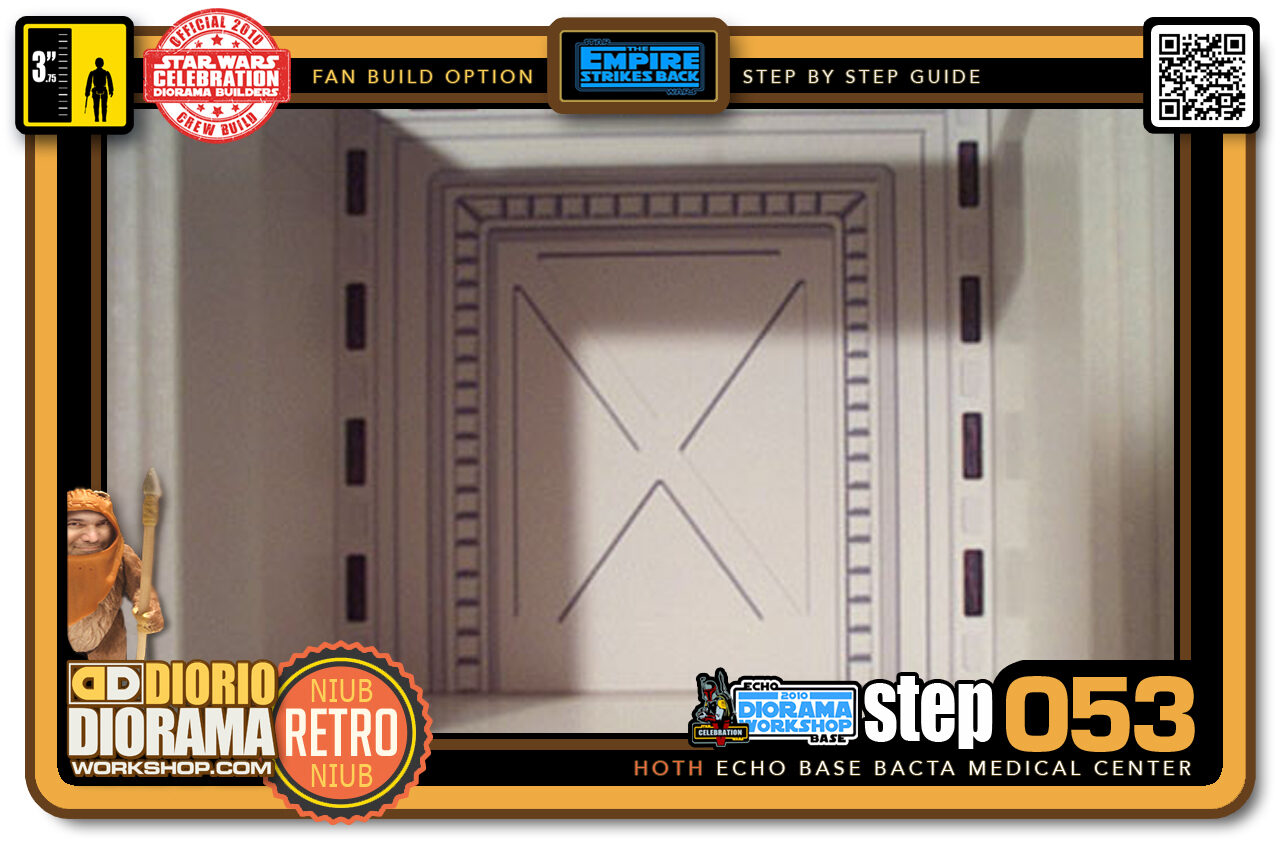
- Step 053 >> The door in it's final resting place on the Left Side of the Medical Center.
-
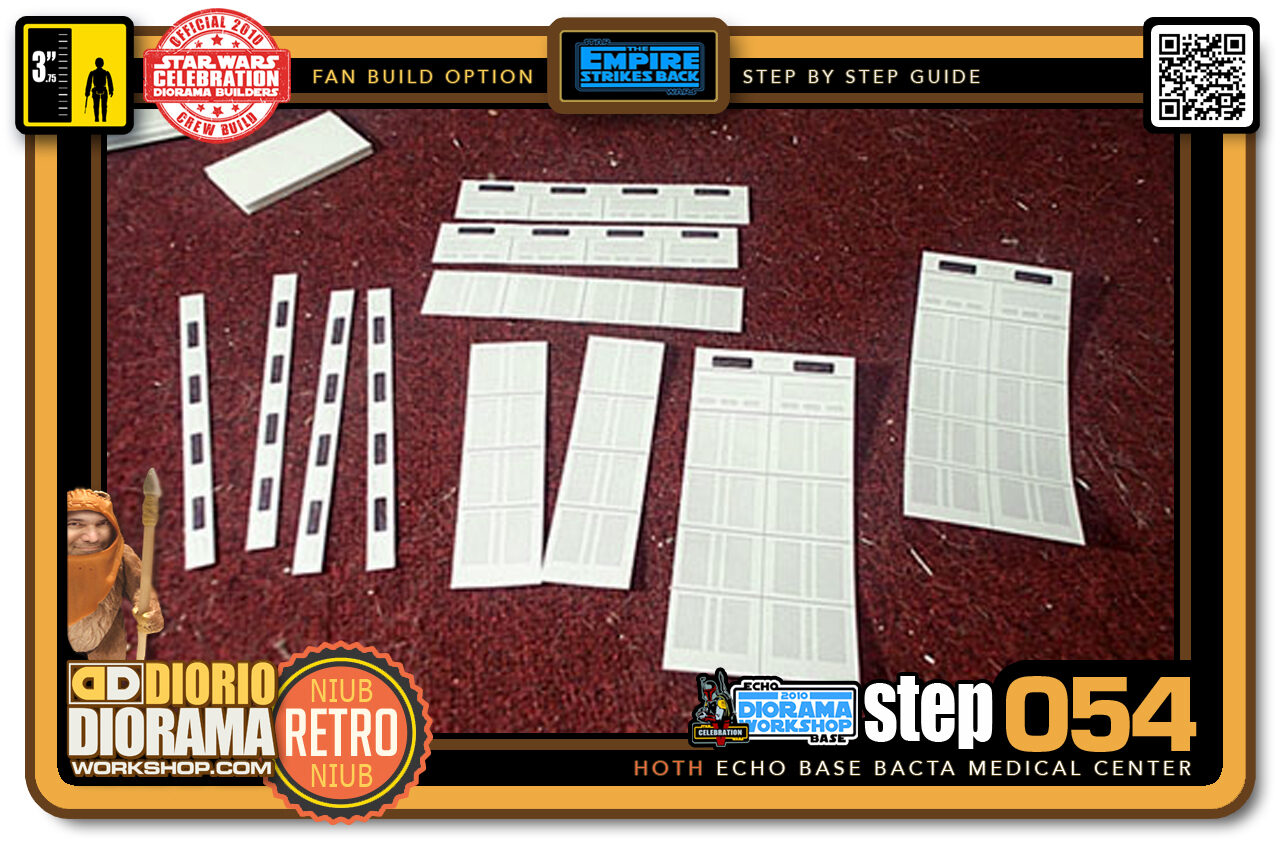
- Step 054 >> Now let's get a bit more complex. These are the textures you need to print and cutout for the Left Side of the Medical Center Walls and Beam.
-
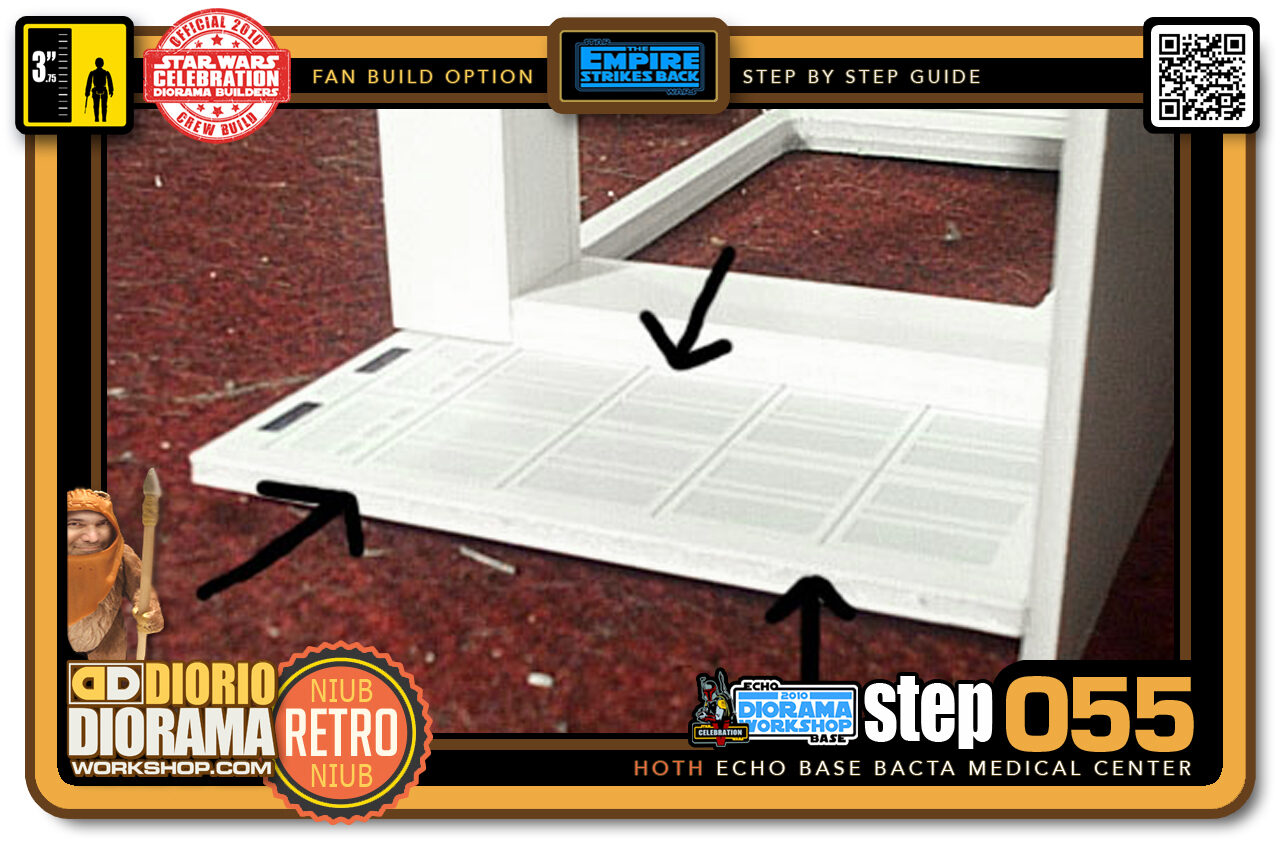
- Step 055 >> The first decal is applied to the Foamcore piece on the left side of the Beam Column. The 2nd copy of this texture is on the mirror opposite side of the room.
-
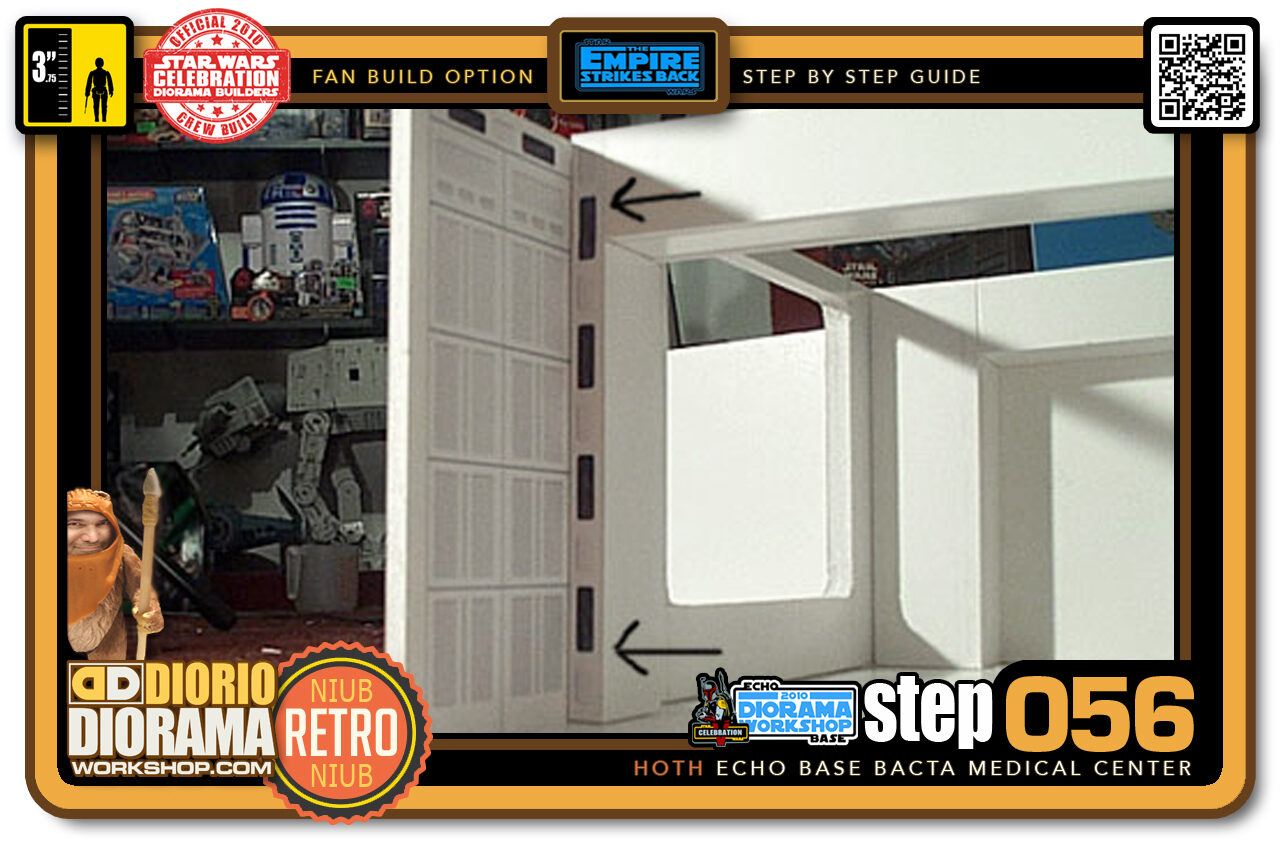
- Step 056 >> Now it's time to place the "Wire" Strips on the edge of the Foamcore Beam Column. Repeat same on Right side Beam Column.
-
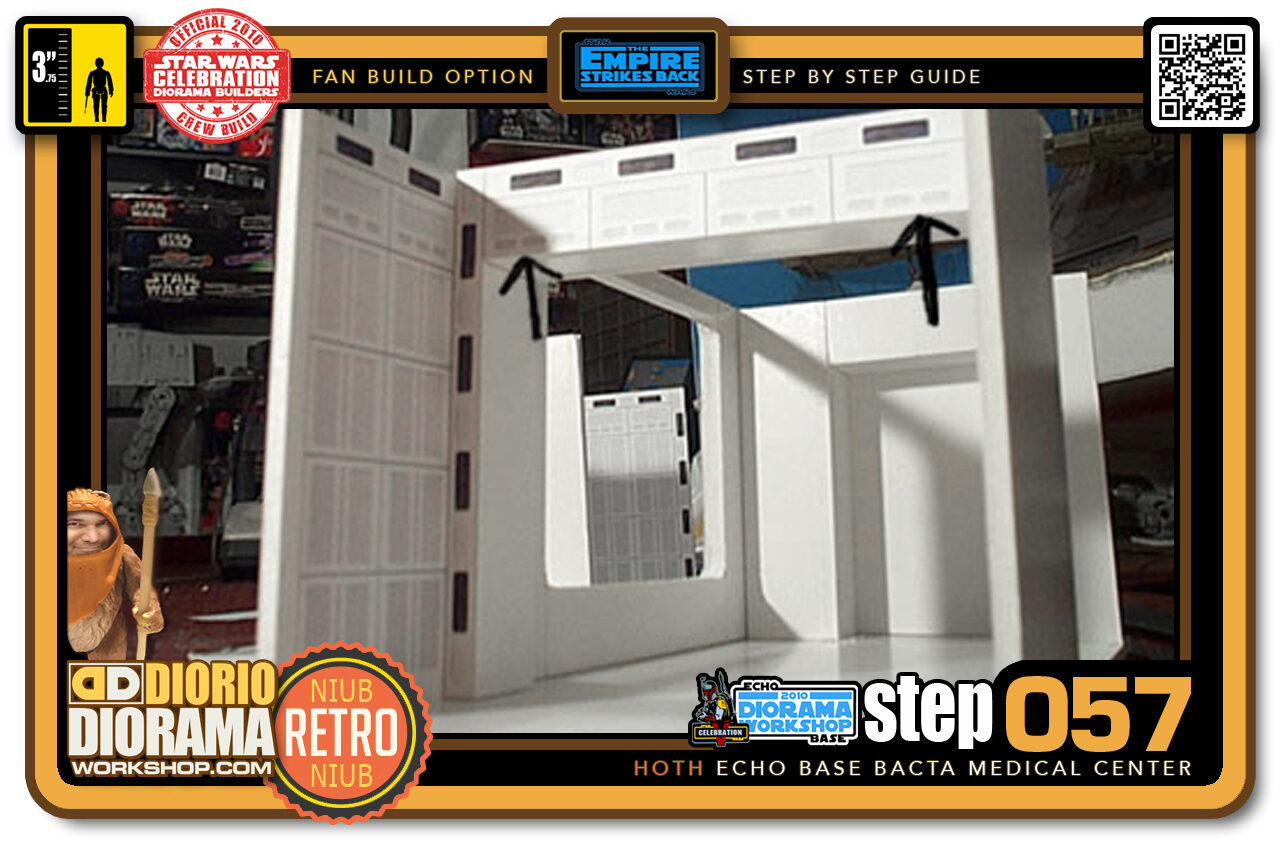
- Step 057 >> Next, I applied the 4 block texture on the Beam's Side. This piece fits perfectly between the "Wire" Strips located on each side of the Columns.
-
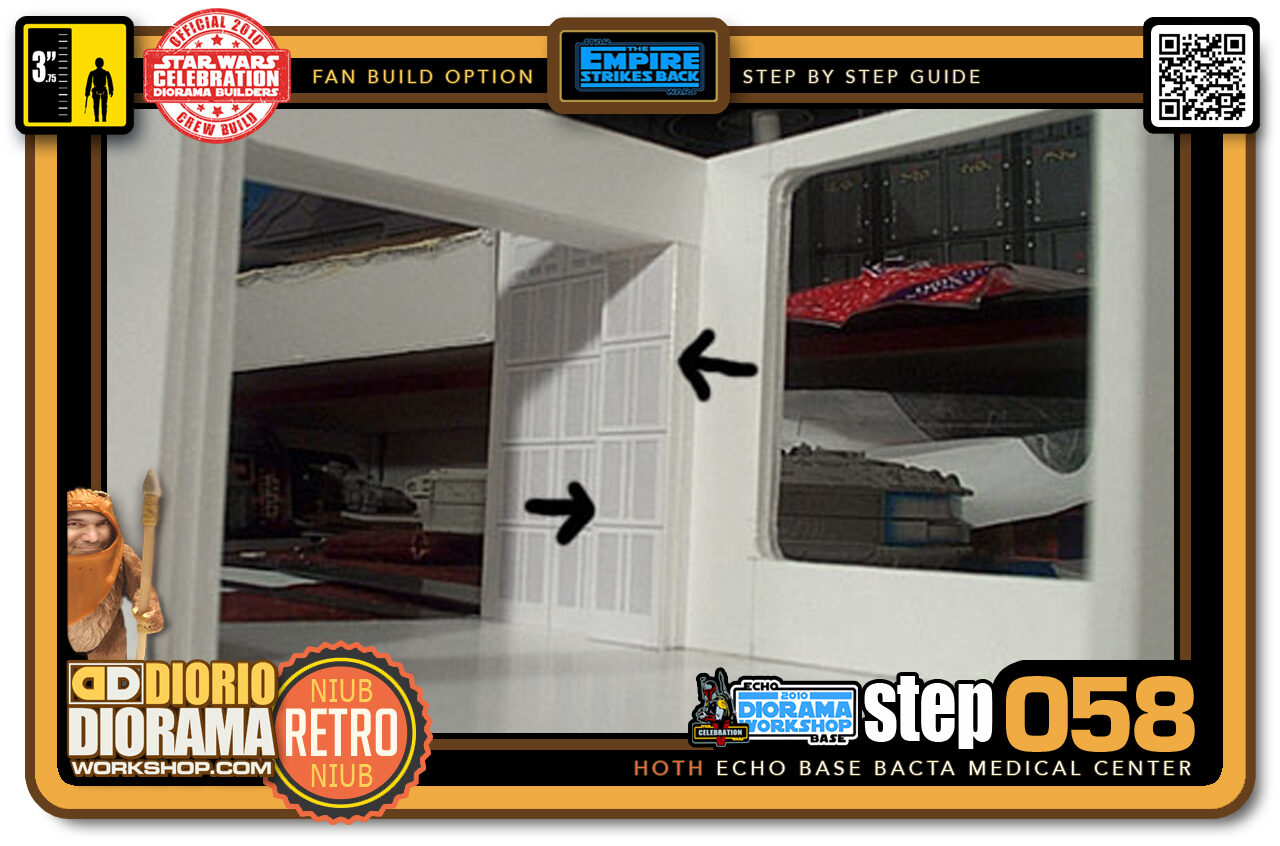
- Step 058 >> Now take the shortened Wall Texture and apply it on the Column's Front between the arrows. Repeat the same move on opposite "Mirror" Column.
-
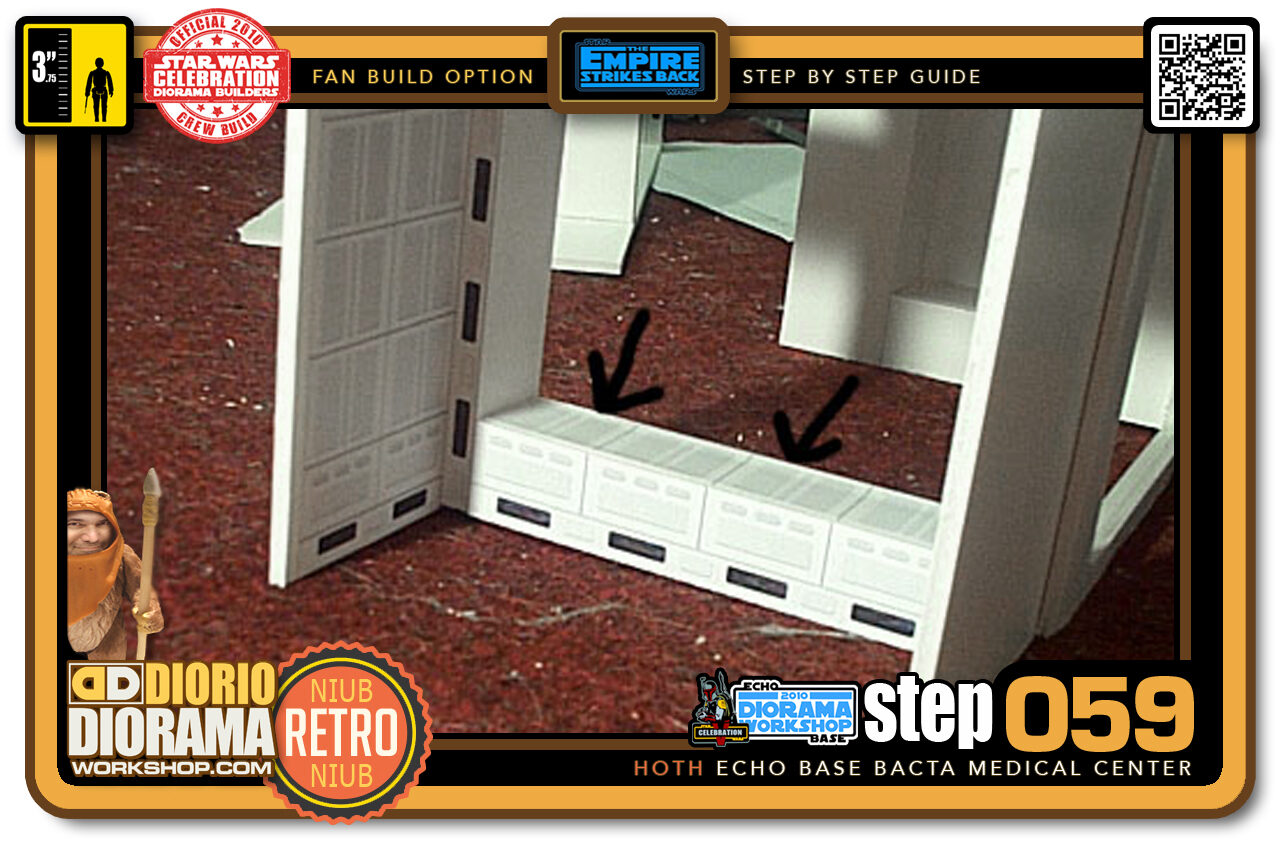
- Step 059 >> Now I applied this texture to the underside of the Beam. I noticed it's not quite as wide as it should be but still looks good.
-
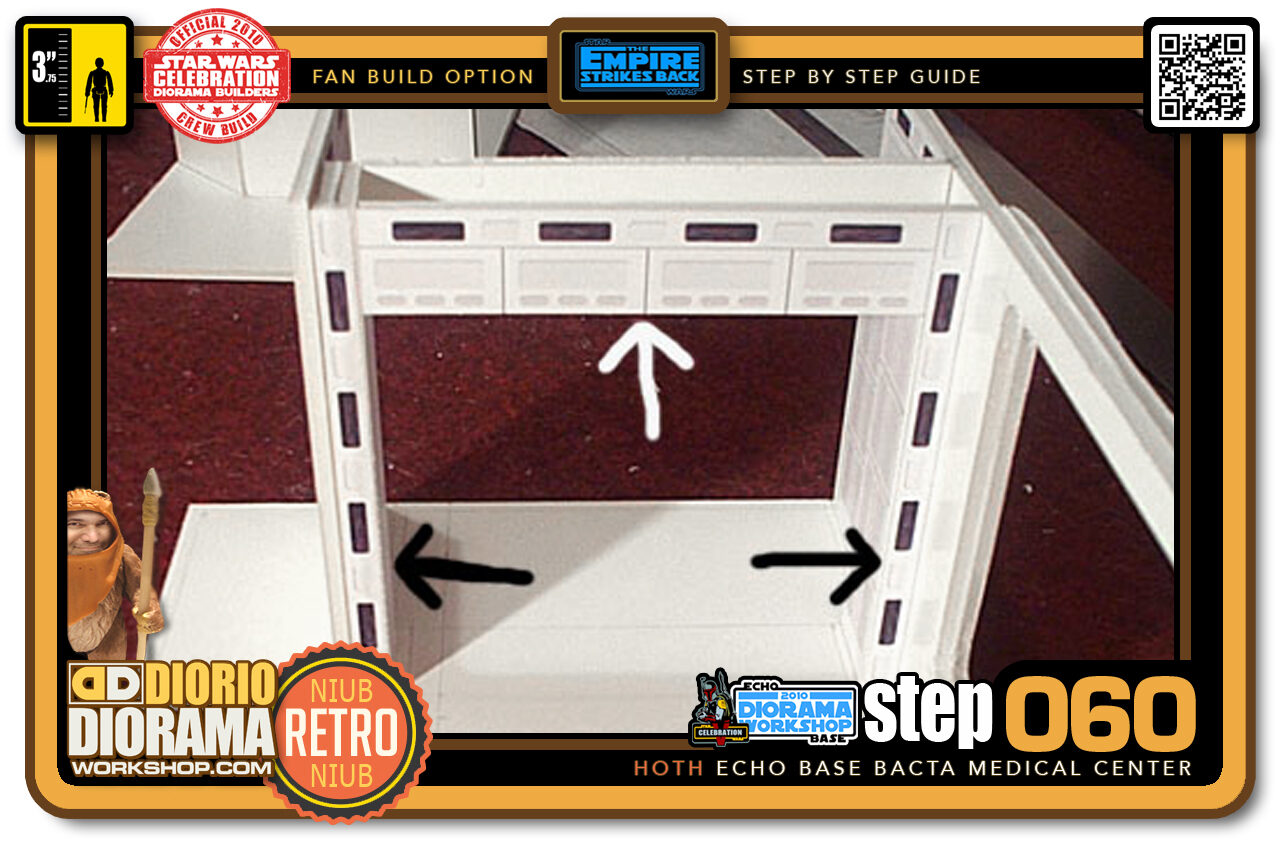
- Step 060 >> Repeat the previous steps to the front side of the structure. Start with the Right and Left "Wire" Strips and then the center Top Beam Texture.
.
Did you already build this Diorama ? At home or at our Star Wars Celebration Diorama Builders workshop ? Would you like to show it in the site’s GALLERY VISITORS DIORAMAS section, YES ? That is Awesome !!! You can find out all the details on how to email me your photos on the VISITORS SUBMISSIONS INFO page … When I get your photos, I will create your very own page just like this one. You may not realize it but work does inspire others to join in the fun of making Action Figure Dioramas.
.
NOT FOR RESALE ALL Decals, tutorials and artwork are ©FrankDiorio (dioramaworkshop.com) and offered FOR FREE to the fans – that would be you ? so you can build and display my diorama designs in your very own home. I realize I cannot control what one does with my graphics once I place them on the web, I can only ask you as one fan to another, please respect the artist and do not be that jerk who uses my designs and tutorials to build a copy of my work only to sell it on EBAY or trade/sale groups and forums. Thank You. Frank.
.

.
.
If you have a facebook account, why not join the Official Diorama Builders Fan Club today, simply click the logo link below.
 .
.
Catch up with fellow visitors and exchange stories, read cool interviews with the crew, exchange photos, fun surprises and grab some FAN ONLY merchandise next year at actual future conventions ?
.
©2021 Frank Diorio DioramaWorkshop.Com
.
IF YOU LIKE WHAT YOU SEE, PLEASE SHARE WITH YOUR FRIENDS
USING THE SOCIAL MEDIA BUTTONS BELOW