


-
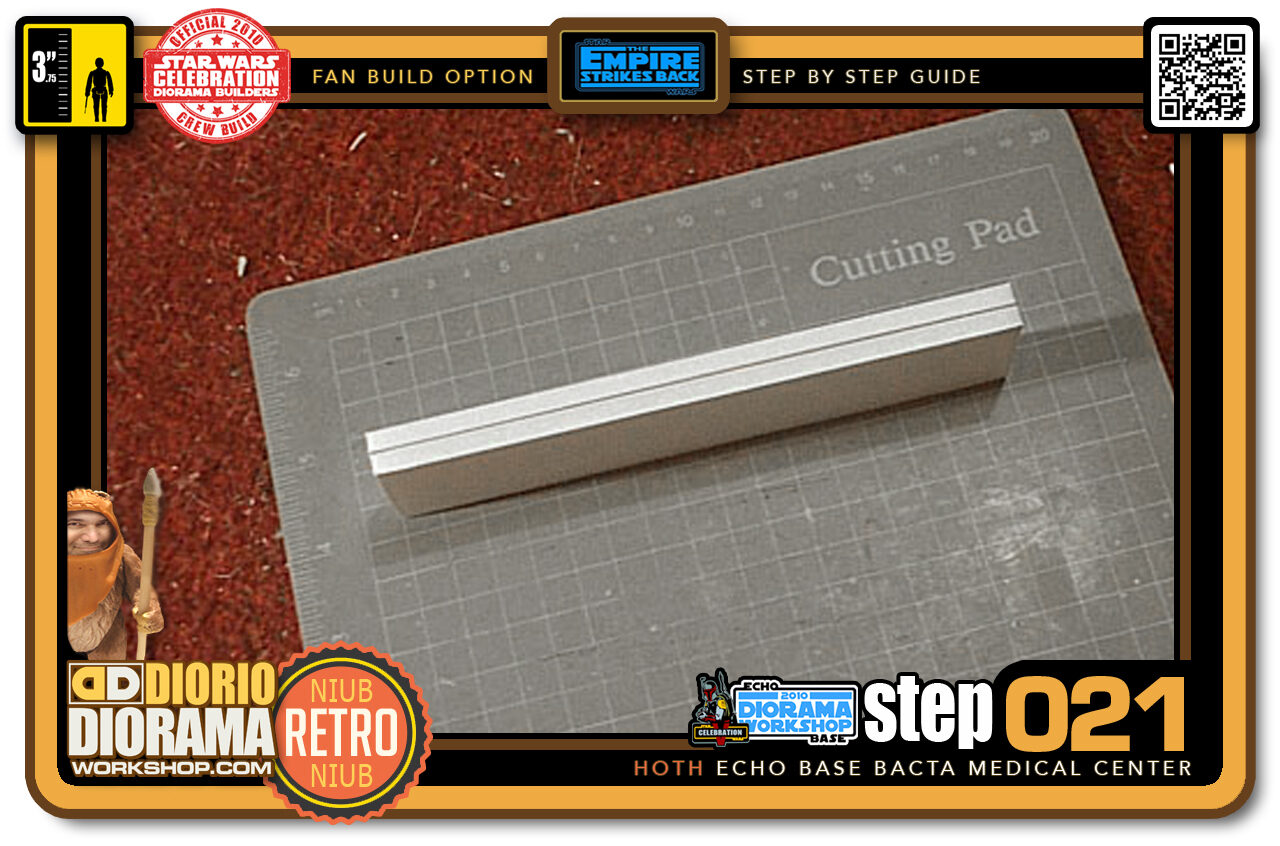
- Step 021 >> Use the Hot Glue to attach the 2 pieces together.
-
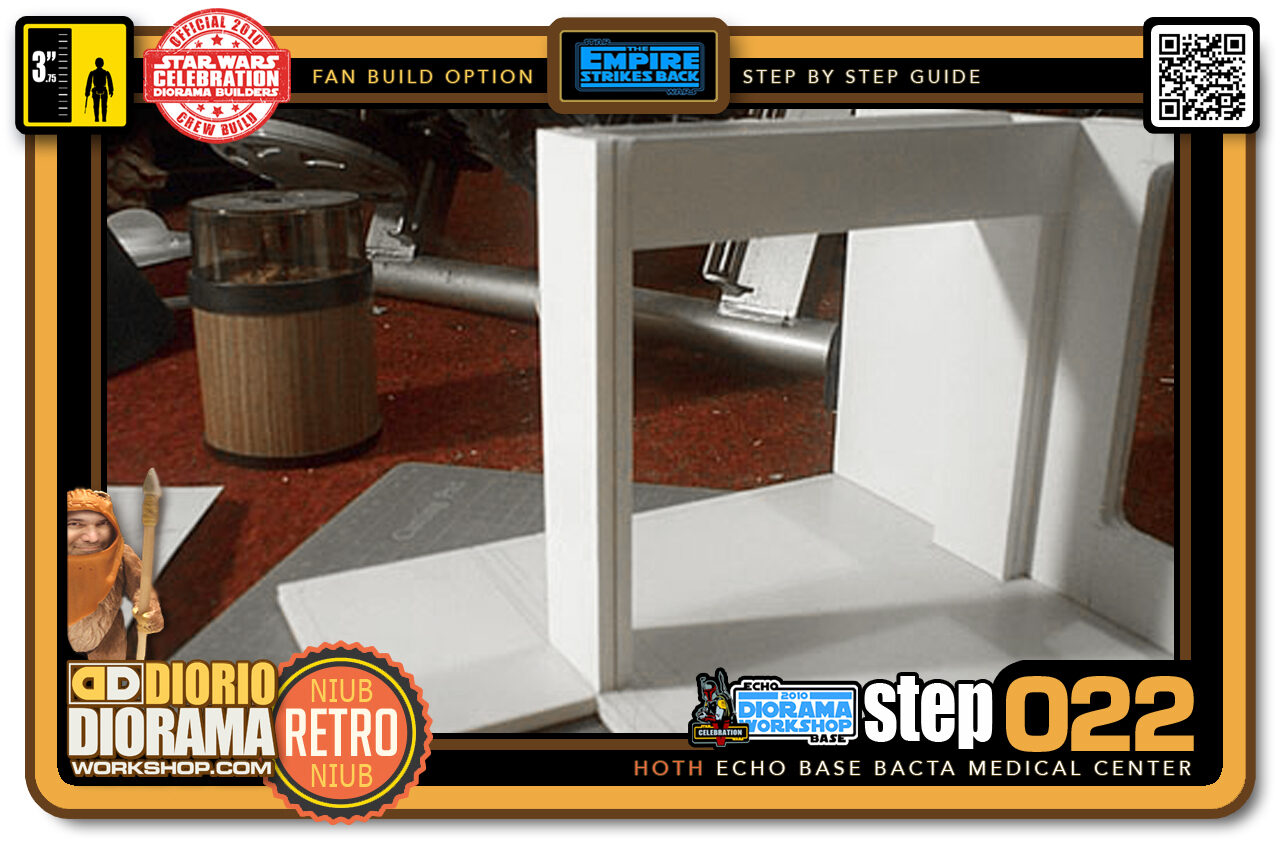
- Step 022 >> Now I used the Hot Glue Gun both at the top and on the floor. Attach 1 end at a time, it's much easier and will avoid a big mess if your glue hardens too quickly. This is our Medical center archway.
-
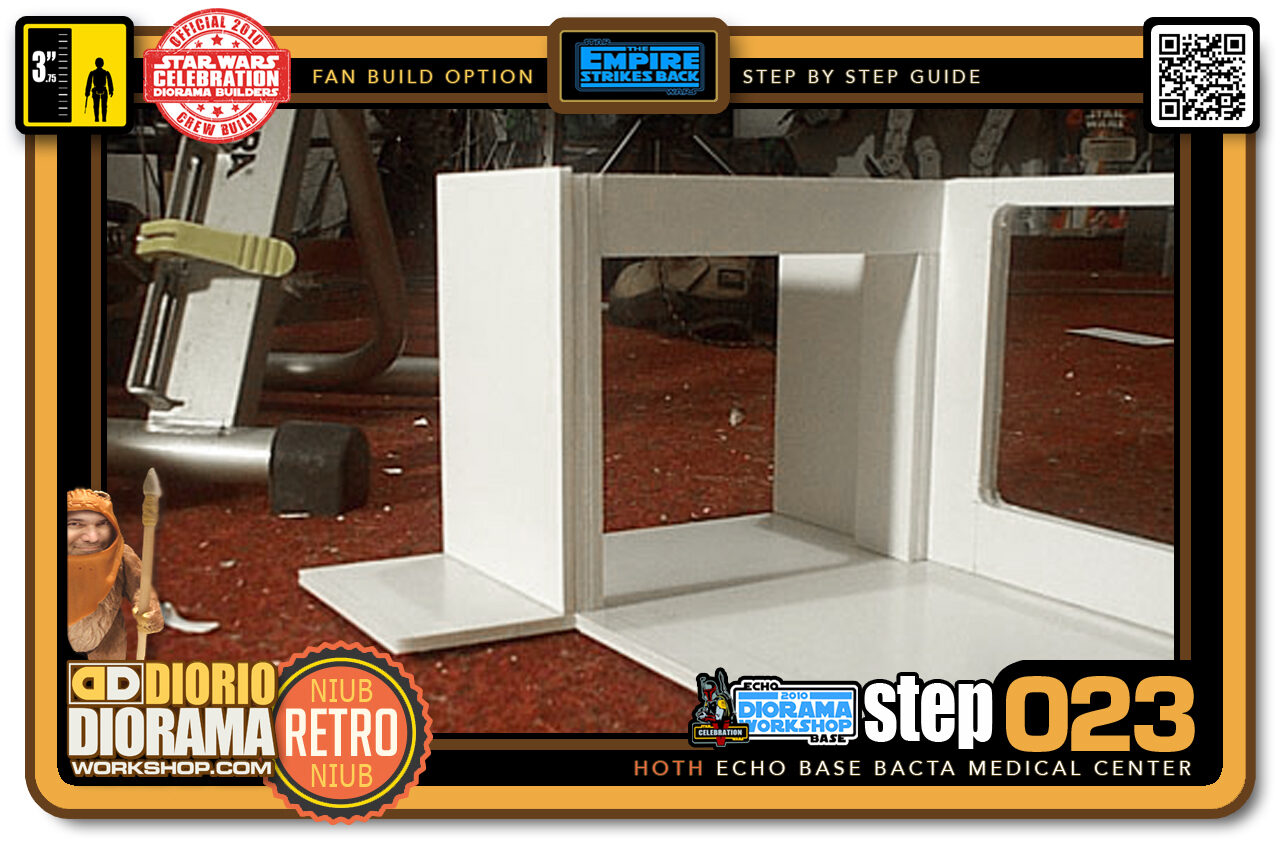
- Step 023 >> Next I cut a piece of foamcore and applied it to the front of the column and along the main floor. This piece is the wall that connects the door to the "window" wall.
-

- Step 024 >> This piece is the Wide door to the medical center.
-
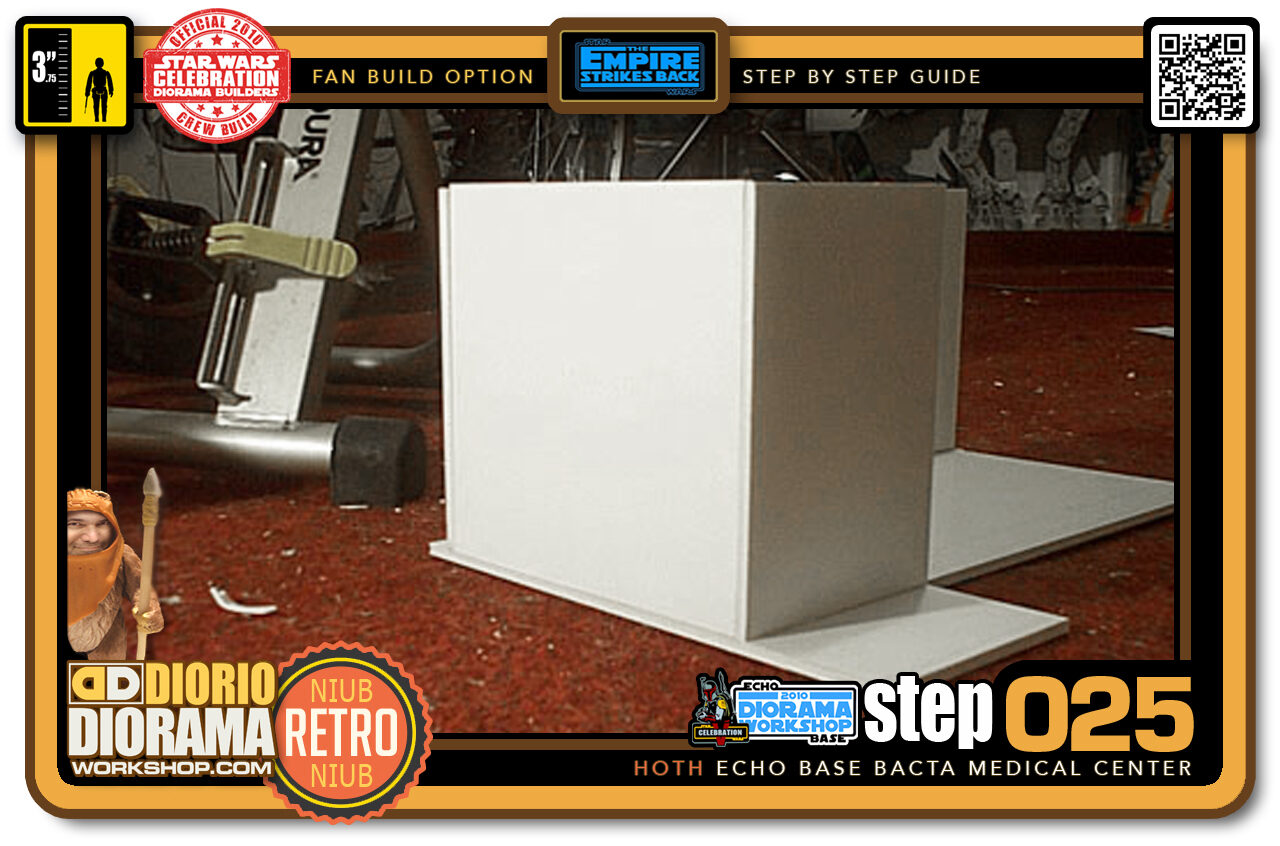
- Step 025 >> It fits on the left side of the Medical Center. Use Hot Glue to attach it to the 2 walls. I am leaving mine loose so that I can remove it to take better pictures.
-
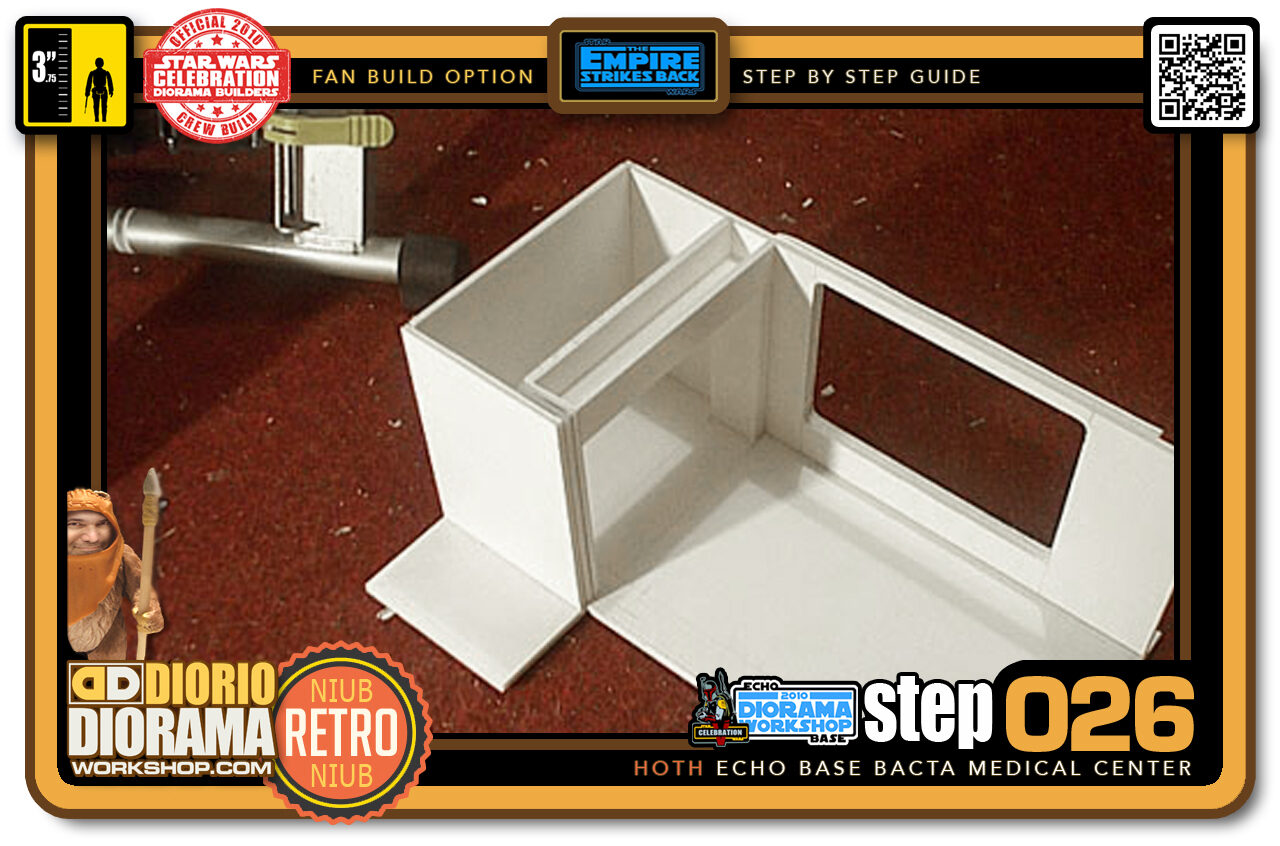
- Step 026 >> Here is a top view of the Medical Center room. You can better see where the wide door fits in.
-
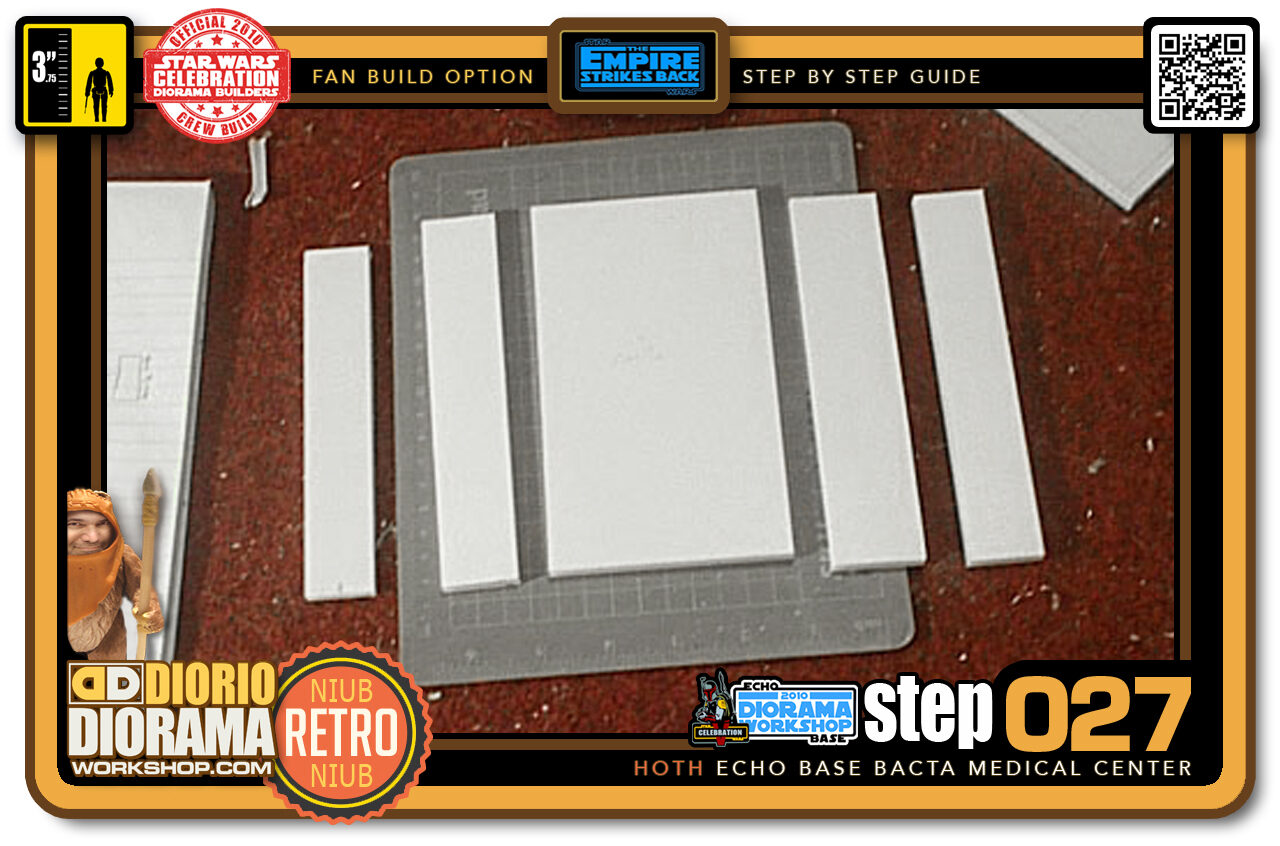
- Step 027 >> Time for the right wall. There is a door in the wall so I cut 5 pieces of foamcore.
-
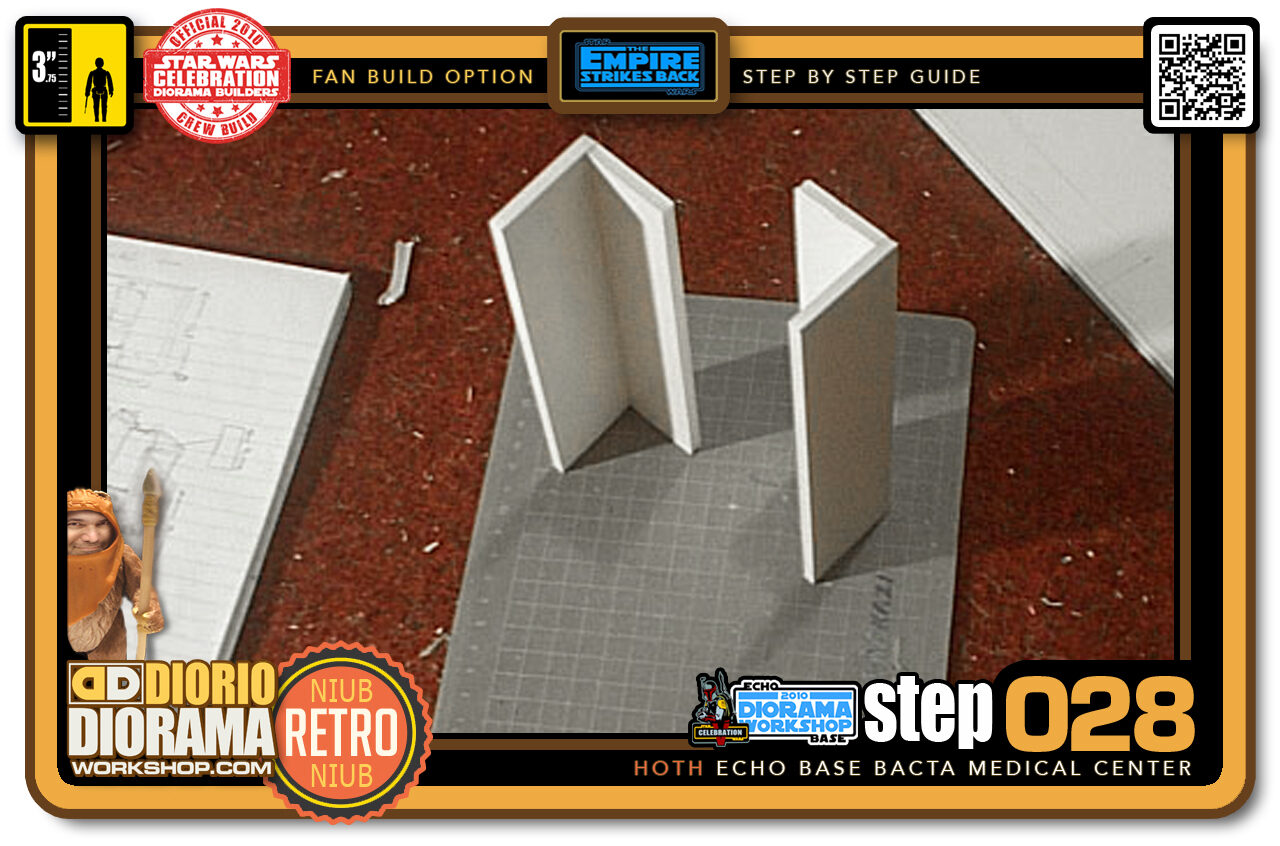
- Step 028 >> These 2 pieces are identical. I used the Hot Glue to attach the wall corners together.
-
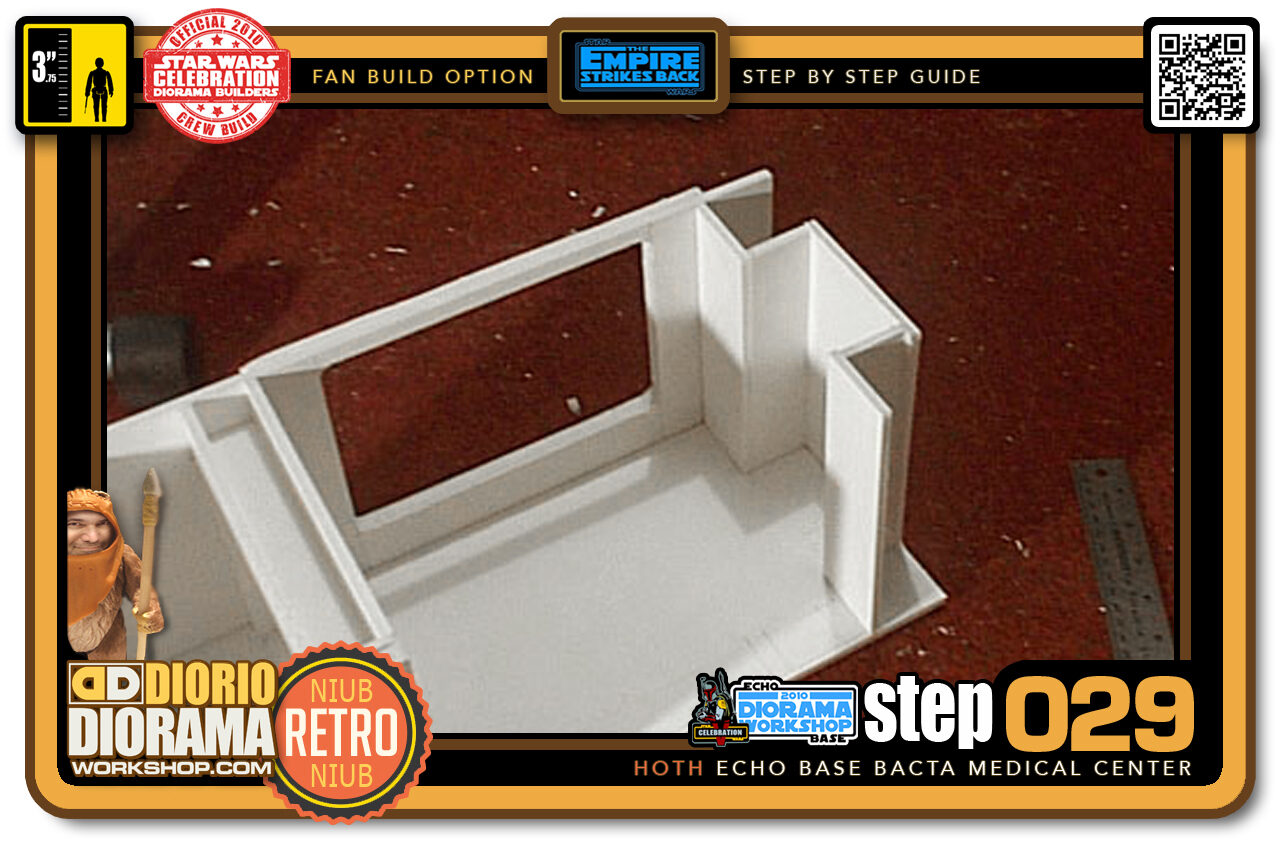
- Step 029 >> Next attach the door piece and the secure the entire wall to the floor base and "window" wall.
-
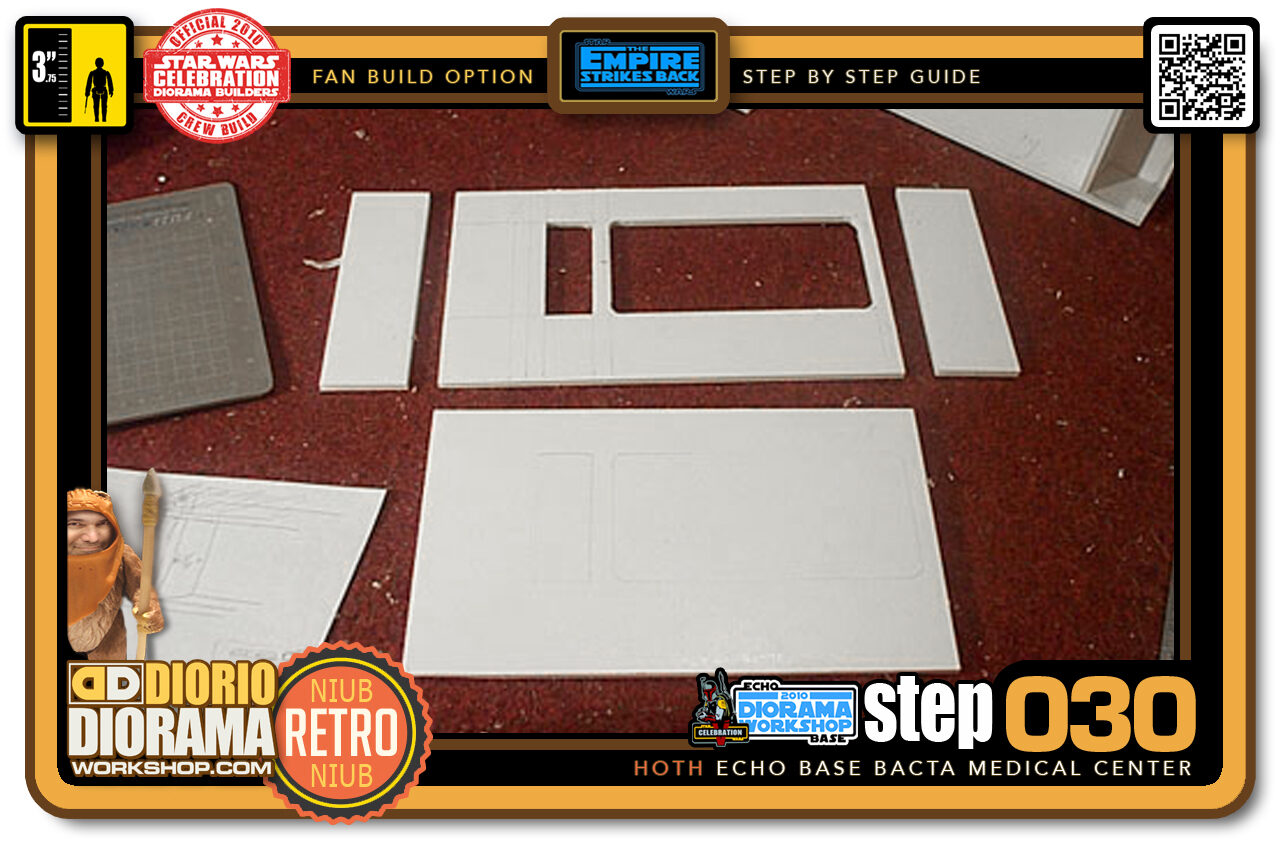
- Step 030 >> These are the pieces needed for the "bed" wall. I cut the closet hole and bed frame from the first piece, as seen on the top of the picture. Next place this piece on top of the 2nd one and trace the shape of the bed frame. Use an Xacto blade to cut the bed hole only.
-
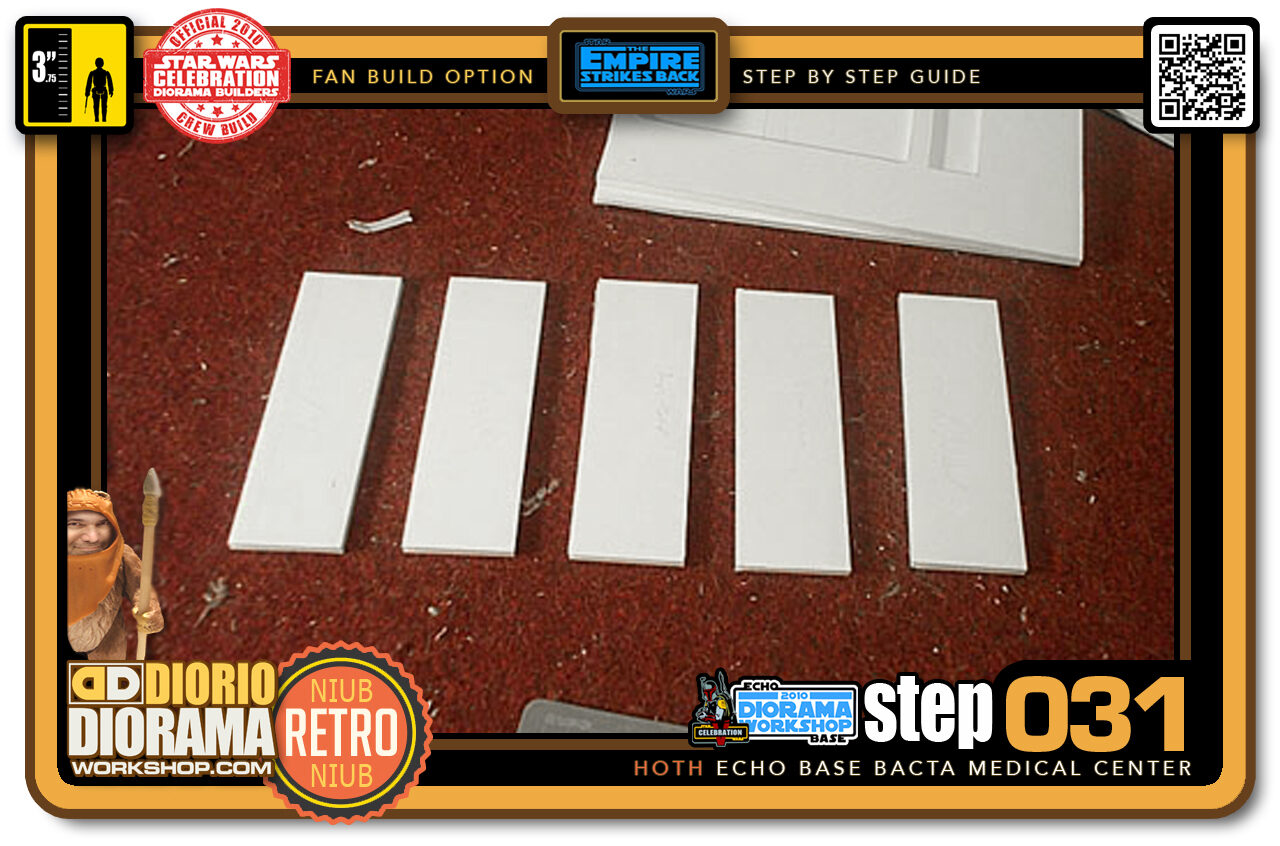
- Step 031 >> The "Bed" wall has a thickness of 5 cm. I cut identical shapes of foamcore to act as separators.
-

- Step 032 >> 3 of the pieces fit vertical on each side of the wall and bed frame. The 2 others are horizontal along the top and bottom of the bed frame. This acts as support but also as Luke's recovery bed.
-
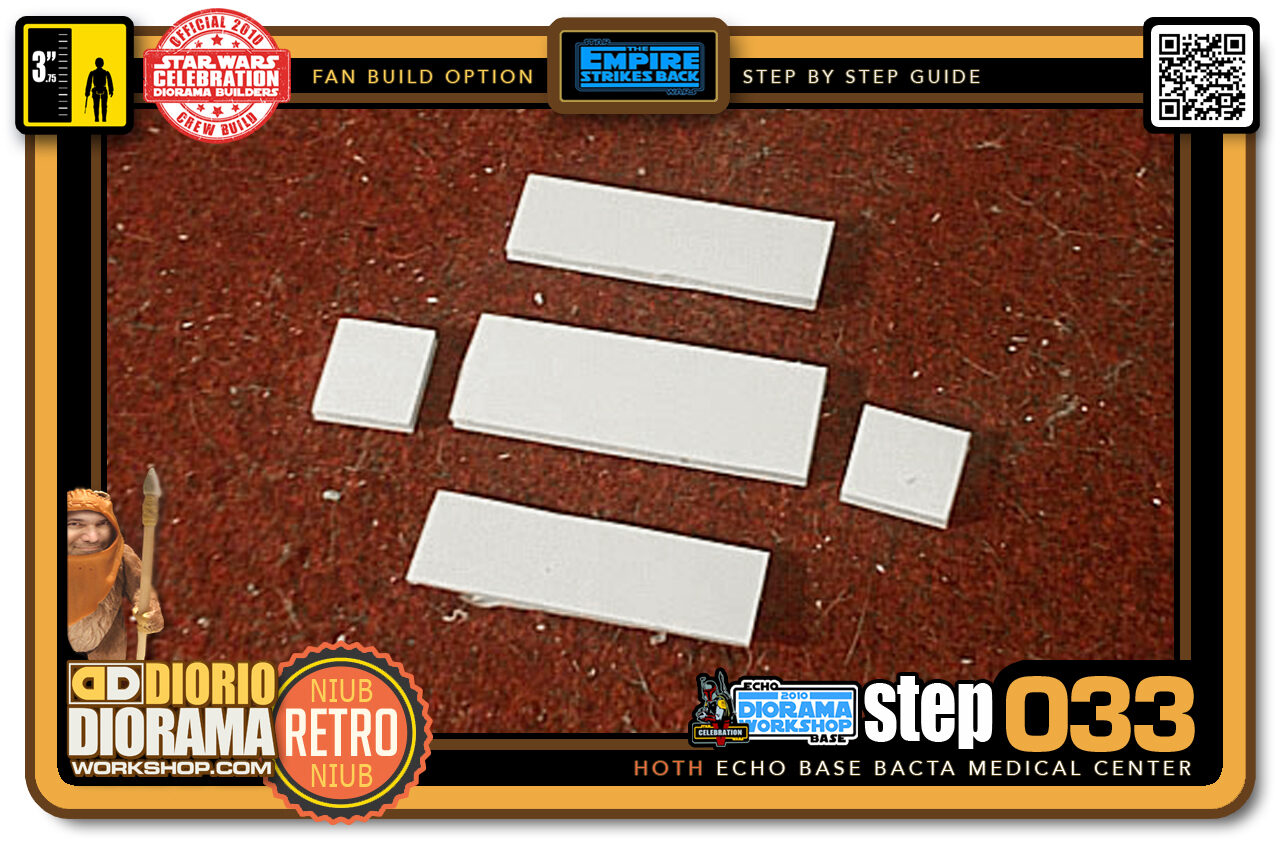
- Step 033 >> The closet need walls to but not as deep as the walls thickness. These are the pieces you need to make a box that will fit around the closet hole in the wall.
-
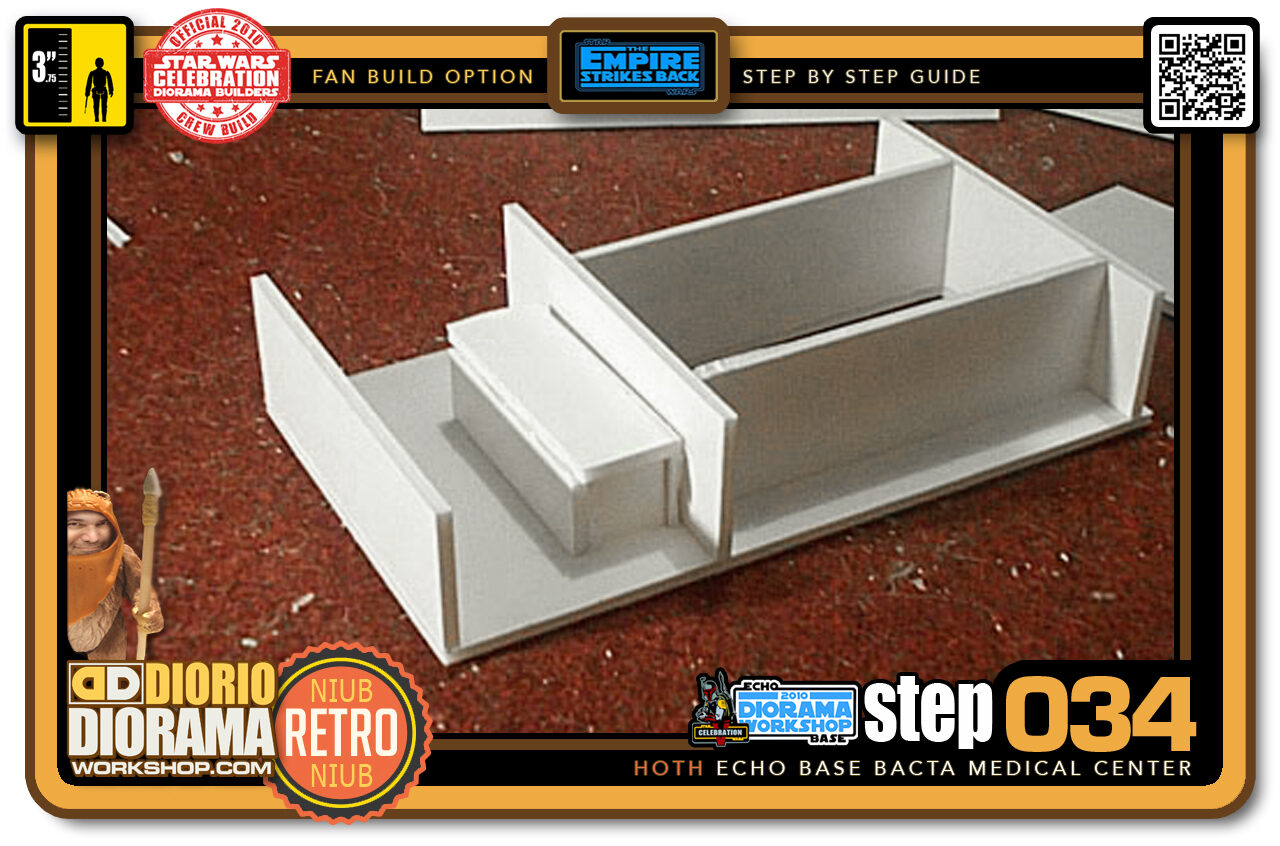
- Step 034 >> Using the Hot Glue Gun, I attached the pieces into a box and then secured it to the rear of the "bed" wall. If the pieces don't fit perfectly that's ok, we won't see the box from the outside.
-
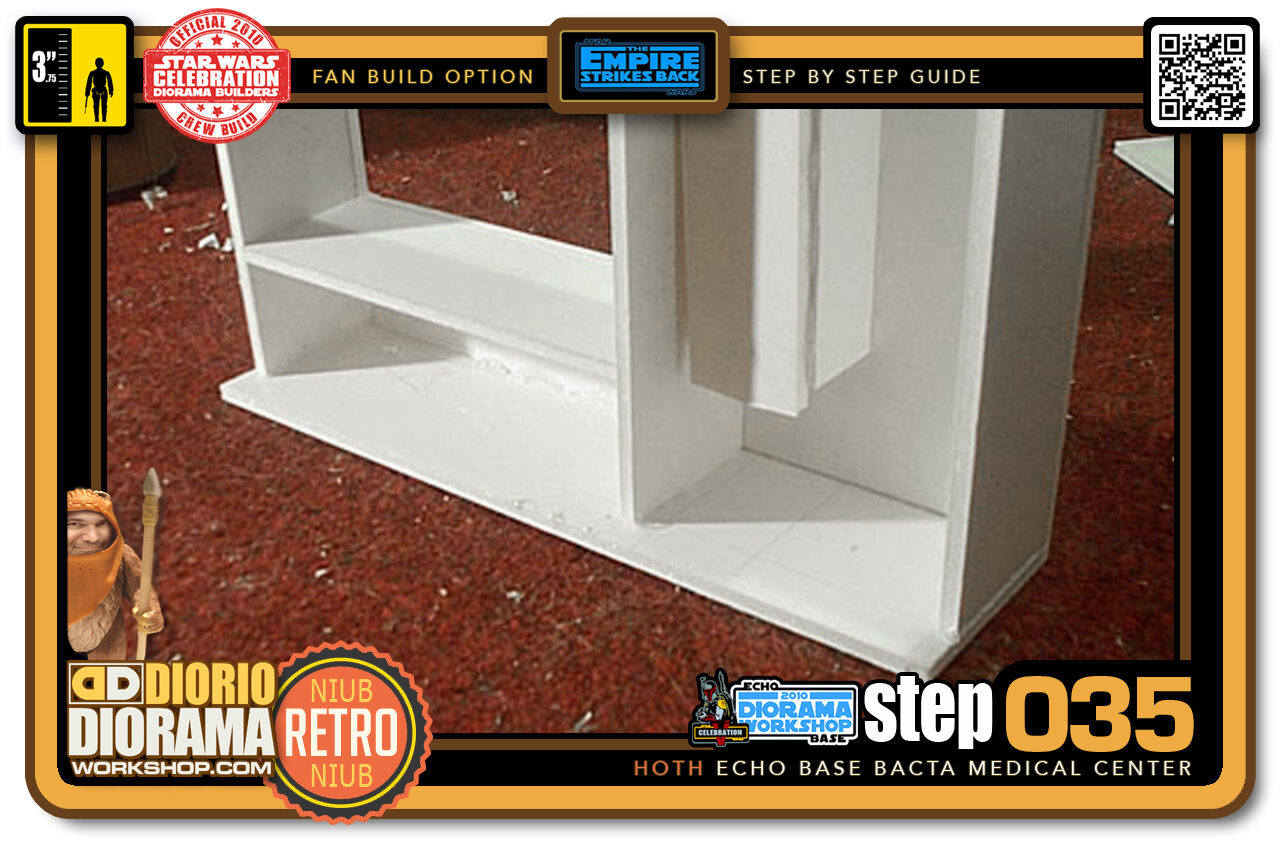
- Step 035 >> Now I attached the wall to the medical Center's floor piece I had cut out. If you decided to have your diorama in 1 piece, your floor base will be bigger then the one in the picture. You can see that there is a space left for 2 foamcore sheets. The first is the rear of the bed and the other will be a back wall plate that will stay removable to facilitate viewing from multiple angles.
-
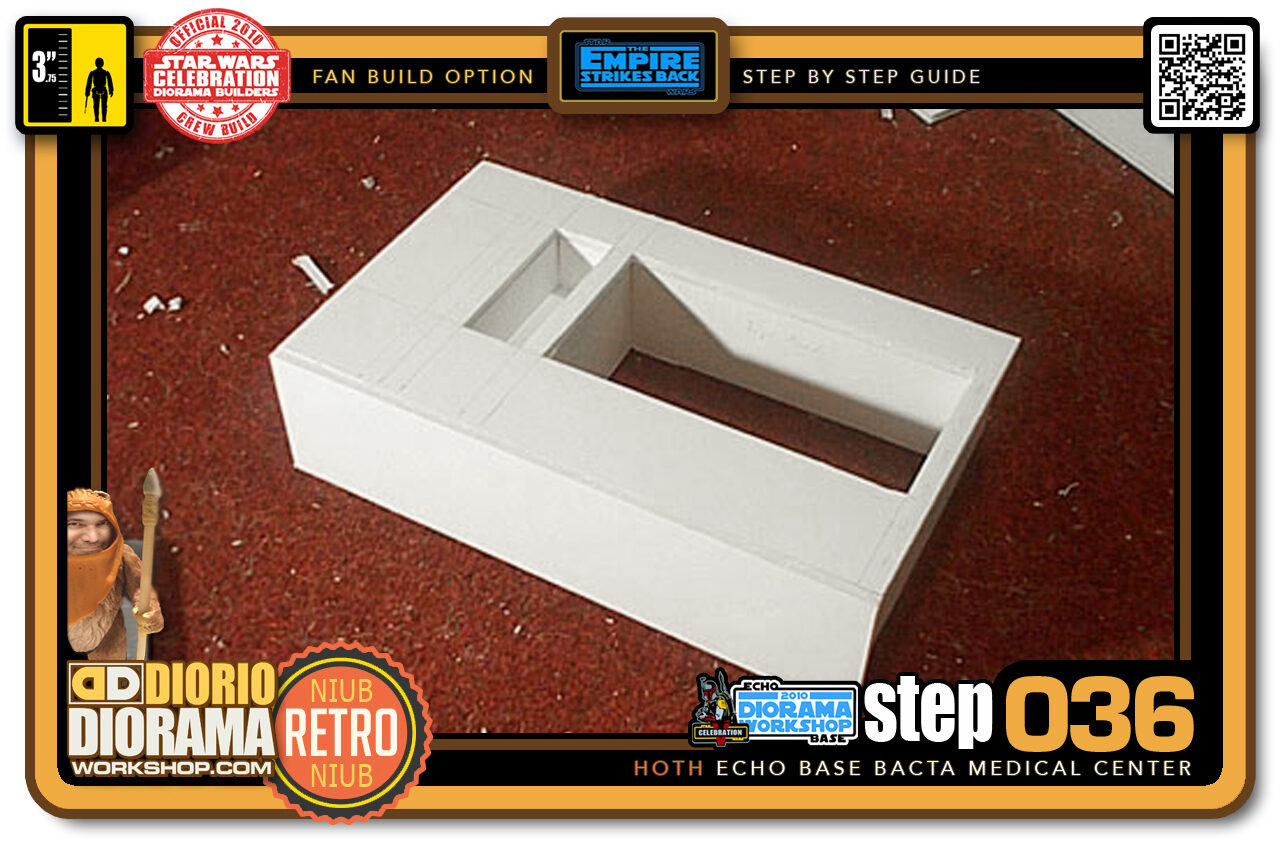
- Step 036 >> This is what the "bed" wall looks like from the front with the floor on the bottom of the Photo.
-
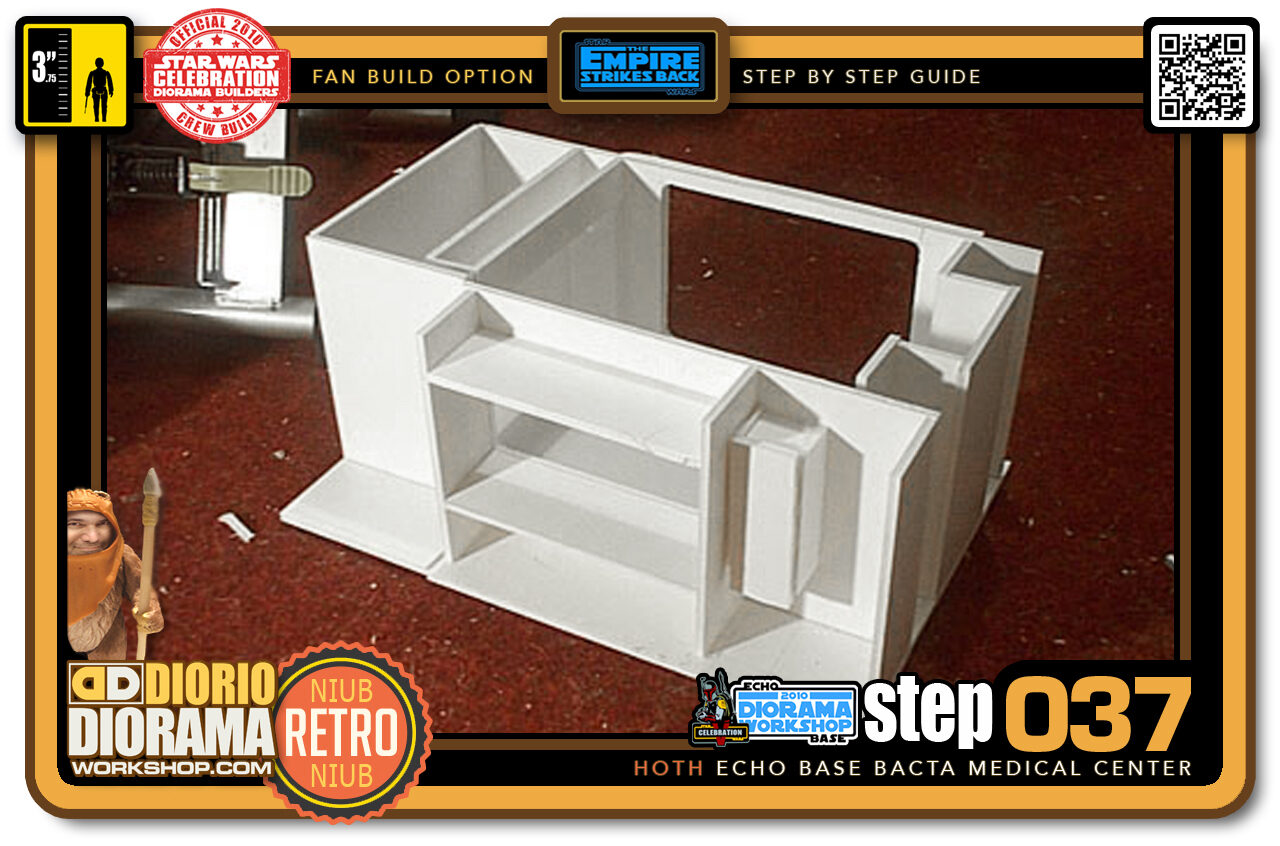
- Step 037 >> The wall fitted in it's proper place. If it looks odd, the back wall hasn't been cut and attached yet.
-
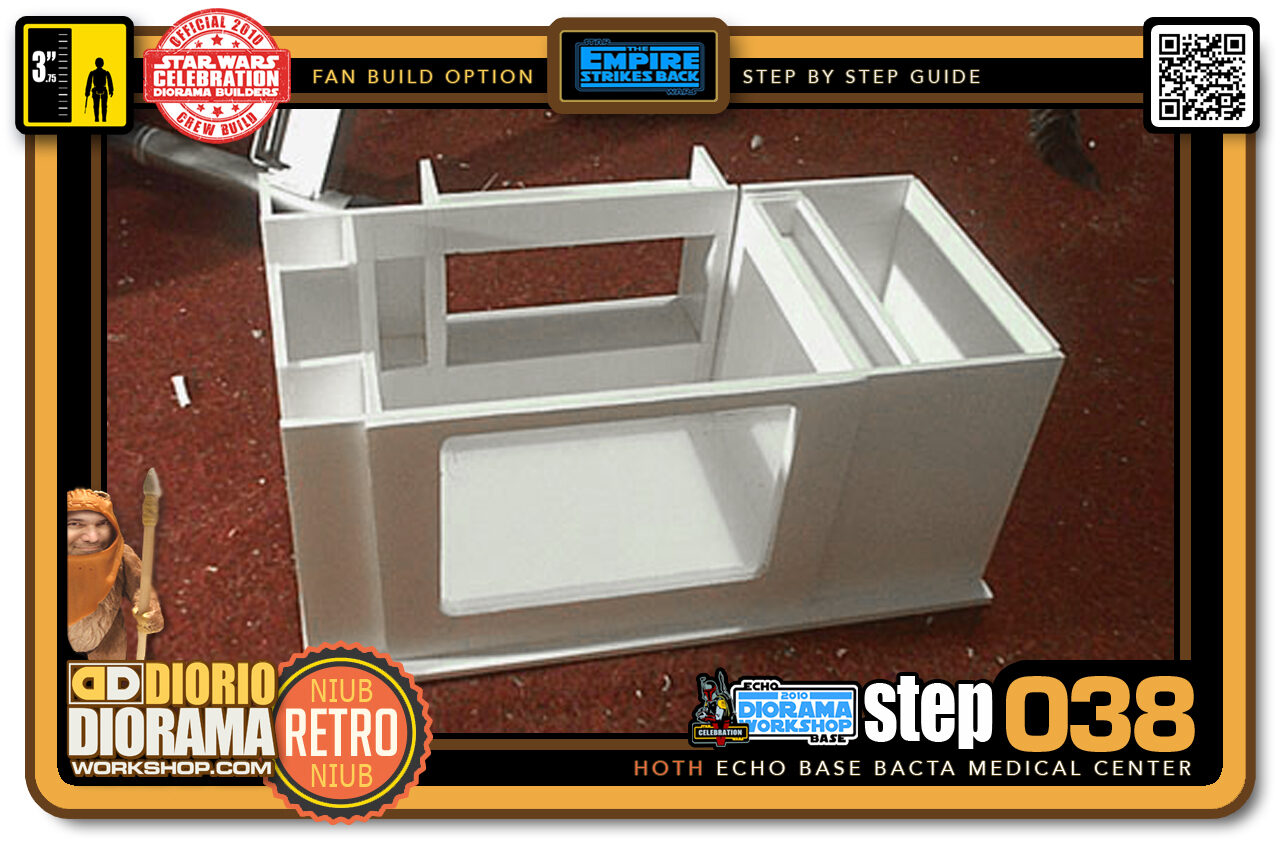
- Step 038 >> This gives you a better view of the Medical Center's design.
-
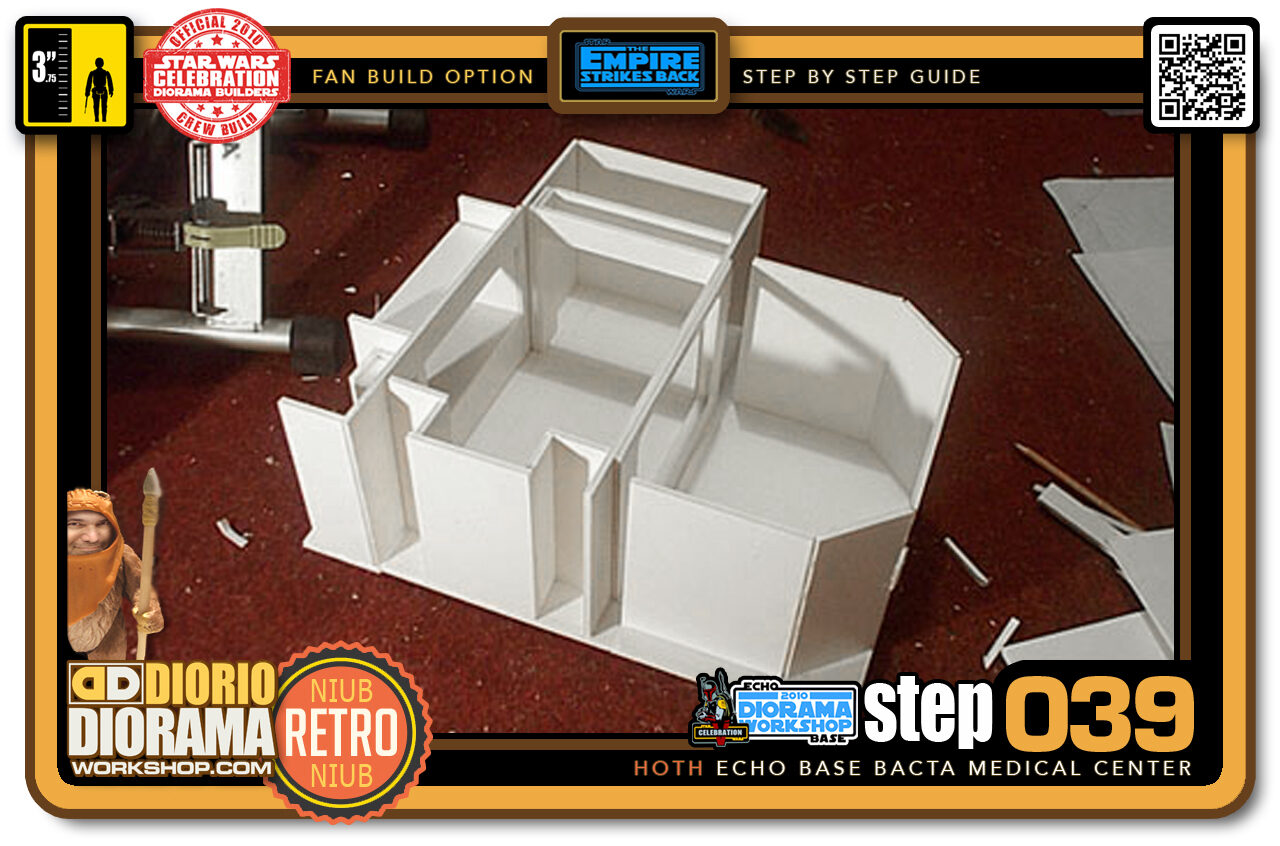
- Step 039 >> The complete diorama shape with all sections placed together. Remember if you prefer, you can have it all attached in 1 piece. You do not have to have it sectional.
-
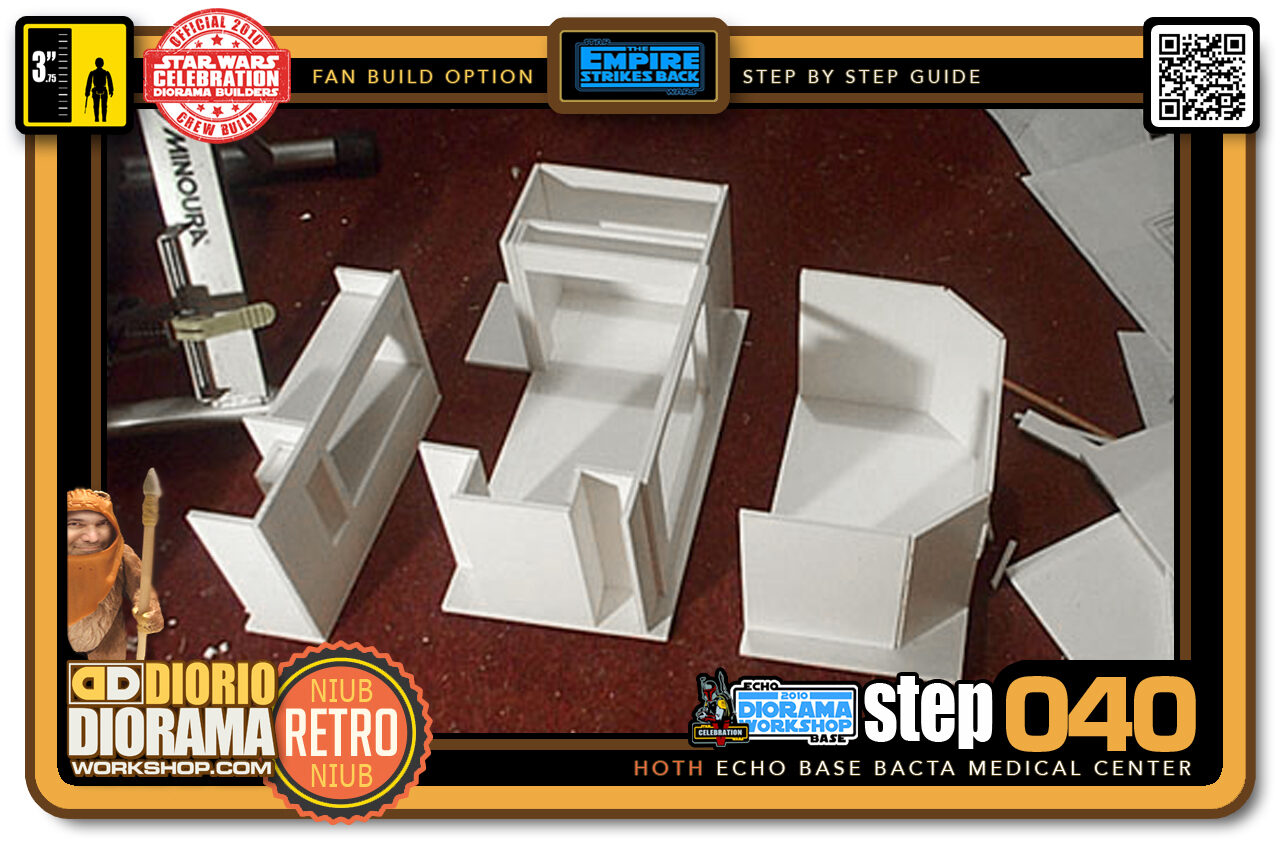
- Step 040 >> This photo shows you how my Diorama separates into 3 pieces. Again, the main reason for doing this was to ease the camera setups, just like on a real movie set 🙂
.
Did you already build this Diorama ? At home or at our Star Wars Celebration Diorama Builders workshop ? Would you like to show it in the site’s GALLERY VISITORS DIORAMAS section, YES ? That is Awesome !!! You can find out all the details on how to email me your photos on the VISITORS SUBMISSIONS INFO page … When I get your photos, I will create your very own page just like this one. You may not realize it but work does inspire others to join in the fun of making Action Figure Dioramas.
.
NOT FOR RESALE ALL Decals, tutorials and artwork are ©FrankDiorio (dioramaworkshop.com) and offered FOR FREE to the fans – that would be you ? so you can build and display my diorama designs in your very own home. I realize I cannot control what one does with my graphics once I place them on the web, I can only ask you as one fan to another, please respect the artist and do not be that jerk who uses my designs and tutorials to build a copy of my work only to sell it on EBAY or trade/sale groups and forums. Thank You. Frank.
.

.
.
If you have a facebook account, why not join the Official Diorama Builders Fan Club today, simply click the logo link below.
 .
.
Catch up with fellow visitors and exchange stories, read cool interviews with the crew, exchange photos, fun surprises and grab some FAN ONLY merchandise next year at actual future conventions ?
.
©2021 Frank Diorio DioramaWorkshop.Com
.
IF YOU LIKE WHAT YOU SEE, PLEASE SHARE WITH YOUR FRIENDS
USING THE SOCIAL MEDIA BUTTONS BELOW