


-
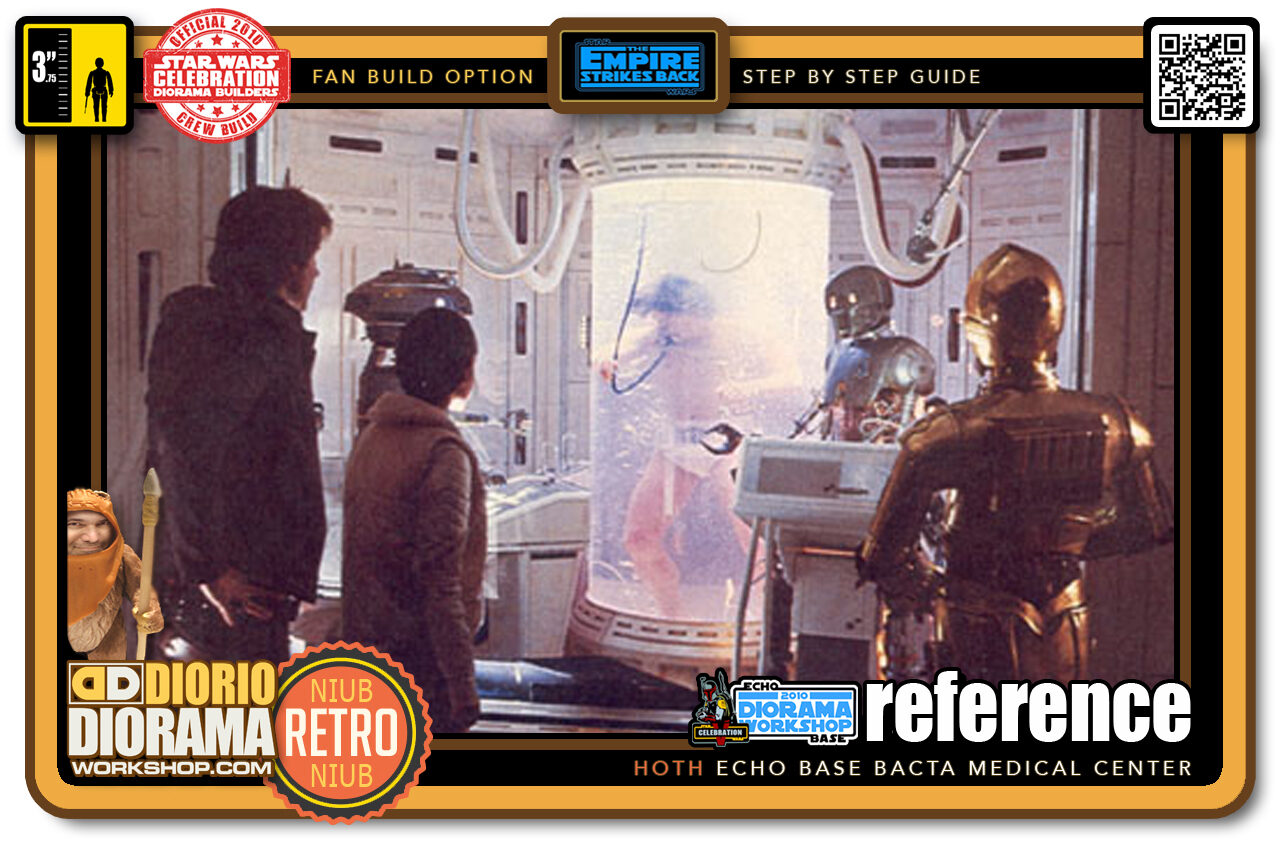
- Reference >> I think this is the most recognized picture from the scene. It's a great starting point to see the details in the wall patterns but doesn't show much of the room our heroes are standing in. For that I went to my ultimate source...The Star Wars laserdiscs 🙂
-
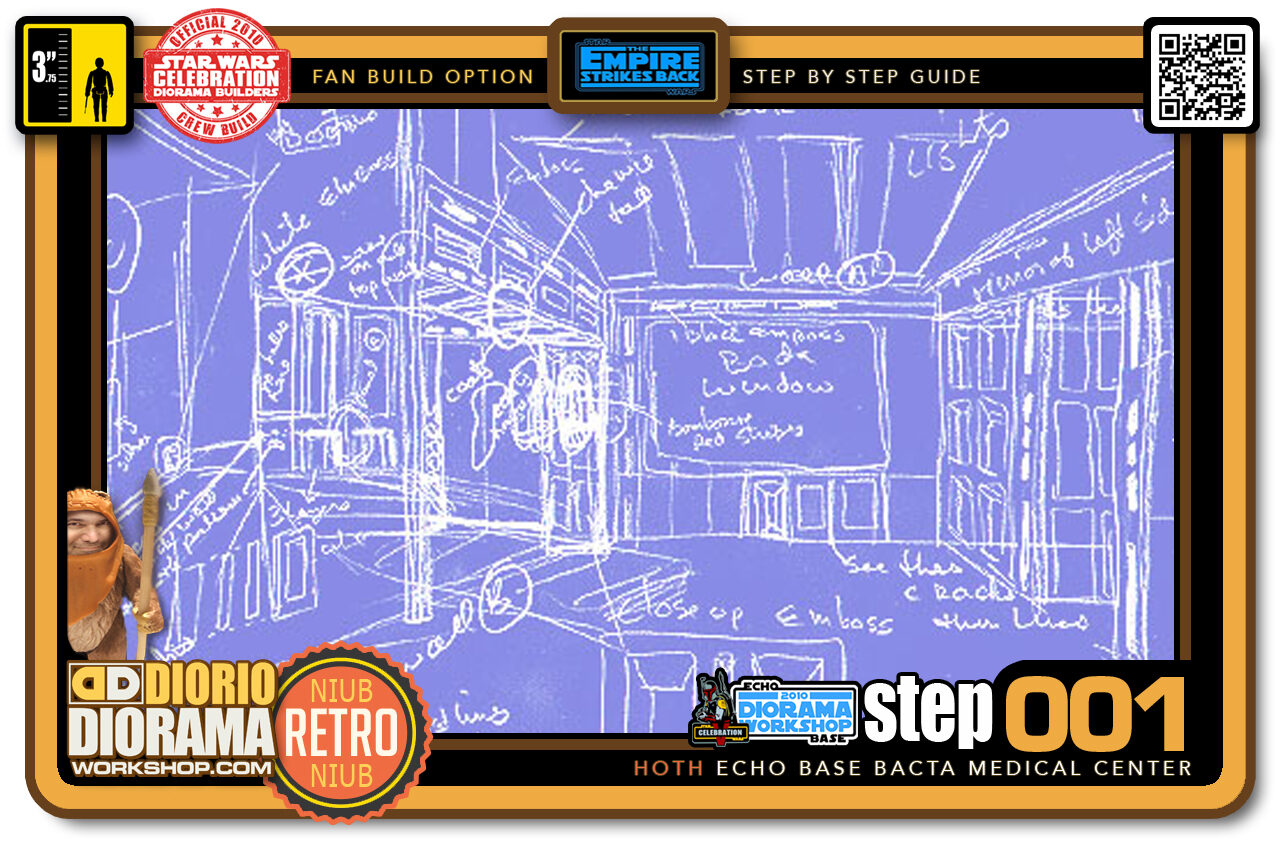
- Step 001 >> Using the pause feature I was able to sketch out the layout of the room i want to build and the details that create the set. It might look like a mess but if you squint your eyes you can make out the room - LOL.
-
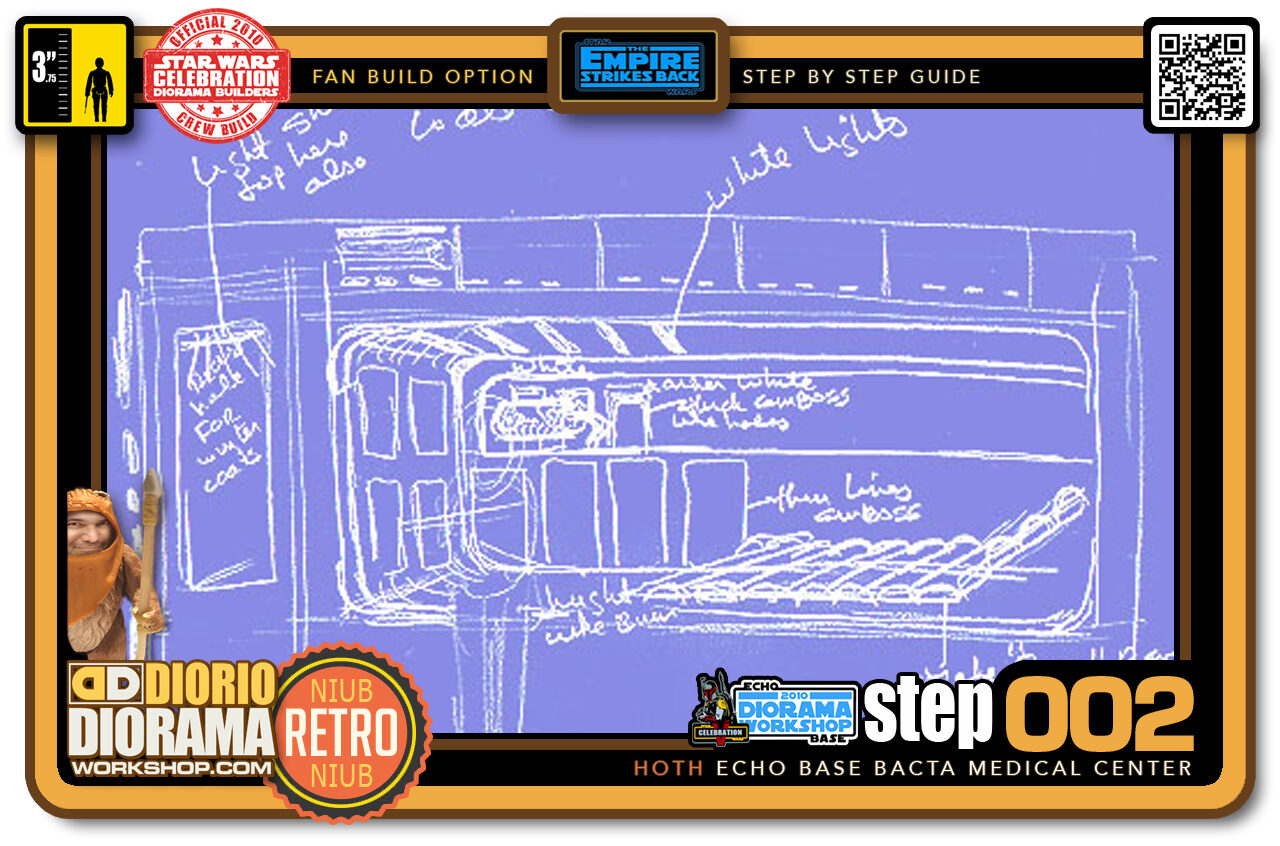
- Step 002 >> This is the opposite wall, facing the Bacta Tank glass wall. It is a recessed enclosure that holds the bed where Luke is recovering during his friends visit. The bed is quite similar to the one in the Falcon's Blastshield Training room (behind the chess table and bench). The back end of this wall will be removable just like the movie set to permit us to look in the room from Luke's right side.
-
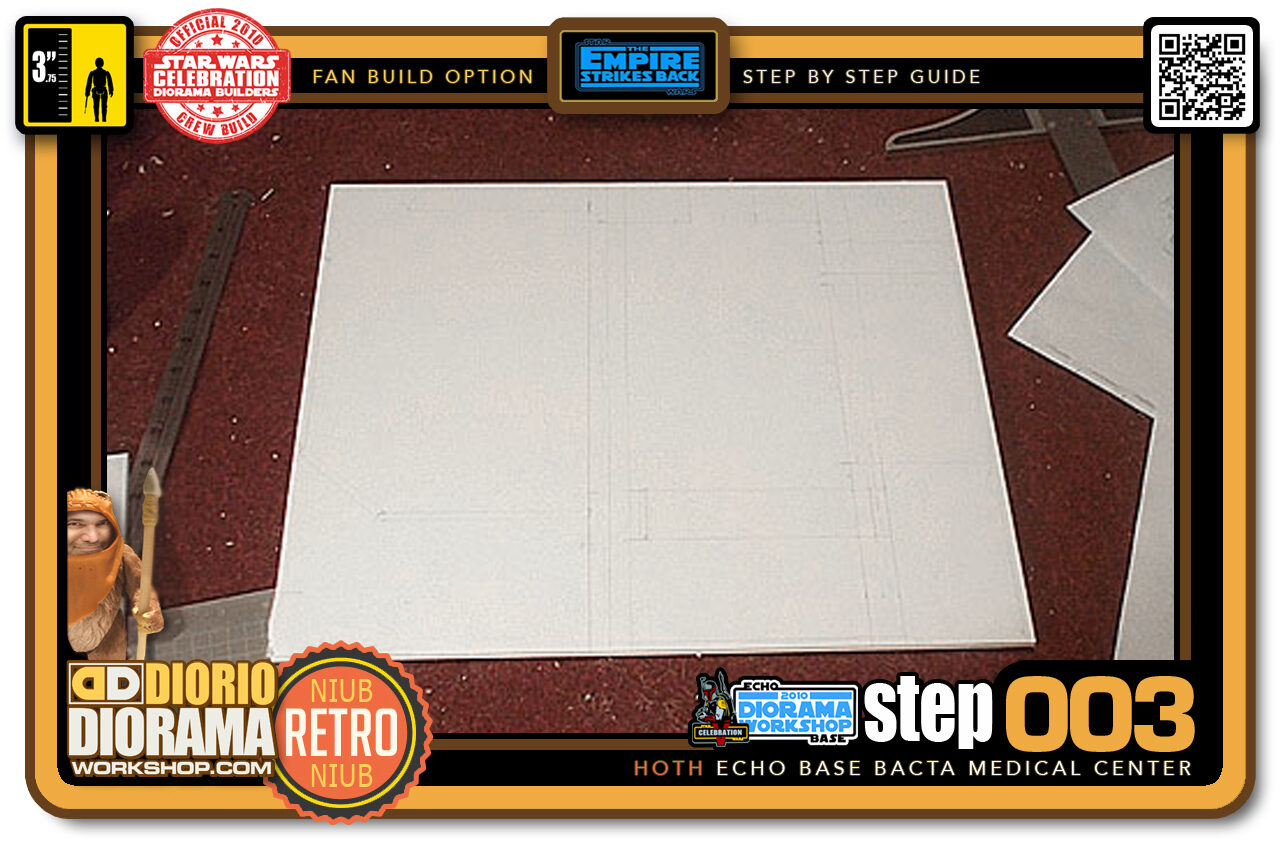
- Step 003 >> First Step is to create the floor piece. Since I decided to make the Diorama sectional, I will cut this piece in 3 sections. You could cut 3 pieces from the start if you prefer.
-
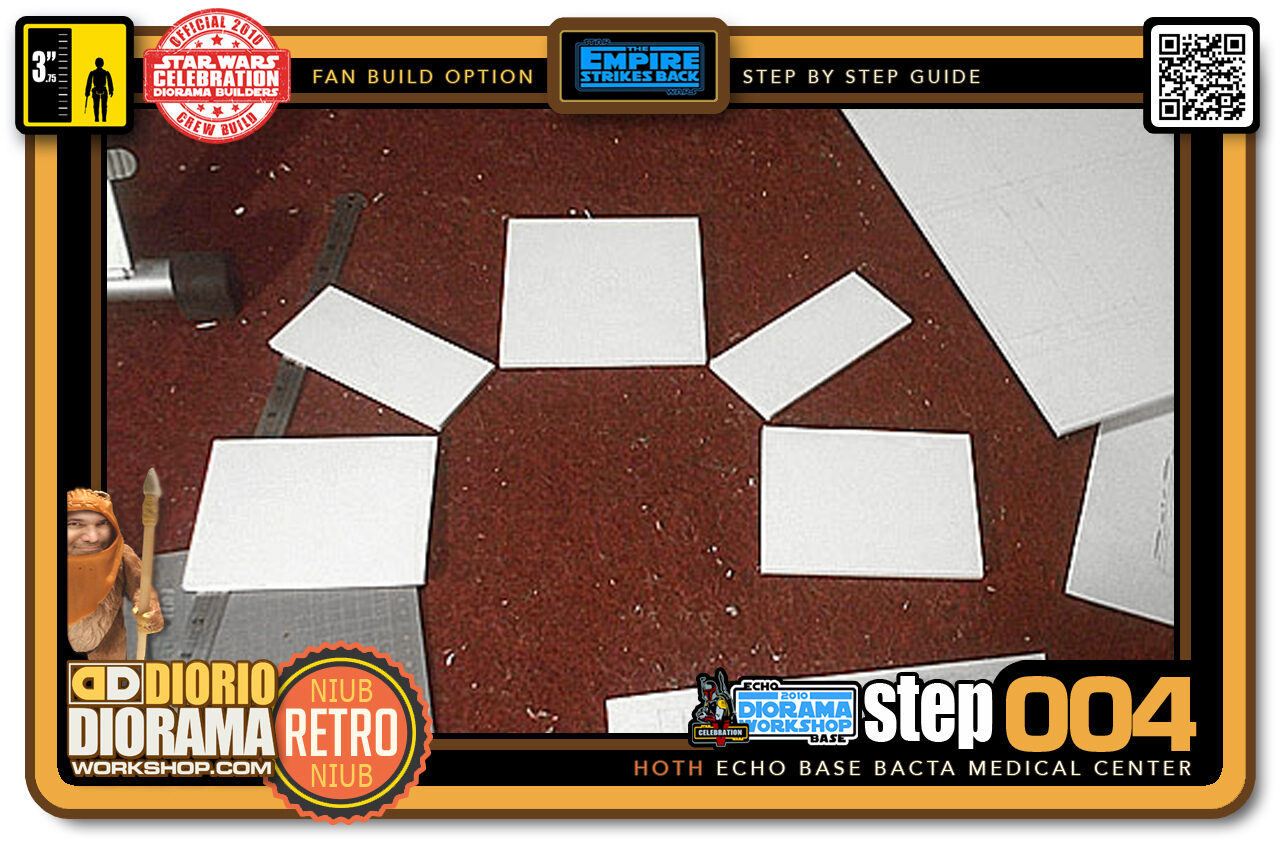
- Step 004 >> Time to make the Bacta room. I cut the 5 pieces that will become the walls. Use the blueprints for the measurements.
-
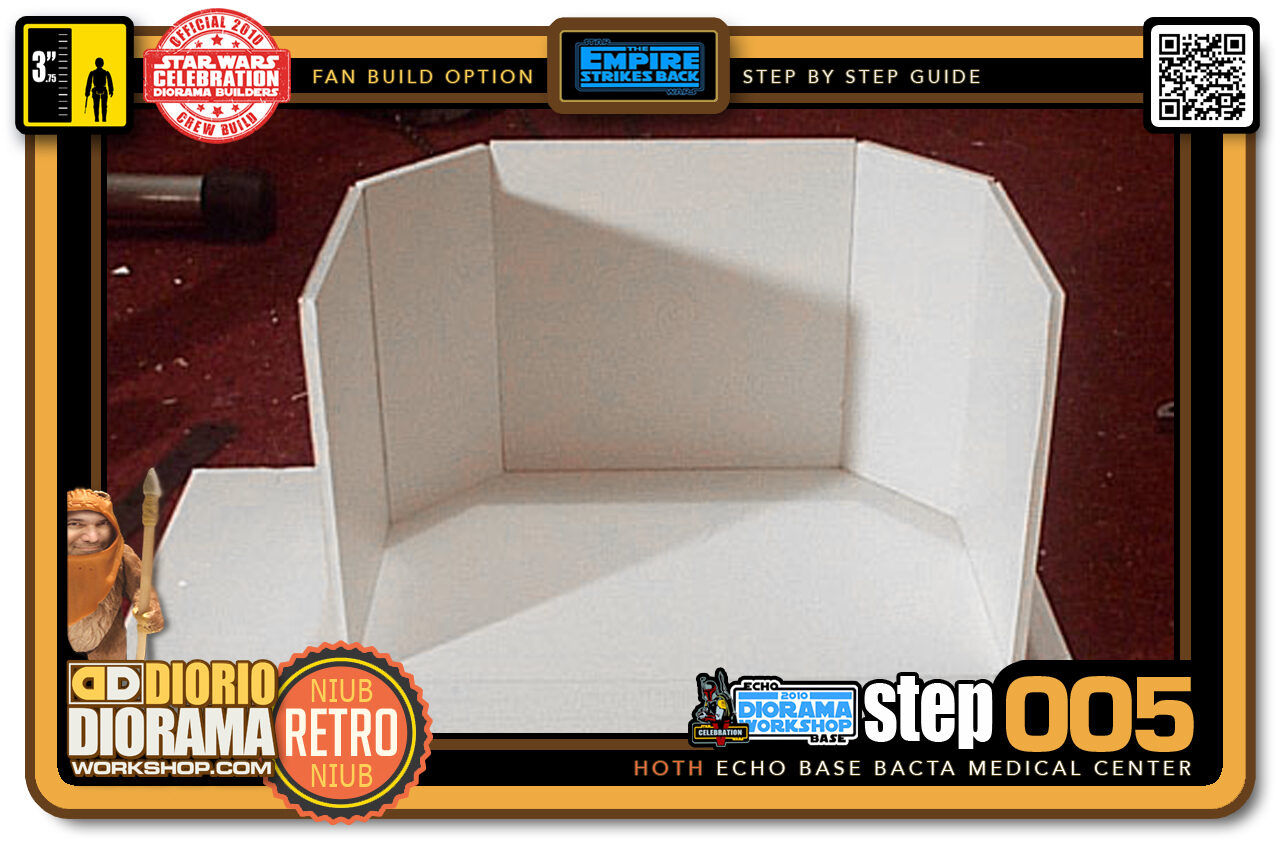
- Step 005 >> Using the Hot Glue Gun, I attached the pieces to the floor piece. For extra strength, use some Hot Glue between the side panels so that they don't get loose.
-
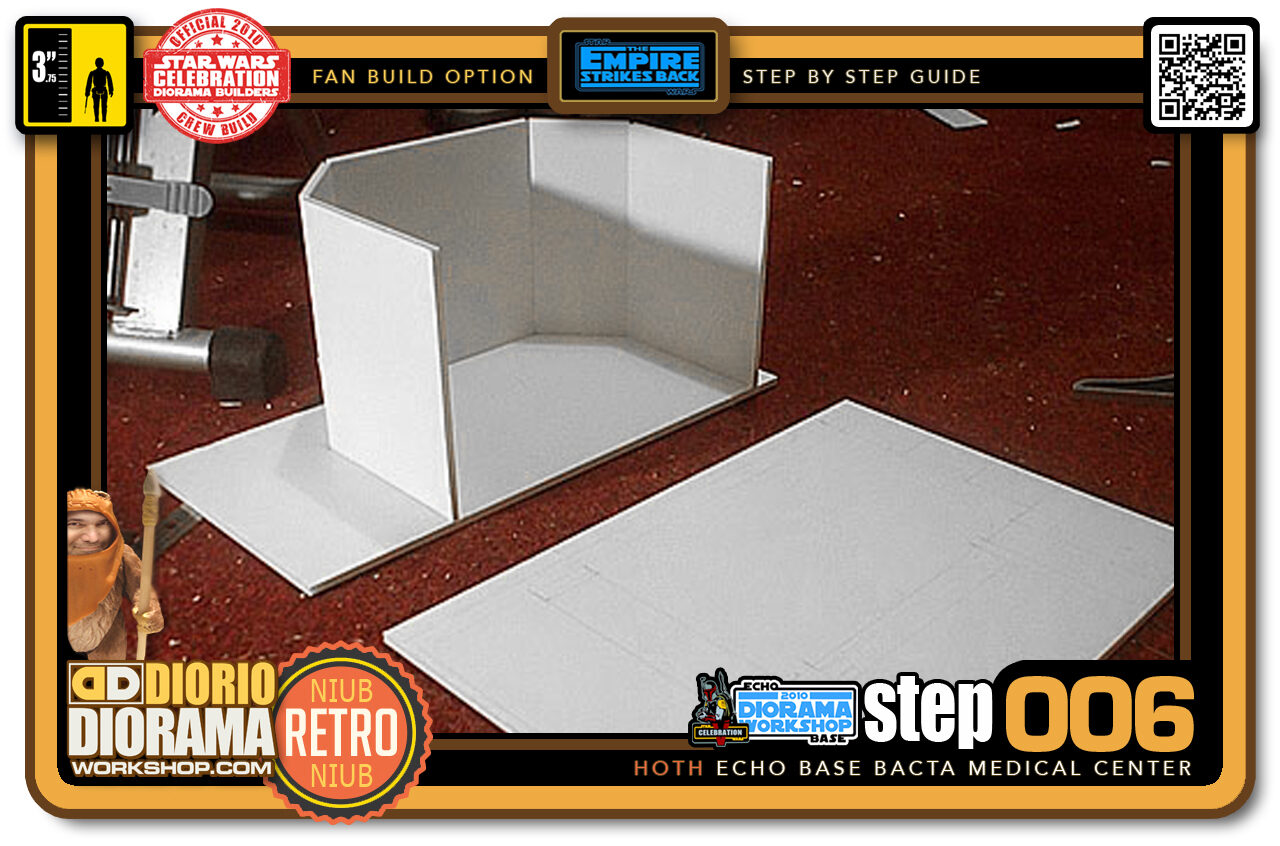
- Step 006 >> I used my Xacto Knife to cut the floor piece at the edge of the window mark. You don't need to cut the diorama in sections, it's just easier for me to take pictures with removable walls.
-
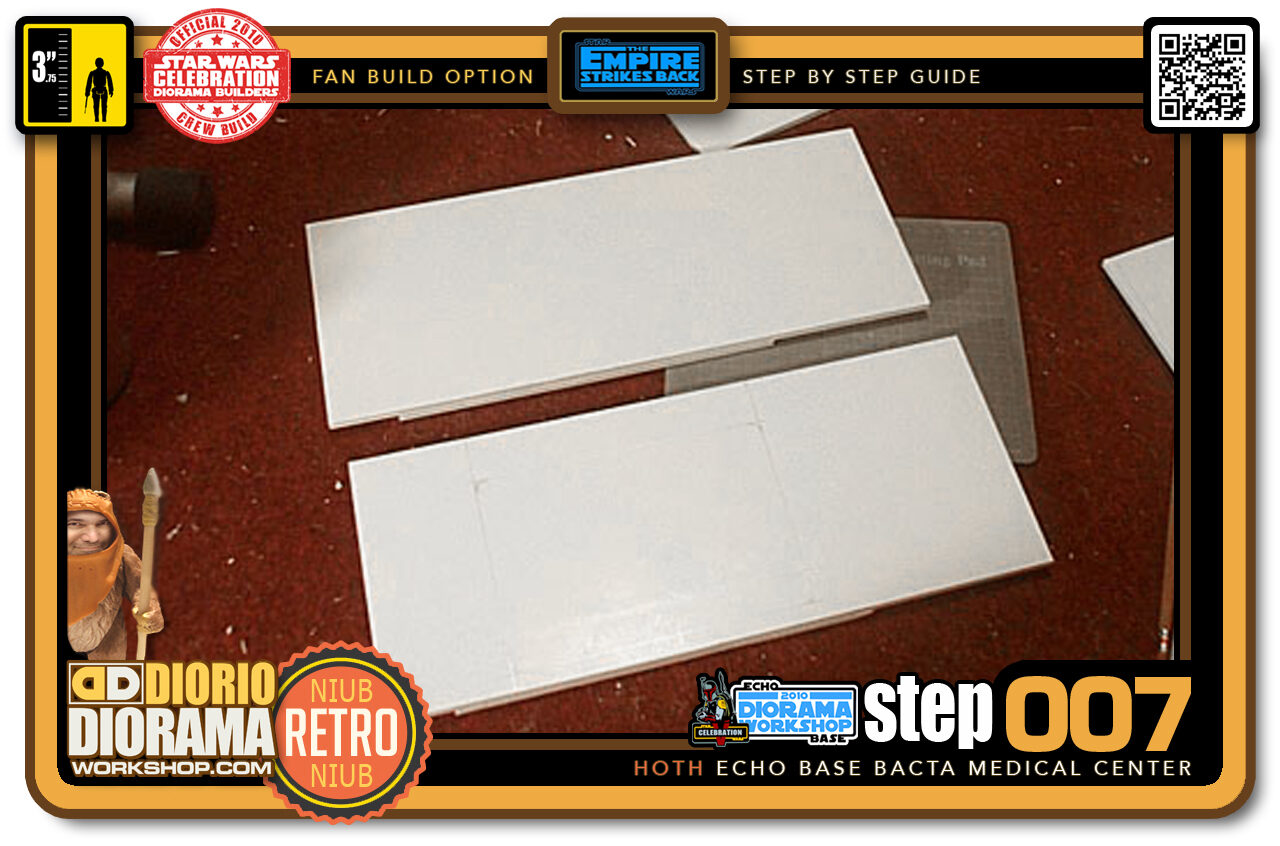
- Step 007 >> Now for the main window peering into the Bacta room. Cut 4 pieces of foamcore. I cut 2 a bit smaller to save some money since they will be inside the grooves and will not be visible.
-
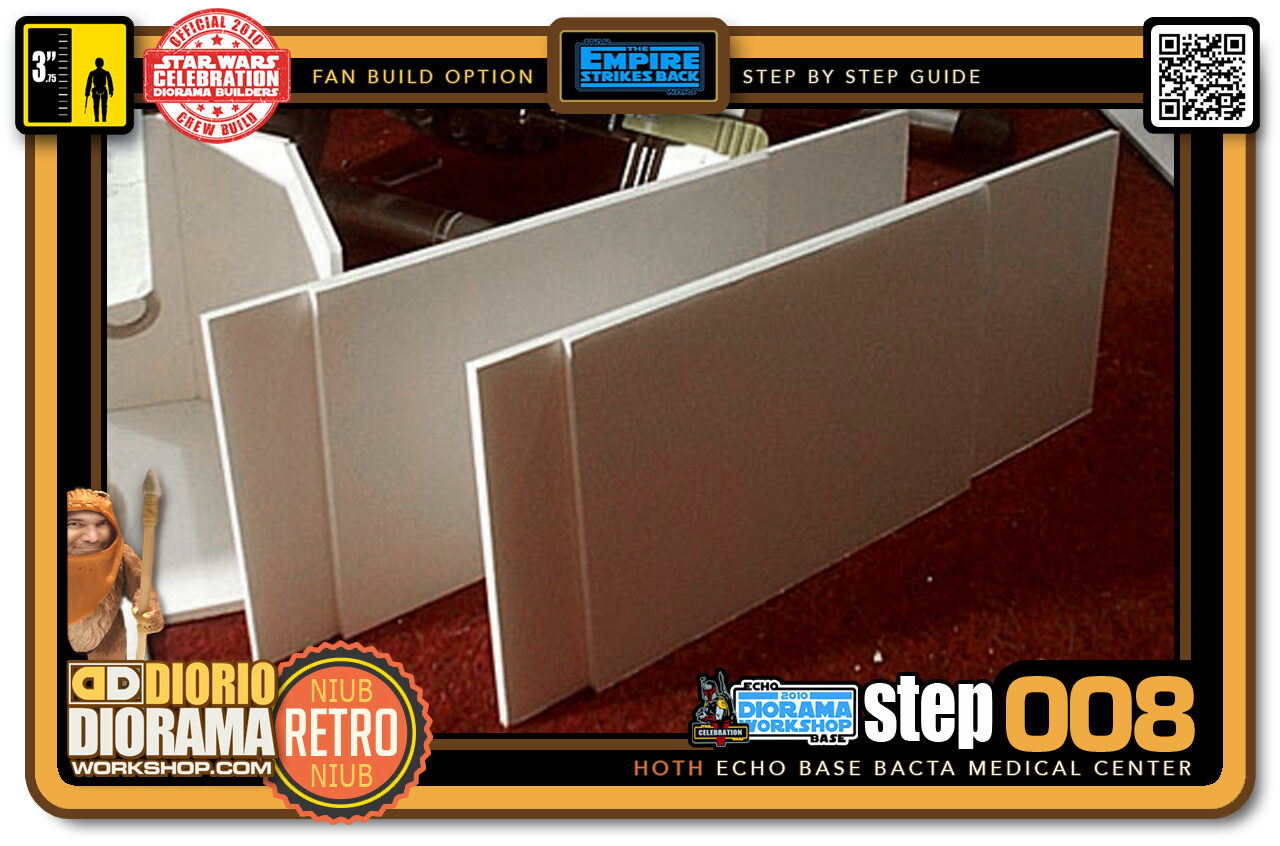
- Step 008 >> Using the Glue gun, attach 2 layers of foamcore together to create a thicker wall. The glass will fit between these 2 pieces once the window is cut out.
-
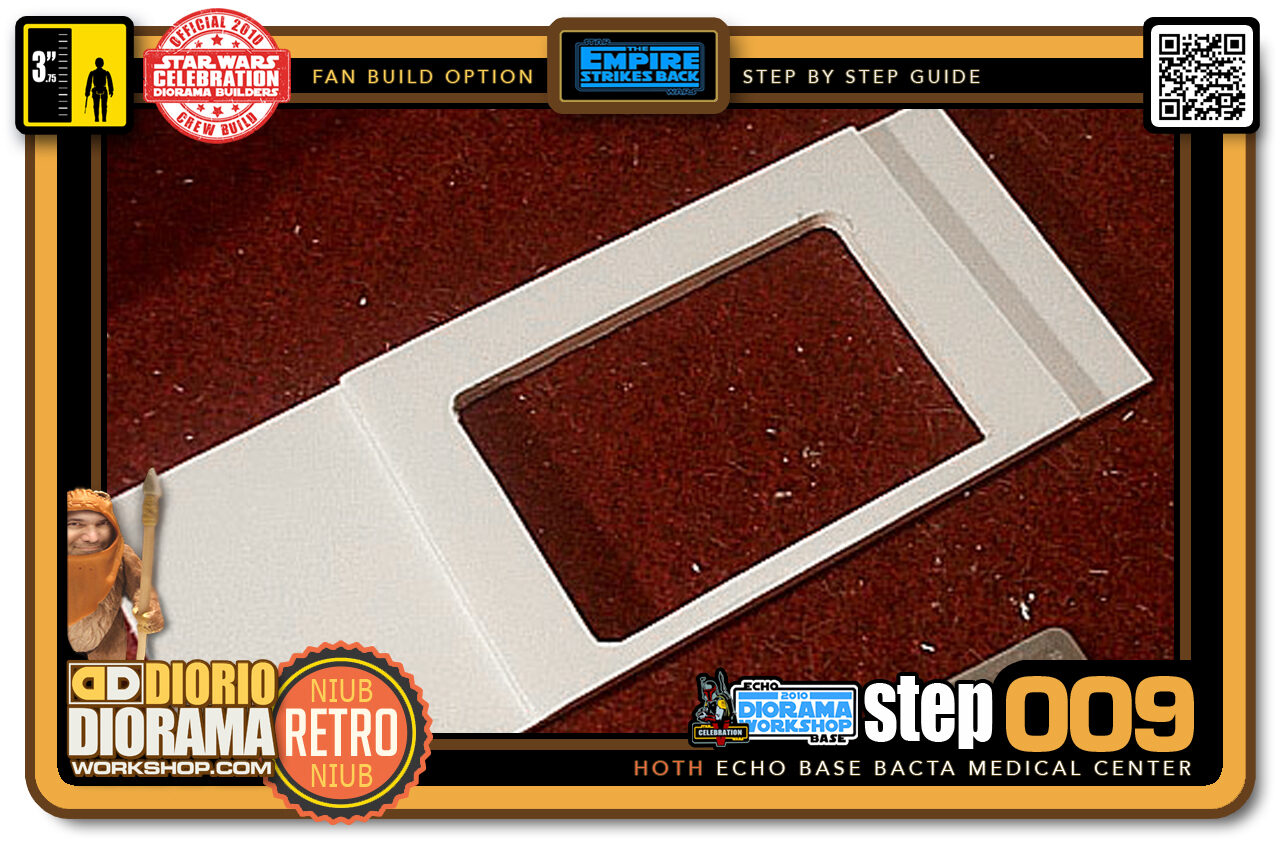
- Step 009 >> Using a very sharp blade, watch out for your fingers - be very careful, cut out the window shape. If your blade is too dull, it will tear the foamcores interior and give an ugly edge to the window.
-

- Step 010 >> Here is 1 half of the window section against the Bacta room walls. Now just cut out the other window from the 2nd piece and the room is complete. If you don't want to create the Medical Center you can stop right here and just apply the wall decals from the Download Section.
-
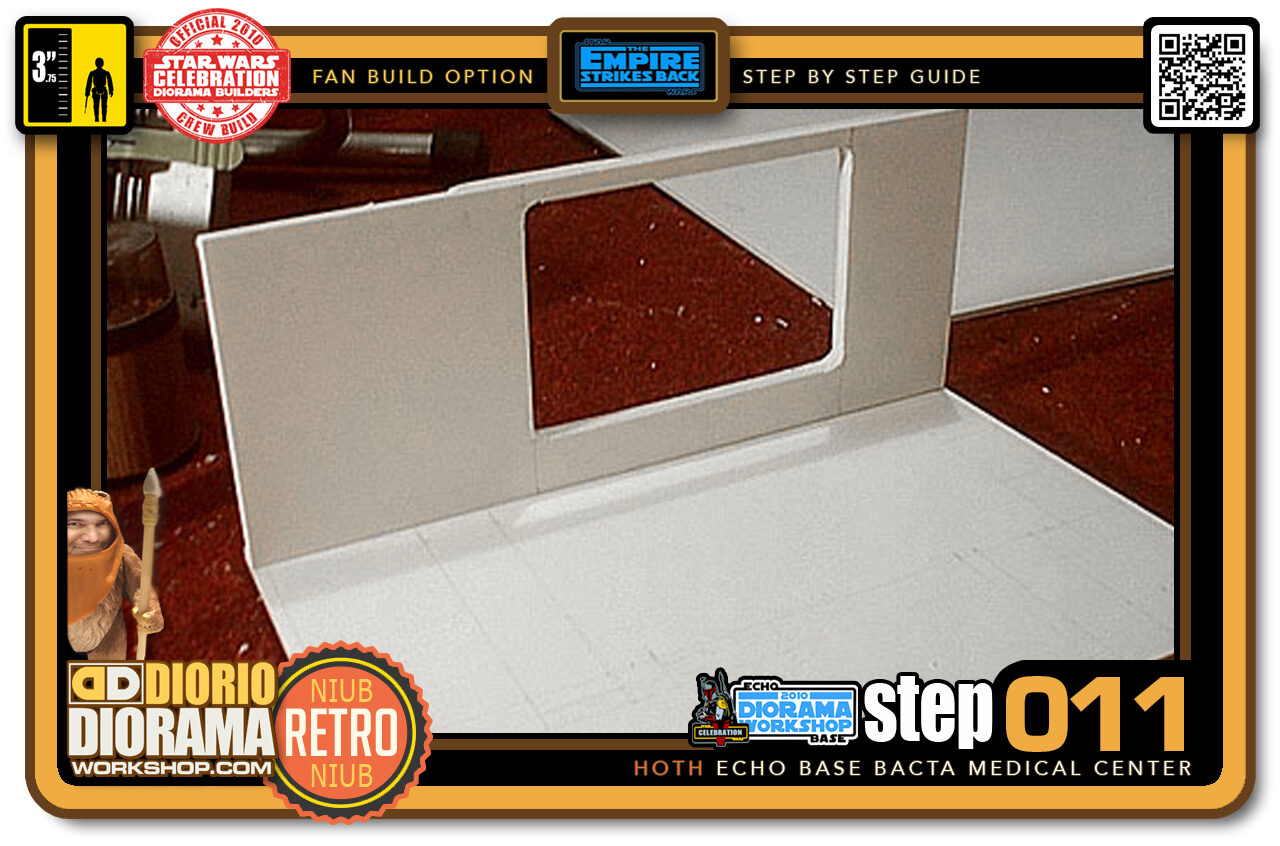
- Step 011 >> Since I want the window separate from the Bacta room, I glued it to the Medical Center's floor piece. You can't see in the picture, but the wall is NOT attached at the edge of the floor. There is a space in back for the other window. This wall will be 4 foamcore pieces thick.
-
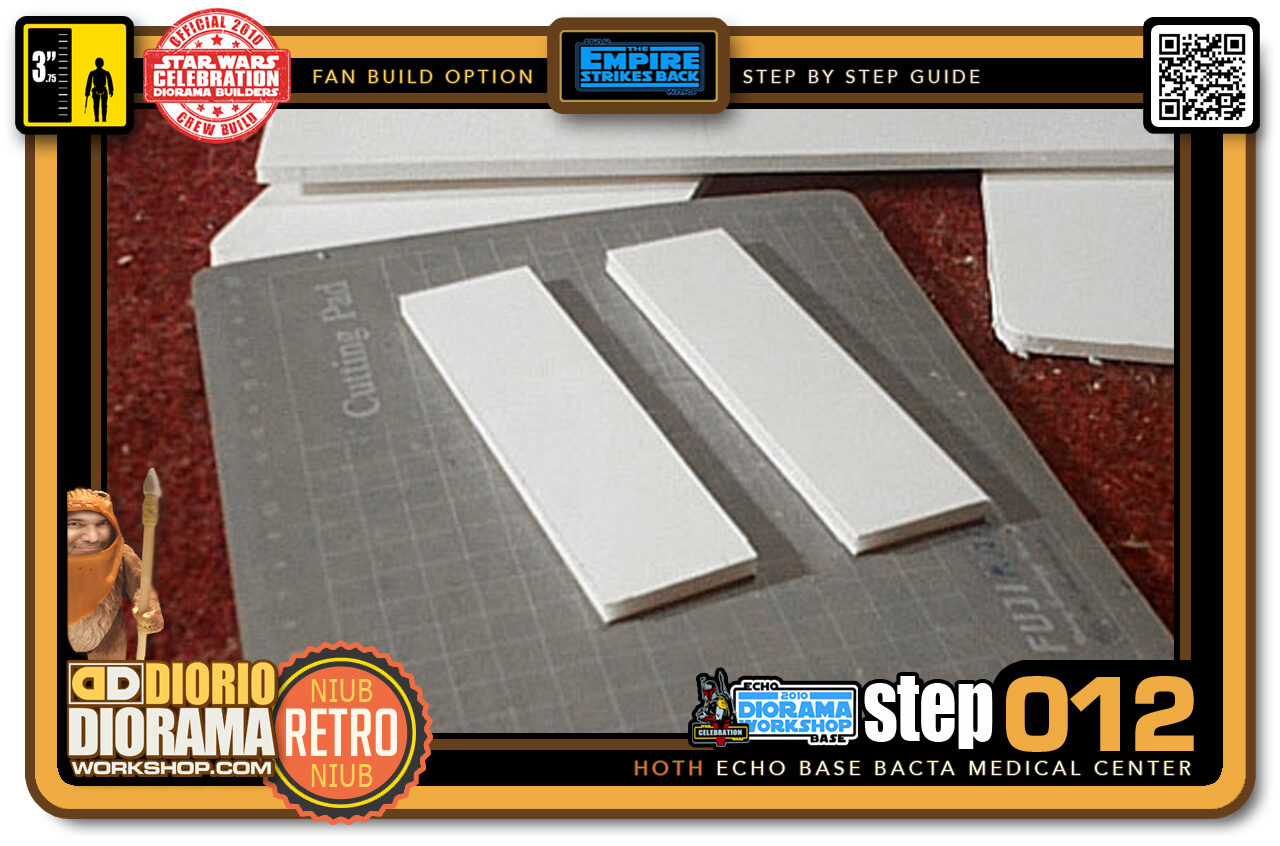
- Step 012 >> Next is the support column for the ceiling beam. I cut 2 pieces of foamcore identical in shape.
-

- Step 013 >> Attach them together using your Hot Glue Gun. 2 pieces give the perfect thickness for the decals.
-
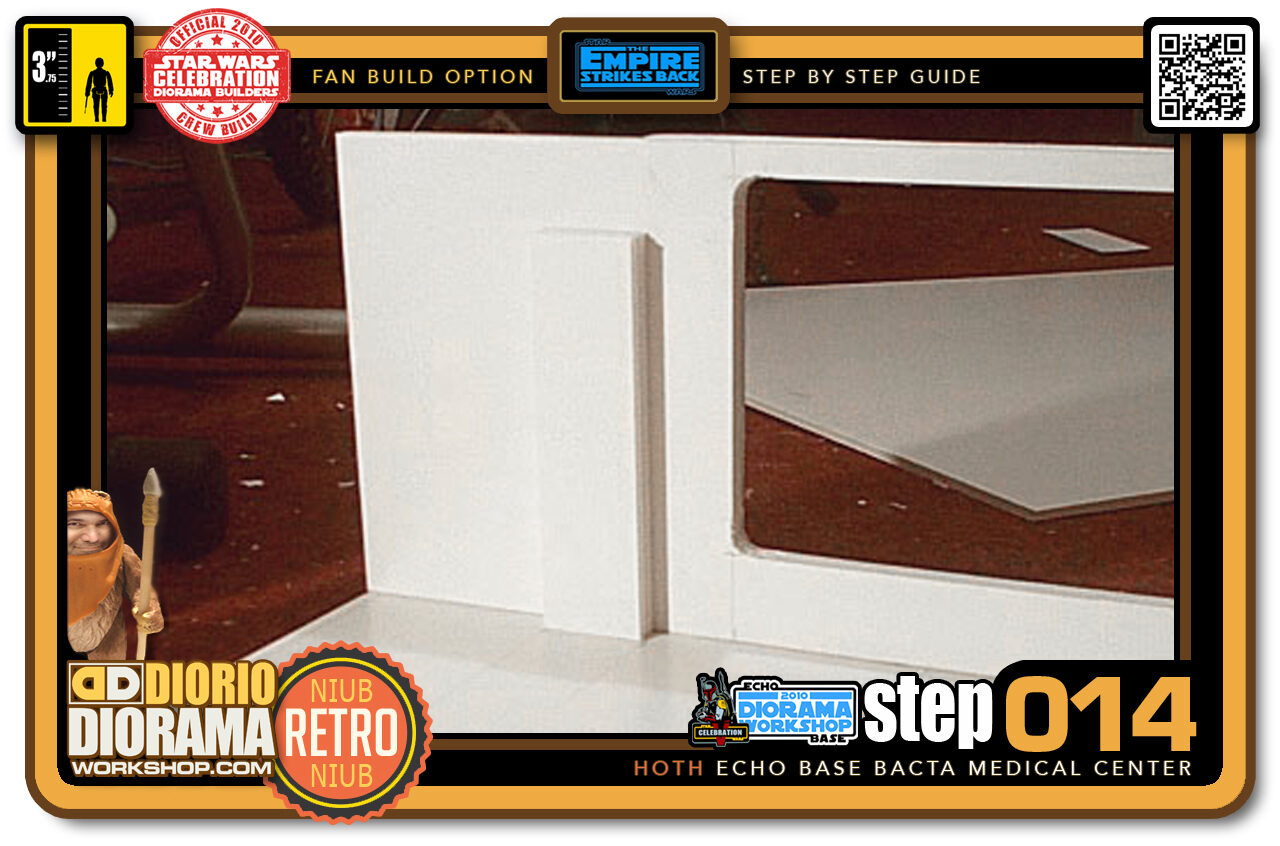
- Step 014 >> Next up, I secured the column in place using Hot Glue.
-
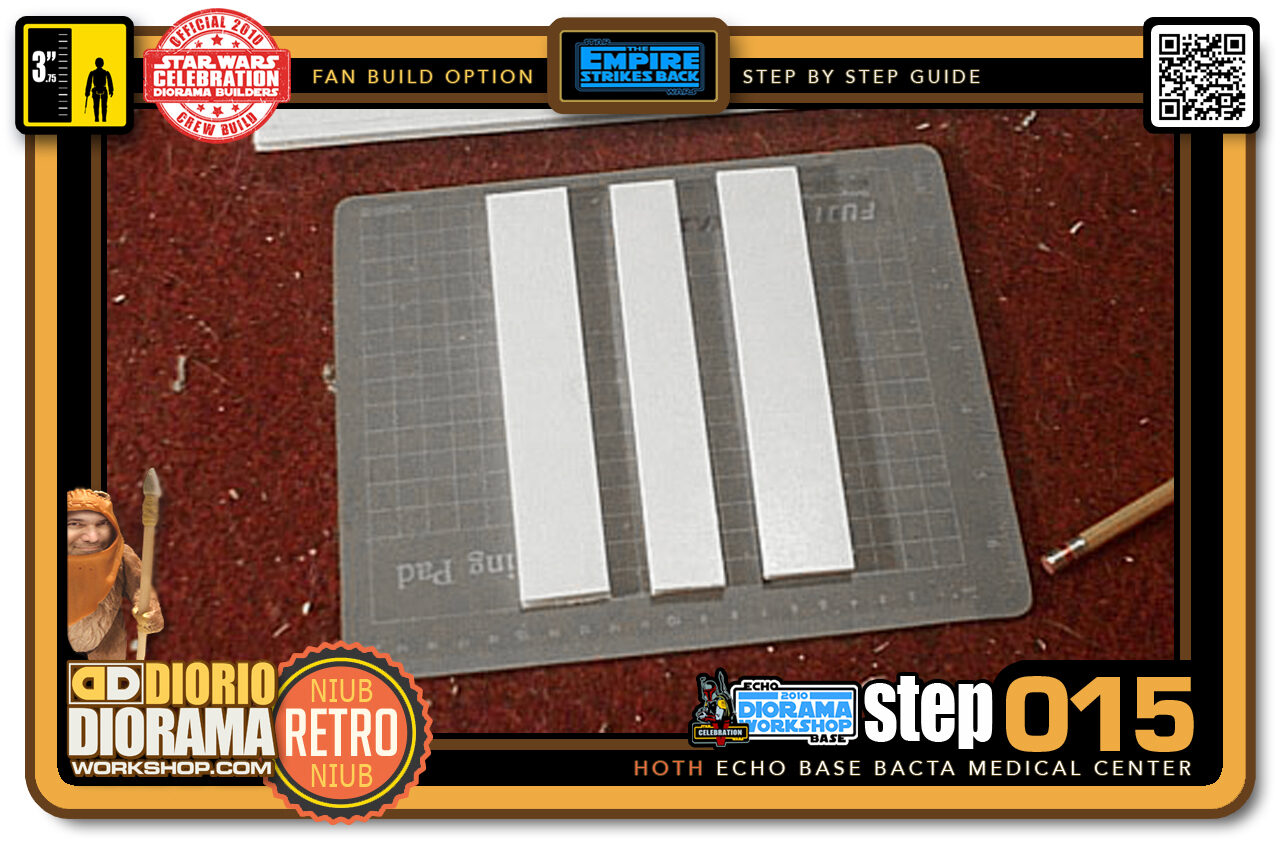
- Step 015 >> Time to make the ceiling beam. I used 3 pieces of foamcore. The center just a bit smaller in width.
-
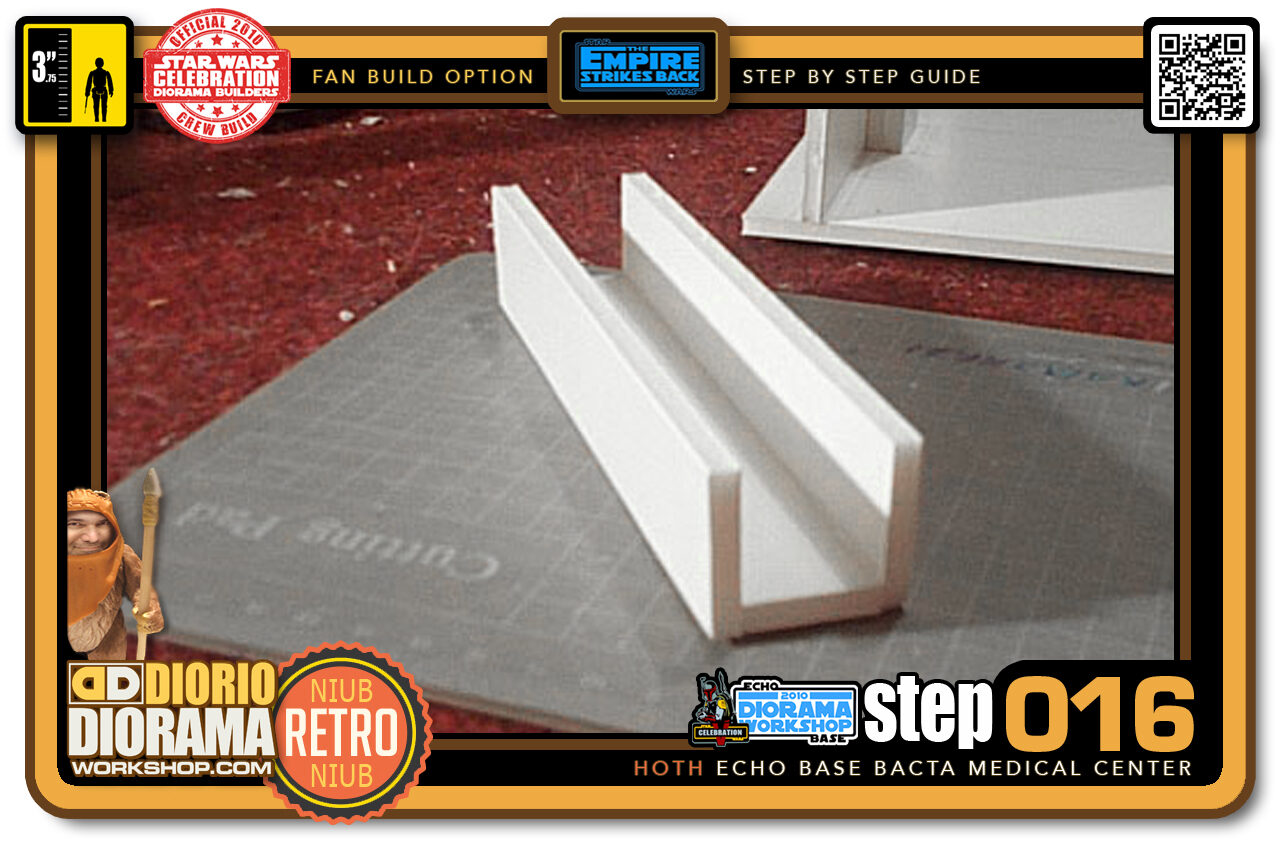
- Step 016 >> Again use the Hot Glue to secure the 3 pieces together.
-
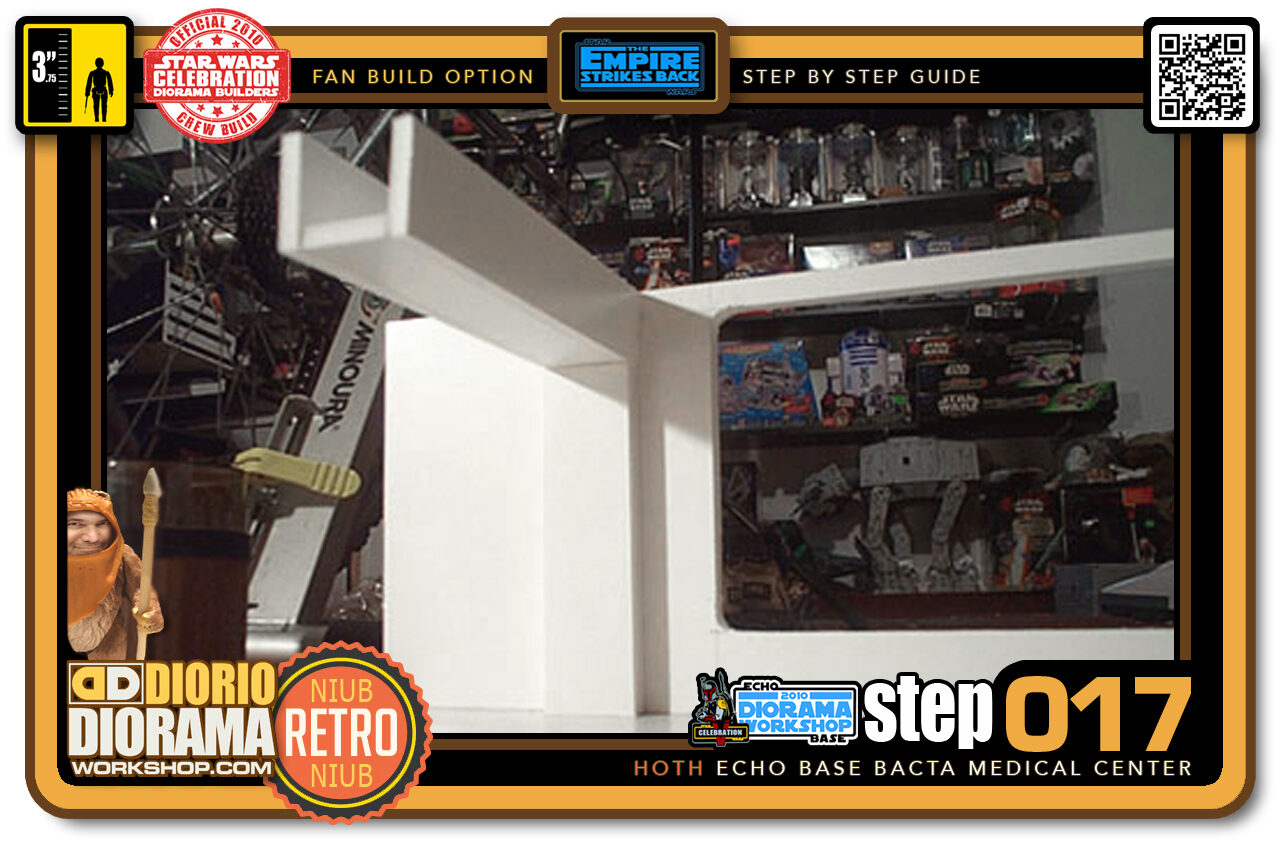
- Step 017 >> Your beam is ready to be placed on top of the column. Make sure that there is enough glue to attach it safely to the back wall.
-
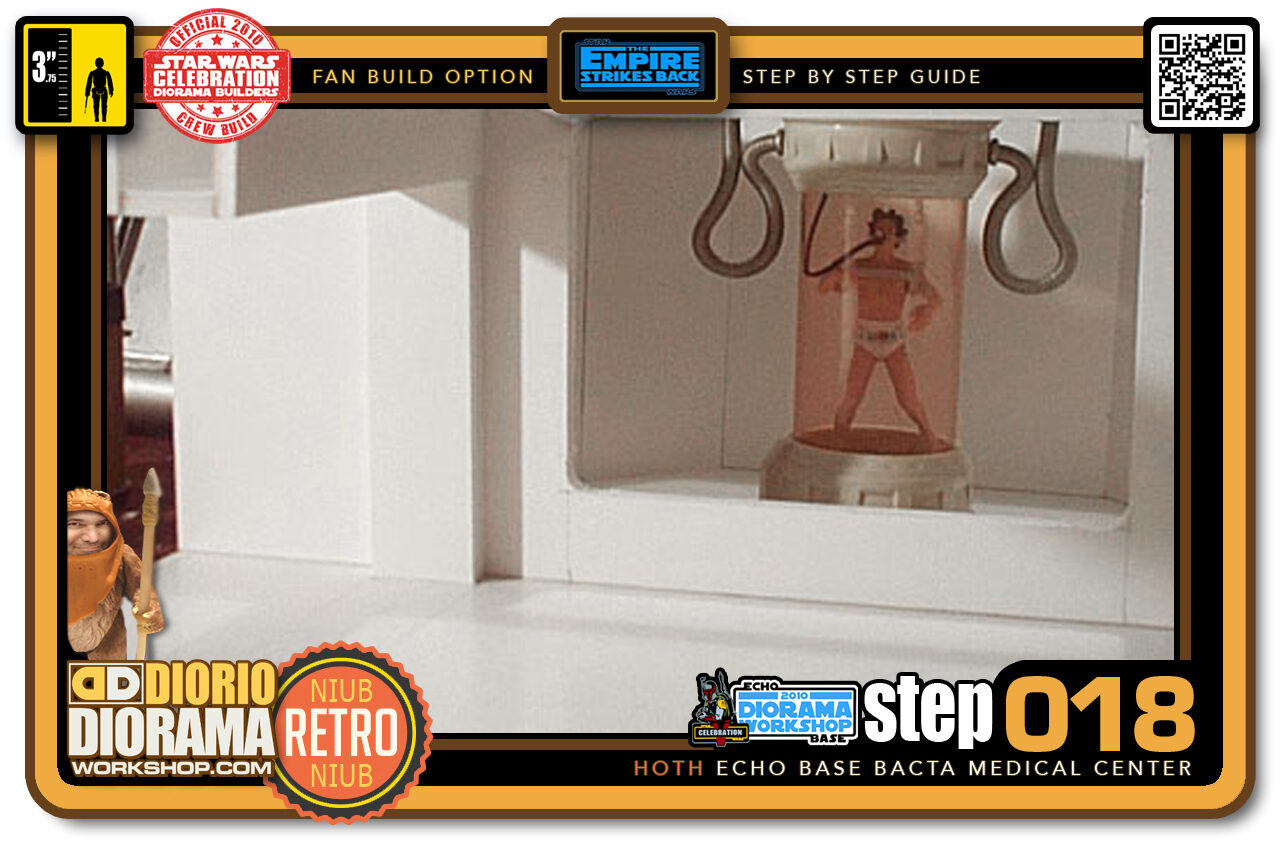
- Step 018 >> Time for bed - hee hee - This is what we have so far when the 2 sections are put together.
-
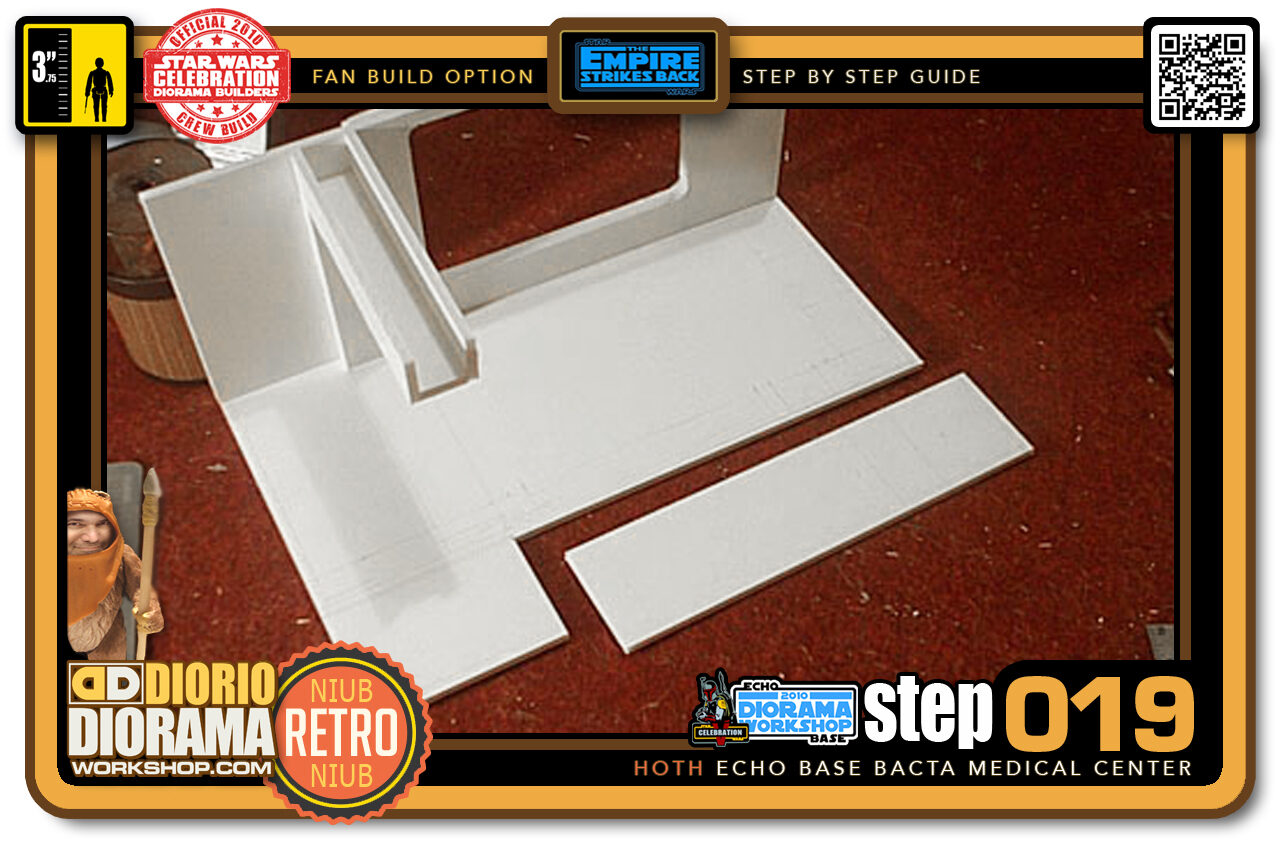
- Step 019 >> This cut is to separate the medical bed from the main room to permit easy access for me to take pictures. You do not need to cut this piece if you want to keep your diorama in 1 piece.
-
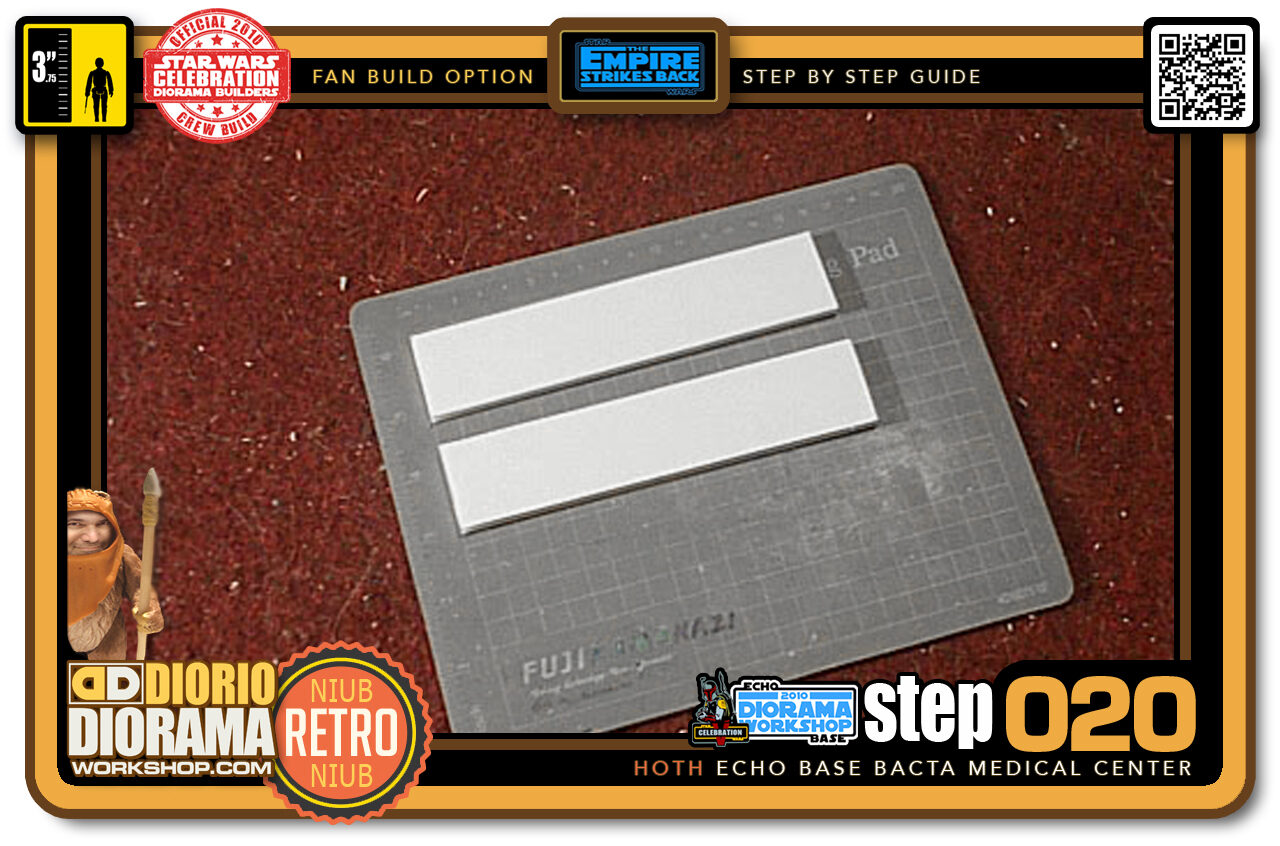
- Step 020 >> Like the first column, I cut 2 identical pieces of foamcore to fit on the opposite end of the beam.
.
Did you already build this Diorama ? At home or at our Star Wars Celebration Diorama Builders workshop ? Would you like to show it in the site’s GALLERY VISITORS DIORAMAS section, YES ? That is Awesome !!! You can find out all the details on how to email me your photos on the VISITORS SUBMISSIONS INFO page … When I get your photos, I will create your very own page just like this one. You may not realize it but work does inspire others to join in the fun of making Action Figure Dioramas.
.
NOT FOR RESALE ALL Decals, tutorials and artwork are ©FrankDiorio (dioramaworkshop.com) and offered FOR FREE to the fans – that would be you ? so you can build and display my diorama designs in your very own home. I realize I cannot control what one does with my graphics once I place them on the web, I can only ask you as one fan to another, please respect the artist and do not be that jerk who uses my designs and tutorials to build a copy of my work only to sell it on EBAY or trade/sale groups and forums. Thank You. Frank.
.

.
.
If you have a facebook account, why not join the Official Diorama Builders Fan Club today, simply click the logo link below.
 .
.
Catch up with fellow visitors and exchange stories, read cool interviews with the crew, exchange photos, fun surprises and grab some FAN ONLY merchandise next year at actual future conventions ?
.
©2021 Frank Diorio DioramaWorkshop.Com
.
IF YOU LIKE WHAT YOU SEE, PLEASE SHARE WITH YOUR FRIENDS
USING THE SOCIAL MEDIA BUTTONS BELOW