


-
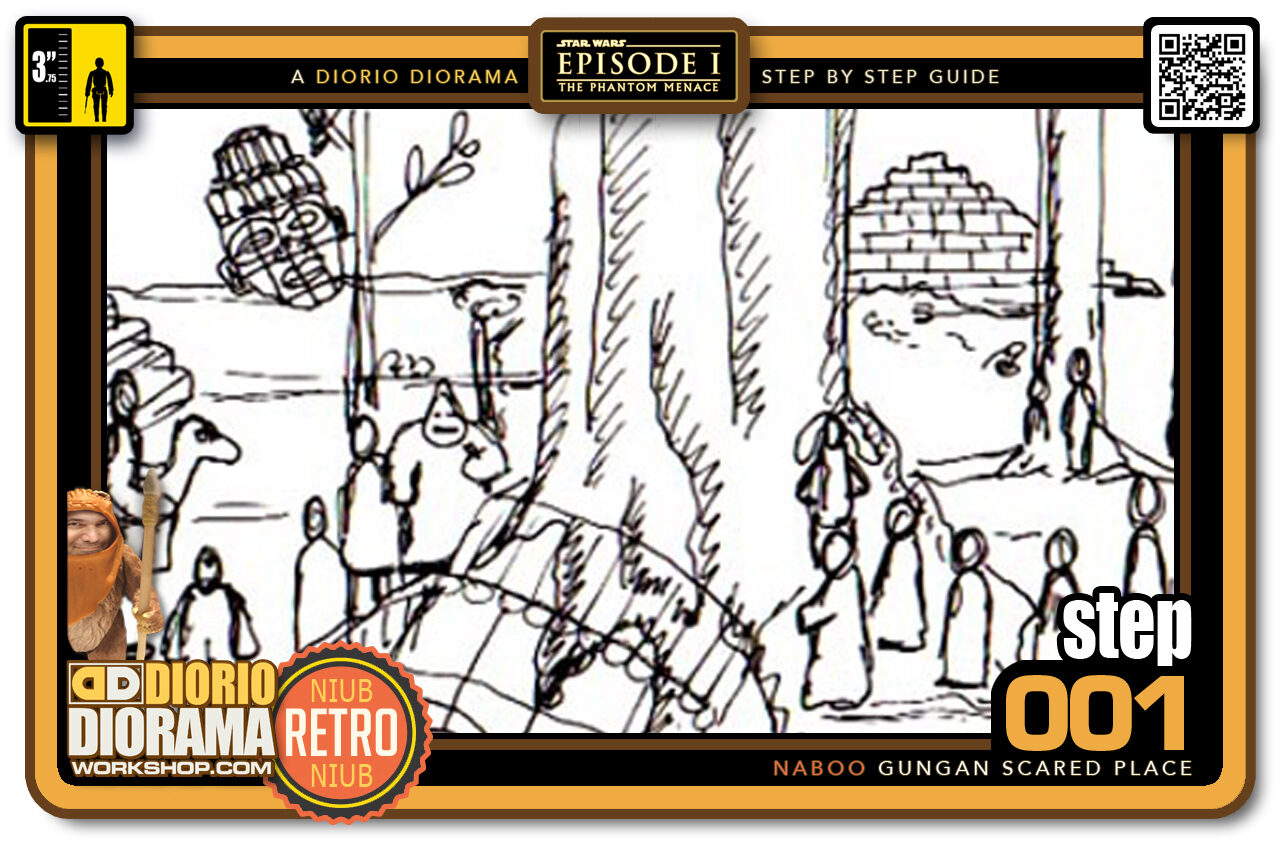
- STEP 001 > Here is a Sketch of what will become the Gungan's Ancient City Ruins. I think with all the figures it will be a very cool scene.
-
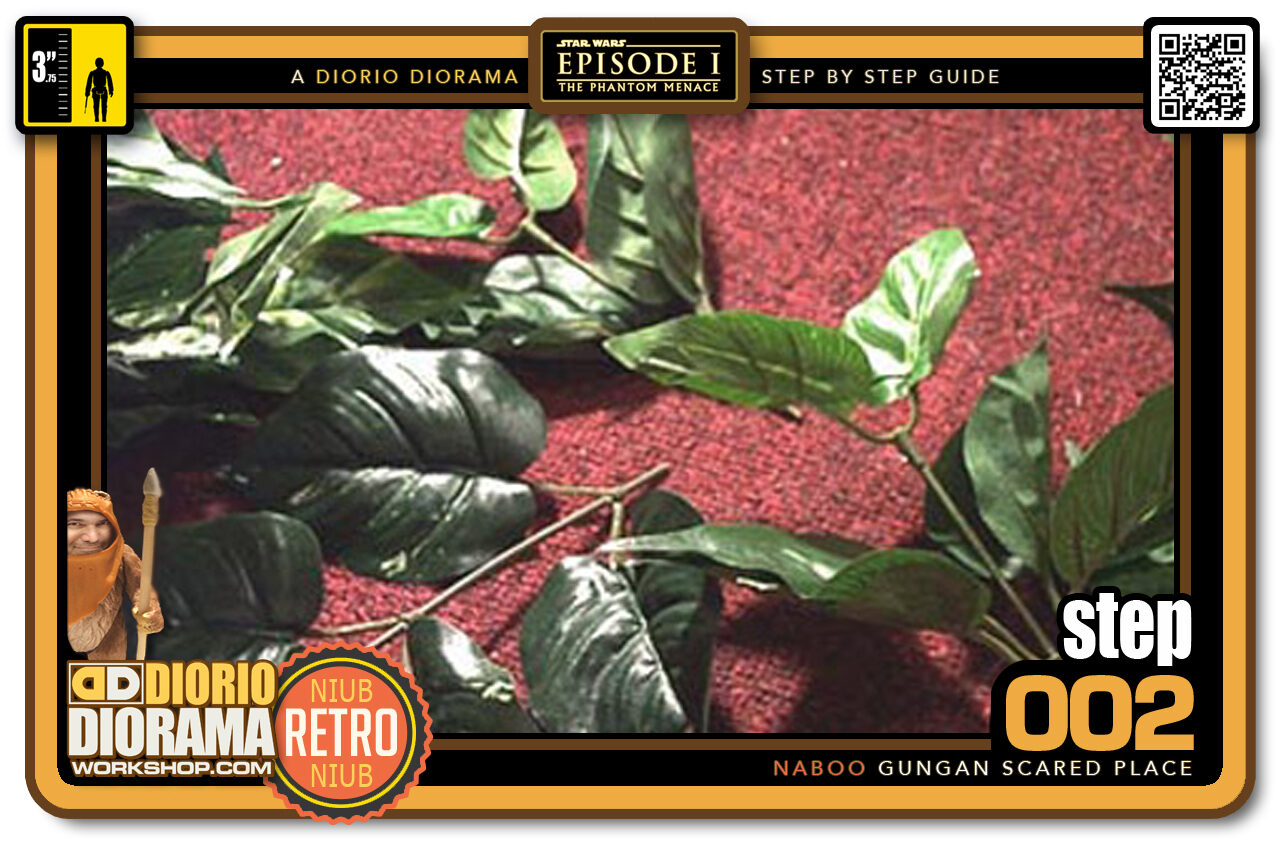
- STEP 002 > I went to Wal-Mart and bought plastic leaves in the arts and craft department. around $1.25 for a bunch. Cut different sizes and this will become your foliage in the diorama.
-
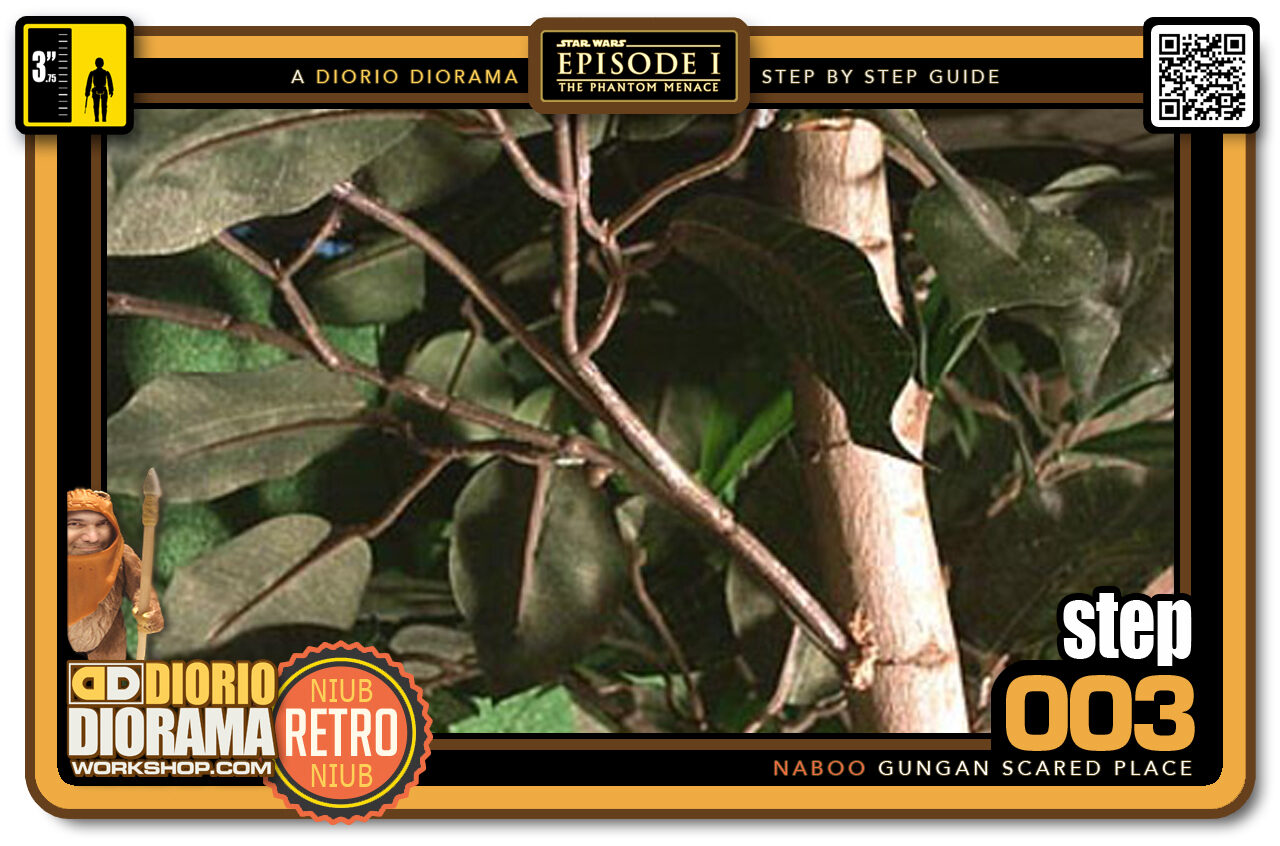
- STEP 003 > Next up, I cut 14 inch lengths of tree branch. These are also found at Wal-Mart. It's a 6 foot "tree" with plastic leaves for branches. It's like a plant decoration with no need of watering to stay alive. These are a good size and reall tree branches look better then plastic. I guess you could sculpt the tree stumps out of plasticine or such but that would be harder and very time consuming. Did I really say that? - ha ha
-
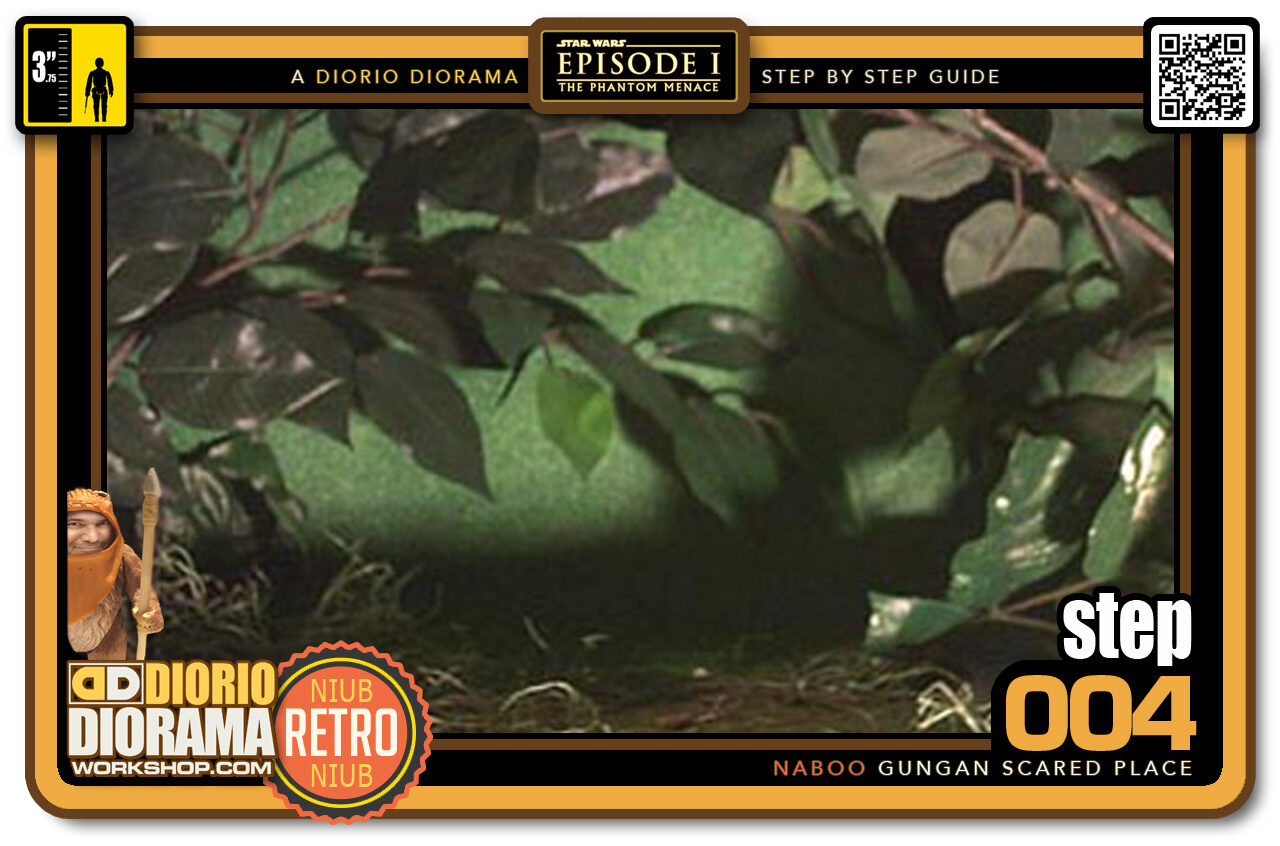
- STEP 004 > On the shelf back and floor I placed a model railroad grass texture poster. I bought this at Toys R Us and it comes rolled in a tube for like $6.00. The green will help hide the wall behind. You could even use aquarium backgrounds of forest if you can find them.
-
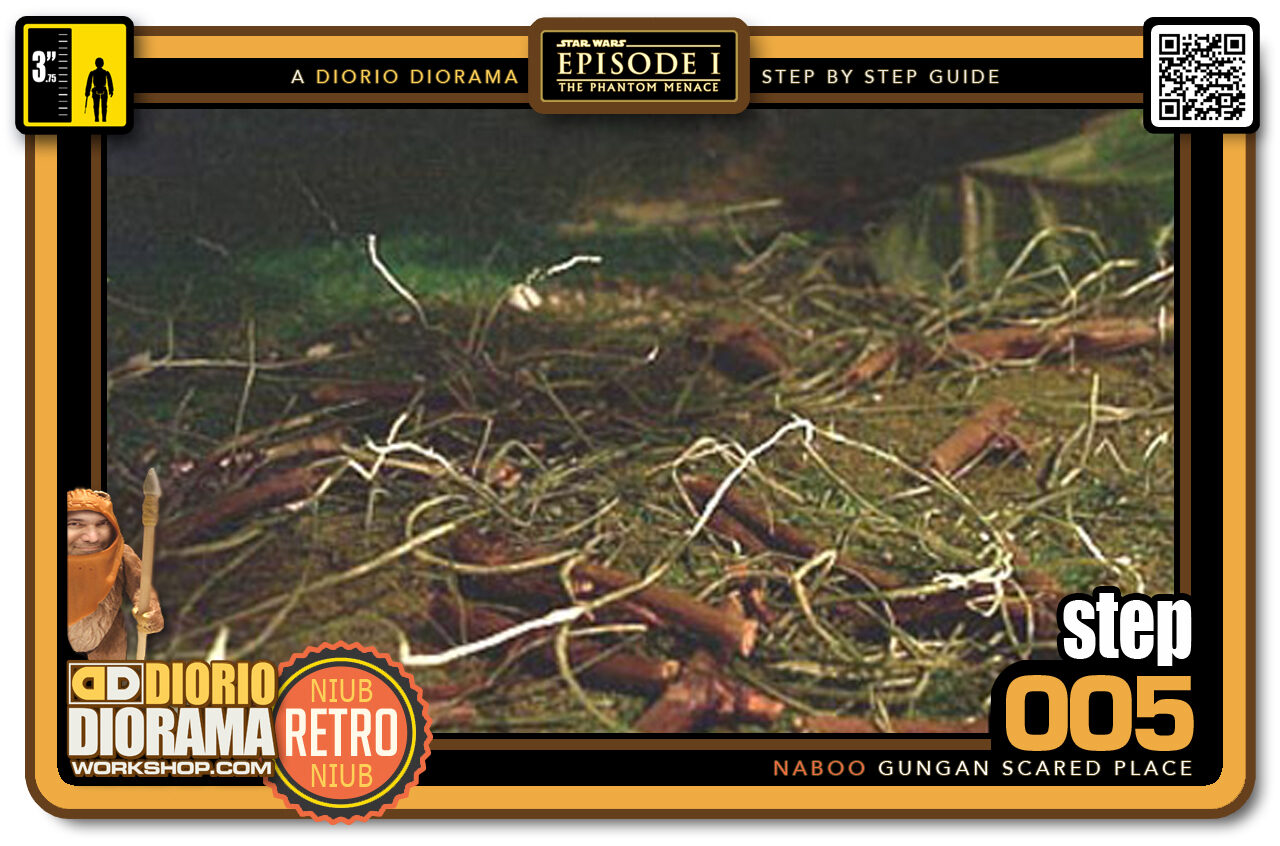
- STEP 005 > Next add some small twigs and the grass things that come with the Wal-Mart tree. I am hoping this will add texture and help give a more real look to the forest.
-
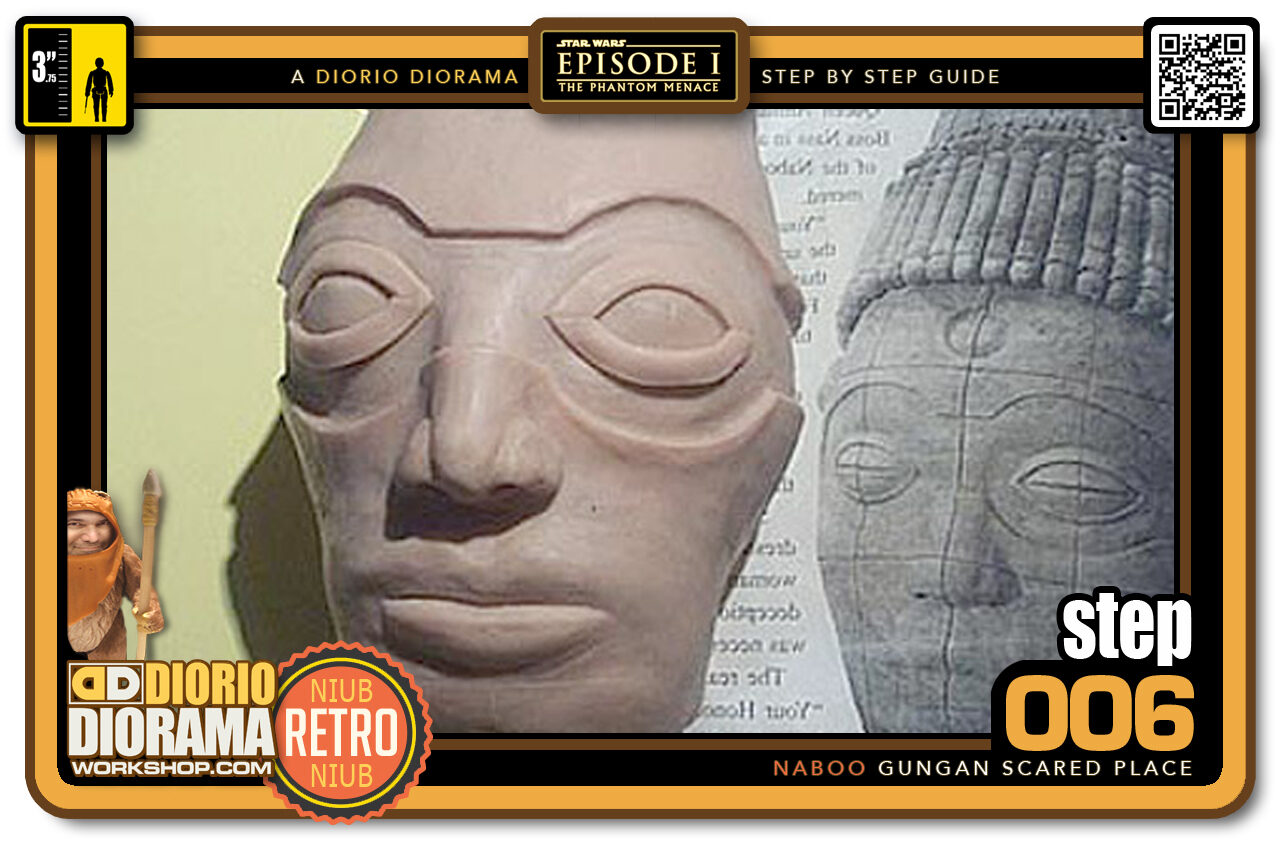
- STEP 006 > First step I added thin strips around the eyes and around the "mask" area. You can't see those because I already smoothed and blended them in before the picture. oops 🙂
-
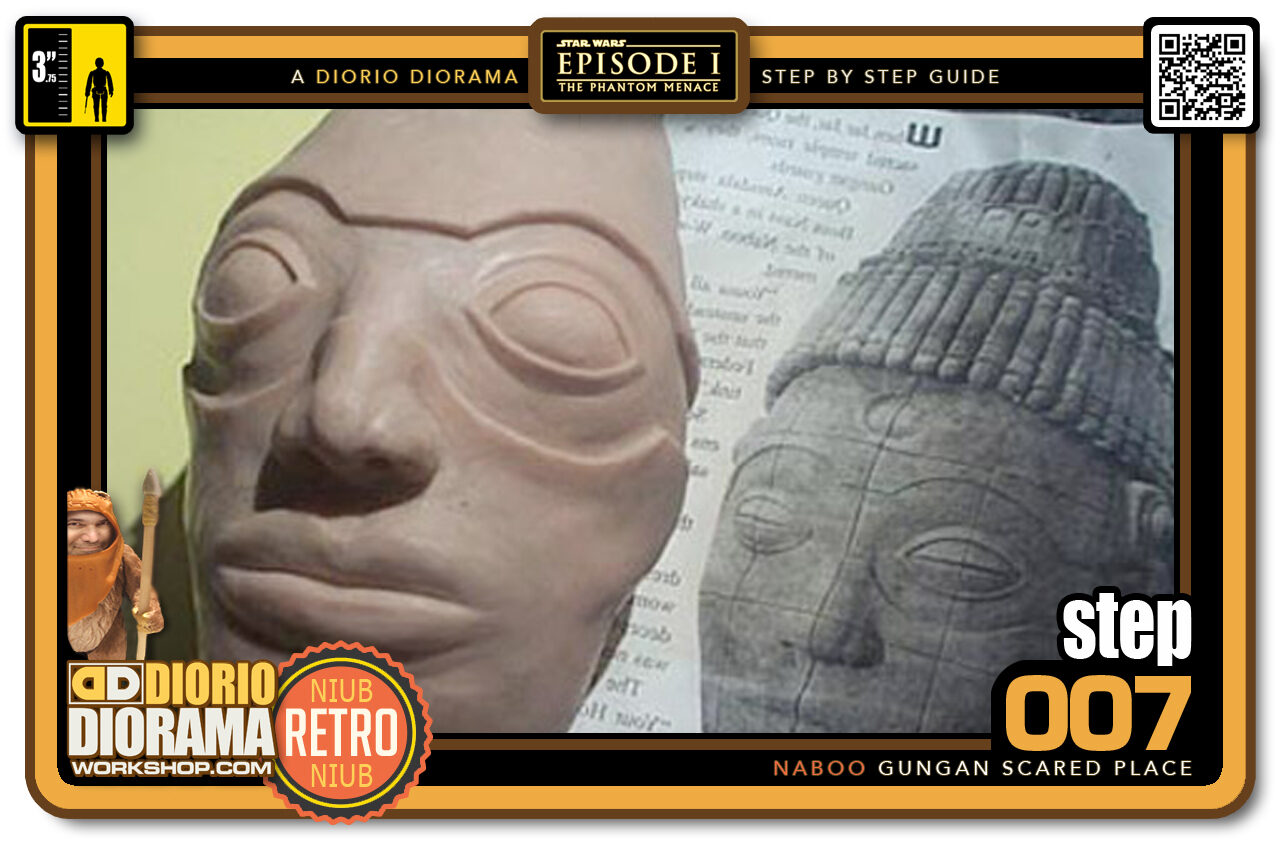
- STEP 007 > Here you can see the difference with the above picture and how the strips are blended with the rest of the face. I might make more changes later on but only after I have hardened the Super Sculpey in the oven. I don't want to have too many details and bruise them with over manipulation. it's easier to work in steps. That's the cool thing about Super Sculpey.
-
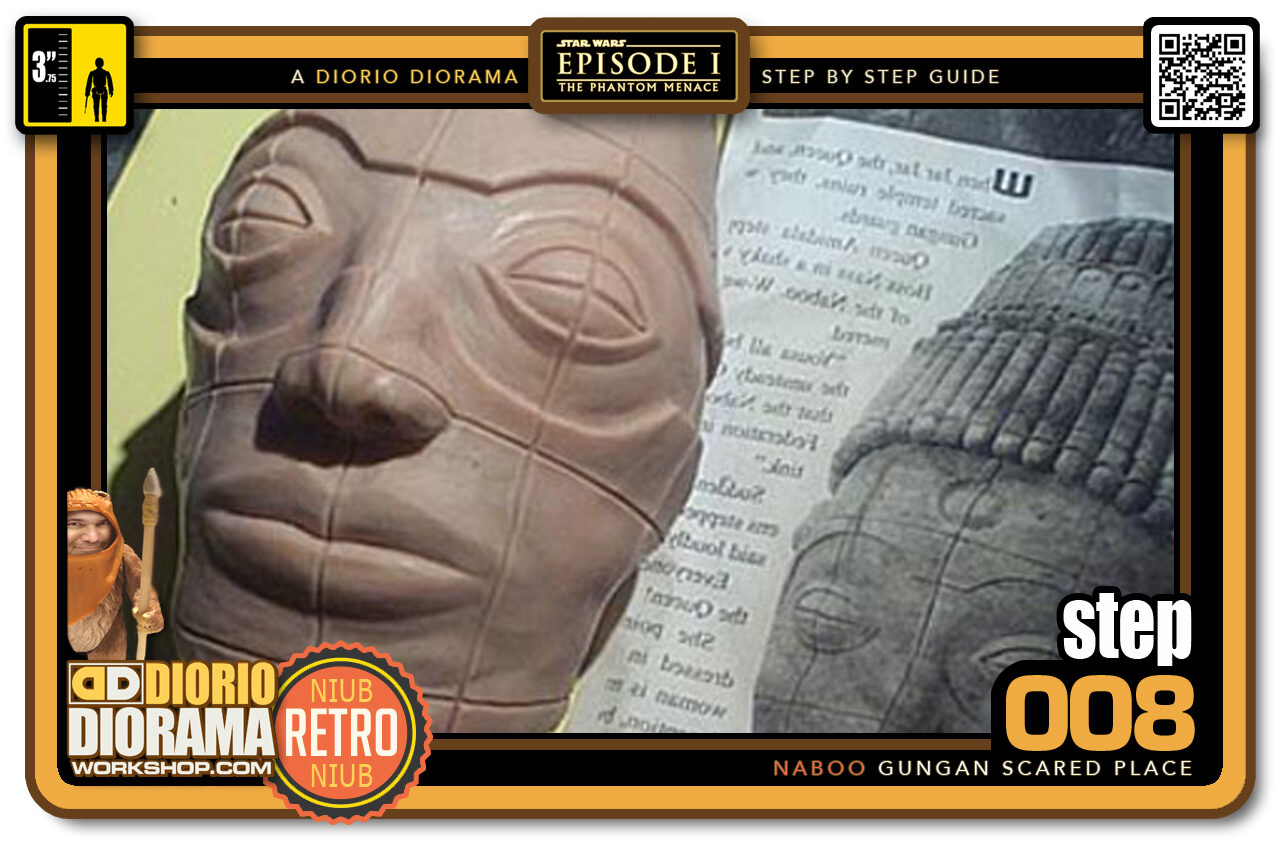
- STEP 008 > I used a tool to create the lines that form the stone slabs that create the face. Slowly it's taking shape and starting to resemble the stone prop.
-
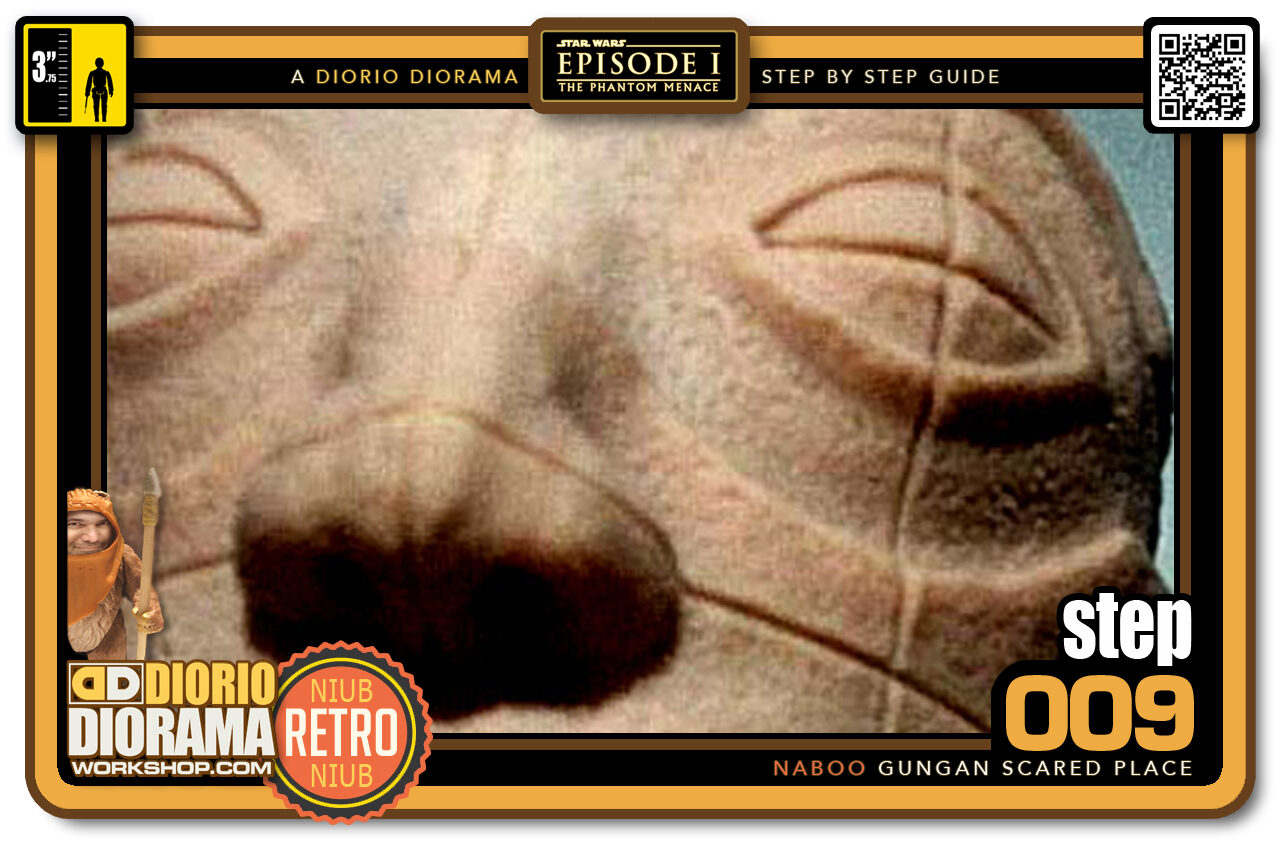
- STEP 009 > Next I used a stamp to create a rock type texture to the entire face. Once painted and in plaster it should look very realistic. I hope - LOL
-

- STEP 010 > And I thought making the Sarlacc's Claws were a pain in the butt - 🙂 Here are half of the "curlers" I made that will go around the statues head. Very repetitive work and time consuming. But hey, at least they will be accurate 😉
-
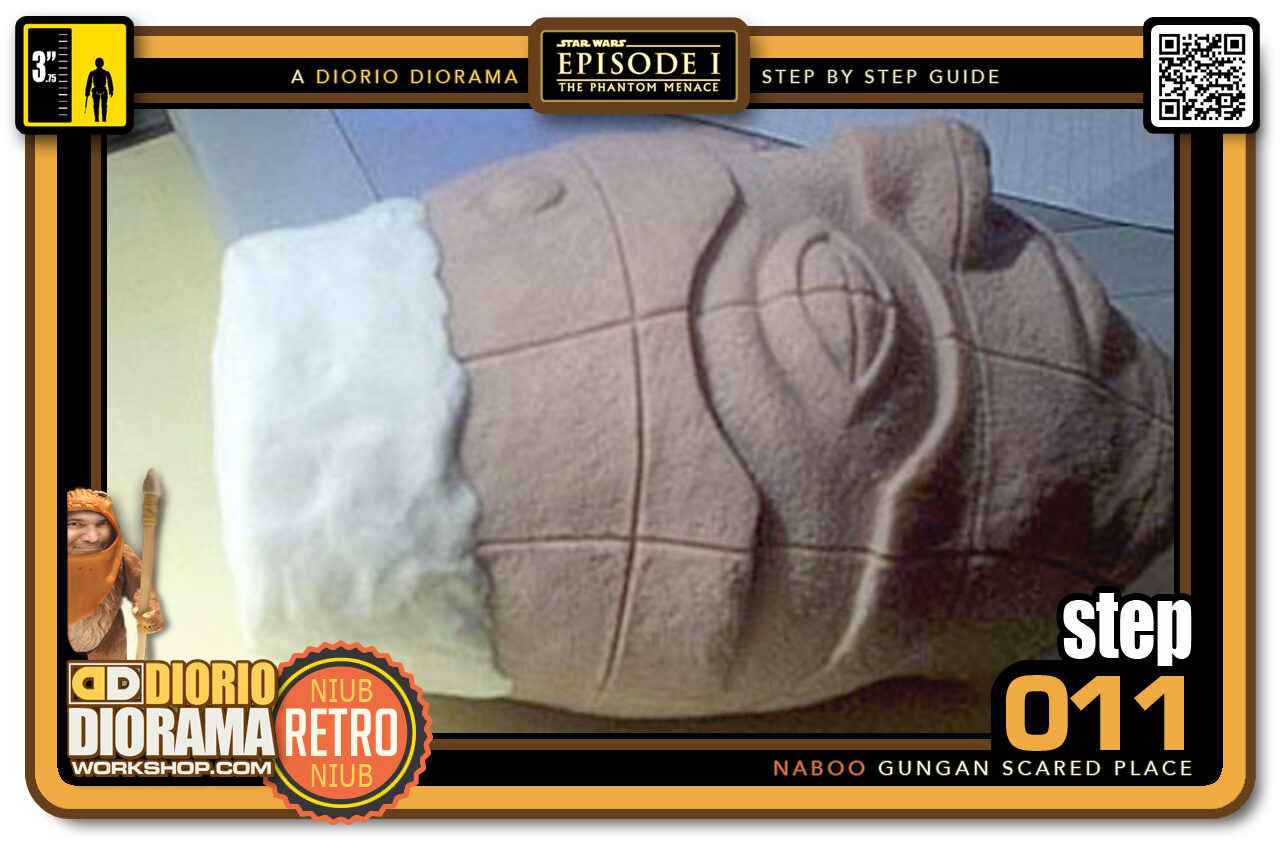
- STEP 011 > Here you can see that I made a cap extension out of Sculpey. It's softer then Super Sculpey and will be easier to stick the curlers into.
-
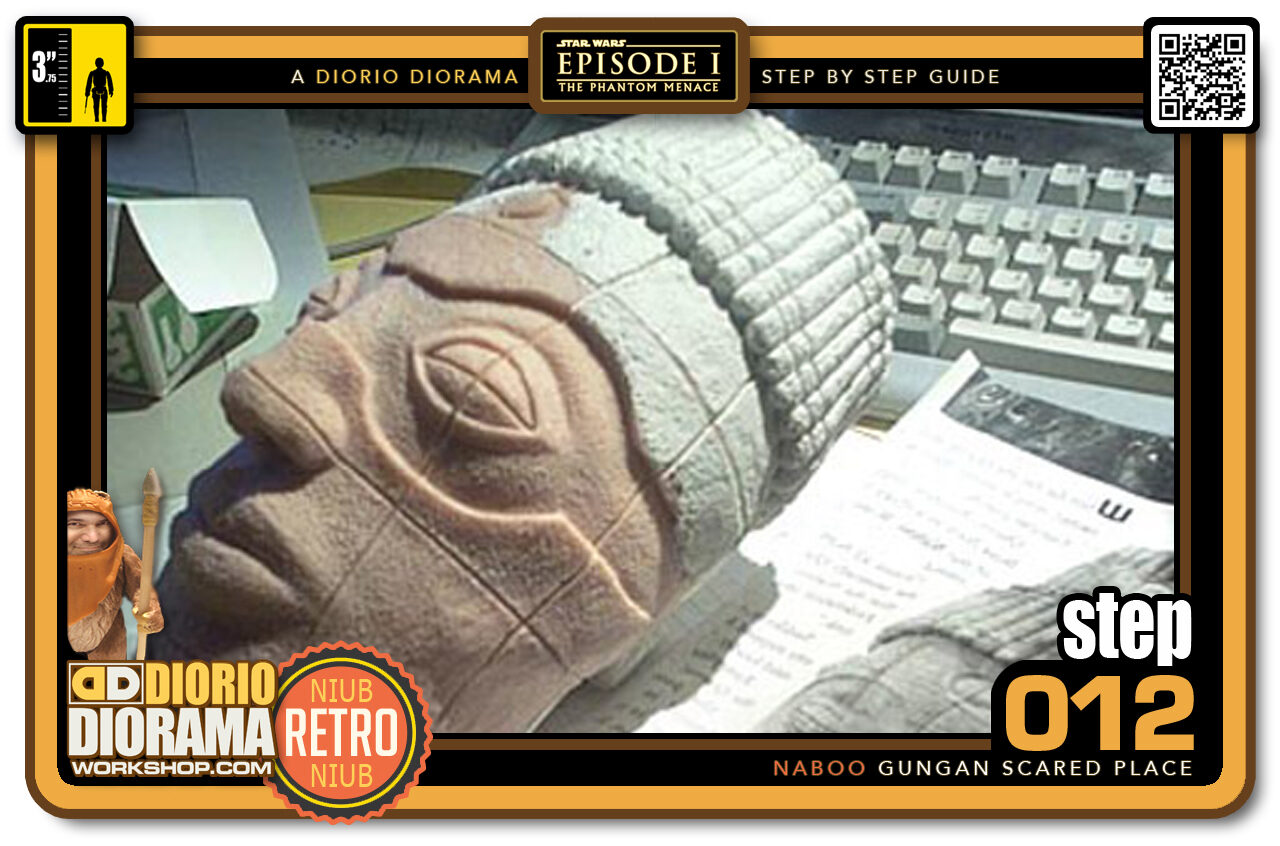
- STEP 012 > After I placed each "curler" into the Scalp, I realized I forgot to stamp the stone texture before hardening the Super Sculpey. Plus I knew those crooked tips would annoy me so I started all over - you knew I would, didn't you? LOL - I remade all the curlers and stamped the stone texture into them plus now the top is all even. I can now sleep at night 😉
-
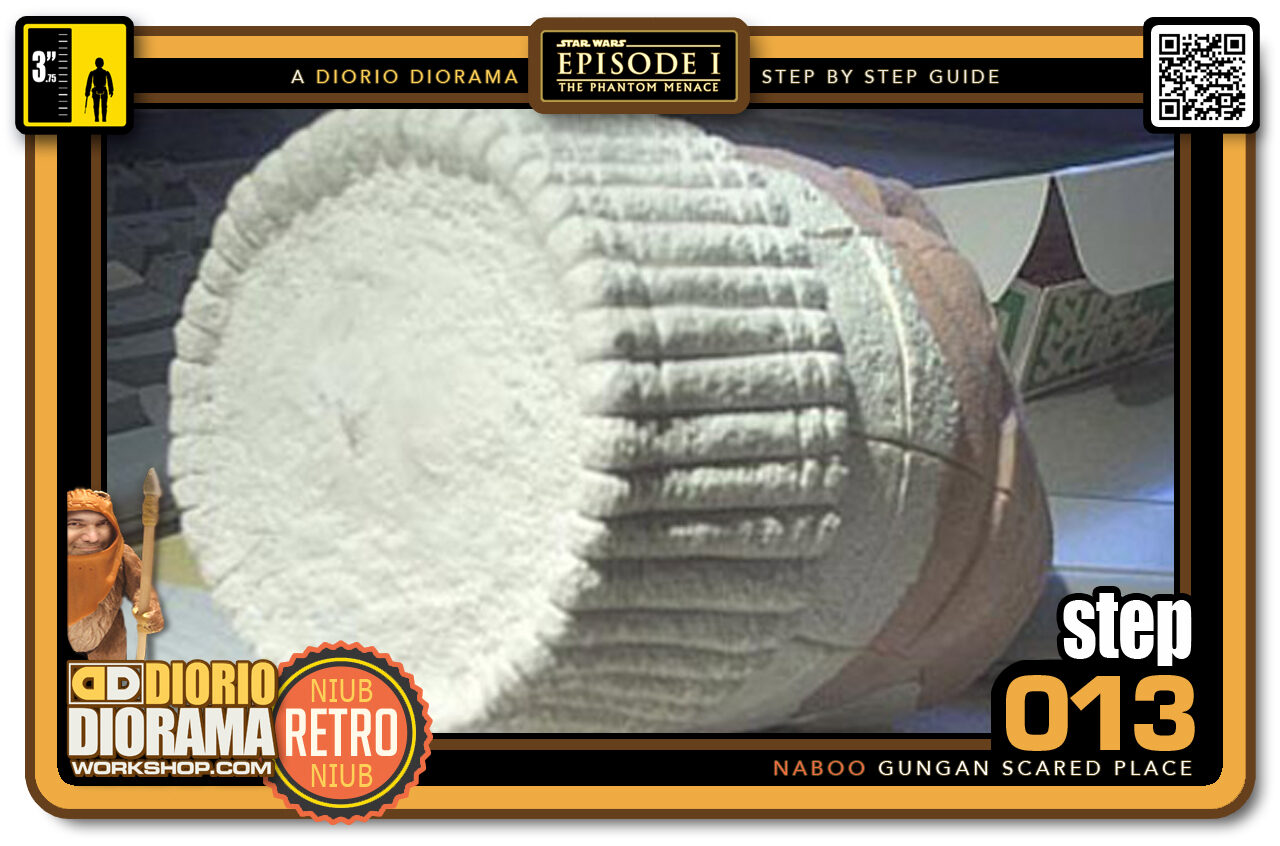
- STEP 013 > Here you can see the top view of the head. I made a flat surface in the centre for the next row of details that make up the hat ornament thingee.
-
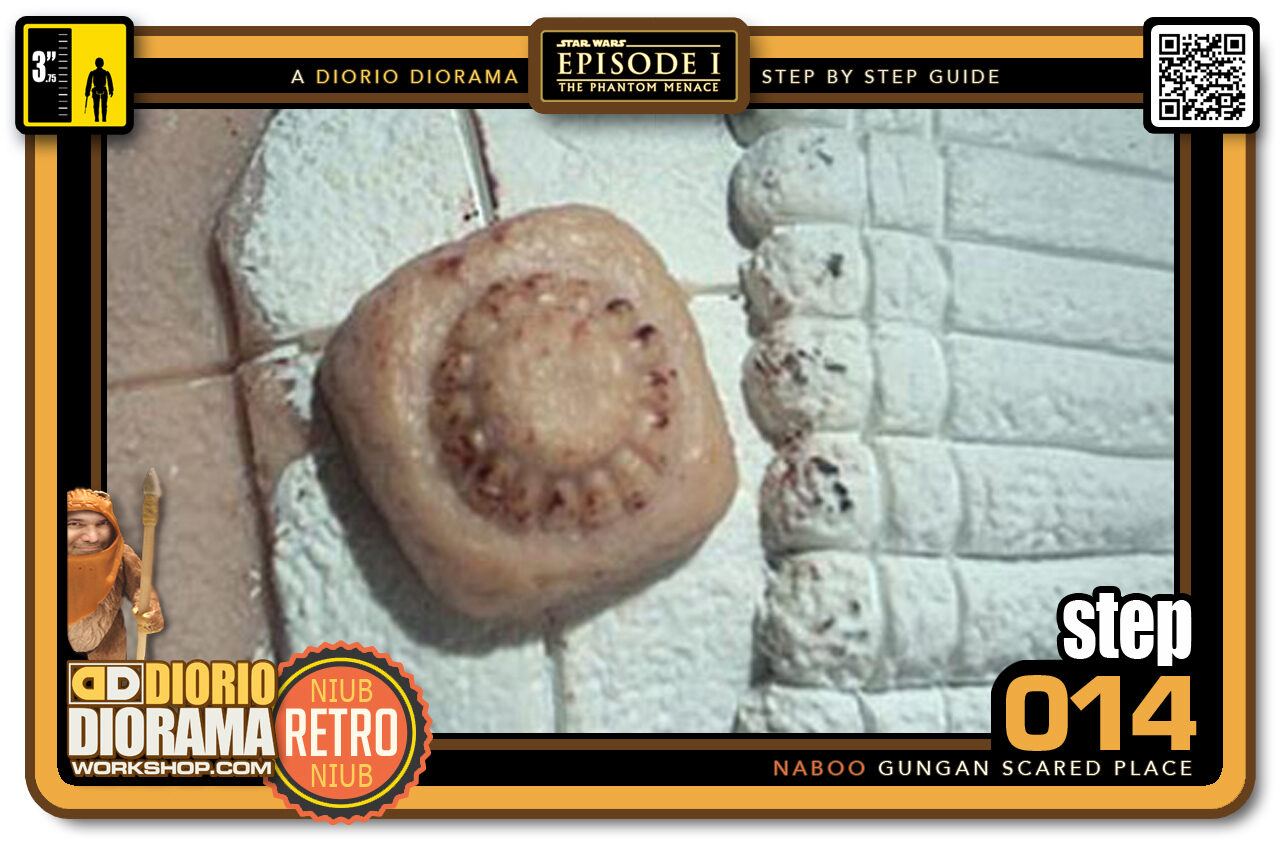
- STEP 014 > Decided to skip the hat and go to easy parts. Here is the temple jewellery doodad. It looks a bit burned I know, that's what happens if you leave the paint stripper gun aimed at the same spot for too long. Be very careful not to scorch. But once painted, it won't show anyway.
-
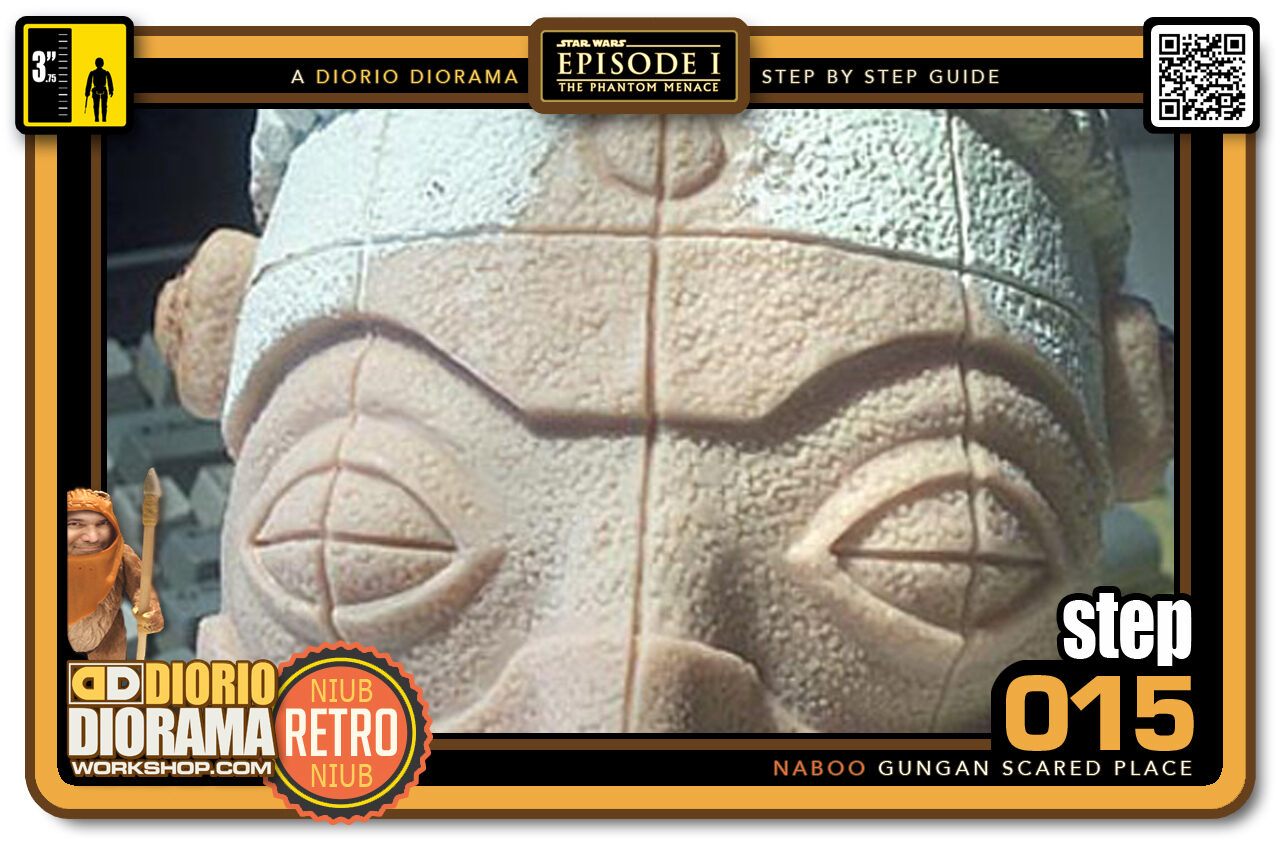
- STEP 015 > You can see where the temple pieces go. Electro shock therapy perhaps? hee hee
-
- STEP 016 > Looking again at the reference pictures, The face was too sunken in, needed a bit more meat to the sides if you will. So I added a skin layer of sculpey for a less anorexic look.
-
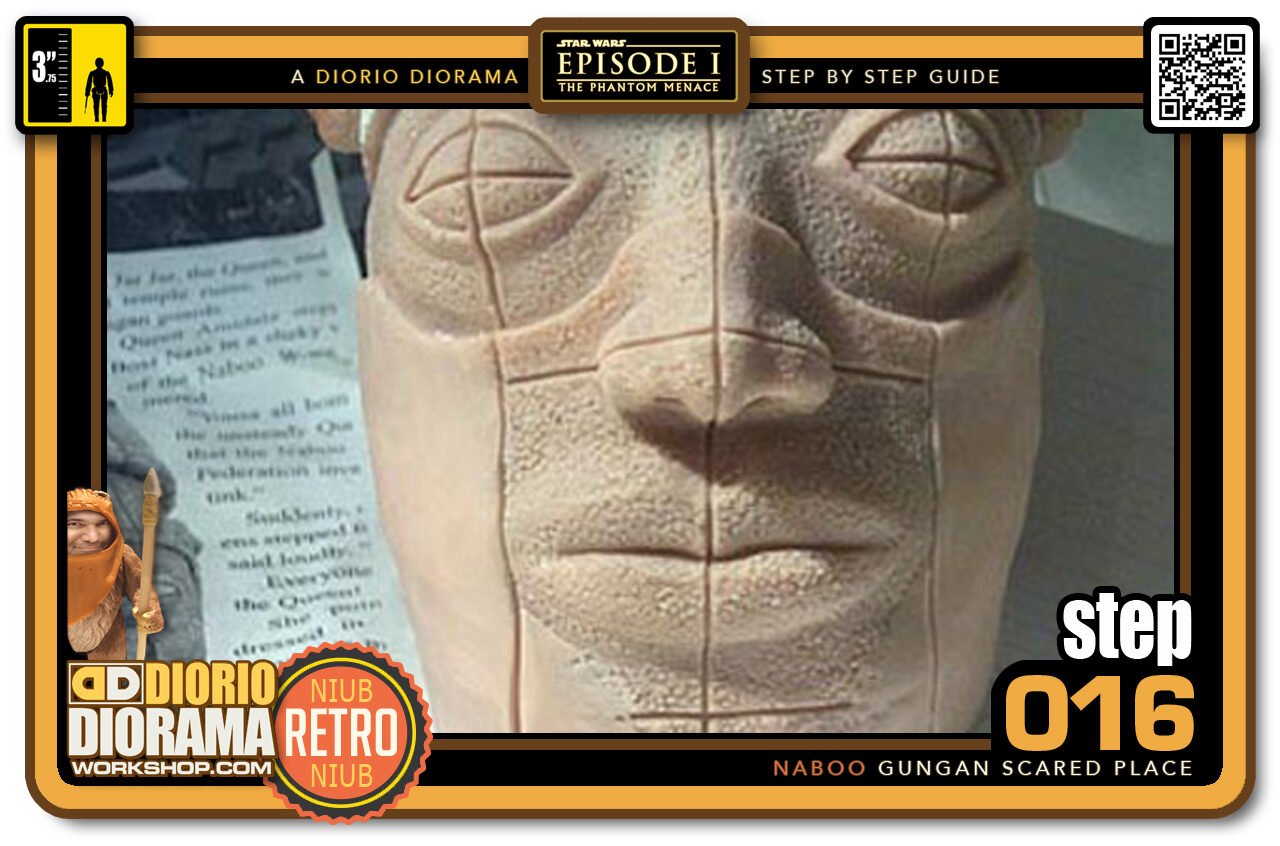
- STEP 017 > This is what the face looks like with the added sculpey. Much better do you think? I stamped the stone texture onto the added skin in order to blend it with what I had originally made last week. You can't really tell what was added which is good.
-
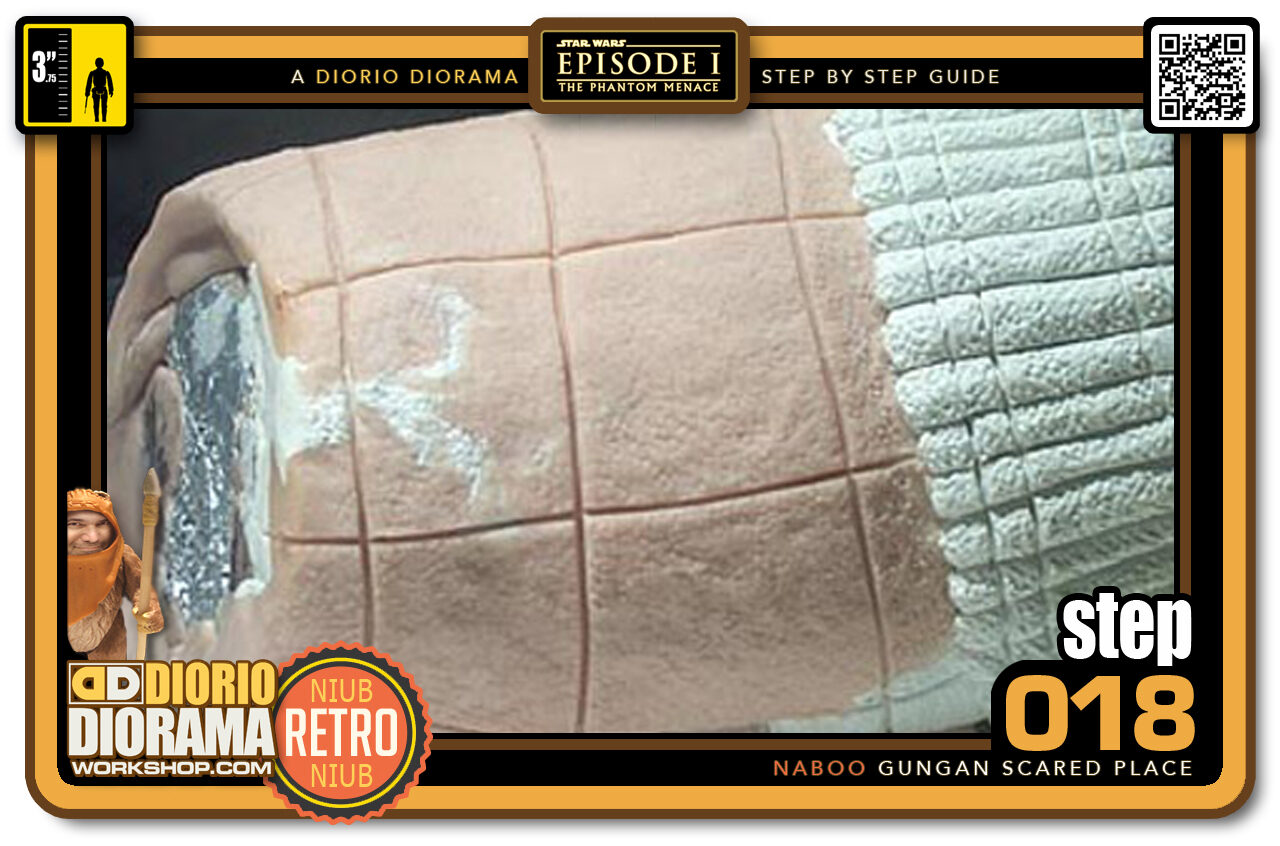
- STEP 018 > I next worked on detailing the back of the head. I needed to do this before placing the ears.
-

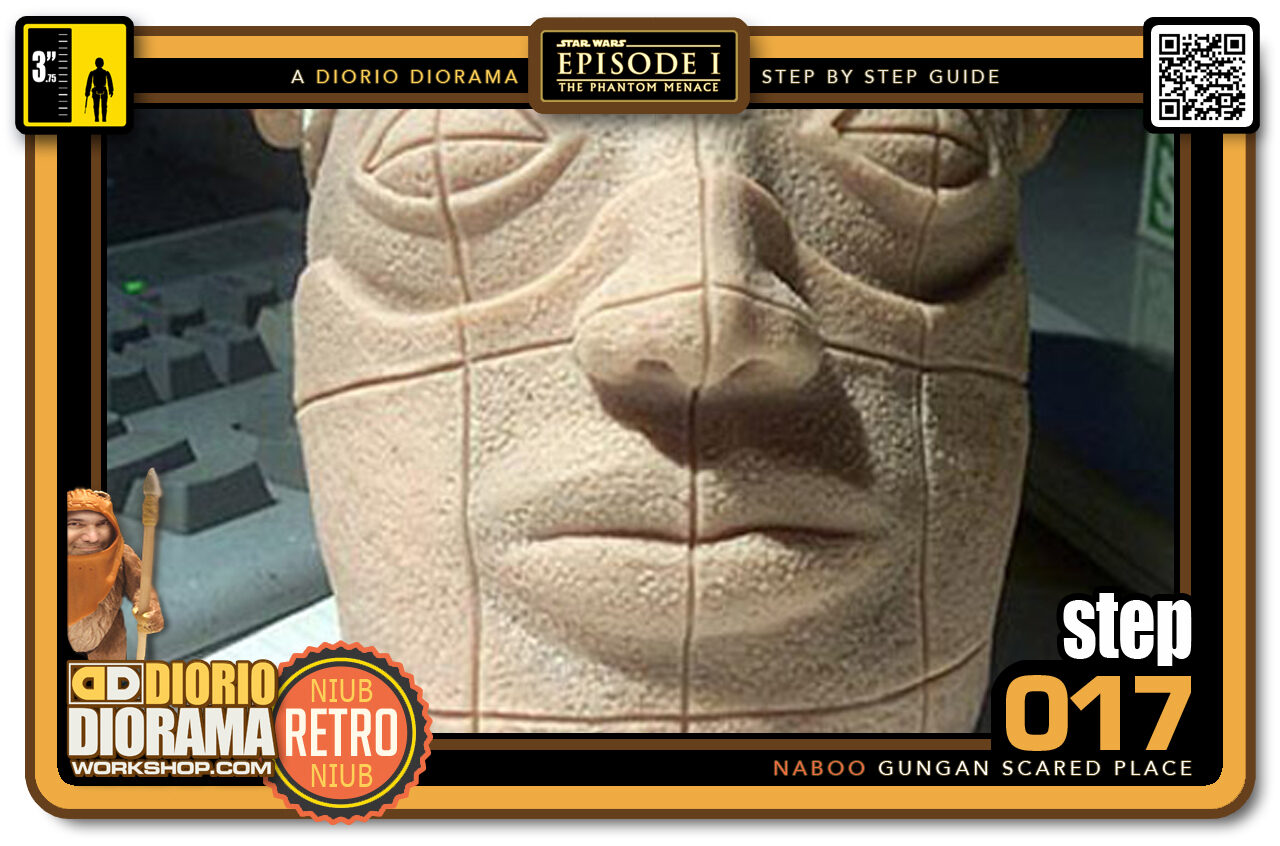
- STEP 019 > This again is what the front looks like so far. Sorry about having to make you tilt your head but the picture wouldn't fit full the other way.
-
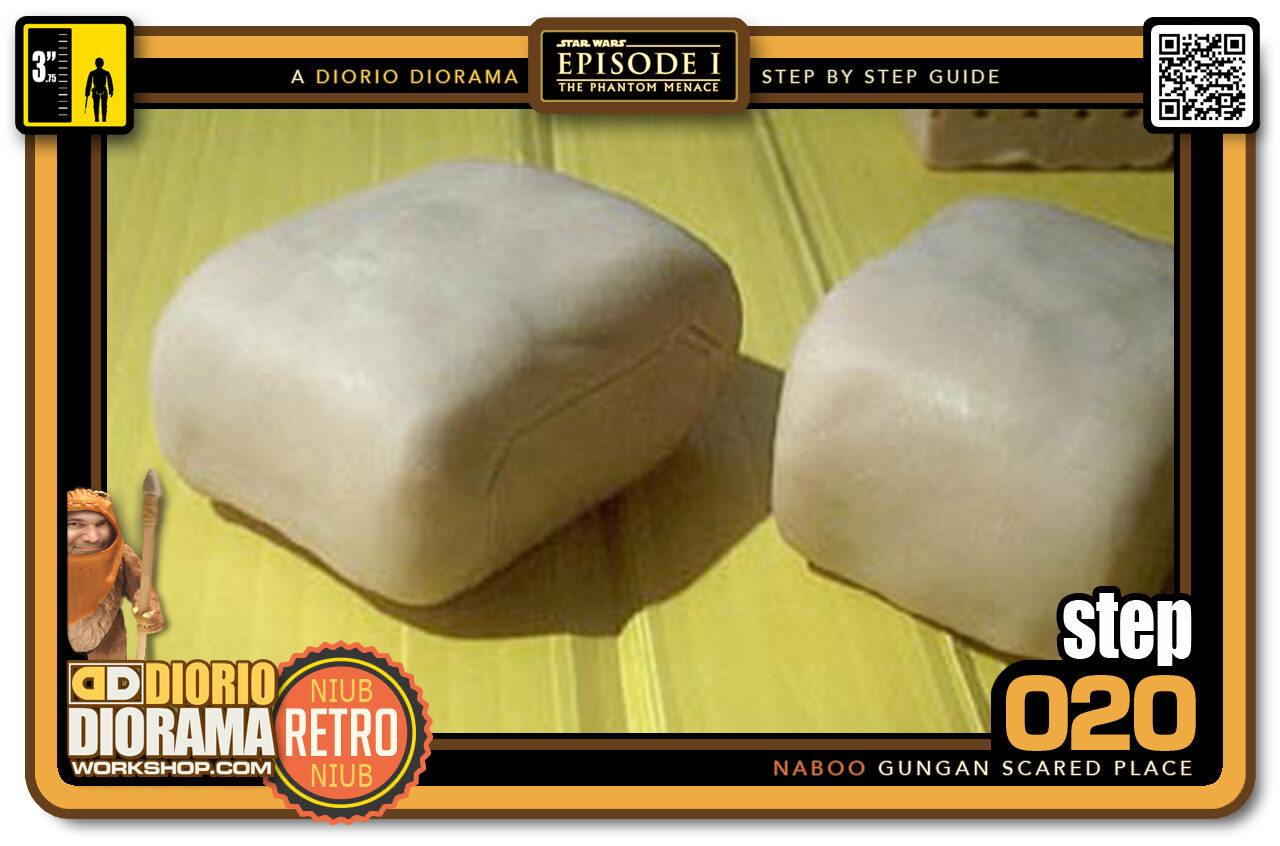
- STEP 020 > Next up is the ears. I made 2 rectangle box shapes with Super Sculpey and smoothed the corners to round out the edges.
.
Did you already build this Diorama ? At home or at our Star Wars Celebration Diorama Builders workshop ? Would you like to show it in the site’s GALLERY VISITORS DIORAMAS section, YES ? That is Awesome !!! You can find out all the details on how to email me your photos on the VISITORS SUBMISSIONS INFO page … When I get your photos, I will create your very own page just like this one. You may not realize it but work does inspire others to join in the fun of making Action Figure Dioramas.
.
NOT FOR RESALE ALL Decals, tutorials and artwork are ©FrankDiorio (dioramaworkshop.com) and offered FOR FREE to the fans – that would be you ? so you can build and display my diorama designs in your very own home. I realize I cannot control what one does with my graphics once I place them on the web, I can only ask you as one fan to another, please respect the artist and do not be that jerk who uses my designs and tutorials to build a copy of my work only to sell it on EBAY or trade/sale groups and forums. Thank You. Frank.
.

.
.
If you have a facebook account, why not join the Official Diorama Builders Fan Club today, simply click the logo link below.
 .
.
Catch up with fellow visitors and exchange stories, read cool interviews with the crew, exchange photos, fun surprises and grab some FAN ONLY merchandise next year at actual future conventions ?
.
©2021 Frank Diorio DioramaWorkshop.Com
.
IF YOU LIKE WHAT YOU SEE, PLEASE SHARE WITH YOUR FRIENDS
USING THE SOCIAL MEDIA BUTTONS BELOW