


-
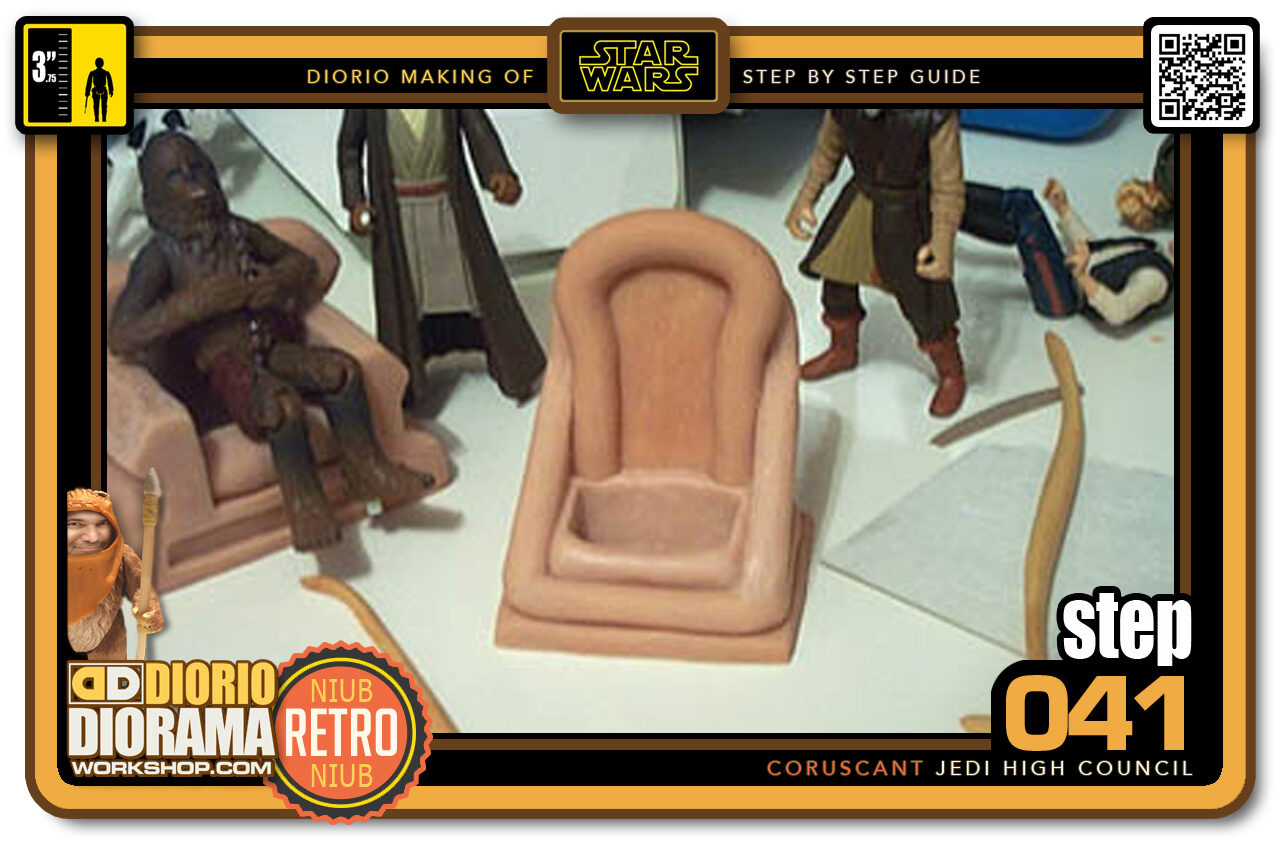
- Step 041 >> Now since I want a trap door to put my figures, I cut out a chunk of the pillow to fit their legs. If you are making a chair and want the jedi to stand next to it, you don't need to cut out the pillow. This is just a step to help me in the mold process.
-
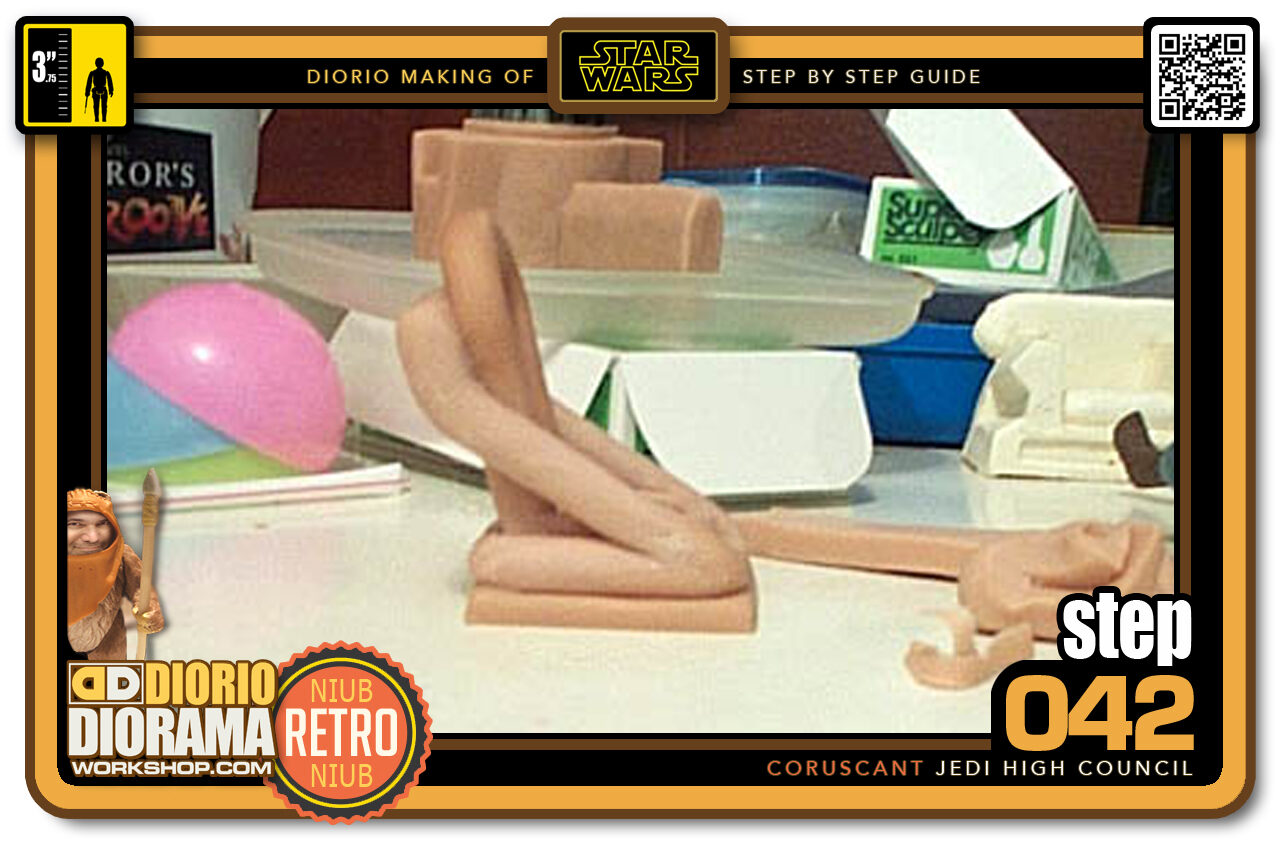
- Step 042 >> My god - I can't believe it took me 1 month to get back to working on this chair. What a month May was - YUK. Anyway, Here I thickened the side tubes a little and making them more straight and round. I used the "dip the tool in water" trick to smooth out the Super Sculpey.
-
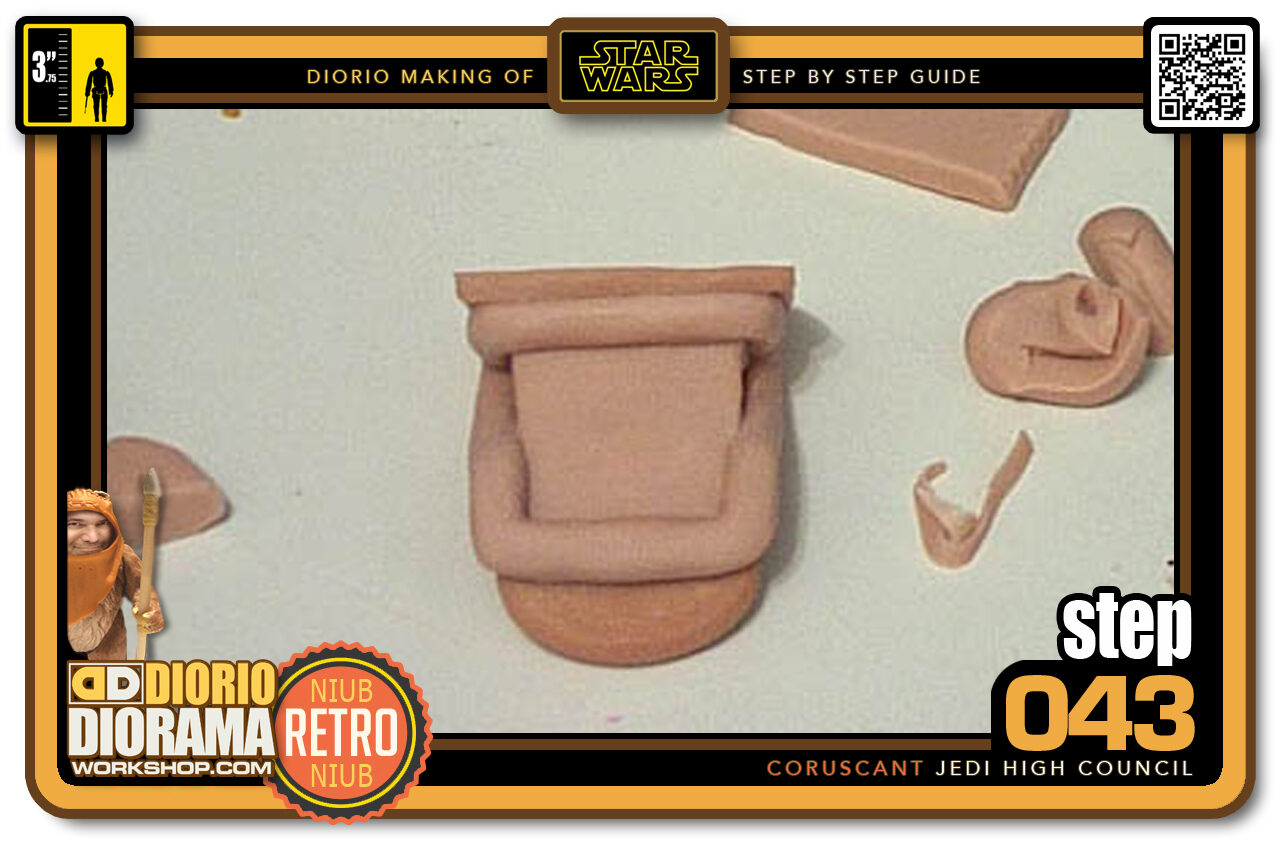
- Step 043 >> Next was to smooth the back of the chair even if we will never see it. I just cut a thin sqaure shape and blended it in to touch all existing sides.
-
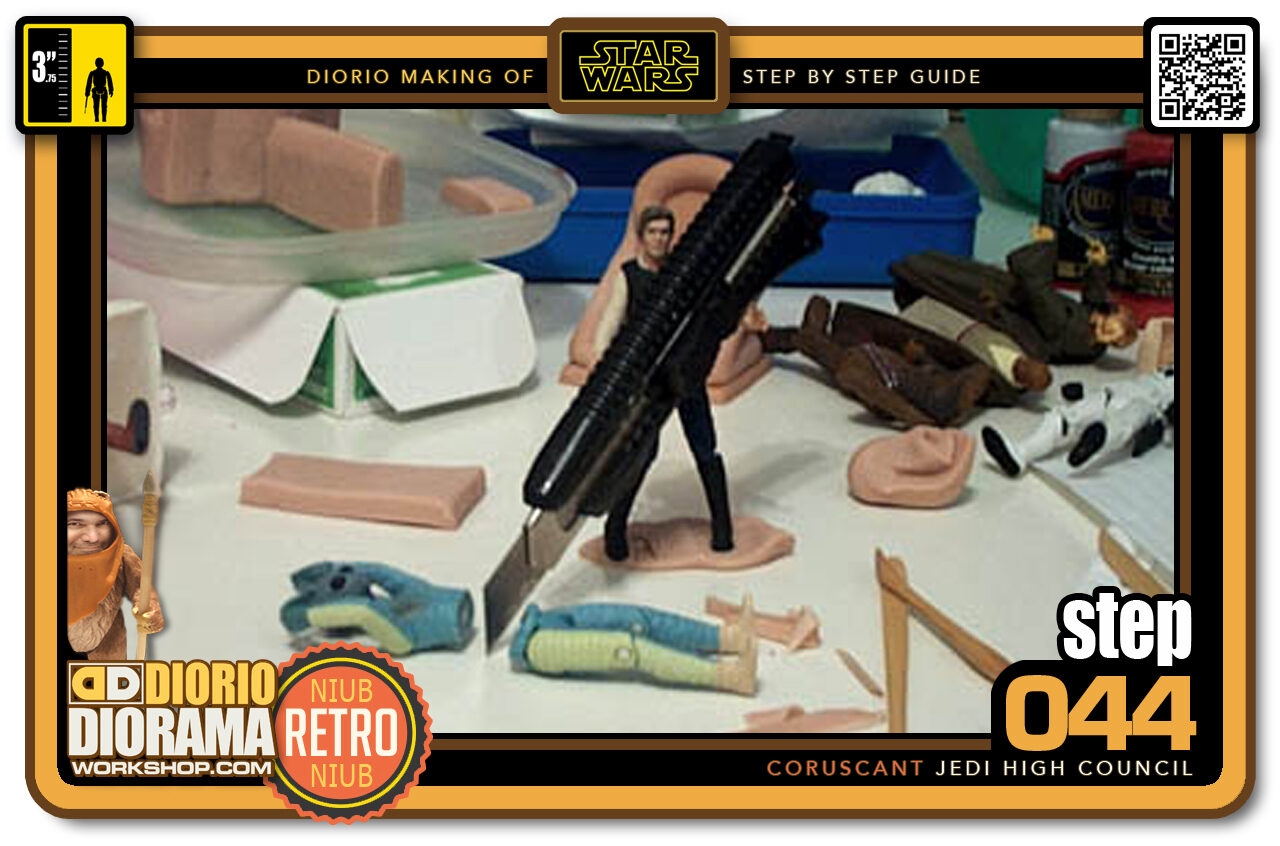
- Step 044 >> For once it was nice to get a little help. Seems I did not have to convince Han Solo that much to Slice Greedo in half - LOL. Why did I do this? Because Greedo's legs will help with the "sitting" shapes of the Jedi Robes. More about that later...
-
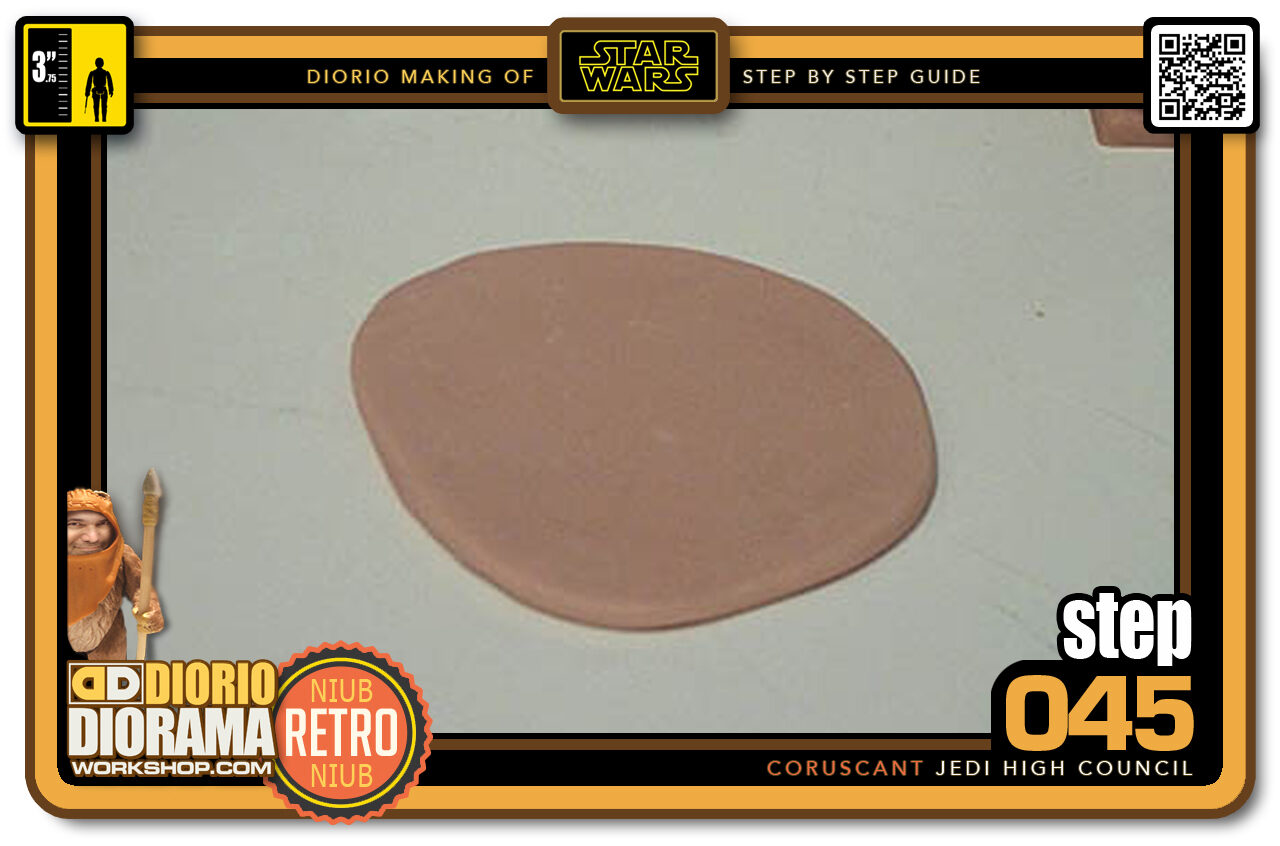
- Step 045 >> Flatten a piece of Super Sculpey to 1/2 a cm thick.
-
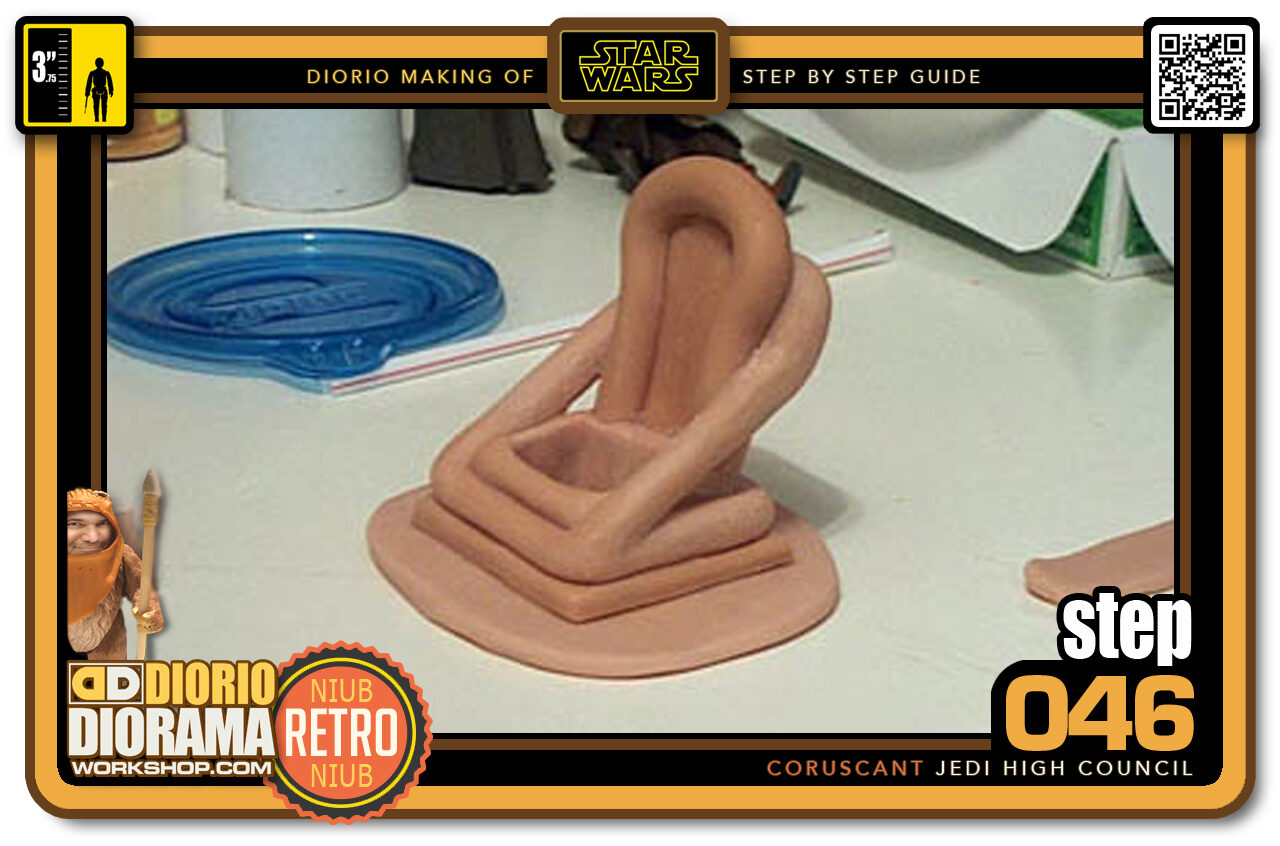
- Step 046 >> Now I place the chair on this to make the base thicker and to give it the accurate angled base.
-
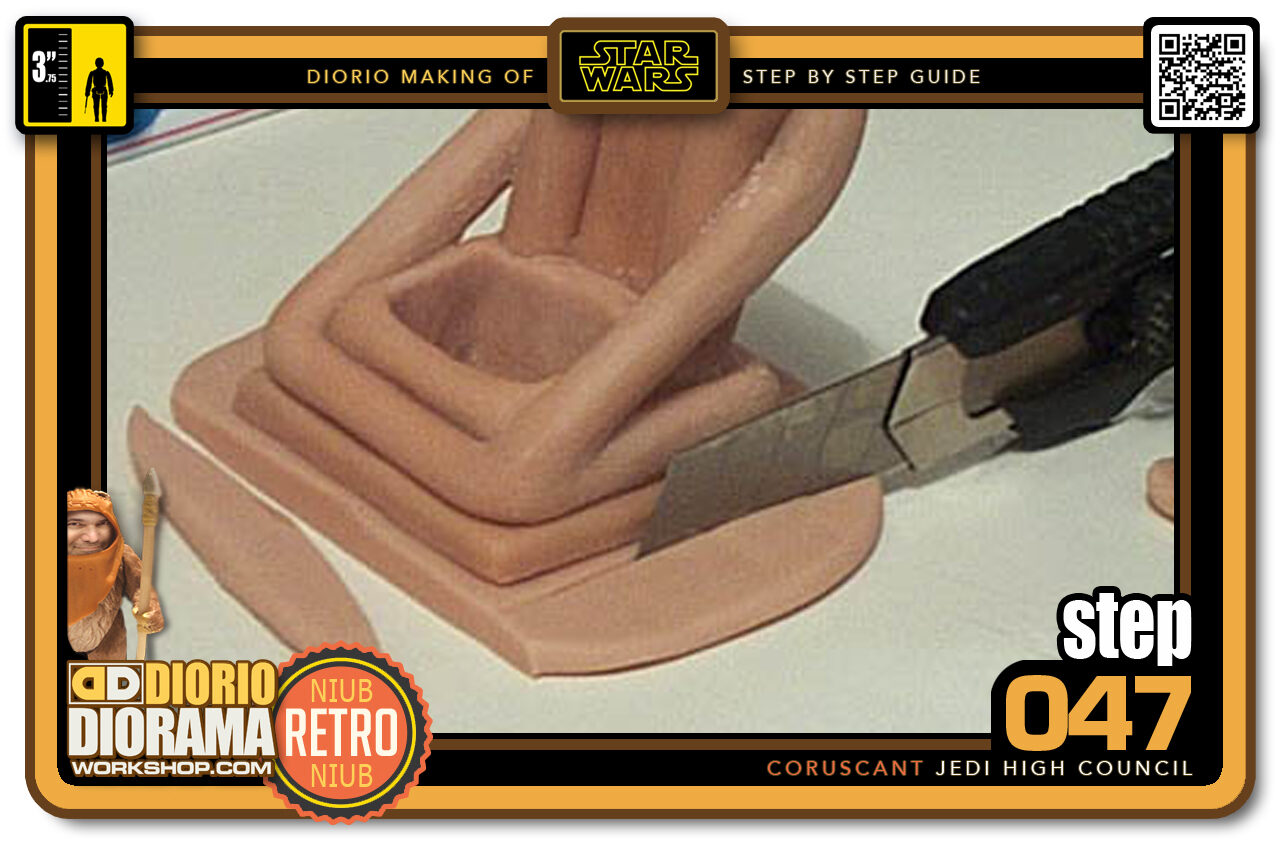
- Step 047 >> Cut the excess Sculpey with your Xacto Knife. Leave 1/4 cm gap all around the chair.
-
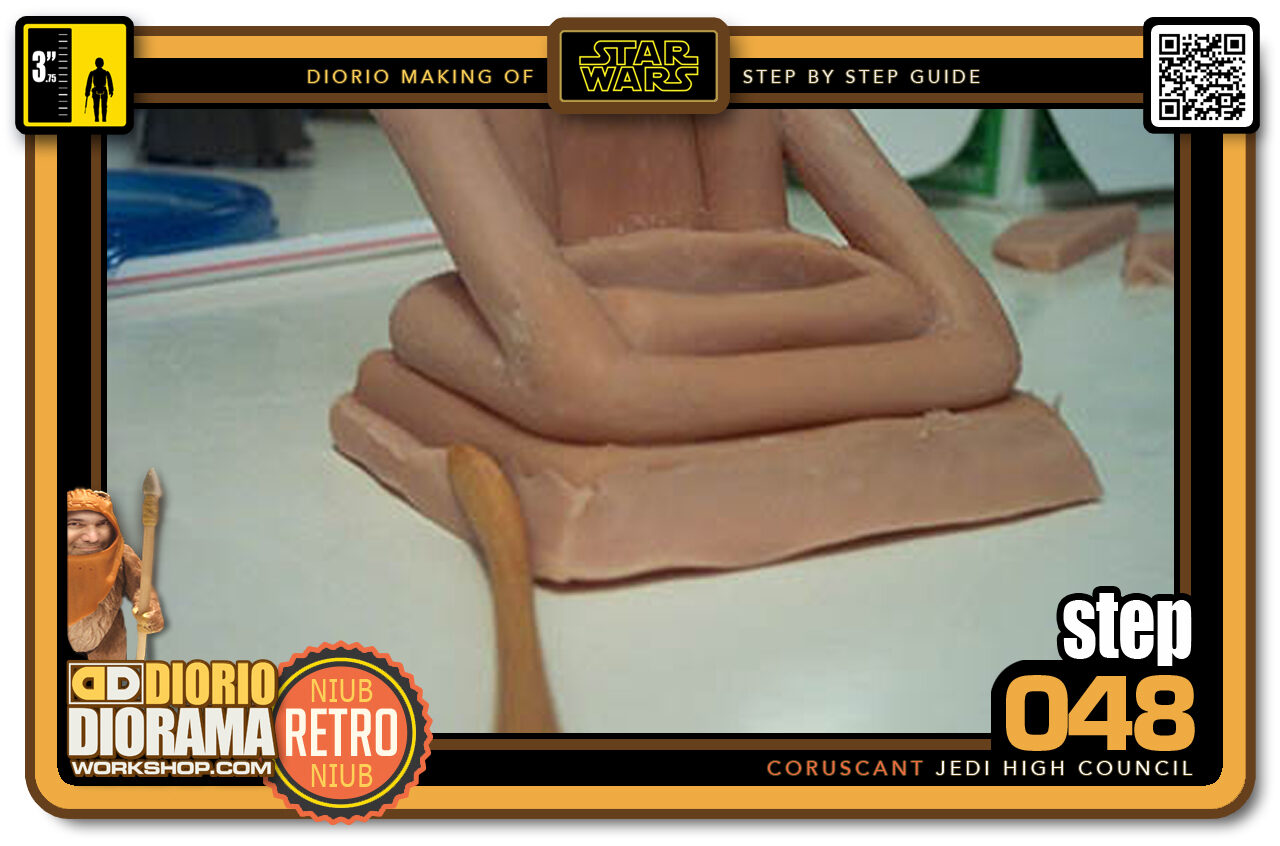
- Step 048 >> Now use your tool to meld the 2 pieces together. At the same time, Push the Sculpey upwards so that it is thinner at the top thus giving us a 45 degree angle for the base.
-
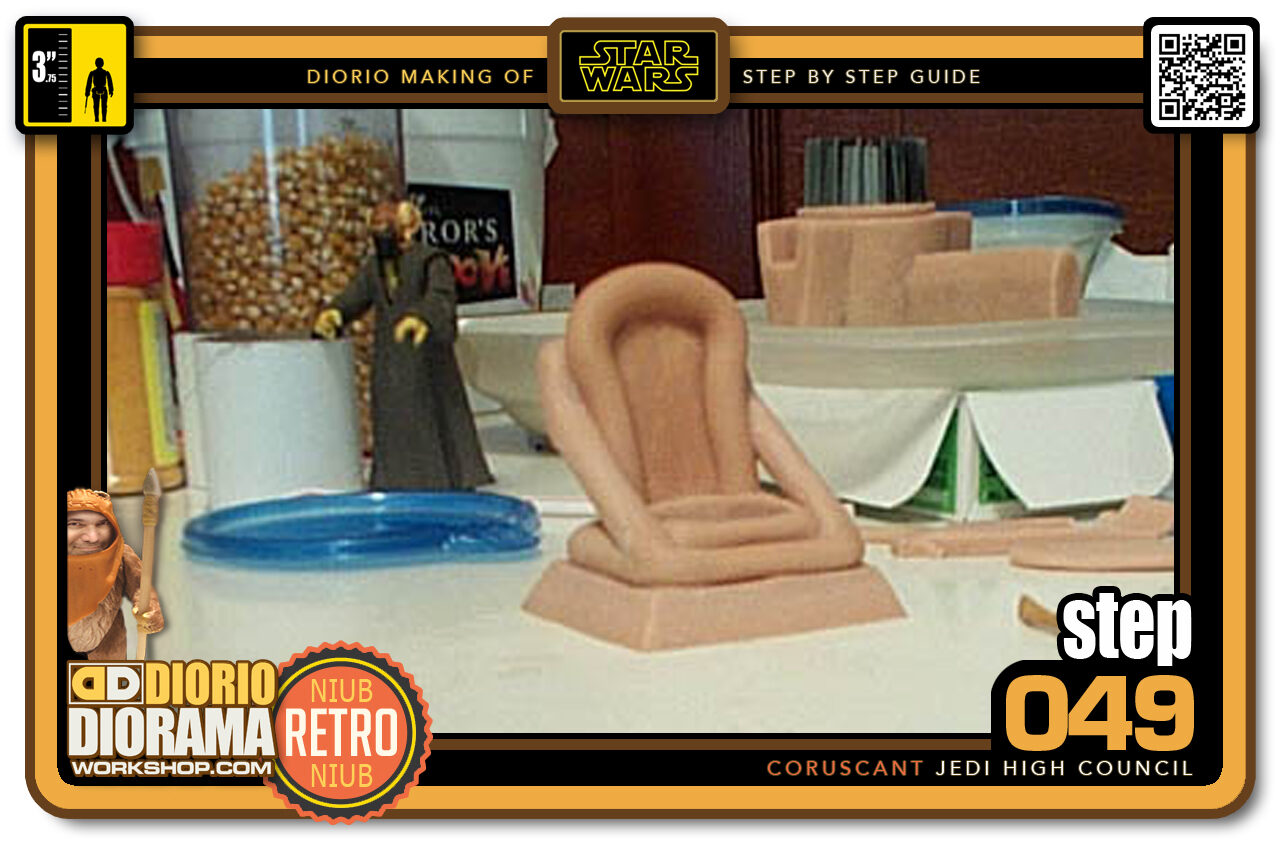
- Step 049 >> This is the finished base. I made sure to sut out the hole in the bottom for the figure to pop out and yes, before you all email me, I do know it looks like a Jedi Toilet - LOL. This is a good point to stick it in the oven and get the new base to harden.
-
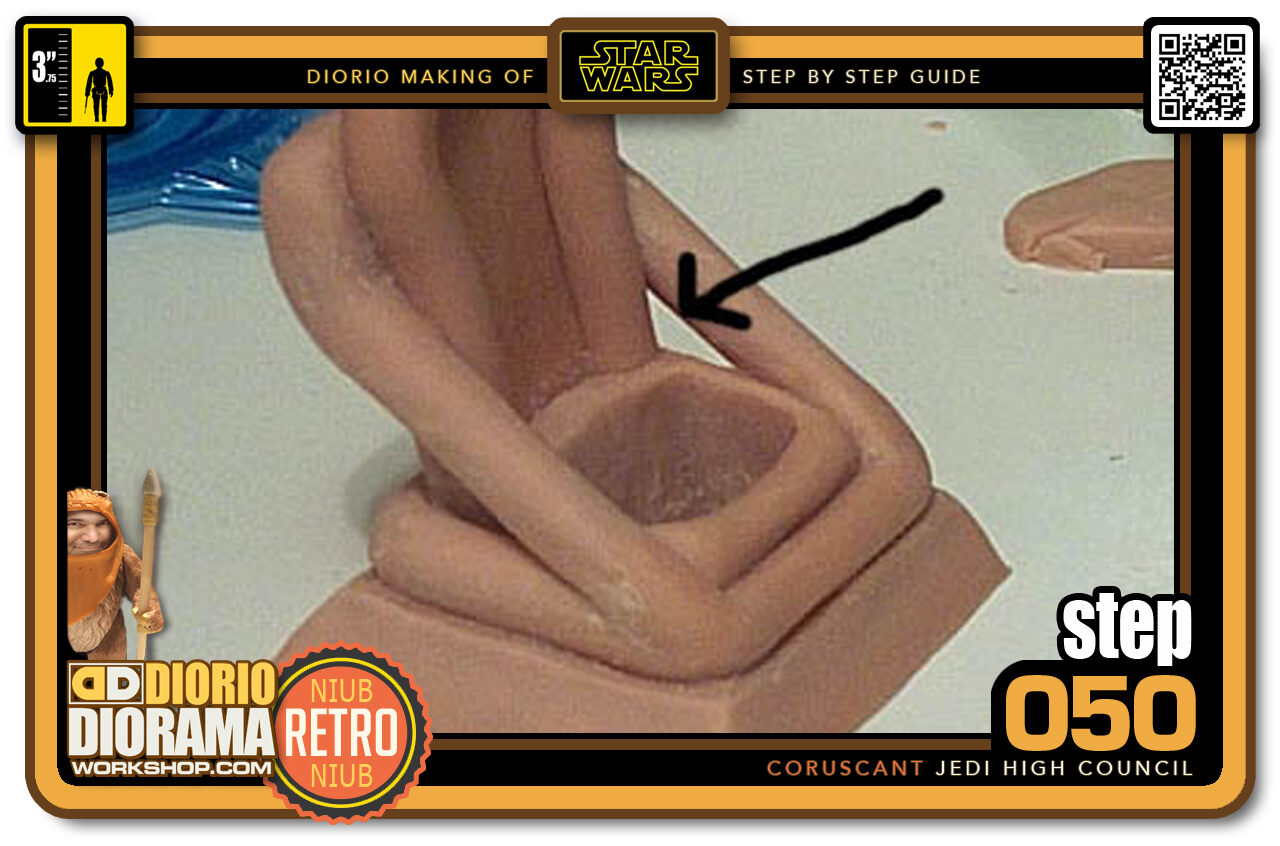
- Step 050 >> These gaps are movie accurate but will cause me a major headache for my mold process, so I decided to fill it in and will use paint to give the illusion of a gap later.
-
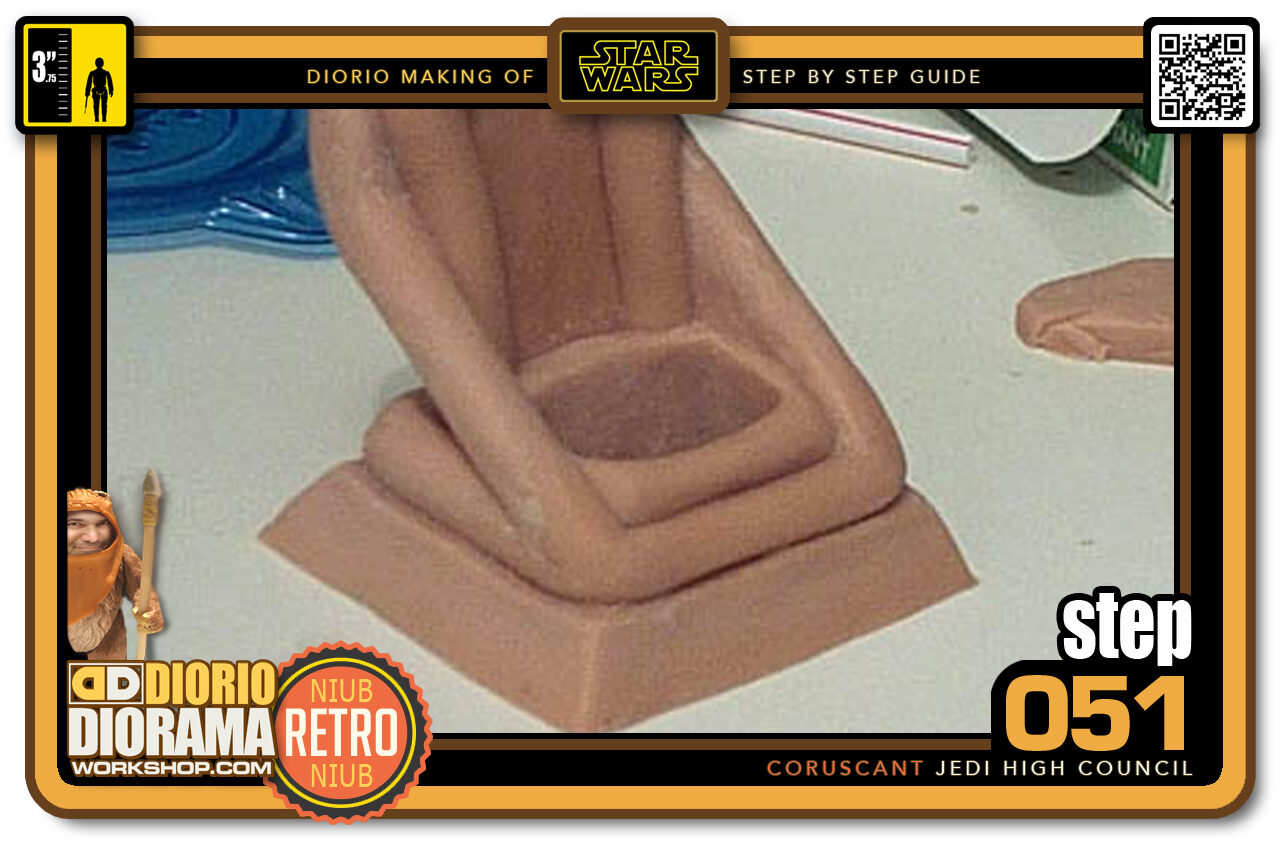
- Step 051 >> This is what the chair looks like with the gap filled. Once the figure is seated it will hardly be visible anyways. You cannot see the fill on the left side of the picture as the tube sticks out far enough to hide our change in design.
-
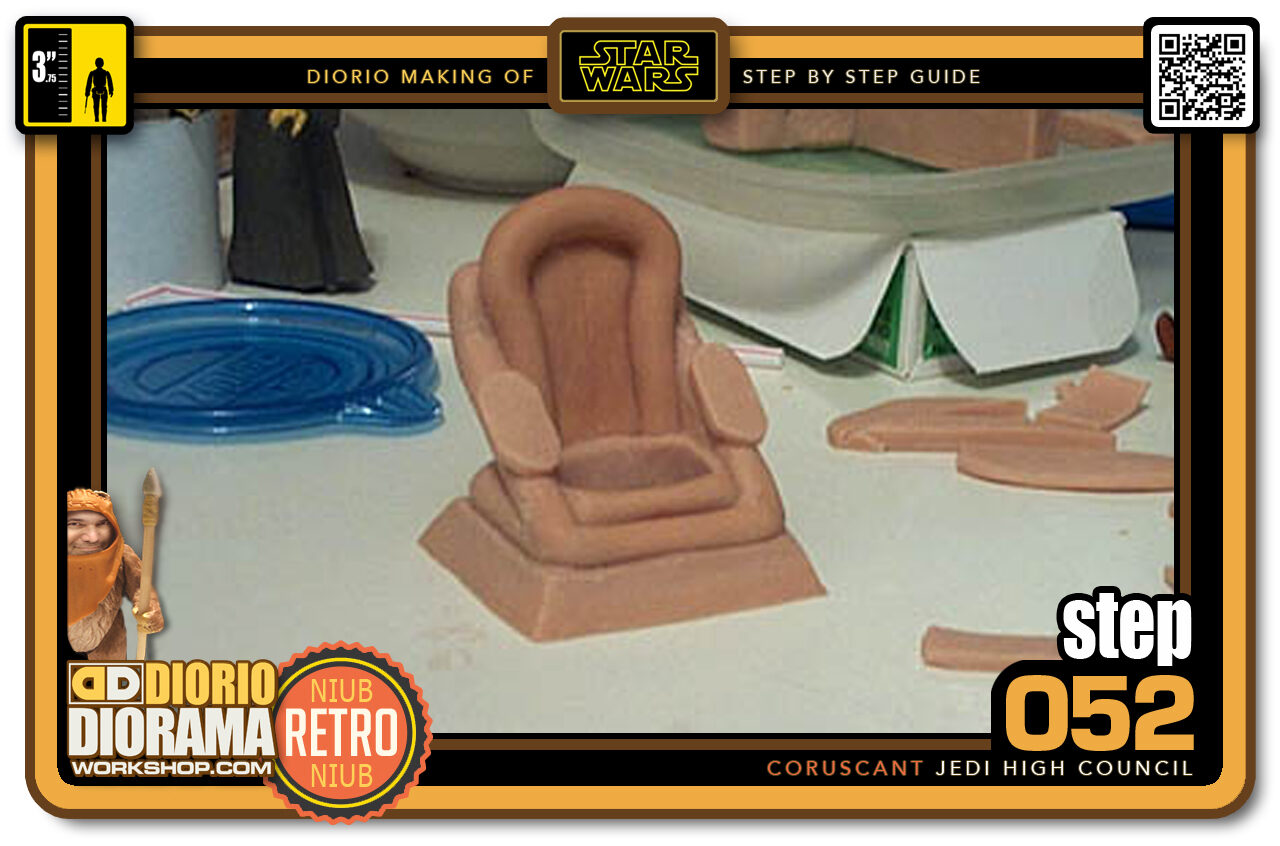
- Step 052 >> Next step are the little pillow arm rests. Cut out small allongated oval shapes and place them on the tubes at an even height.
-
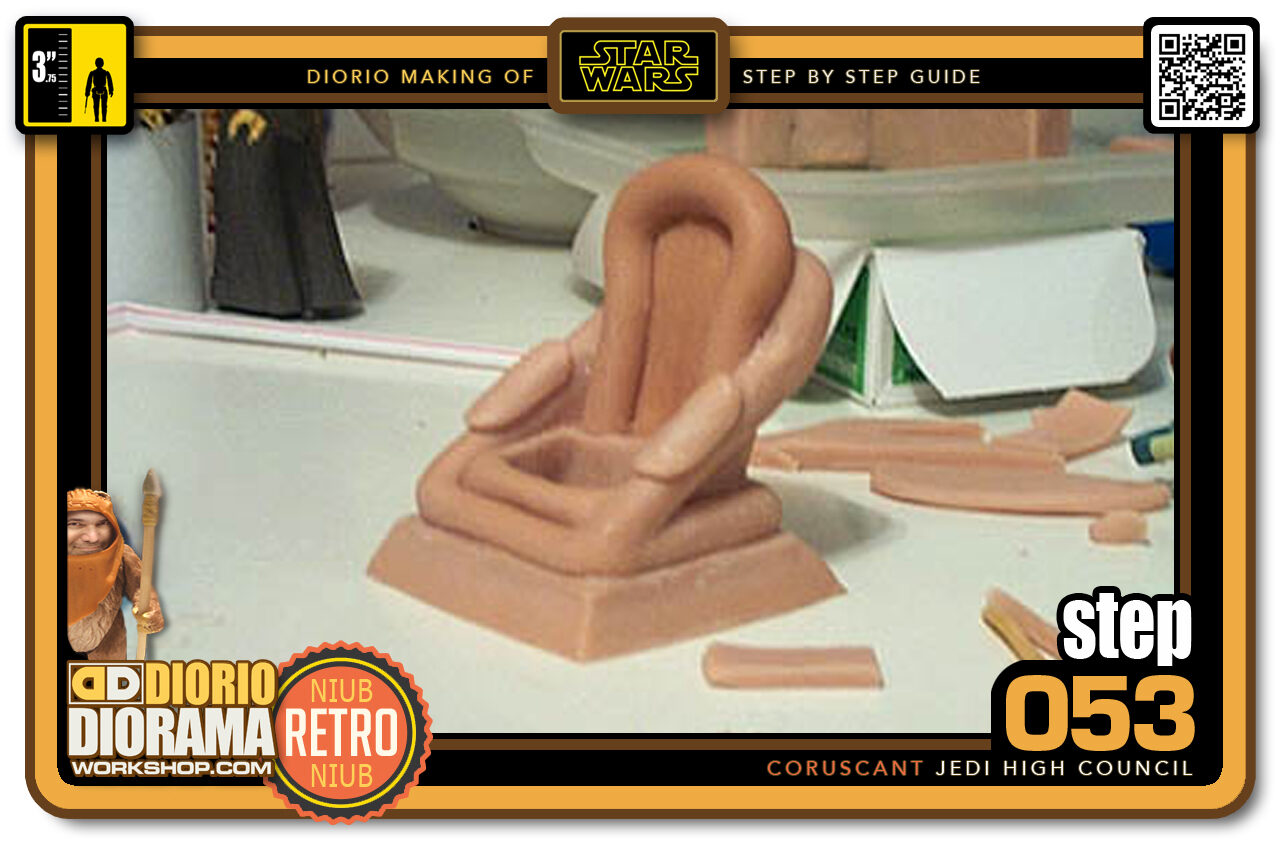
- Step 053 >> Now press down with your fingers to make them "wrap" around the tube. use your tools to smooths out the edges and blend the pieces into 1.
-
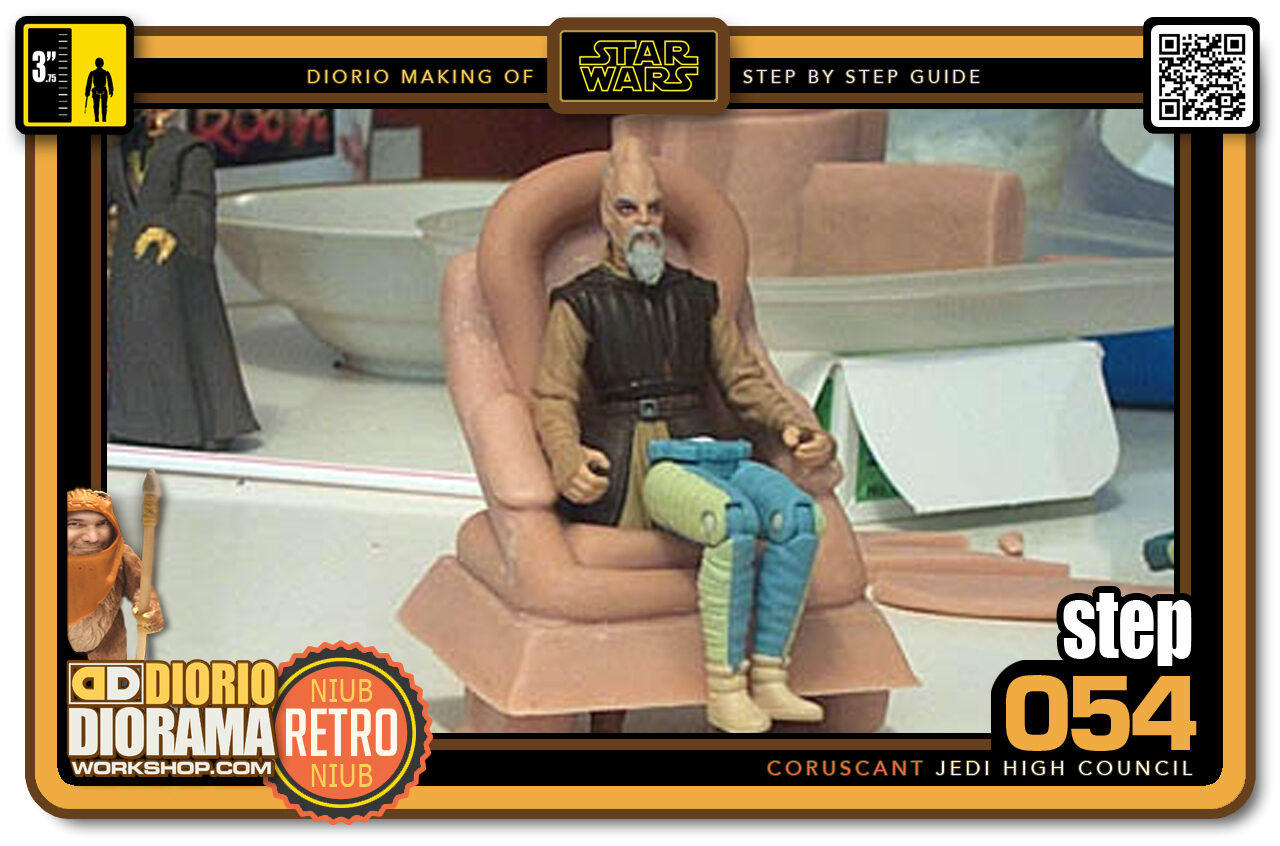
- Step 054 >> A picture of the finished chair with our Jedi sporting some lovely stockings. hee hee. As you can see, when the chair will be placed on a raised platform (like the actual movie set was for the puppeteers) you will not have to ruin your figure to make him sit. He will stand right through the chair and have fake legs do the sitting for him. NO NO NO not Greedo legs ! ;P After moulding the chair, my next step is Sculpting every Jedi's legs.
-
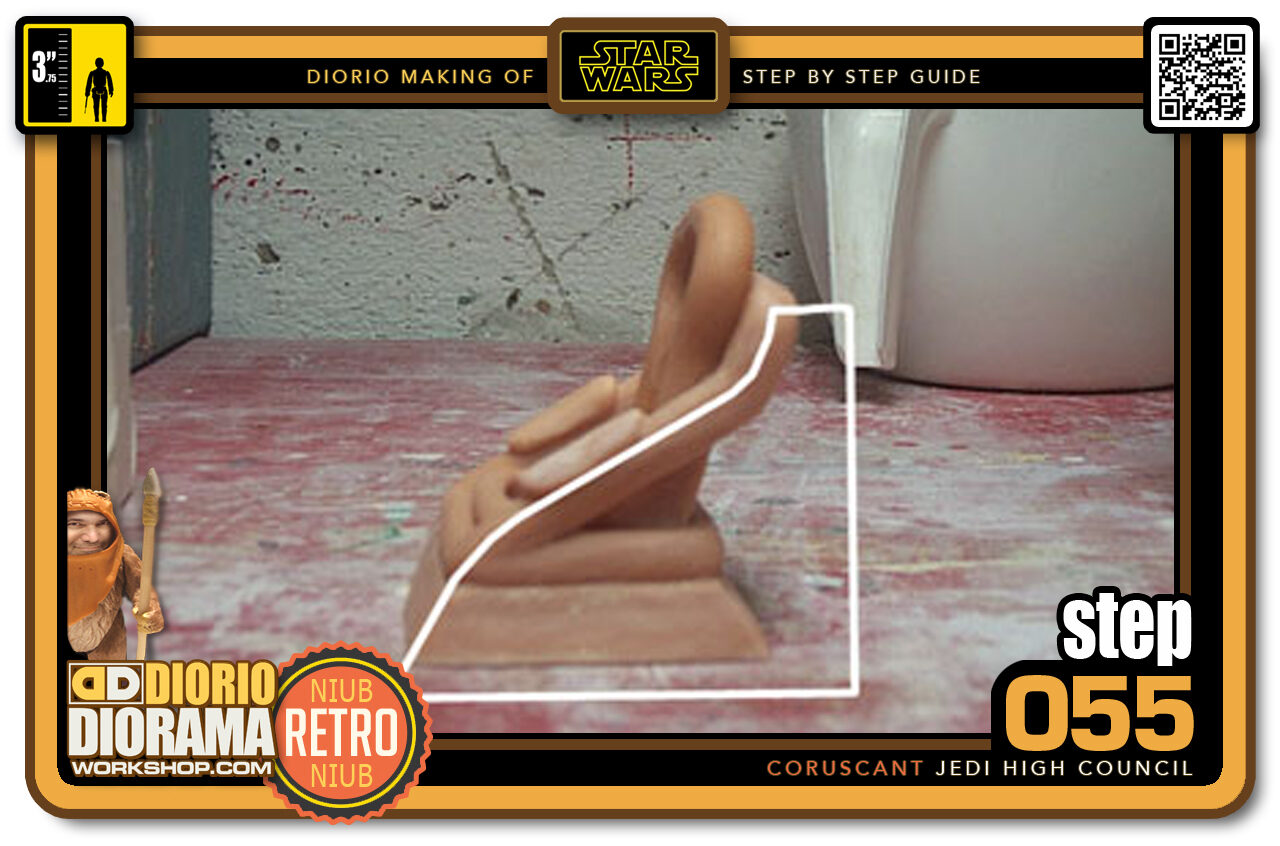
- Step 055 >> This chair is a bit more complex to mold. I must find a way to divide the chair in 2 halves so that the mold will easily come apart and removal of the resin cast won't get stuck. The white lines indicate the most simple division that should do the trick.
-
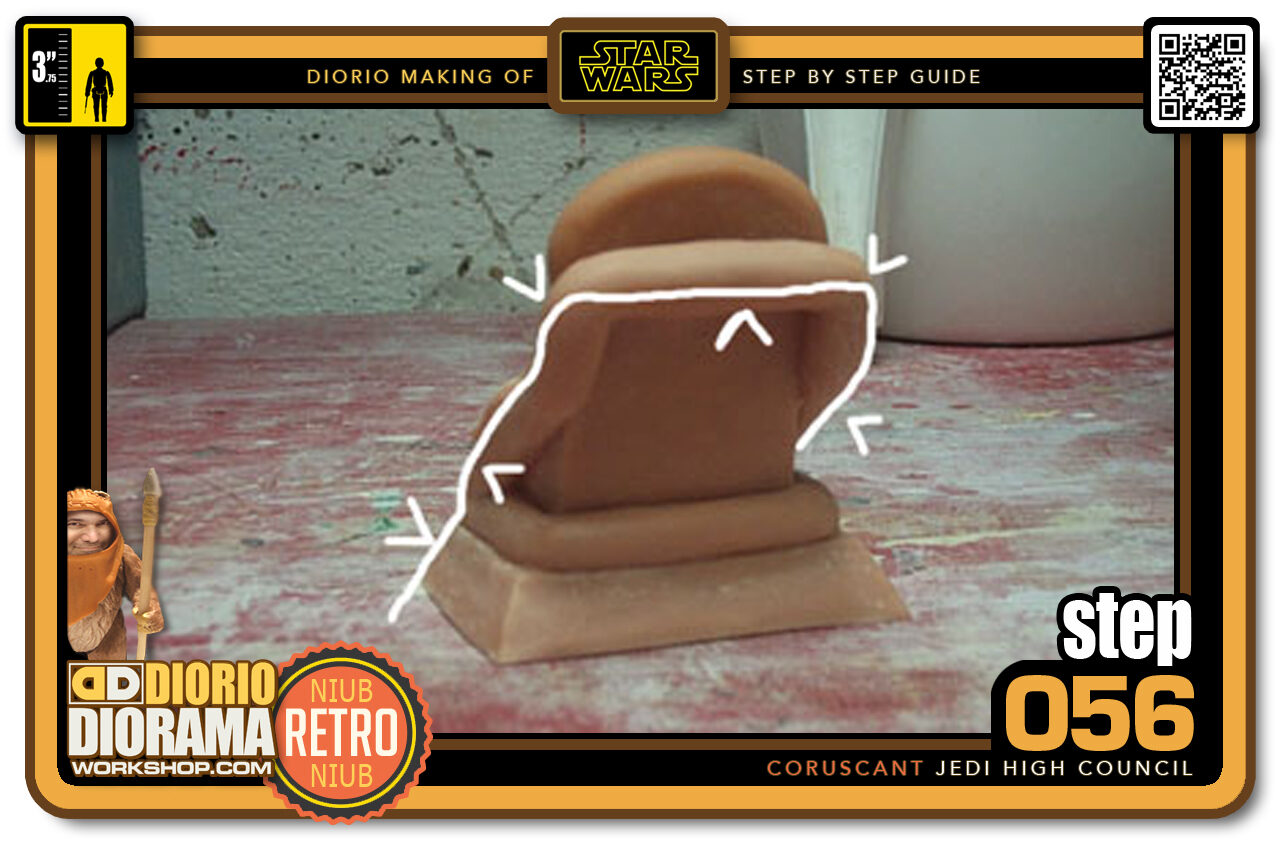
- Step 056 >> Here is a view from behind. Having the division in the center of the tubes should also facilitate the sanding of excess resin that reveals the molds joint.
-
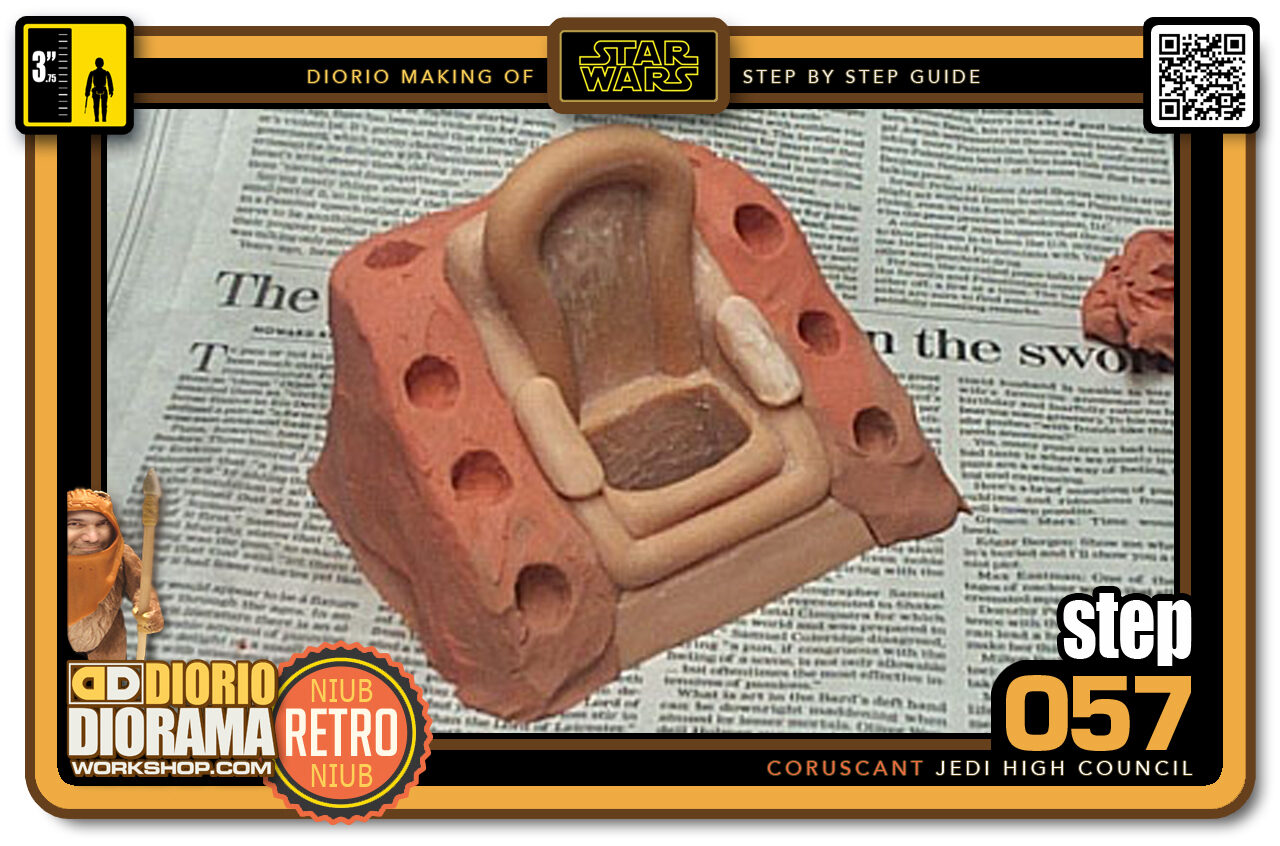
- Step 057 >> Now that I know where I want to seperate the mold, I must make a division wall in plastiscine that will prevent the silicone from attaching to the back half of the chair. The holes all around the side are made to "lock" the 2 halves in place and prevent them to slip during casting. That would be bad and give us a deformed chair.
-
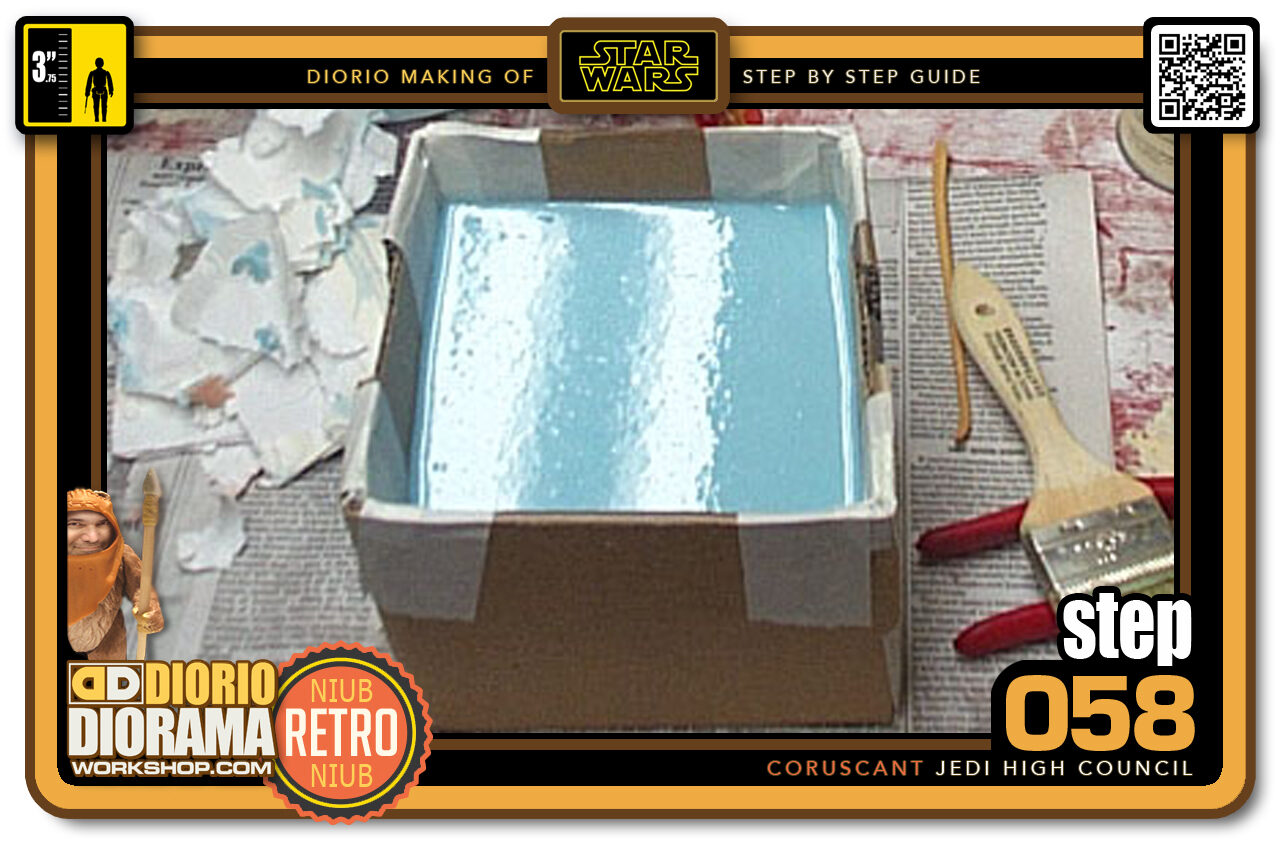
- Step 058 >> Next I build a simple box shape out of carboard and spray the insides with release agent. I can then use my trusty por-A-Mold and pour the Silicone mixture into the box.
-
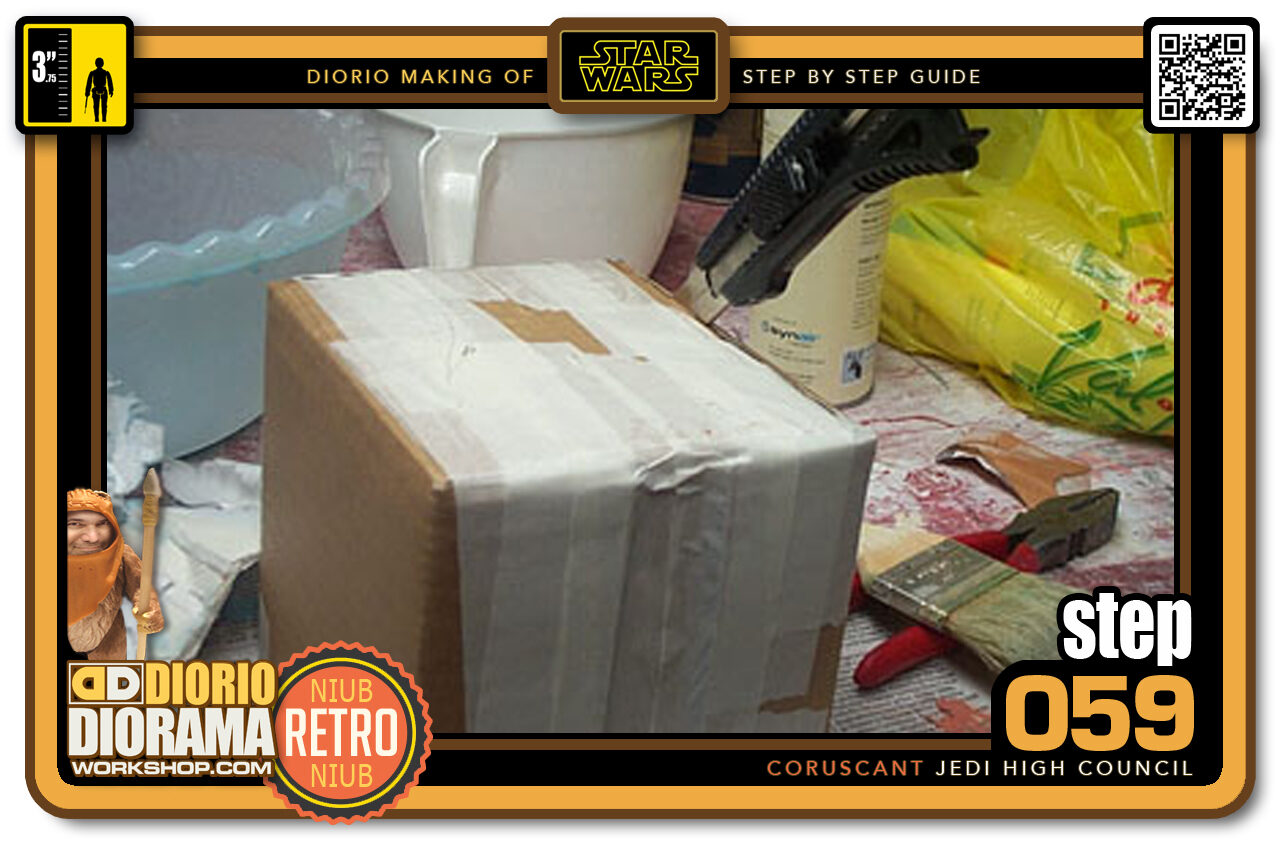
- Step 059 >> The next day I flip the box over and use my Xacto knife to remove the bottom of the box.
-
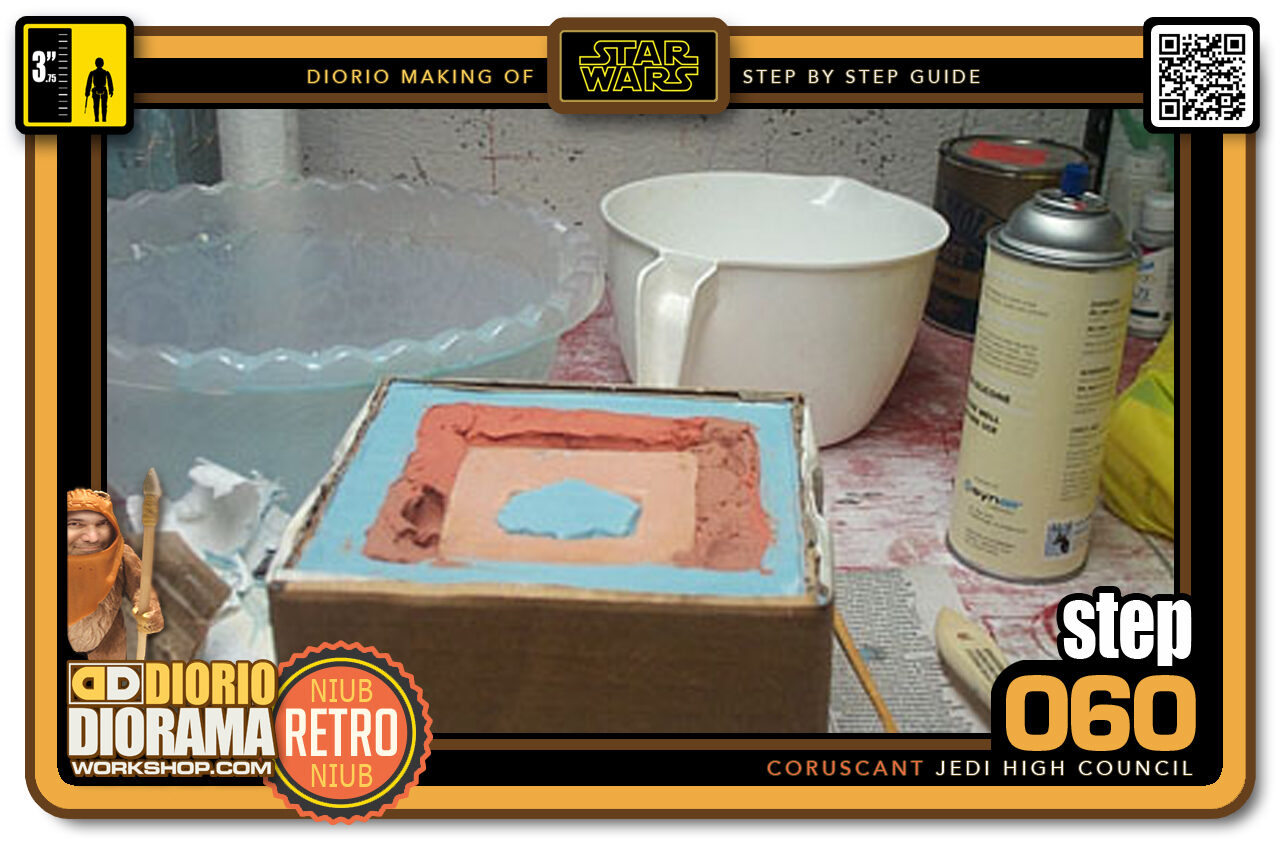
- Step 060 >> This exposes us to the bottom of the chair and the plastiscine that we used to cover the back half of the Silicone mould.
.
Did you already build this Diorama ? At home or at our Star Wars Celebration Diorama Builders workshop ? Would you like to show it in the site’s GALLERY VISITORS DIORAMAS section, YES ? That is Awesome !!! You can find out all the details on how to email me your photos on the VISITORS SUBMISSIONS INFO page … When I get your photos, I will create your very own page just like this one. You may not realize it but work does inspire others to join in the fun of making Action Figure Dioramas.
.
NOT FOR RESALE ALL Decals, tutorials and artwork are ©FrankDiorio (dioramaworkshop.com) and offered FOR FREE to the fans – that would be you ? so you can build and display my diorama designs in your very own home. I realize I cannot control what one does with my graphics once I place them on the web, I can only ask you as one fan to another, please respect the artist and do not be that jerk who uses my designs and tutorials to build a copy of my work only to sell it on EBAY or trade/sale groups and forums. Thank You. Frank.
.

.
.
If you have a facebook account, why not join the Official Diorama Builders Fan Club today, simply click the logo link below.
 .
.
Catch up with fellow visitors and exchange stories, read cool interviews with the crew, exchange photos, fun surprises and grab some FAN ONLY merchandise next year at actual future conventions ?
.
©2021 Frank Diorio DioramaWorkshop.Com
.
IF YOU LIKE WHAT YOU SEE, PLEASE SHARE WITH YOUR FRIENDS
USING THE SOCIAL MEDIA BUTTONS BELOW