


-
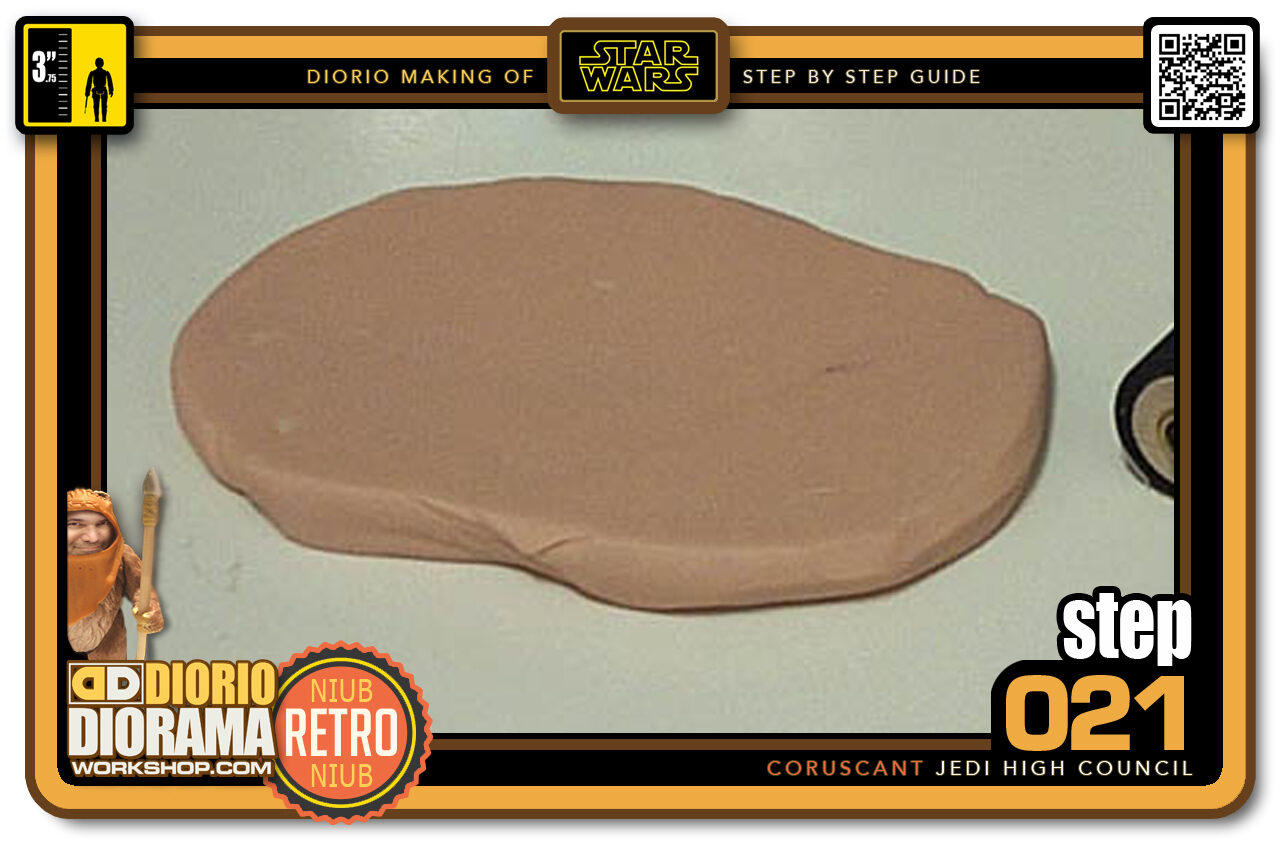
- Step 021 >> Now it's time for the pillow. Flatten a piece of Super Sculpey into a pancake like shape.
-
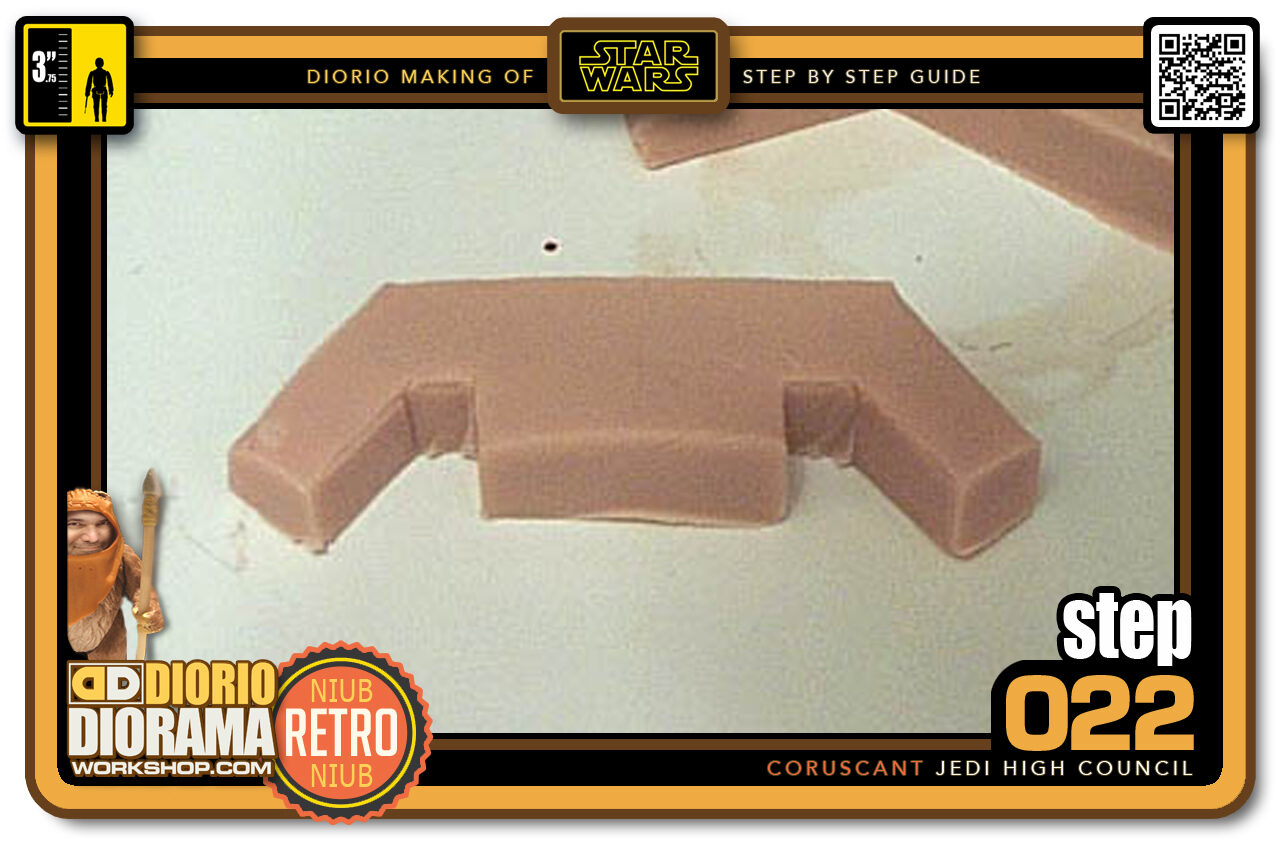
- Step 022 >> Then place it against the chairs back and trace and cut this pattern. The grooves in this shape is where the armrests will support the pillow.
-
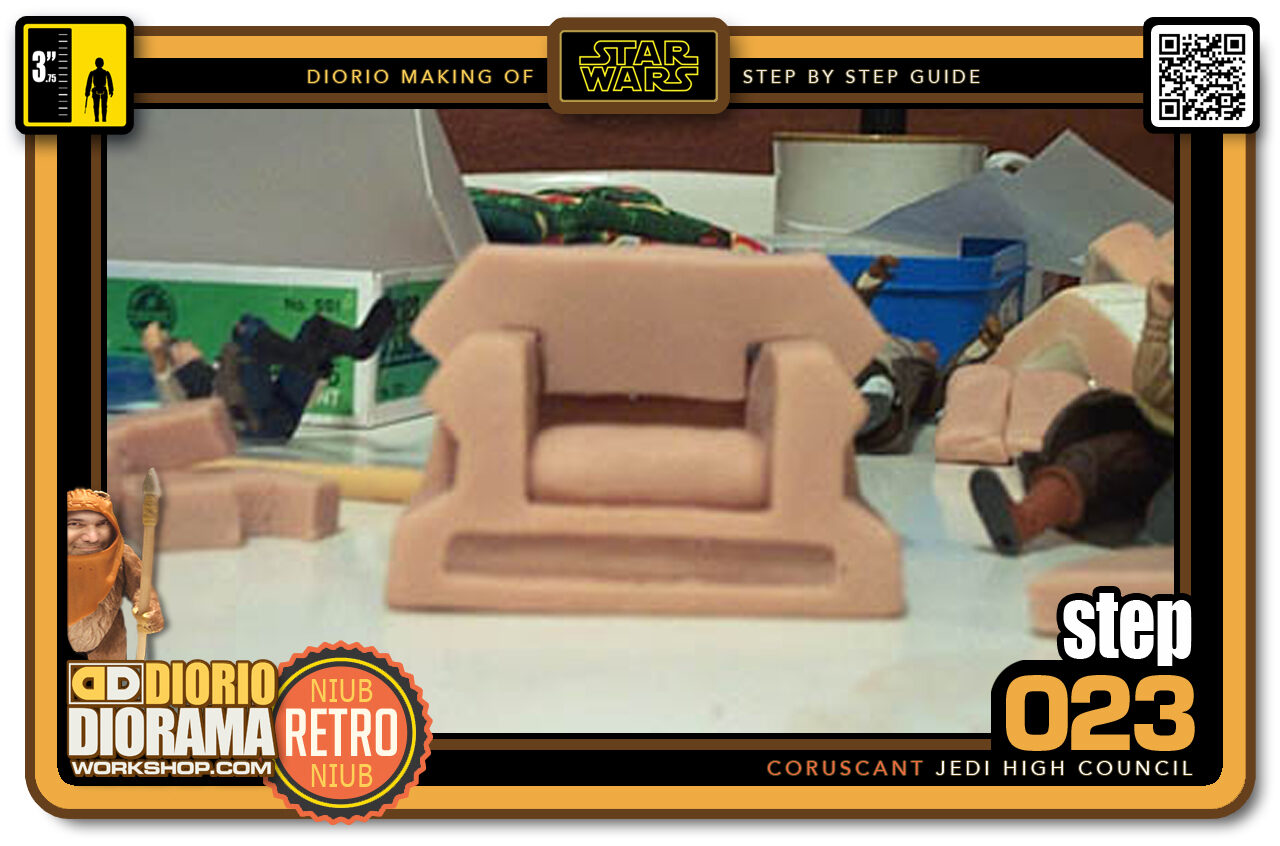
- Step 023 >> Don't rub your eyes the picture is fuzzy 🙂 This is how the pillow should fit once it is placed on the chair. Now cut the excess pillow edges of both sides using the angle of the chairs side for proper length.
-
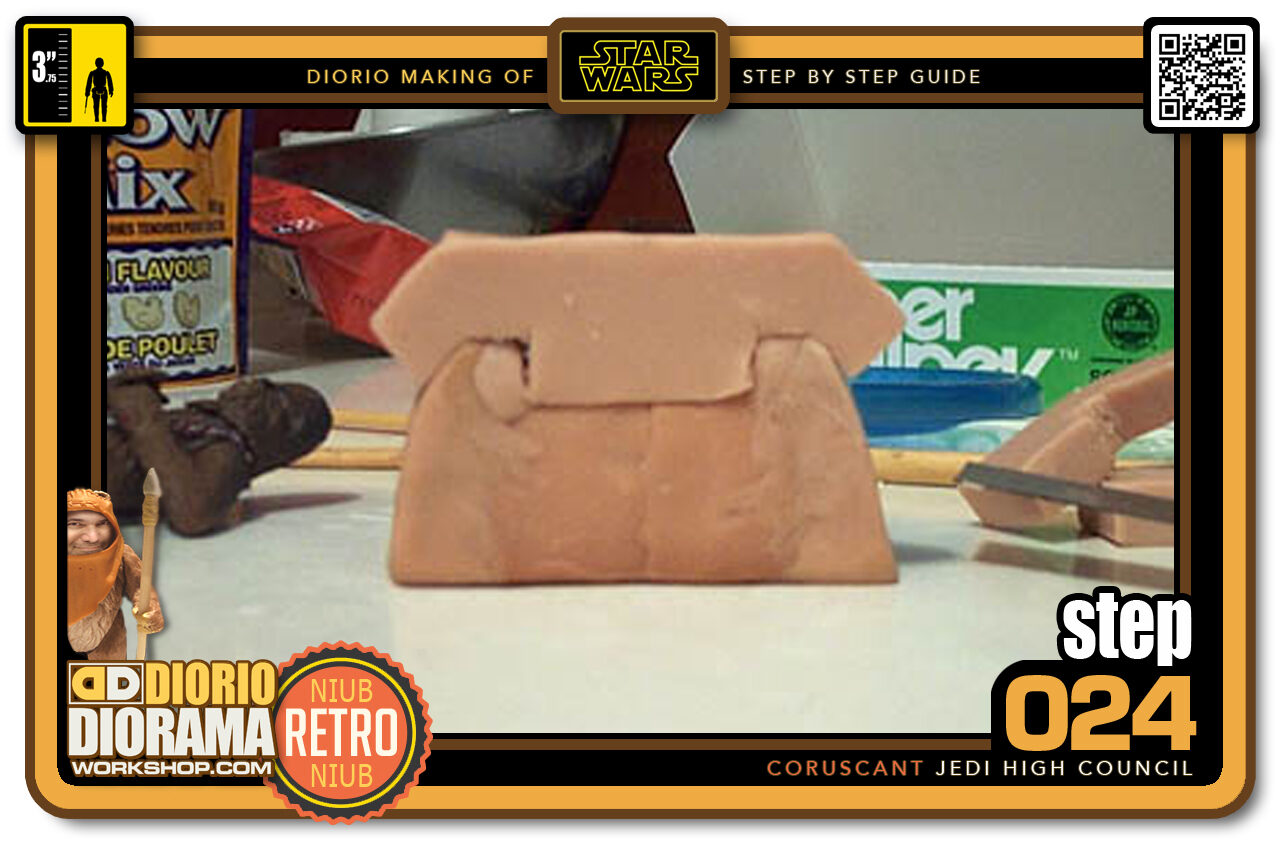
- Step 024 >> This is what the back of the chair looks like with the pillow on. Just add a small amount of Super Sculpey and smooth out all the joints.
-
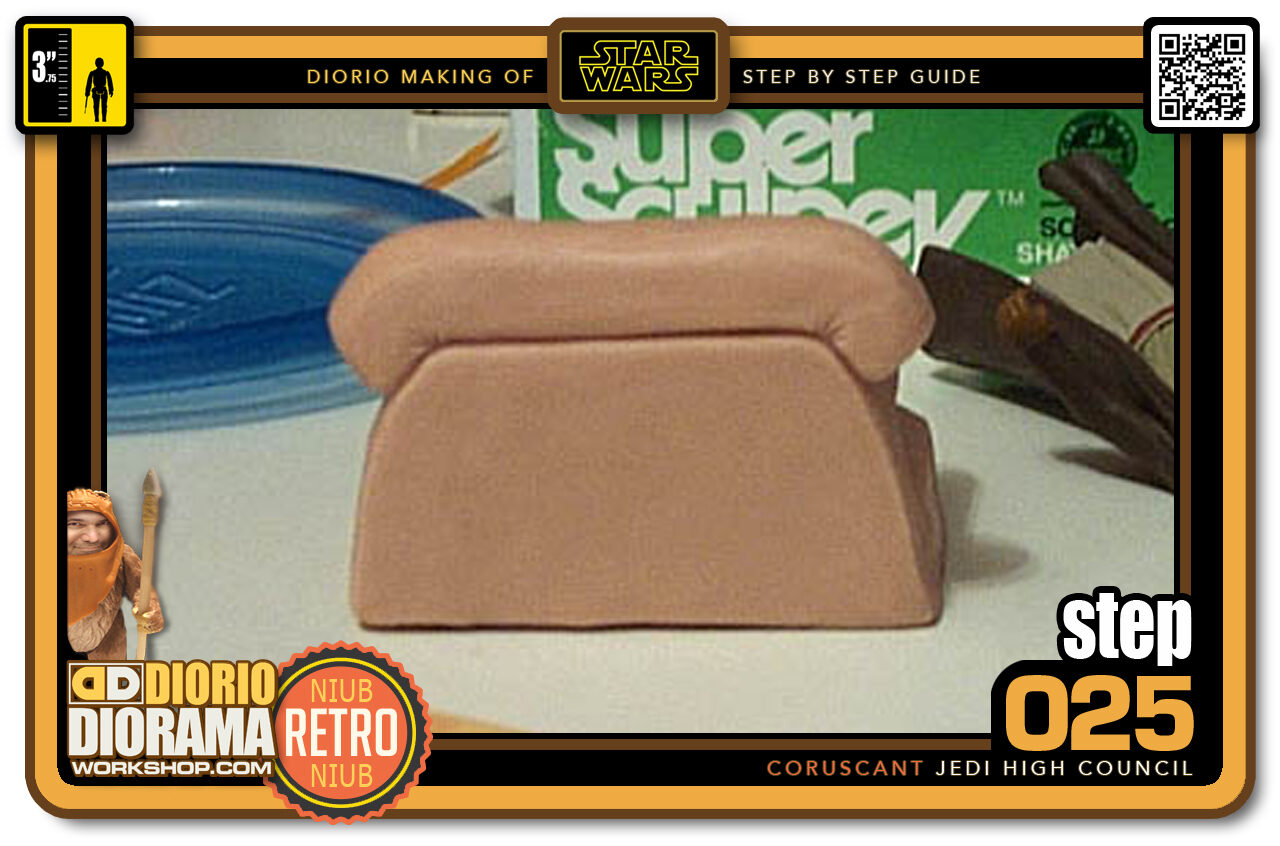
- Step 025 >> Once everything is smooth, using your tools, make an indentation to simulate the pillow resting on the chair. You can even add little pleats in the corners where the material would fold.
-
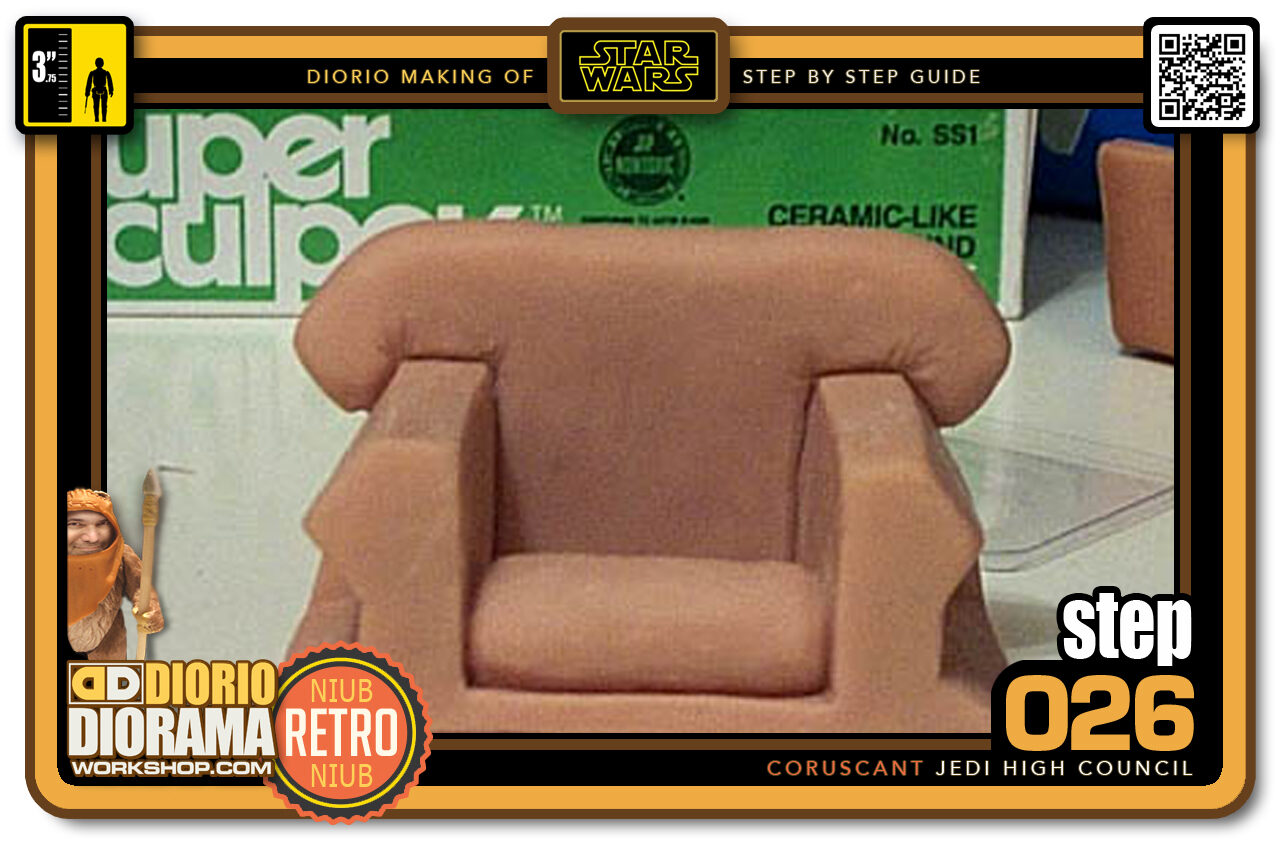
- Step 026 >> Now repeat the same thing for the front. Round ouff the pillows corners and add small pleats details making sure to keep the Sculpey smooth.
-
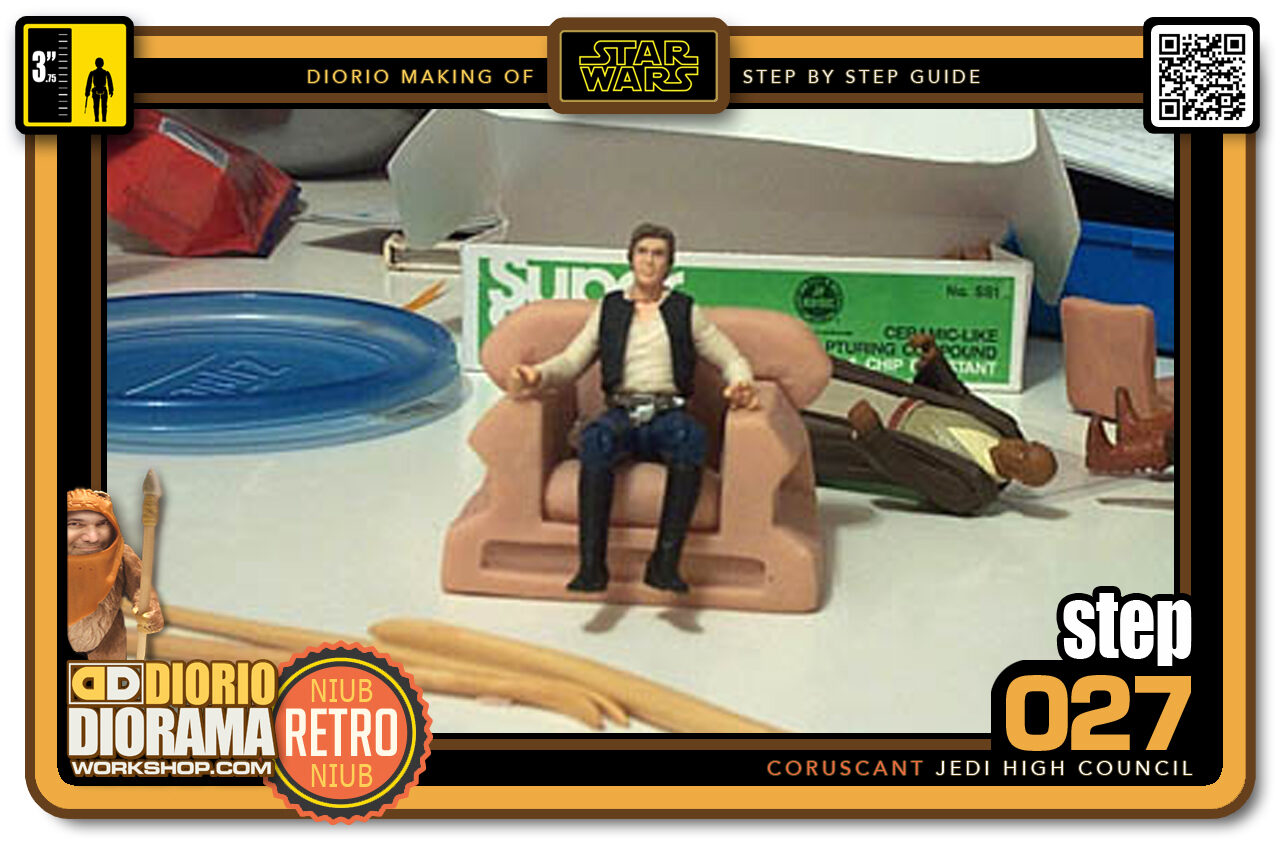
- Step 027 >> And our chair is ready to be molded. How else would it be possible to find it's way to Niubniub's trading post ? - hee hee. Looks like not only Jedi's find this chair comfy 🙂
-
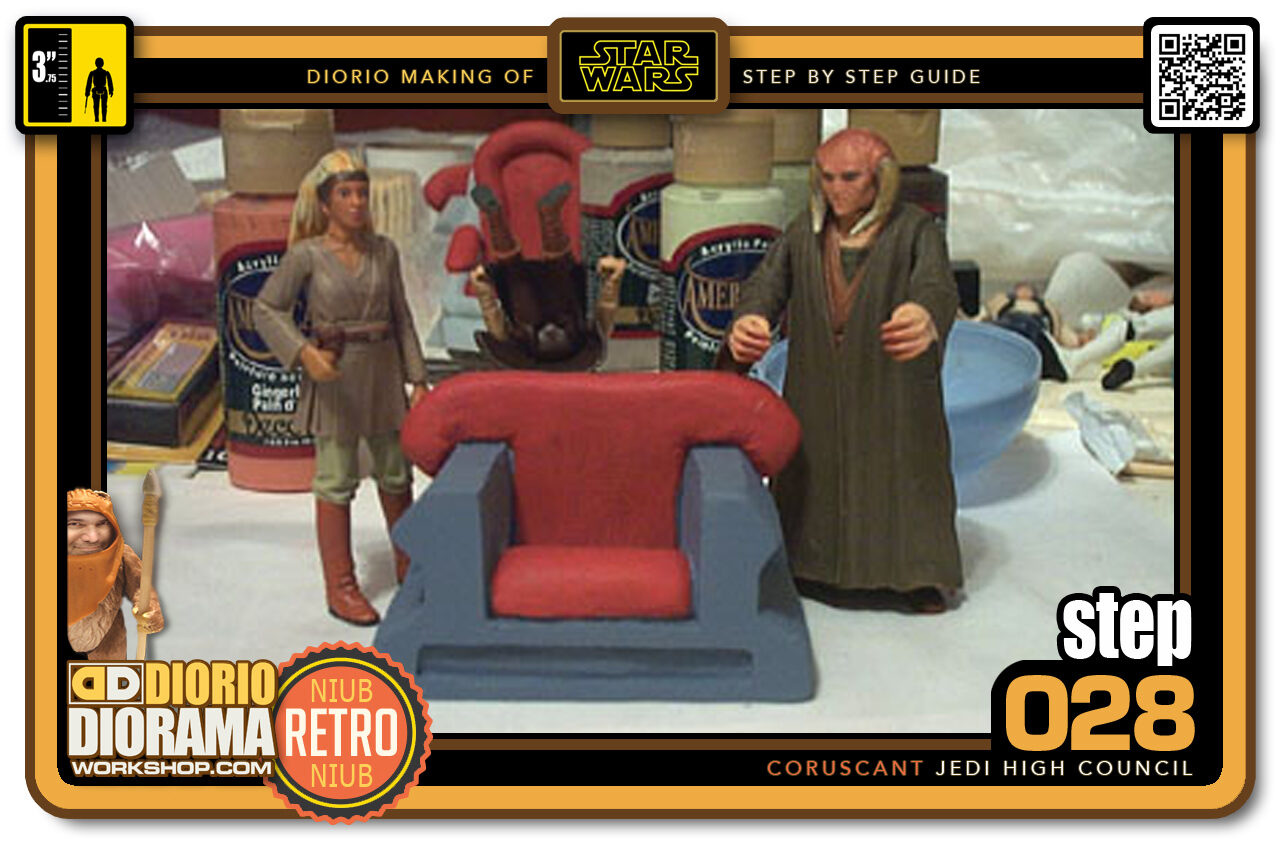
- Step 028 >> The chair as it looks once painted. Now all we need is to start customising our Jedis.
-
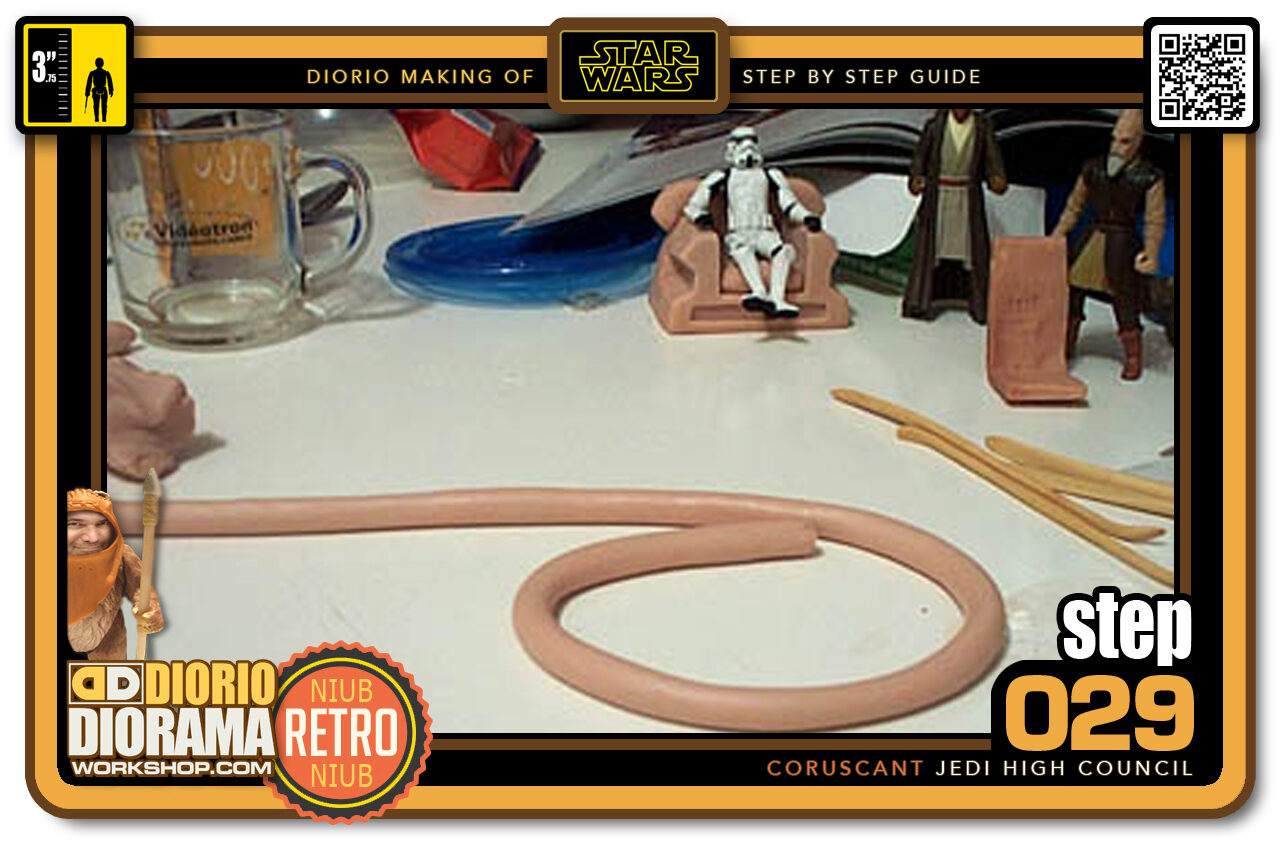
- Step 029 >> Time for Style "B" This one is a bit harder because of the metal pipes used in the real one. Start off with a snake of Super Sculpey. Hey what's a Stormtrooper doing sitting in that chair? - LOL
-
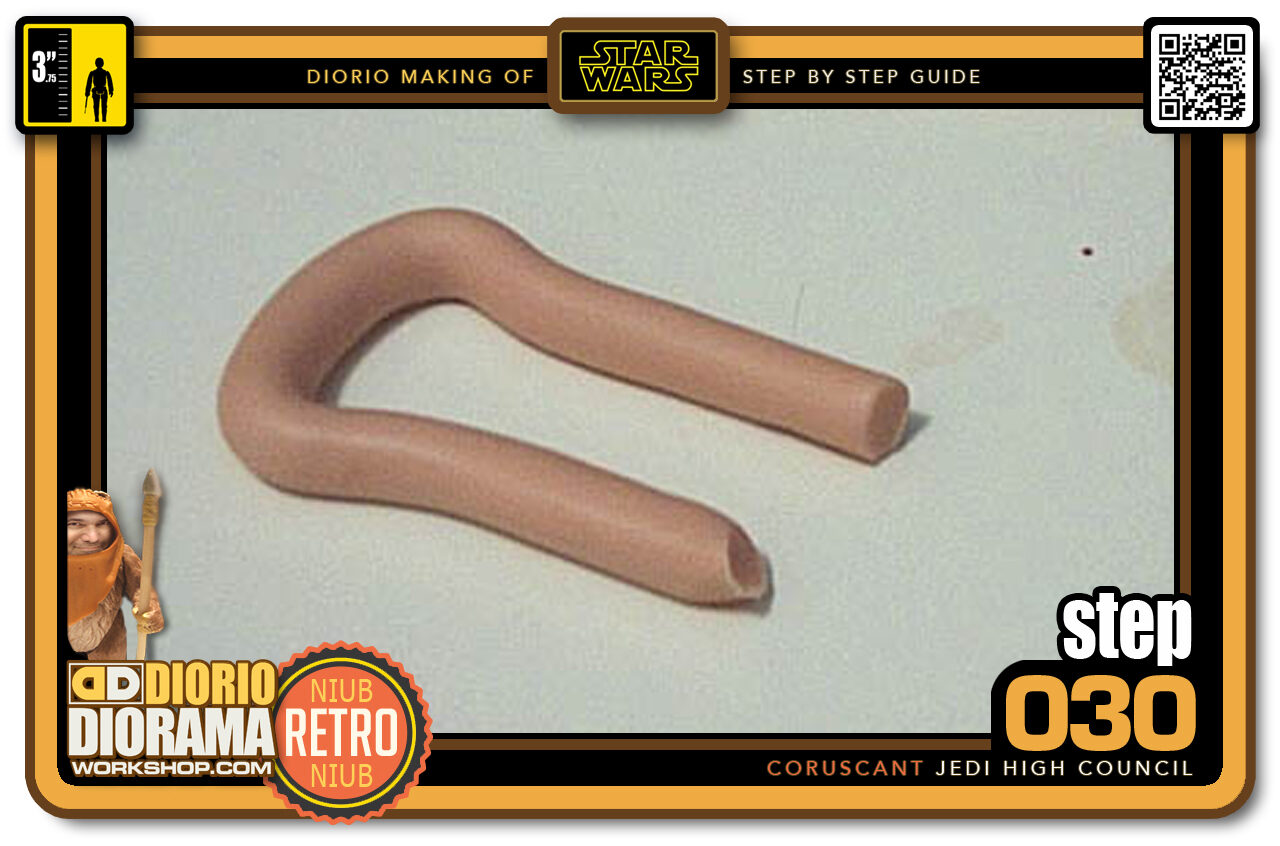
- Step 030 >> This is the shape we must make with the snake. It will become the pillow of the chair's back.
-
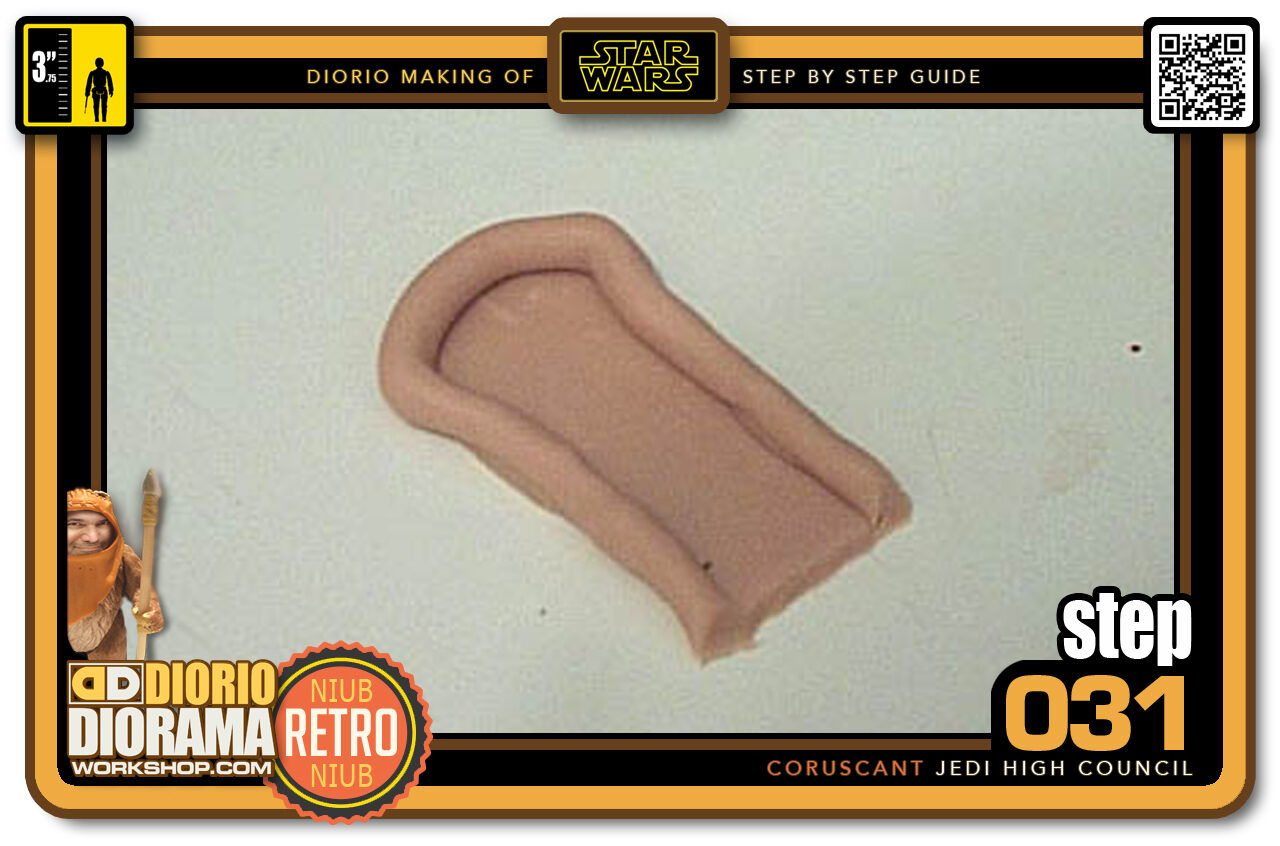
- Step 031 >> Place the pillow on a thin layer of Sculpey and bake. This will be our basis for all the other measurements. So it's best it is hardened as we will be playing around with it.
-
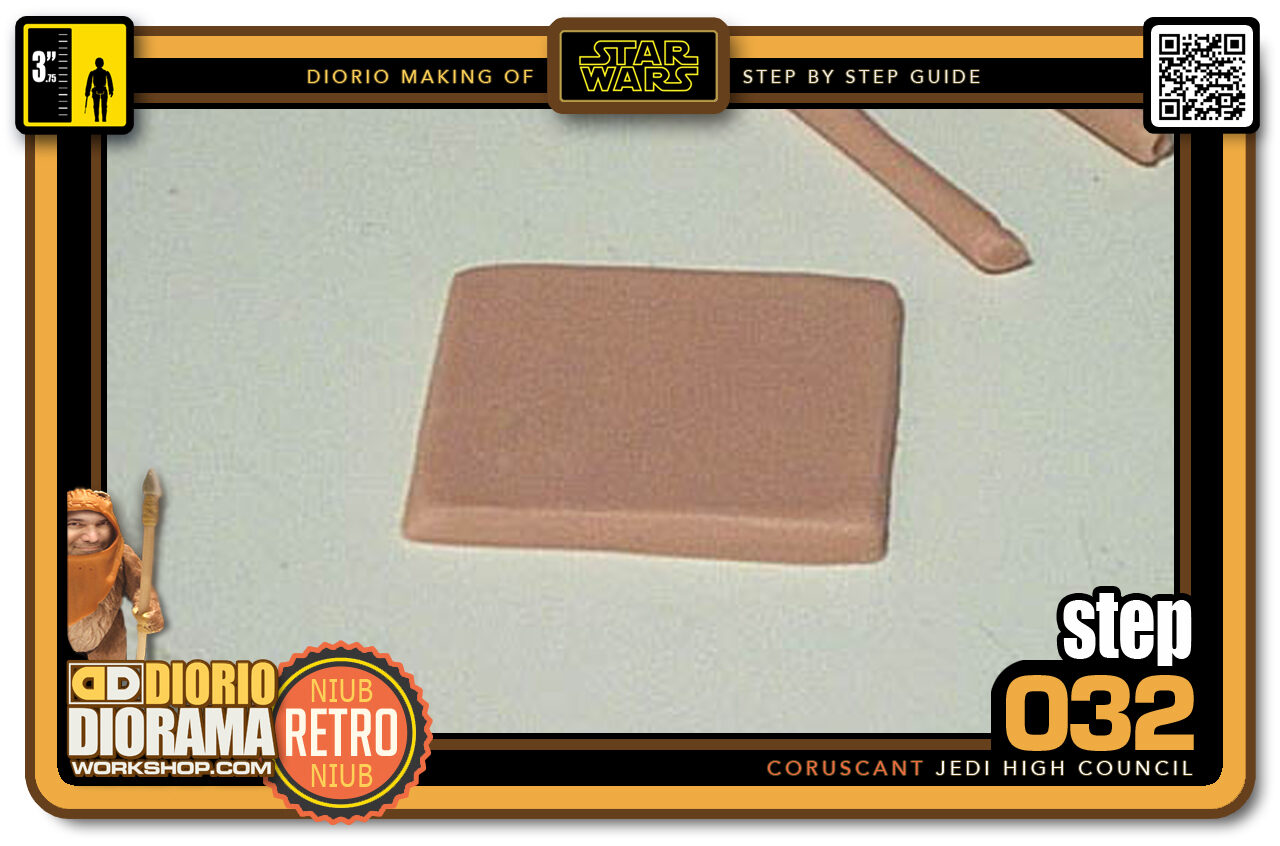
- Step 032 >> Using the baked chair back, cut out a flat rectangle shape. This is the base of the chair. Measure 1 snakes width to each side of the back for exact base size.
-
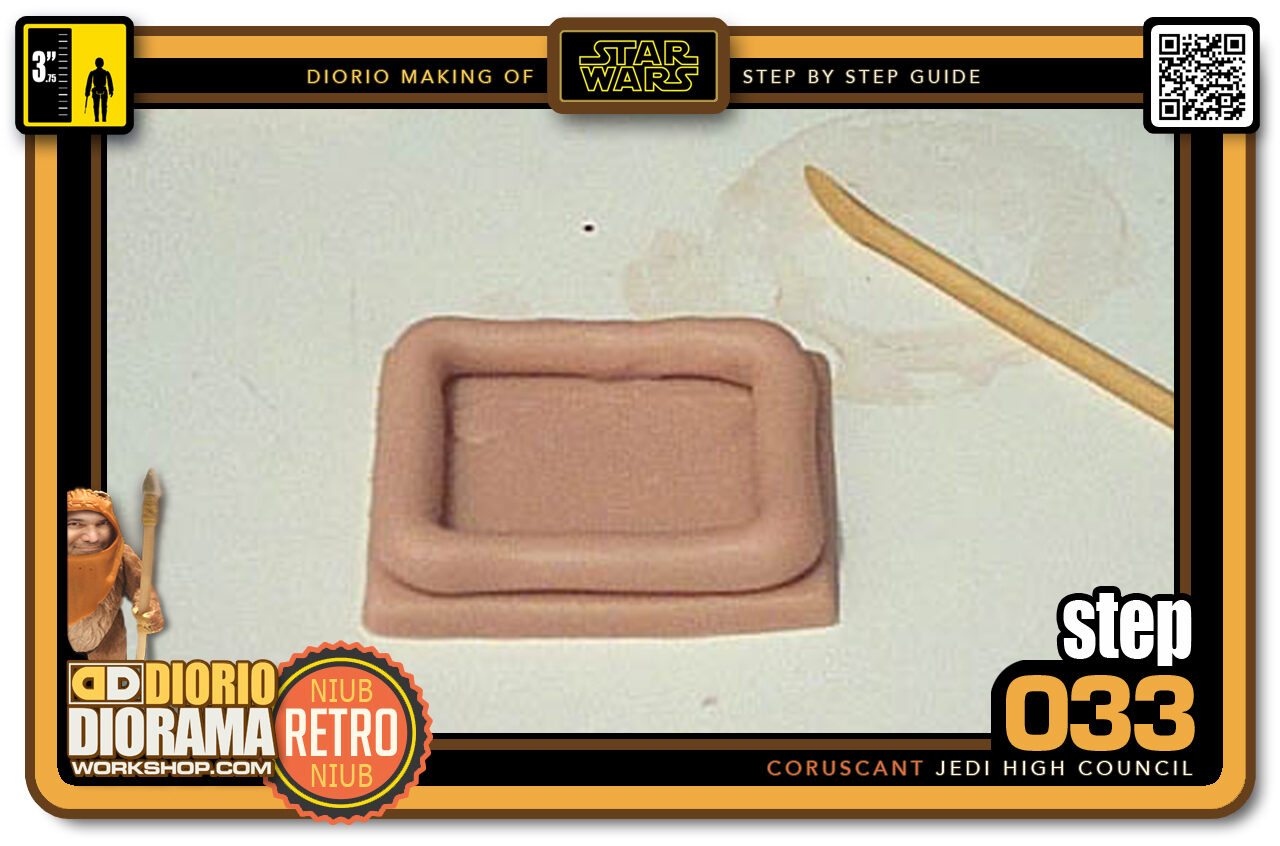
- Step 033 >> Now take another piece of snake and wrap it around the base. This will be where the chair's back rests and will also help reinforce the chair when I cut out the hole in the sitting pillow.
-
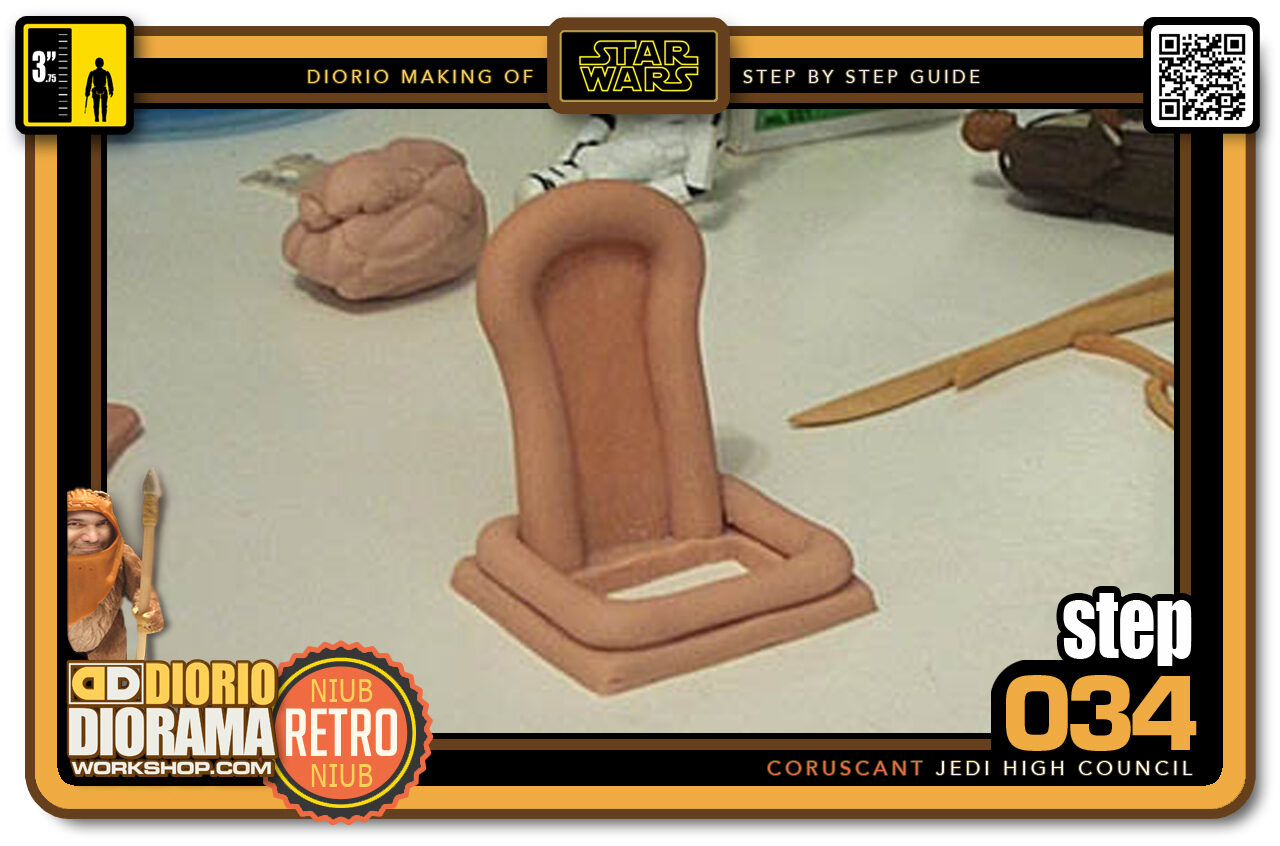
- Step 034 >> Now we are ready to put the chair's back inbetween the base's snakes. Stick in in a bit to keep in in place. I cut out a hole in the center so the figure will fit inside.
-
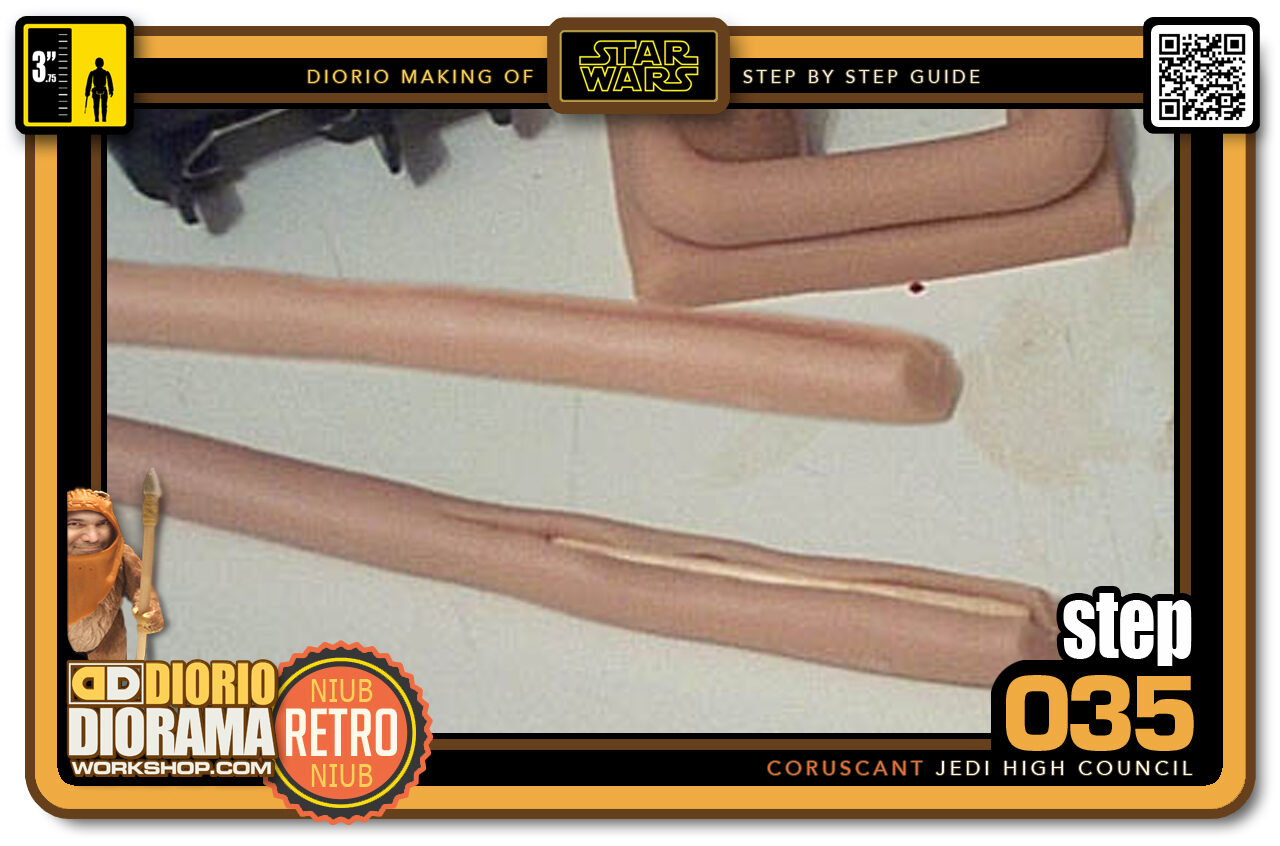
- Step 035 >> This next step is tricky. We must make the side pipes as straight as possible. So I got the idea to make a slit in the Sculpey with my exacto blade and inserted a toothpick. Re-seal the slit and smooth out the snake. The toothpicks will prevent the snake from drooping out of shape during baking.
-
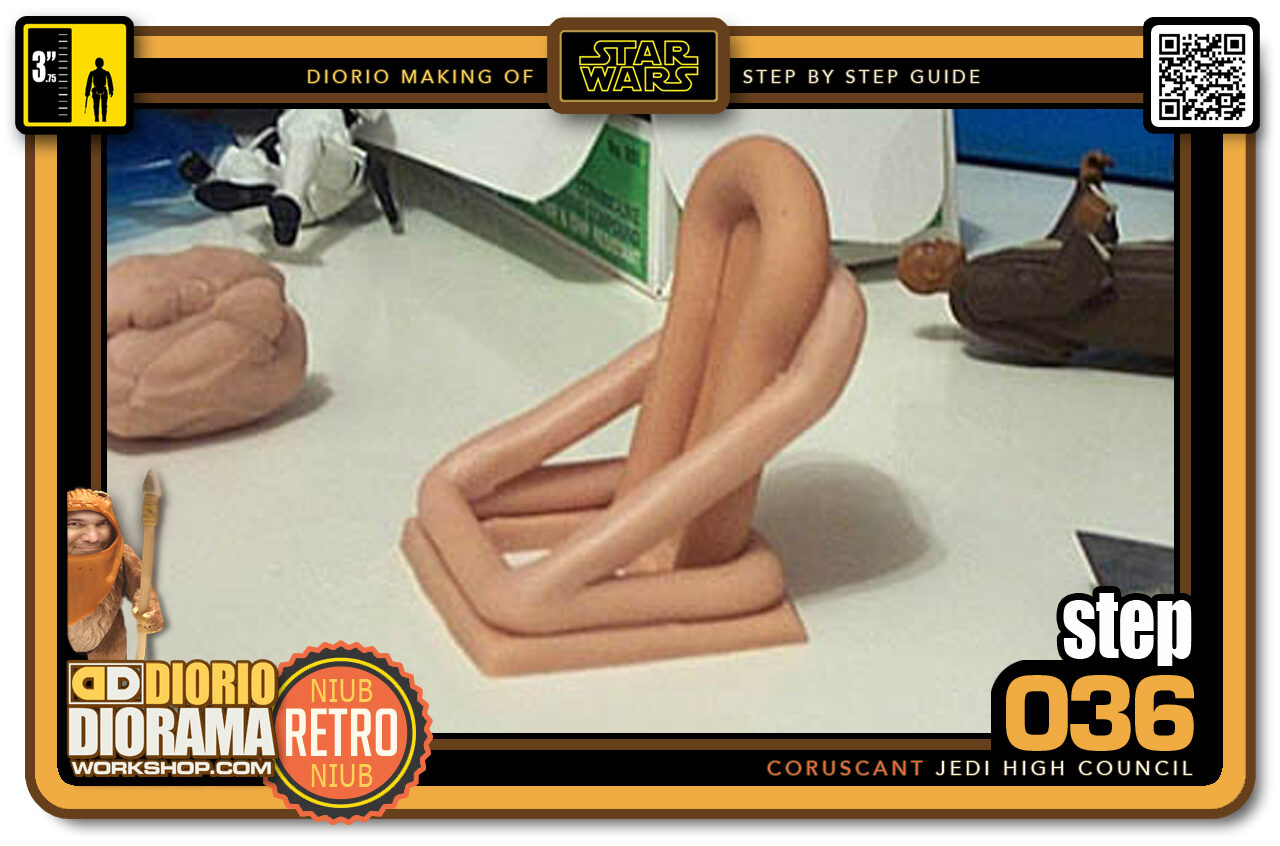
- Step 036 >> Place the snakes on the sides and blend with the front snakes of the base. The snakes go around the back as a support. There is a little area where it goes up before turning the corner.
-
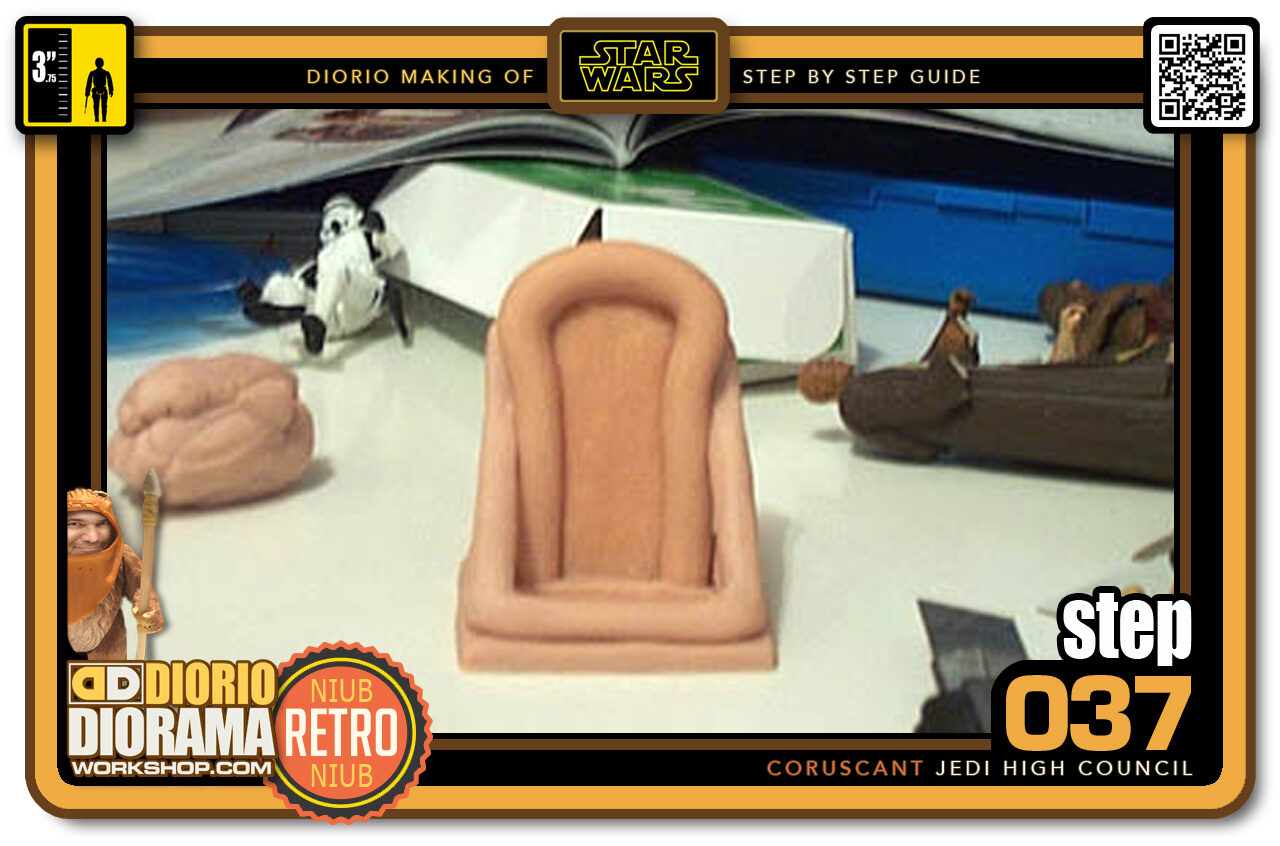
- Step 037 >> Here is what the side snakes look like from the front.
-
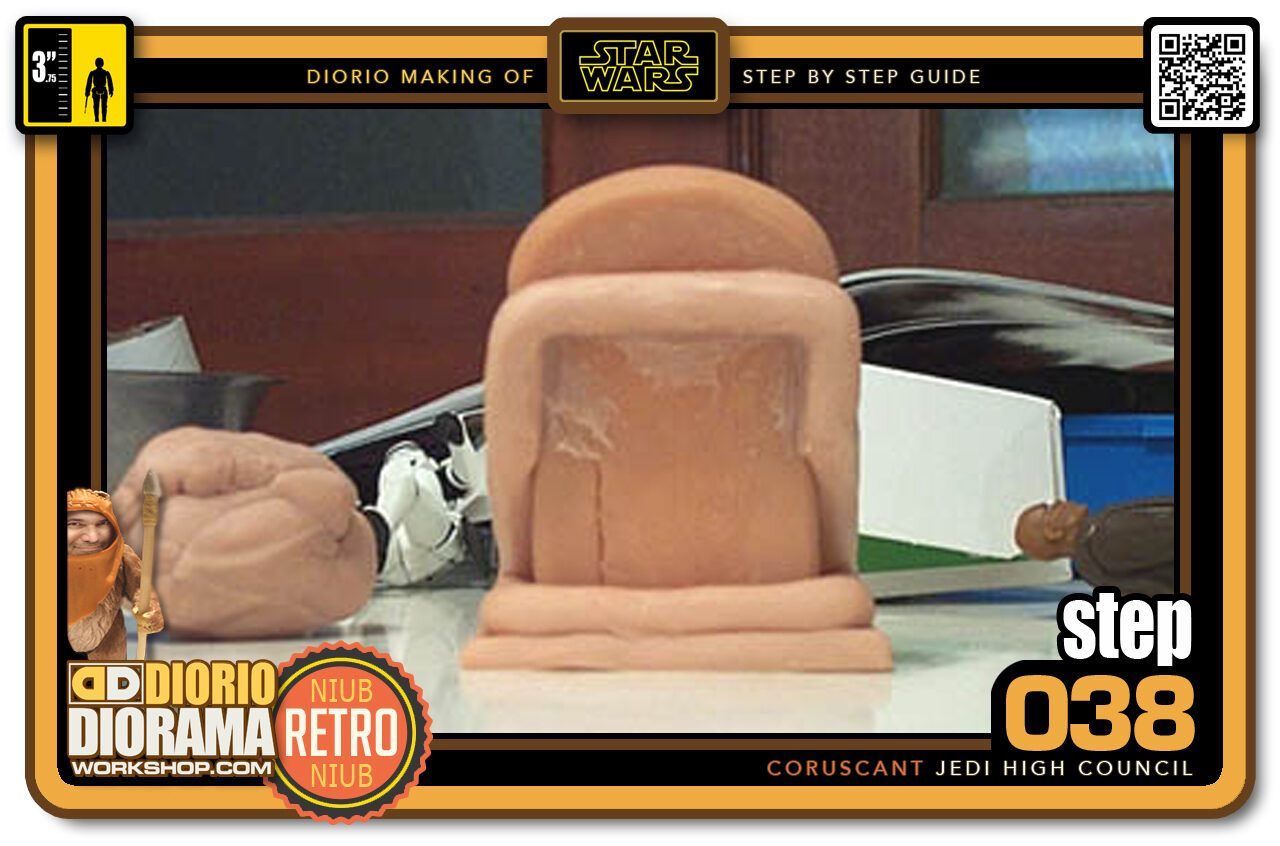
- Step 038 >> Here we are behind the chair. We can now clearly see how the snake pieces join at the top to create a support for the chair. If this isn't perfect at this point, that's ok. We will be perfecting all the snakes after we bake the chair and harden it.
-
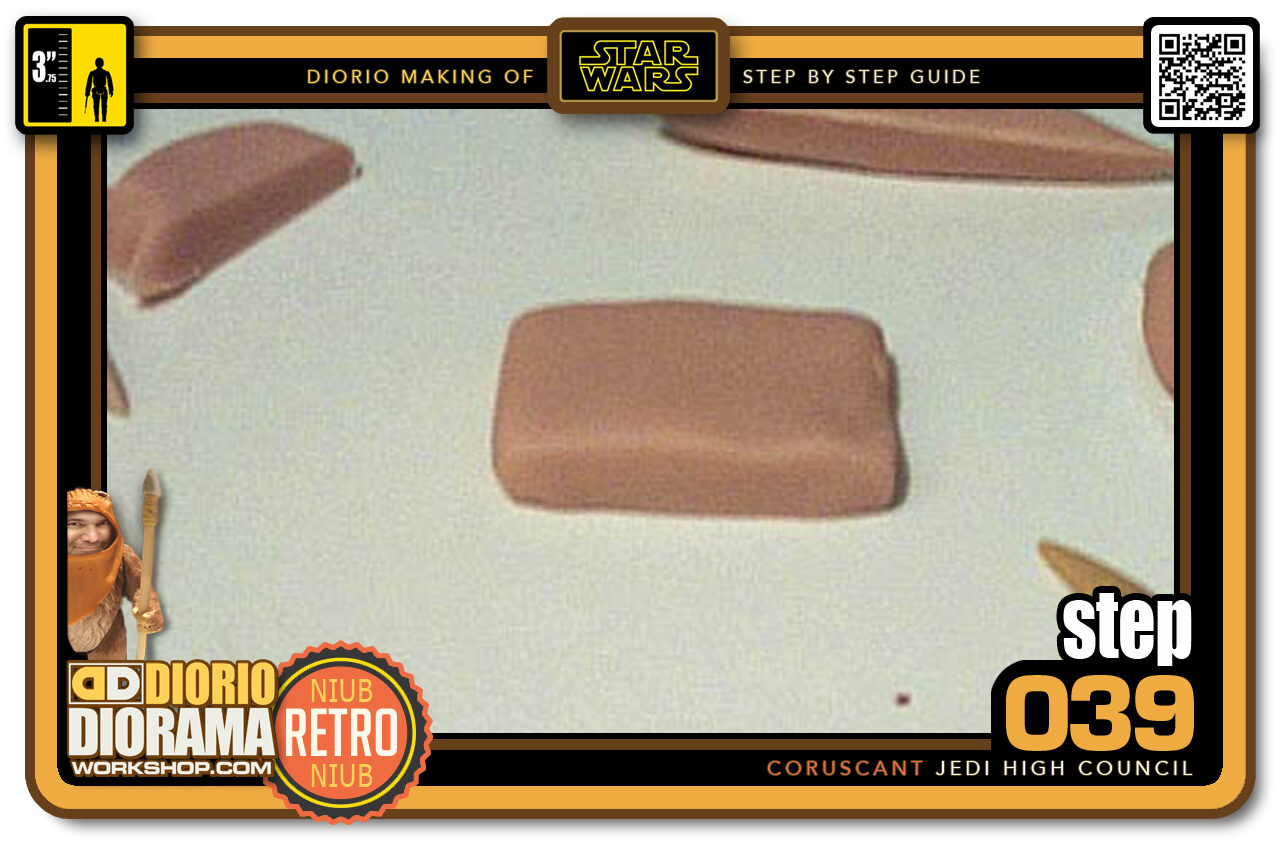
- Step 039 >> We now need to make a nice pillow for the Jedi to sit on. So smooth out a piece of sculpey and shape it into a rectangle. It should be as wide as the inside of the side snakes.
-
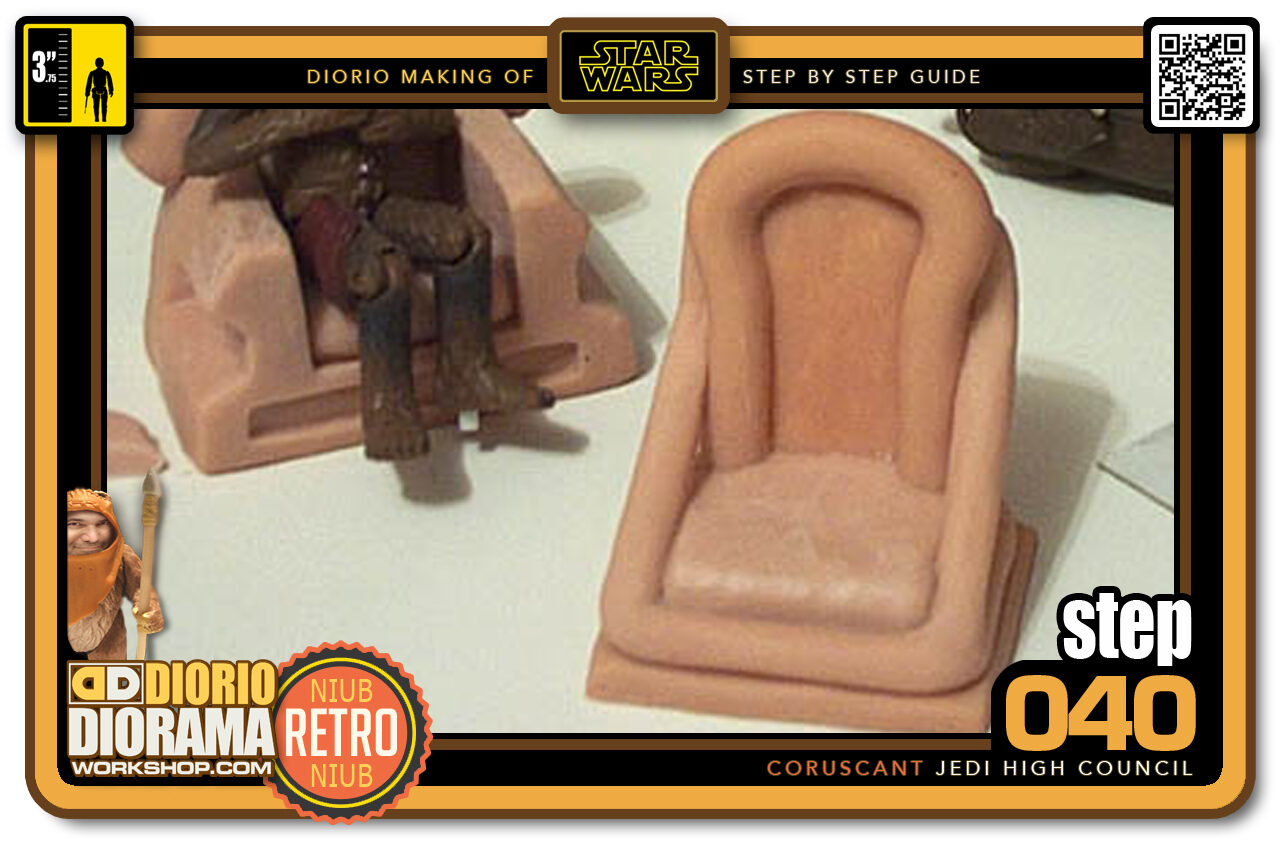
- Step 040 >> This is where the fillow was fitted. I smoothed out some of the corners and merged the rear of the pillow with the chair's back.
.
Did you already build this Diorama ? At home or at our Star Wars Celebration Diorama Builders workshop ? Would you like to show it in the site’s GALLERY VISITORS DIORAMAS section, YES ? That is Awesome !!! You can find out all the details on how to email me your photos on the VISITORS SUBMISSIONS INFO page … When I get your photos, I will create your very own page just like this one. You may not realize it but work does inspire others to join in the fun of making Action Figure Dioramas.
.
NOT FOR RESALE ALL Decals, tutorials and artwork are ©FrankDiorio (dioramaworkshop.com) and offered FOR FREE to the fans – that would be you ? so you can build and display my diorama designs in your very own home. I realize I cannot control what one does with my graphics once I place them on the web, I can only ask you as one fan to another, please respect the artist and do not be that jerk who uses my designs and tutorials to build a copy of my work only to sell it on EBAY or trade/sale groups and forums. Thank You. Frank.
.

.
.
If you have a facebook account, why not join the Official Diorama Builders Fan Club today, simply click the logo link below.
 .
.
Catch up with fellow visitors and exchange stories, read cool interviews with the crew, exchange photos, fun surprises and grab some FAN ONLY merchandise next year at actual future conventions ?
.
©2021 Frank Diorio DioramaWorkshop.Com
.
IF YOU LIKE WHAT YOU SEE, PLEASE SHARE WITH YOUR FRIENDS
USING THE SOCIAL MEDIA BUTTONS BELOW