


-

- STEP 021 > The two Hasbro 2002 Diorama Trash Compactor Sets are connected and fit perfectly inside the Walls. I placed (not glued yet) the Door Decal to see what the finished scene will look like. LOVING it 🙂 Remove the decal and it is time to paint.
-
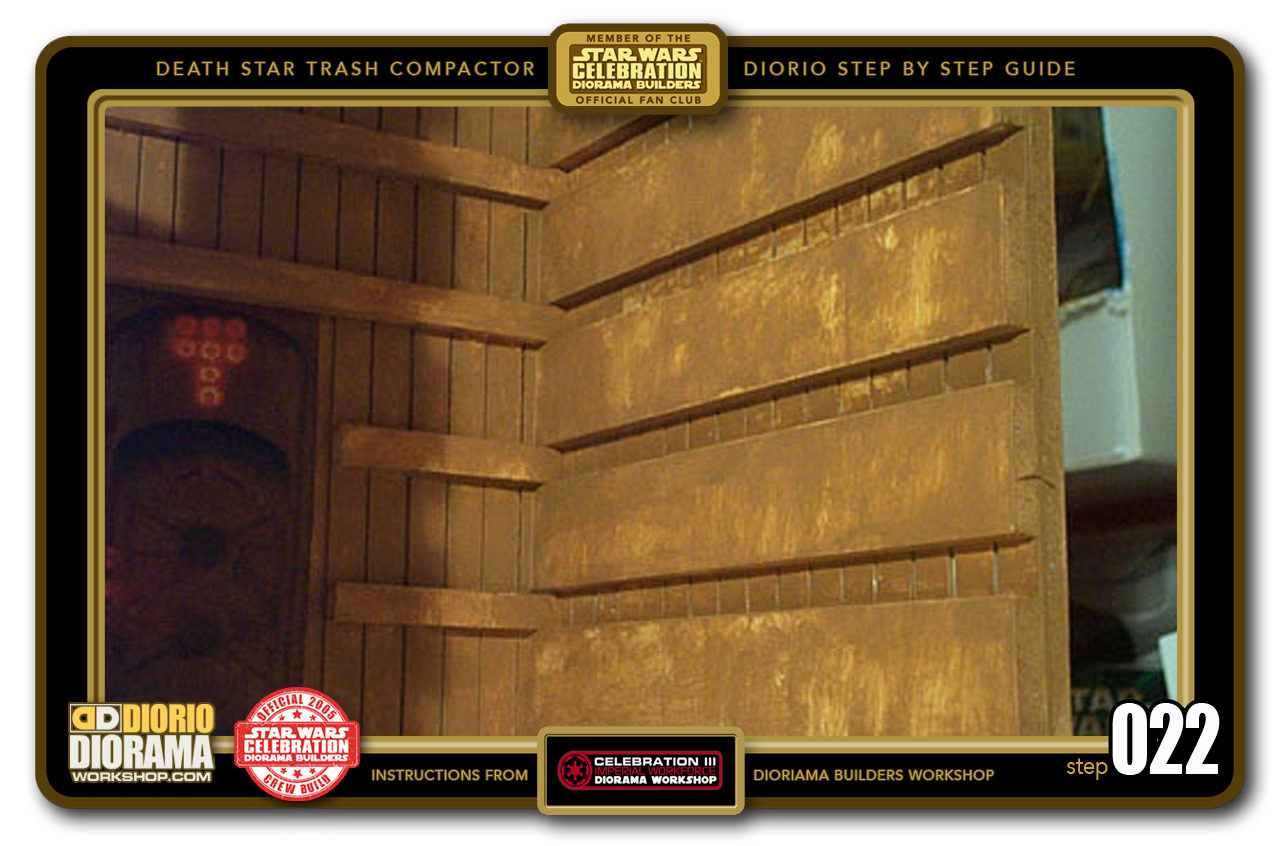
- STEP 022 > We start with a base coat of Light Brown to the entire Foamfore Walls. Latex paint with a little added water to dilute gives it a nice "Wash" effect. IMPORTANT: Make sure to NOT put TOO much Water because your Foamcore will WARP. And make sure to use a little amount of paint at a time. Dip the brush in a little bit of paint and Press the brush all over the foamcore. As the paint on the brush starts to dry, move it quickly back and forth pressing hard to color the Foamcore. This is what gives the old rusty look. Then dab a little more paint and repeat the process. DO NOT paint a THICK coat like your bedroom walls 🙂
-
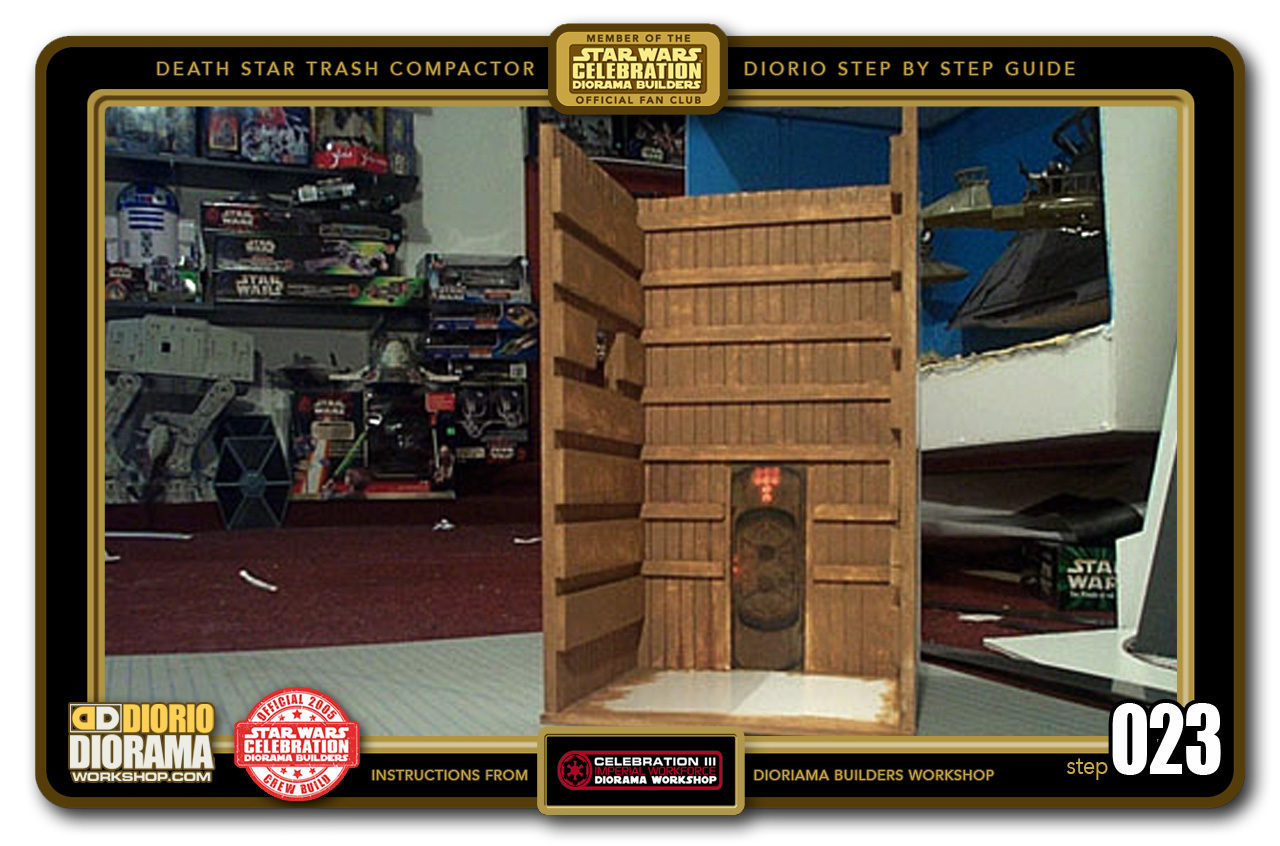
- STEP 023 > And here is what the Diorama looks like with the Base Coat and the Door Decal put back in it's slot (DO NOT GLUE THE DOOR YET) just for show. Now we are ready for detailing, adding oil Drips and stains.
-
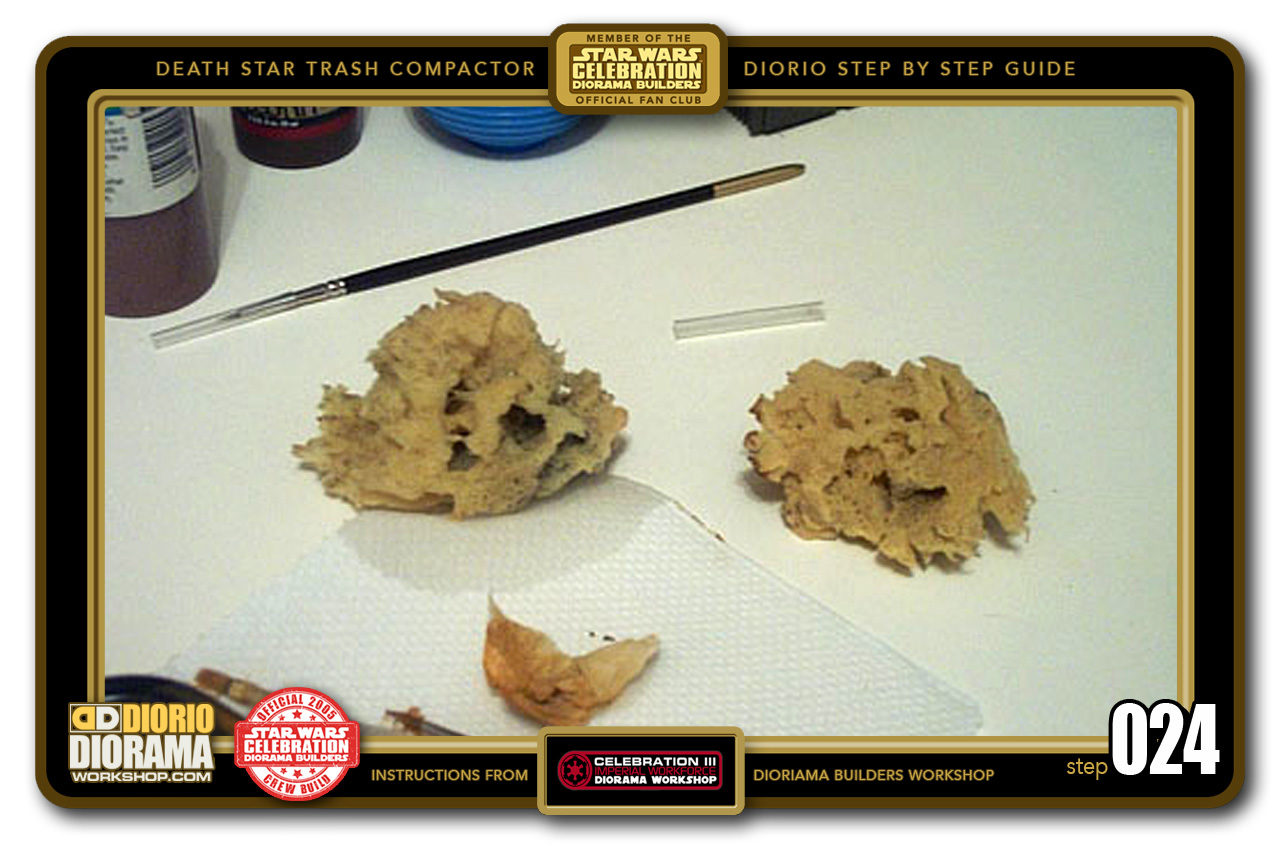
- STEP 024 > A very useful item in your paint kit are variety of sponges. These will allow you to create all kinds of artistic effects ranging from rocky surfaces, marble floors and rusty walls.
-
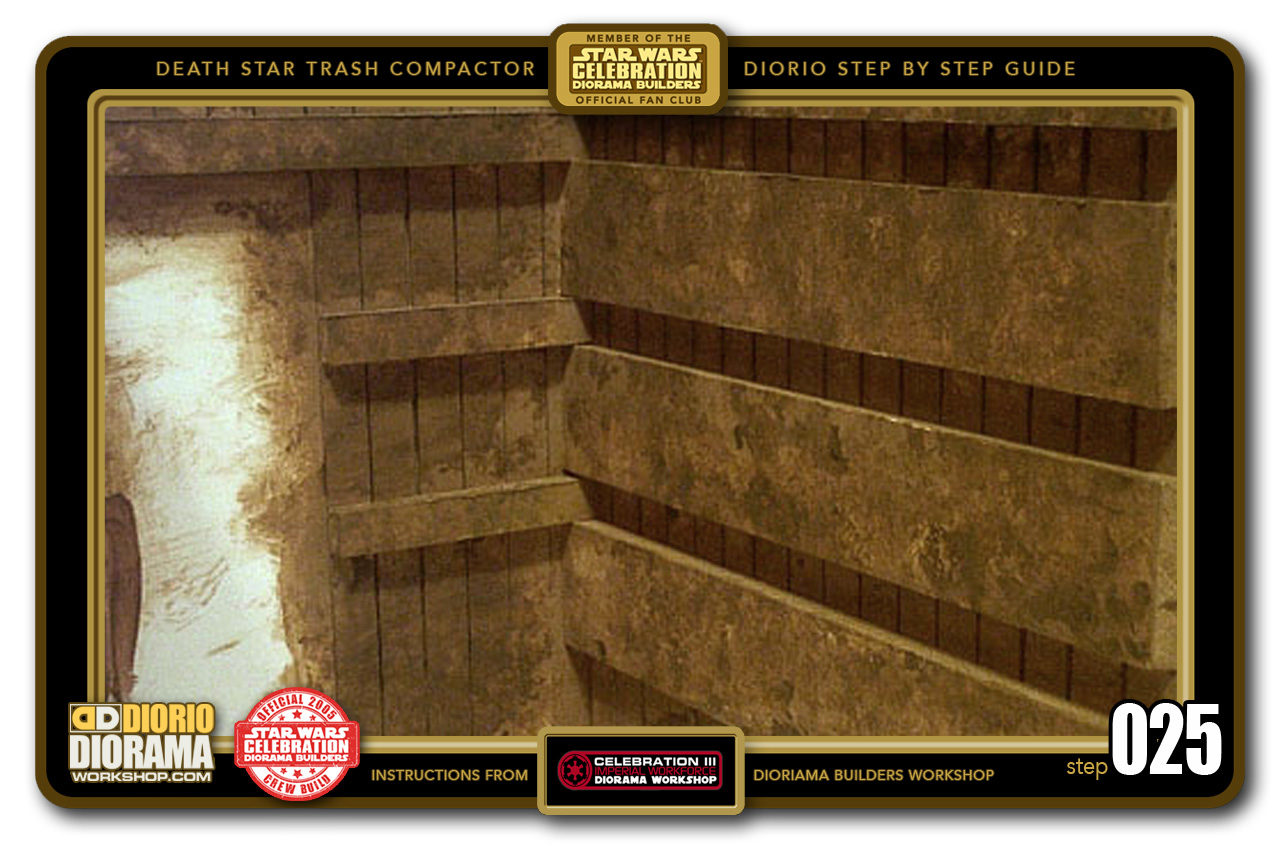
- STEP 025 > I placed a darker brown (then the base brown) latex paint in a little tray and added some water to not have it it's normal thickness. If the paint drips it's ok, it is a dirty trash compactor, that is what we want 🙂 So dip your sponge and then dab it a little on a paper towel to remove the globs, now lightly press it all over the foamcore surface. Don't pres TOO hard, you want to keep a textured look. Pretend the Sponge is on a big Pogo Stick bouncing all over the place 🙂 Apply up and down, DO NOT STROKE THE SPONGE when pressed onto the foamcore, we don't want streaks.
-
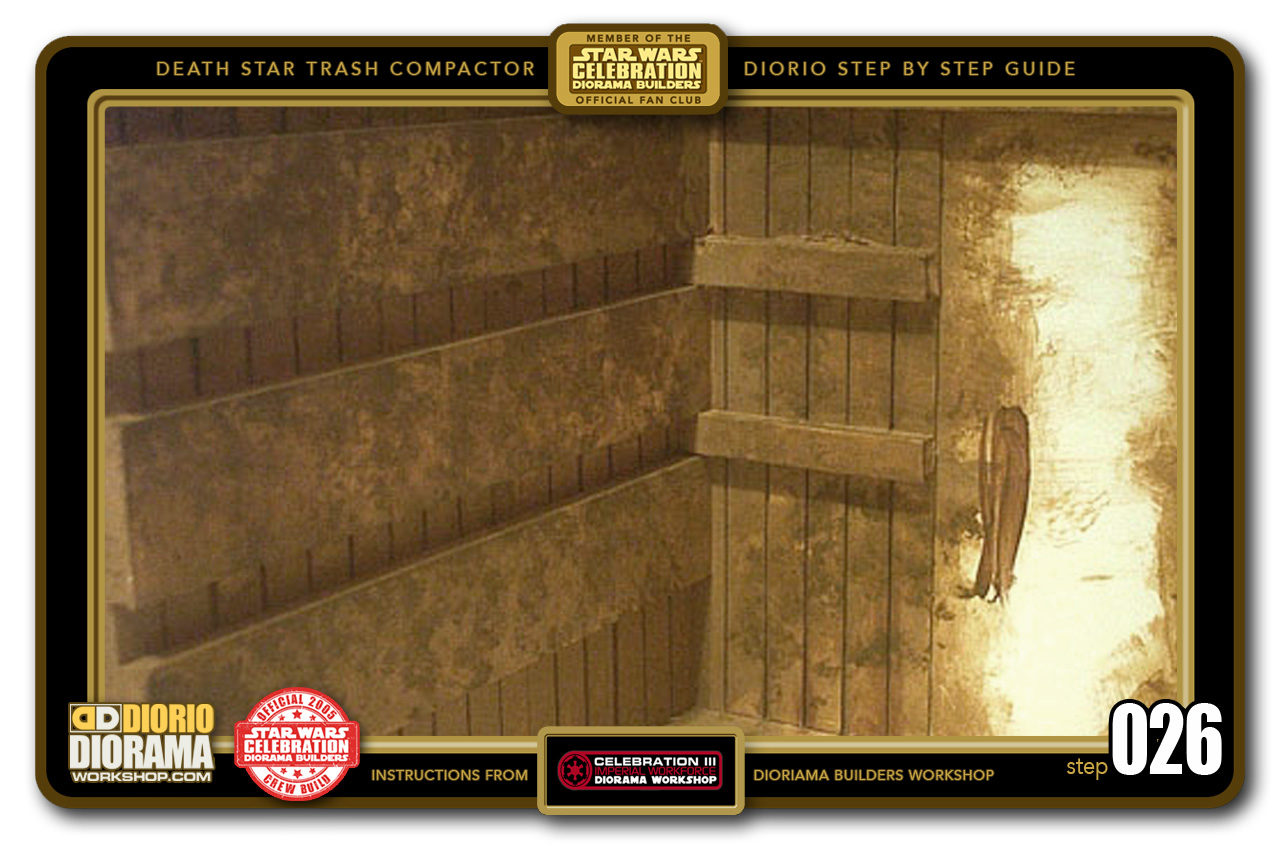
- STEP 026 > Now do the same thing for the remaining walls. Don't worry if the sponge doesn't reach into the corners. We will fix that later when putting our brushed "Oil Drips" coat of paint. Let this dry about 5-10 minutes depending how much water you mixed into the paint.
-
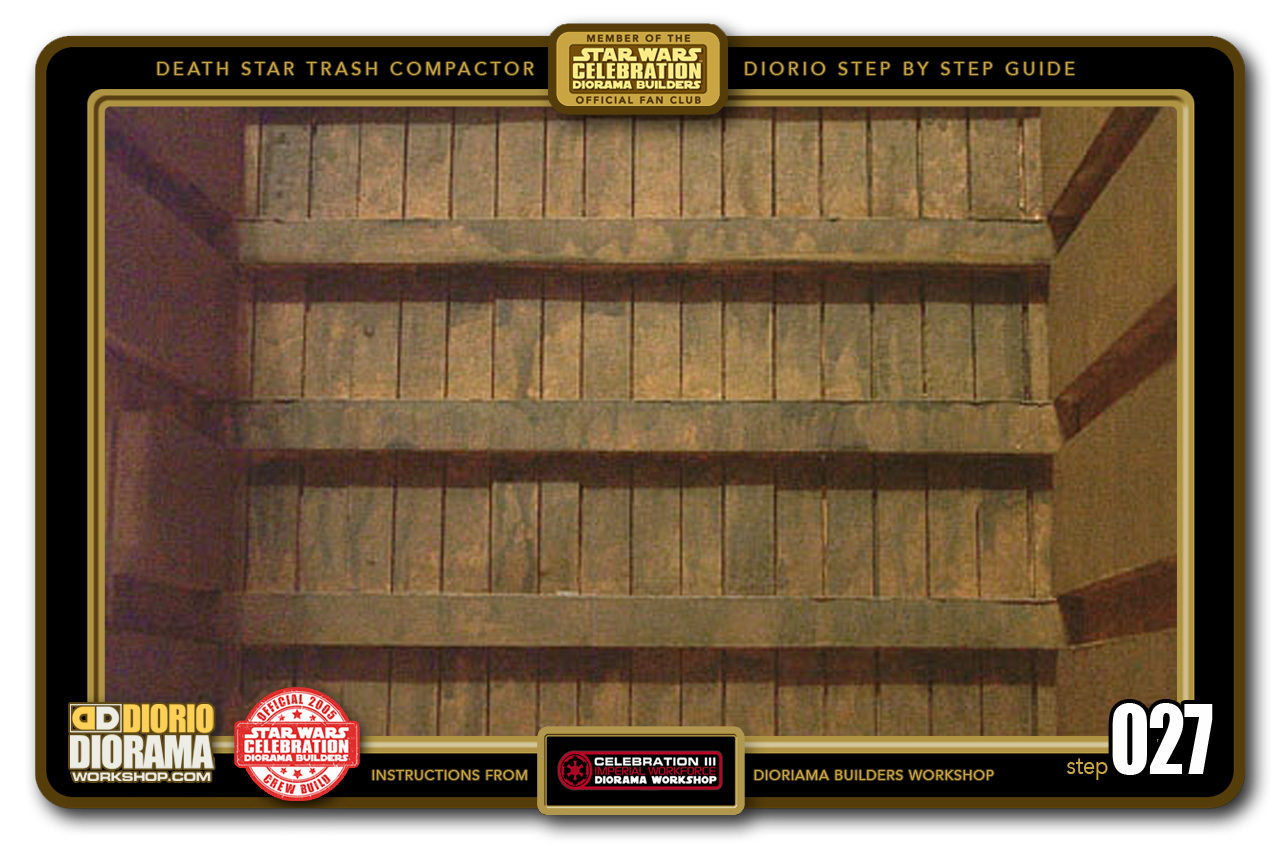
- STEP 027 > Now comes the fun part. Dripping paint to give a yucky "Oil Leaking" effect. Start with the "B"" back wall. To do this I used a big brush dipped in a glass of water and wet the entire surface of Foamcore in the first zone you will paint. Now take a tiny fine detail brush soaked with a mix of darker brown and black paints (add plenty of water this time to dilute the paint so it drips) and press the brush onto the top of each Beam. Since the beam is wet, the watered down paint will flow easily and drip into some really cool patterns. IMPORTANT: Make sure to ONLY water ONE Beam (paint zone) at a time. If the water dries up, the paint will not drip properly. Continue until ALL beams on the wall are yucky LOL.
-
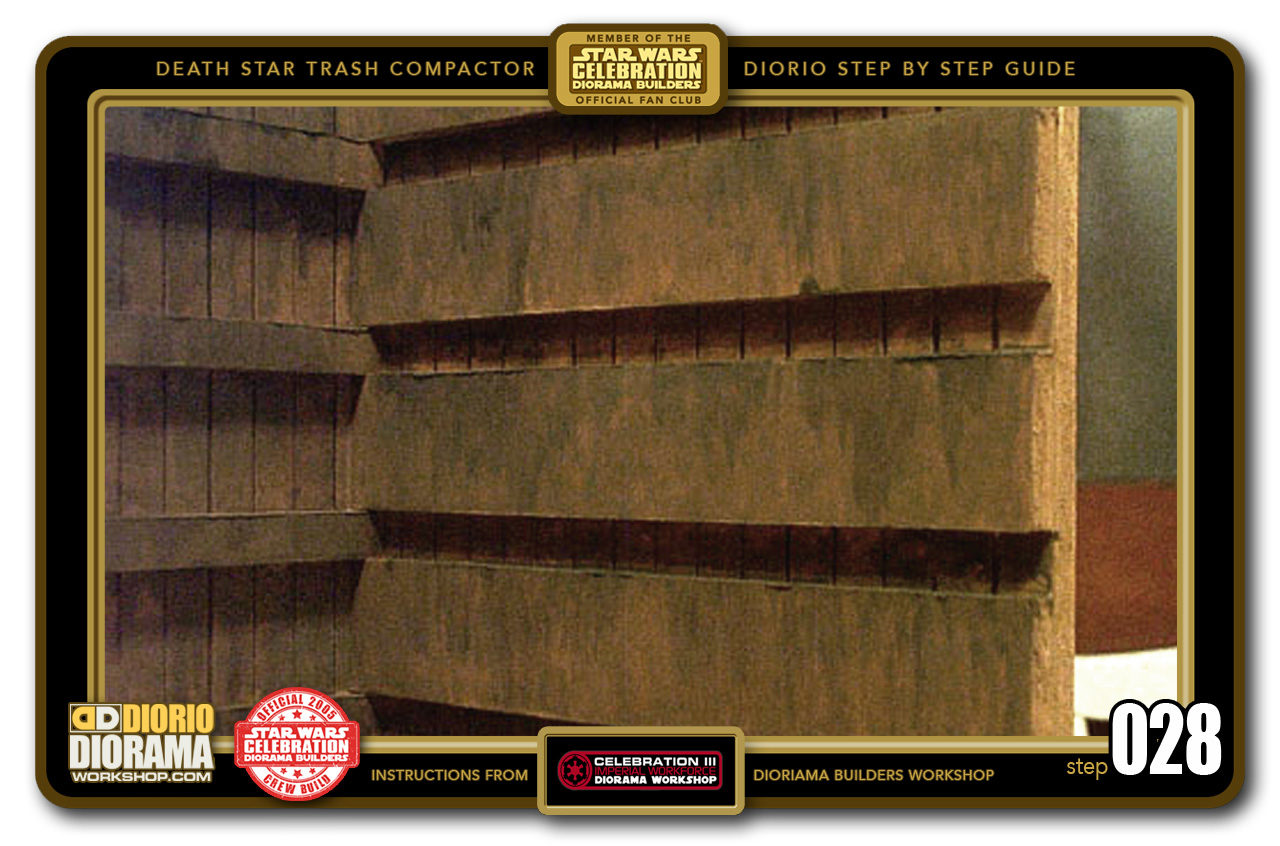
- STEP 028 > Now do the same technique on the Right "C" Wall. Because the beams are taller, after the paint dripped, I took my sponge and very lightly moved it from top to bottom of the beam to accentuate the "Oil Drips" I did 2-3 passes on each beam to get the result I was happy with. If you get too much "dark" drips, simply use the same technique but with a lighter color. No 2 diorama walls will look the exact same, just make it yucky and have fun. 🙂
-
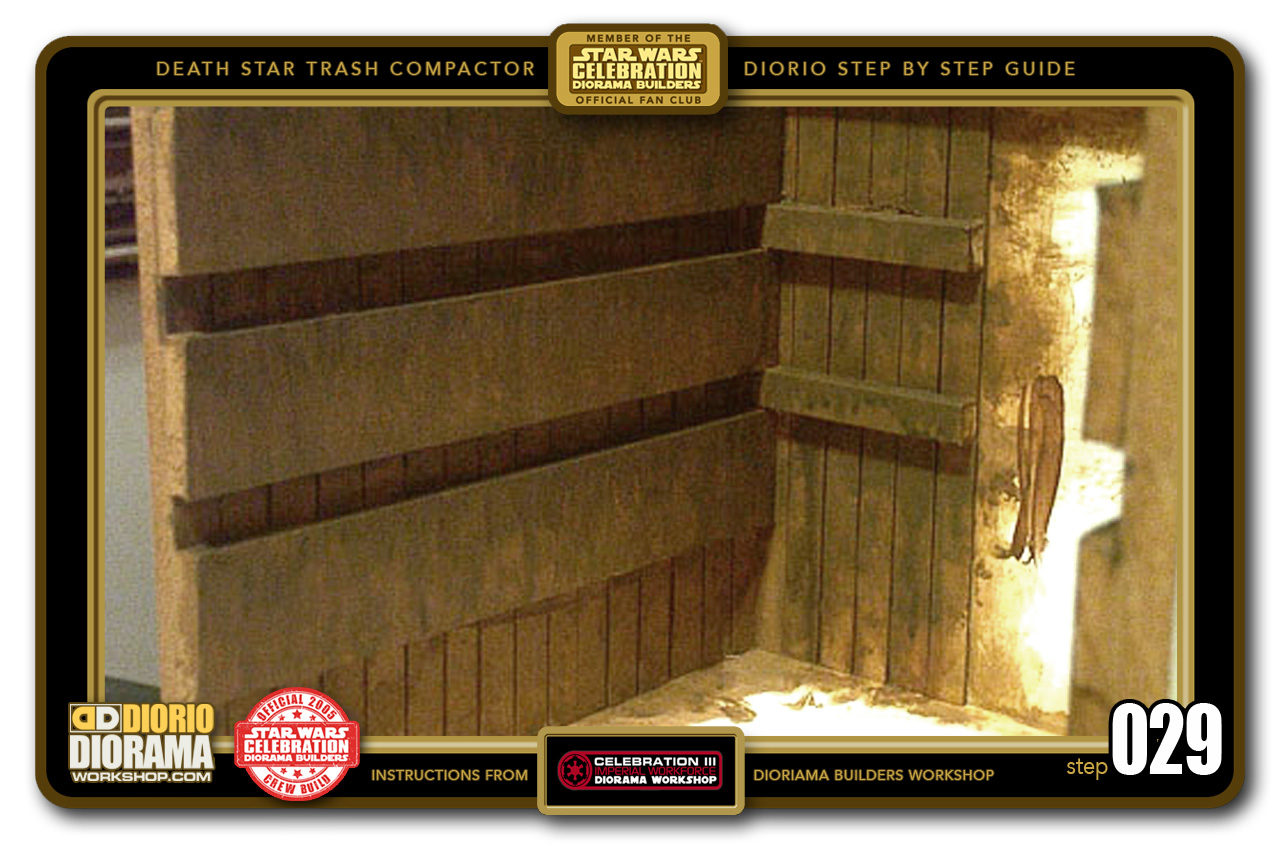
- STEP 029 > After 2 hours, i was ready to do the Left "A" wall. Remember to only wet ONE beam at a time. if you put TOO much water at a time, you could get warping. The diorama is still made from cardboard remember.
-
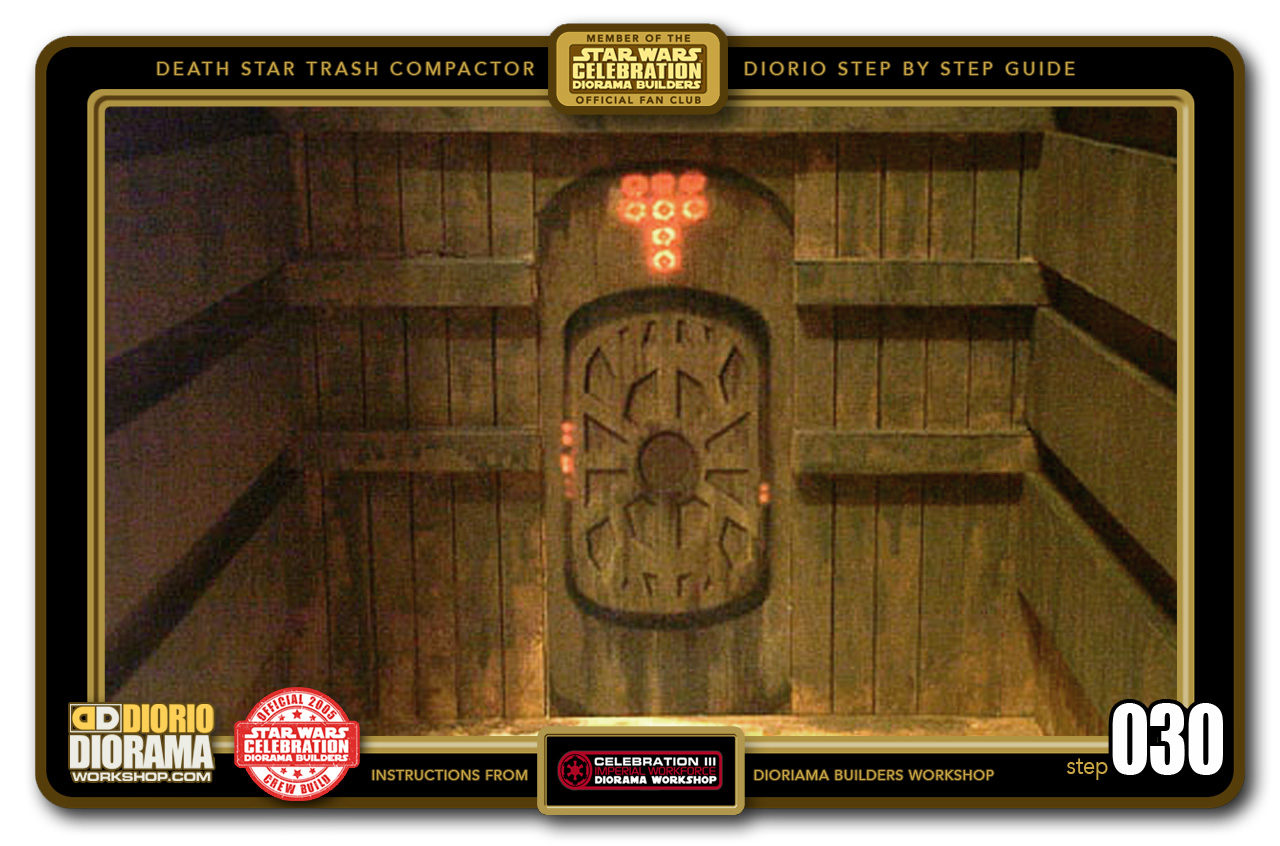
- STEP 030 > The final step once all the walls are all dry, is to take your printed door decal (Available in the Tutorial Star Wars menu) and use your UHU Gluestick to finally attach it to the wall. The decal maybe a little tight depending how accurate you were when the strip and beams were glued in place. If so, just align it to the wall and trim to the exact size of your opening. And you now have a finished Death Star Trash Compactor diorama. How easy was that ?
-
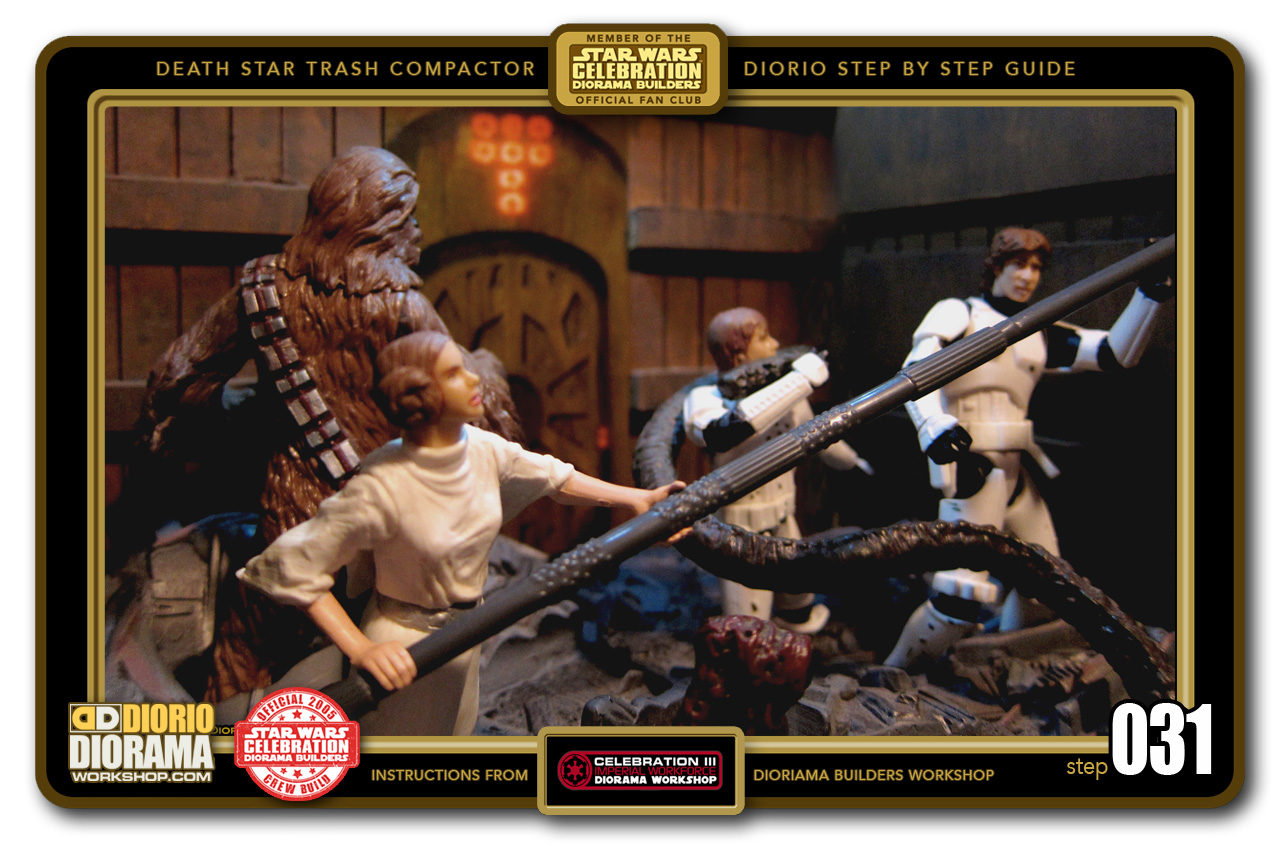
- STEP 031 > Now you can grab your Hasbro action figures and insert them into the diorama. If you weren't collecting when these came out in 2002, you can use any figure and just cover the bottom of the room with greeblies, junk parts from model kits and such to make it look like the characters are sinking in trash. Now you can continue another Death Star section and connect them to make the ultimate Death Star playset.

.
Did you already build this Diorama ? At home or at our Star Wars Celebration Diorama Builders workshop ? Would you like to show it in the site’s GALLERY VISITORS DIORAMAS section, YES ? That is Awesome !!! You can find out all the details on how to email me your photos on the VISITORS SUBMISSIONS INFO page … When I get your photos, I will create your very own page just like this one. You may not realize it but work does inspire others to join in the fun of making Action Figure Dioramas.
.
NOT FOR RESALE ALL Decals, tutorials and artwork are ©FrankDiorio (dioramaworkshop.com) and offered FOR FREE to the fans – that would be you ? so you can build and display my diorama designs in your very own home. I realize I cannot control what one does with my graphics once I place them on the web, I can only ask you as one fan to another, please respect the artist and do not be that jerk who uses my designs and tutorials to build a copy of my work only to sell it on EBAY or trade/sale groups and forums. Thank You. Frank.
![]() Catch up with fellow visitors and exchange stories, read cool interviews with the crew, exchange photos, fun surprises and grab some FAN ONLY merchandise next year at actual future conventions ?
Catch up with fellow visitors and exchange stories, read cool interviews with the crew, exchange photos, fun surprises and grab some FAN ONLY merchandise next year at actual future conventions ?
.
©2018 Frank Diorio DioramaWorkshop.Com
.
IF YOU LIKE WHAT YOU SEE, PLEASE SHARE WITH YOUR FRIENDS
USING THE SOCIAL MEDIA BUTTONS BELOW