


-
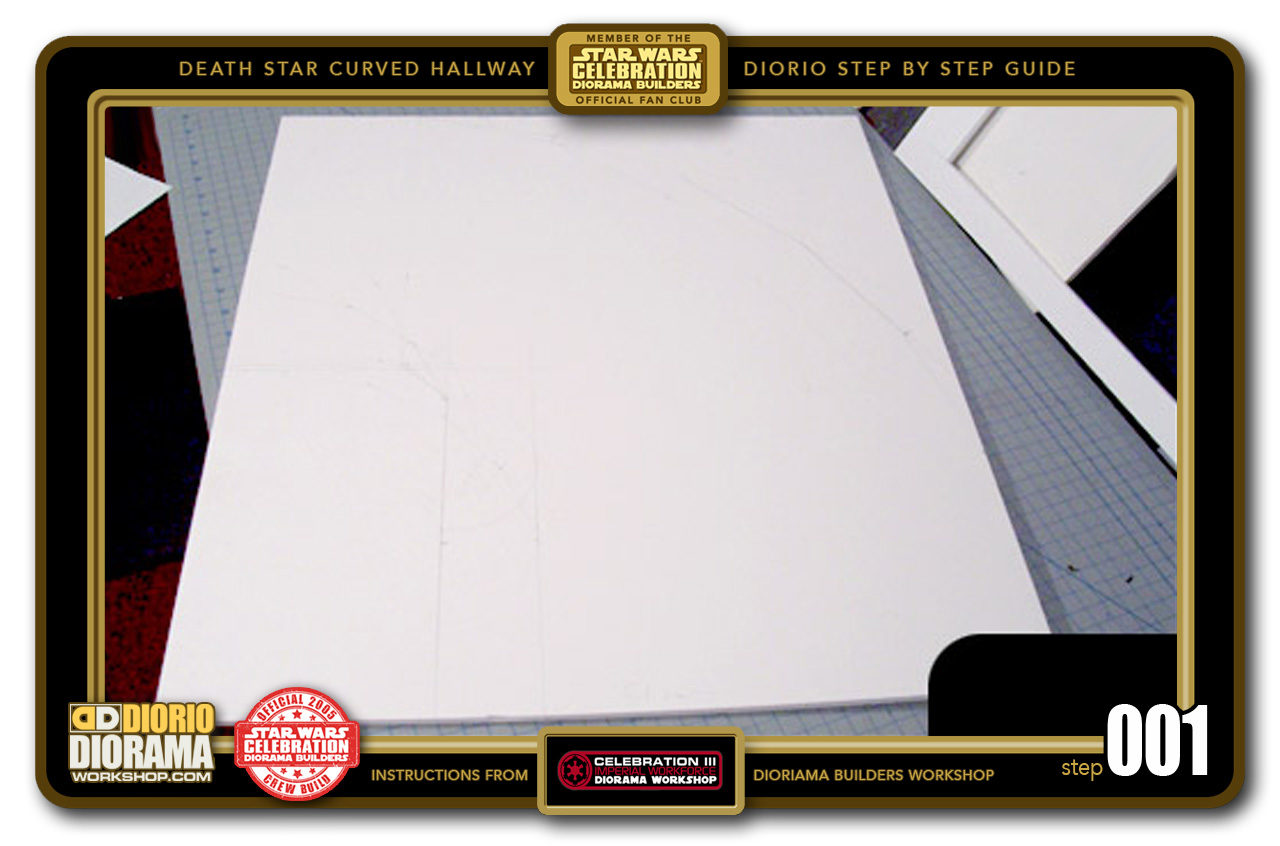
- STEP 001 > This curved hallway is part of the "rear" Death Star diorama design. These will add depth to your basic hallways as it will be placed behind and seen through either a Large Blastdoor or Archway. Start with a 50.5cm X 59.5cm sheet of Foamcore.

-

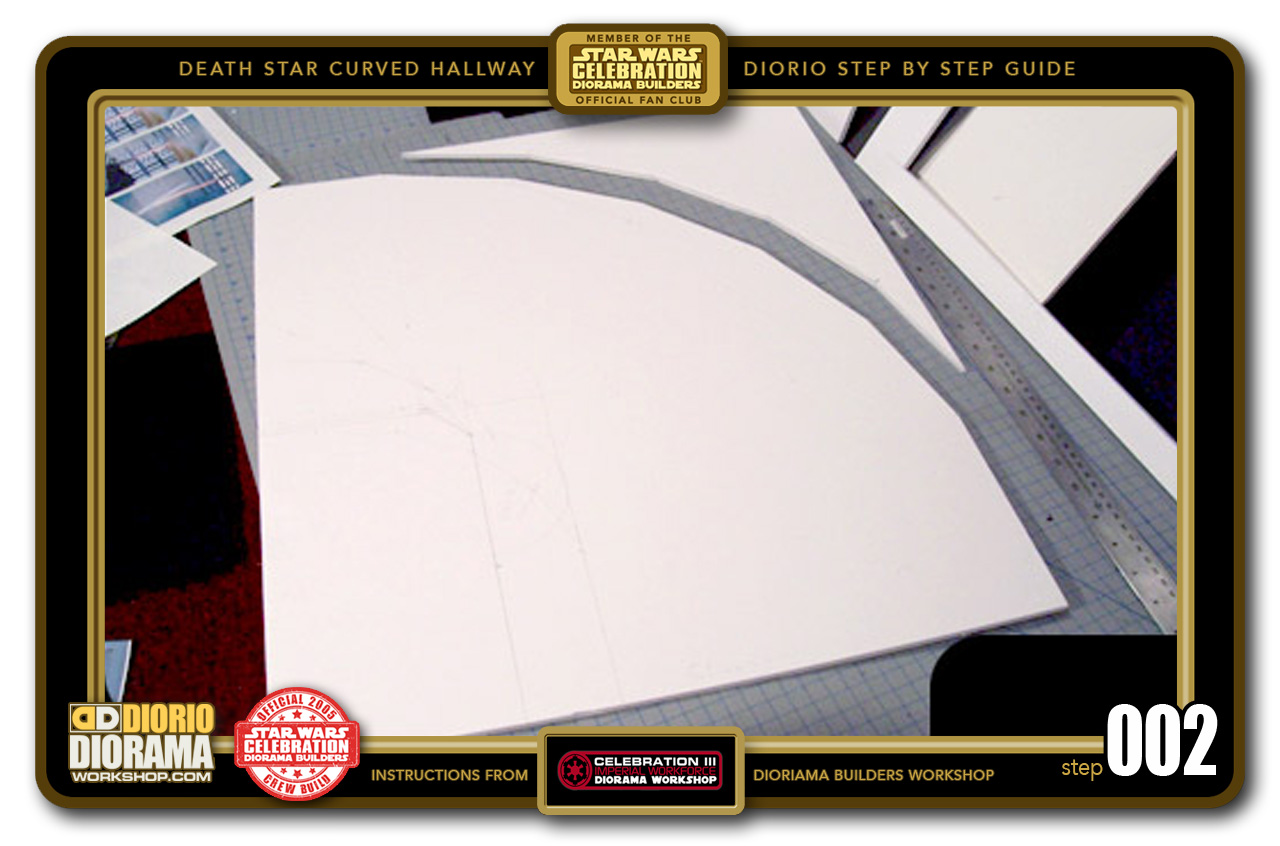
- STEP 002 > From the right bottom (50.5cm) corner, measure upwards 18cm. At 15 degrees towards the left, pencil mark and draw a line that measures 12cm. At the end of that line, swerve another 15 degrees towards the left, pencil mark and draw another line that measures 12cm. Continue this way until you have created a 1/4 circle of 6X 12cm lines (which will become your wall panels and create the curve.
-
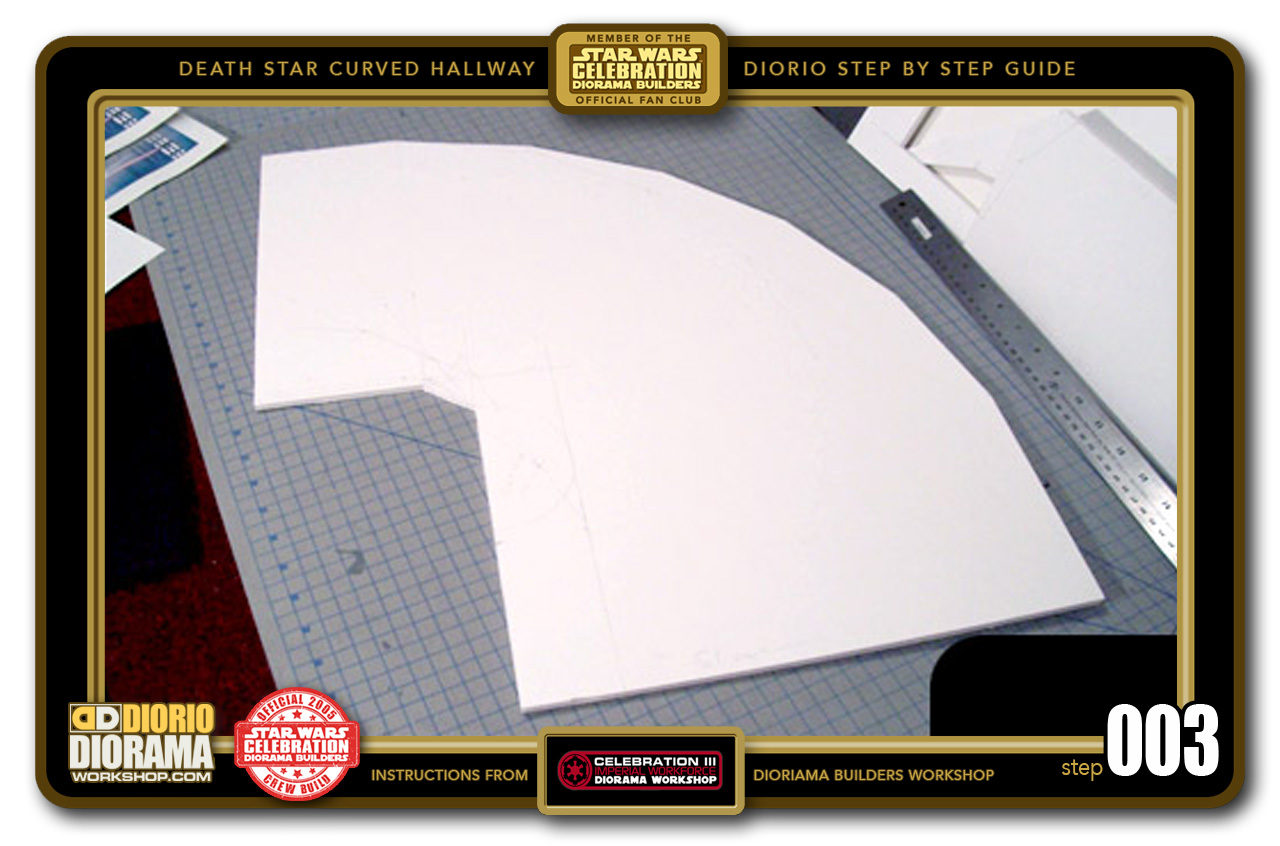
- STEP 003 > Now from the left bottom (50.5cm) corner, measure 16cm. From this mark, draw a straight 24cm line straight up 90 degrees. Now go to the left top (59.5cm) corner and measure down 31.5cm. From this mark, draw a 12cm line towards the right at a 90 degree angle. Now simply connect the 2 lines which should be at 45 degrees and measure about 5.5cm Once the lines are drawn out, simply cut out the shape with your Xacto knife.

-

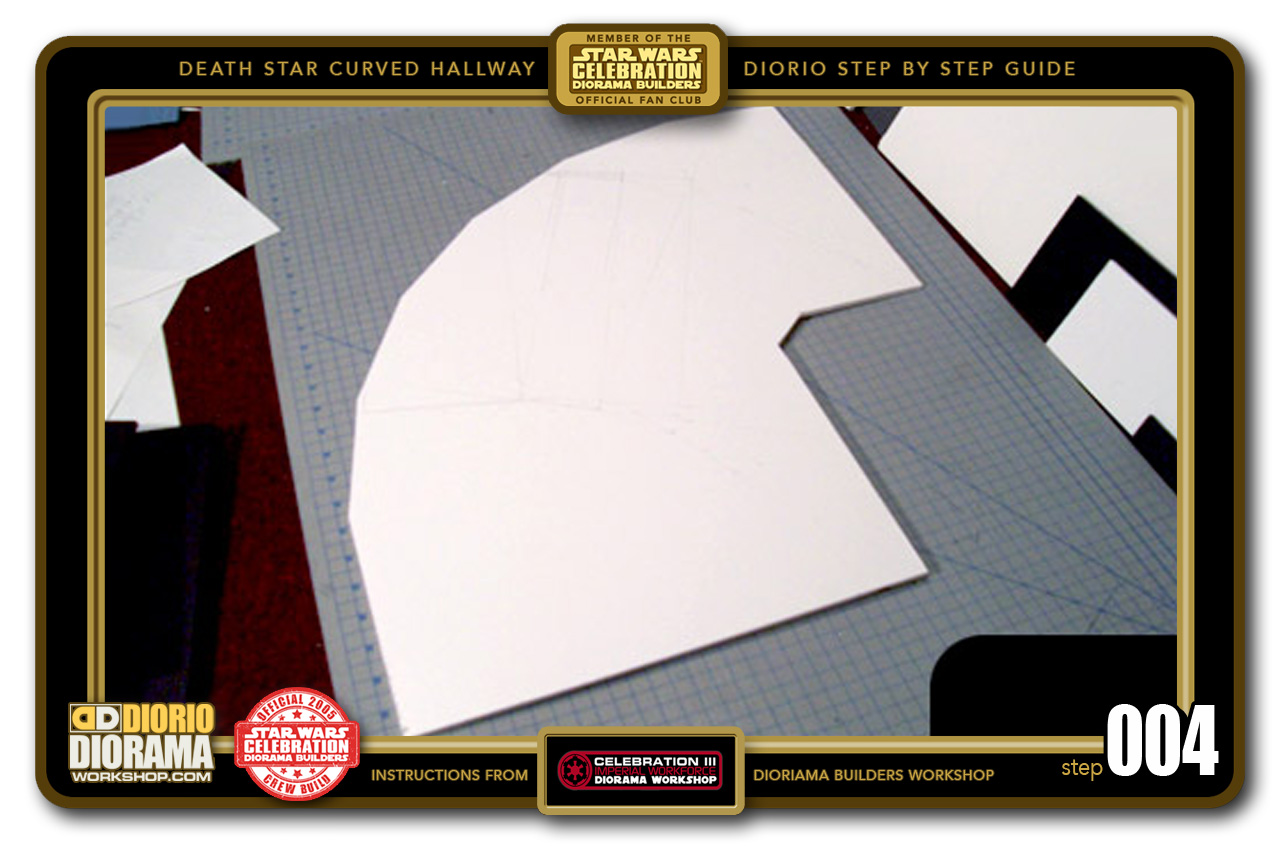
- STEP 004 > Flip the foamcore to it's upper side, with the curve going to the right. Of course you can mirror the instructions to create a left curve as well. Let your creativity take charge 😀
-

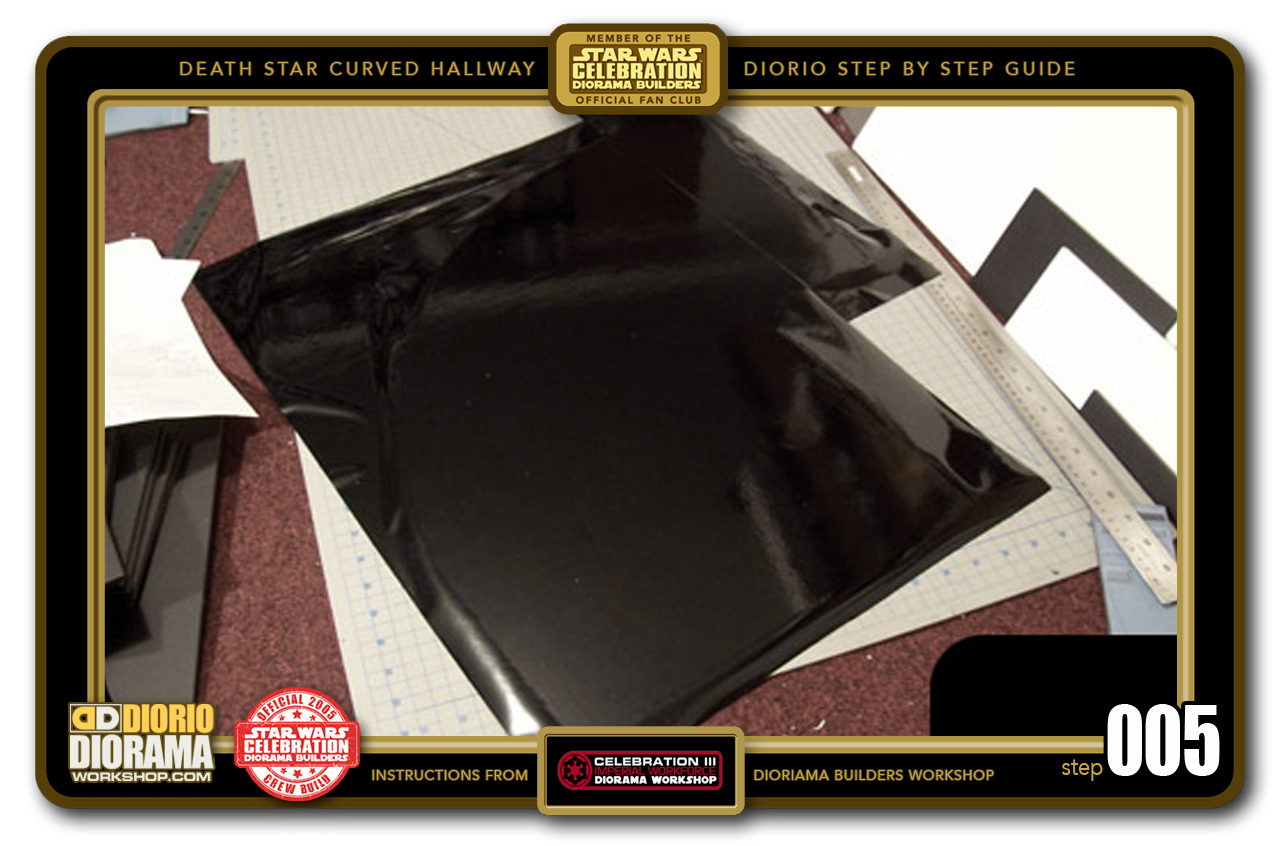
- STEP 005 > Apply the MacTac / DC FIX Black Gloss Vinyl flooring to the Foamcore base. TAKE YOUR TIME. The trick is to NOT unroll the backing protective wax paper all at once. You want to expose about 2-3 inches of the sticky surface and align it with your floor. Then press down from center towards the right and center towards the left. Now peel back another 2-3 inches, press again center right, center left, move your way to the other side of your floor. This technique will minimize wrinkles and avoid you having unsightly air bubbles. I will film a MacTac guide on my YouTube channel to show how it's done if you need further clarity.
-
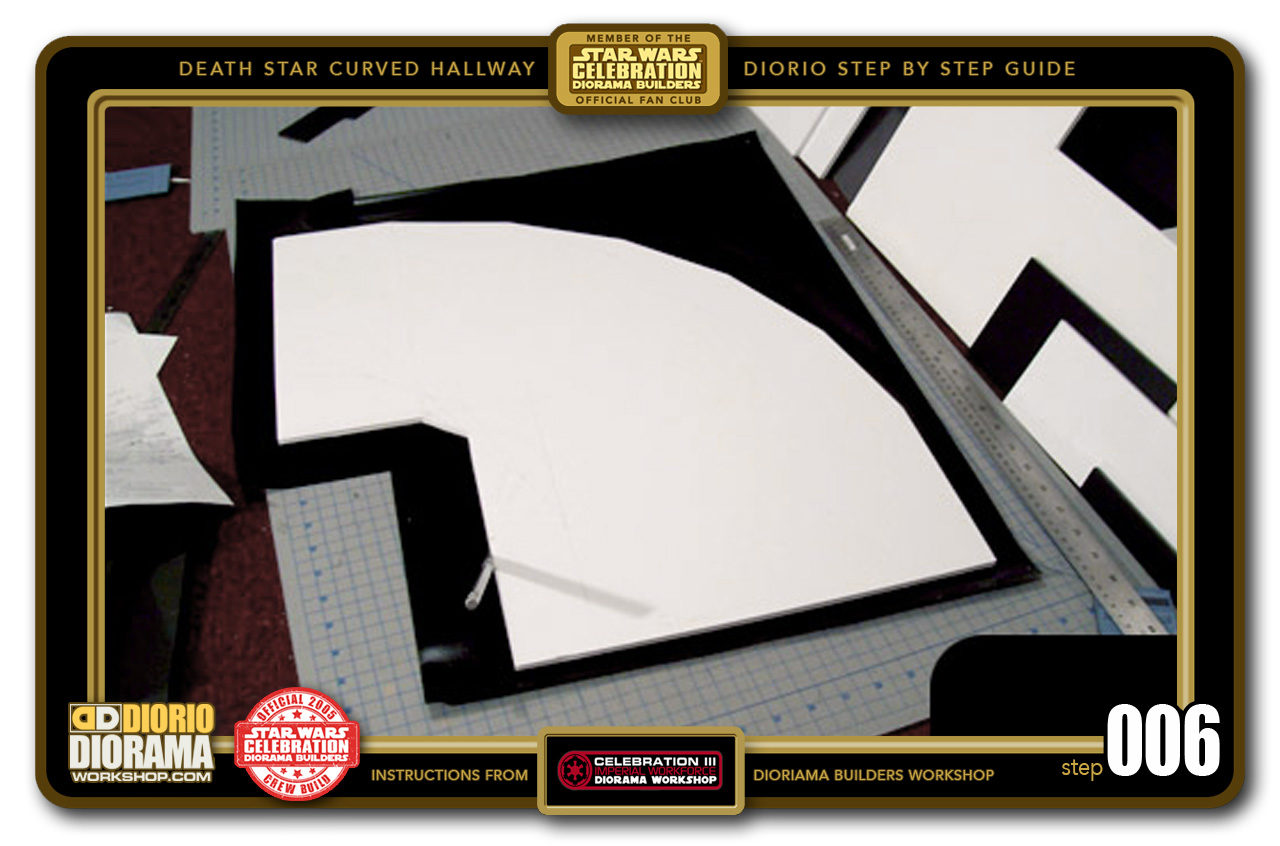
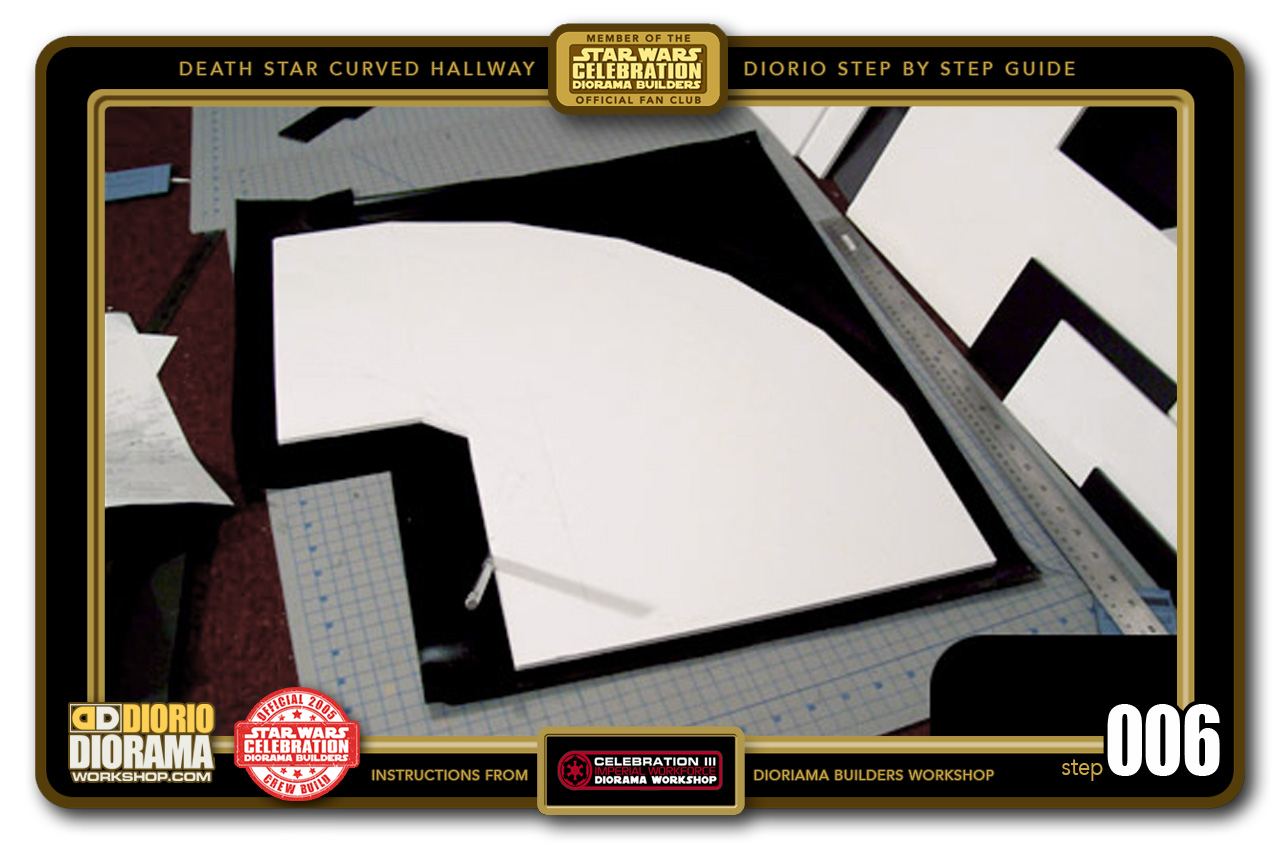
- STEP 006 > After you make sure that the surface is smooth and bubble free, flip the floor back onto its underside.
-
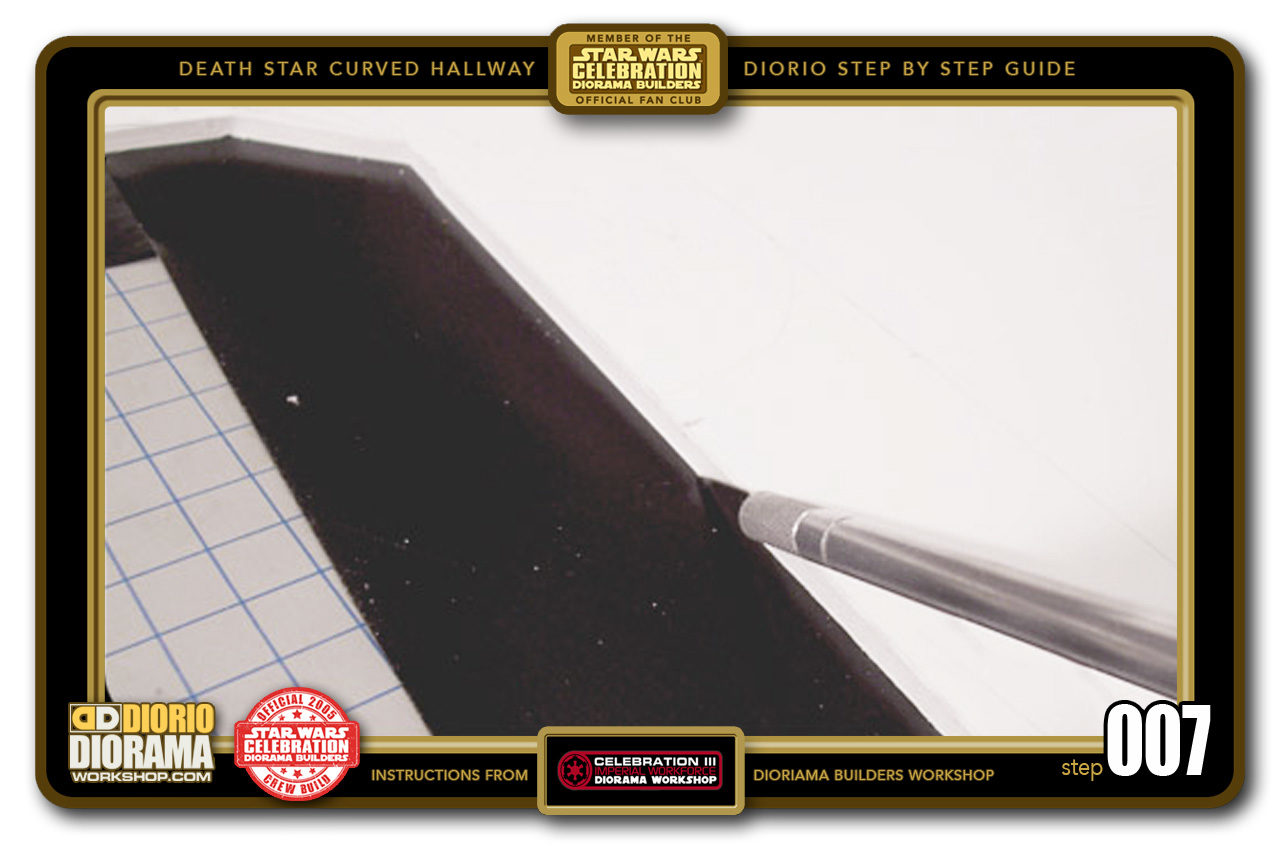
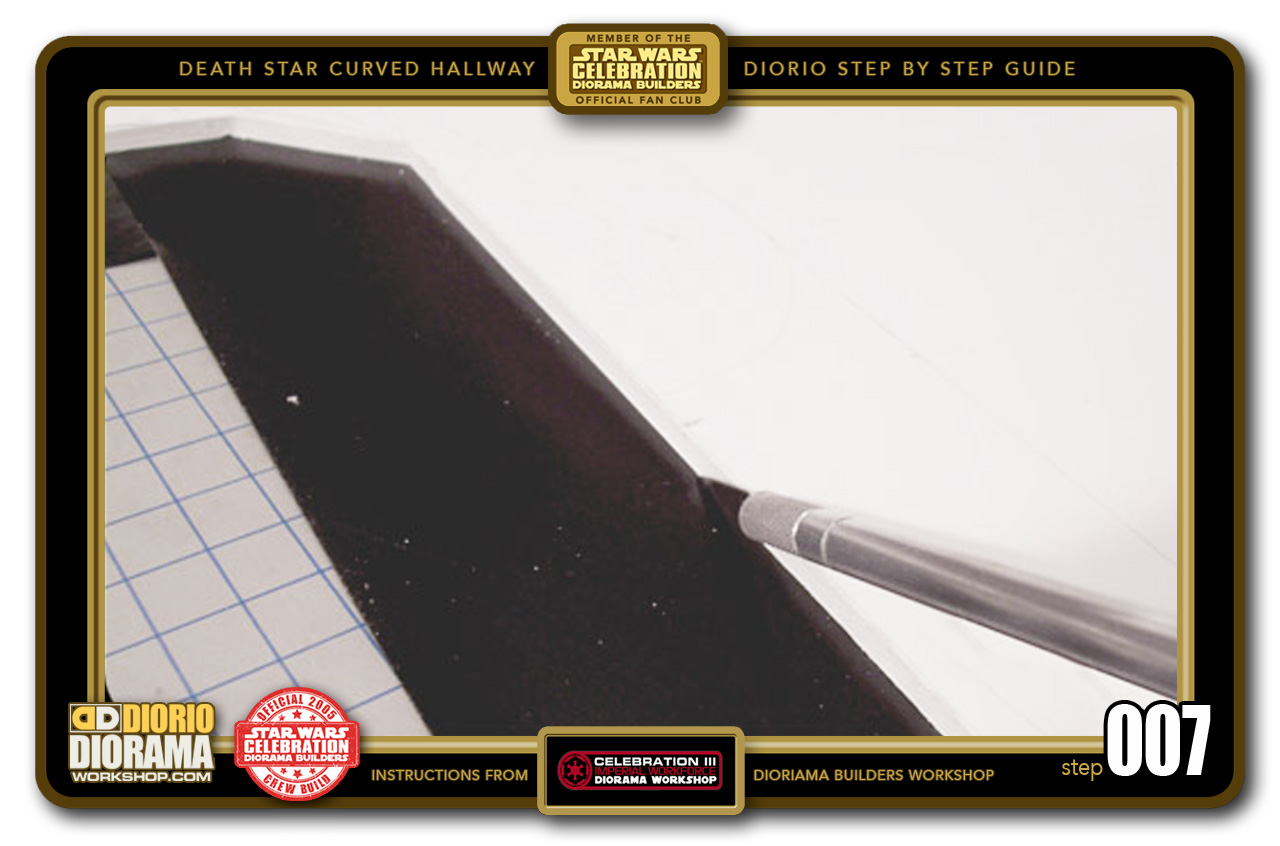
- STEP 007 > Time to trim off the excess MacTac DC-Fix. Use a sharp Xacto Pen and watch your fingers !!! 🙂 Go all the way around following the foamcore edges. Don't go TOO FAST and risk cutting into the Foamcore.
-
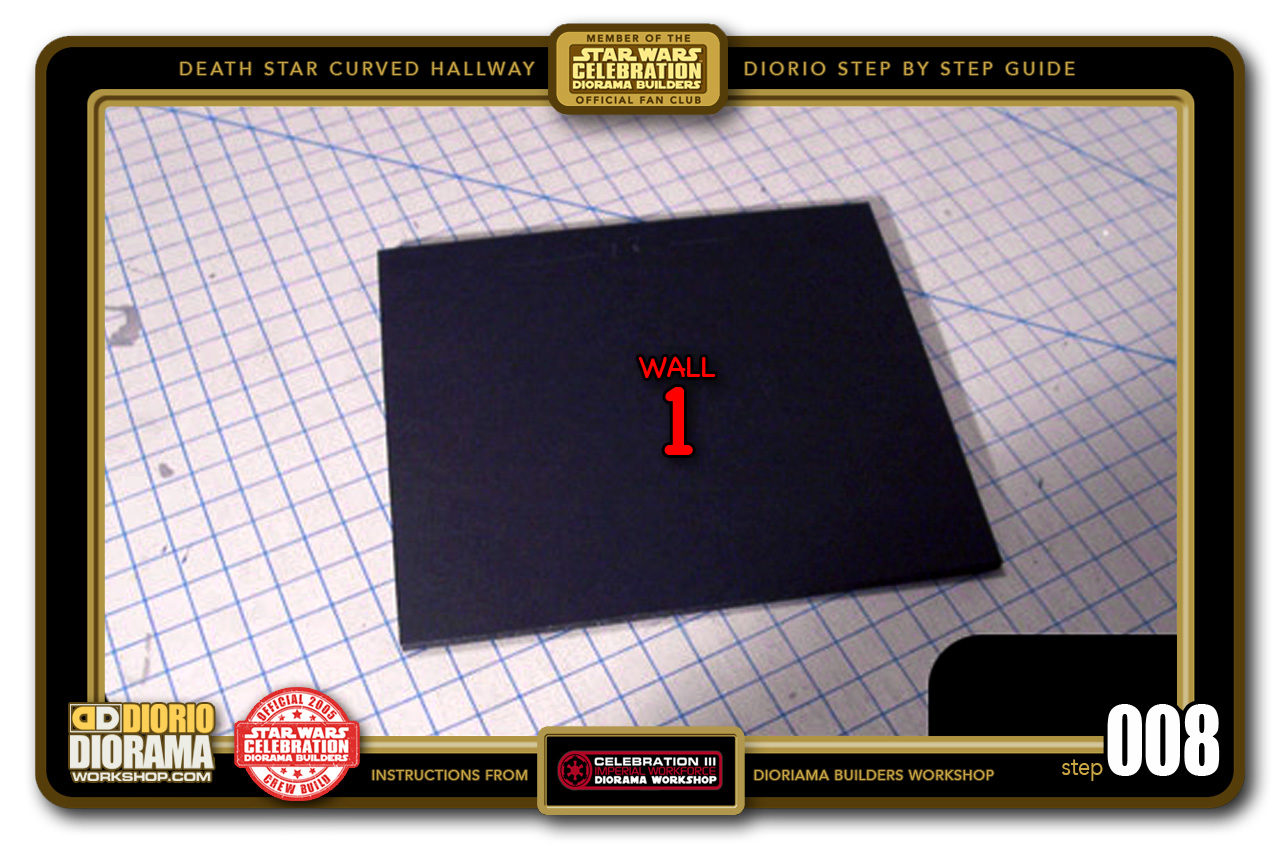
- STEP 008 > Let's start making some walls. Using Black Foamcore (you can use white but for Death Star walls, I prefer black in case some of your decals don't align perfectly one against the other) cut a piece 18cm X 15.5cm

-
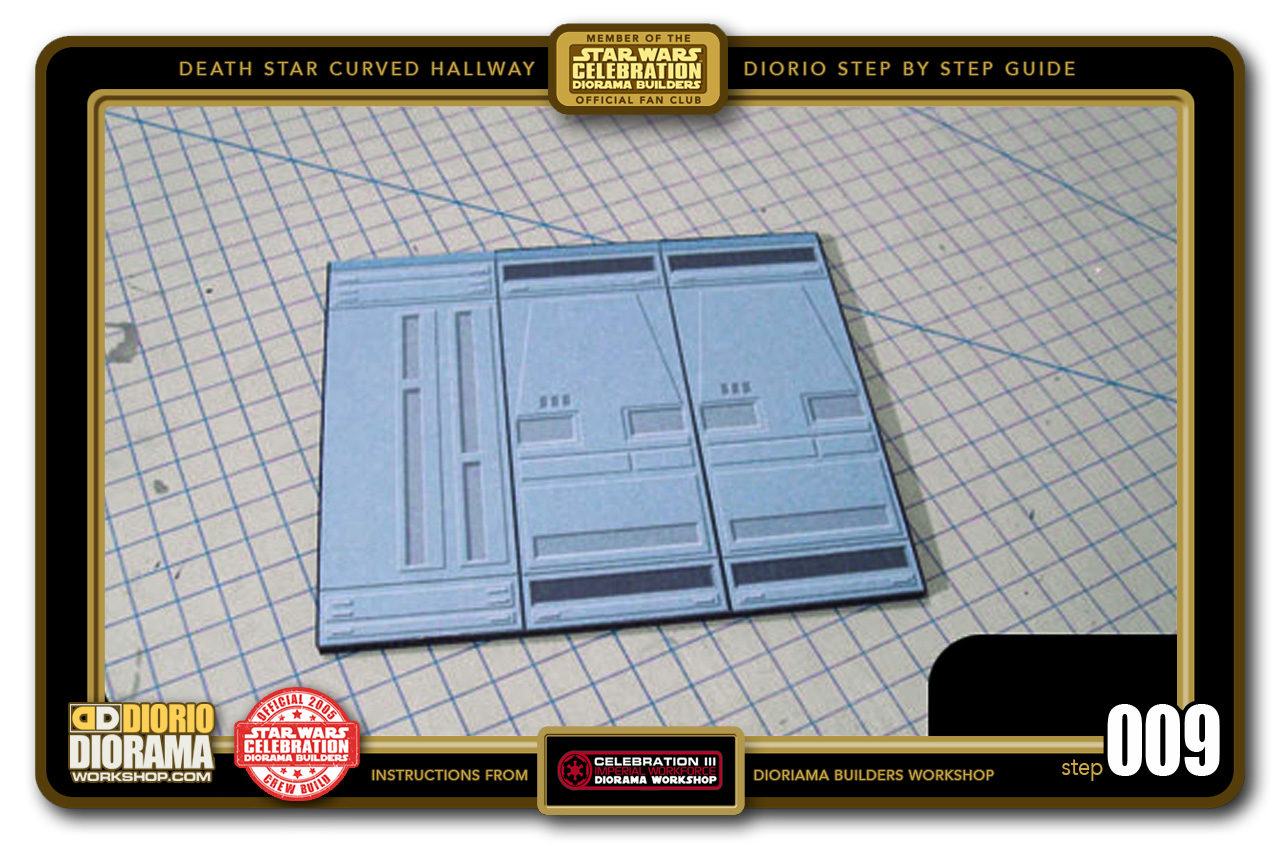
- STEP 009 > Apply 3 Basic Hallway Panels decals to this first "WALL 1" section. To be movie accurate, you need ONE groove panel and TWO trapeze with black top and bottom ventilation holes panels. Of course the cool thing about the Death Star, is that you can place ANY decal that you like. It's your choice, Movie or creativity 🙂 Decals are available in the Tutorials Star Wars menu.

-
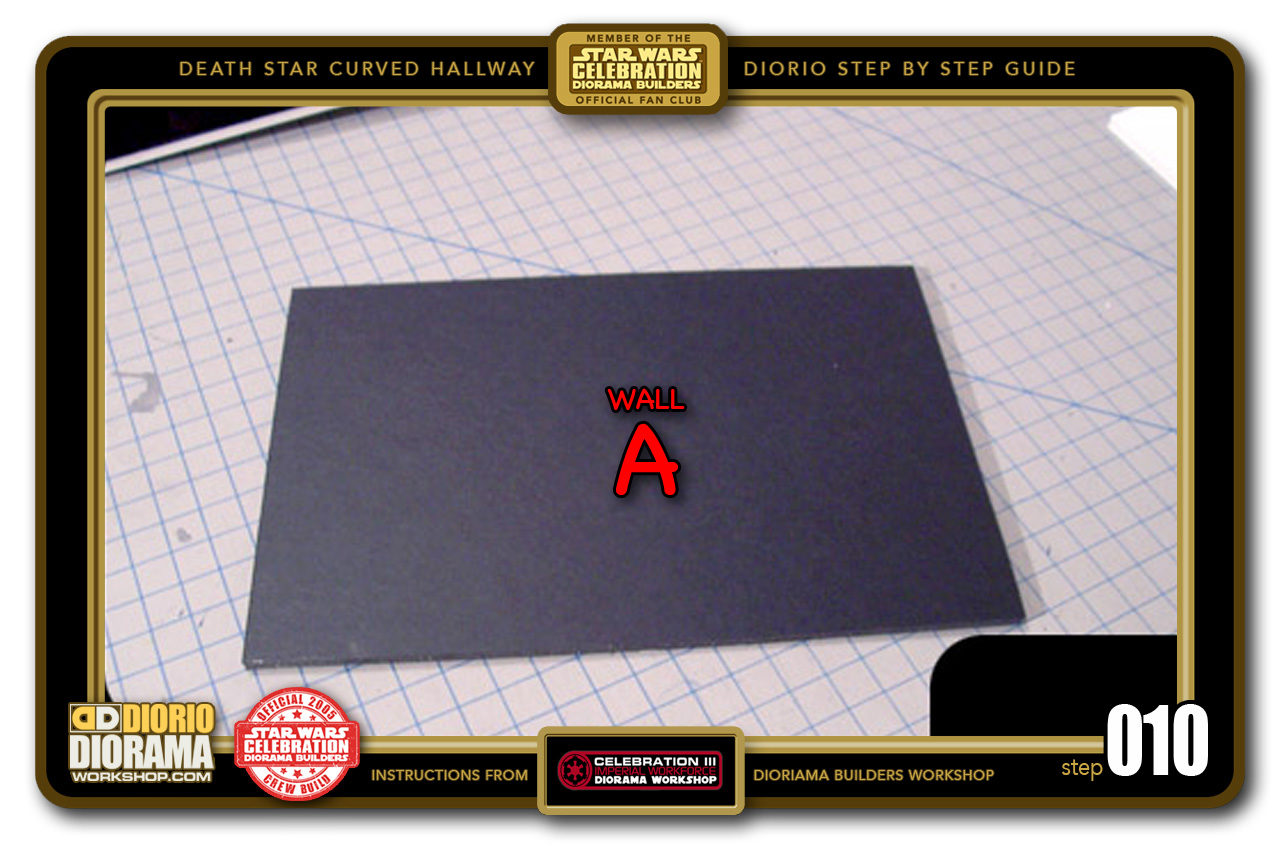
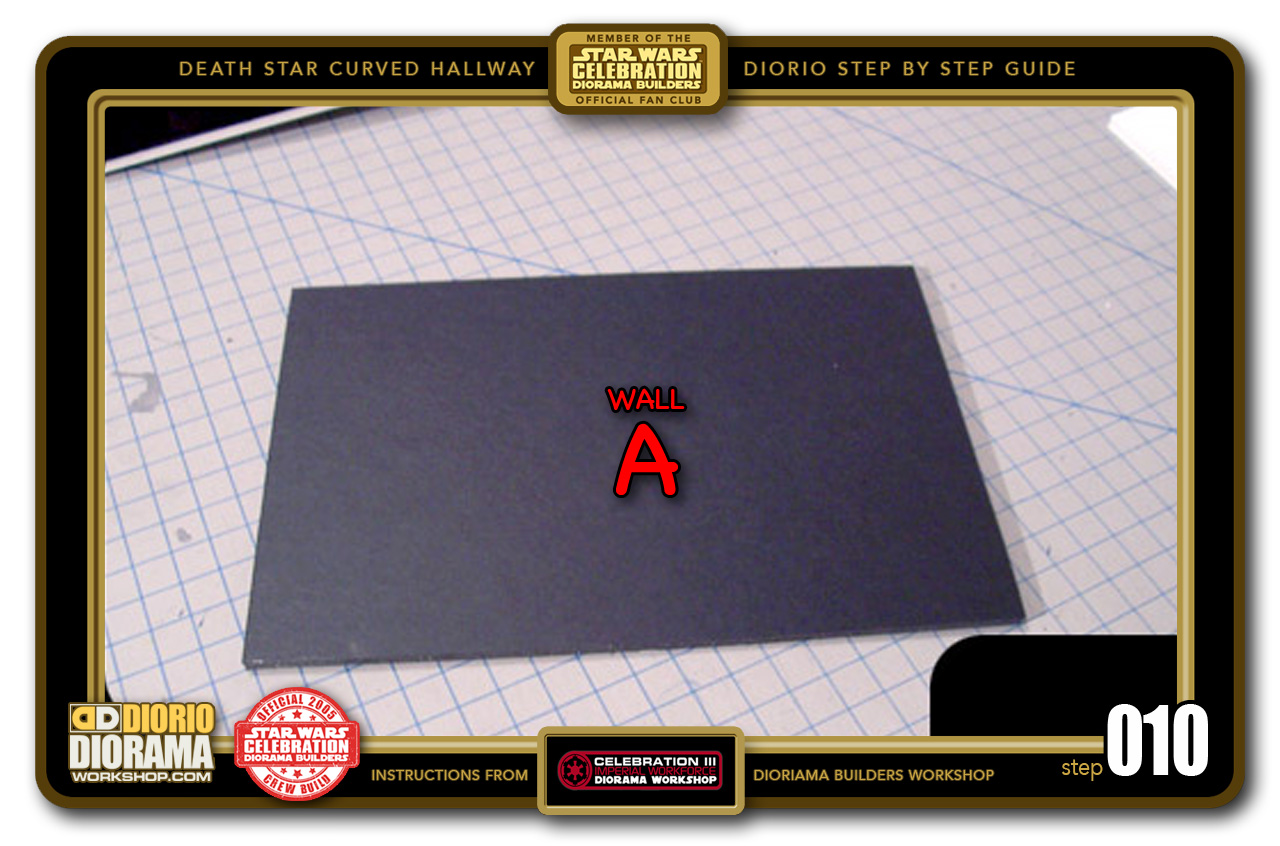
- STEP 010 > Let's do the right side "WALL A". Cut a 24cm X 15.5cm piece of black foamcore.
-
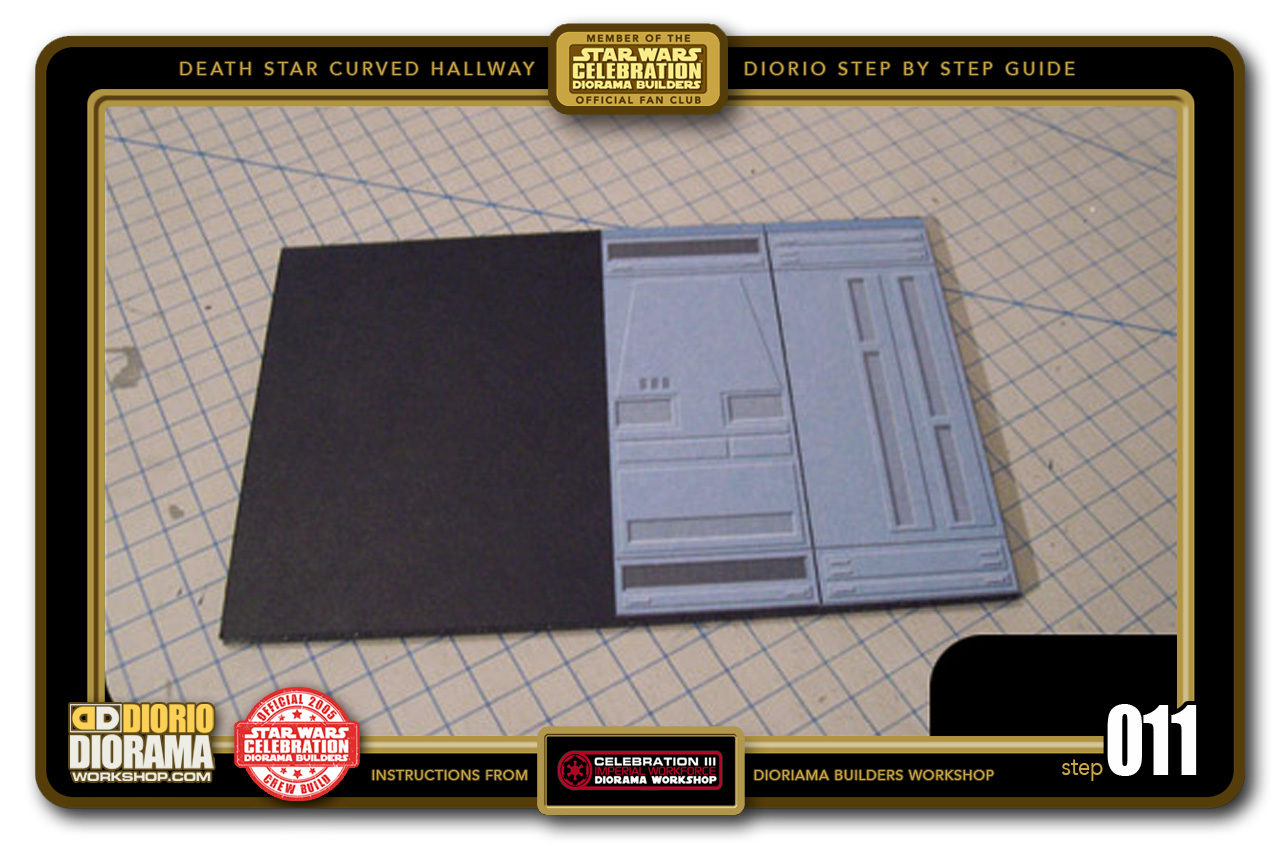
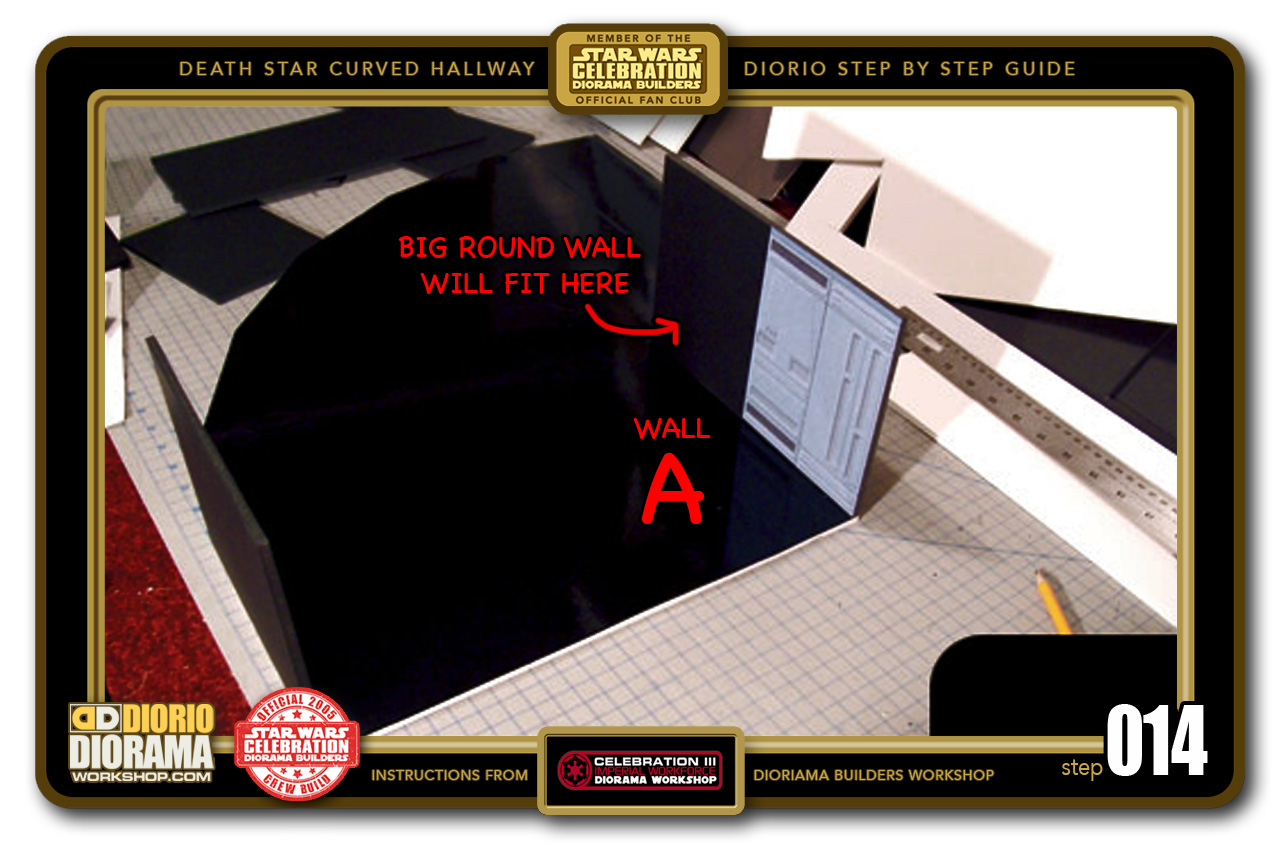
- STEP 011 > For movie accuracy apply TWO decals on the RIGHT side only. Leave the left side blank. This space will be covered later on (Step 042) with a BIG ROUND WALL panel. Of course, if you don't want to make or place a curved panel, you can cover the left side with TWO more basic wall panel decals.

-

- STEP 012 > Flip your floor back to it's proper side. The MacTac DC-Fix should be on top - duh - LOL.

-
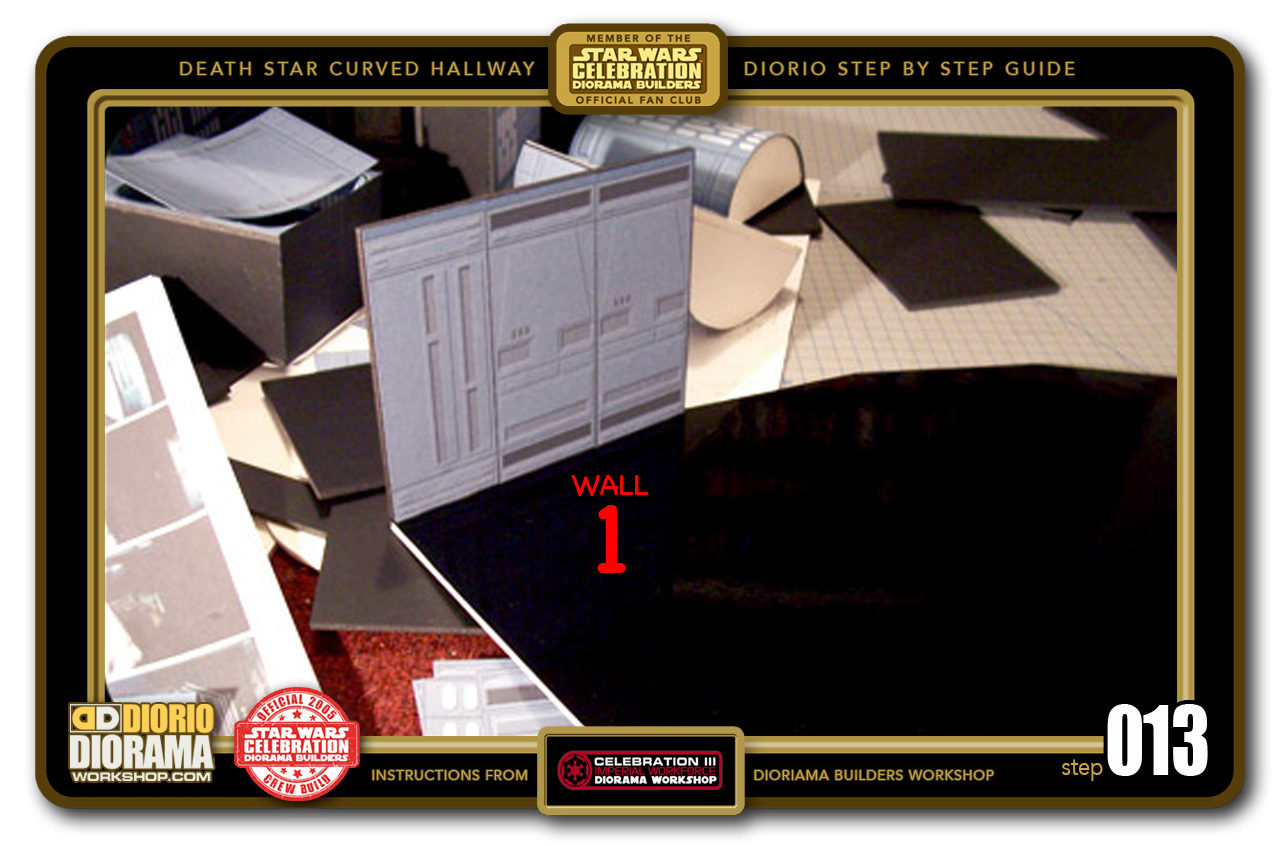
- STEP 013 > Take your left side "WALL 1" and secure it to the floor using your hot glue gun. Make sure to align it flush with the corner edge of the floor. DO NOT leave a gap.

-

- STEP 014 > Now take the right side "WALL A" and glue it to the floor with your hot glue gun. As you did with the left wall, make sure it is aligned flush with the floor base corner.
-
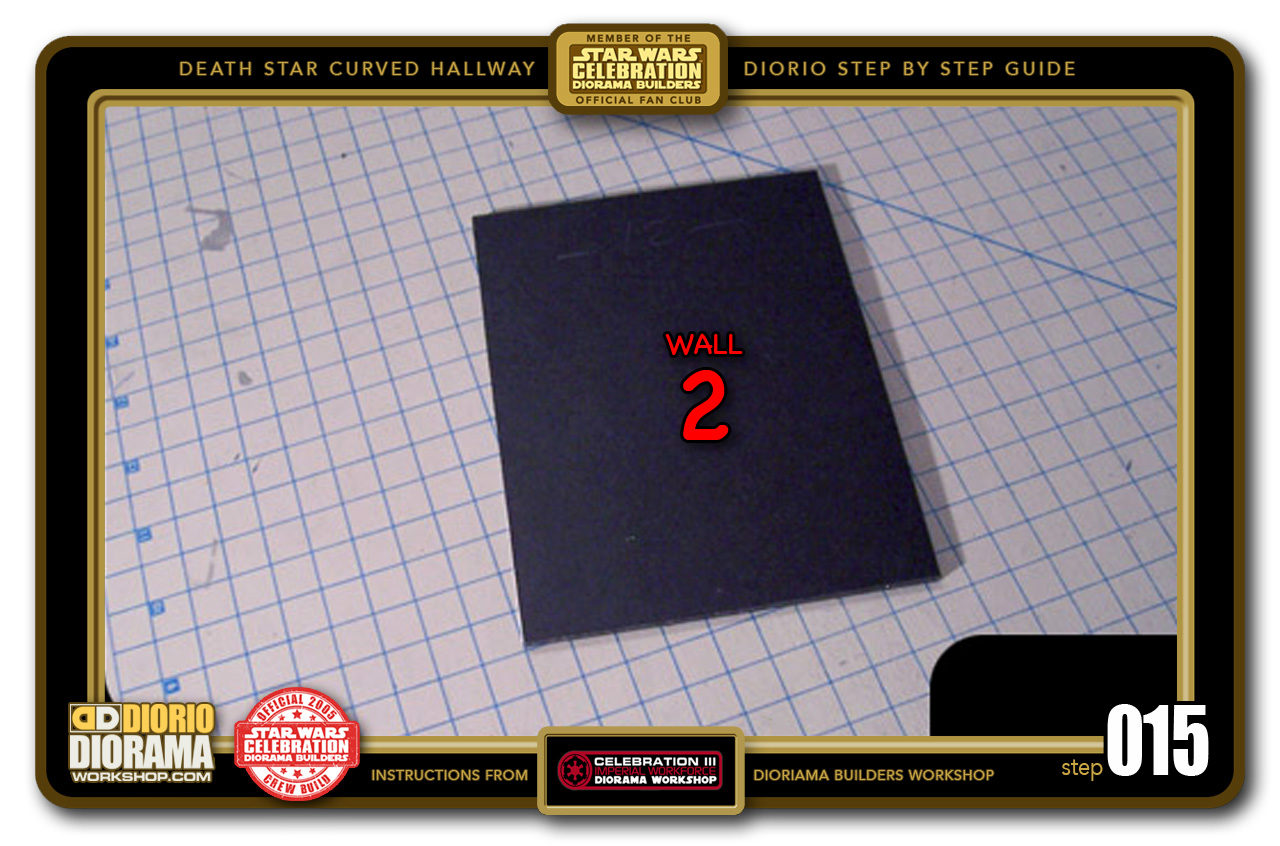
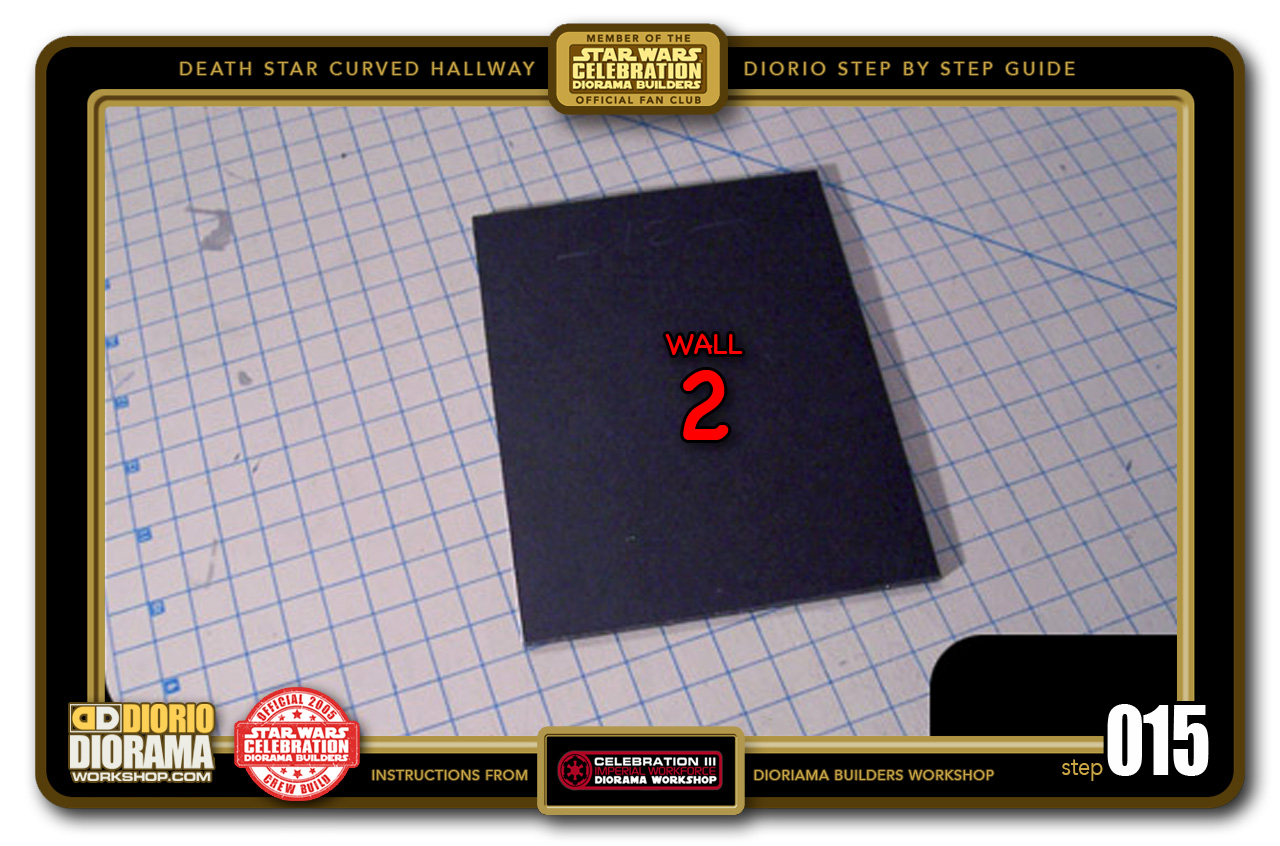
- STEP 015 > Time to make the 12cm X 15.5cm rectangles. You will need to make 7 of these for your 2,3,4,5,6,7 and C WALLS.
-

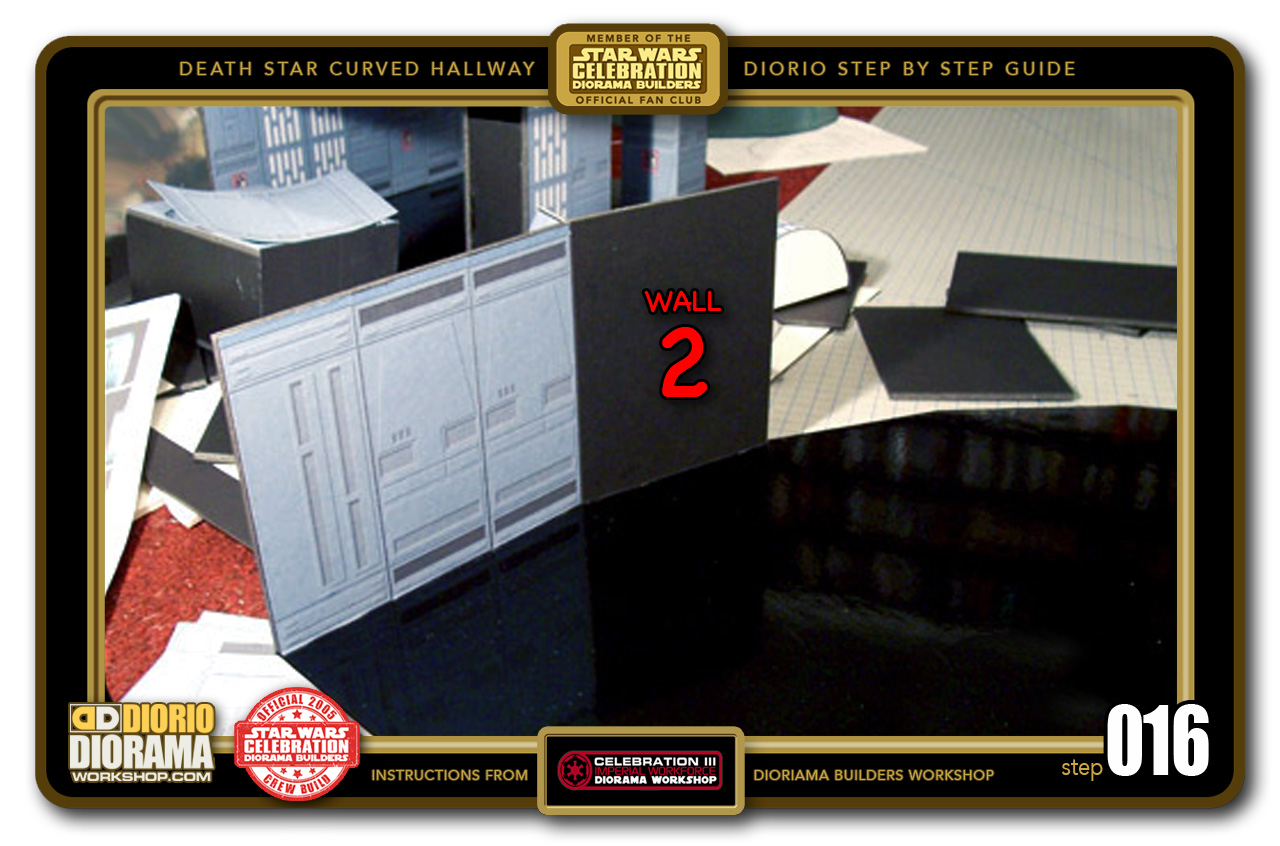
- STEP 016 > Grab your first rectangle - "WALL 2" panel - and hot glue it to the floor base right next to the left "WALL 1" panel. No need to put glue between the pieces quite yet. If you use glue only on the bottom for now, that will help you get a better fit later on.
-
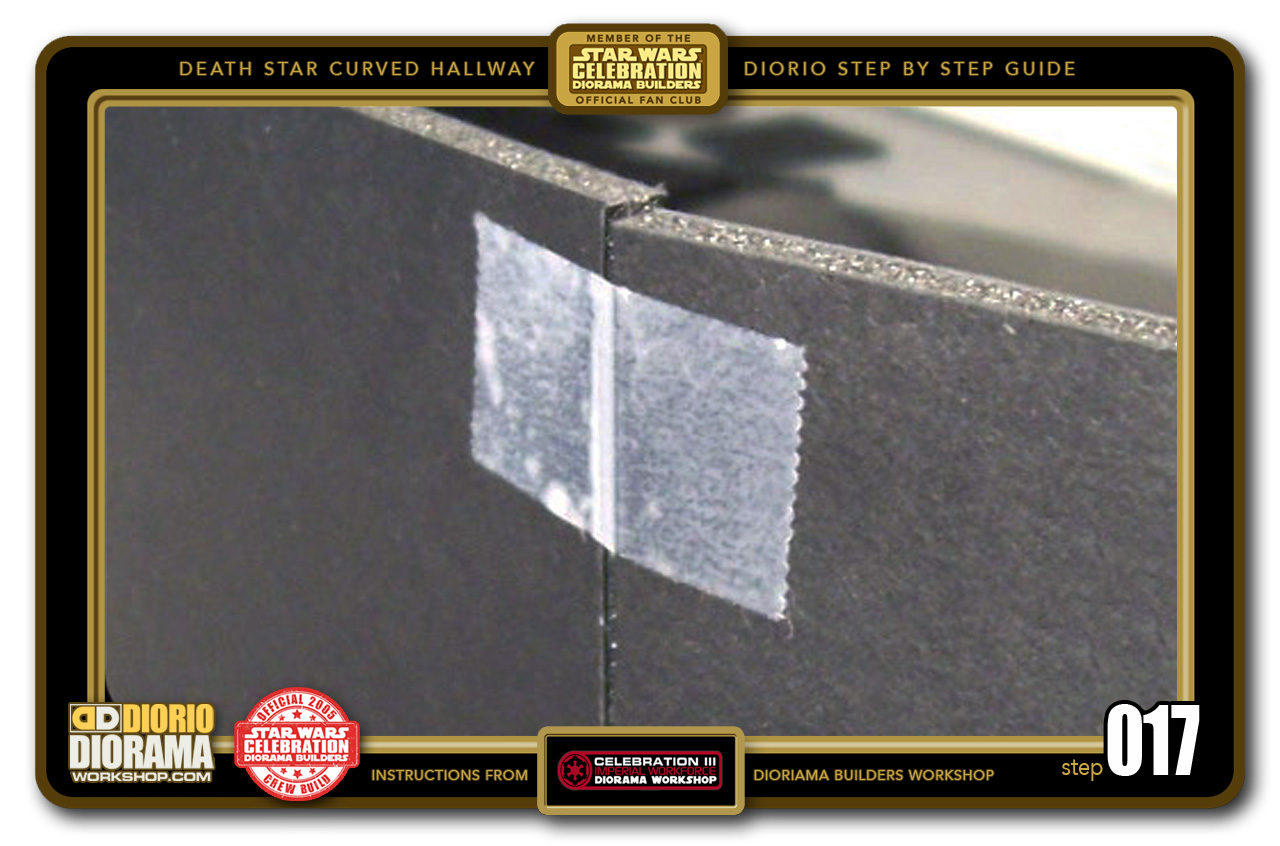
- STEP 017 > Place a small piece of tape at the top behind the 2 panels. Now you can hot glue "WALL 3" to the floor as close to the corner of your "WALL 2" as possible. Put another piece of tape behind to keep them temporrarely together for now.

-

- STEP 018 > Using one of your other rectangles, stick on TWO basic wall panel decals. For movie accuracy, a trapeze with 2 black top and bottom ventilation shafts and Neon panel sections are used. You can of course select any basic hall decals of your choice if you prefer.

-
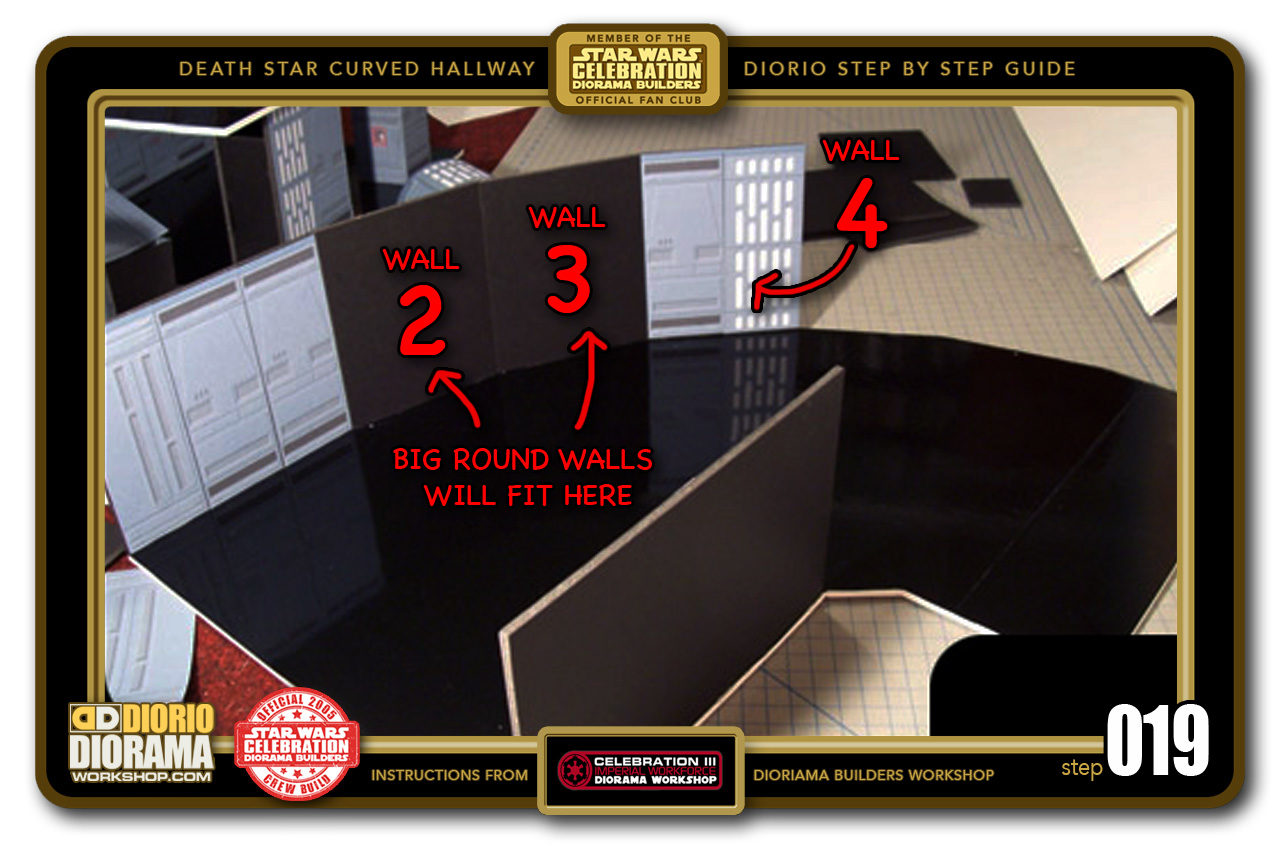
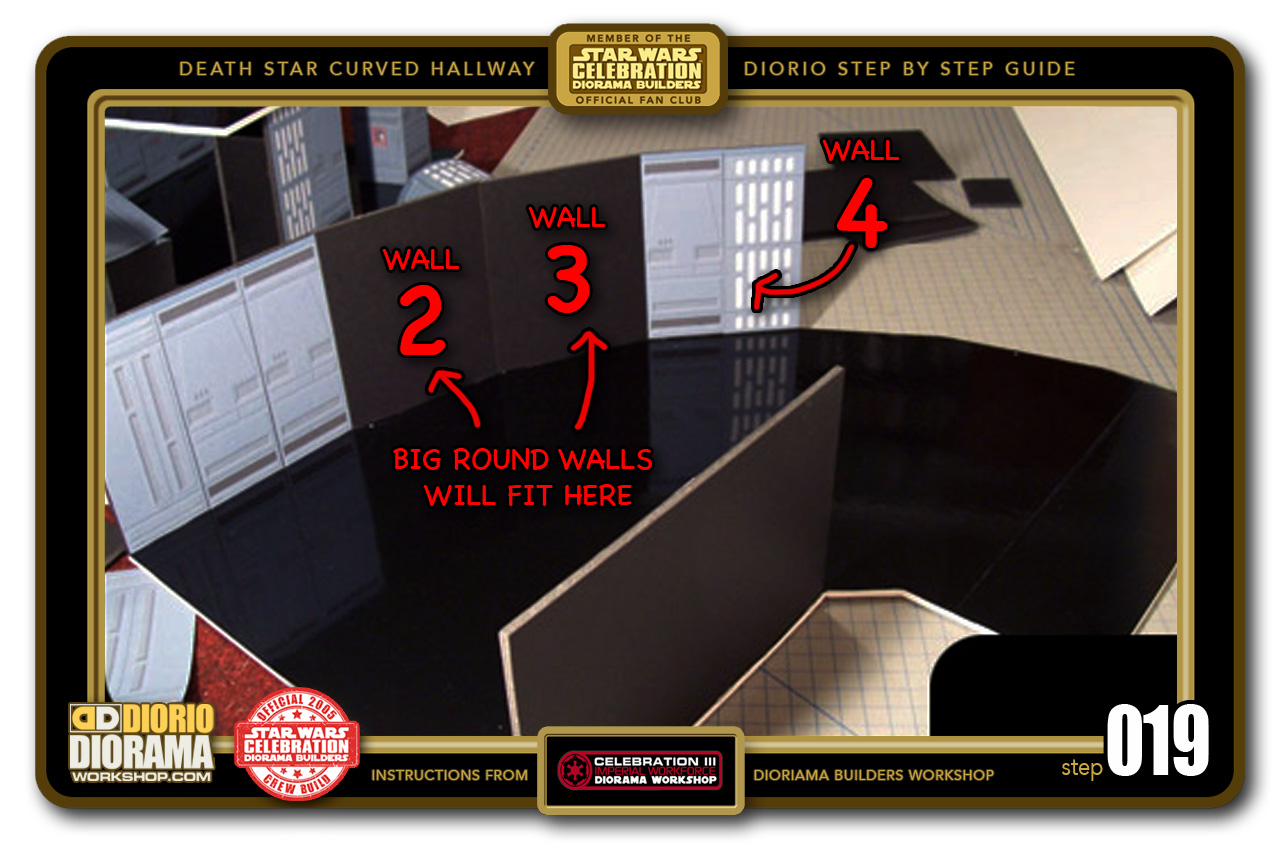
- STEP 019 > Now hot glue the "WALL 4" unit next to the TWO blank wall units. Secure the units together with a small piece of tape near the rear top of the Foamcore. If you don't want movie accuracy and 2 large round panels to cover "WALLS 2 and 3" you can use any of the basic wall panels instead.
-
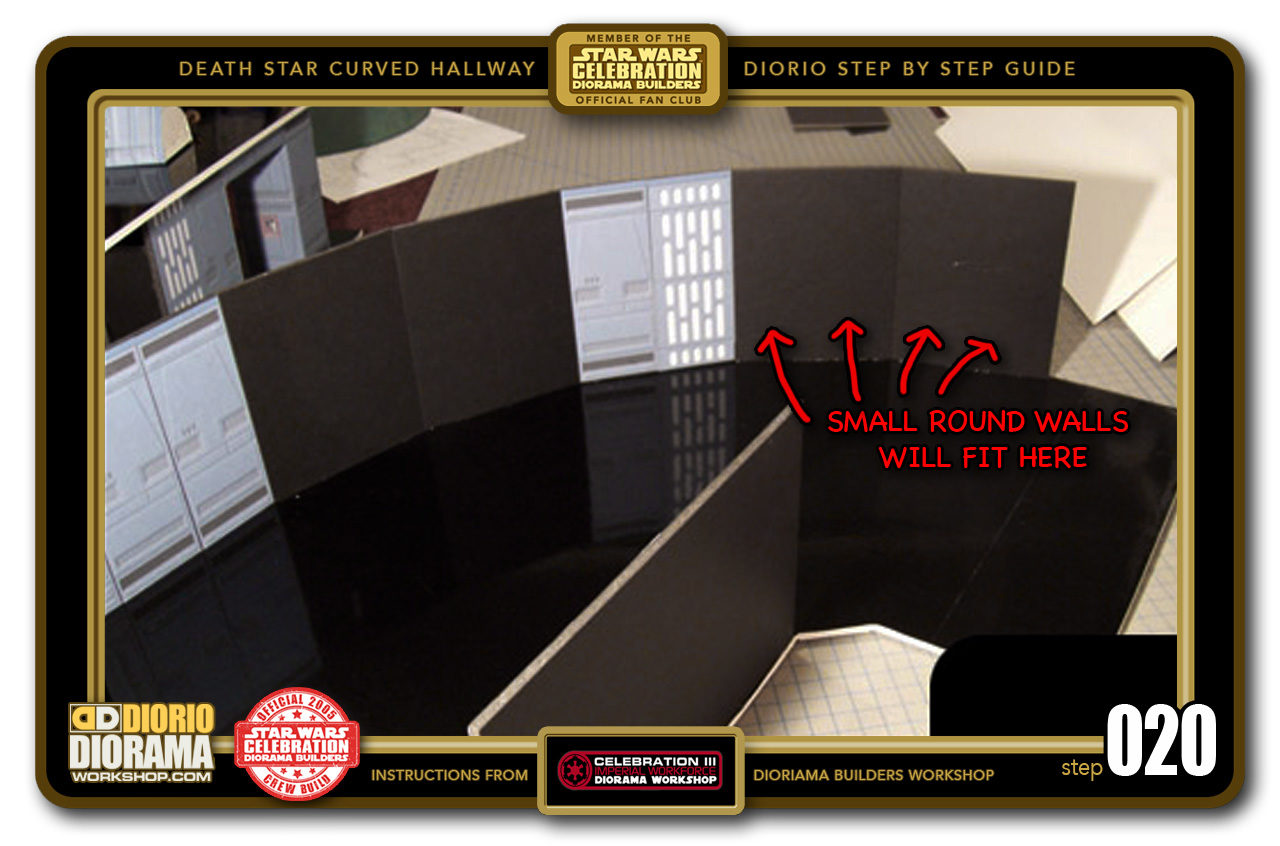
- STEP 020 > Hot glue 2 more rectangles to become your "WALLS 5 and 6" These are now blank as they will be covered with 4 small round wall panels just like in the movie. If you don't want the trouble of making these, you can simply apply any of the basic wall panel decals instead.


.
Did you already build this Diorama ? At home or at our Star Wars Celebration Diorama Builders workshop ? Would you like to show it in the site’s GALLERY VISITORS DIORAMAS section, YES ? That is Awesome !!! You can find out all the details on how to email me your photos on the VISITORS SUBMISSIONS INFO page … When I get your photos, I will create your very own page just like this one. You may not realize it but work does inspire others to join in the fun of making Action Figure Dioramas.
.
NOT FOR RESALE ALL Decals, tutorials and artwork are ©FrankDiorio (dioramaworkshop.com) and offered FOR FREE to the fans – that would be you ? so you can build and display my diorama designs in your very own home. I realize I cannot control what one does with my graphics once I place them on the web, I can only ask you as one fan to another, please respect the artist and do not be that jerk who uses my designs and tutorials to build a copy of my work only to sell it on EBAY or trade/sale groups and forums. Thank You. Frank.
.
.
If you have a facebook account, why not join the Official Diorama Builders Fan Club today, simply click the logo link below.
 .
.
Catch up with fellow visitors and exchange stories, read cool interviews with the crew, exchange photos, fun surprises and grab some FAN ONLY merchandise next year at actual future conventions ?
.
©2018 Frank Diorio DioramaWorkshop.Com
.
IF YOU LIKE WHAT YOU SEE, PLEASE SHARE WITH YOUR FRIENDS
USING THE SOCIAL MEDIA BUTTONS BELOW