


-

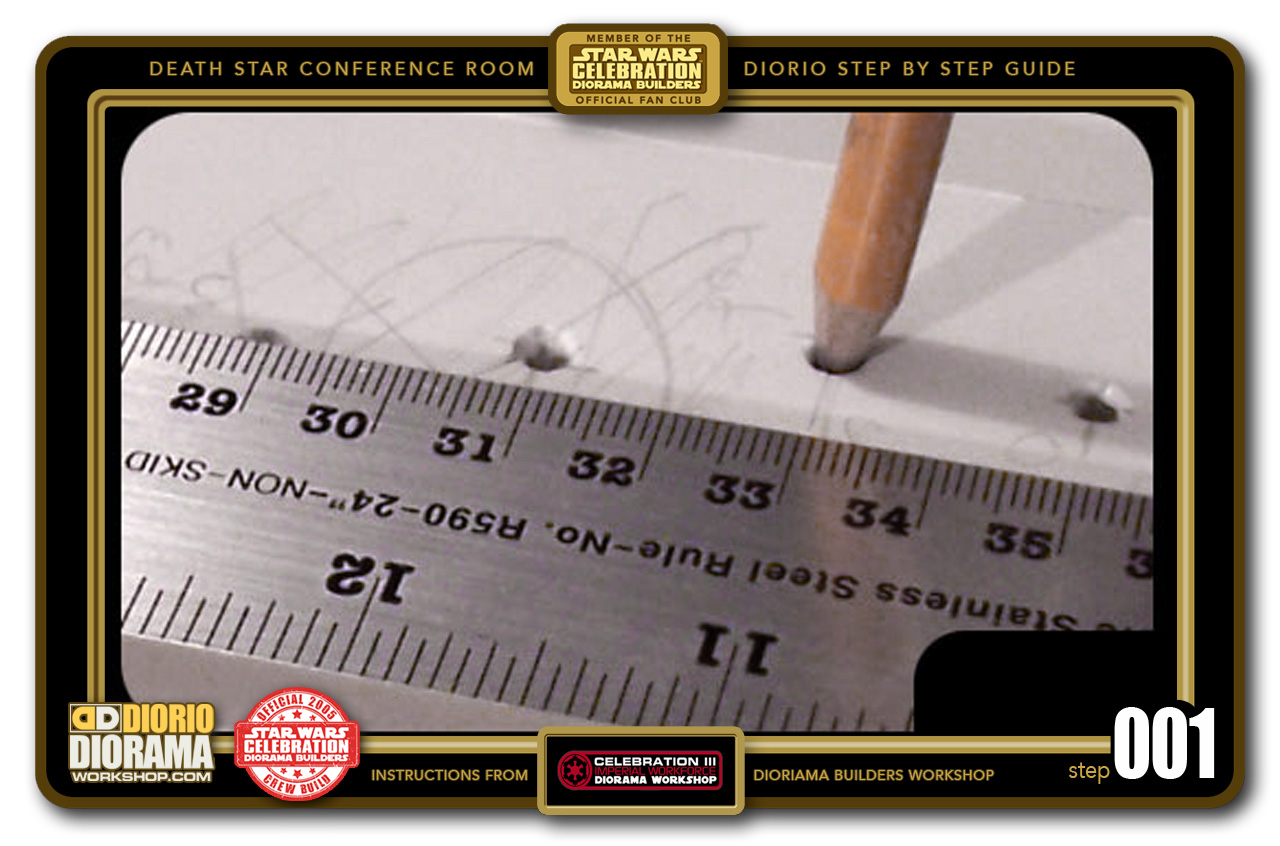
- STEP 001 > Let's start with the floor base of the room. It is a round shape with a flat short extrusion which exits to the Death Star Hallway. Start with a 36cm or longer 1 inch(ish) wide scrap piece of foamcore. At one end, stick a pushpin centered to the width and 1 cm from the tip (edge). Then measure 31cm and 33 cm from the pushpin and poke holes so that your pencil can fit to the other side. It's sometimes easier to start with a smaller needle, then work your way up to a pen/pencil hole.
-

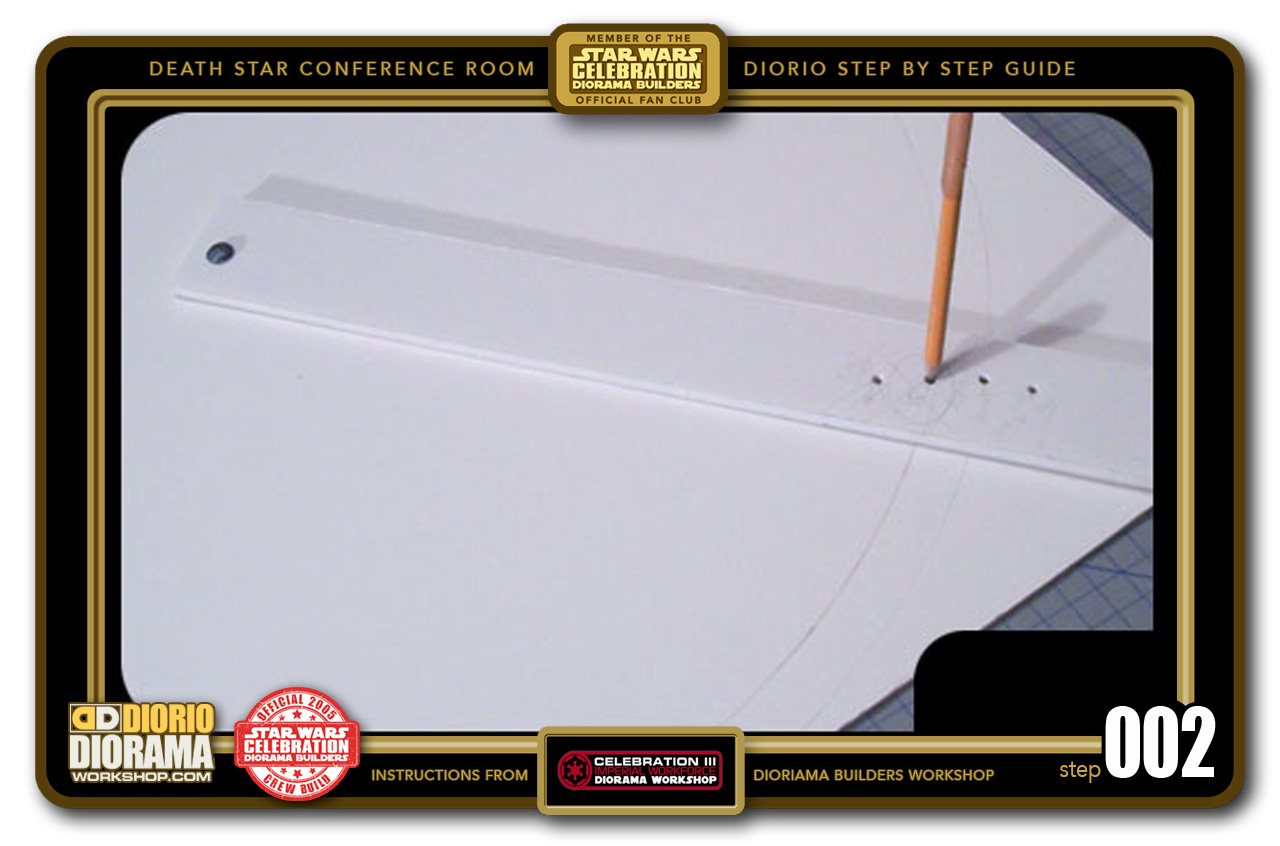
- STEP 002 > Estimate the center of your foamcore sheet and press the pushpin into your floor piece then with the pencil in your guide hole, let it spin the guide all the way around till it goes around in a circle. Make sure the pushpin doesn't pop out. That could result in an uneven circle. Draw the outer circle (33cm) first and then change the pencil's place to draw the inner circle (31cm).
-
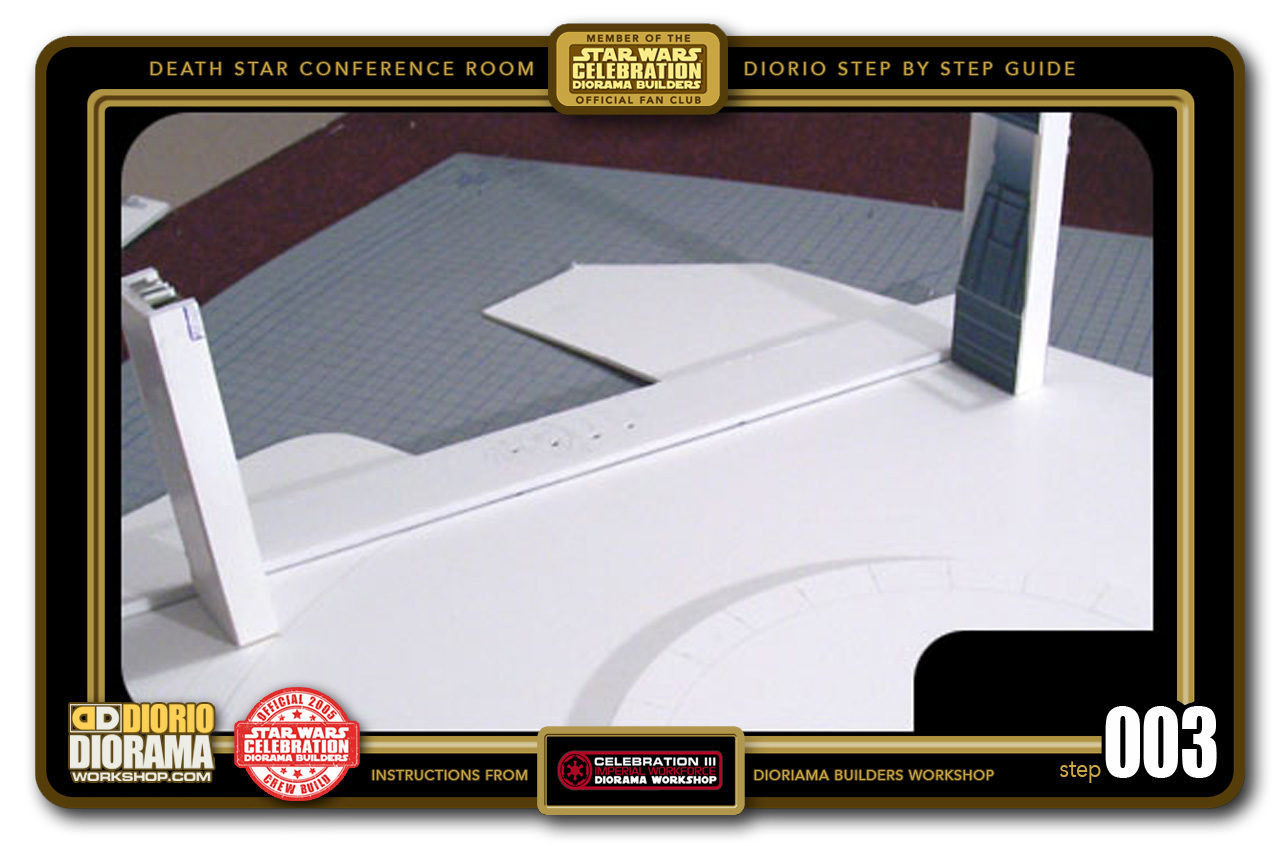
- STEP 003 > At one end of the room will be a straight section where the main sliding doors are located to enter the room. This wall connects with 2 basic wall pieces that will be glued at 90 degrees from the door itself. Shown here with 2 temporary base units to help you understand what I am trying to say :).

-
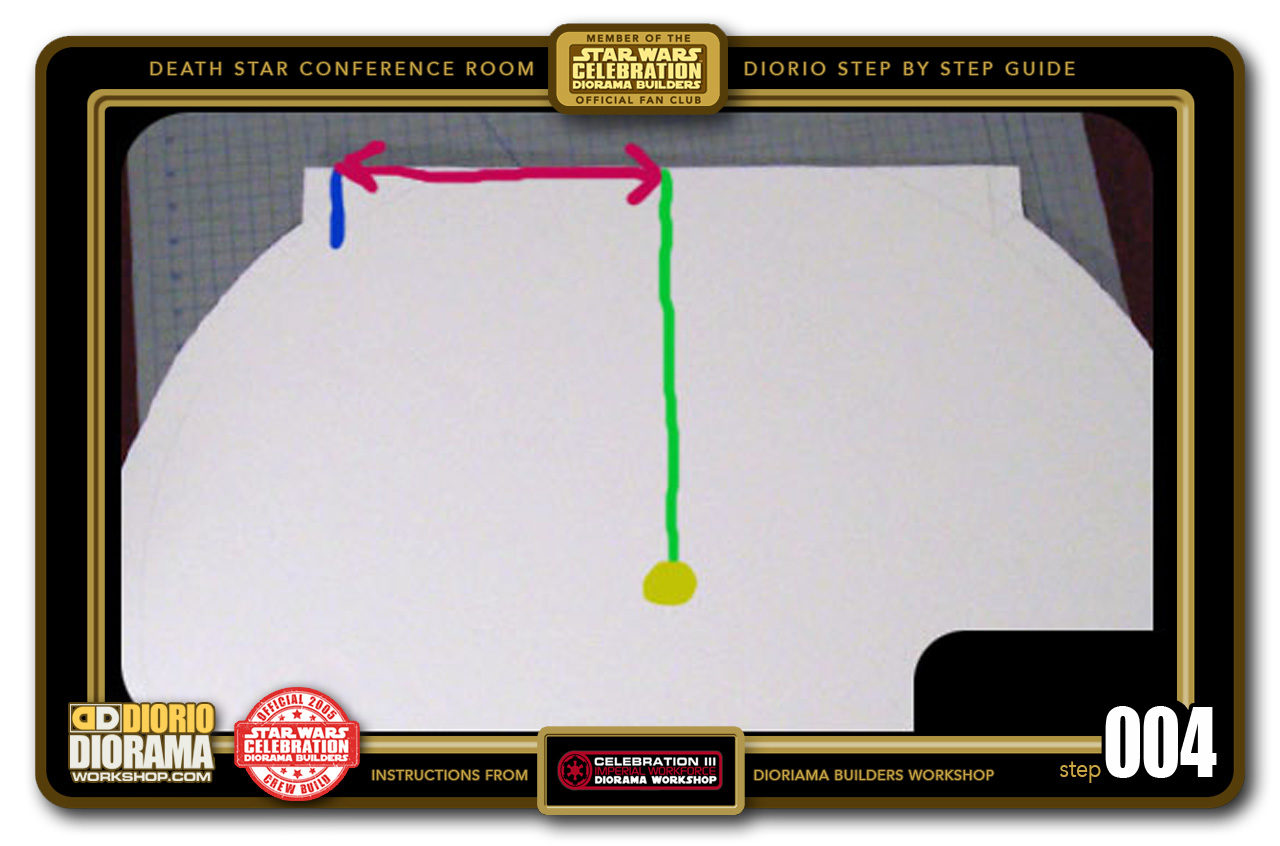
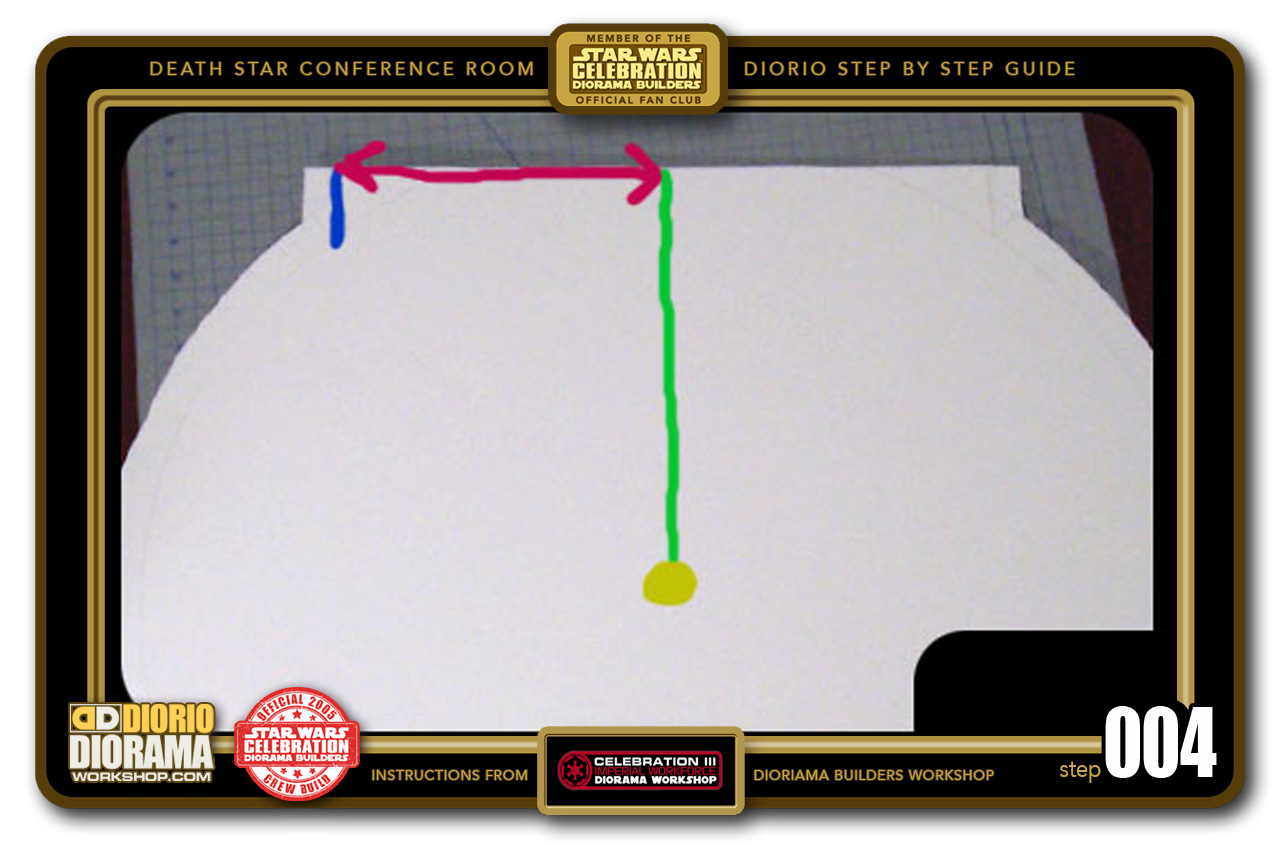
- STEP 004 > Let me try and explain it better with color coding. The Yellow dot is the Center where the pushpin was inserted during the pencil circle tracing. The Green line is a line that goes down from the center to the extremity of the outer circle. This line is 28cm long. More on that later... The red line indicates 90 degrees from the green line.
-
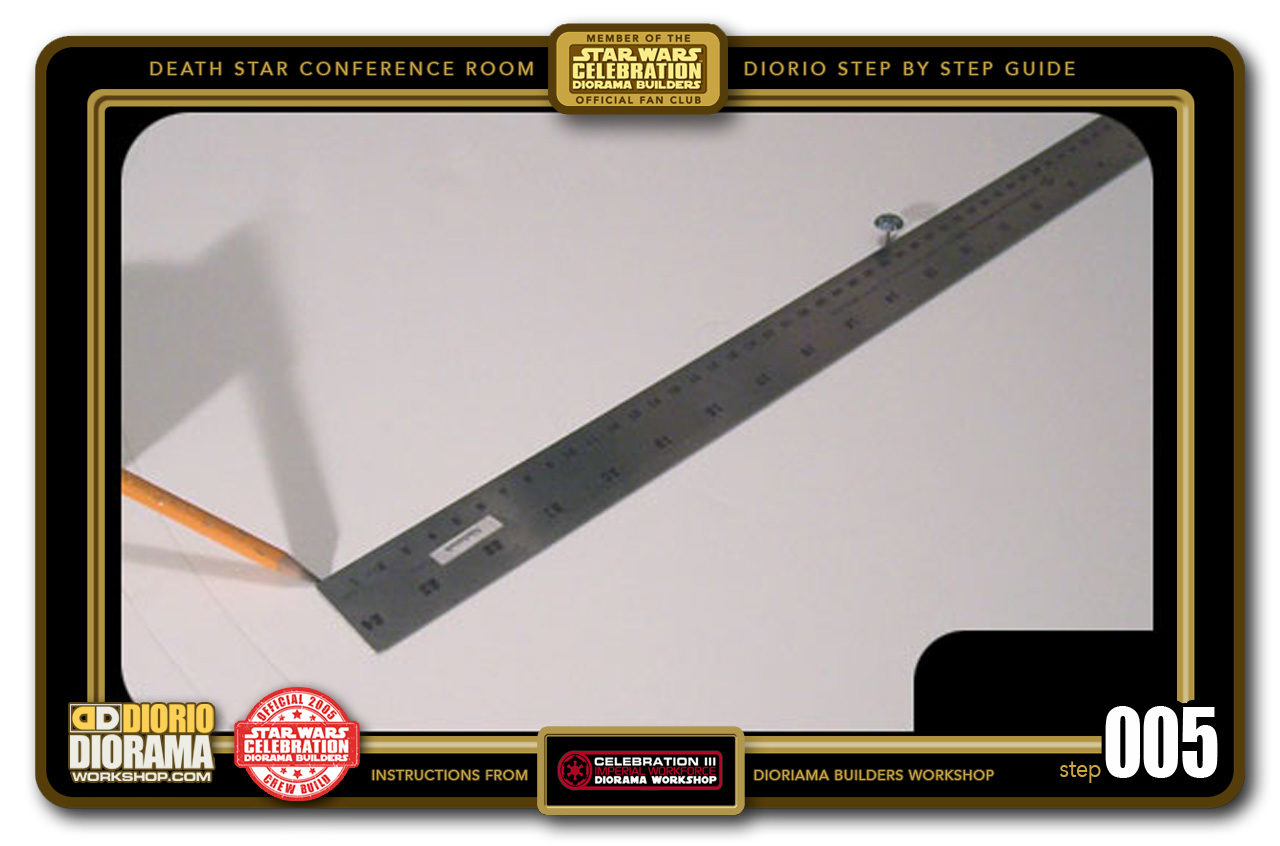
- STEP 005 > So place a ruler against the center of the circle and measure 28cm from the pushpin mark. This is the green line in STEP 004. It doesn't matter where you draw the line in the circle. It is the angles at the end of this line that will transform the circle shape into the correct conference room floor.

-
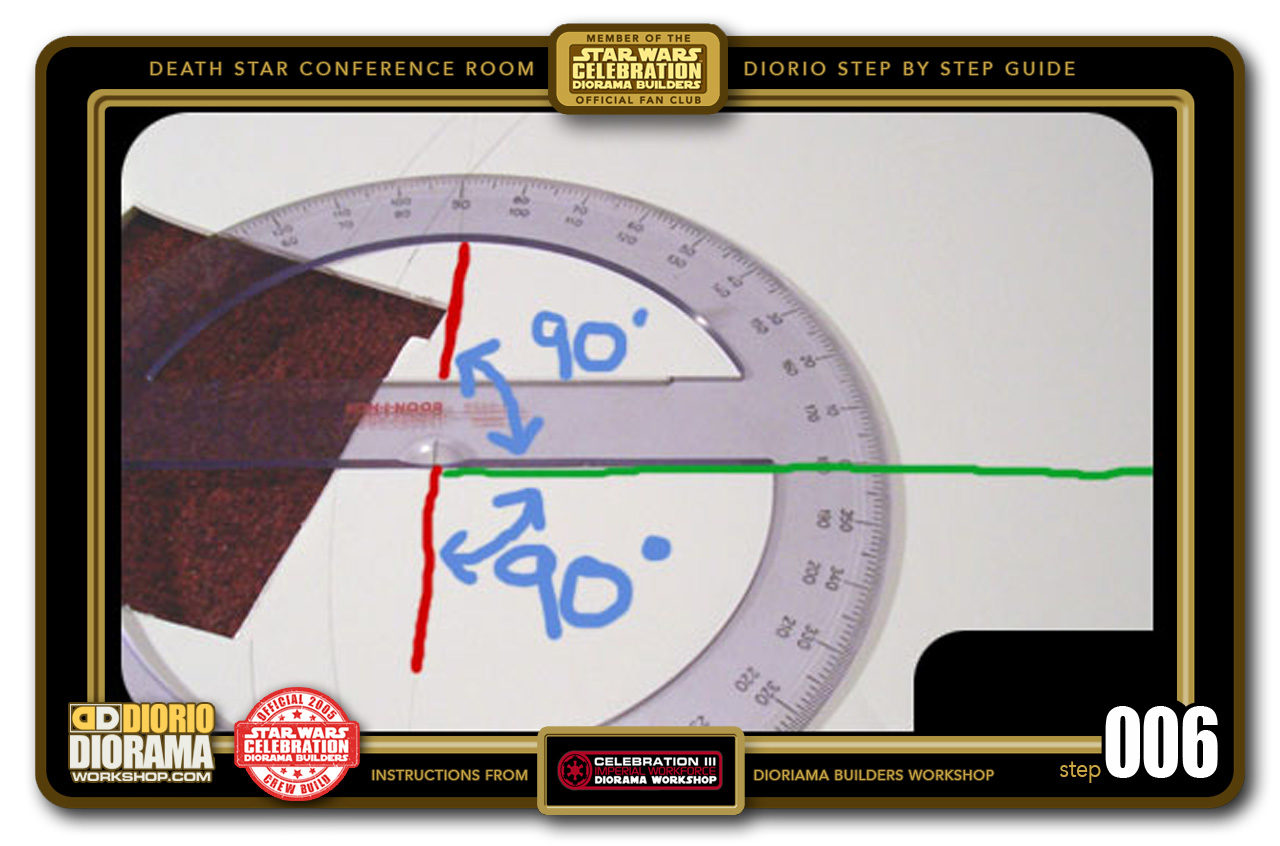
- STEP 006 > Now that the line is drawn, you must draw a line that is a perfect 90 degrees of the "green" line. The red line should extend to 20.5cm on each side for a total witdth of 41cm. NOTE: Ignore the hole in the foamcore on the left where you see the red carpet. That isn't a cut for the build, created for the floor. It was already there as I was not using a brand new piece of foamcore. Pretend it's all white 😛 Like yours is right now 🙂

-
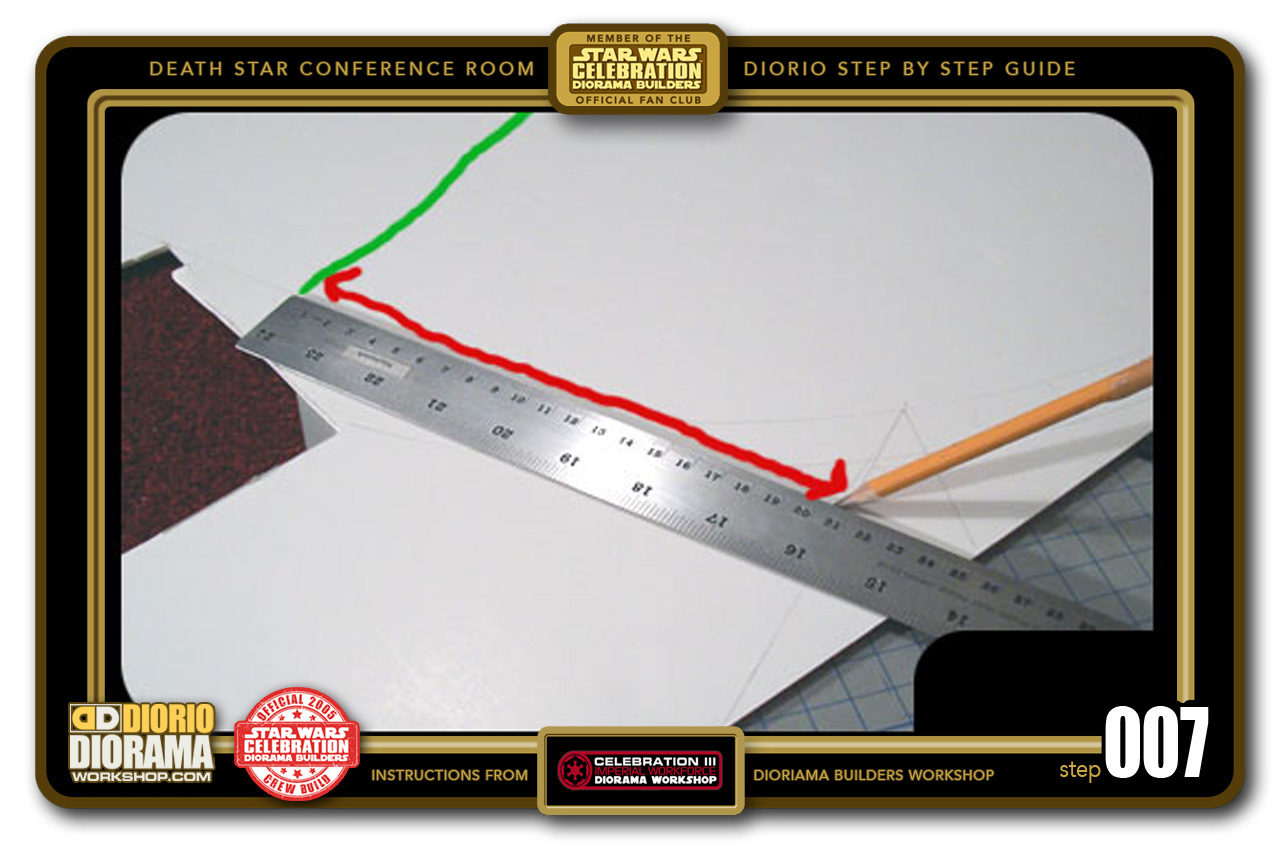
- STEP 007 > Ok, so now that your "red" line is drawn, measure 20.5cm from the green line and make a mark there with your pencil.

-
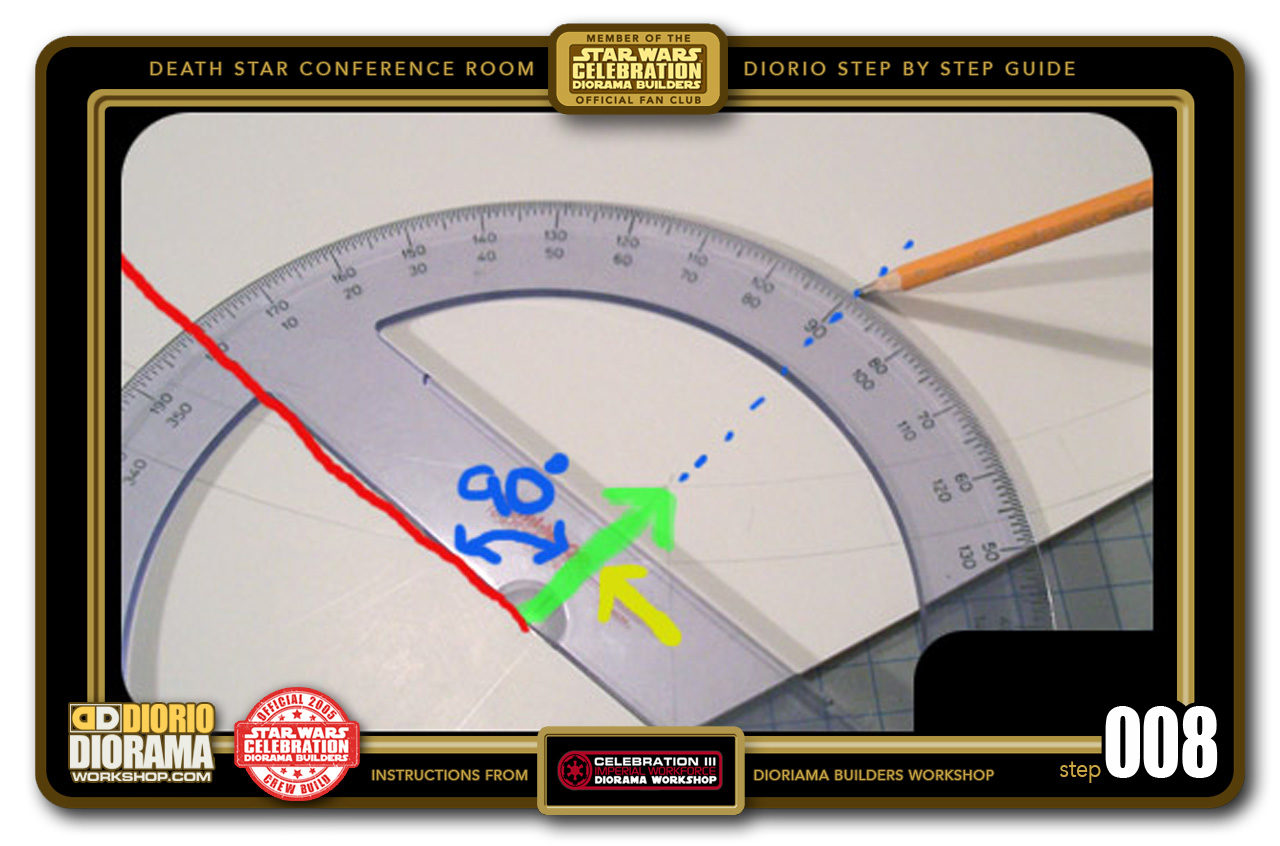
- STEP 008 > Now measure another perfect 90 degrees from the end of the "red" line towards the inside of the circle. The blue dots represent the line you will draw after marking the 90 degrees with your pencil. The green arrow is the actual length you will draw with your ruler - 5cm to be precise. This will connect your line with the inner 31cm circle line.

-
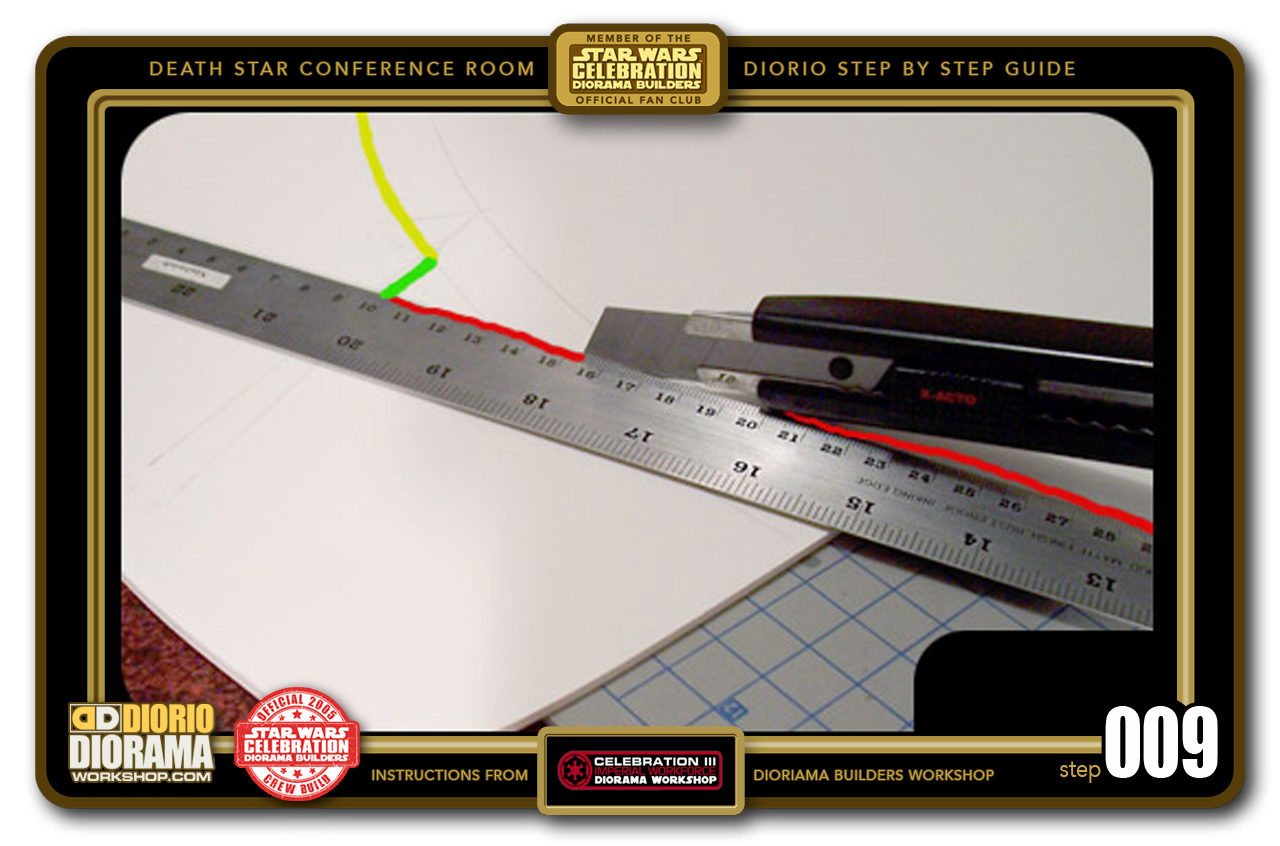
- STEP 009 > So now it is time to cut the conference floor shape. Make sure to use a new sharp blade to avoid jaggy edges and get a nice smooth rounded shape and WATCH YOUR FINGERS !!! 🙂 You will be cutting along the red line, then the short green line (stop at the outer circle) and the outer 33 cm circle line represented here by the yellow color.

-
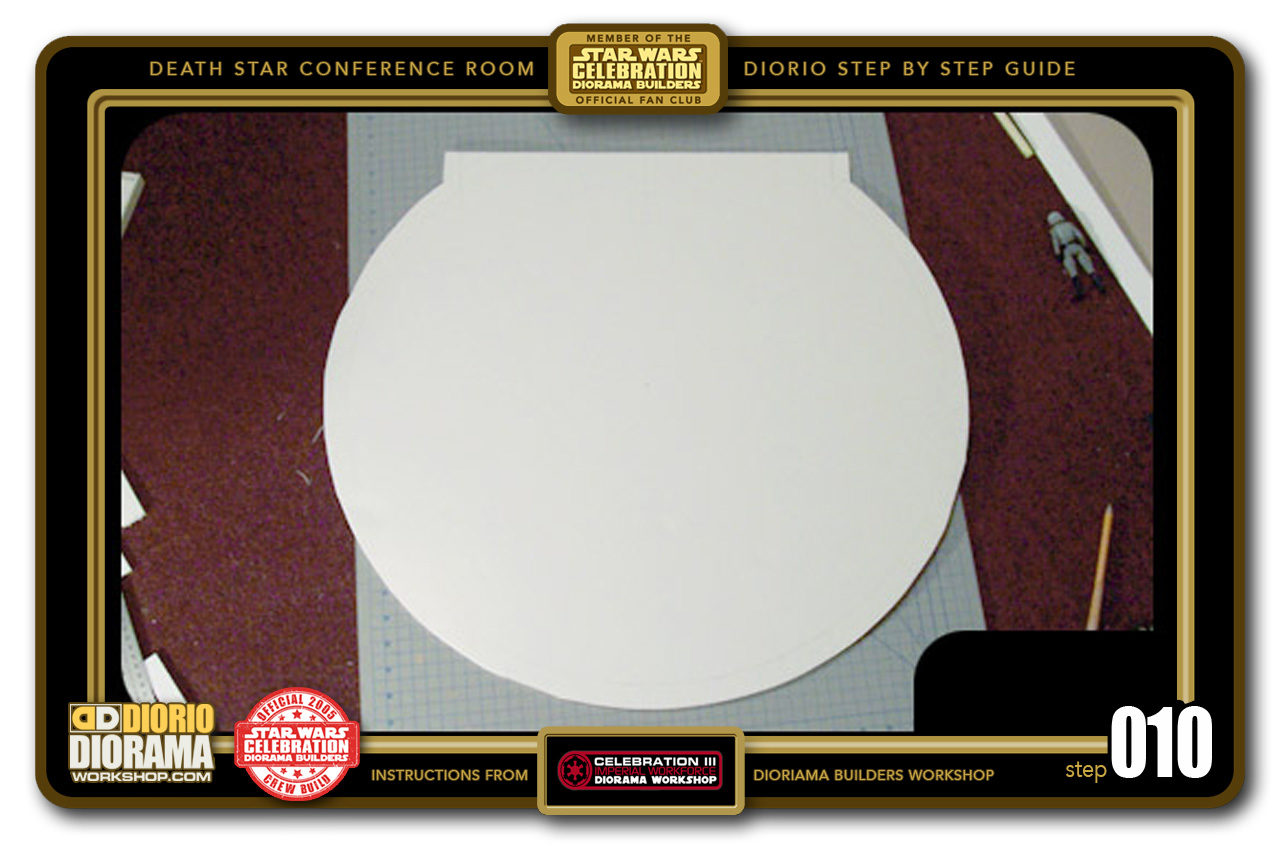
- STEP 010 > Here is what your floor shape should look like once cut. Almost like a toilet bowl cover LOL. Now we can give it a nice shiny finish.

-
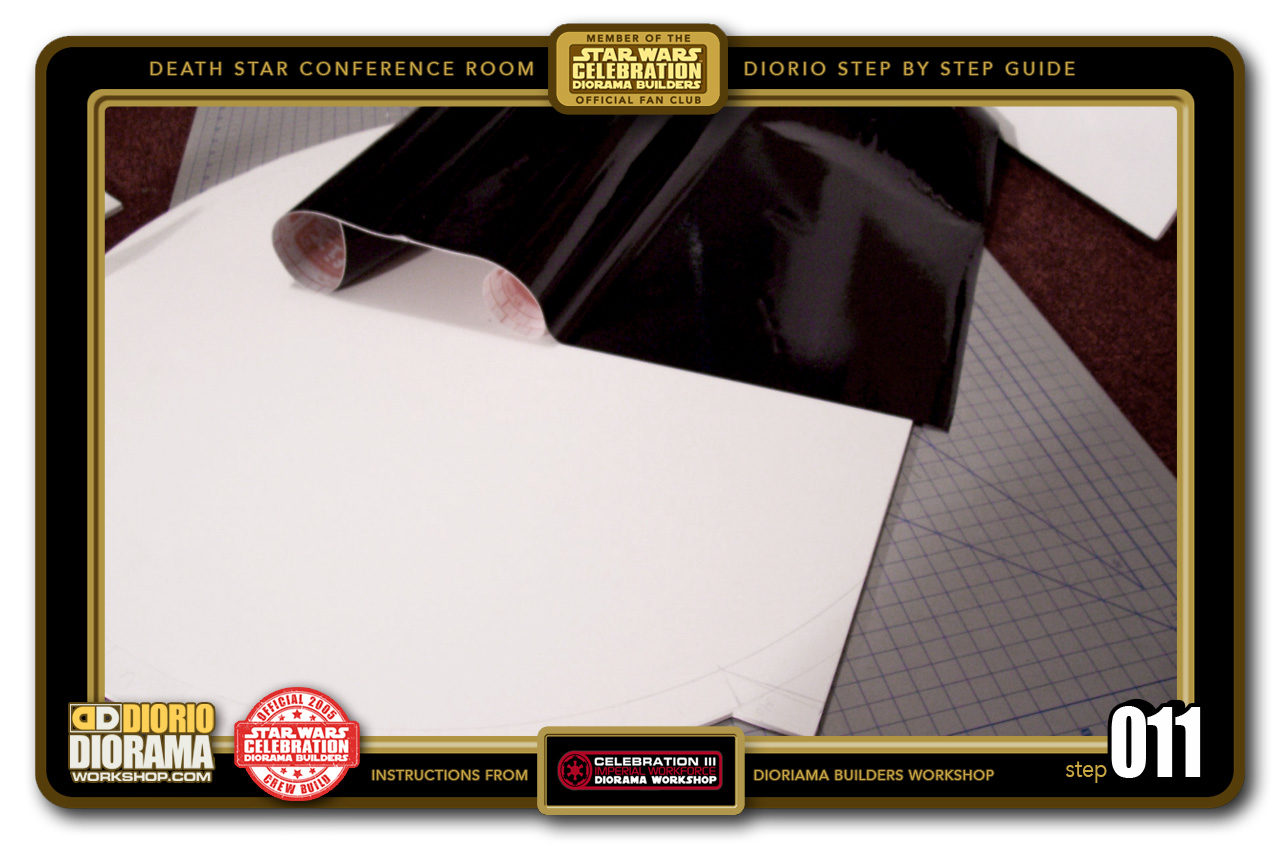
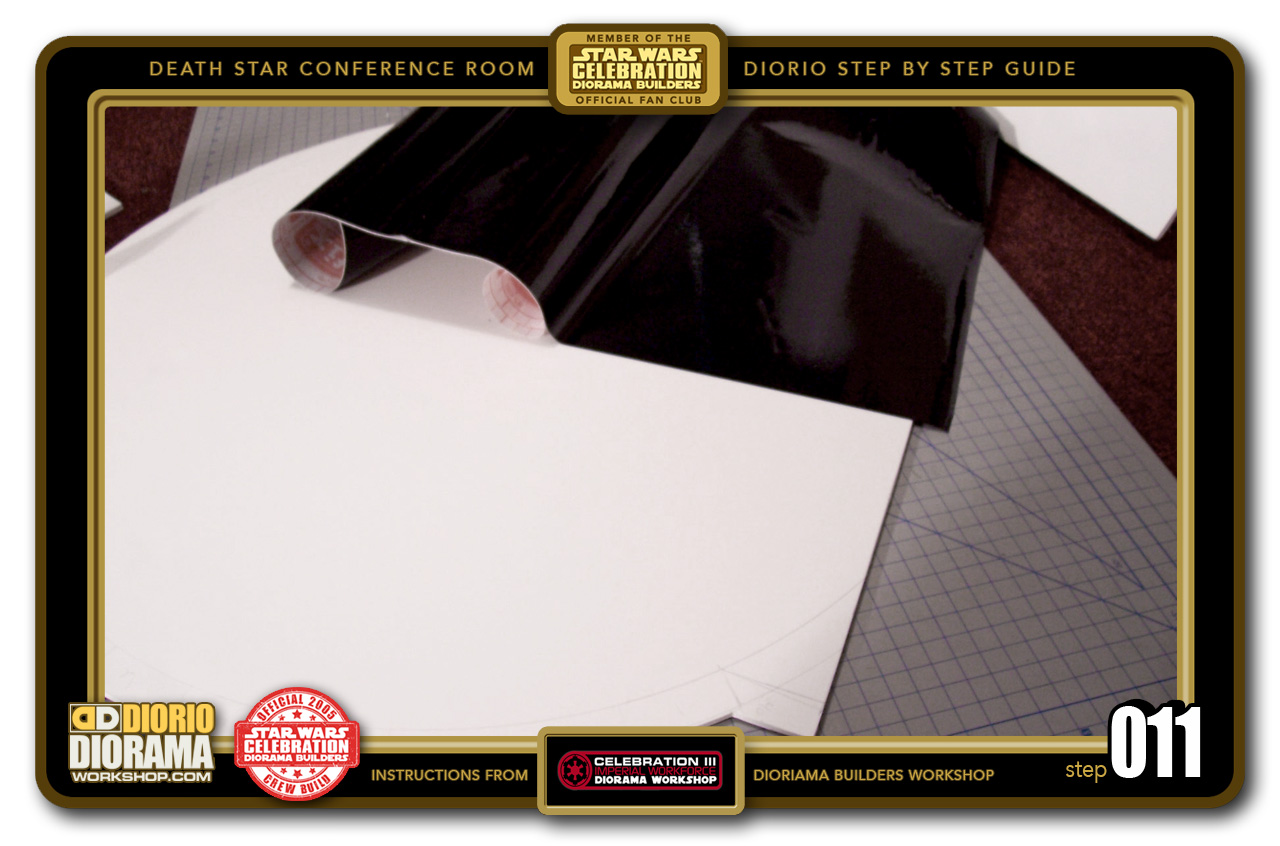
- STEP 011 > I like to use MacTac, (some places call it DC-FIX) it's sold at all Home Depot type stores and often used for the bottom of kitchen drawers and cabinets. It comes in many (ugly floral) patterns and colors, including this awesome gloss black. Simply cut a rough piece that fits from one end of the circle to the other. Because of the size of this diorama, I had to place 2 halves, thankfully, the glossy black hides the overlapping seam very well. To apply, simply S-L-O-W-L-Y peel back a 6-7 inch "zone" from the back waxy paper and lay it against the foamcore. Then you can press with your hand or a flat piece of foamcore from one end to the other, making sure to avoid and push out any trapped air bubbles or wrinkles. Then unroll another 6-7 inches and repeat, continue until the entire MacTac is applied to the foamcore surface.
-

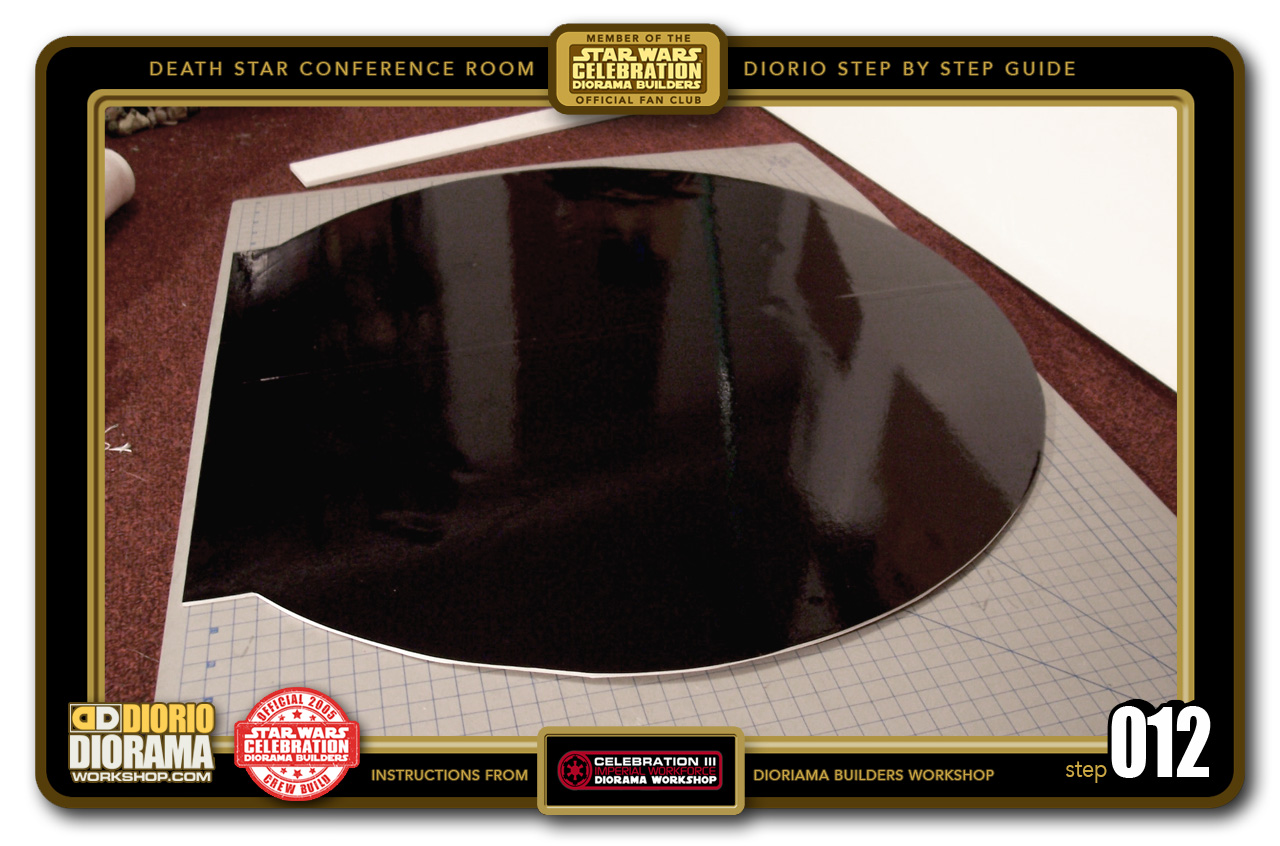
- STEP 012 > After the first MacTac was applied, I repeated the procedure on the other half of the exposed floor. When both sides are done, you get a gorgeous shiny black reflective floor. Just like the movie set. Woohoo 😀 Let's move on to the table...
-
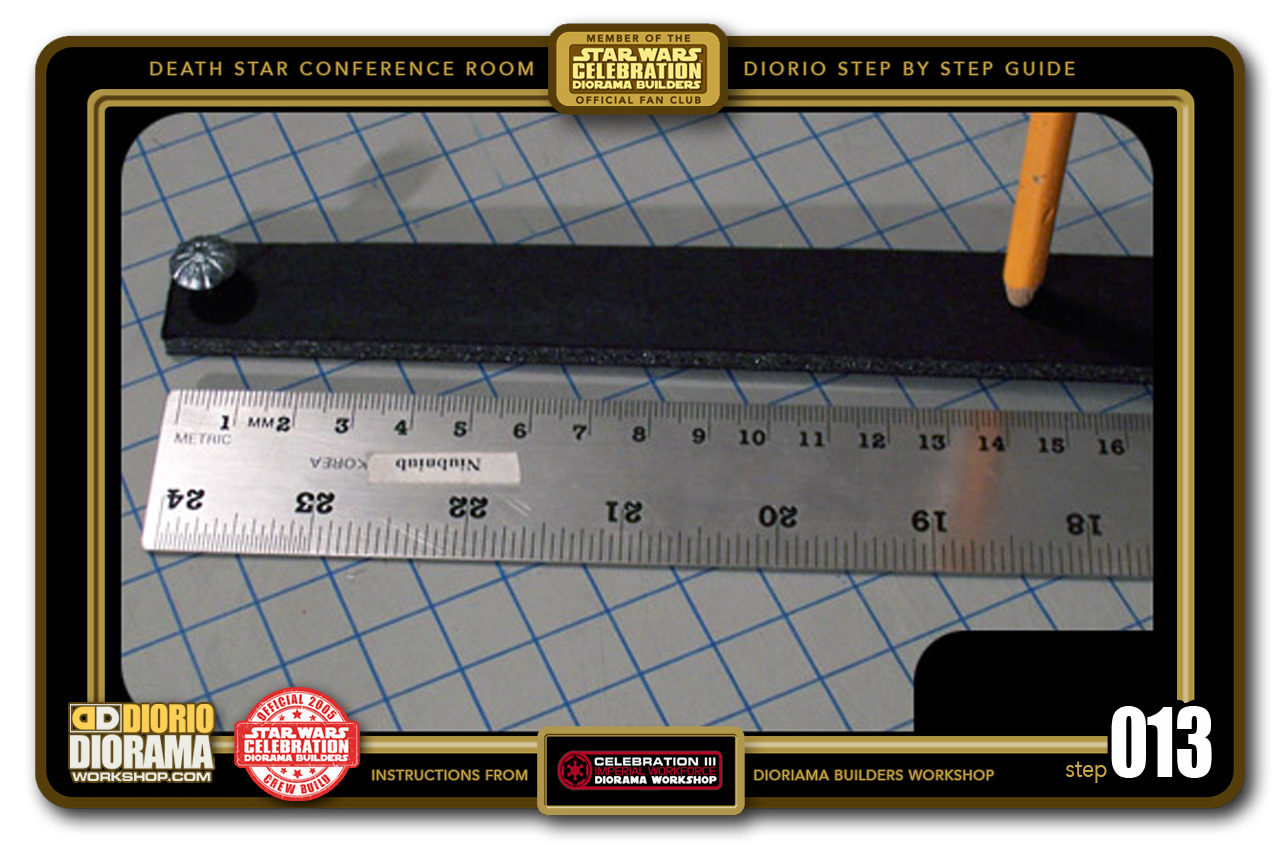
- STEP 013 > Using the same tracing technique as the conference floor circle, take another foamcore strip (or the same as you used before) and this time measure out 14cm from the pushpin. This will be the outer circle and where you will make your cut.

-
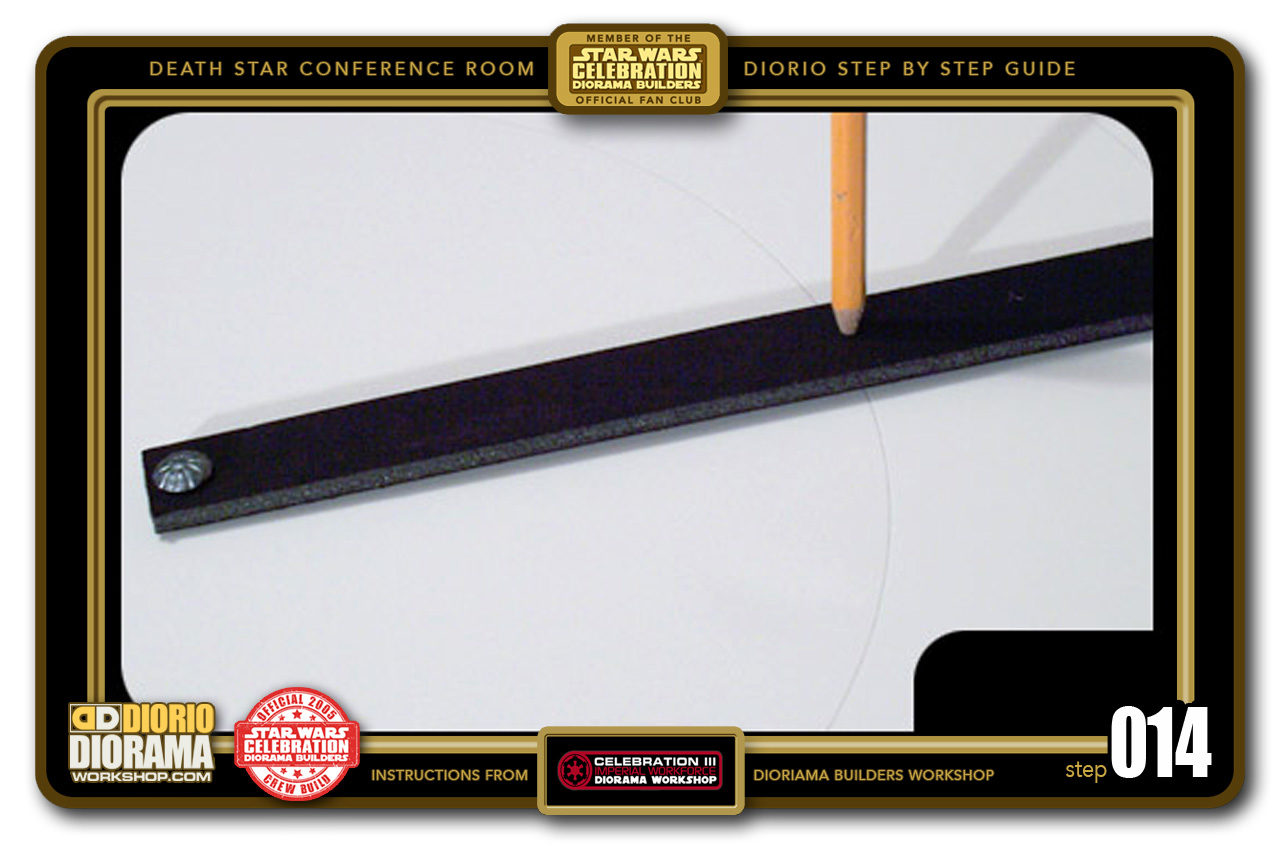
- STEP 014 > Again press the pushpin into the center of a piece of foamcore and with your pencil, gently go all the way around to draw a nice perfect circle.

-

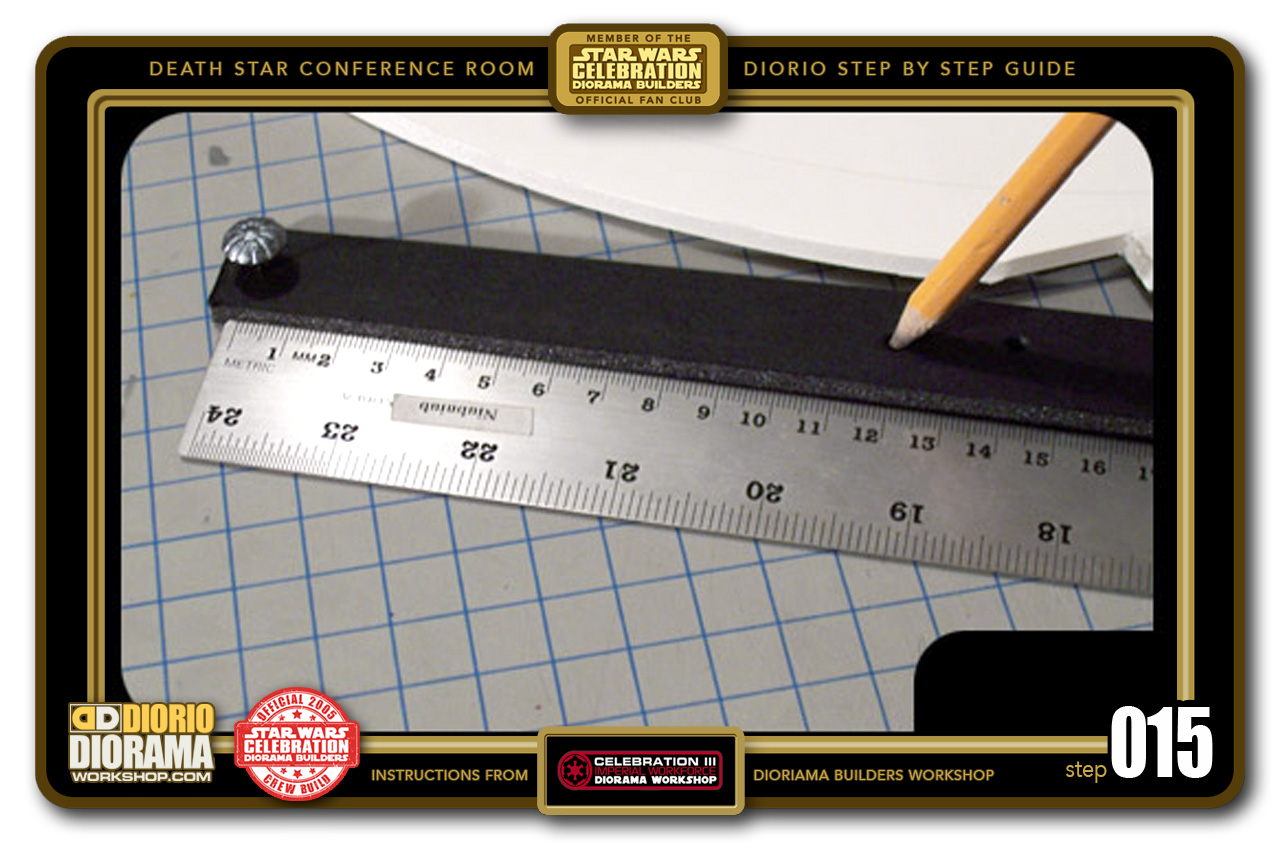
- STEP 015 > Now measure 12cm from the pushpin and poke a 2nd hole wide enough for your pencil to stick out to the other side.
-

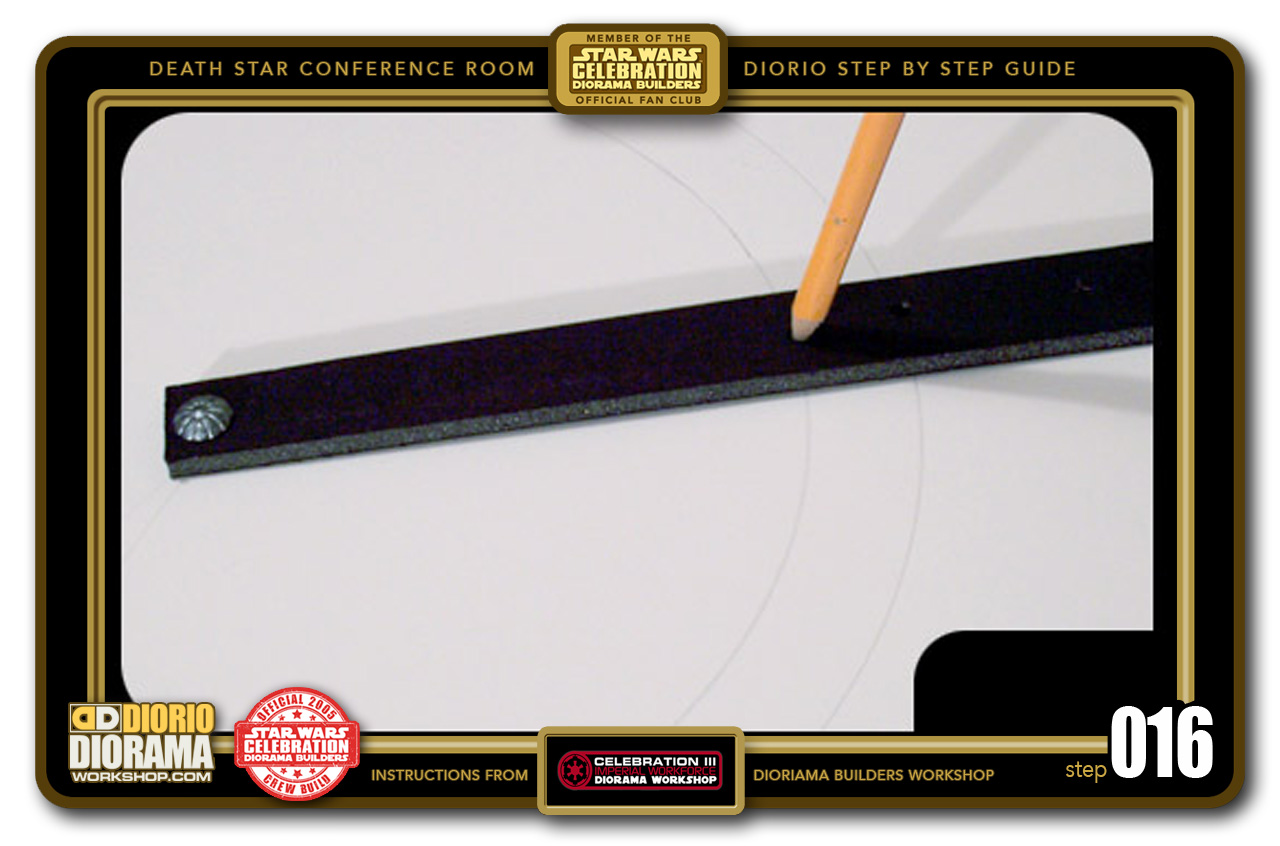
- STEP 016 > Now simply go all the way around again to draw the table's inner circle. This will help you figure out where the outer Command Panels are placed.
-

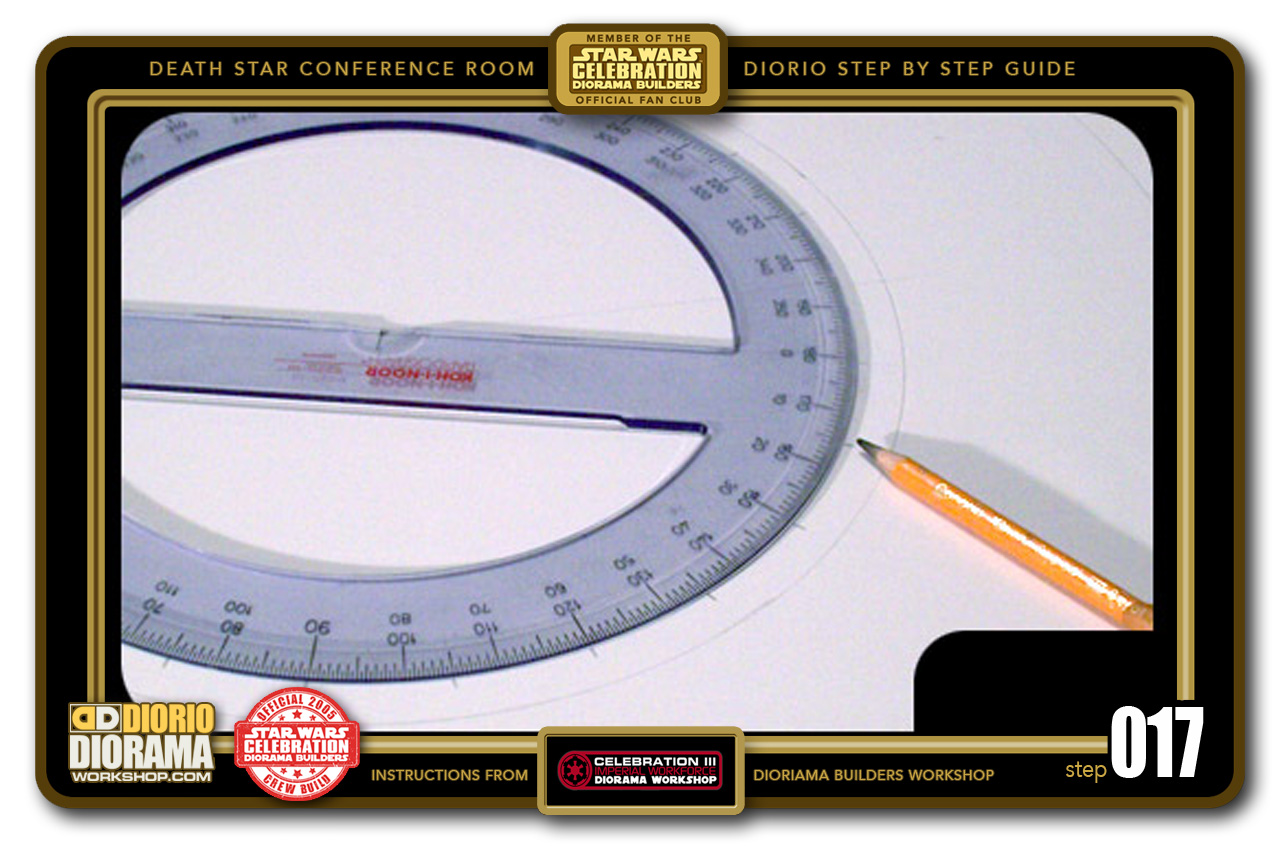
- STEP 017 > Take out your Angle Ruler and place it centered with the pushpin hole you made while tracing your circle shapes. Now use a pencil or pen to make a mark at every 15 degrees until you go all the way around.
-
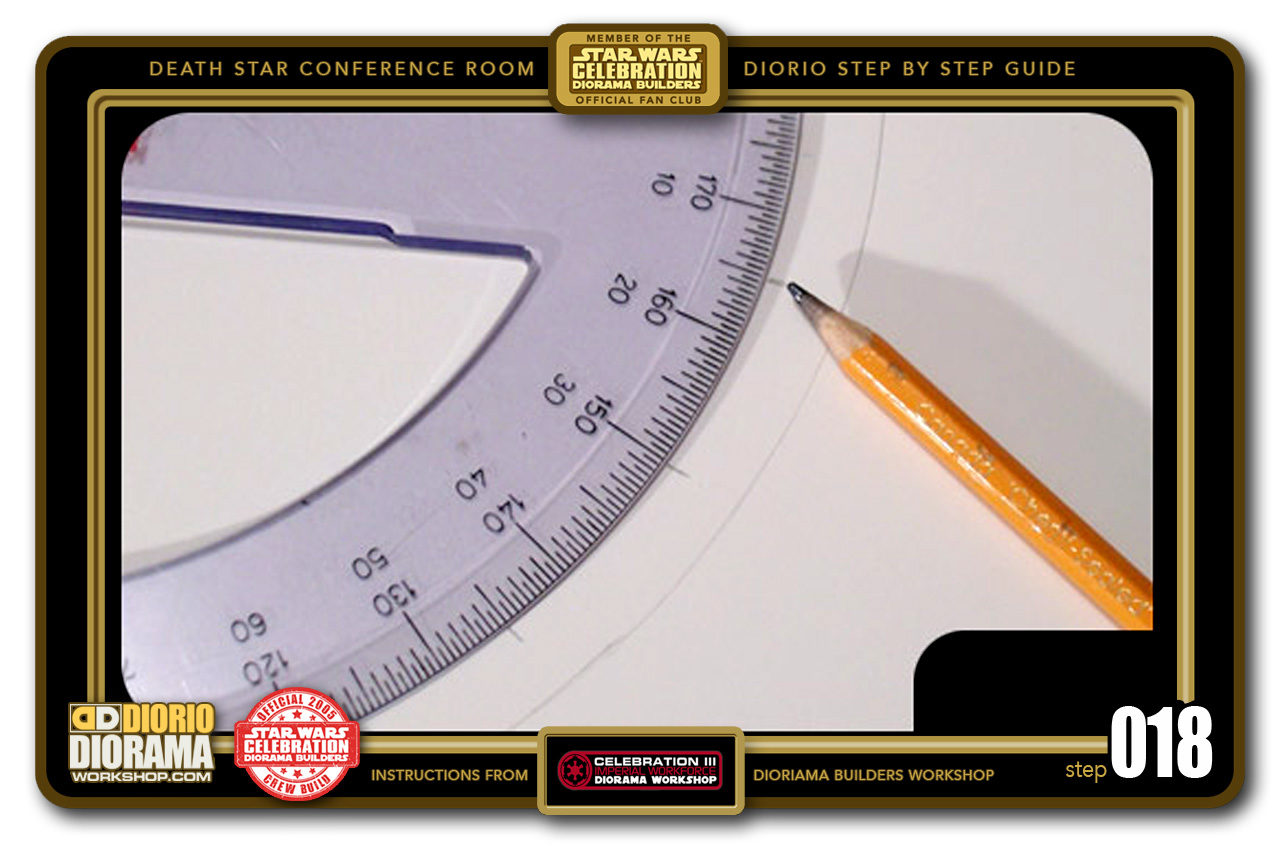
- STEP 018 > Here is a close up showing what the markings look like at every 15 degrees.

-
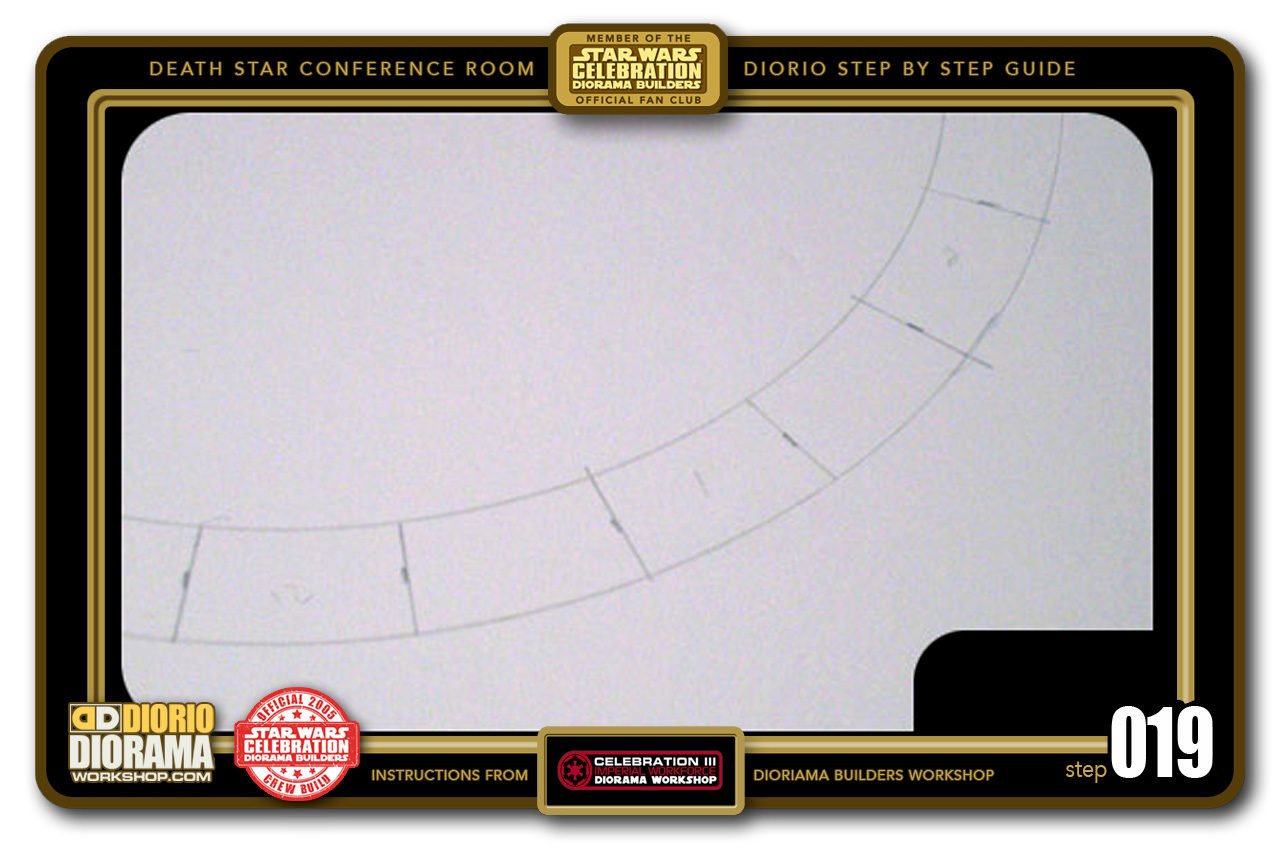
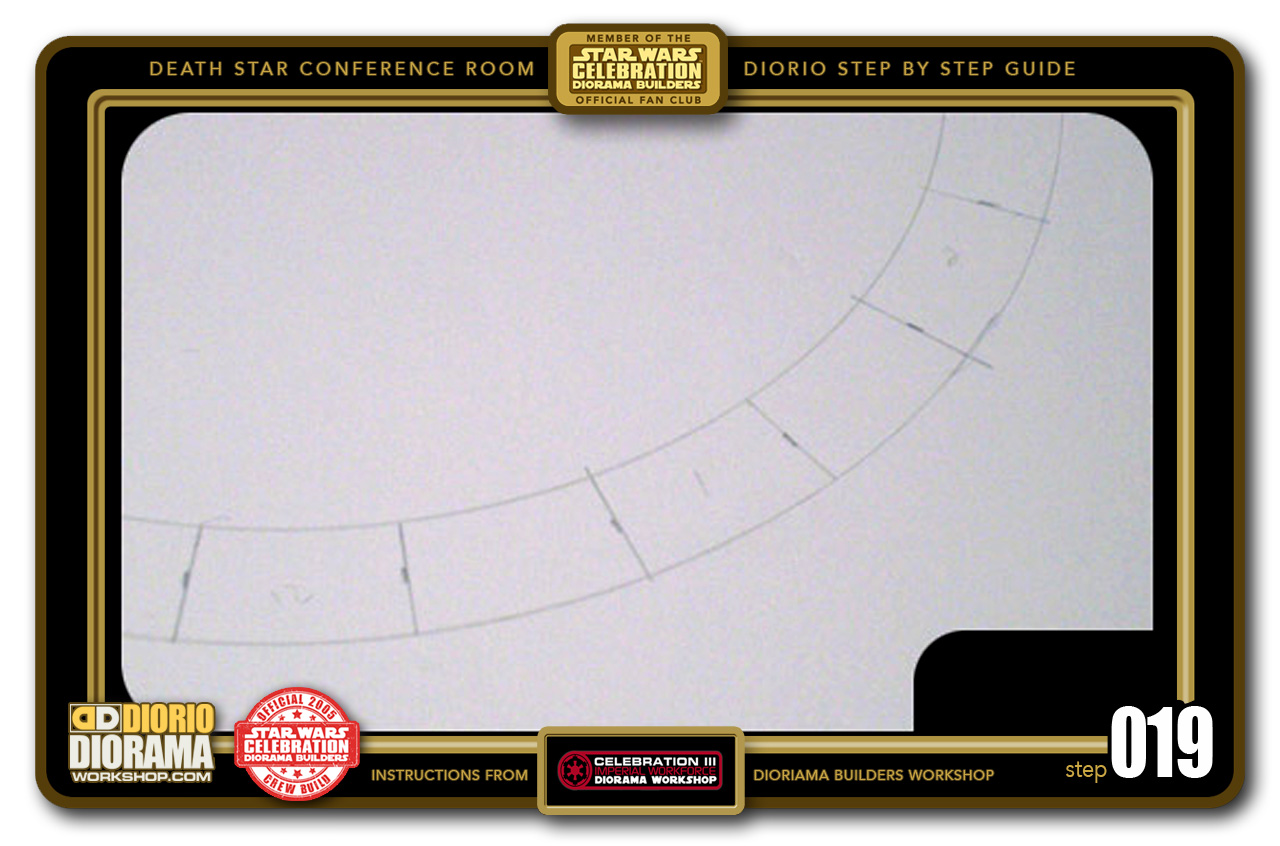
- STEP 019 > Now use your ruler to draw straight lines that connect the inner and outer circles markings. To do this, place your ruler so that is goes all the way accross to the other side of the outer circle shape. Select a mark then look to the other side of your circle and find the mark that aligns the opposite 180 degree mark. Connect the "dots" and continue going all the way around the circle shape. Does that sound confusing? LOL
-

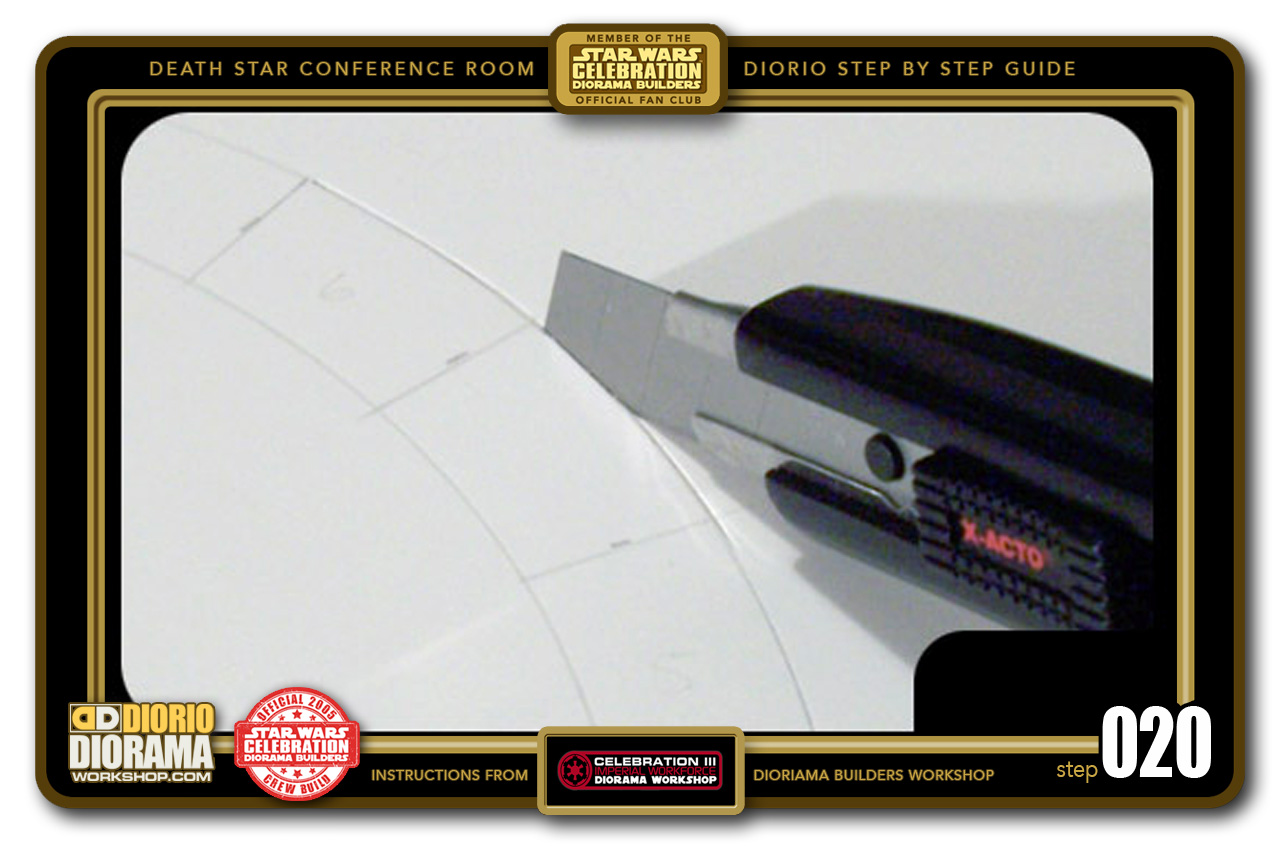
- STEP 020 > Now you can cut the table OUTER SHAPE ONLY !!! Again, Cut the OUTER circle ONLY for now. Again, watch out for your fingers when cutting with a sharp blade.

.
Did you already build this Diorama ? At home or at our Star Wars Celebration Diorama Builders workshop ? Would you like to show it in the site’s GALLERY VISITORS DIORAMAS section, YES ? That is Awesome !!! You can find out all the details on how to email me your photos on the VISITORS SUBMISSIONS INFO page … When I get your photos, I will create your very own page just like this one. You may not realize it but work does inspire others to join in the fun of making Action Figure Dioramas.
.
NOT FOR RESALE ALL Decals, tutorials and artwork are ©FrankDiorio (dioramaworkshop.com) and offered FOR FREE to the fans – that would be you ? so you can build and display my diorama designs in your very own home. I realize I cannot control what one does with my graphics once I place them on the web, I can only ask you as one fan to another, please respect the artist and do not be that jerk who uses my designs and tutorials to build a copy of my work only to sell it on EBAY or trade/sale groups and forums. Thank You. Frank.
.
.
If you have a facebook account, why not join the Official Diorama Builders Fan Club today, simply click the logo link below.
 .
.
Catch up with fellow visitors and exchange stories, read cool interviews with the crew, exchange photos, fun surprises and grab some FAN ONLY merchandise next year at actual future conventions ?
.
©2018 Frank Diorio DioramaWorkshop.Com
.
IF YOU LIKE WHAT YOU SEE, PLEASE SHARE WITH YOUR FRIENDS
USING THE SOCIAL MEDIA BUTTONS BELOW