


-
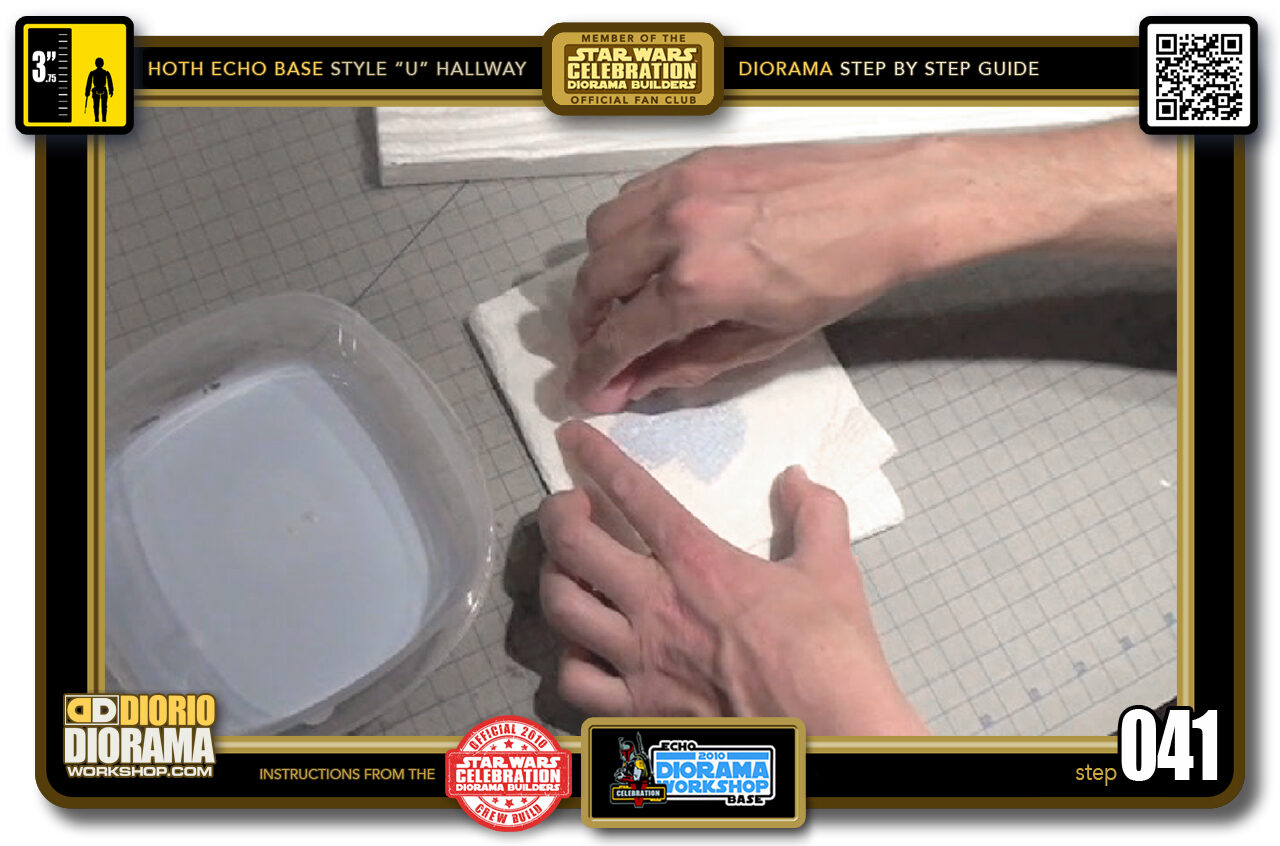
- Step 041 >> Now before you place it on your textures, you need to FIRST DAB the EXCESS PAINT off on a Napkin or Paper Towel so that the paint only gets applied on the extruded zones of your texture.
-
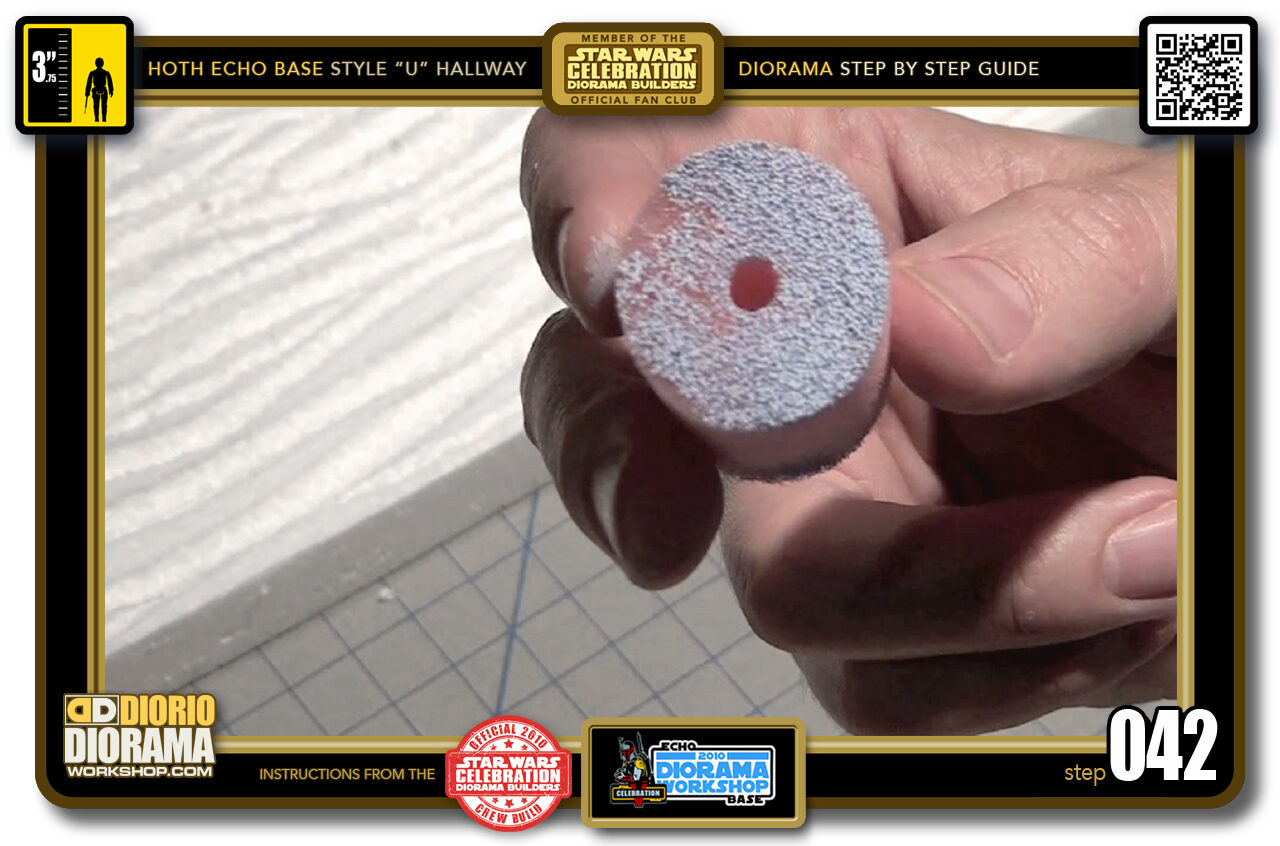
- Step 042 >> You should now have the perfect amount of paint ready to be applied.
-
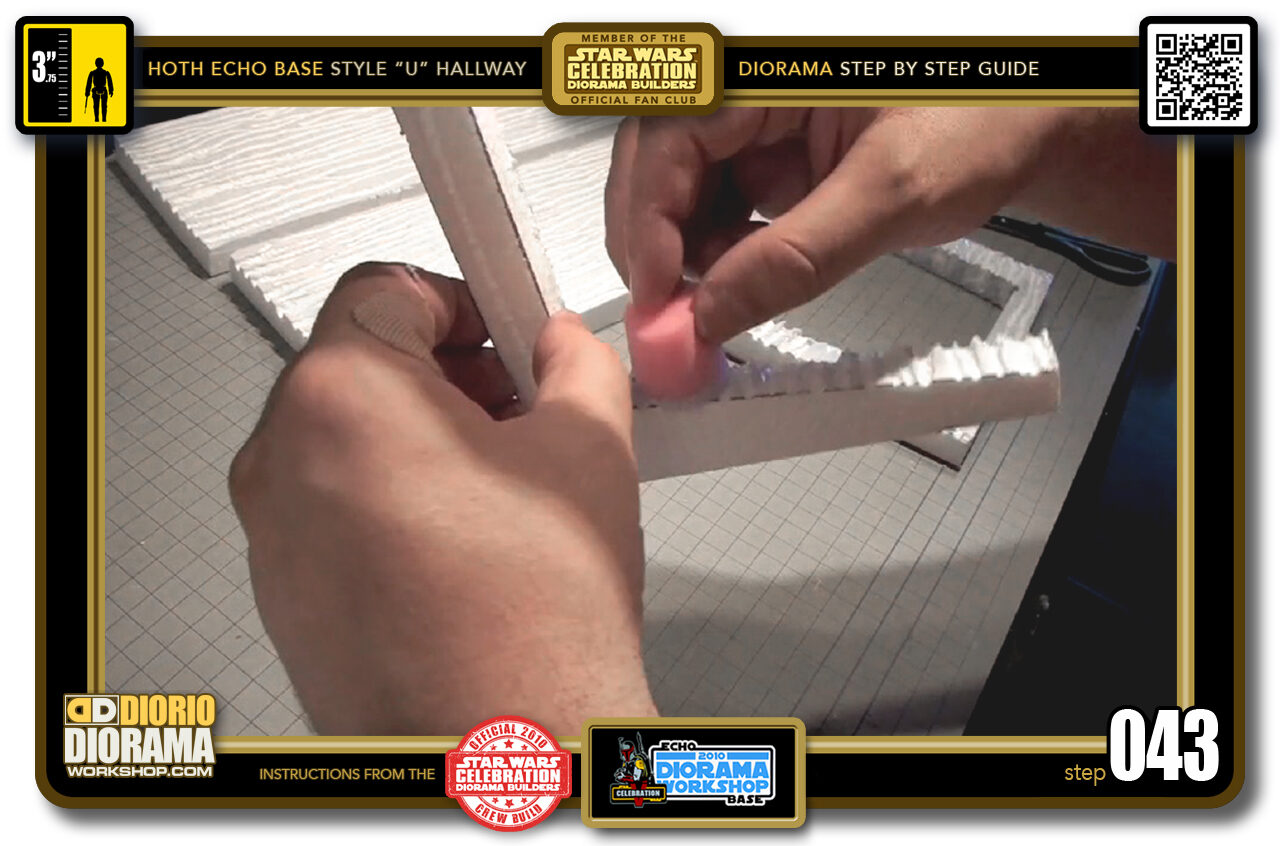
- Step 040 >> What you want to do is just lightly rub your sponge along the TOP of your textures. DON'T PRESS HARD, you DON'T want paint to go INSIDE the grooves and have it look all ONE colour like your house walls. Cover all insides of your end arches as well as their textured fronts.
-
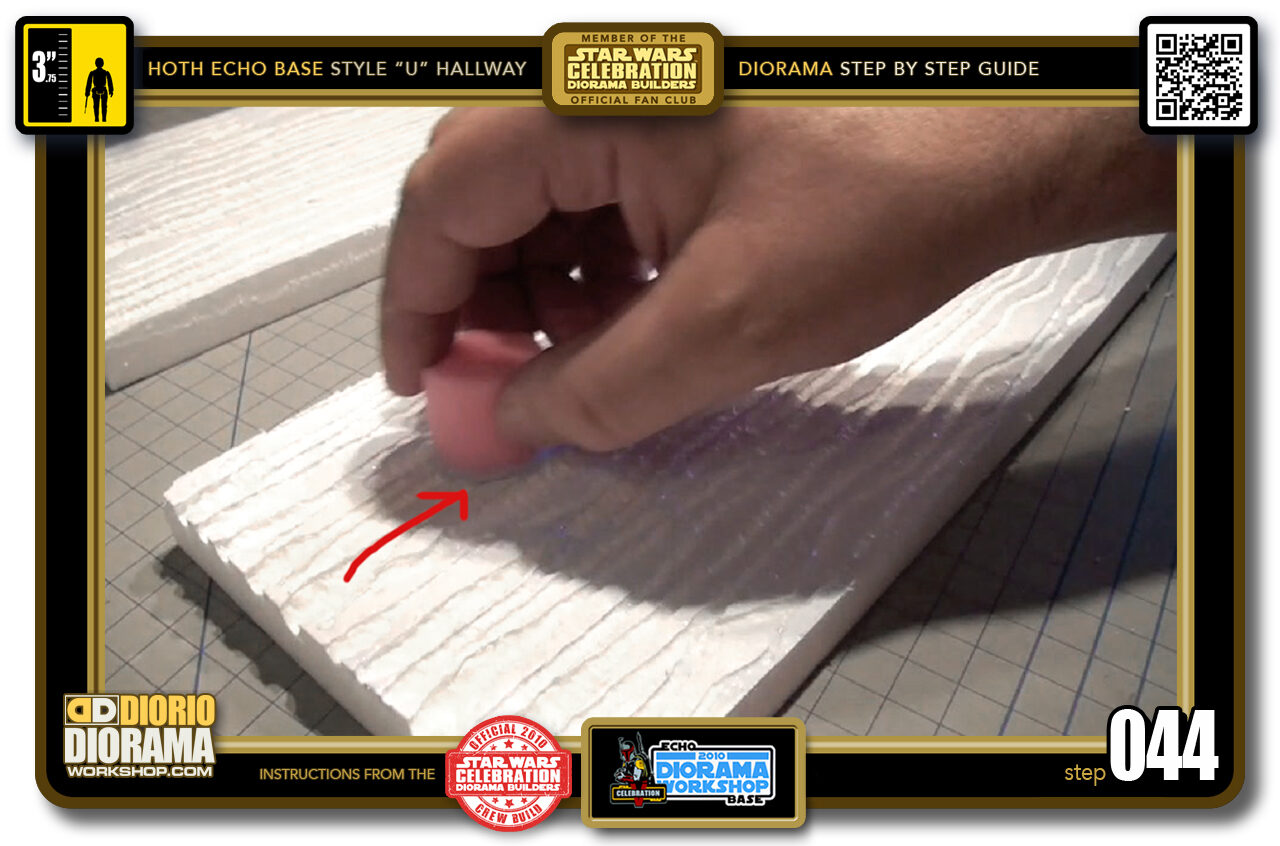
- Step 044 >> Then do the same for your walls by placing your sponge on your raised grooves moving Left to Right. If you DON'T press down hard, the paint will apply only on the TOP of the grooves.
-
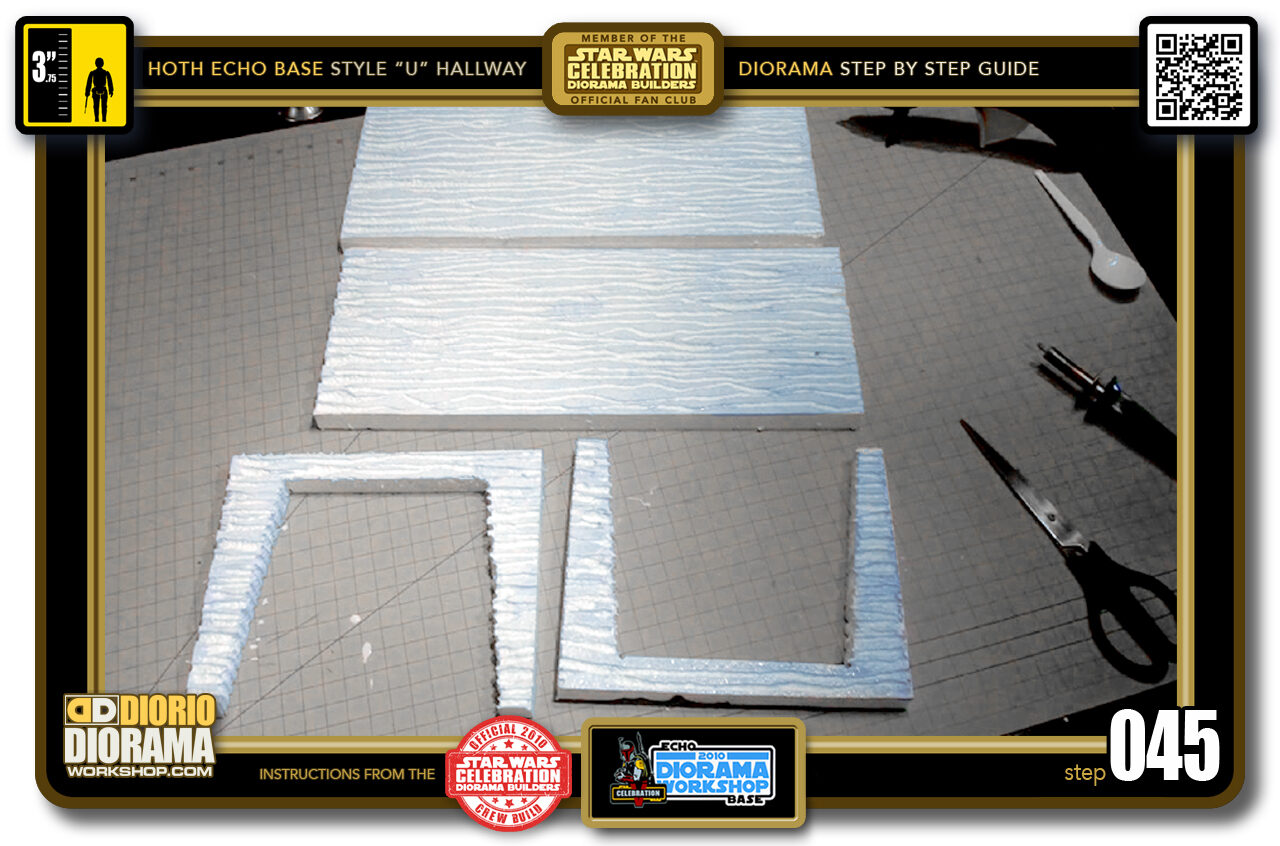
- Step 045 >> This sponge technique will get a cool TWO TONED paint effect just like in the movie 🙂
-
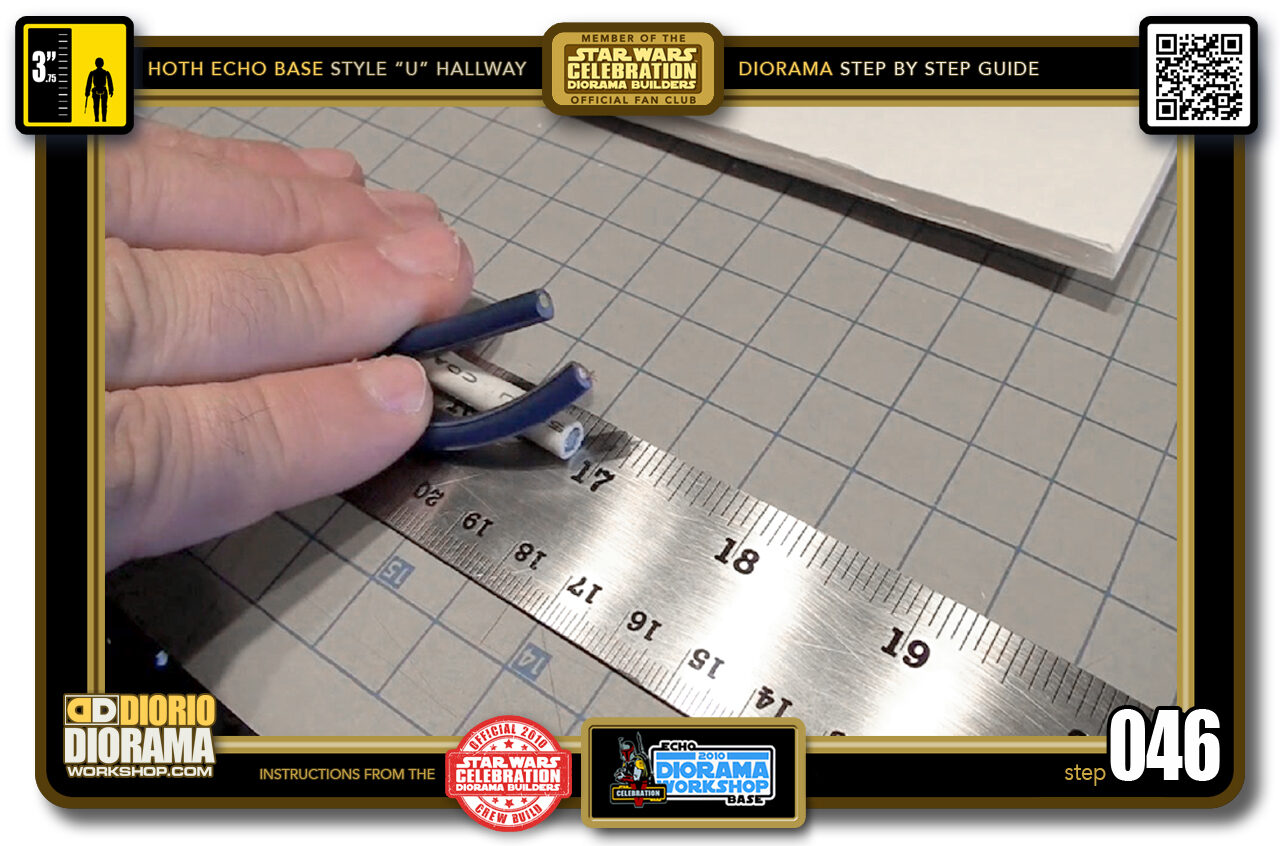
- Step 046 >> Now get some scrap Stereo Cables (you can even find these at Dollar Stores which could be cheaper then a stereo store) and measure 17". You need to CUT THREE wires. If you want movie accuracy, you need TWO BLUE and ONE WHITE wire.
-
-
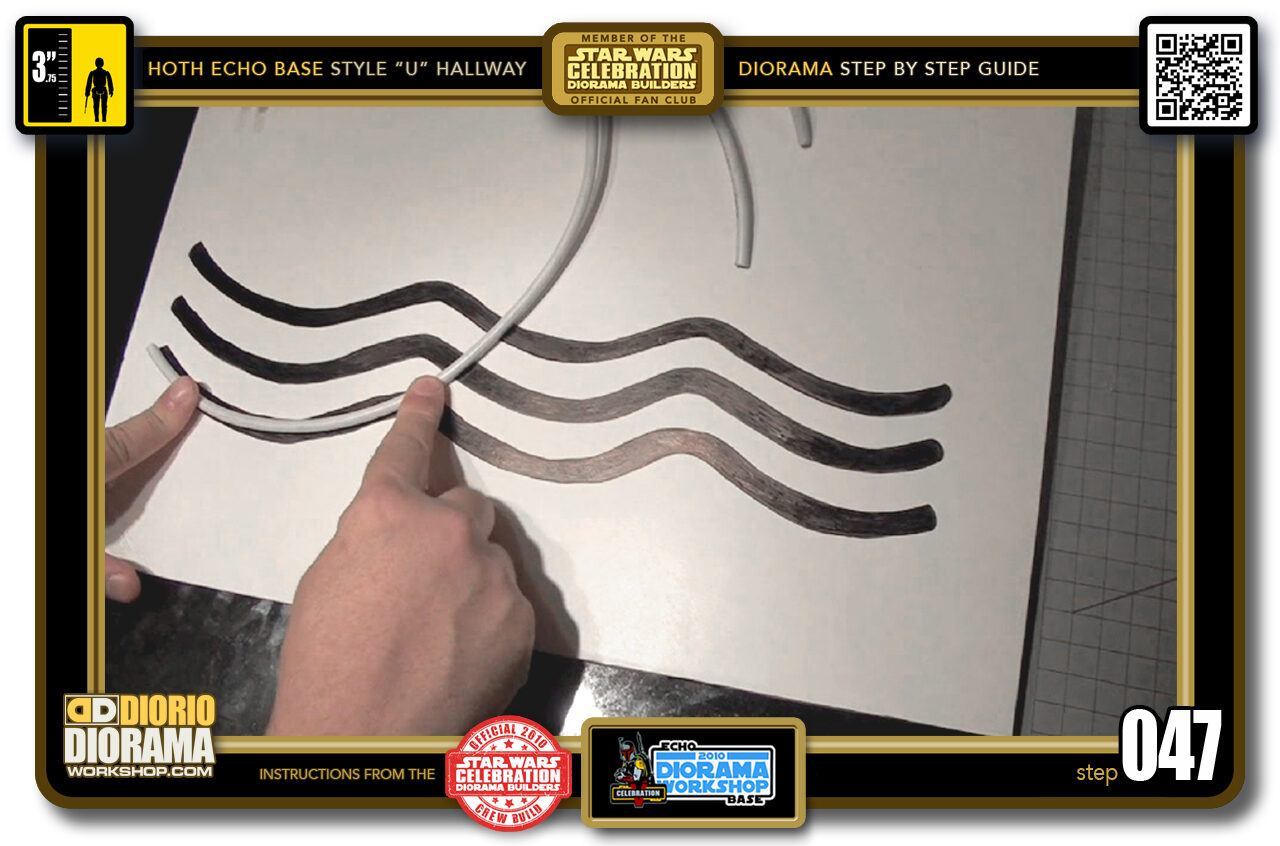
Step 047 >> You can PRINT this WAVE TEMPLATE from the "U" Hallway Blueprints (check tutorial speed index link). This template will help you figure out where to FOLD your wires once you tape the two halves together with tape.
You will start by placing one wire along any of the lines. When you reach a HIGH PEAK, hold your index finger at the wave's peak and press hard as you WIGGLE Up and Down the wire to try and input a "memory" into the wire so that it can keep a WAVY shape. you need to do the wiggles because your wire wants to return into a STRAIGHT line which could lead it to POP out of it's pin supports.
-
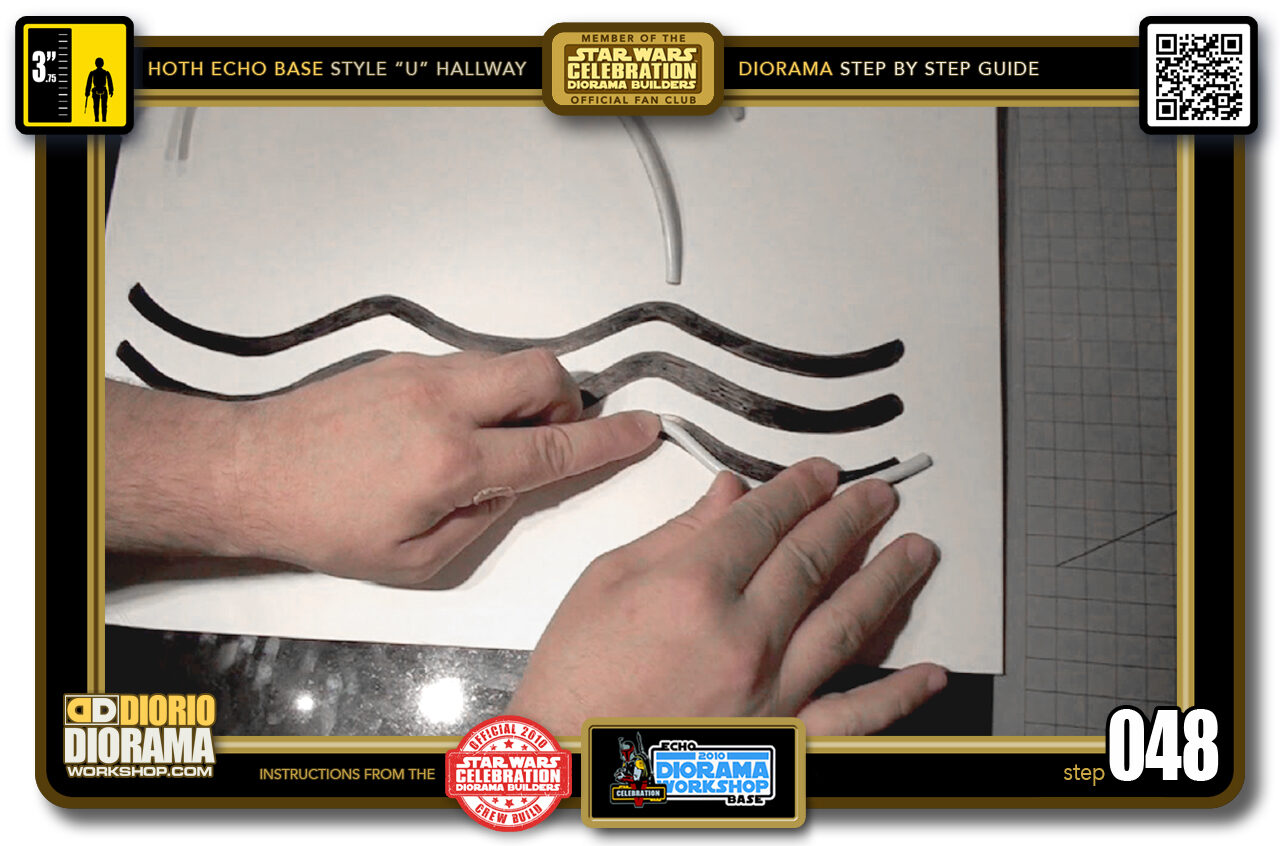
- Step 048 >> When you get to the next peak of the waves, do the same thing, hold your index finger and press hard as you WIGGLE Up and Down the wire to try and input a "memory" into the wire so that it can keep a WAVY shape. If your hallway is longer than my design you may have more than 2 peaks.
-
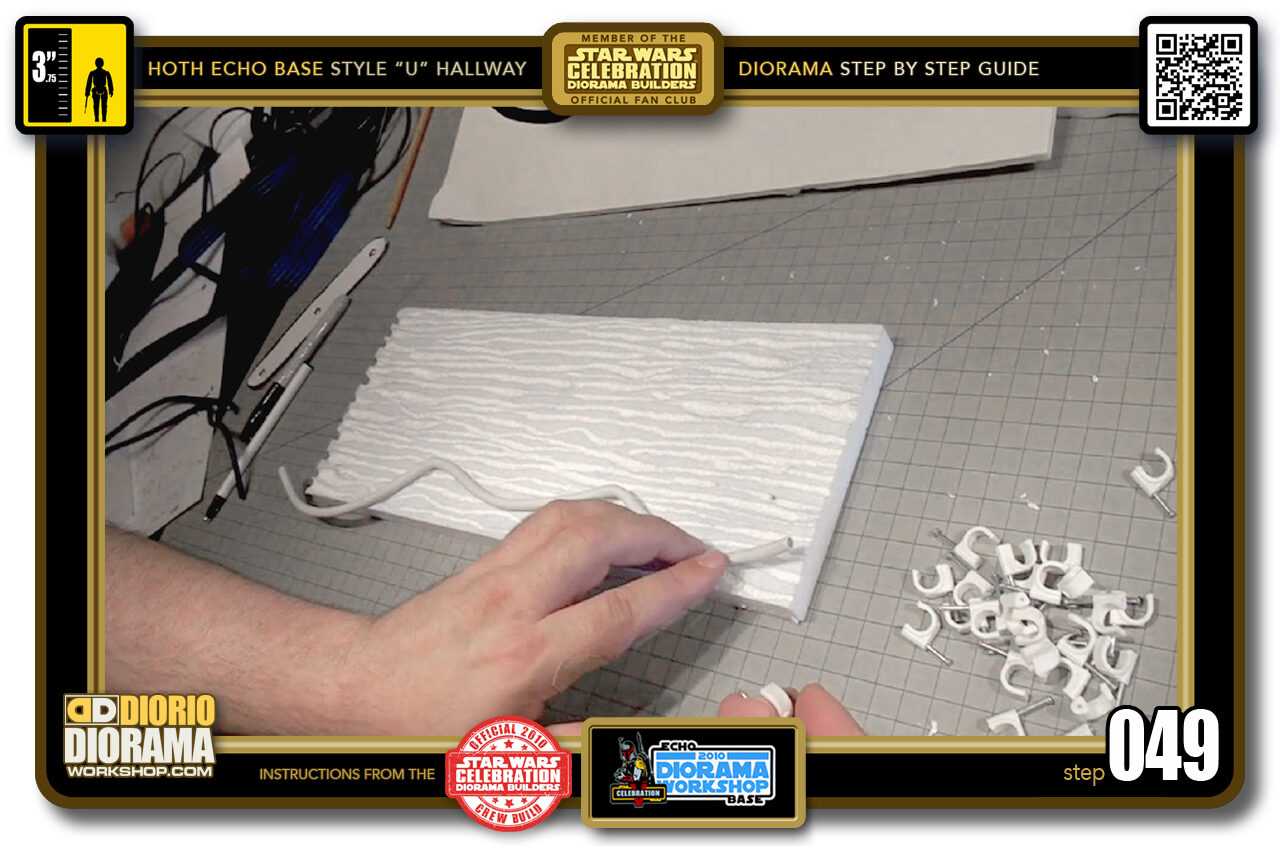
- Step 049 >> Your wires should now have a good memory curve and ready to be attached to the wall surface with clips.
-

- Step 050 >> Start by centering your wire against the wall ends and find one of your peaks. Place it about 1 inch from the bottom of the wall, take a CABLE PIN HOLDER (Also found at the Dollar store) and press it over the wire.
-
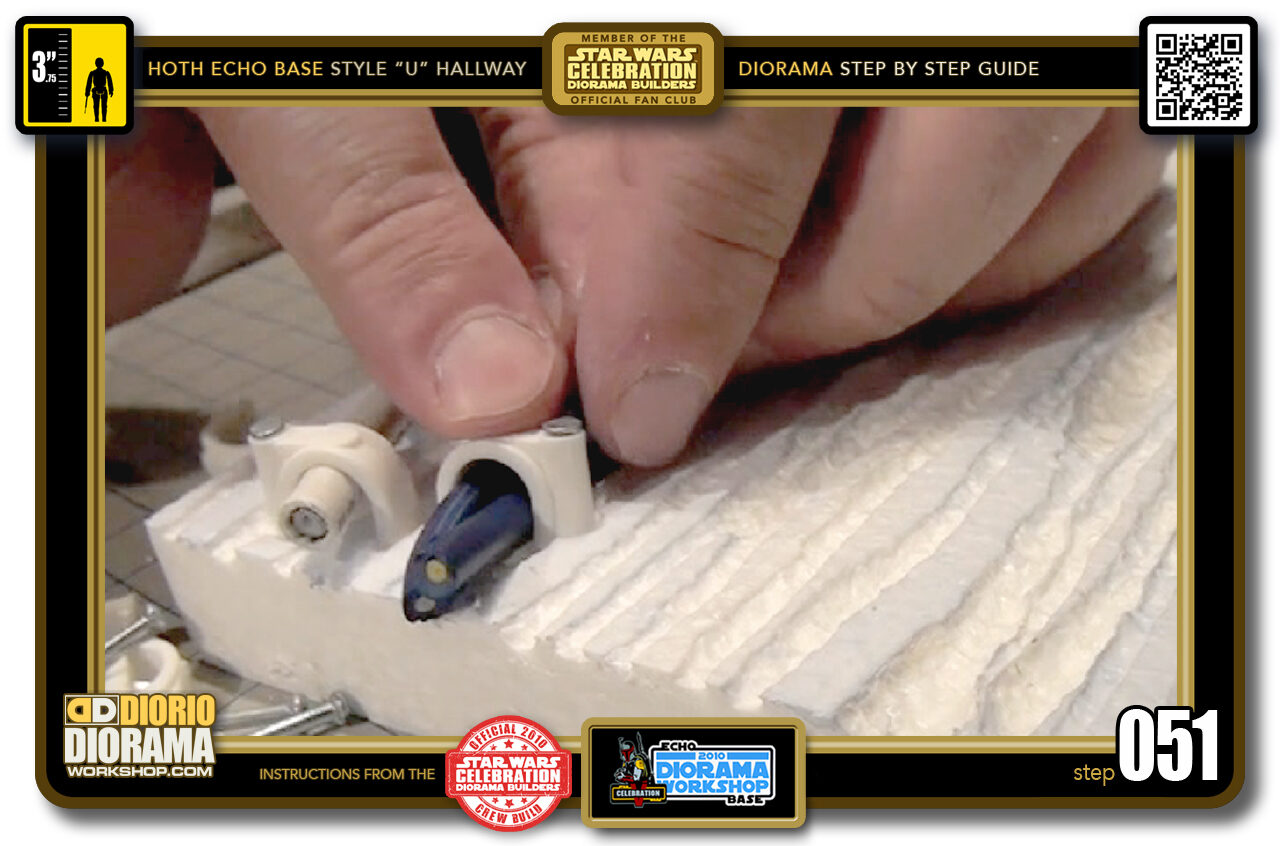
- Step 051 >> Place a CABLE CLIP at each end of your wires as well as the peaks.
-
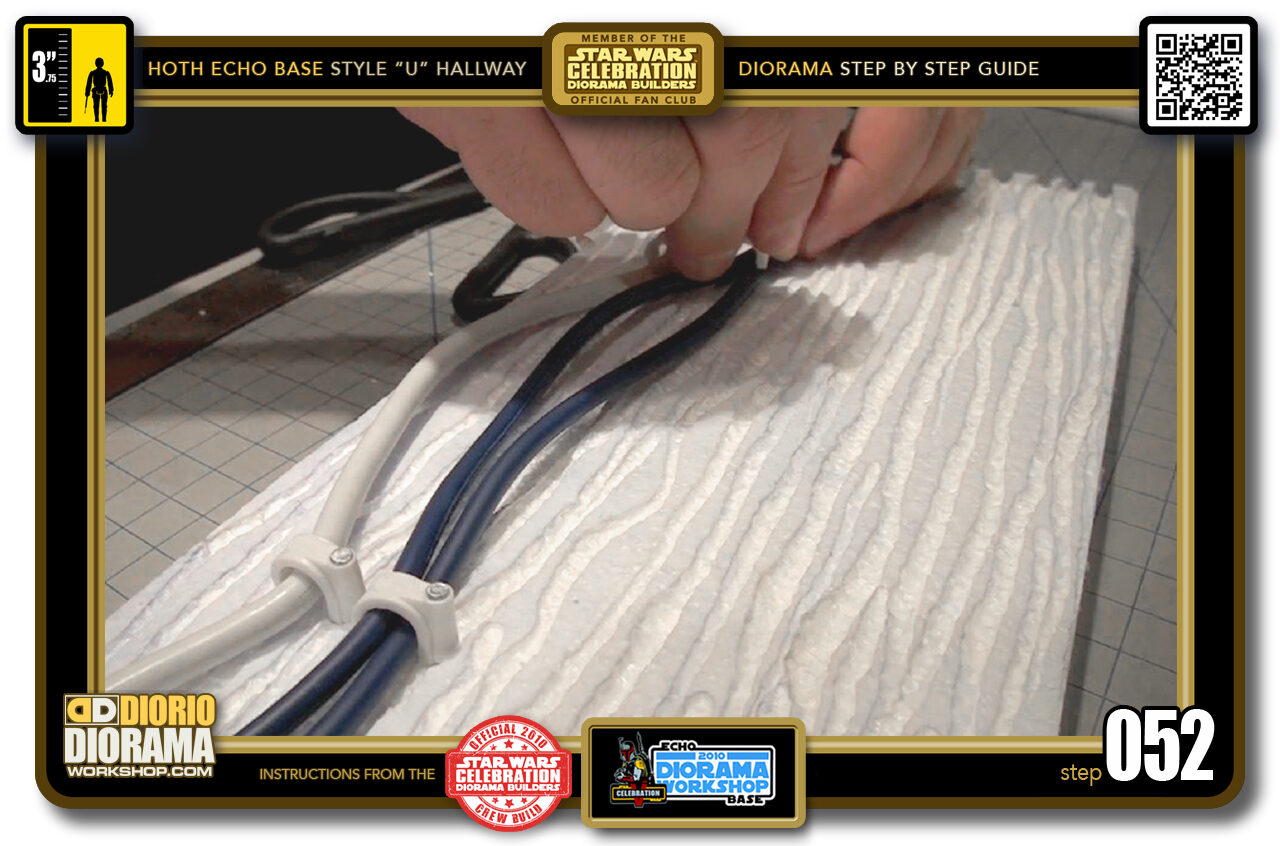
- Step 052 >> Continue putting your pins at the TIPS of each of the FOUR wave tops. You want ONE WHITE wire at the bottom and the TWO BLUE wires touching each other in the SAME clip at the top.
-
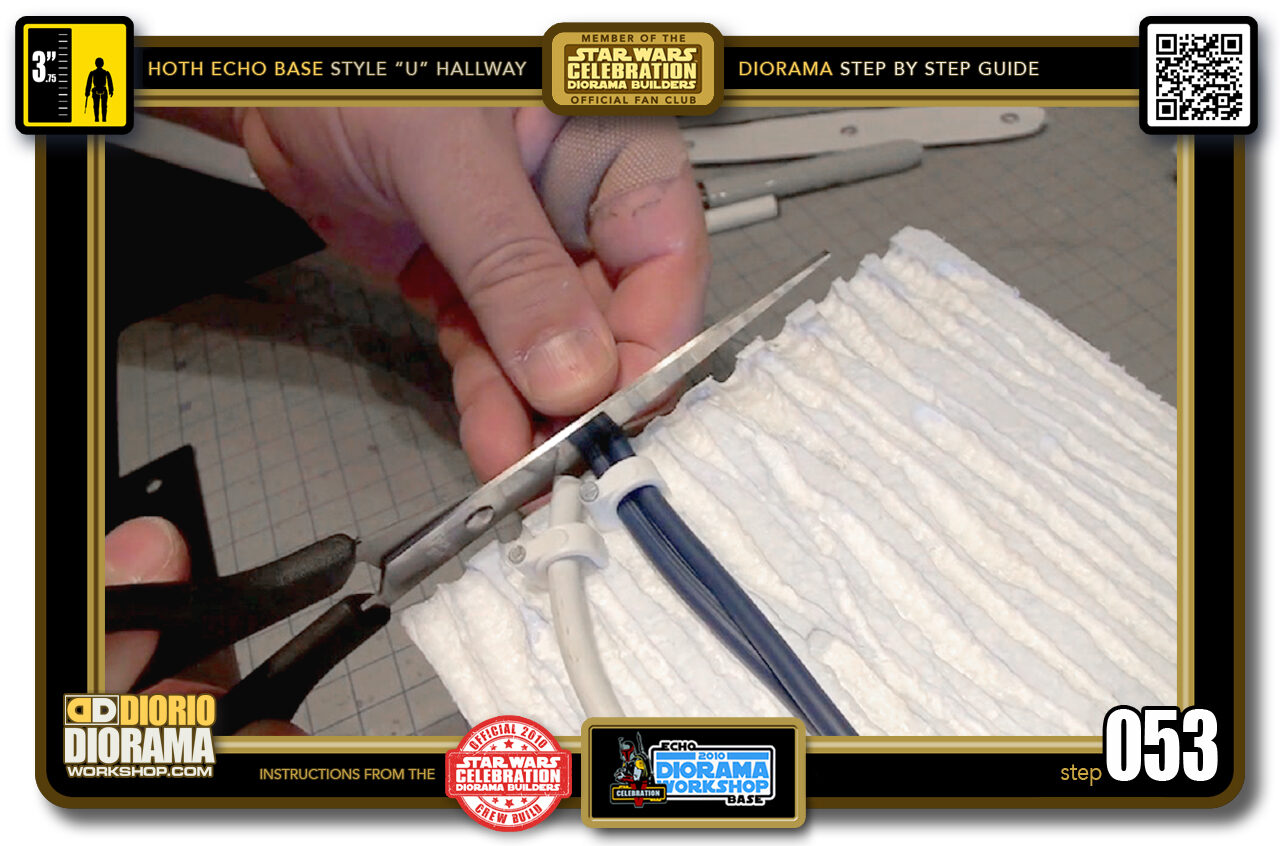
- Step 053 >> If there is excess, you can use scissors to CUT off the ends to ALIGN with the wall edge.
-
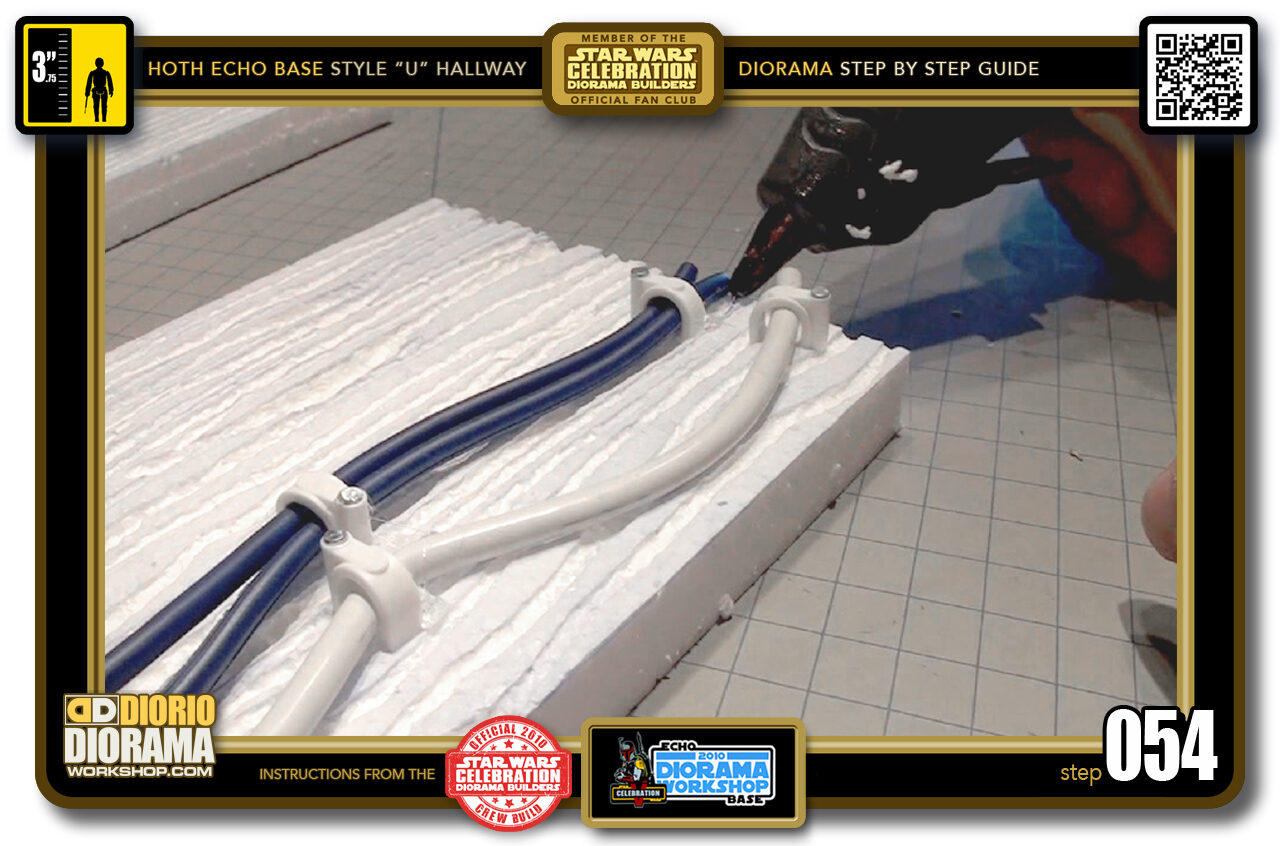
- Step 054 >> You can now use your Hot Glue Gun if you want to add some EXTRA support to prevent the pins from popping out. If you have a DOUBLE TEMPERATURE setting, switch it to LOW so you don't make a HUGE hole in the grooves.
-
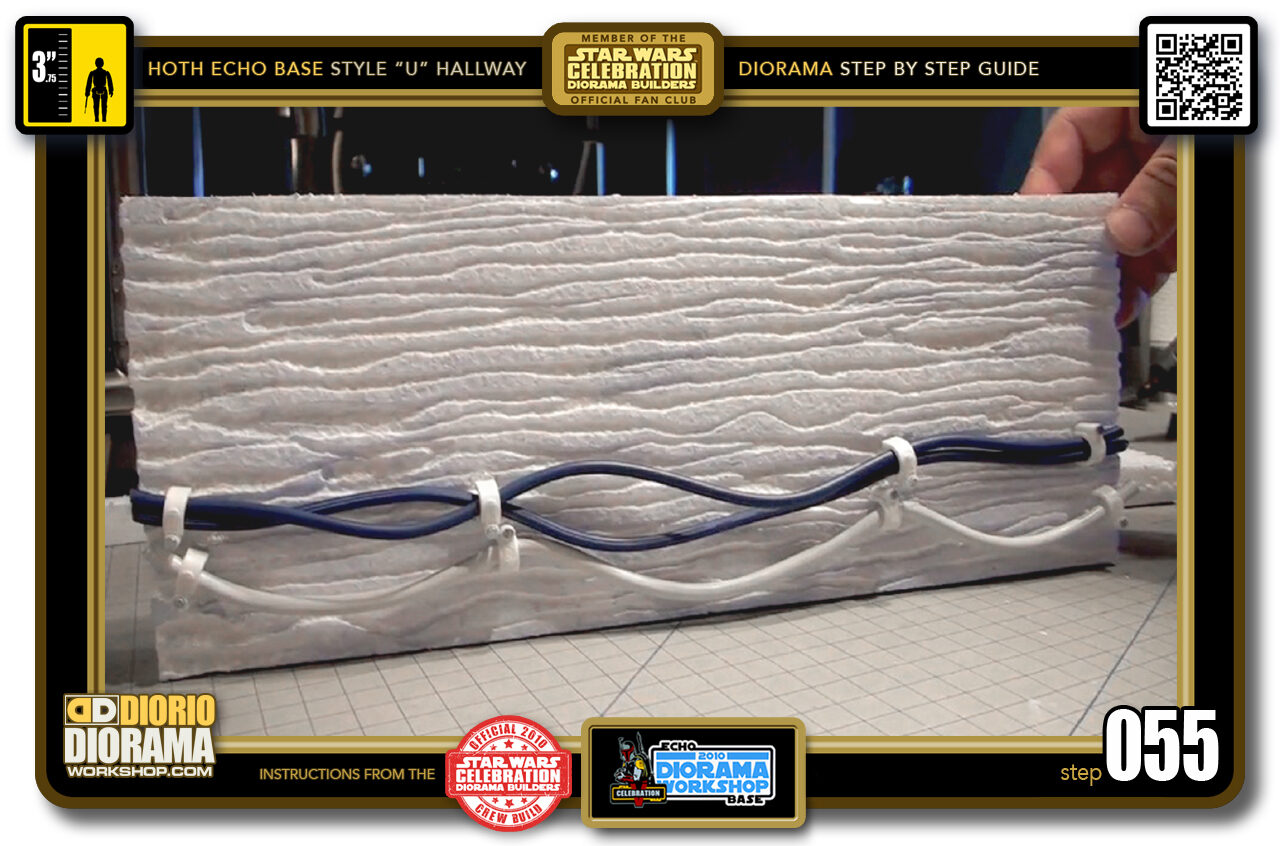
- Step 055 >> Your wires should now look like this. The cool thing about these hallways, is that YOU decide how many wires you want and at what height and on one or both walls. Follow the same way as in my design or use your imagination.
-
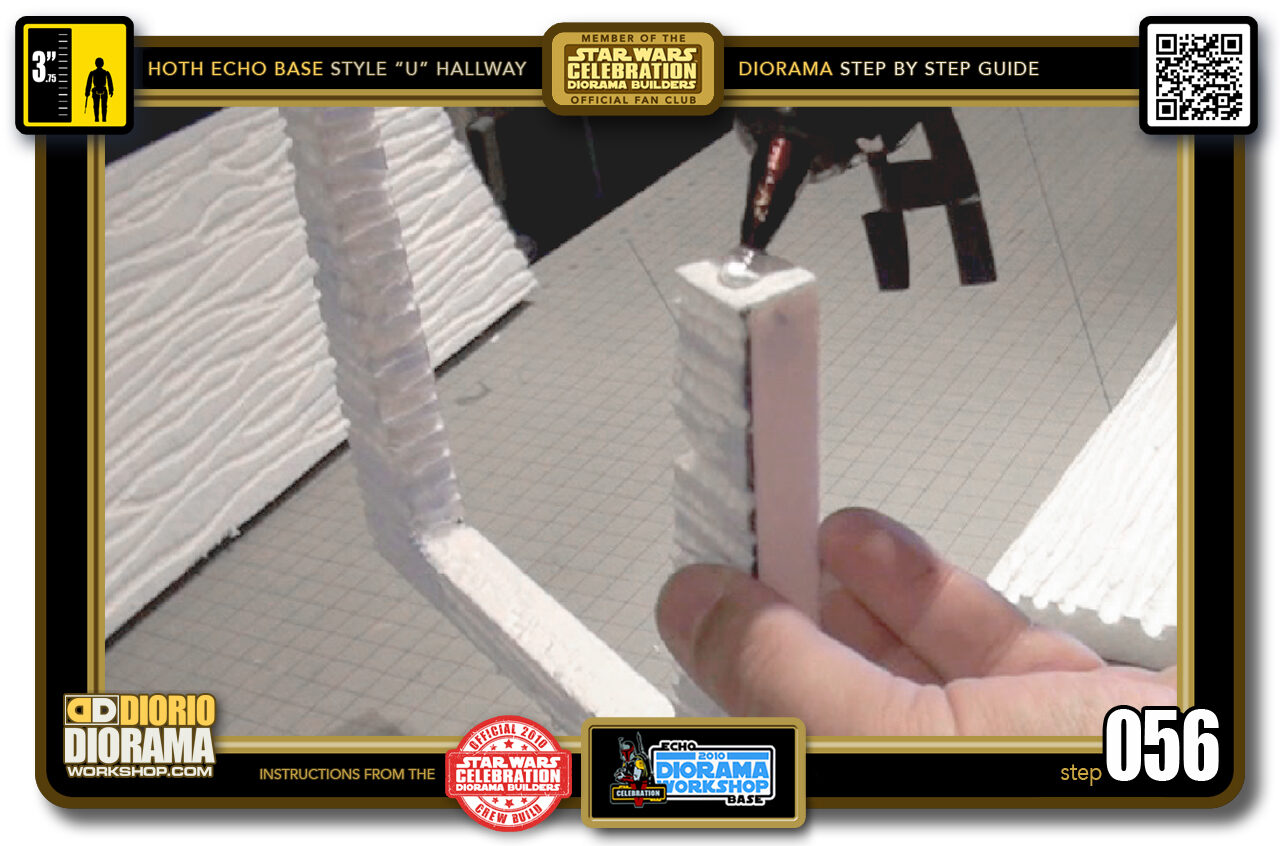
- Step 056 >> Let's start to assemble the Hallway. Put TWO dabs of Hot Glue at the bottom of one of your "U" arches.
-
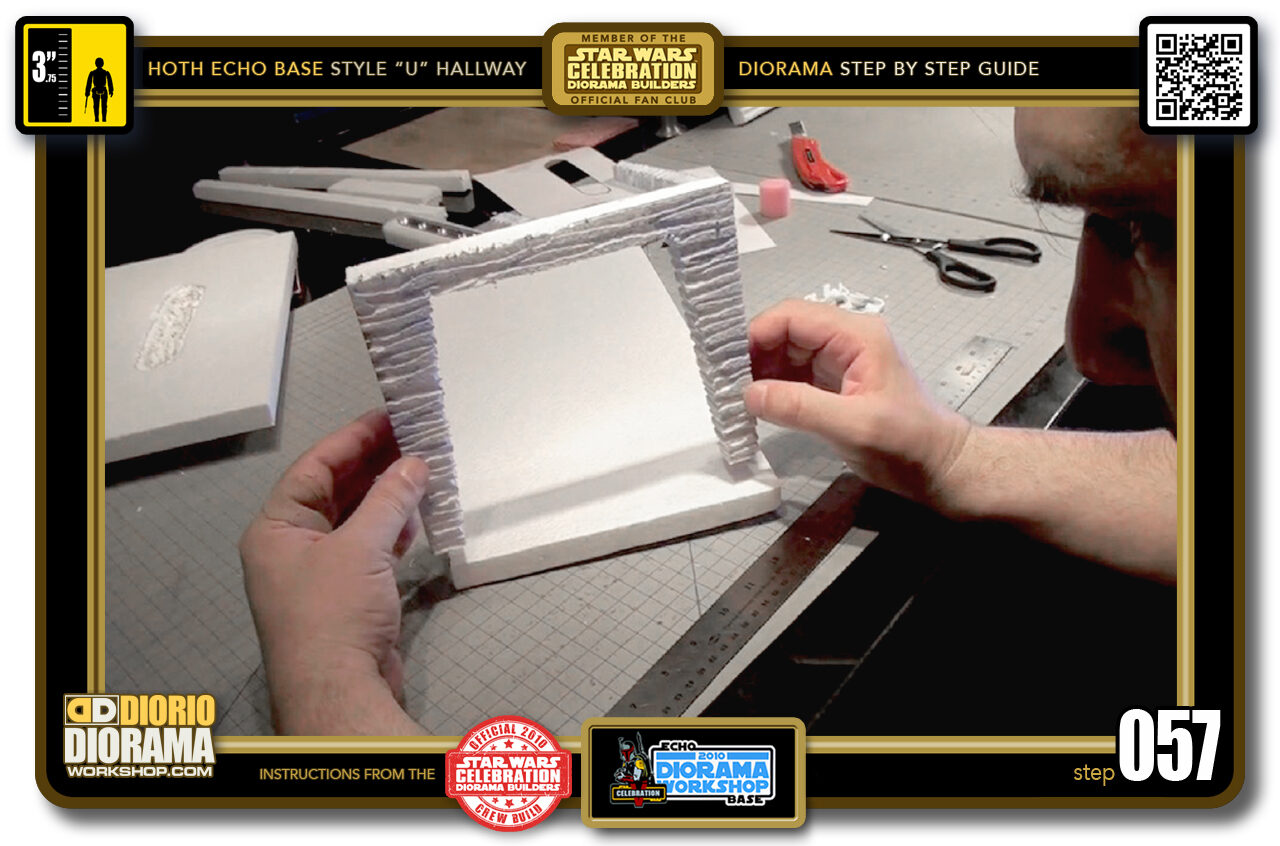
- Step 057 >> Carefully place the bottom of the arch ALIGNED with the FRONT of your floor piece.
-
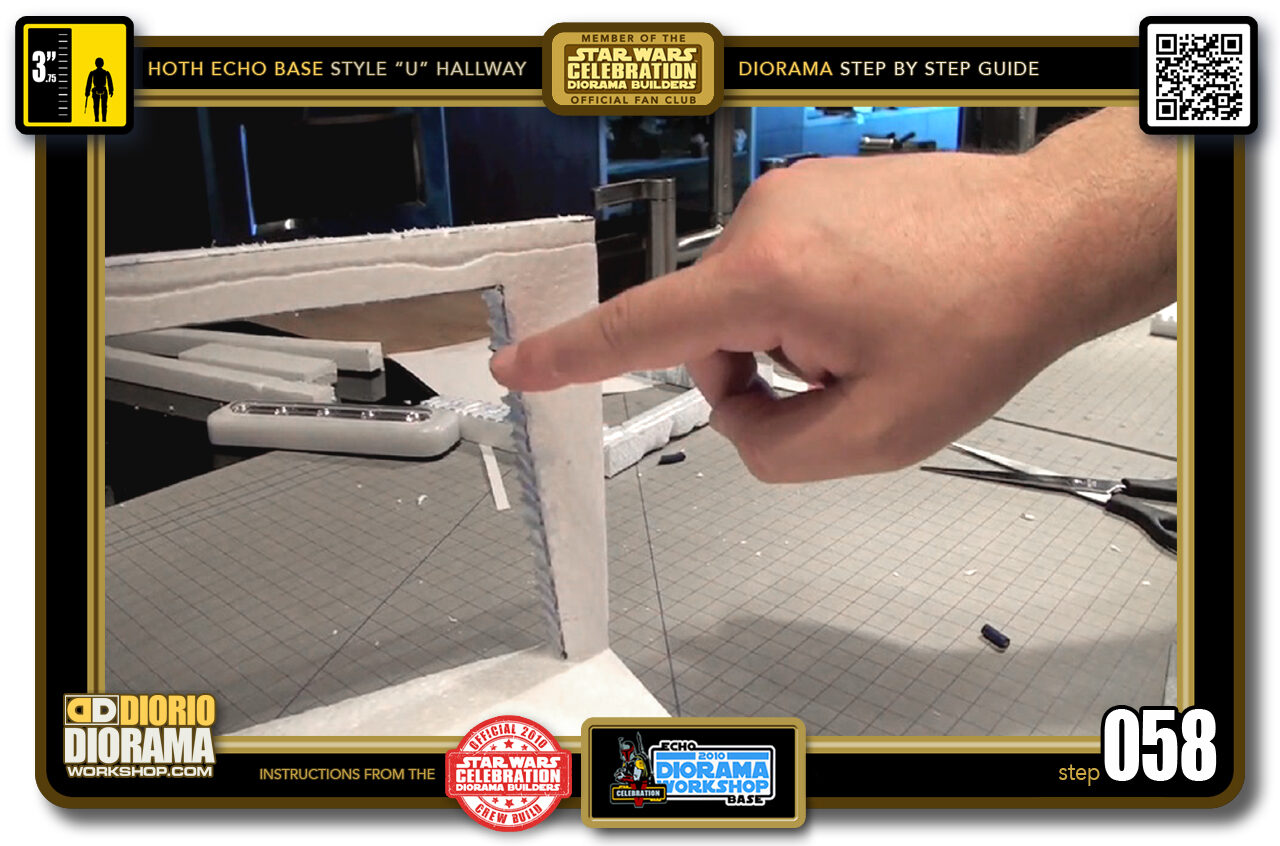
- Step 058 >> As you can see, the archways are ANGLED on the inside.
-
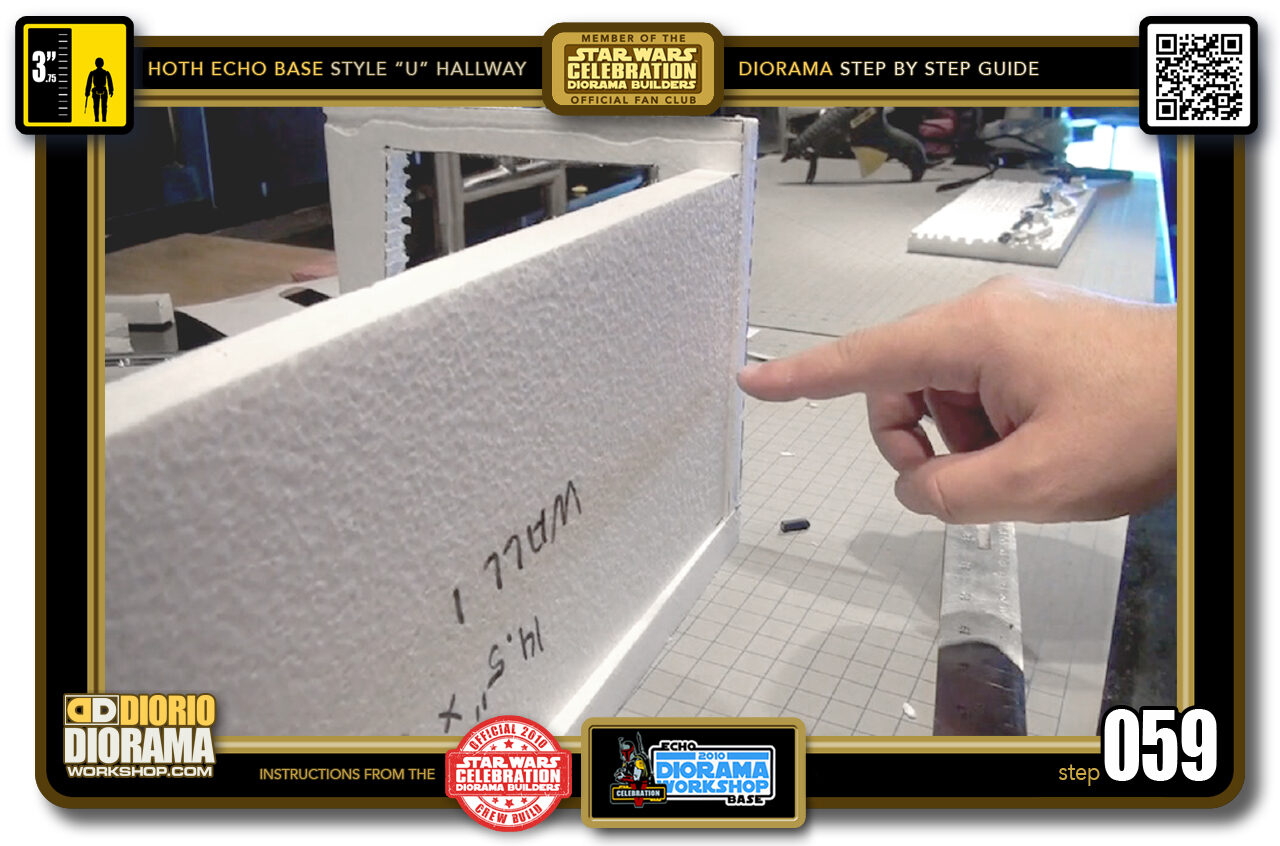
- Step 059 >> So when you go to glue your walls, if you align the walls with the OUTSIDE Arch Ends like you see here, there will be a BIG GAP on the INSIDE of your hallway tunnel. We DON'T WANT THAT !!!
-
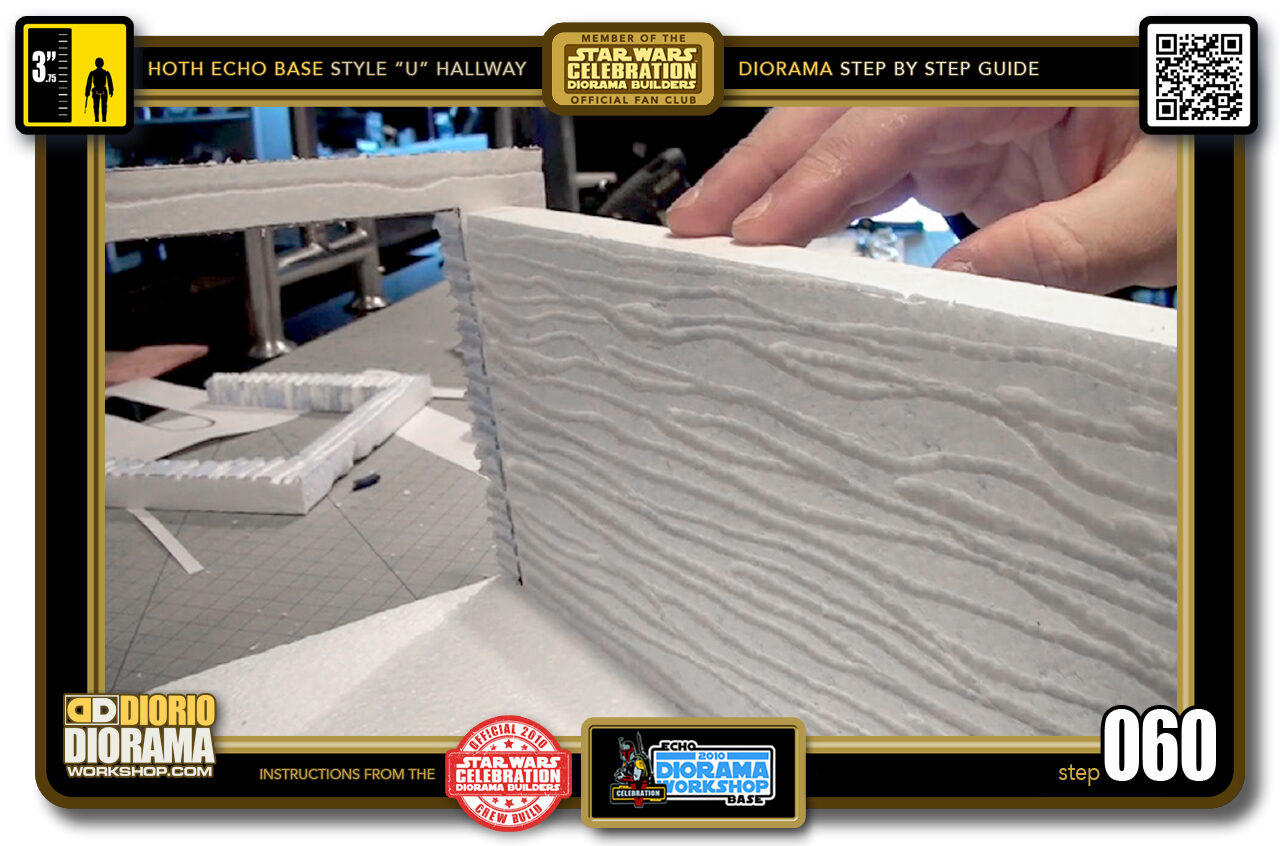
- Step 060 >> So what you will need to do is angle it, lean it towards the inside to make sure of is flush with inner arch sides.
.
Did you already build this Diorama ? At home or at our Star Wars Celebration Diorama Builders workshop ? Would you like to show it in the site’s GALLERY VISITORS DIORAMAS section, YES ? That is Awesome !!! You can find out all the details on how to email me your photos on the VISITORS SUBMISSIONS INFO page … When I get your photos, I will create your very own page just like this one. You may not realize it but work does inspire others to join in the fun of making Action Figure Dioramas.
.
NOT FOR RESALE ALL Decals, tutorials and artwork are ©FrankDiorio (dioramaworkshop.com) and offered FOR FREE to the fans – that would be you ? so you can build and display my diorama designs in your very own home. I realize I cannot control what one does with my graphics once I place them on the web, I can only ask you as one fan to another, please respect the artist and do not be that jerk who uses my designs and tutorials to build a copy of my work only to sell it on EBAY or trade/sale groups and forums. Thank You. Frank.
.

.
.
If you have a facebook account, why not join the Official Diorama Builders Fan Club today, simply click the logo link below.
 .
.
Catch up with fellow visitors and exchange stories, read cool interviews with the crew, exchange photos, fun surprises and grab some FAN ONLY merchandise next year at actual future conventions ?
.
©2021 Frank Diorio DioramaWorkshop.Com
.
IF YOU LIKE WHAT YOU SEE, PLEASE SHARE WITH YOUR FRIENDS
USING THE SOCIAL MEDIA BUTTONS BELOW