


-
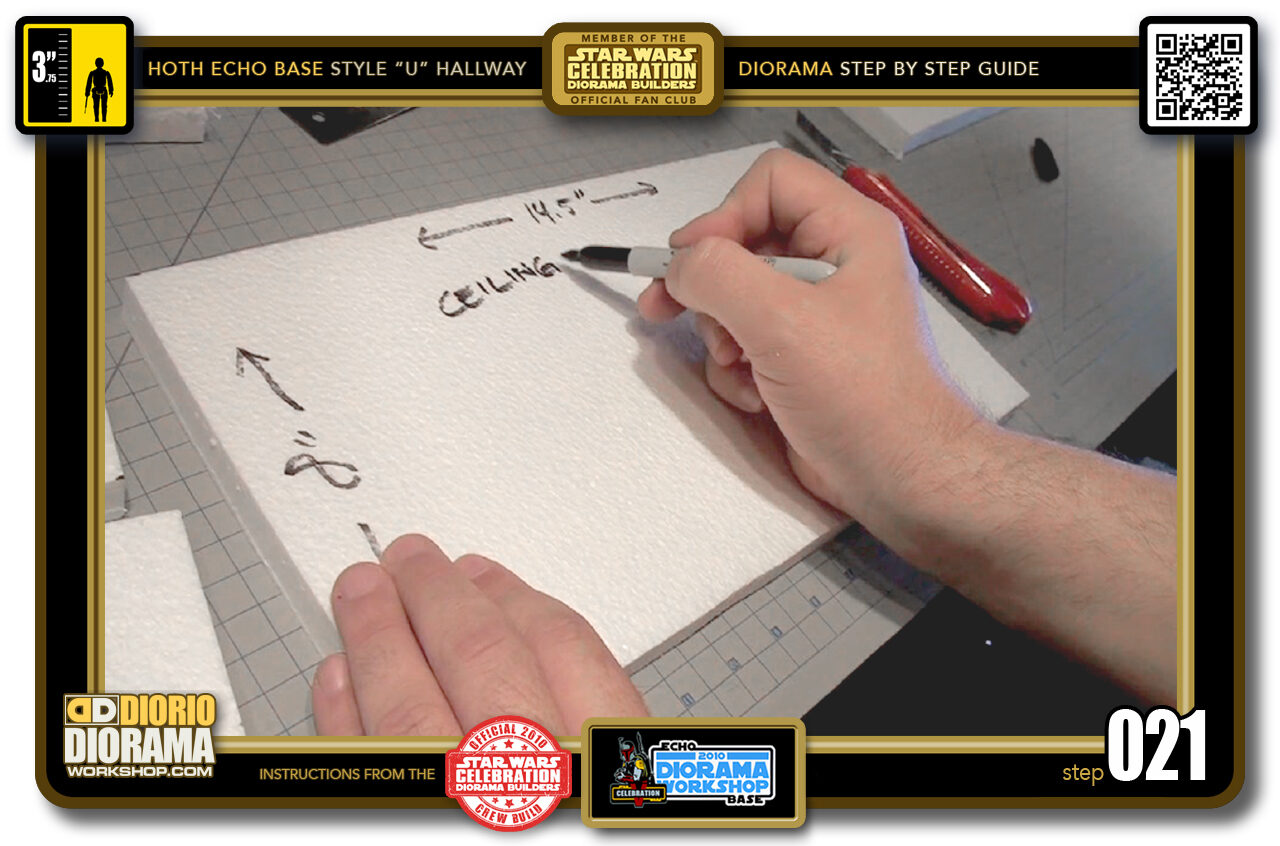
- Step 021 >> The other will be your Ceiling (14.5" x 8") piece. If you wish you can also identify the back of this shape with your sharpie pen.
-
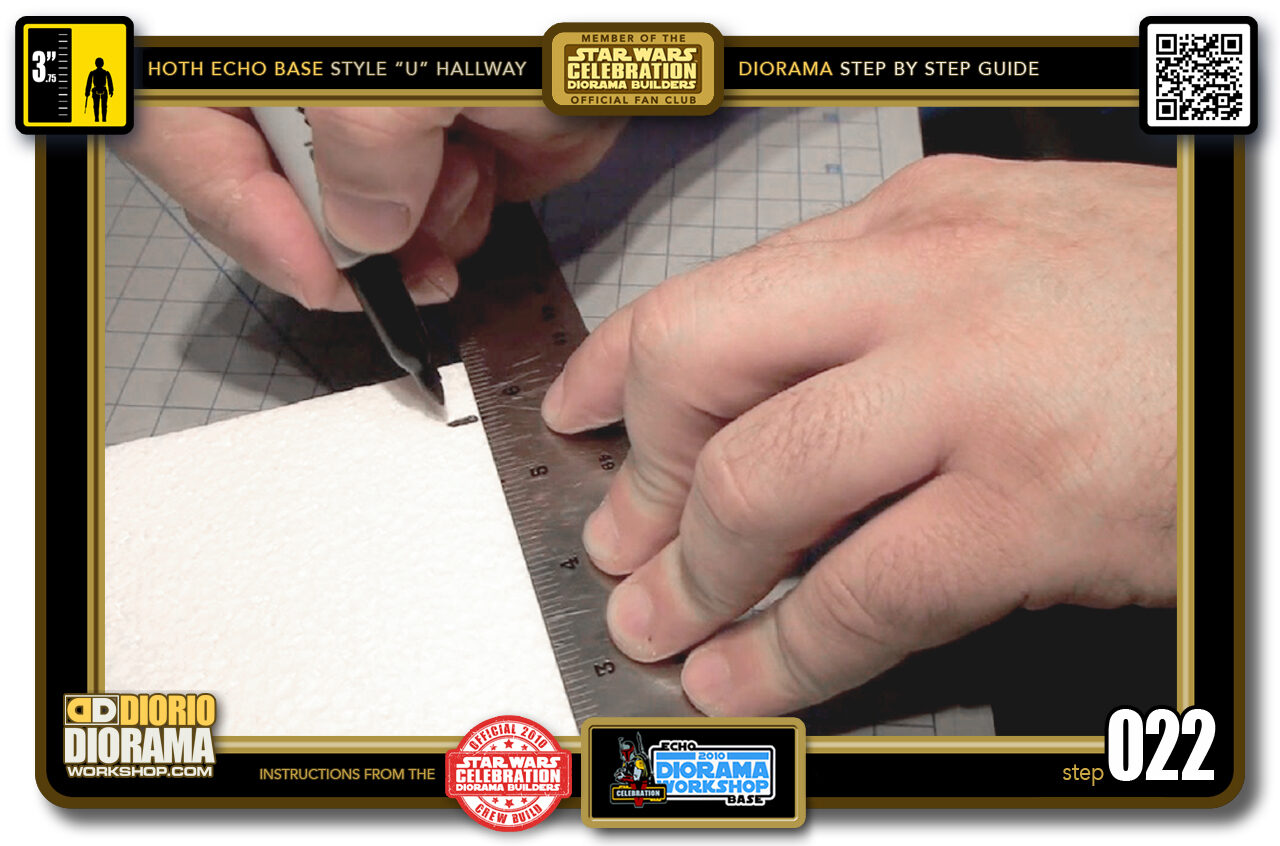
- Step 022 >> As you did before, Measure 5.75" at the Left and Right from your Top side.
-
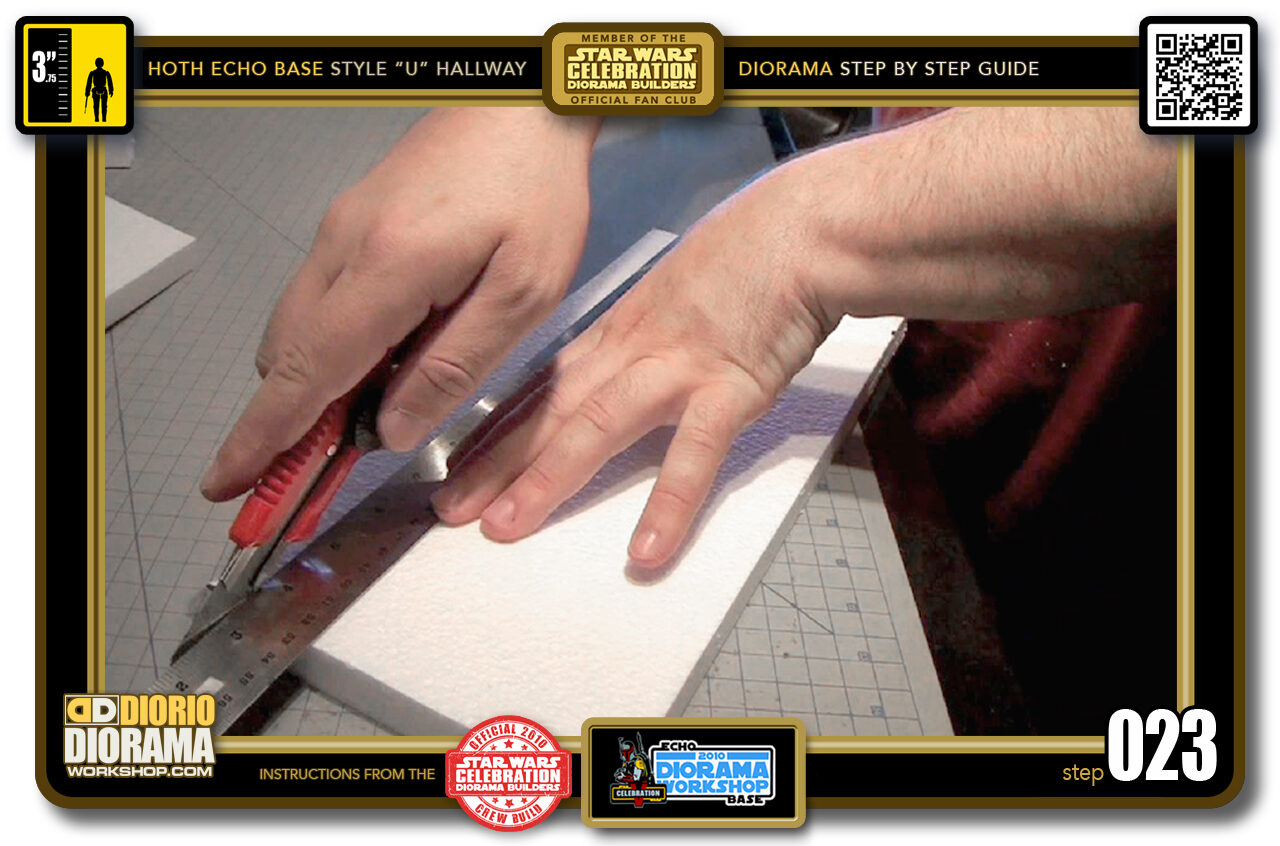
- Step 023 >> Cut off the excess with your Utility Knife.
-
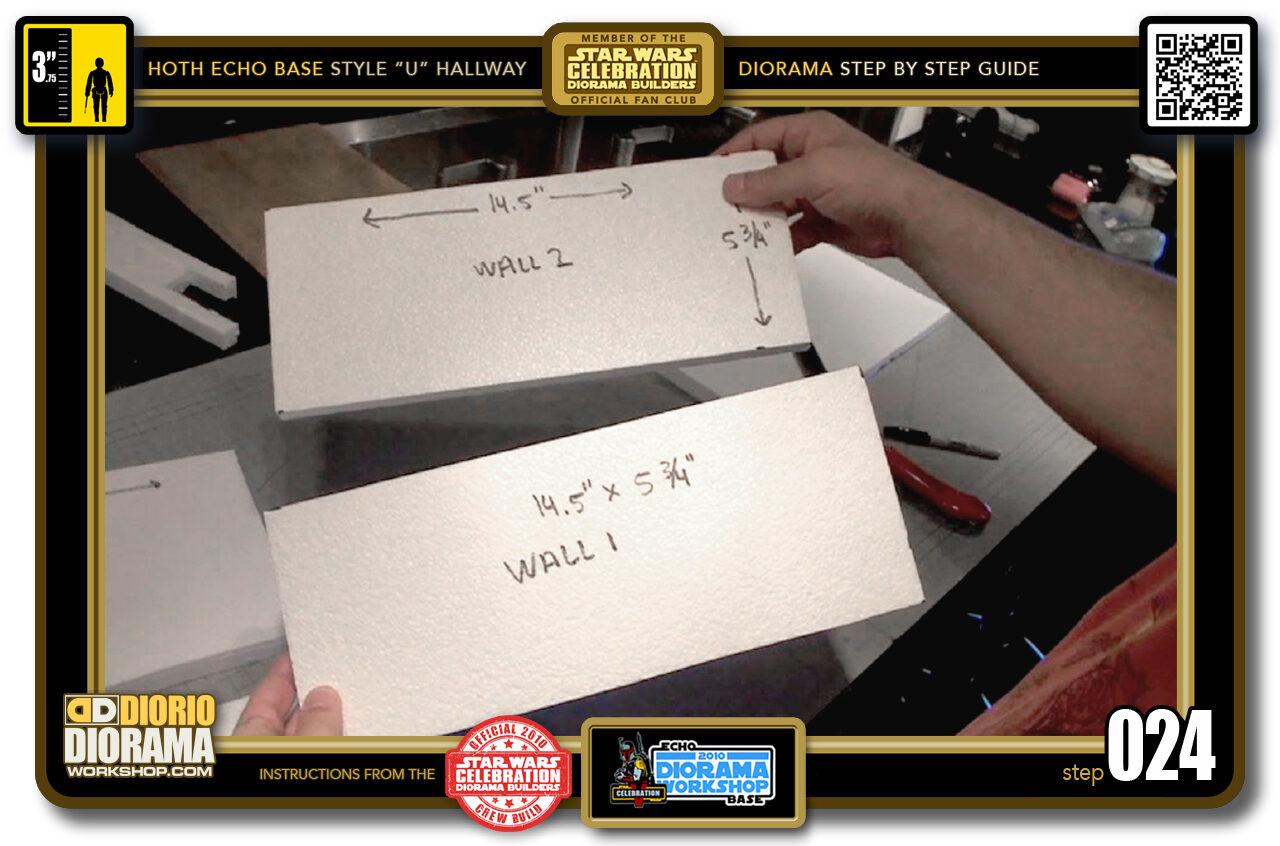
- Step 024 >> You should now have your TWO Wall pieces (14.5" x 5.75")
-
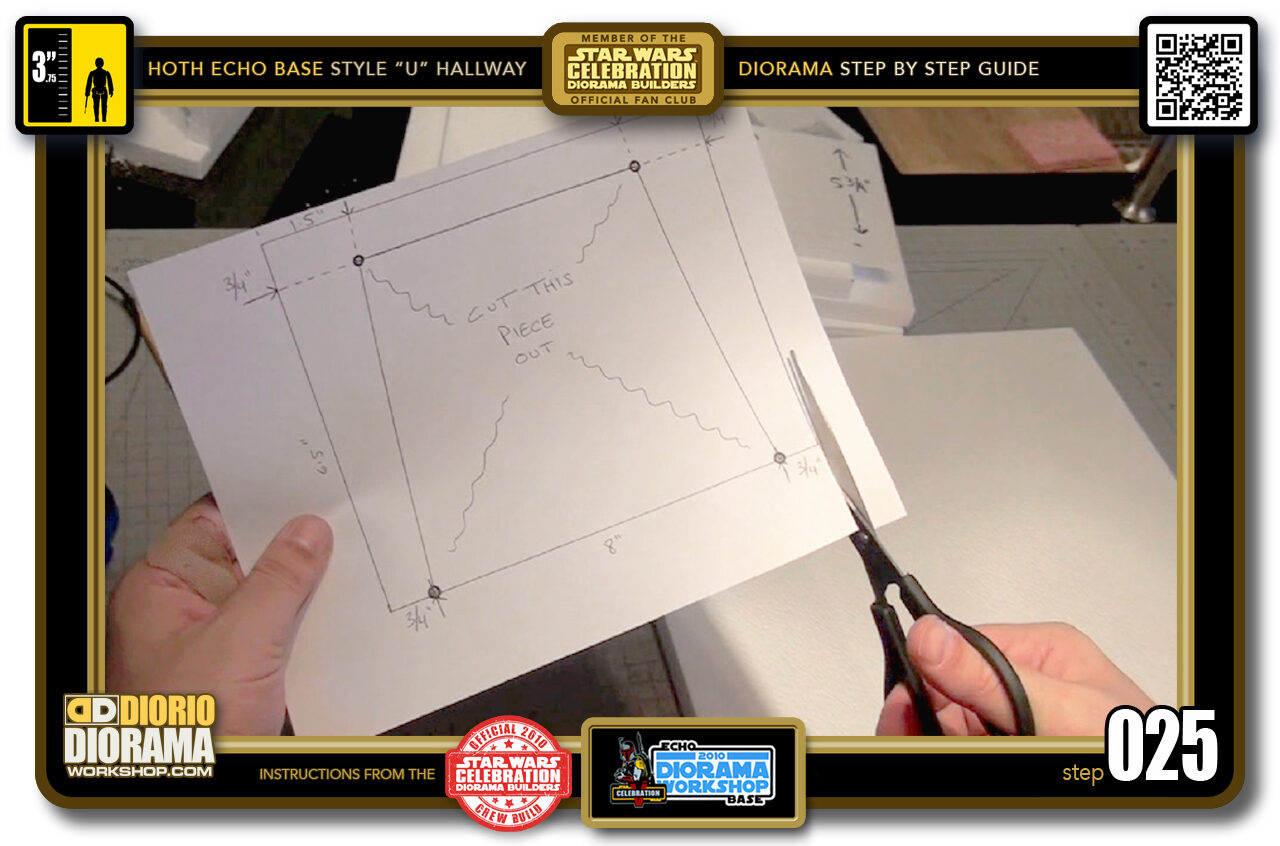
- Step 025 >> Next, Download and Print the "U" HALLWAY END ARCH TEMPLATE. Cut the Template along it's OUTSIDE lines.
-
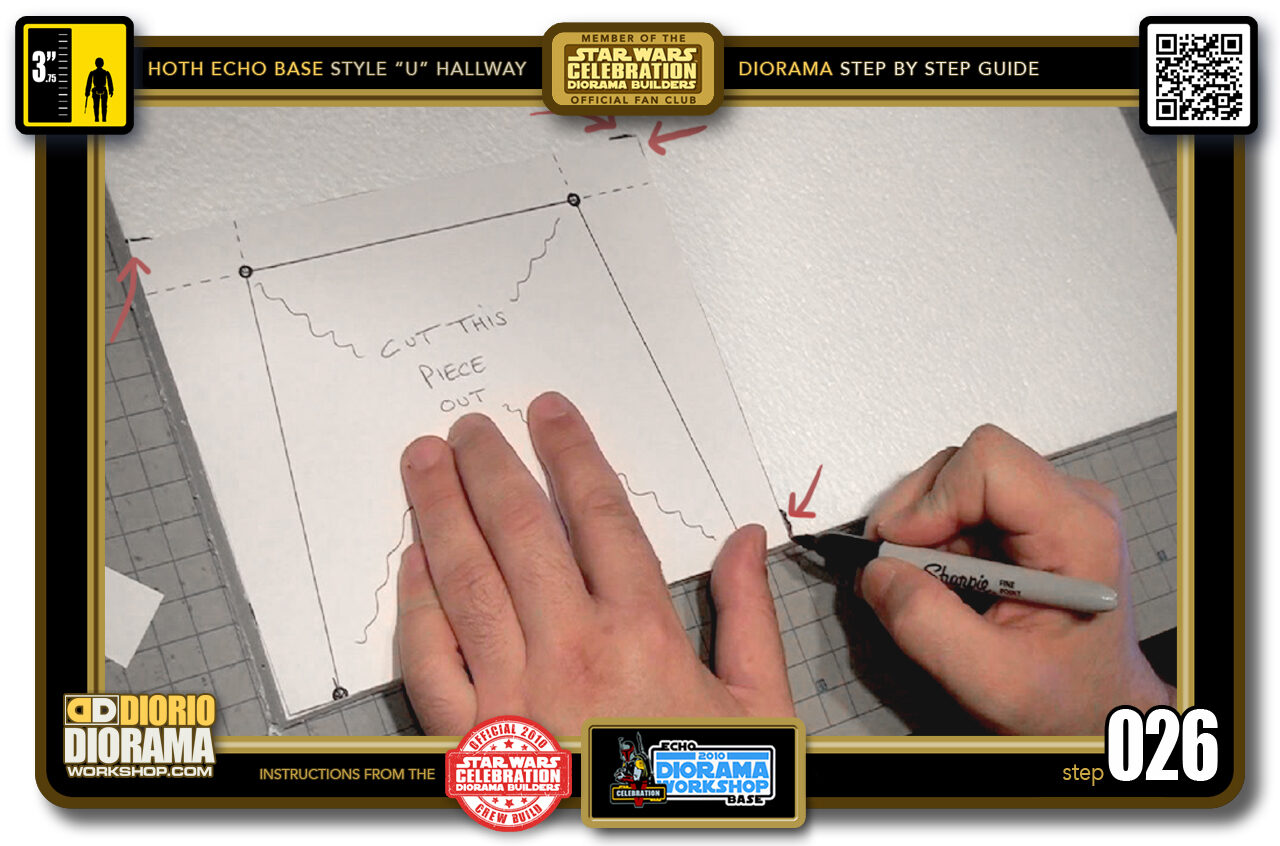
- Step 026 >> Place your Template on a piece of Styrofoam - make sure to ALIGN it to one of the sides - and Mark the EDGES ...... as well as the Corners ...
-
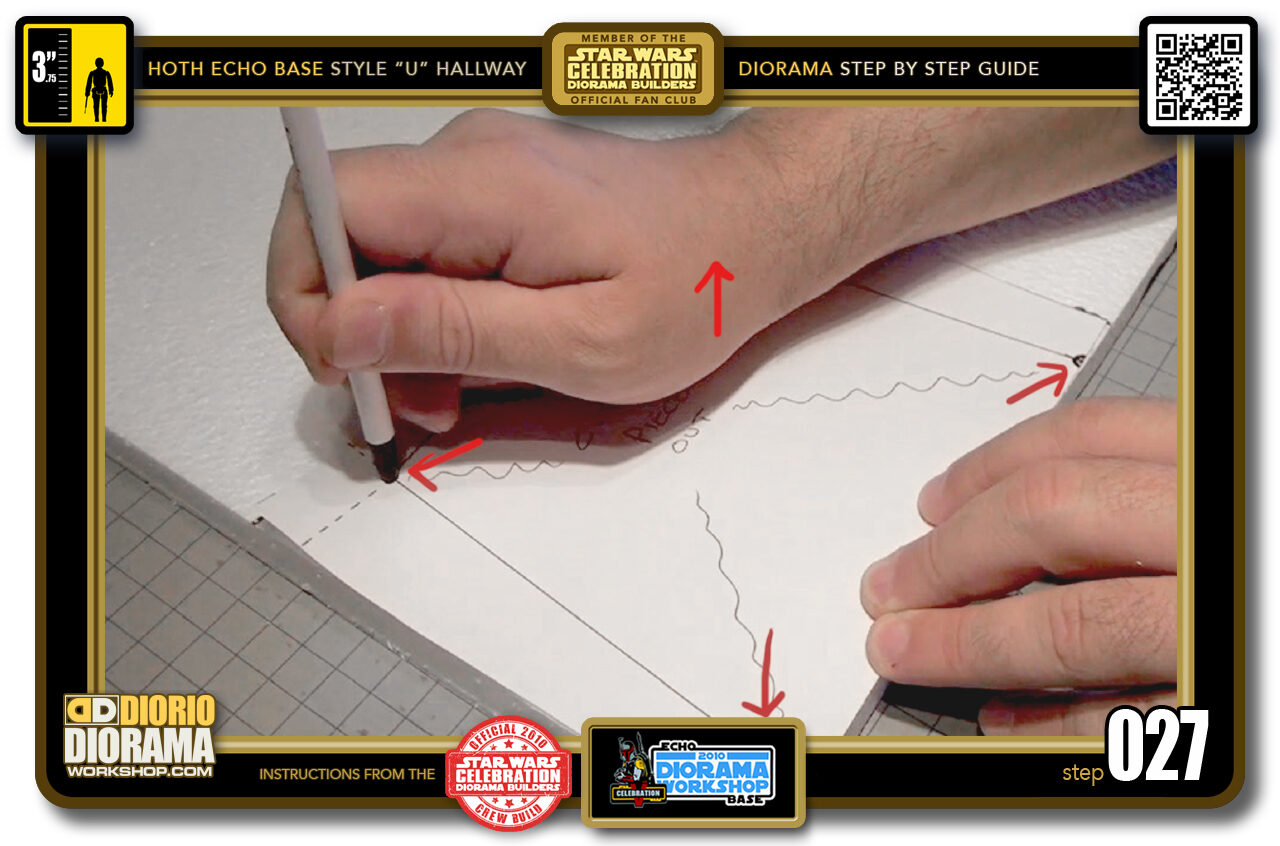
- Step 027 >> Now using a REGULAR pen, pencil or sharp object you can POKE INSIDE all FOUR of the inner corner CIRCLES.
-
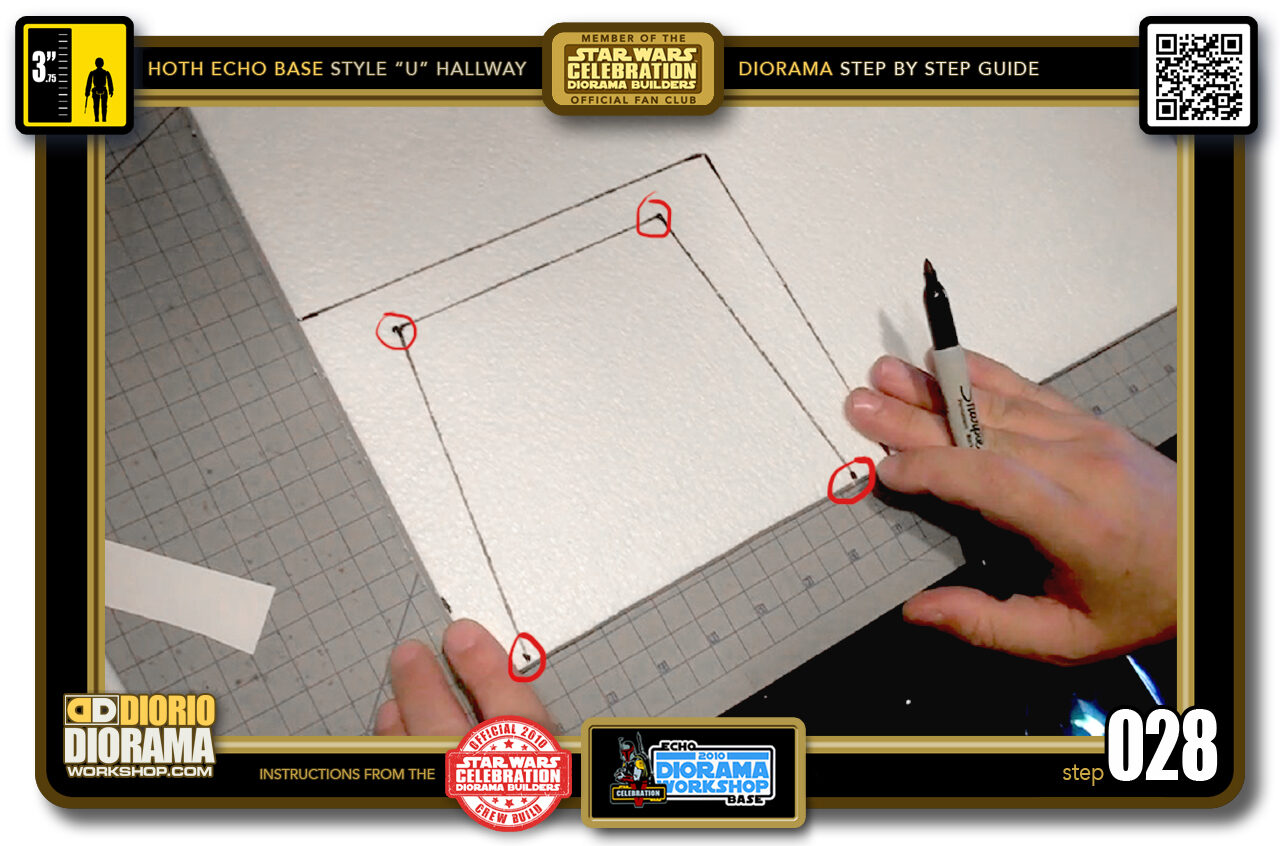
- Step 028 >> Now take your Sharpie Pen and trace along your four INNER circle pokes to create this ARCHWAY shape. You can also connect the outer markers as well to help you see where you will be cutting your styrofoam.
-
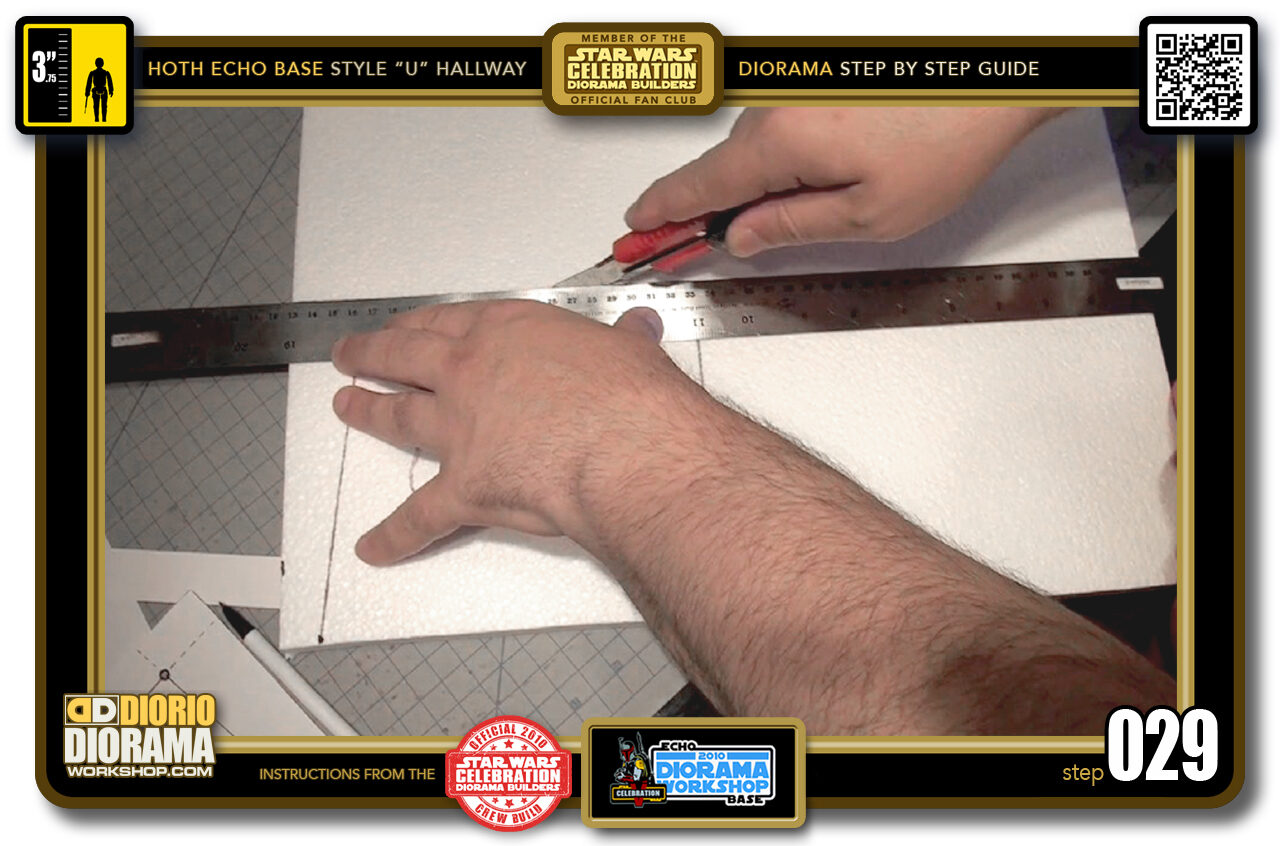
- Step 029 >> Start by slicing the Top and Sides of your Archway. Now GENTLY and CAREFULLY slice the Inside guides of your archway with your Utility Knife. Be careful when you reach the bottom sides as they are thinner and become more fragile which cause cause them to snap if not handled carefully.
-
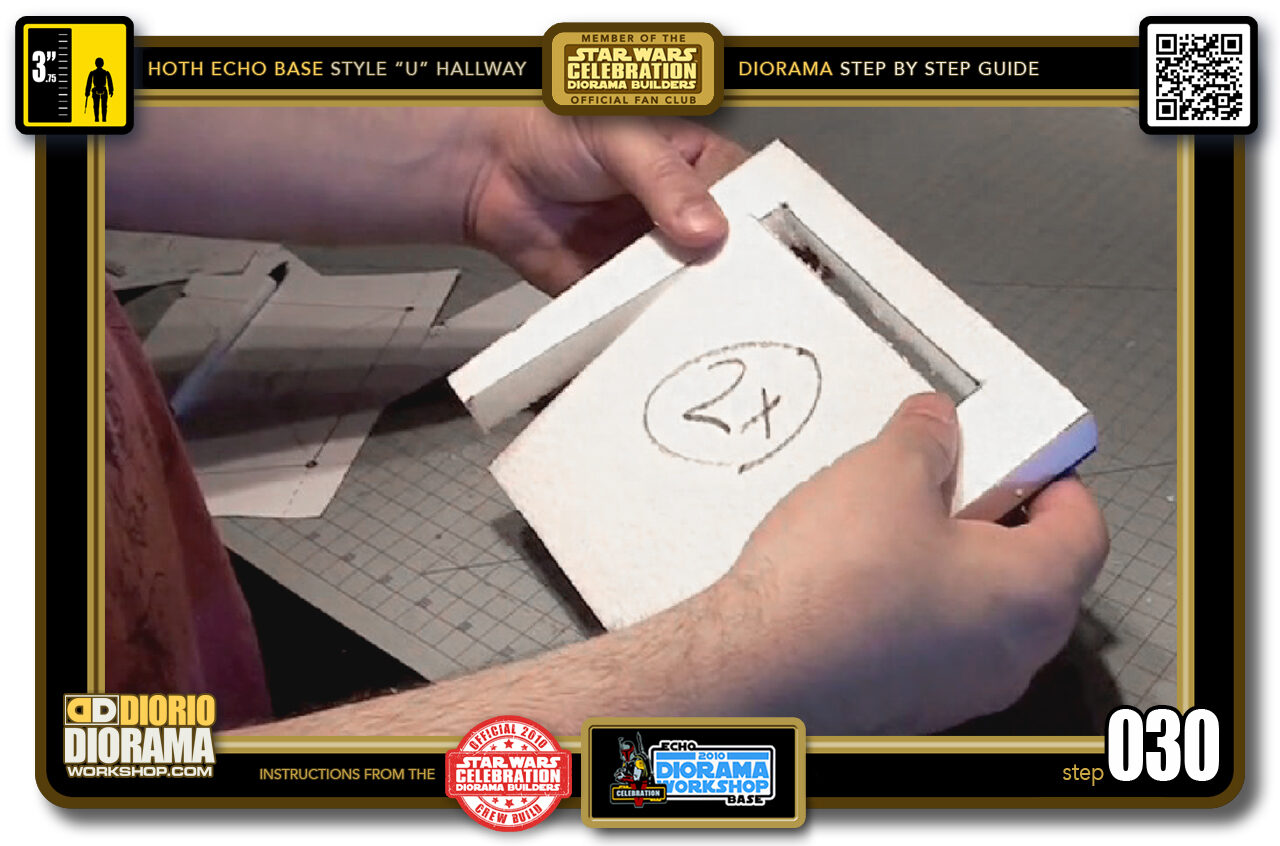
- Step 030 >> When you are done slicing, you can POP OUT the inner styrofoam. You can toss this in the recycle bin for the moment. (Good for future projects like mountains for example)
-
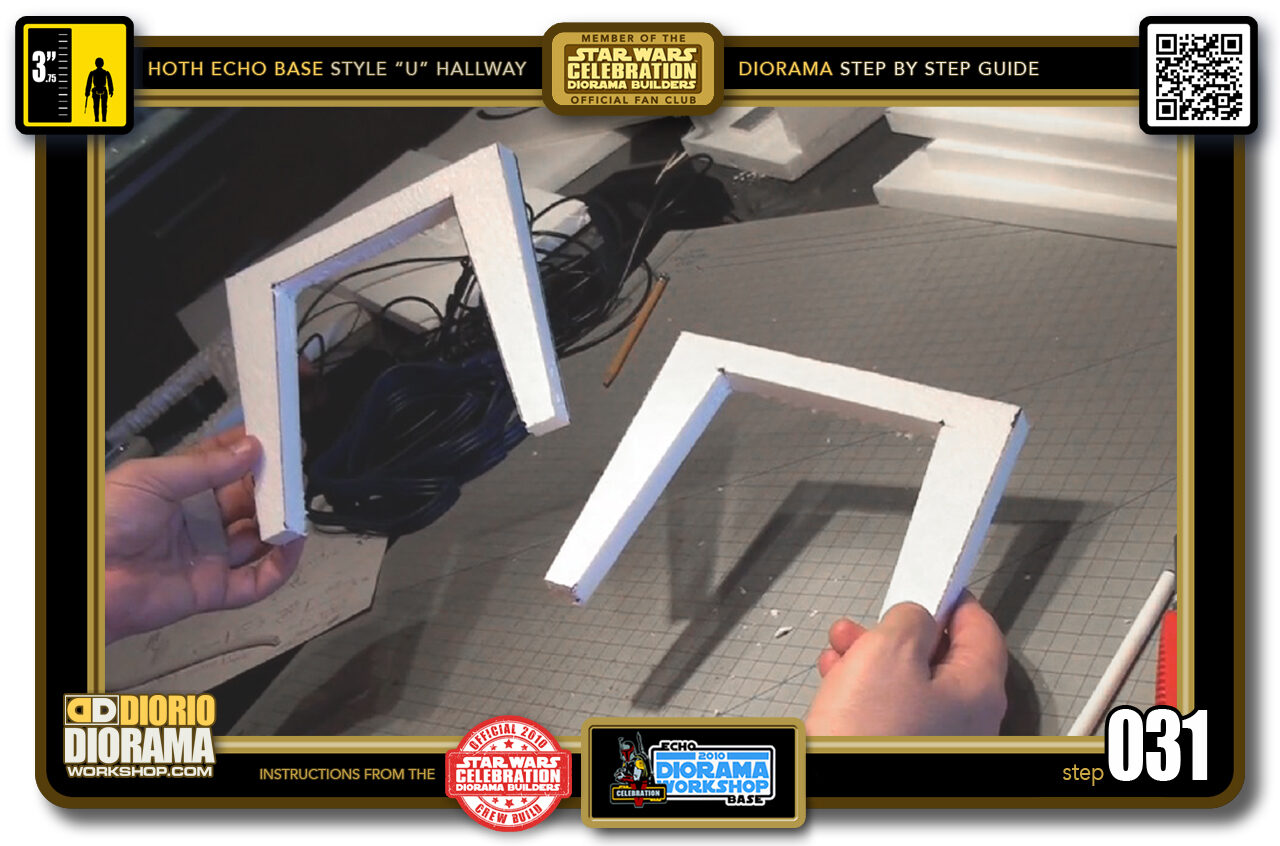
- Step 031 >> You need to repeat Steps 026 to 030 so that have TWO "U" Archway ends to work with.
-

- Step 032 >> These will go on the ends of your "U" Shape Hallway. Remember that this is the Fan Build measurements as used at the booth, if your shelf is bigger, and you decided to extend beyond this, your hallway may look different.
-
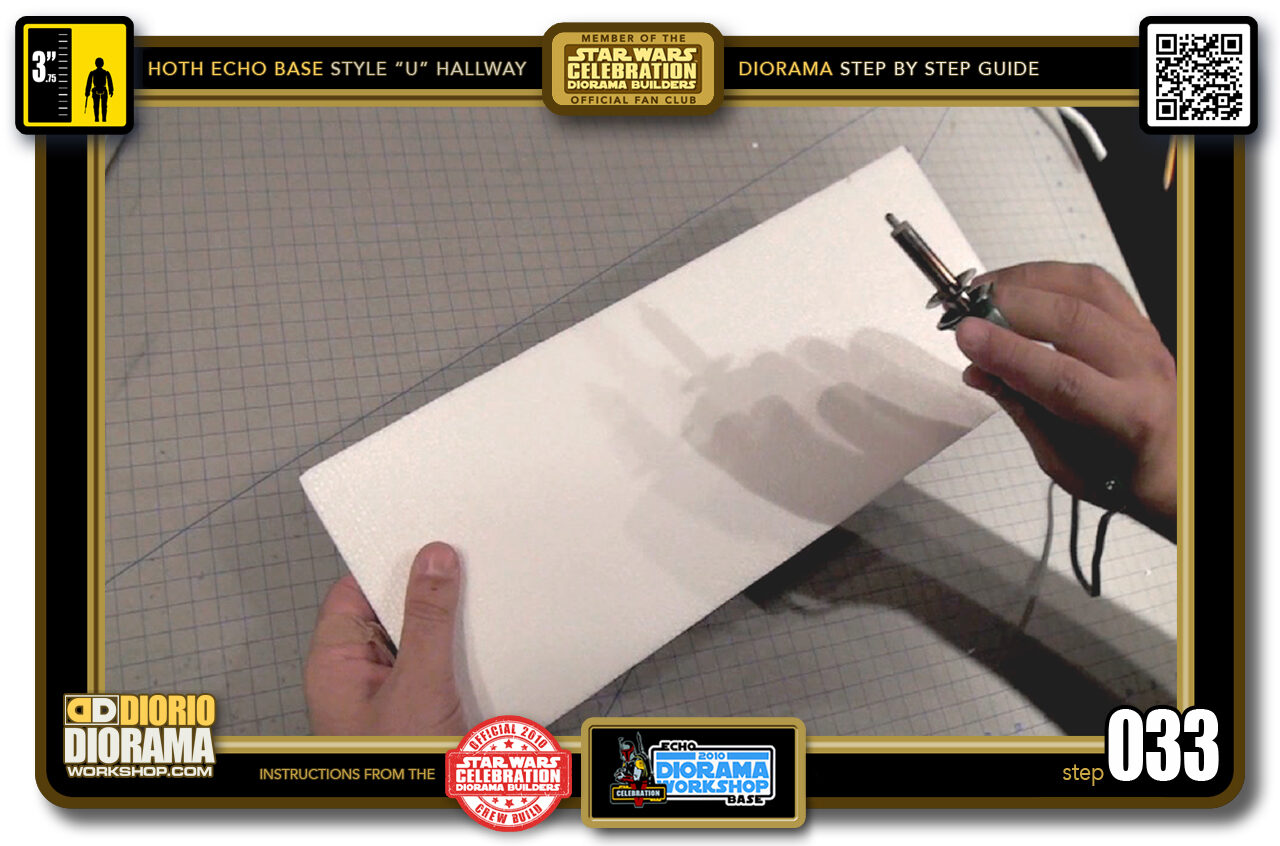
- Step 033 >> Start by grabbing your first WALL piece, and grab your WOOD BURNING PEN. You can buy these at your local Art Supply store. MAKE SURE TO DO THIS IN A WELL VENTED ROOM AND WEAR A FILTER MASK. Burning Styrofoam SMELLS and IS TOXIC.
-
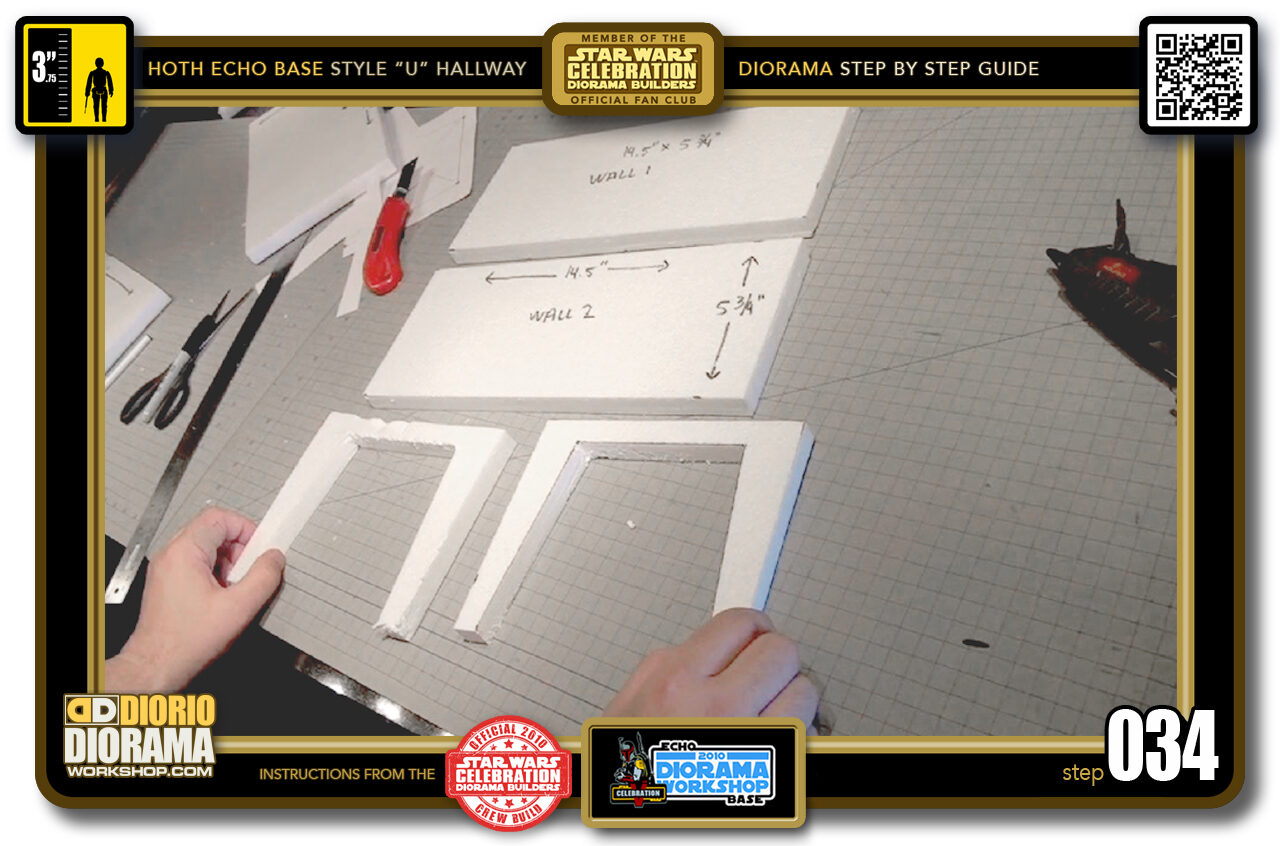
- Step 034 >> What we need to do first is add the movie set texture to the inside of your walls. The cool thing about making Hoth Hallways with Styrofoam is you can do this with a heat toll that will melt grooves like a knife in butter. You will need to prepare these FOUR pieces. Your 2 walls and 2 end arches.
-
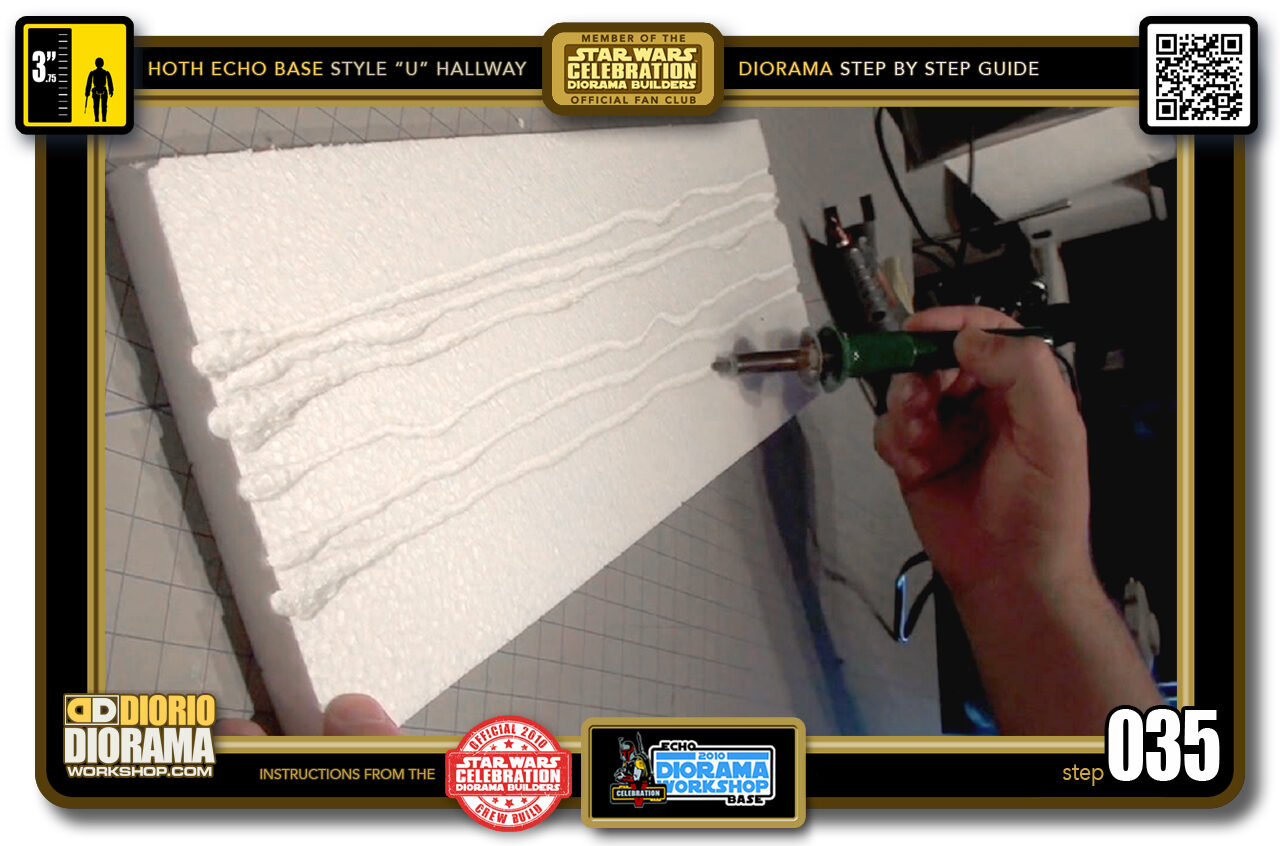
- Step 035 >> As you move Left to Right, the heat from your pen will BURN a GROOVE into the styrofoam. The same way as you would use a pen or pencil to draw a line on a piece of paper. Just DO NOT stay too long in the SAME SPOT as you will burn a hole right THROUGH the styrofoam. You DON'T want that LOL.
-
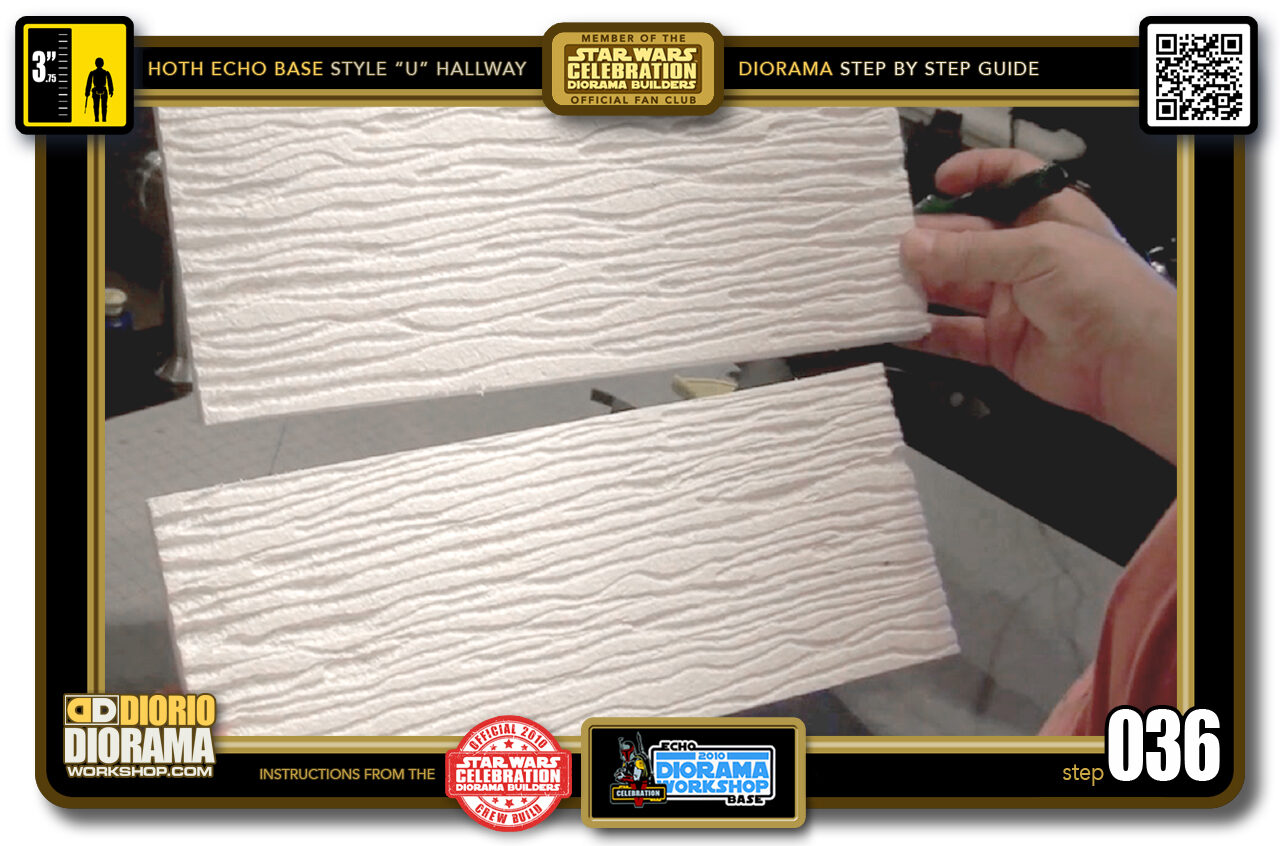
- Step 036 >> You need to continue your grooves until you cover the ENTIRE surface of BOTH WALLS. After a few minutes they look like this. Pretty cool don't you think? 😀
-
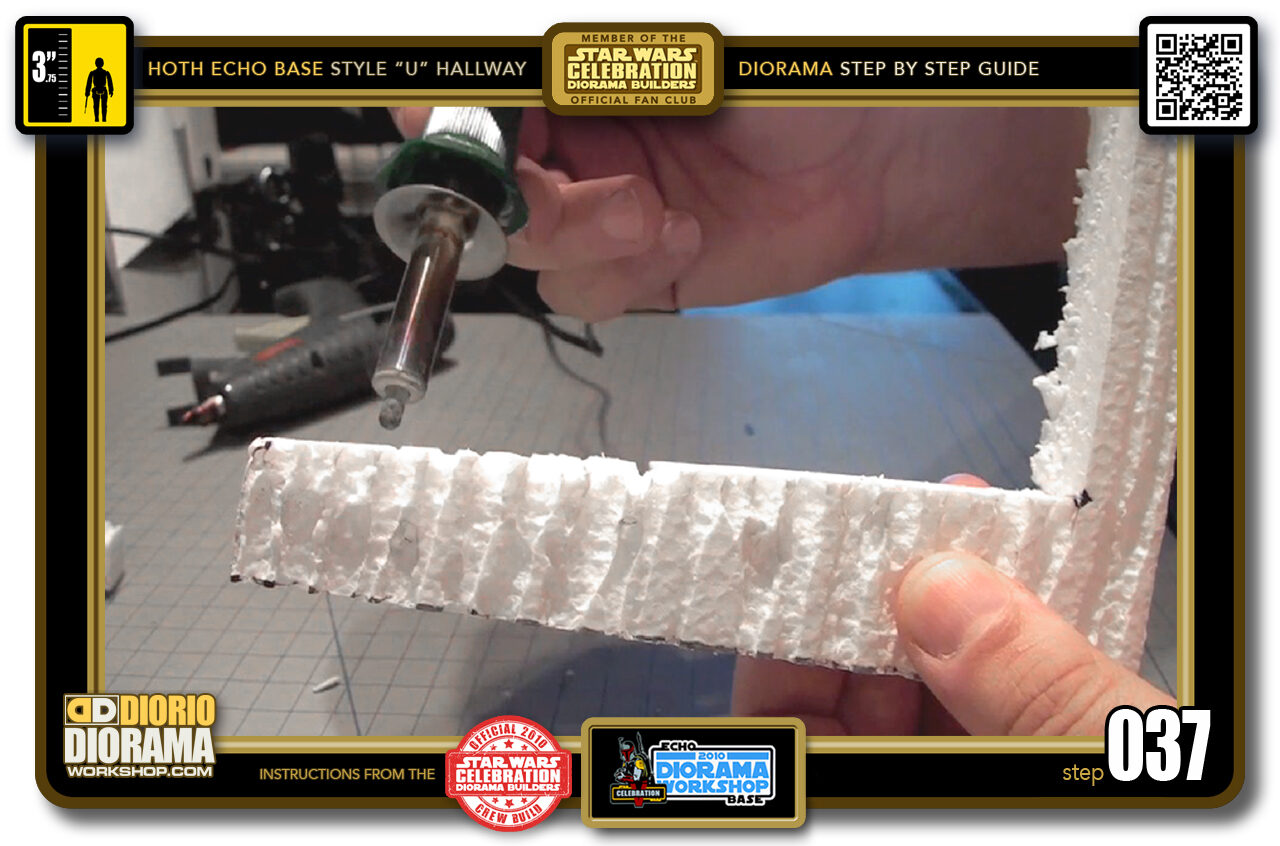
- Step 037 >> You will ALSO need to burn grooves on ONLY ONE SIDE of BOTH Arches. When the fronts are done, burn some grooves on the INNER sides of your arches as well. When you place your wall against the front arch, it will make it look like all grooves wrap AROUND the corners.
-
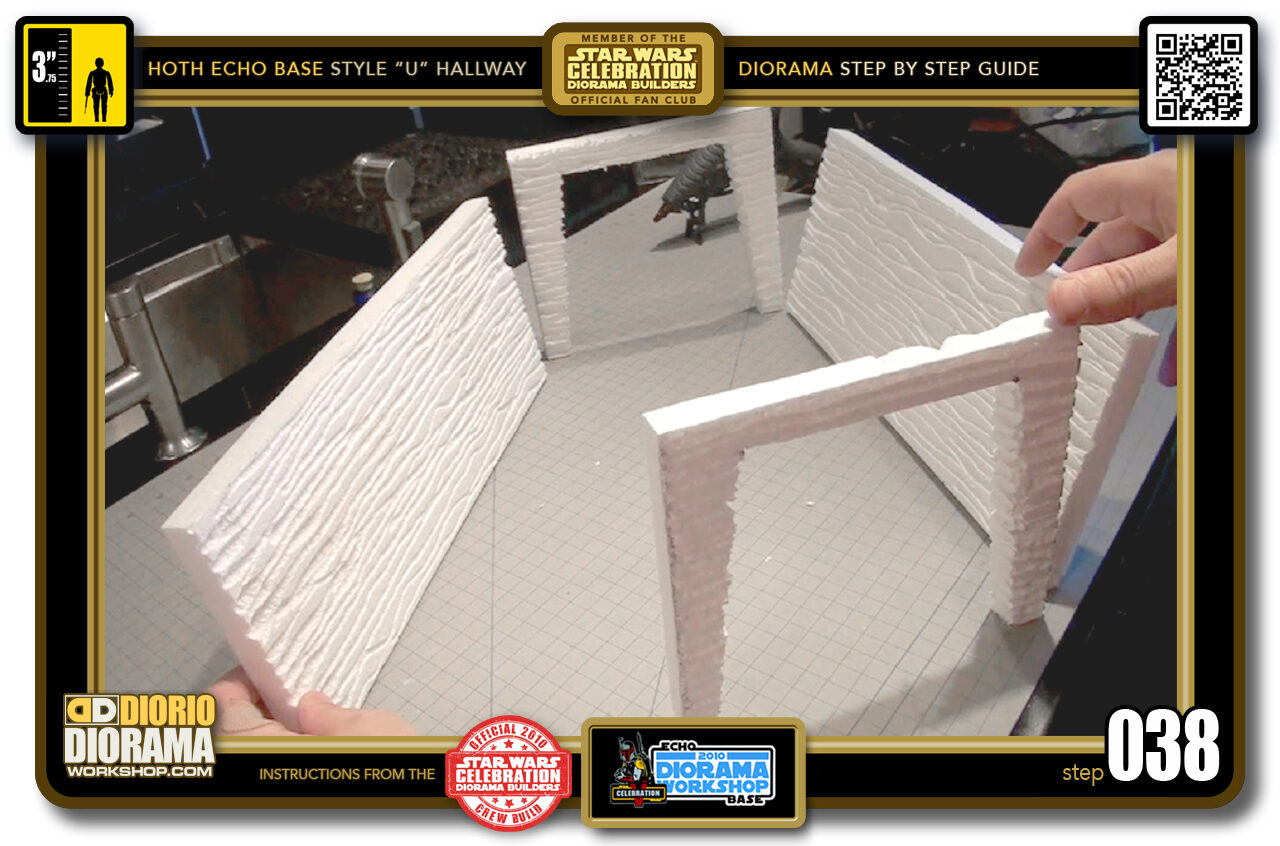
- Step 038 >> Our textured styrofoam is all done and ready for painting.
-
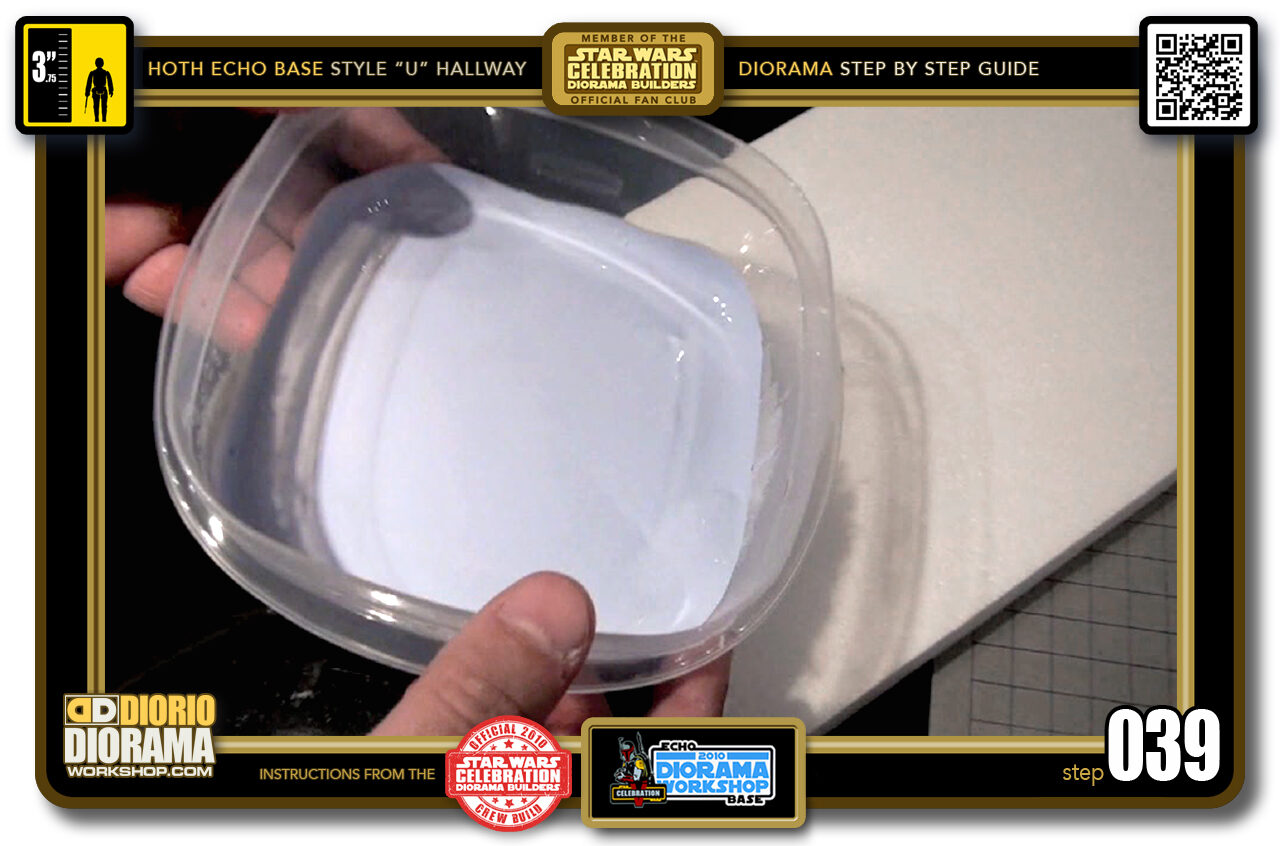
- Step 039 >> Now we want to give the illusion you see in the film where there is a slight blue hue to the snow. I placed some basic dollar store latex paint in a little plastic Tupperware. I couldn't find the exact shade in the store so I mixed white and blue to get this pale baby blueish colour.
-
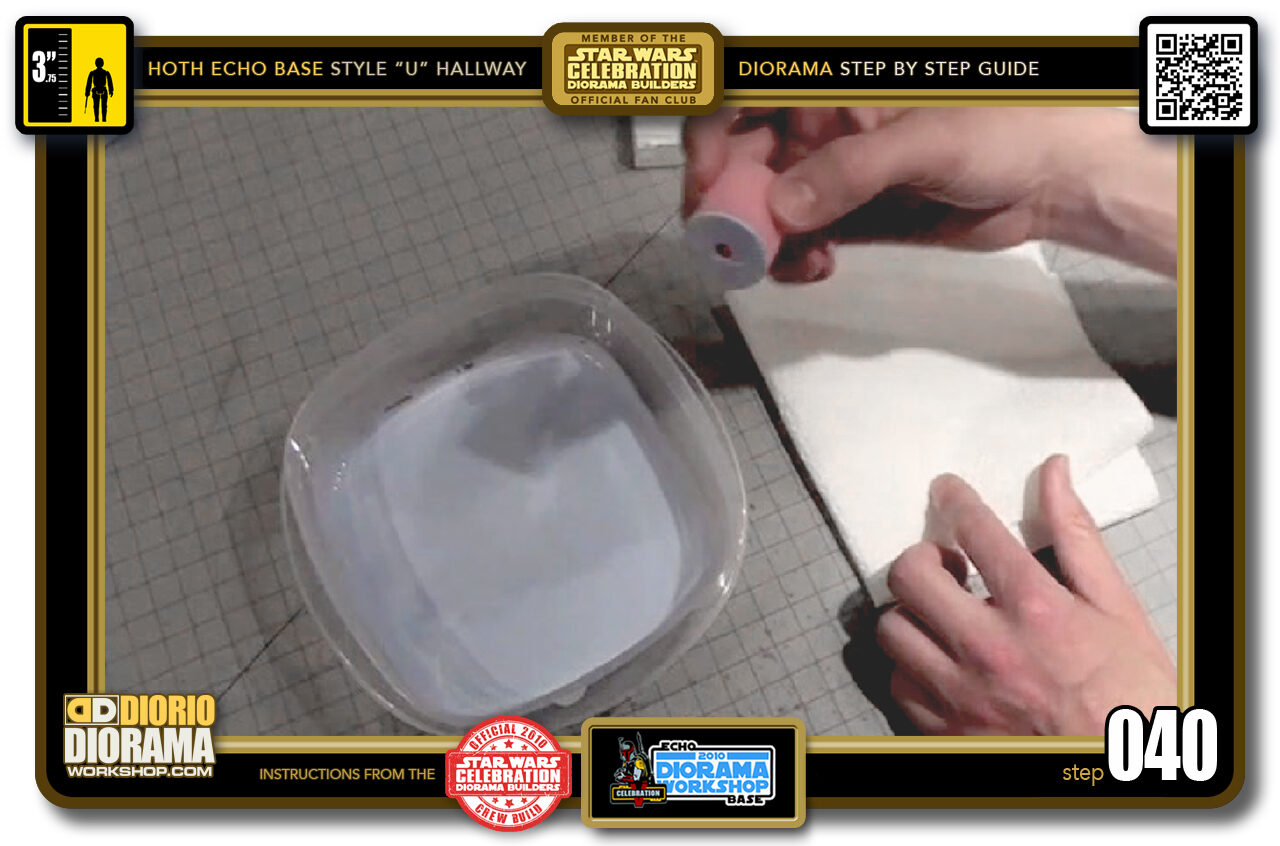
- Step 040 >> Now take a sponge or as I did here and at the convention, a Hair Curler sponge 🙂 Dip it into your "BABY BLUE" Latex Paint. ALSO NOTE : The paint has been watered down (simply add 2 quantities of water to 1 quantity of paint) to allow it to spread better without clumping.
.
Did you already build this Diorama ? At home or at our Star Wars Celebration Diorama Builders workshop ? Would you like to show it in the site’s GALLERY VISITORS DIORAMAS section, YES ? That is Awesome !!! You can find out all the details on how to email me your photos on the VISITORS SUBMISSIONS INFO page … When I get your photos, I will create your very own page just like this one. You may not realize it but work does inspire others to join in the fun of making Action Figure Dioramas.
.
NOT FOR RESALE ALL Decals, tutorials and artwork are ©FrankDiorio (dioramaworkshop.com) and offered FOR FREE to the fans – that would be you ? so you can build and display my diorama designs in your very own home. I realize I cannot control what one does with my graphics once I place them on the web, I can only ask you as one fan to another, please respect the artist and do not be that jerk who uses my designs and tutorials to build a copy of my work only to sell it on EBAY or trade/sale groups and forums. Thank You. Frank.
.

.
.
If you have a facebook account, why not join the Official Diorama Builders Fan Club today, simply click the logo link below.
 .
.
Catch up with fellow visitors and exchange stories, read cool interviews with the crew, exchange photos, fun surprises and grab some FAN ONLY merchandise next year at actual future conventions ?
.
©2021 Frank Diorio DioramaWorkshop.Com
.
IF YOU LIKE WHAT YOU SEE, PLEASE SHARE WITH YOUR FRIENDS
USING THE SOCIAL MEDIA BUTTONS BELOW