


-
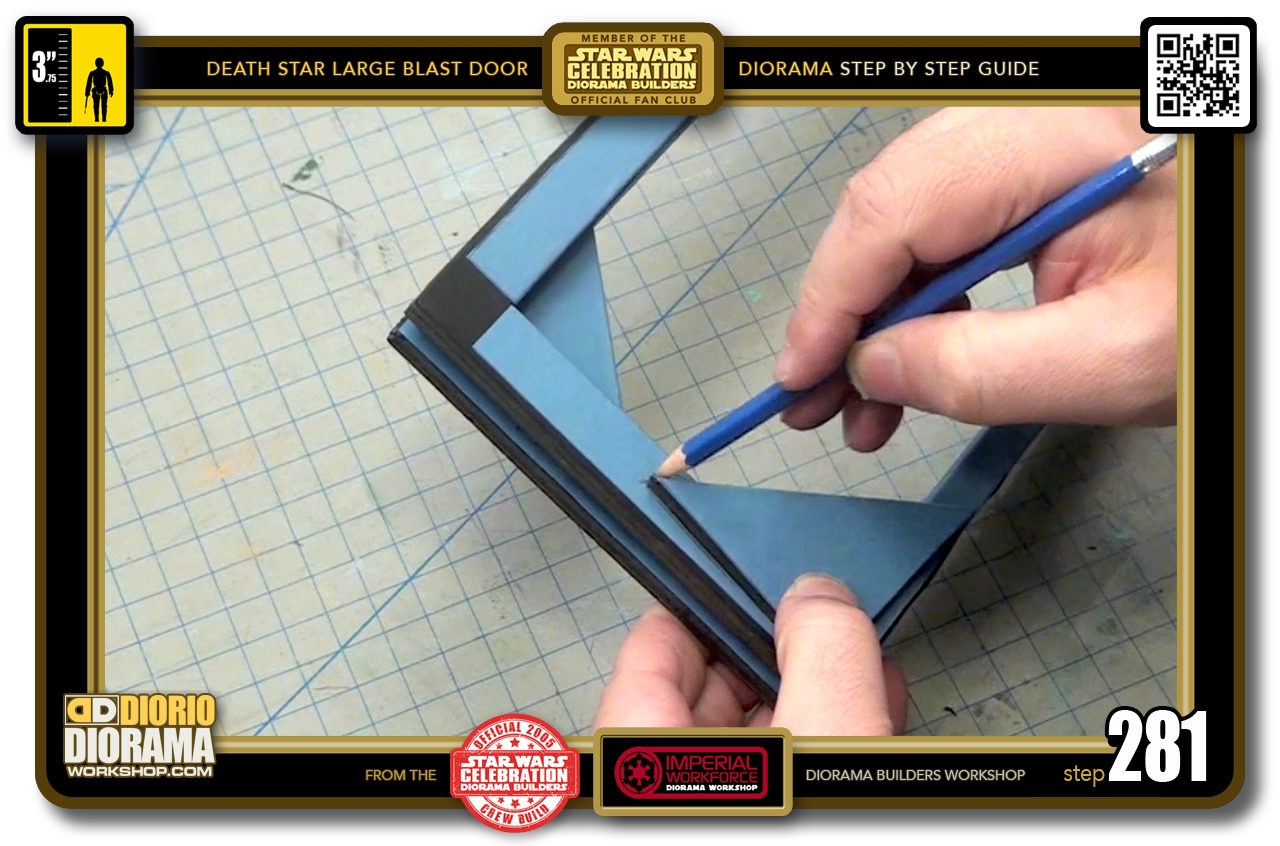
- STEP 281 > Turn your frame over and grab your pencil to trace all around your Doritos shape.
-
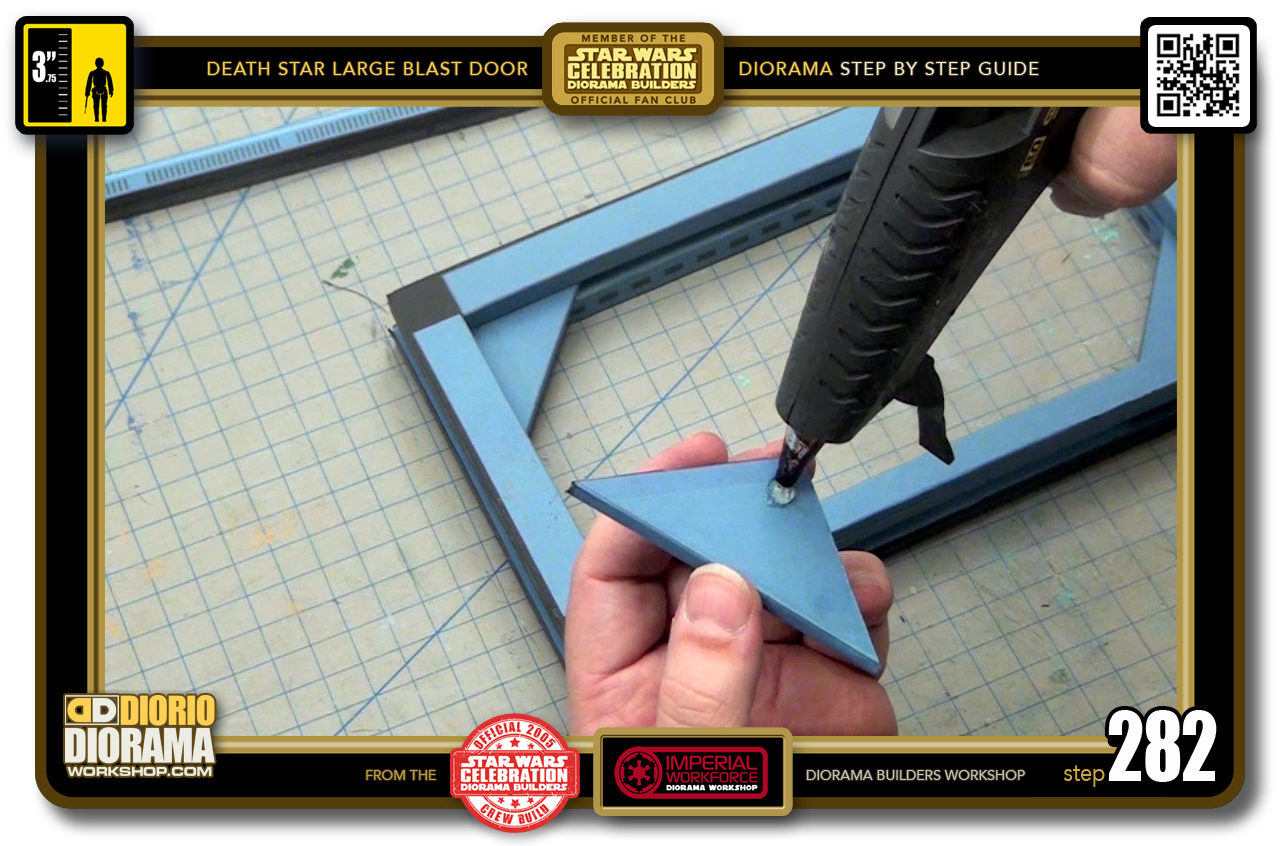
- STEP 282 > Put a drop of Hot Glue on the top of your Doritos triangle.
-
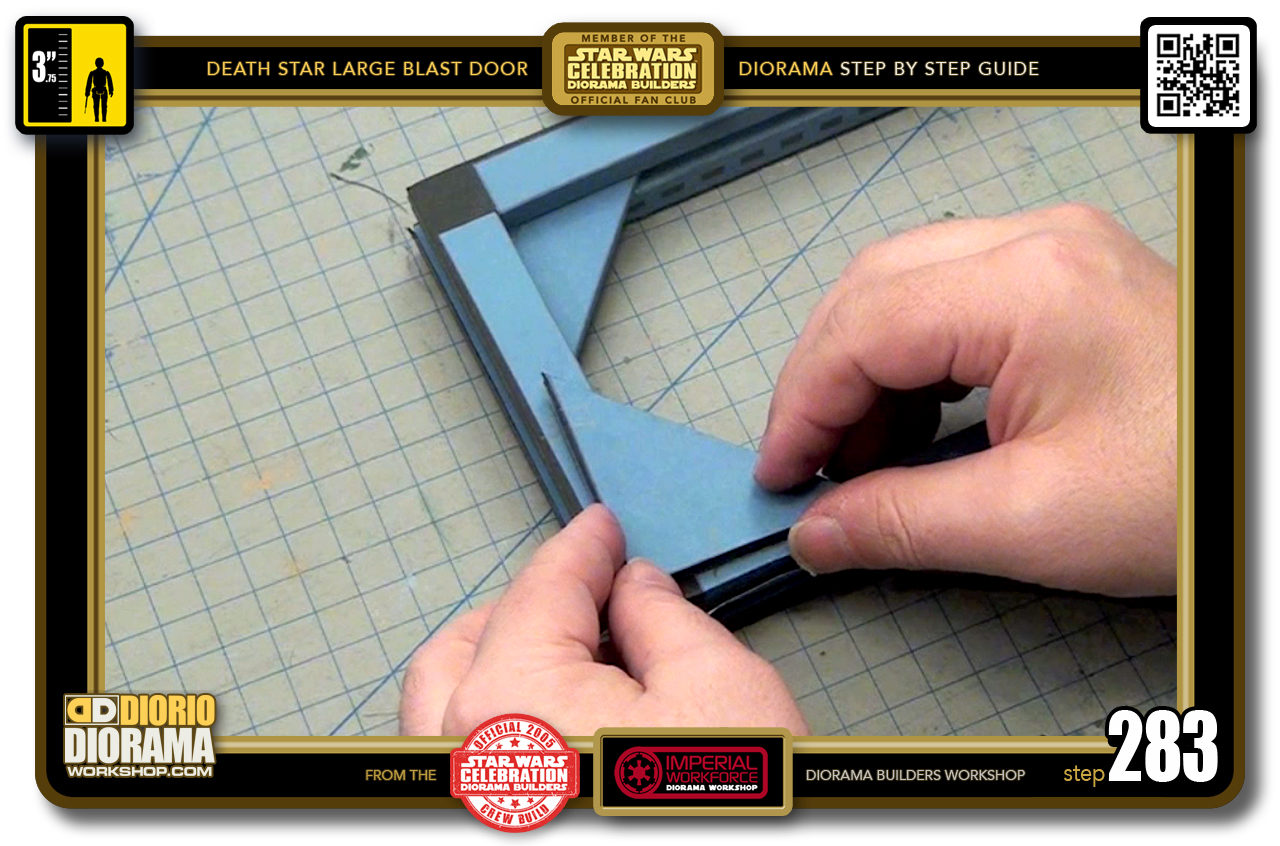
- STEP 283 > Quickly and carefully place it alligned with your pencil guides.
-
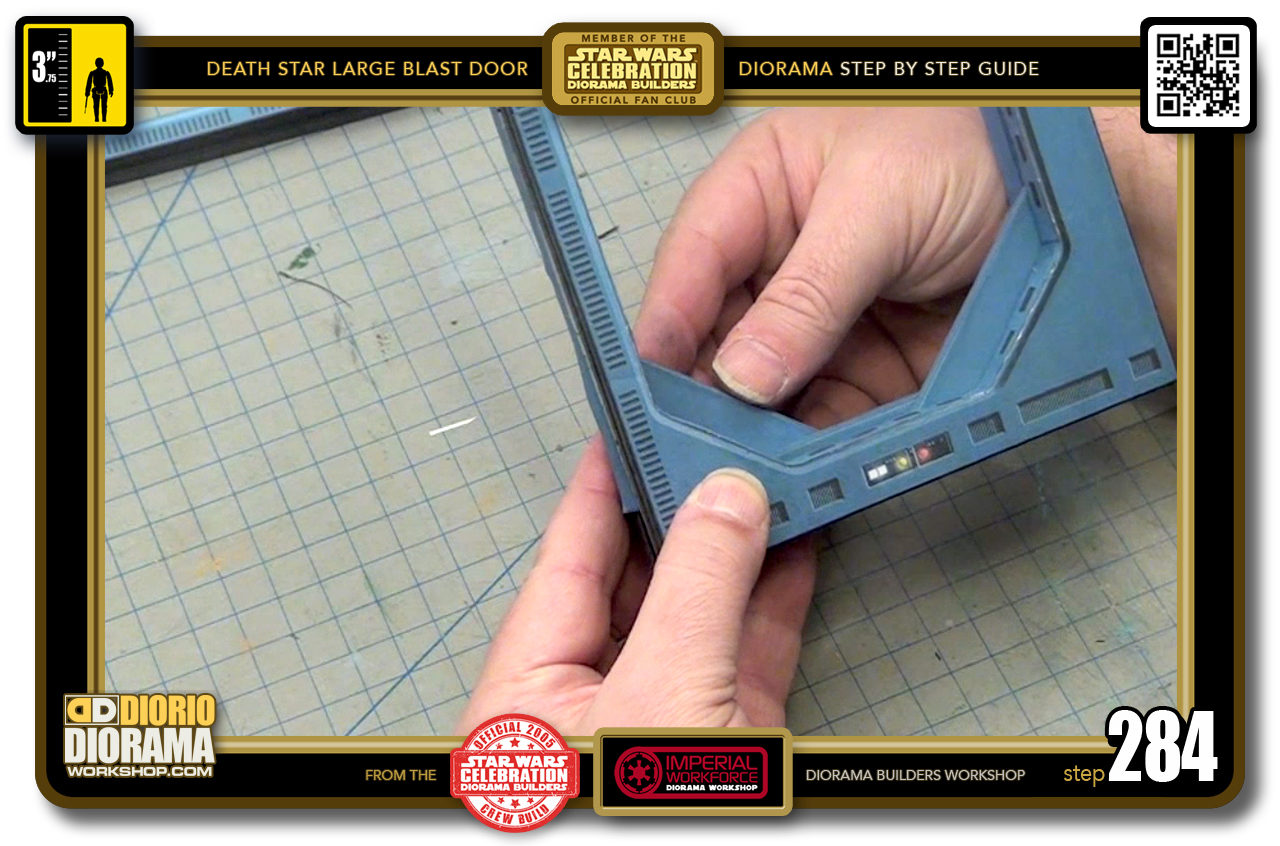
- STEP 284 > Flip it back to the front and quickly adjust the PARALLEL if need be. Keep pressed for about 30 seconds until the Hot Glue cools off.
-
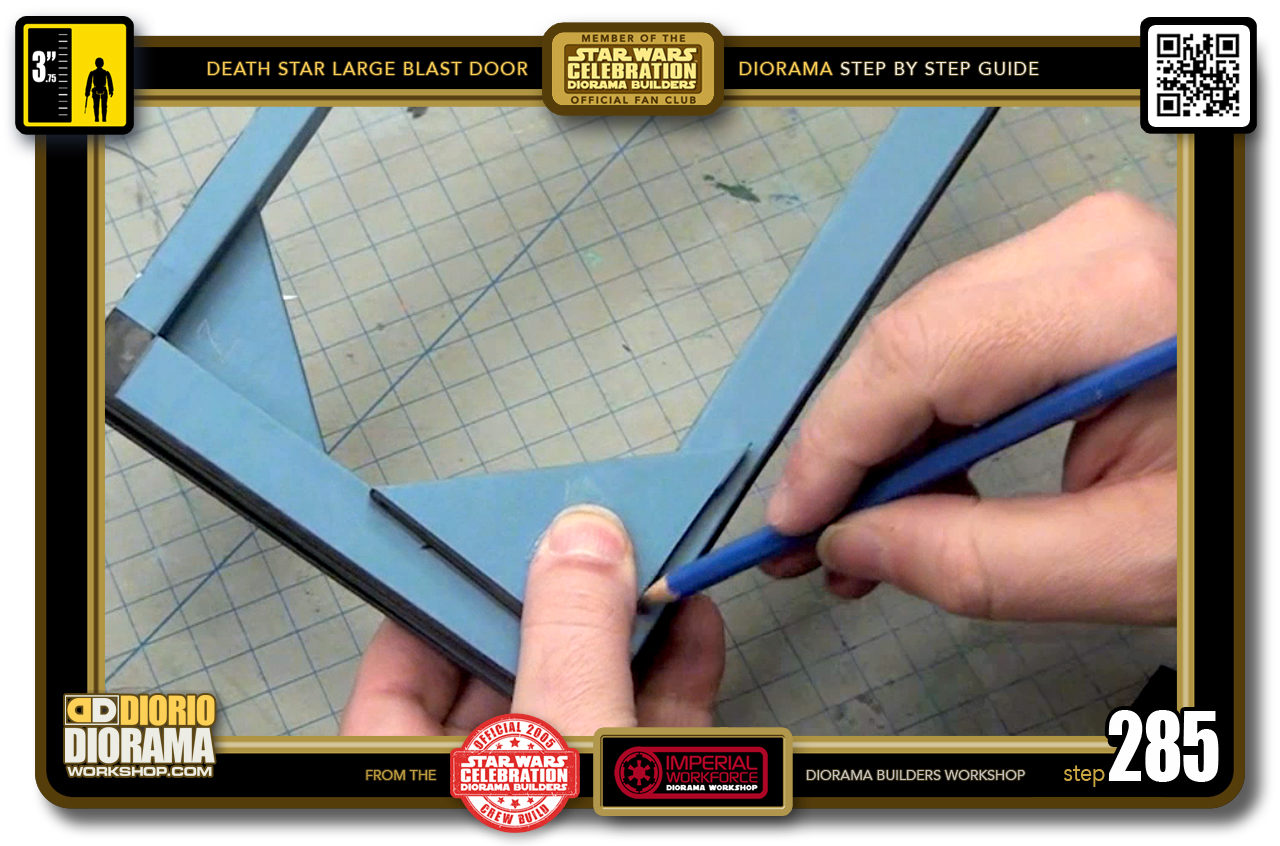
- STEP 285 > Grab Doritos triangle #4, place it, flip the frame over and trace around it with your pencil.
-
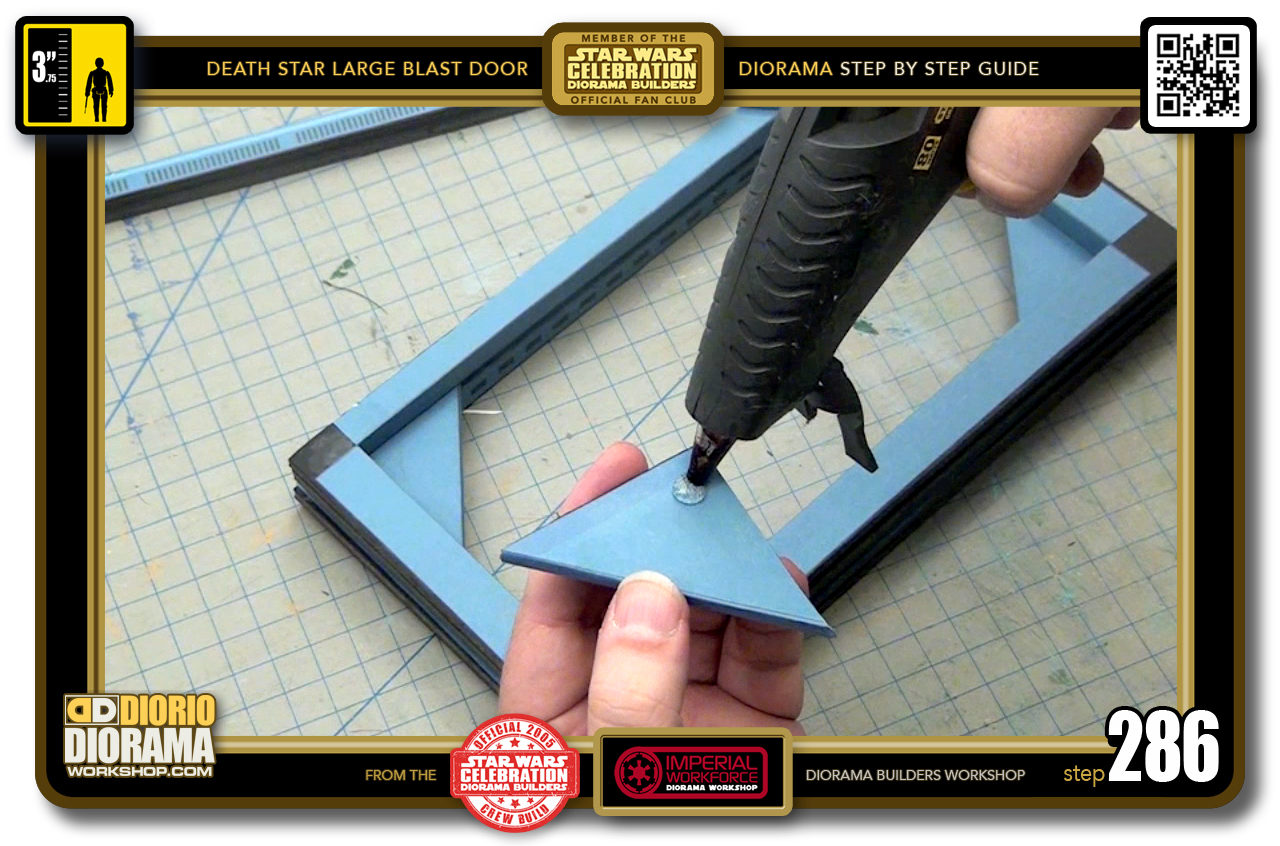
- STEP 286 > Small drop of Hot GLue on the Doritos.
-
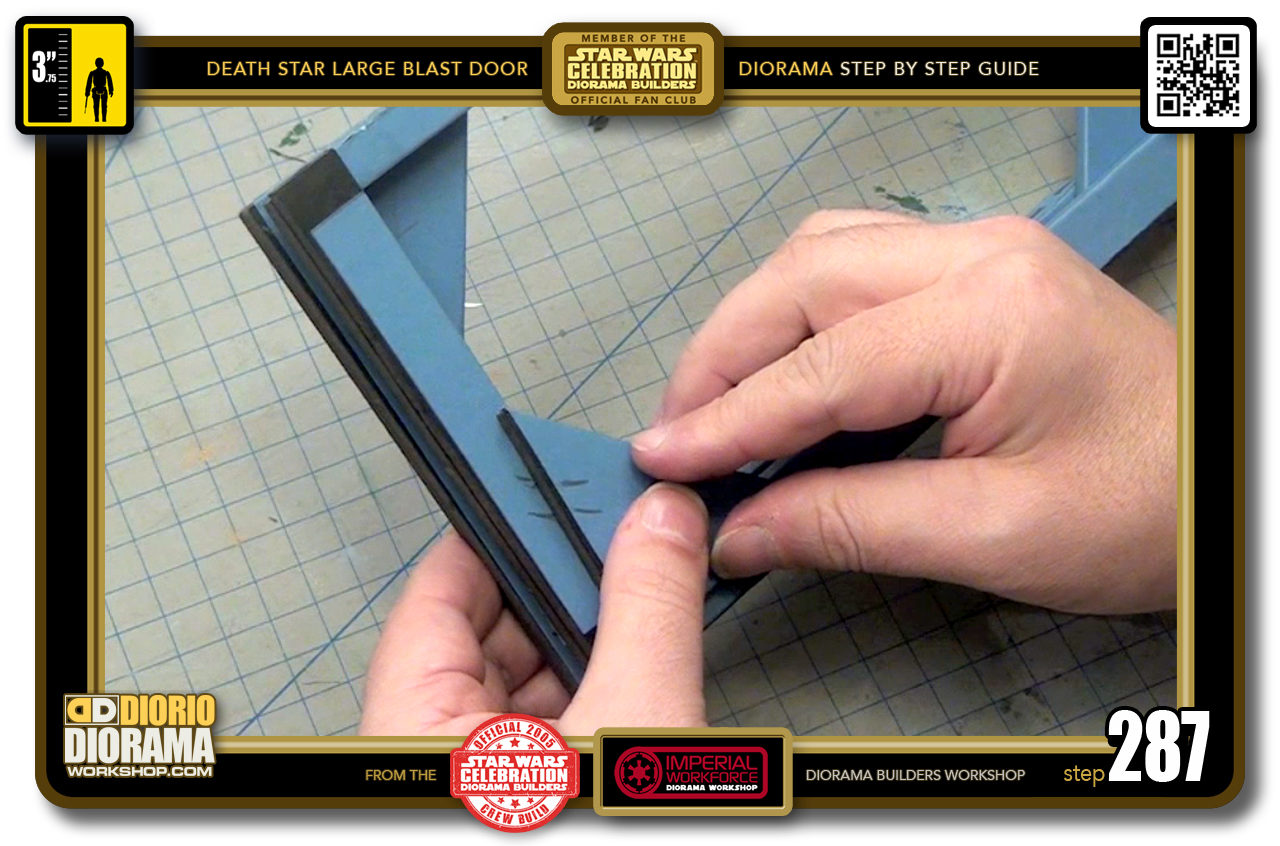
- STEP 287 > Quickly place it aligned with your pencil guide lines.
-
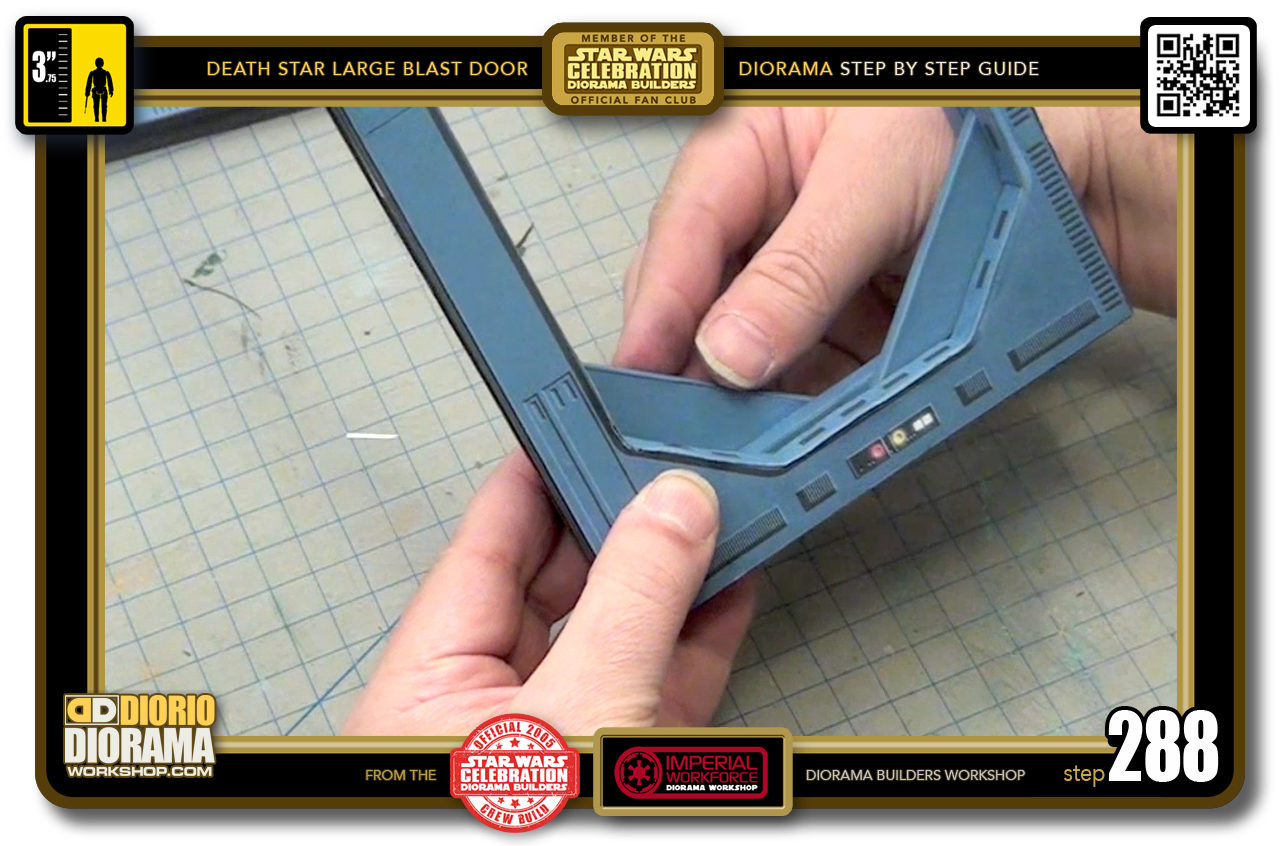
- STEP 288 > A quick flip back to the front view, adjust if you need to for the PERFECT PARALLEL.
-
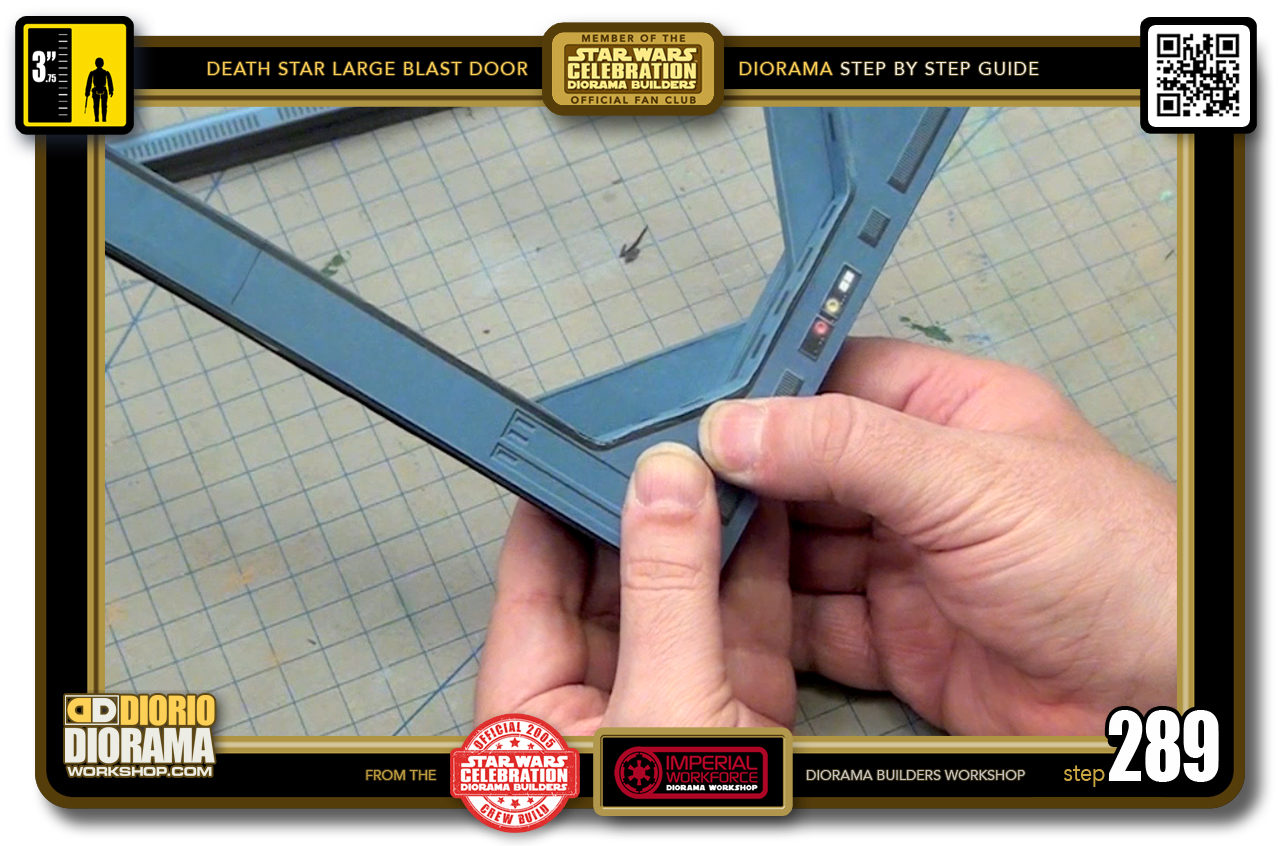
- STEP 289 > Keep pressed for about 30 seconds until the Hot Glue cools off.
-
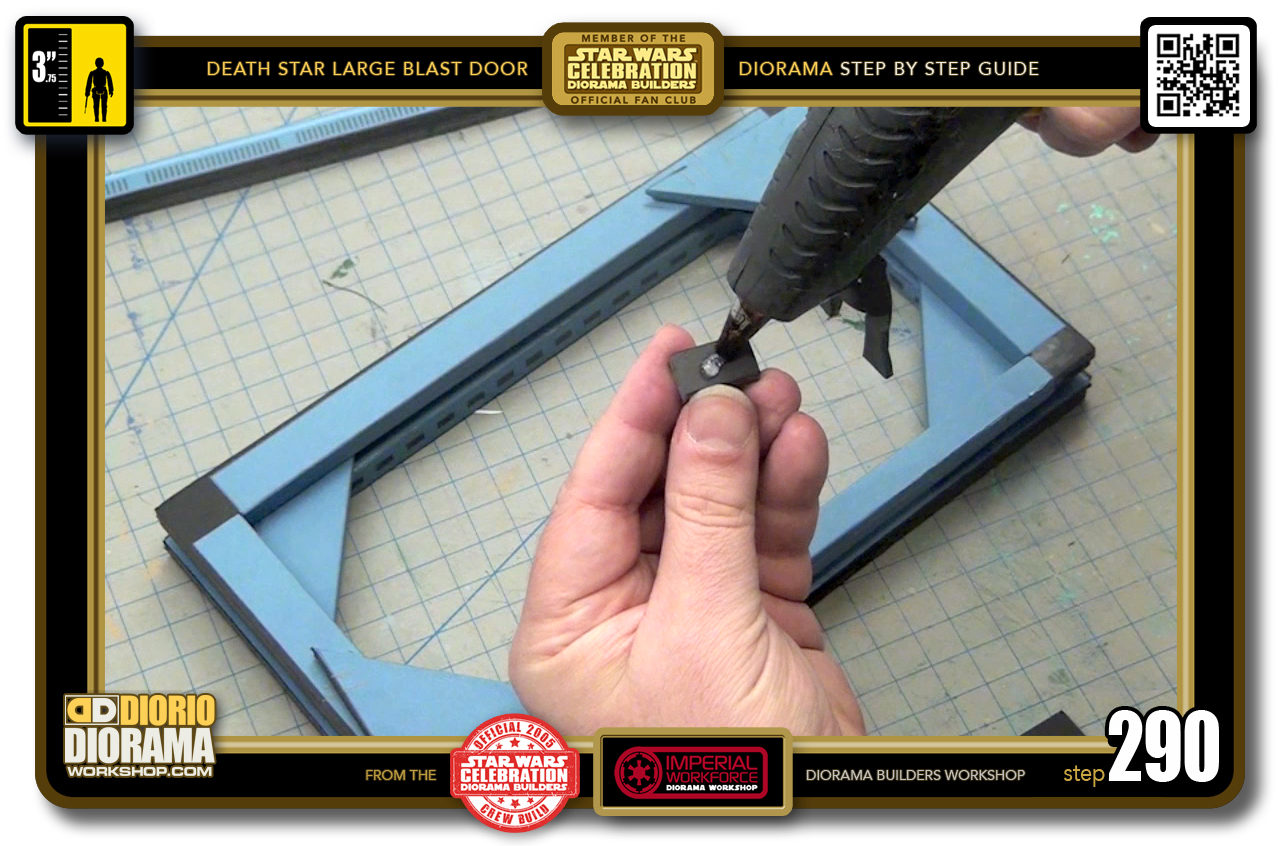
- STEP 290 > Grab a corner support and put a drop of Hot Glue onto it.
-
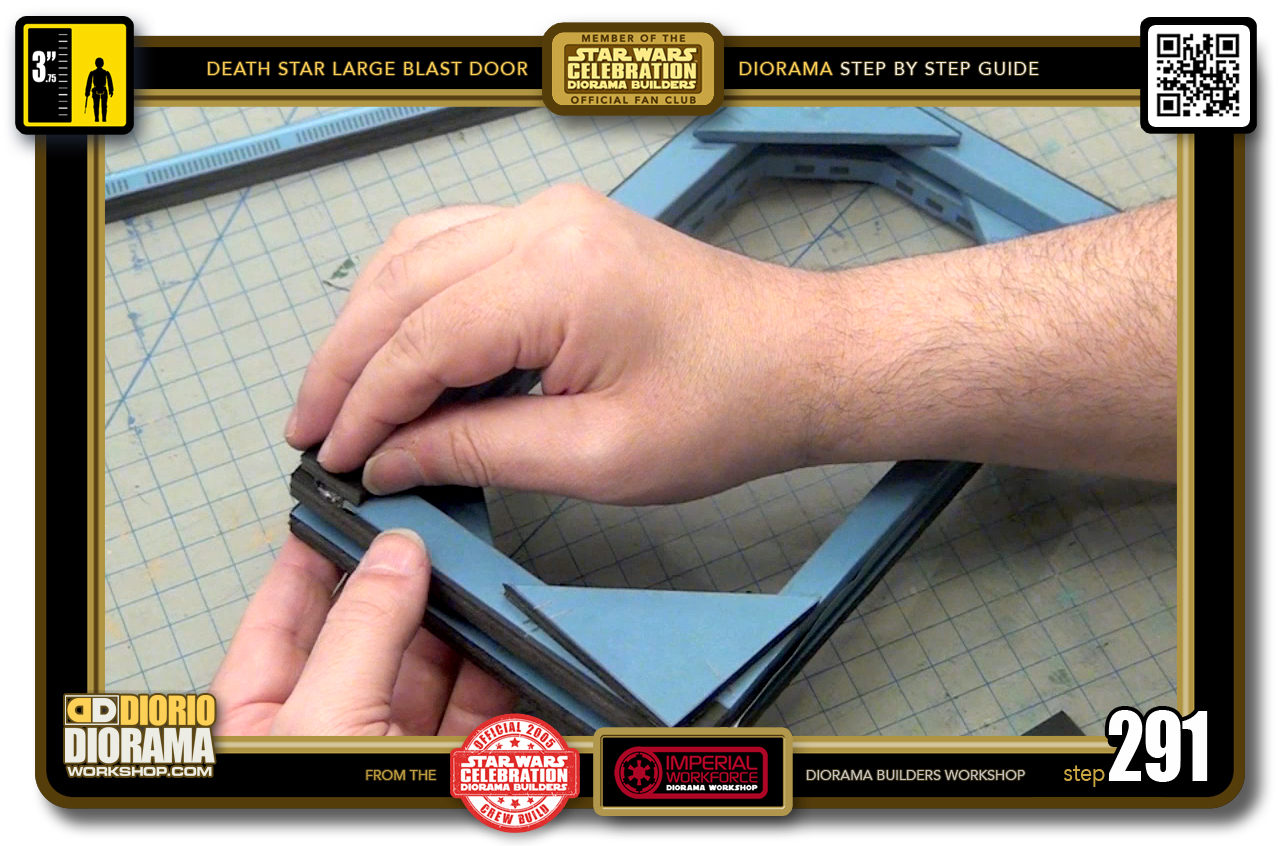
- STEP 291 > As before, place it in the corner as close as the frame's outside edge as possible.
-

- STEP 292 > Grab another corner support and add another drop of Hot Glue.
-
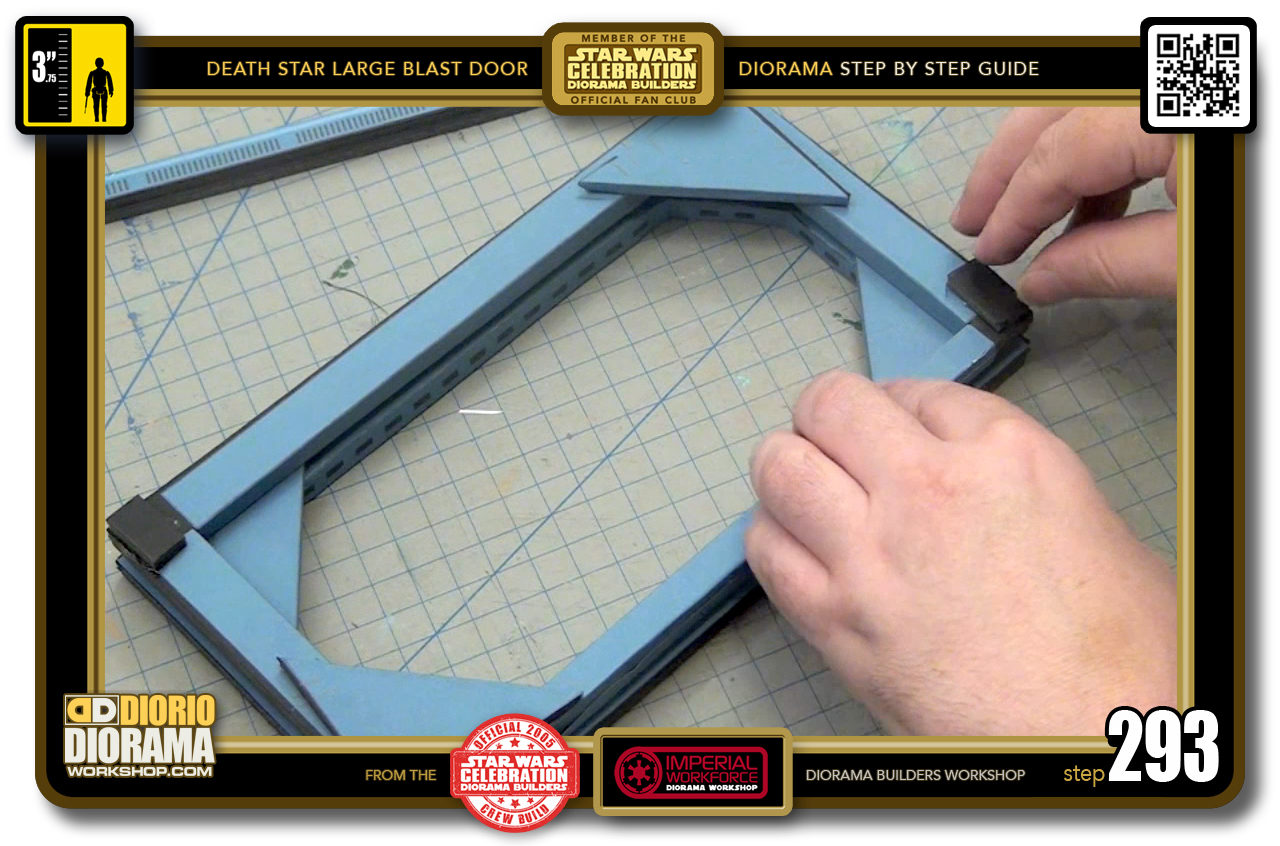
- STEP 293 > Position it in the last available corner as close to the frame's outside edge as possible
-
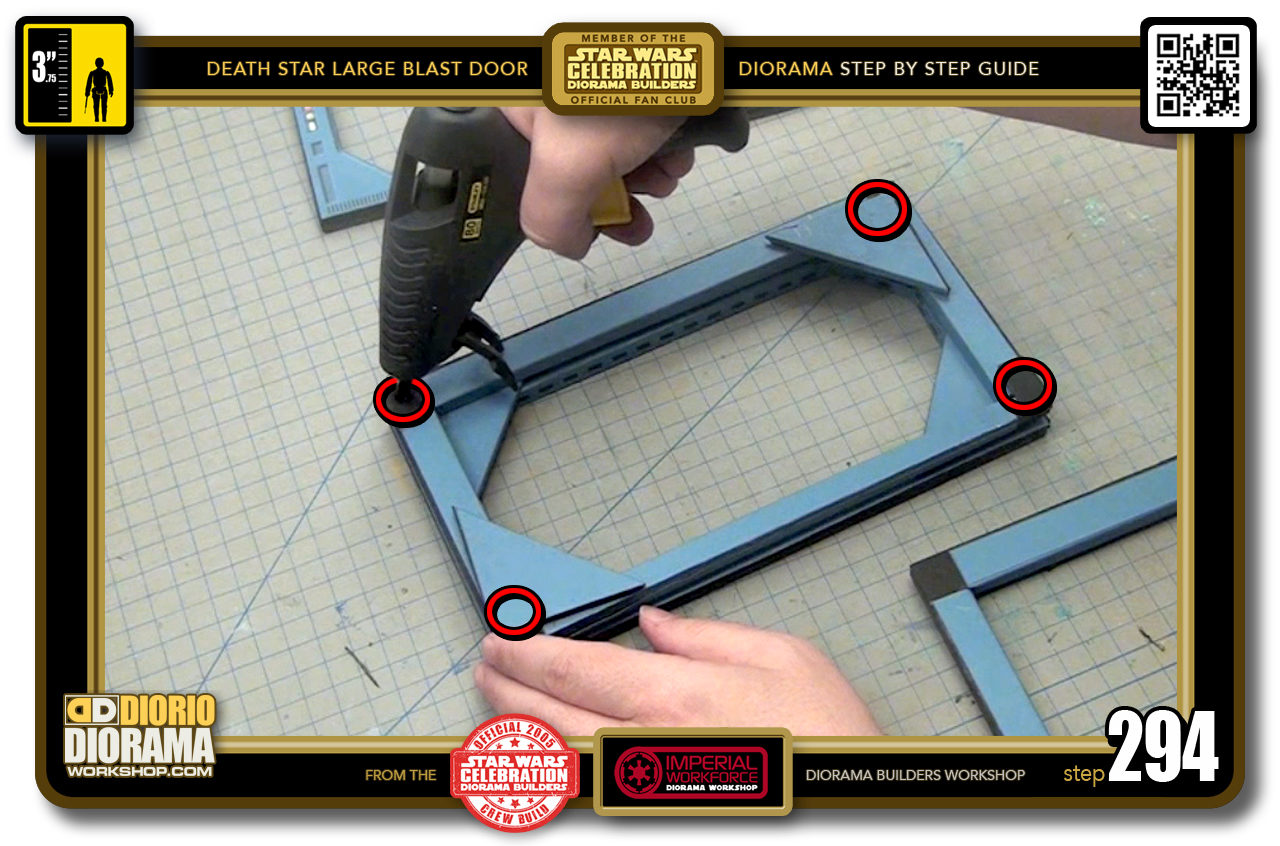
- STEP 294 > After you let step 293 cool off 30 seconds or so, grab your Hot Glue Gun and as before, put 4 drops in each corner's outer edges.
-
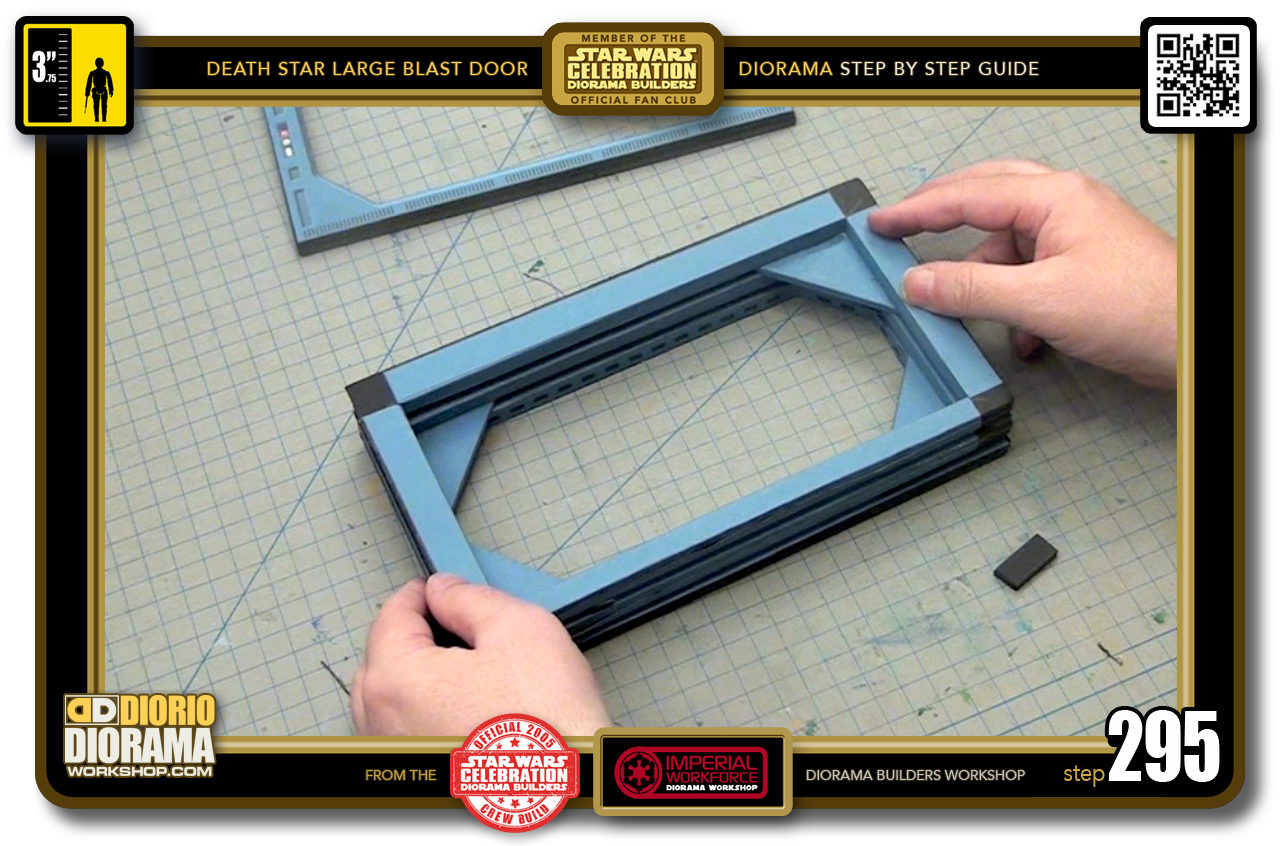
- STEP 295 > Grab your layer 3 rectangular frame, align and gently and press down. MAKE CERTAIN THE 3rd FRAME'S BOTTOM IS POSITIONED WITH THE 2 OTHER FRAME BOTTOMS.
-
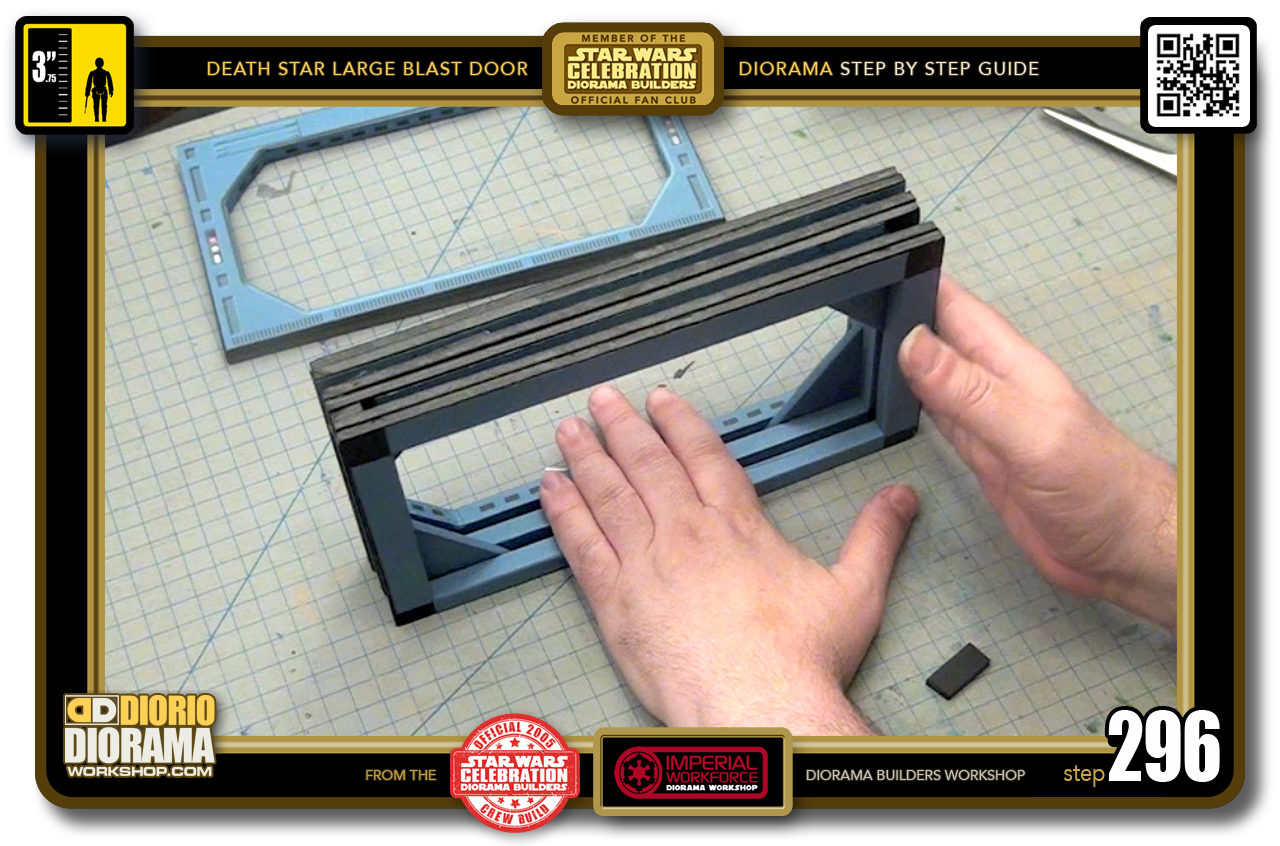
- STEP 296 > Carefully place the 3 layers on the table, press down on the bottom making sure all is flat and aligned with the first 2 layers, also make sure the sides are flush and aligned as well.
-
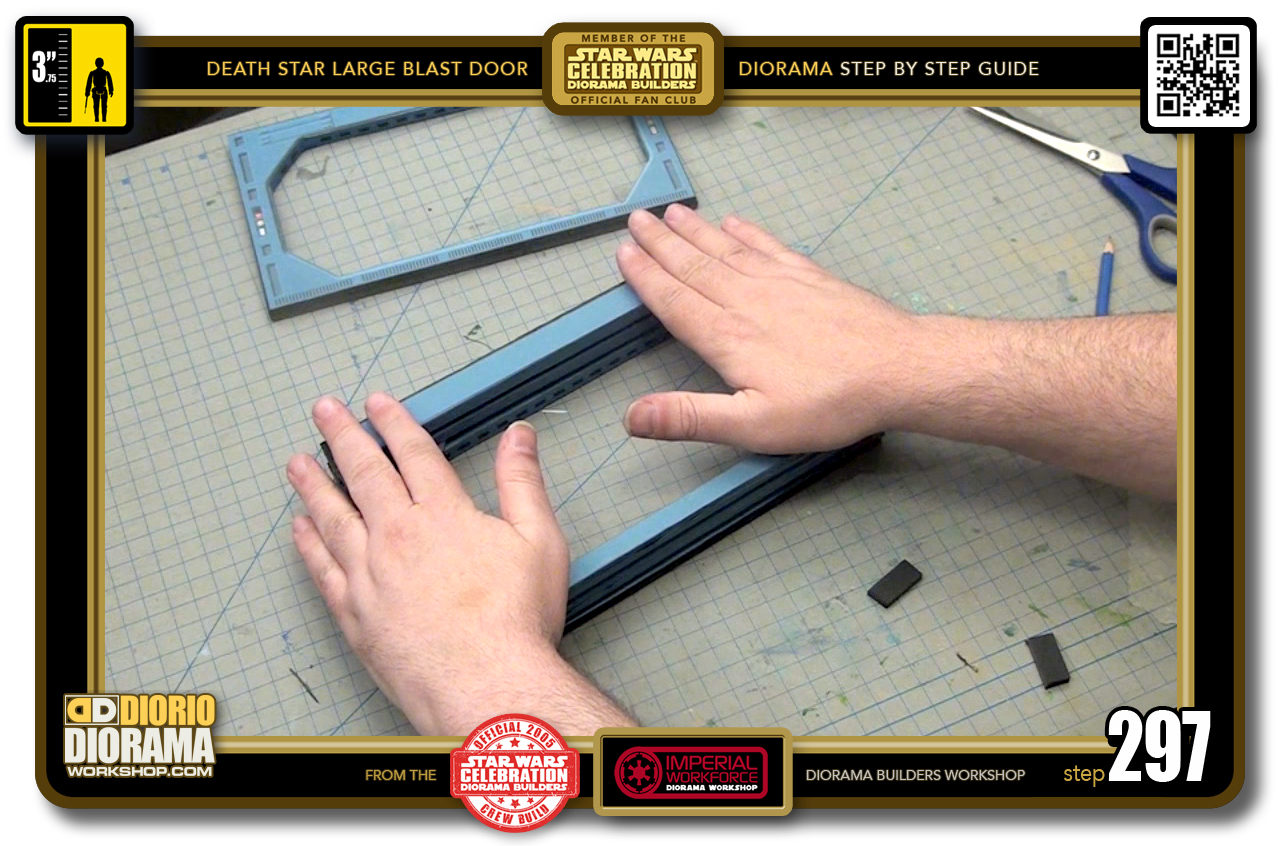
- STEP 297 > When satisfied, you can now rest it back on the table and press down on the corner with your hands for about 30 seconds until the Hot Glue cools off.
-
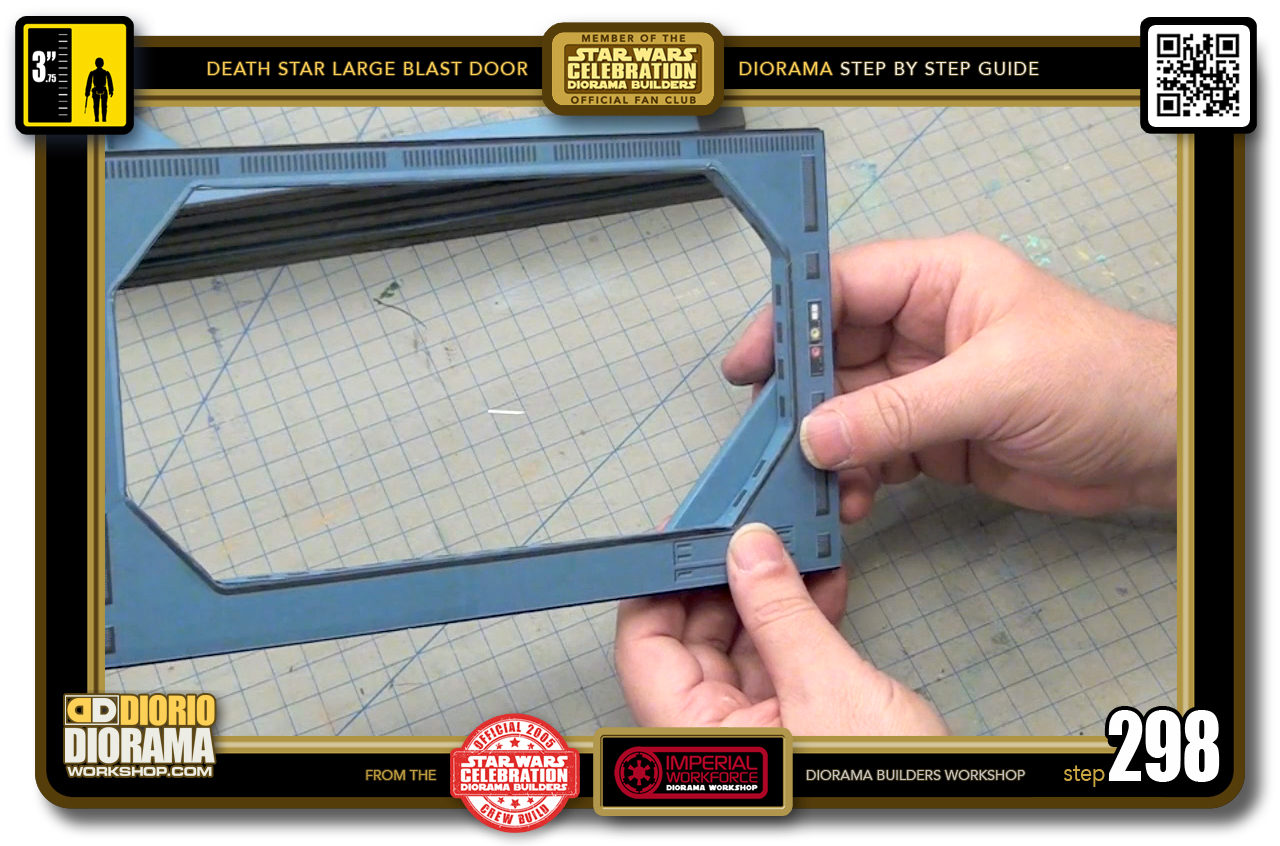
- STEP 298 > Take your layer 4 octagonal frame. Grab a Doritos triangle and place it at the bottom right - actually this is the TOP LEFT corner ... LOOK CLOSELY AT THE PHOTO AND NOTICE THAT THE FRAME IS UPSIDE DOWN. THE TOP OF IT IS AT THE BOTTOM IN THE PHOTO. Thus you are really attaching the Doritos to the TOP LEFT corner even though it looks like the bottom right. SORRY FOR THE CONFUSION. Align the 1 cm gap AND PARALLEL angles.
-
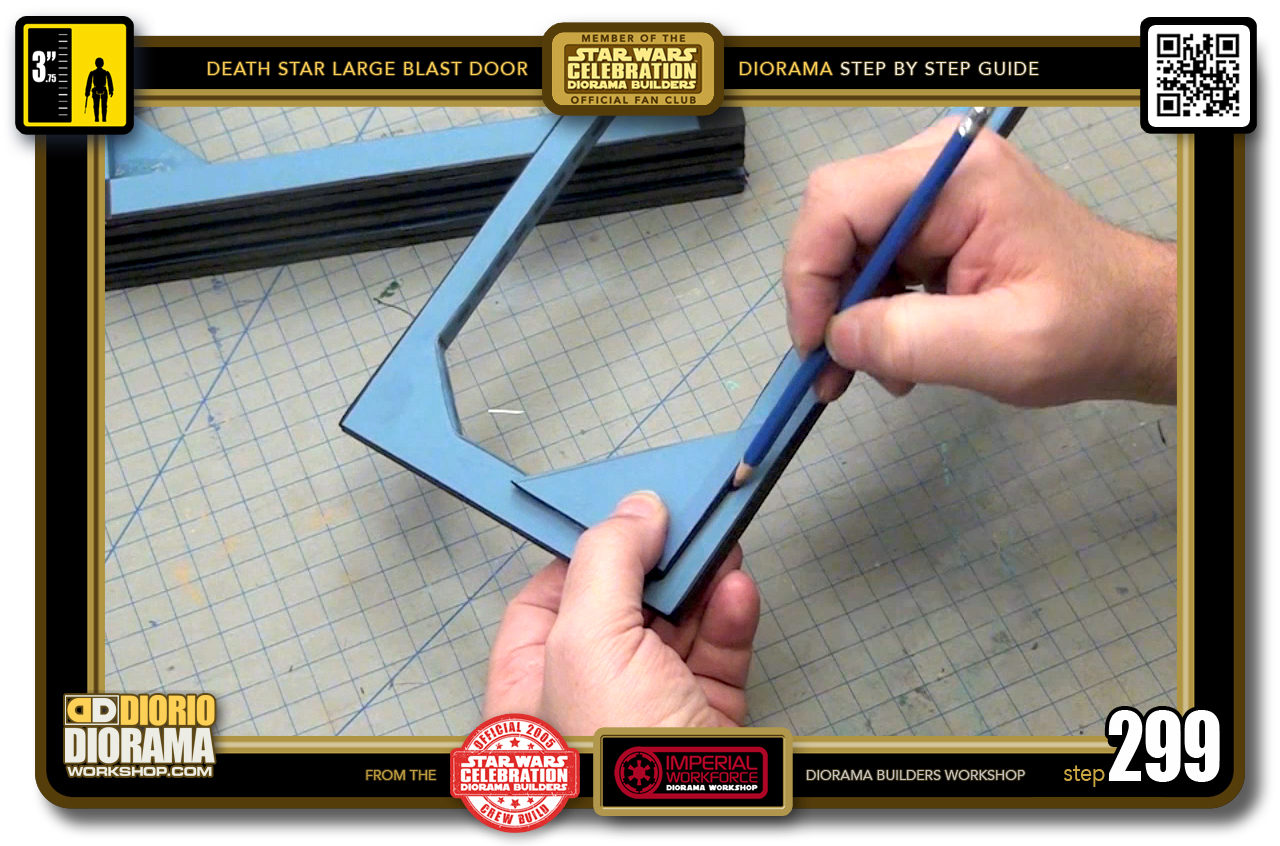
- STEP 299 > Keeping pressure on the Doritos triangle as to not have it move around, turn your frame around and with your pencil, trace all around the outside of the Doritos.
-
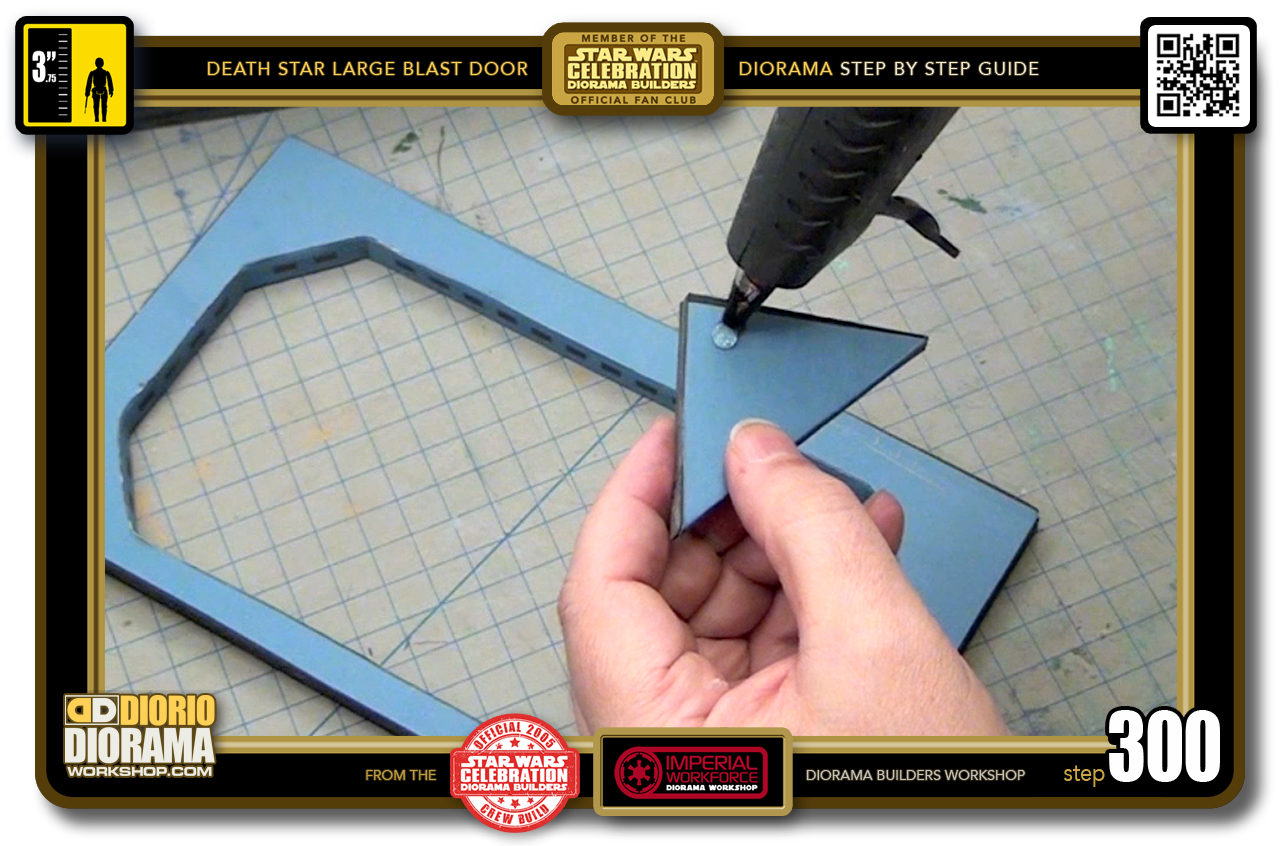
- STEP 300 > A quick drop of Hot Glue to the top of the Doritos triangle.

.
Did you already build this Diorama ? At home or at our Star Wars Celebration Diorama Builders workshop ? Would you like to show it in the site’s GALLERY VISITORS DIORAMAS section, YES ? That is Awesome !!! You can find out all the details on how to email me your photos on the VISITORS SUBMISSIONS INFO page … When I get your photos, I will create your very own page just like this one. You may not realize it but work does inspire others to join in the fun of making Action Figure Dioramas.
.
NOT FOR RESALE ALL Decals, tutorials and artwork are ©FrankDiorio (dioramaworkshop.com) and offered FOR FREE to the fans – that would be you ? so you can build and display my diorama designs in your very own home. I realize I cannot control what one does with my graphics once I place them on the web, I can only ask you as one fan to another, please respect the artist and do not be that jerk who uses my designs and tutorials to build a copy of my work only to sell it on EBAY or trade/sale groups and forums. Thank You. Frank.
.
.
If you have a facebook account, why not join the Official Diorama Builders Fan Club today, simply click the logo link below.
 .
.
Catch up with fellow visitors and exchange stories, read cool interviews with the crew, exchange photos, fun surprises and grab some FAN ONLY merchandise next year at actual future conventions ?
.
©2018 Frank Diorio DioramaWorkshop.Com
.
IF YOU LIKE WHAT YOU SEE, PLEASE SHARE WITH YOUR FRIENDS
USING THE SOCIAL MEDIA BUTTONS BELOW