


-
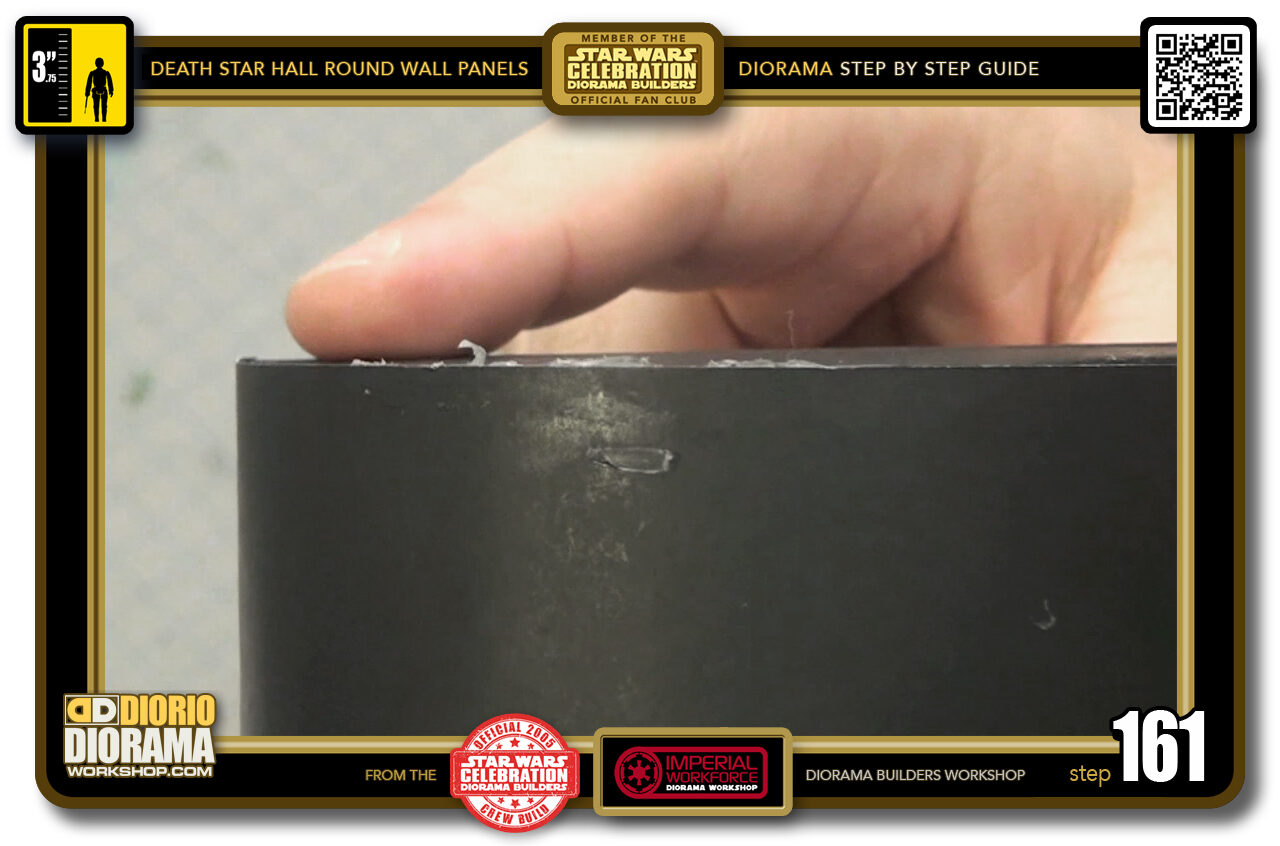
- STEP 161 > Now trimmed, you top and bottom surfaces will be completely flush.
-
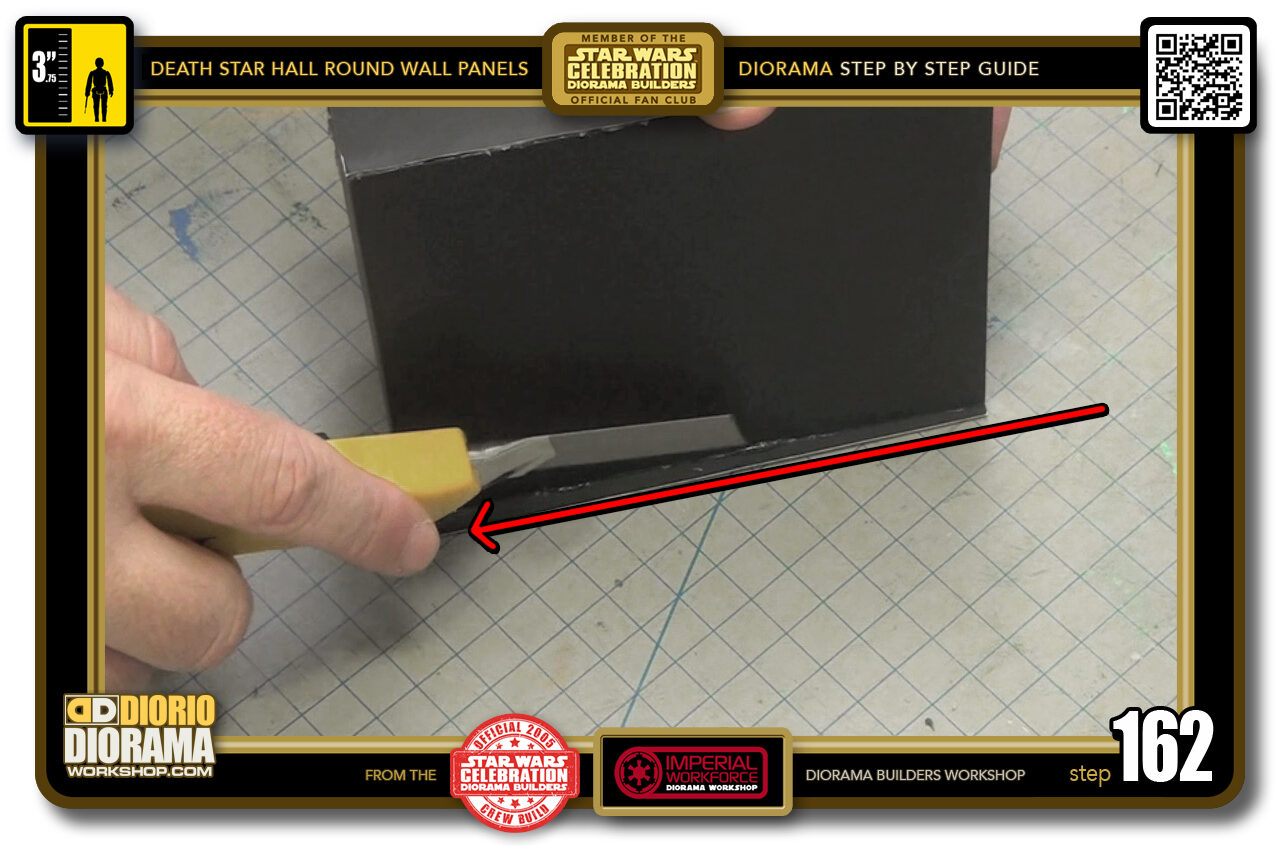
- STEP 162 > Last but not least, the excess rear end. Extend your X-Acto blade as much as you can so it can reach the very corner, and use the edge as your guide and bring down your knife until it completely removes the excess strip. You may have to do 1 or 2 extra passes if your blade needs to cut through hardened hot glue excess.
-
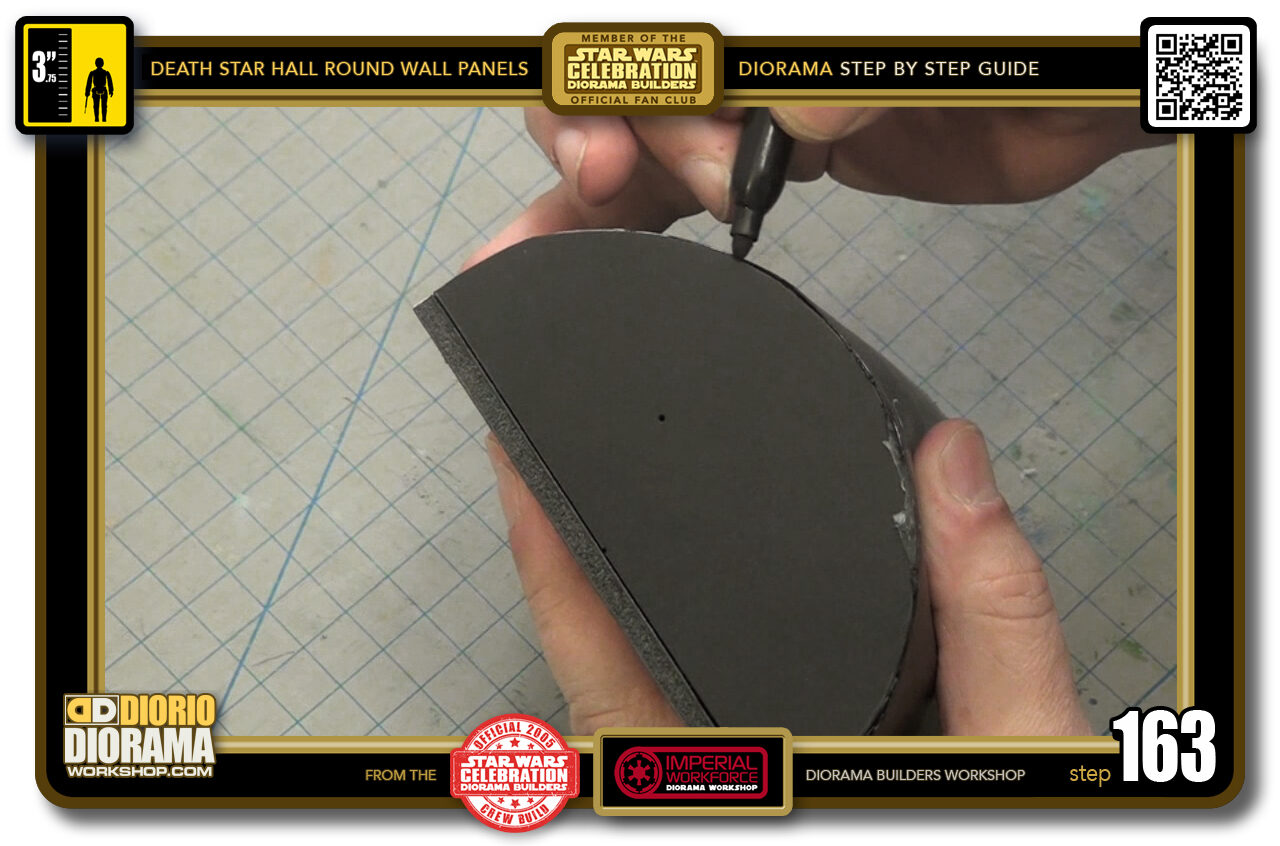
- STEP 163 > We now want to use the Black Sharpie to cover the exposed white edges of your posterboard cuts. Even if you didn't trim off any excess, you want to hide the white that can peek out when placed against the Hallway fllor and ceilings.
-
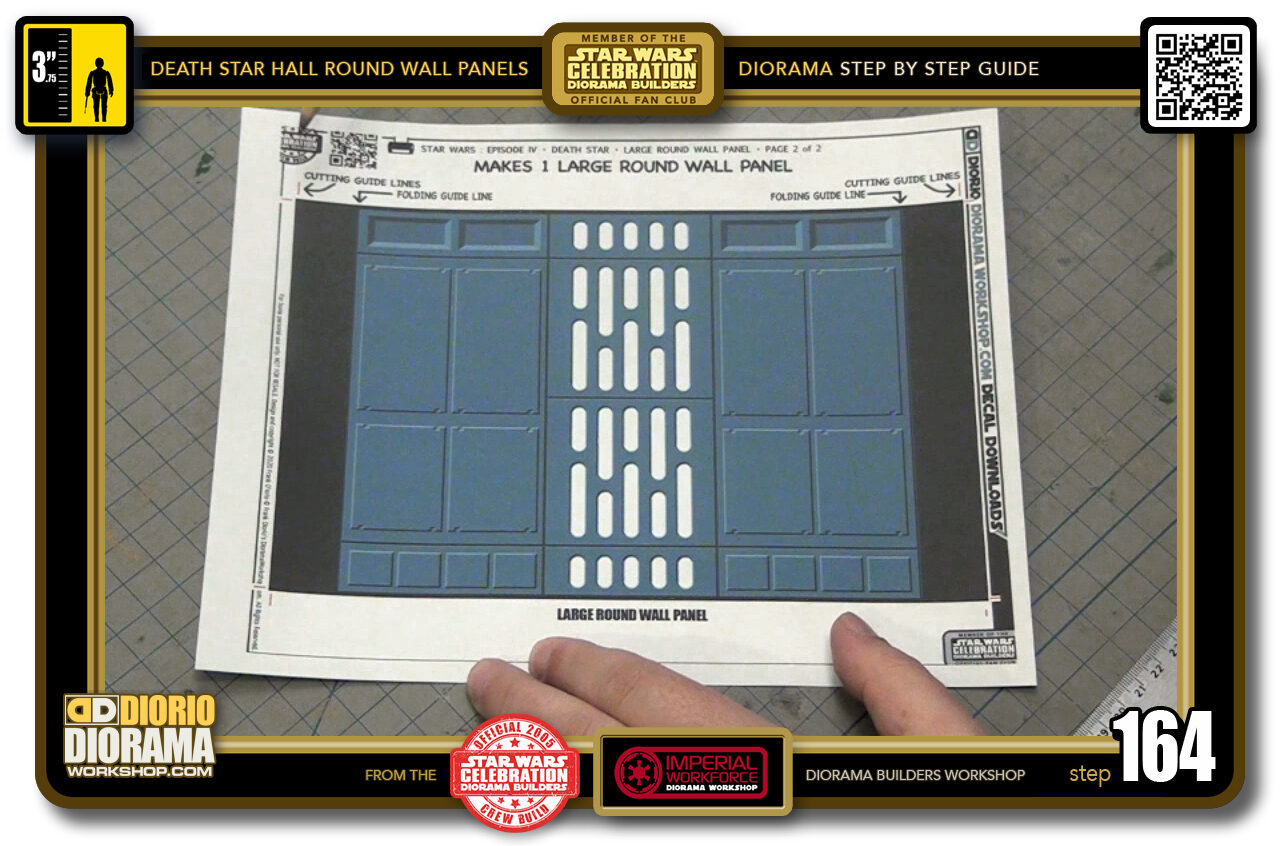
- STEP 164 > Grab your printed decal - available for free in the Tutorial Speed index menu.
-
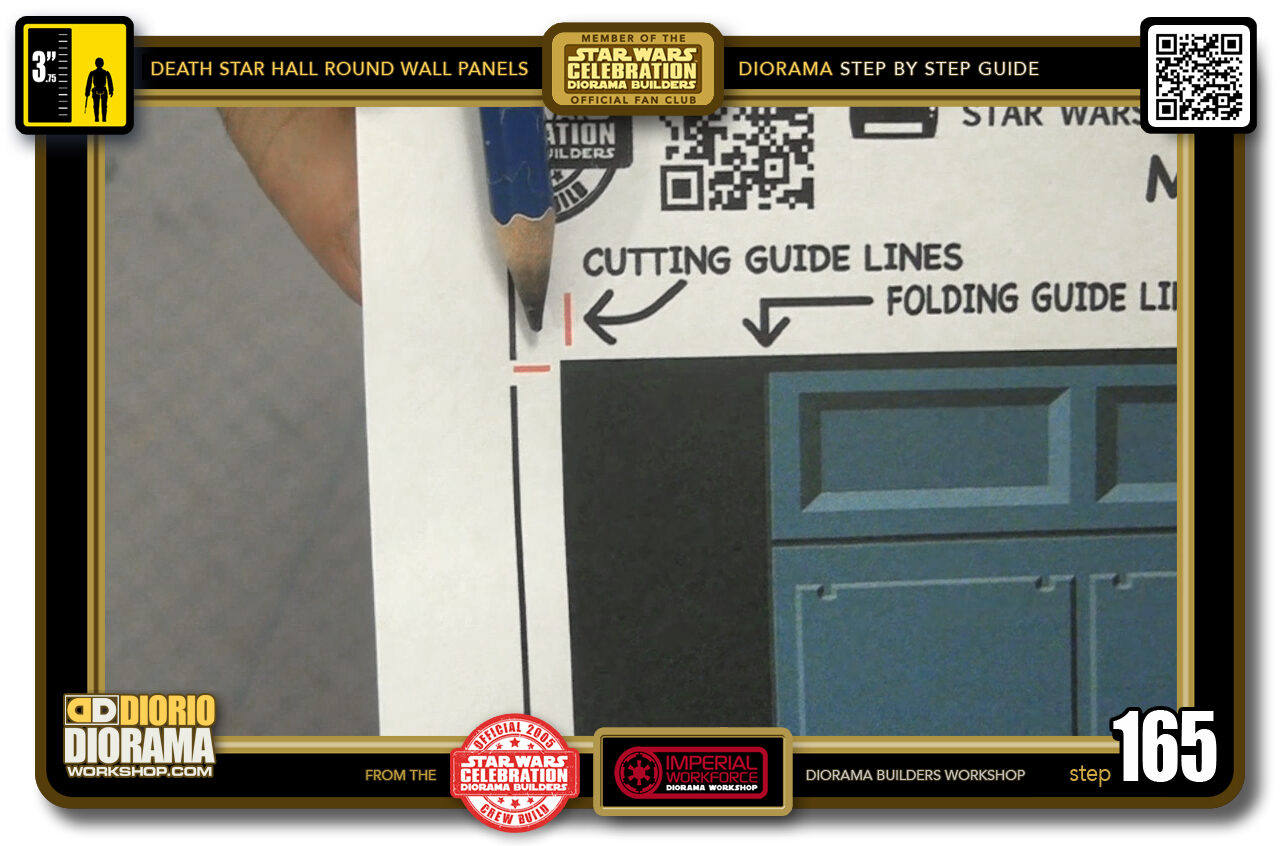
- STEP 165 > You will notice the Large Round Wall Panel decal has the same guide lines as it's small sister. The RED GUIDES are for CUTTING and the black ones for FOLDING.
-
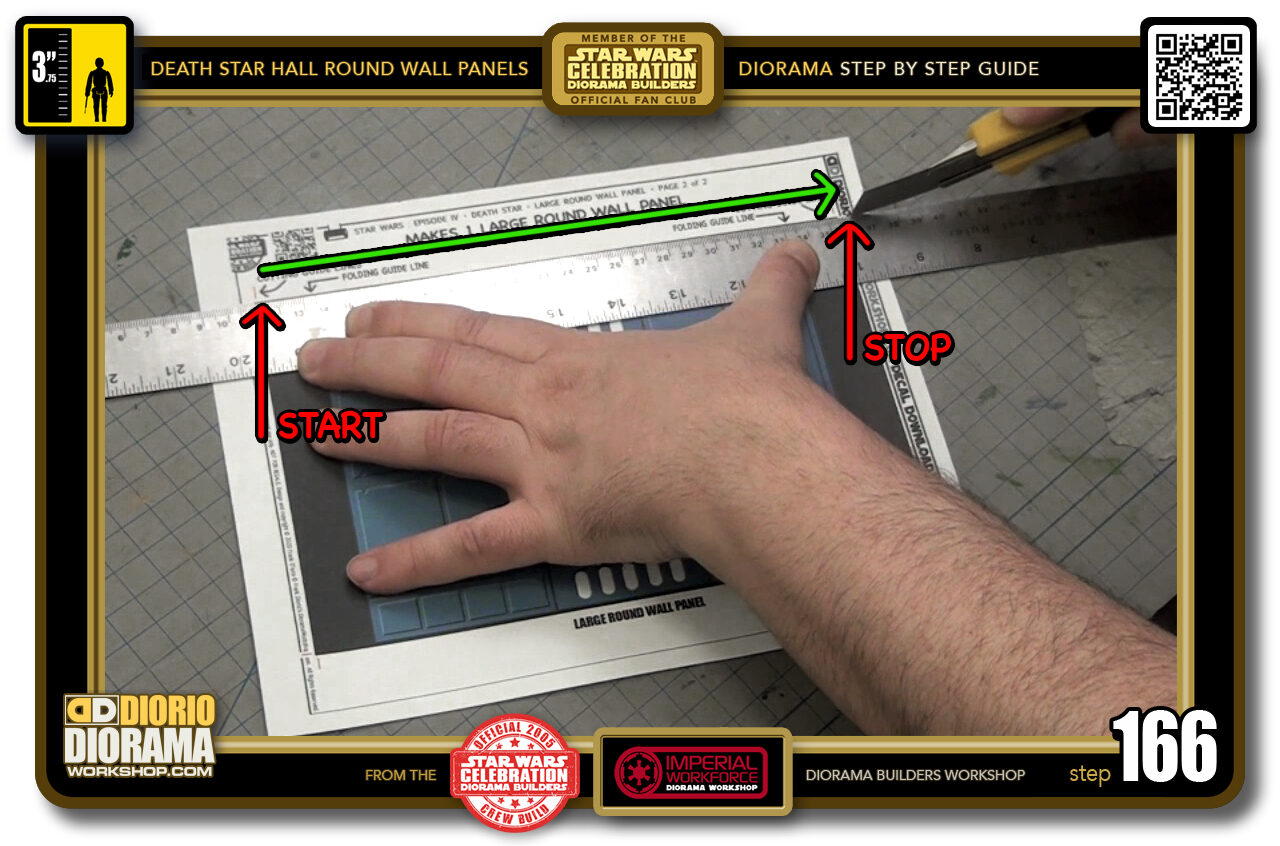
- STEP 166 > Start with the top, now you DON'T WANT TO CUT THE ENTIRE STRIP OF PAPER !!! Start and Stop approximately where you see I did in the photo.
-
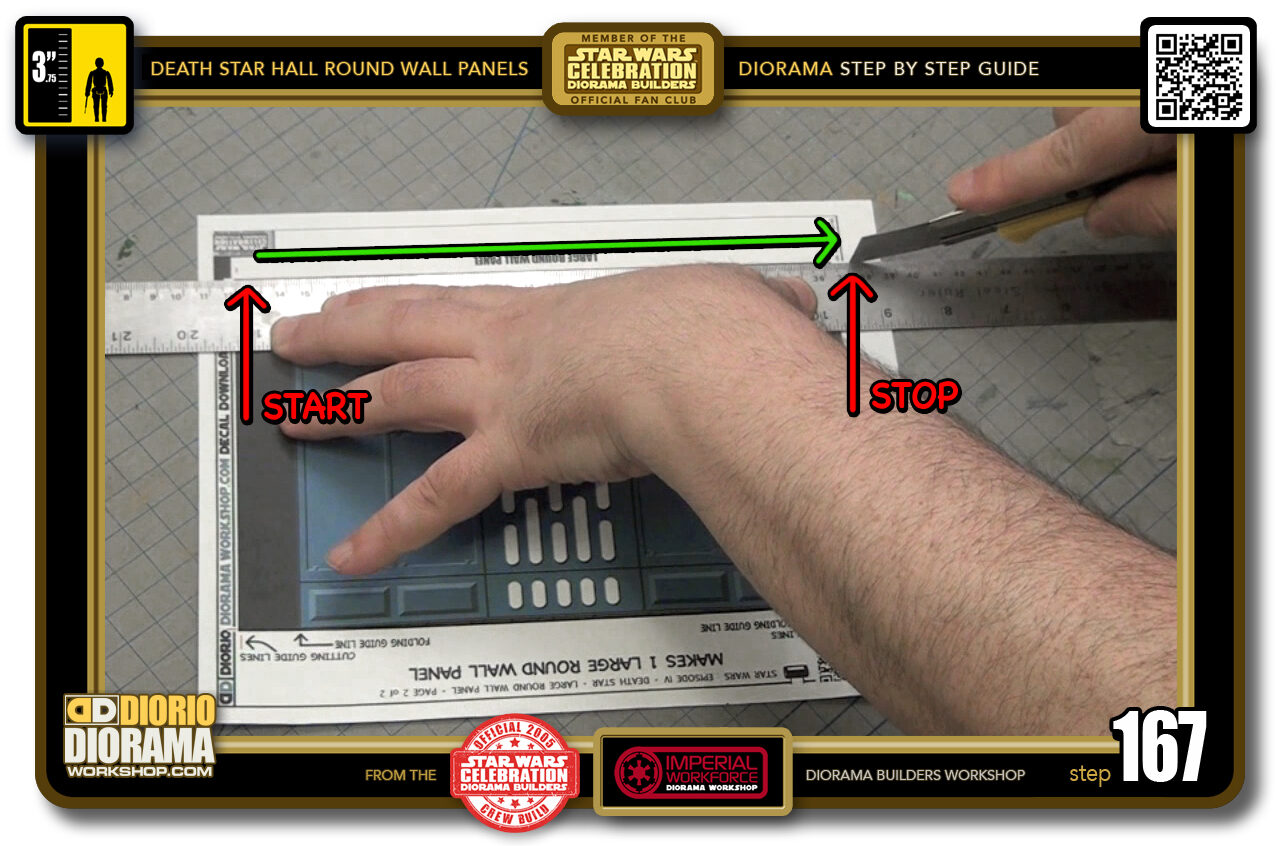
- STEP 167 > Flip your decal around 180 degrees and cut along the other guide lines. Start and Stop close to the red arrows.
-
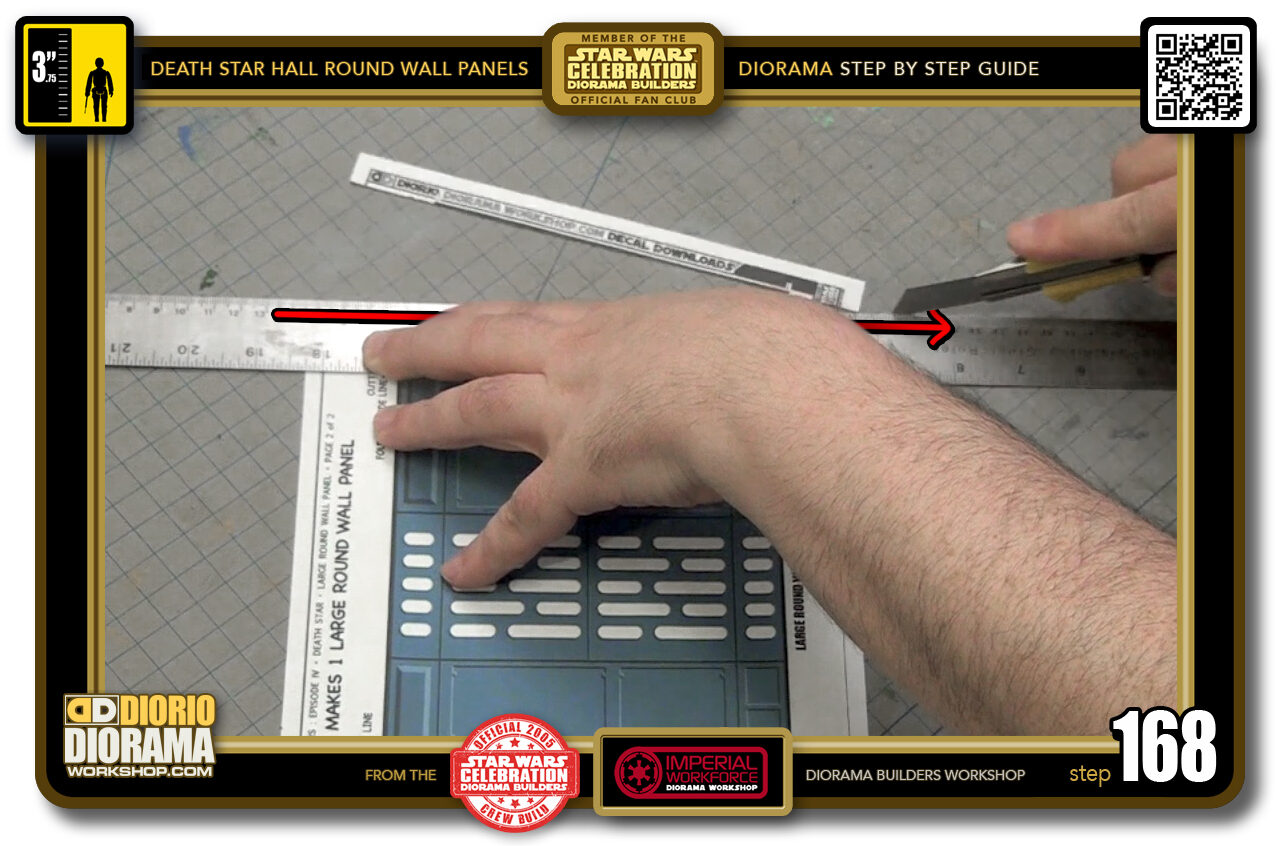
- STEP 168 > Now we can trim off the entire length of paper for the sides. Simply align your ruler with the Vertical Red Cutting Guides and slice away. Repeat on the other side.
-
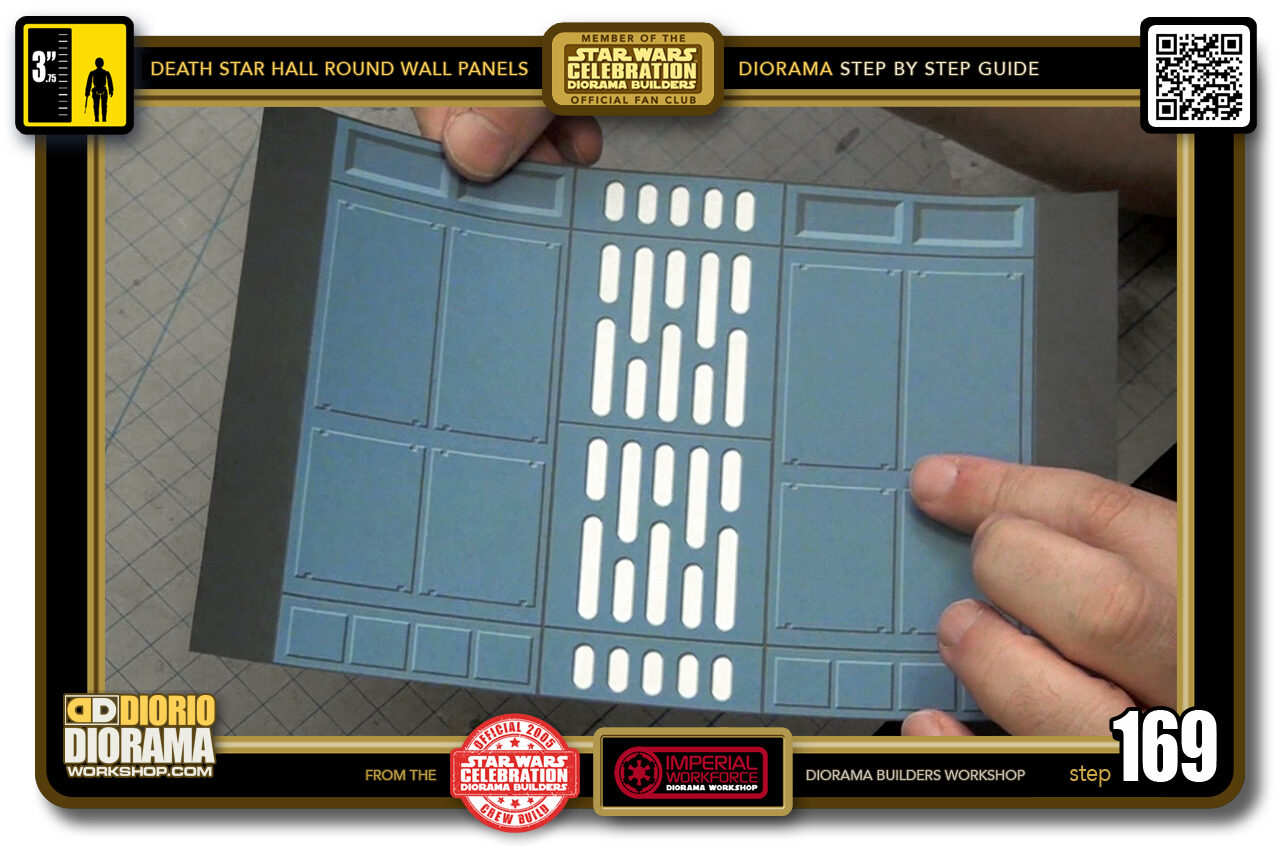
- STEP 169 > Your decal is ready for folding.
-
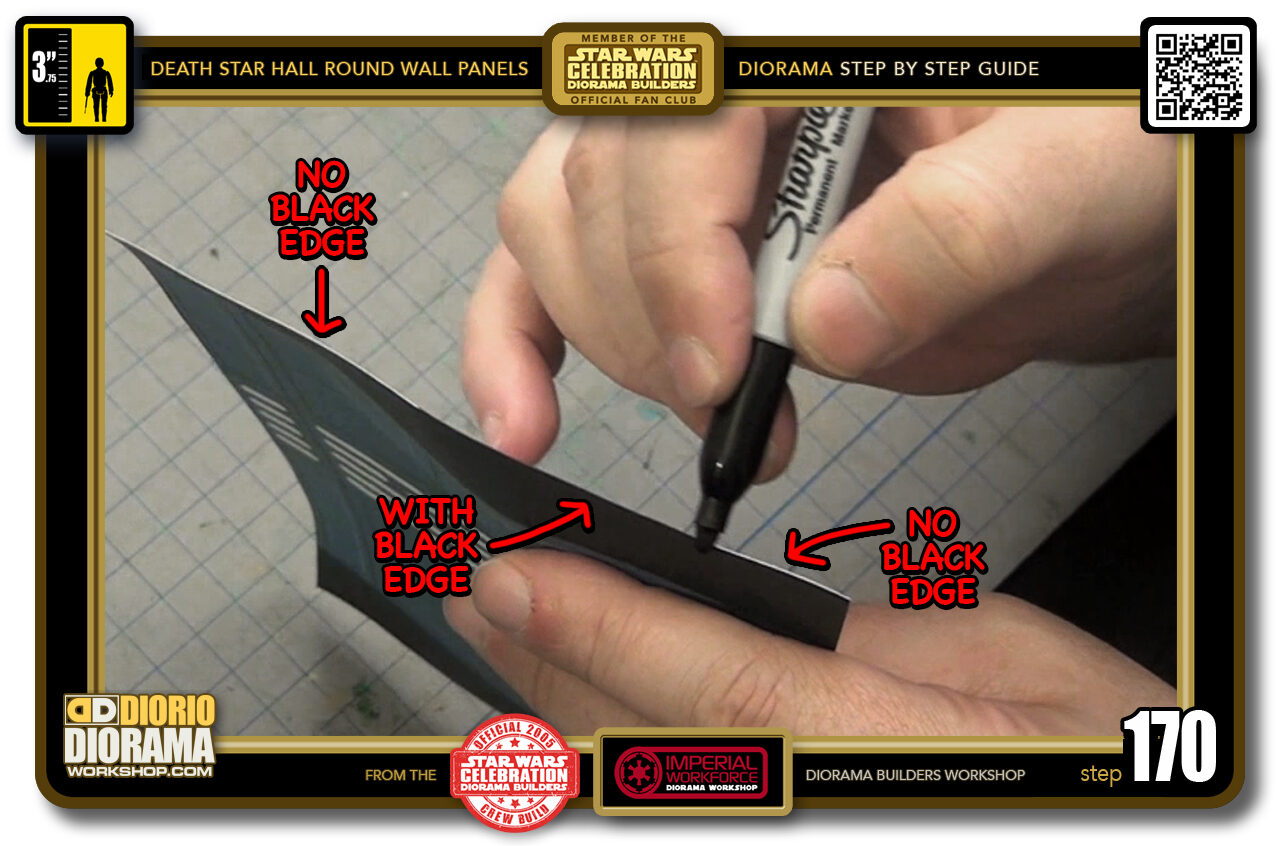
- STEP 170 > But first we want to go all the way around the paper edges with your black Sharpie so that you will hide the unsightly white line that you see when placing decals onto black foamcore if you don't do this step. It seems like waste of time but it makes a huge difference in the blending of the walls.
-
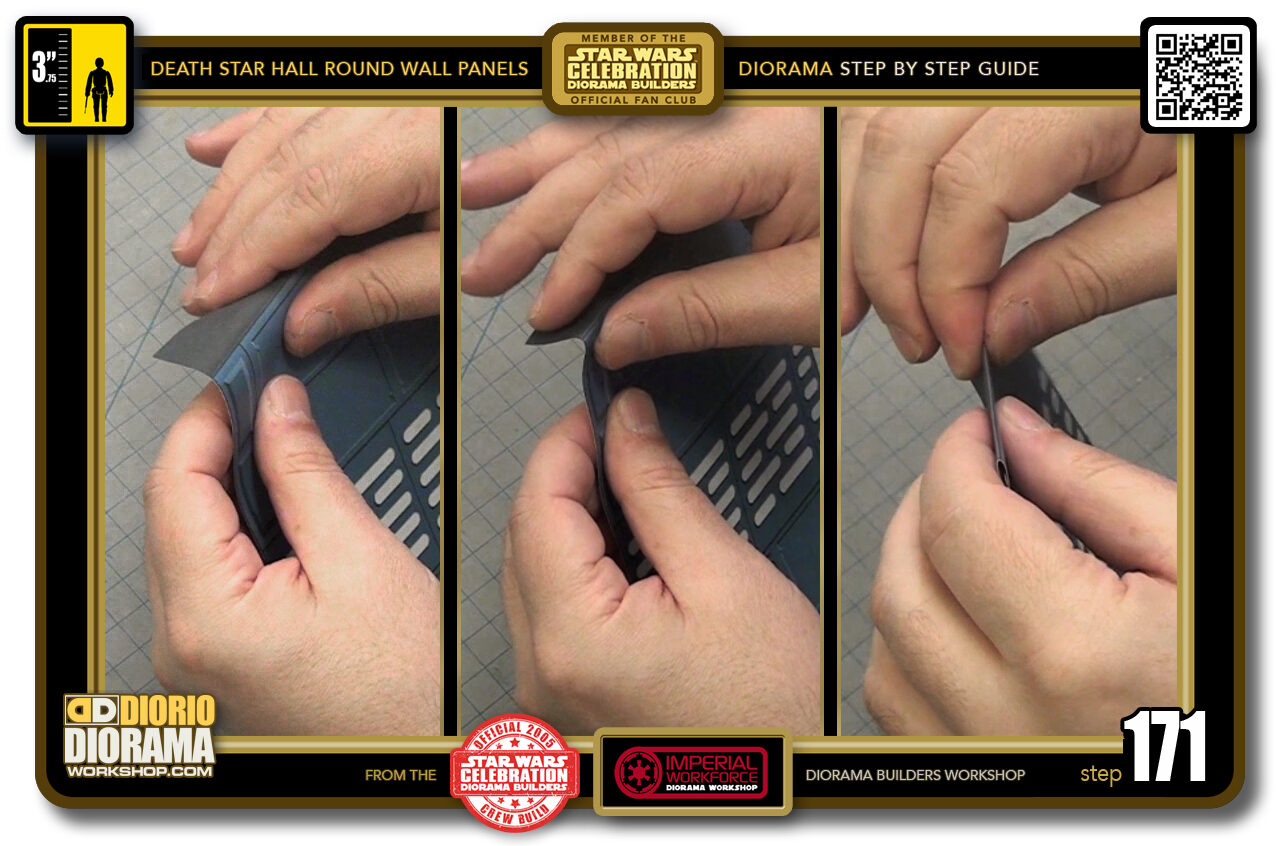
- STEP 171 > If you used regular paper folding will be easier, if you use Full Label Sheets like I do with wax peeling paper on the back - making the decal thicker - you will need to fold in in multiple steps like you did for the Small Round Wall decals. Light pressure pinches getting stronger and stronger as the fold memory starts to increase.
-
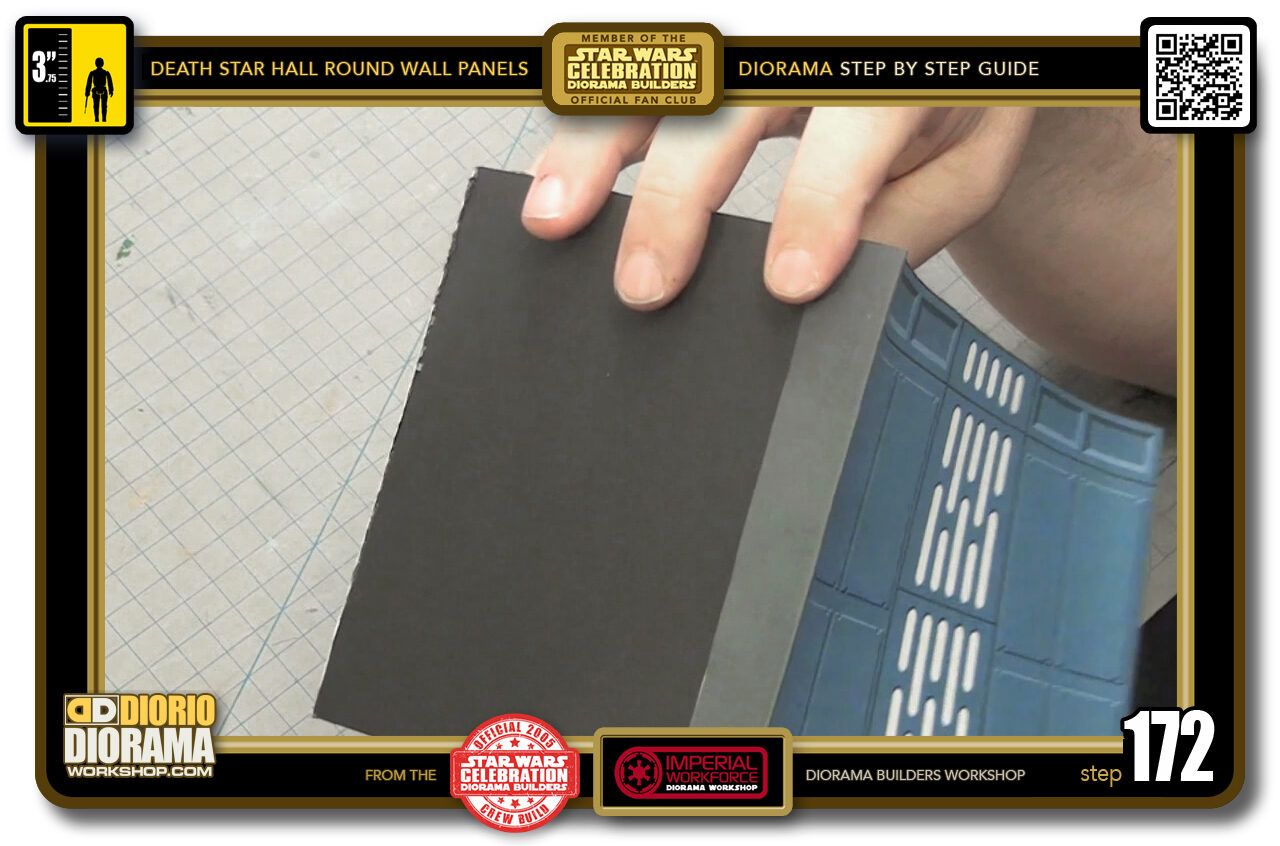
- STEP 172 > The dark strip of your decal will fit just like this on the rear of your Large Round panel base.
-
-
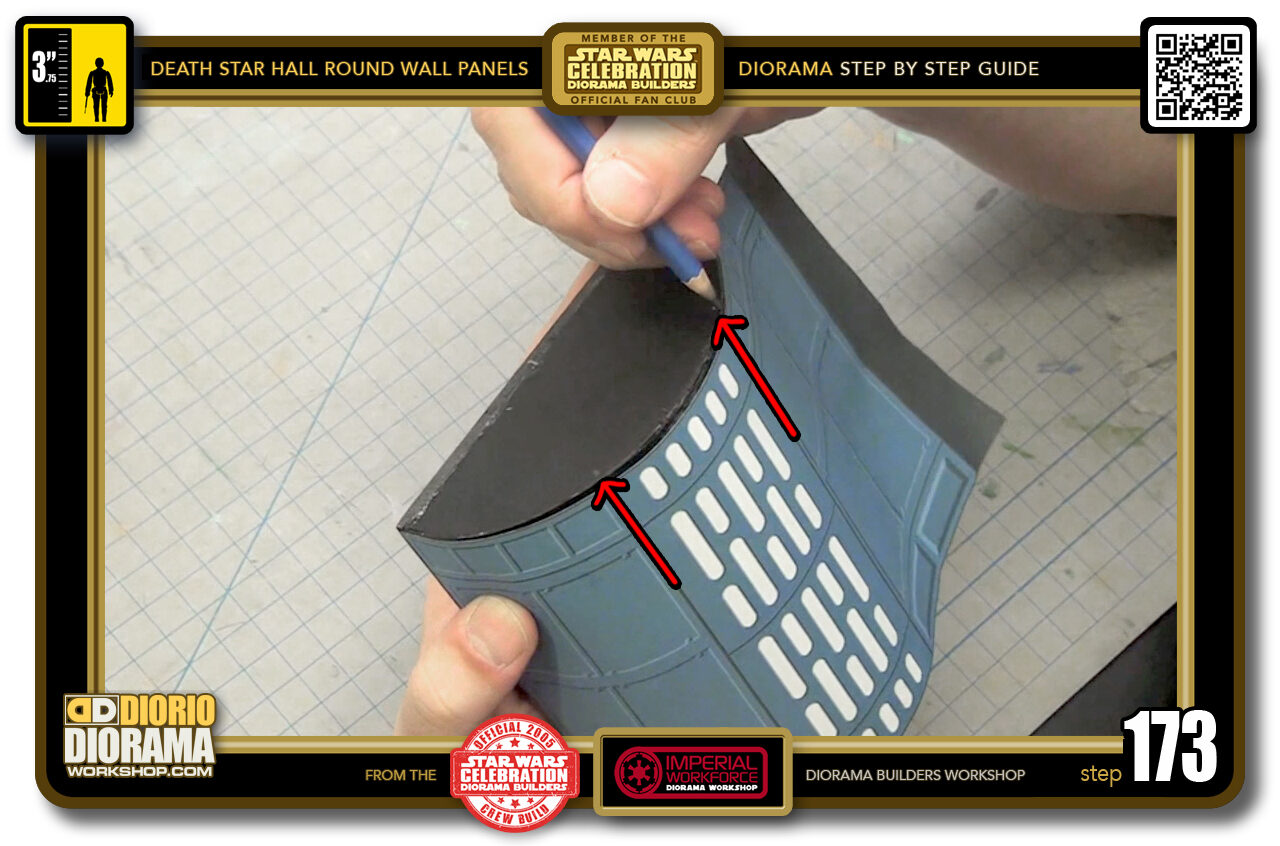
STEP 173 > First thing to do with the Large Rounded Wall Panel decal is put 2 marks on the top of your half circle shape. To do this DON'T PEEL your decal yet, place it dry making sure the rear fold is in the correct position and fold the decal around the tube.
Now find the 2 centre lines that are on each side of the neons and follow them all the way to the top and put your guide mark there with your pencil.
-
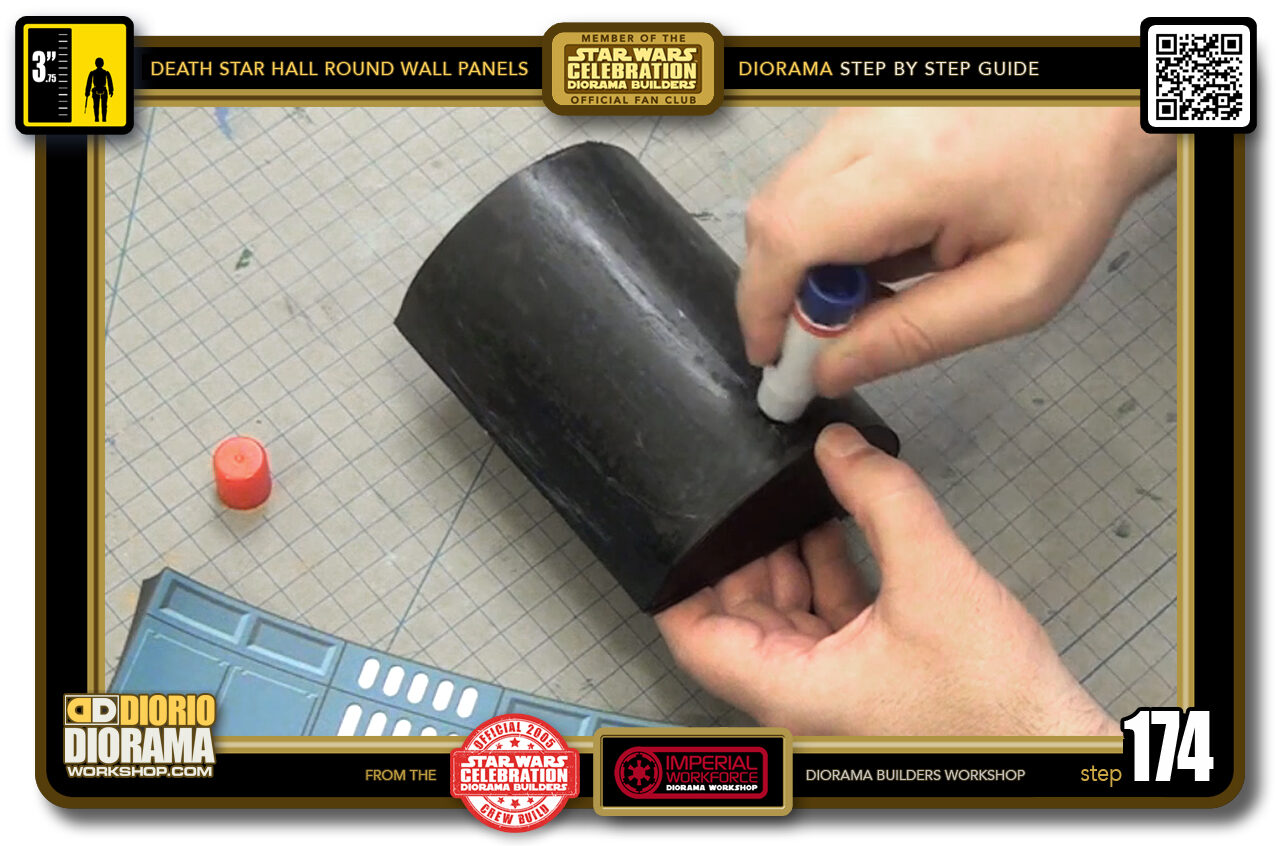
- STEP 174 > We are ready to attach the decal. Grab a gluestick and apply a good amount all over the poster board surface - DON'T GLUE THE REAR YET. - NOTE: - Even if you are using peel off sheets, put the gluestick, it will allow you to giggle the decal into the proper position a lot easier that just peeling it off until you get it just right.
-
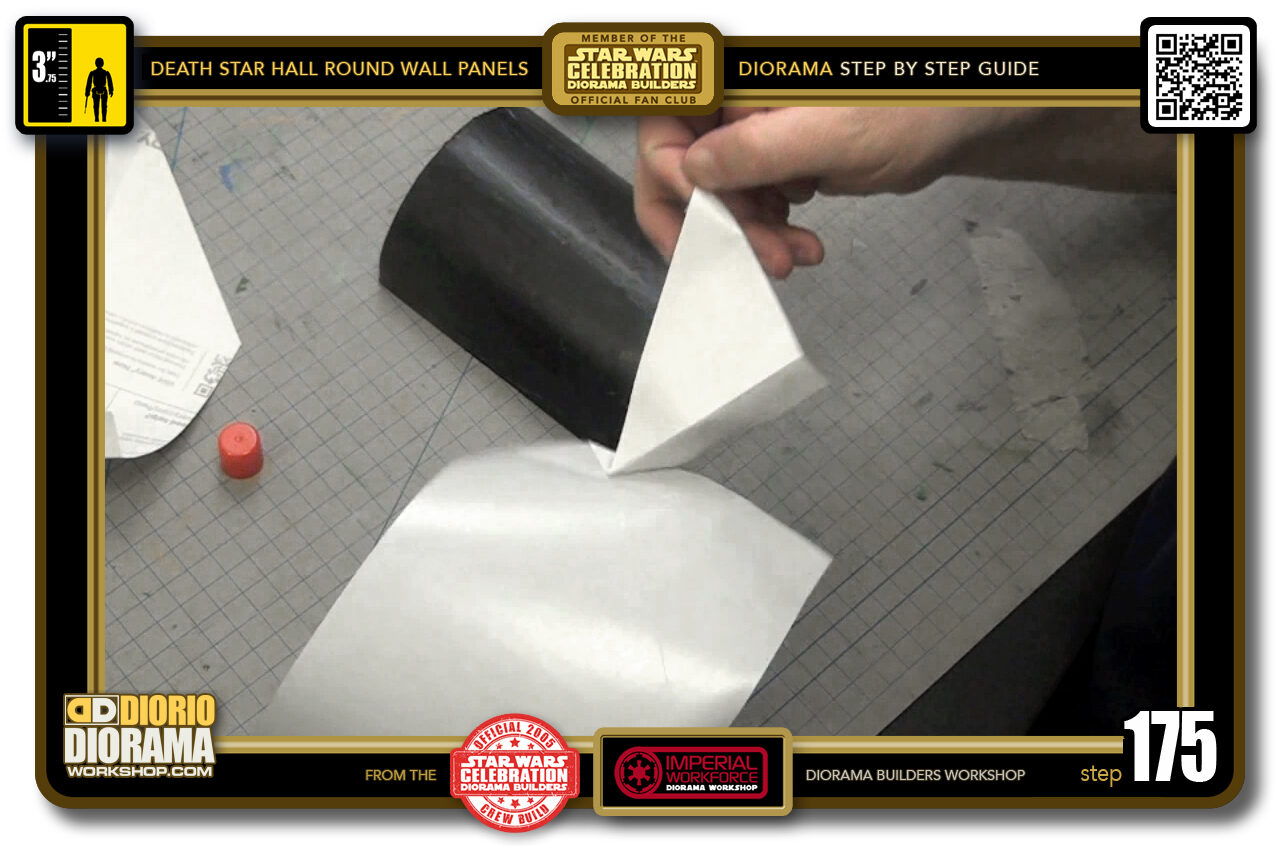
- STEP 175 > For those who printed on Full Label sheets, peel off the backs.
-
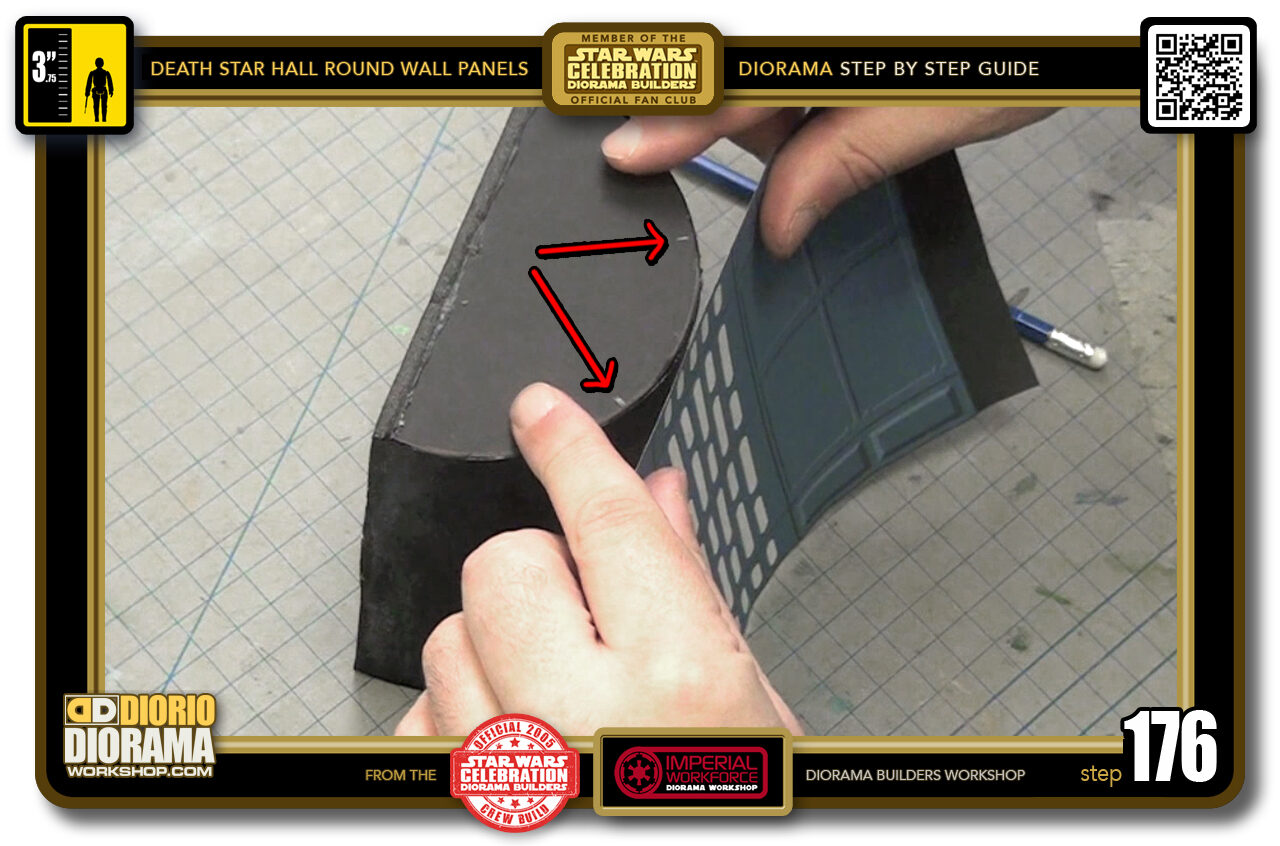
- STEP 176 > Now carefully align the lines on each side of the neons with the 2 marks you made at the top. When they are just perfect, gently put some pressure with your fingers along the top edge but ONLY on the NEON CENTRE AREA. DO NOT PLACE THE SIDES AGAINST THE TUBE YET !!!
-
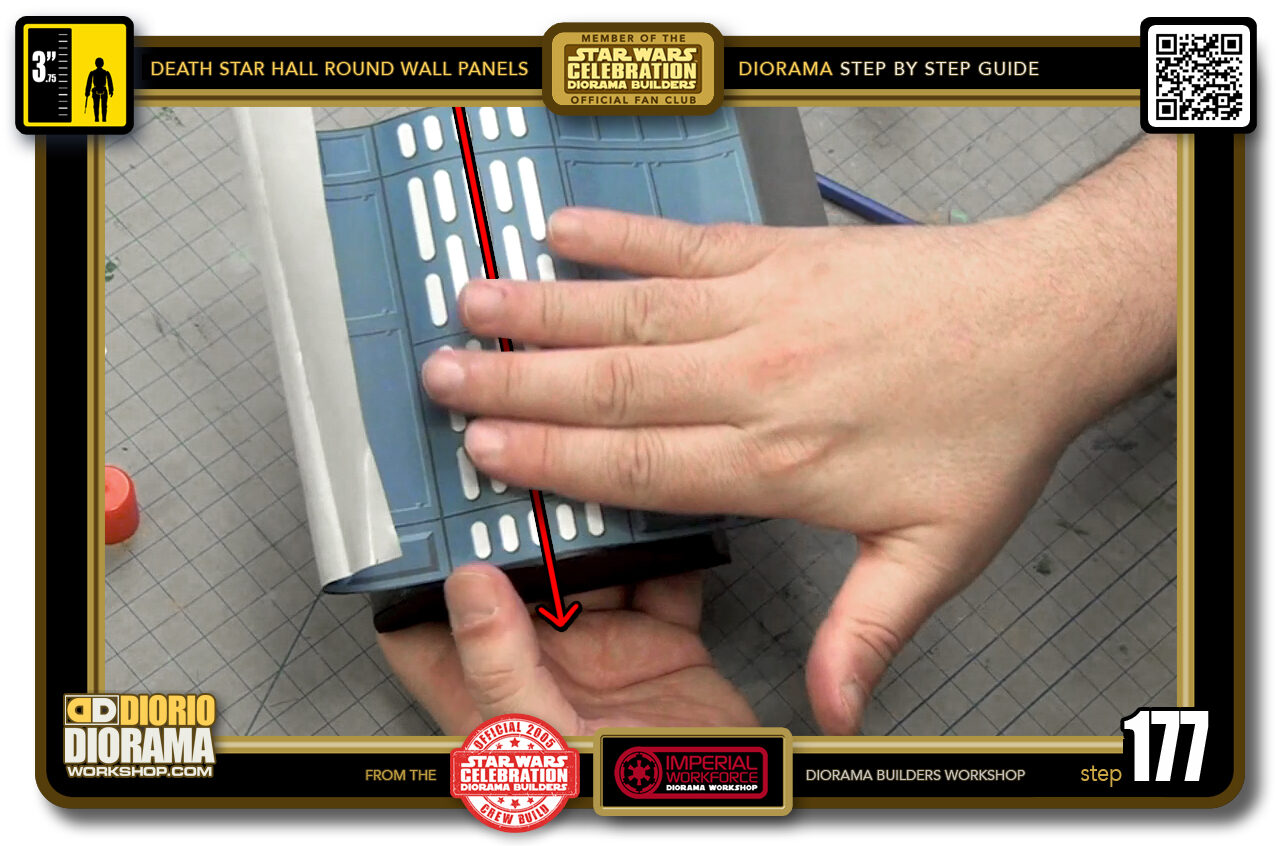
- STEP 177 > Now place your hand at the top of the neons and gently work you way down to the bottom. You are pressing ONLY on the NEONS.
-
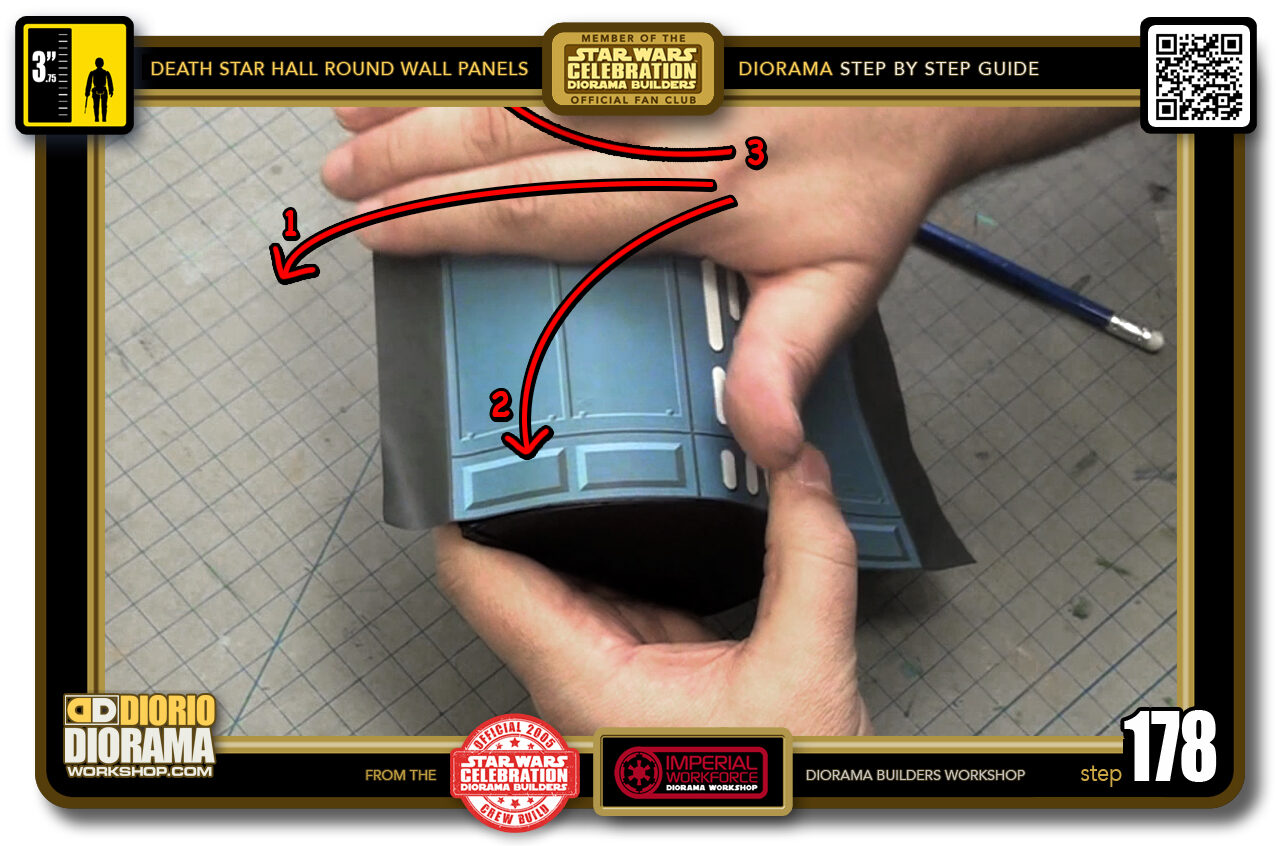
- STEP 178 > Now that the Neon Centre is locked in we can move to the sides. 1) Start at the centre and move your way to the outer edge. Then lift and bring your hand back to the start. 2) lower it back down onto the decal and move your hand forward again but this time moving it towards the bottom too. Lift your hand back to the start and 3) repeat this time moving forward and up.
-
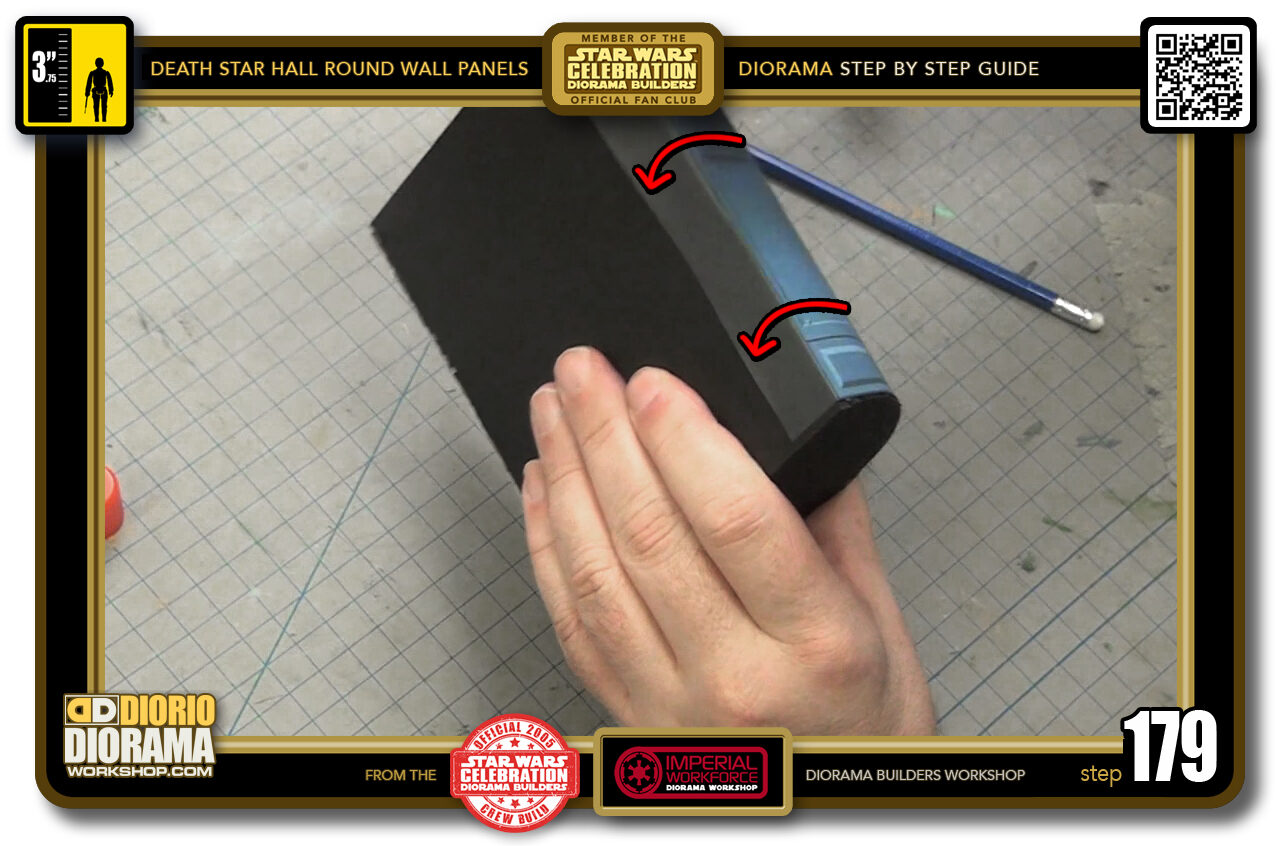
- STEP 179 > When the decal is wrapped around this side of the tube, you can bend the dark strips at their fold and press it against the rear for the wall.
-
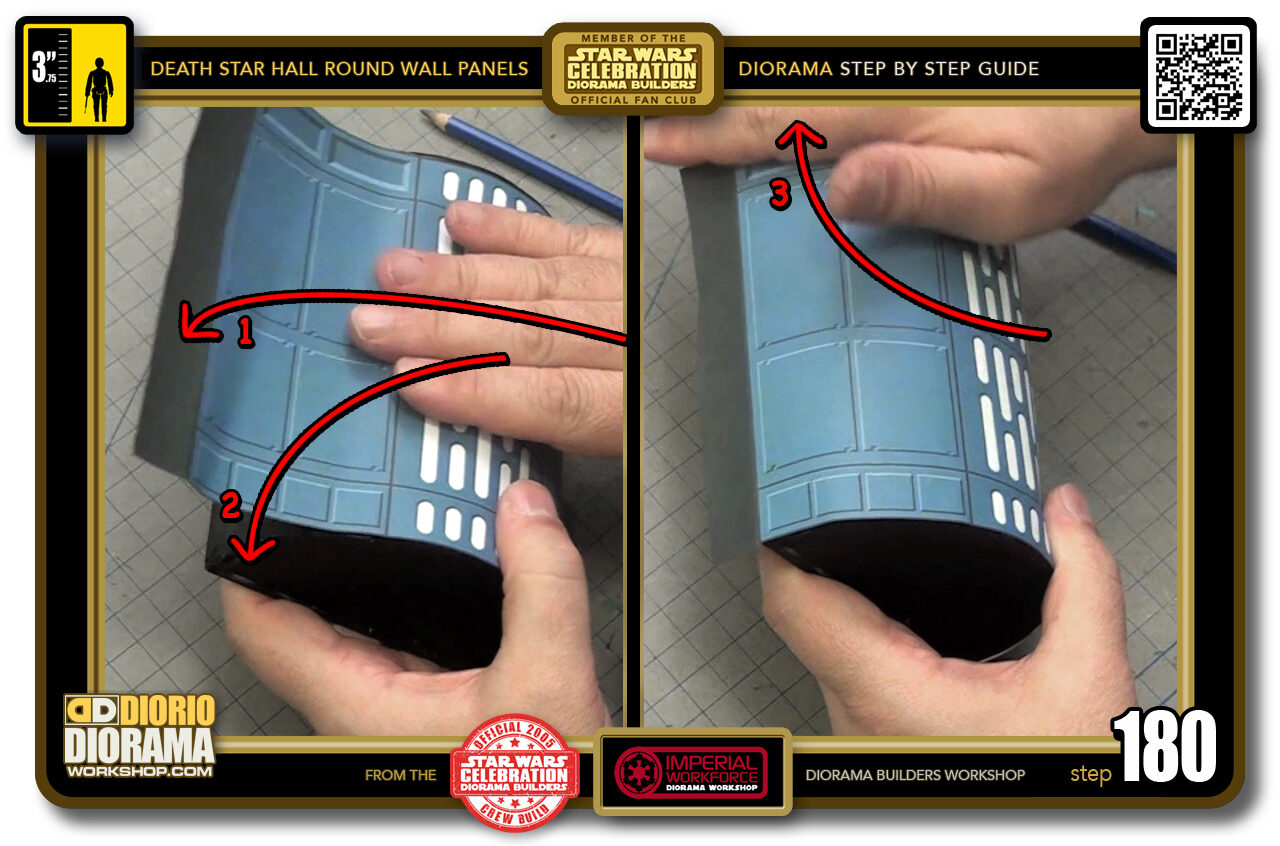
- STEP 180 > Flip your Large Round Wall panel 180 degrees and do the same technique to wrap around your decal on this side of the tube.

.
Did you already build this Diorama ? At home or at our Star Wars Celebration Diorama Builders workshop ? Would you like to show it in the site’s GALLERY VISITORS DIORAMAS section, YES ? That is Awesome !!! You can find out all the details on how to email me your photos on the VISITORS SUBMISSIONS INFO page … When I get your photos, I will create your very own page just like this one. You may not realize it but work does inspire others to join in the fun of making Action Figure Dioramas.
.
NOT FOR RESALE ALL Decals, tutorials and artwork are ©FrankDiorio (dioramaworkshop.com) and offered FOR FREE to the fans – that would be you ? so you can build and display my diorama designs in your very own home. I realize I cannot control what one does with my graphics once I place them on the web, I can only ask you as one fan to another, please respect the artist and do not be that jerk who uses my designs and tutorials to build a copy of my work only to sell it on EBAY or trade/sale groups and forums. Thank You. Frank.
.
.
If you have a facebook account, why not join the Official Diorama Builders Fan Club today, simply click the logo link below.
 .
.
Catch up with fellow visitors and exchange stories, read cool interviews with the crew, exchange photos, fun surprises and grab some FAN ONLY merchandise next year at actual future conventions ?
.
©2018 Frank Diorio DioramaWorkshop.Com
.
IF YOU LIKE WHAT YOU SEE, PLEASE SHARE WITH YOUR FRIENDS
USING THE SOCIAL MEDIA BUTTONS BELOW