


-
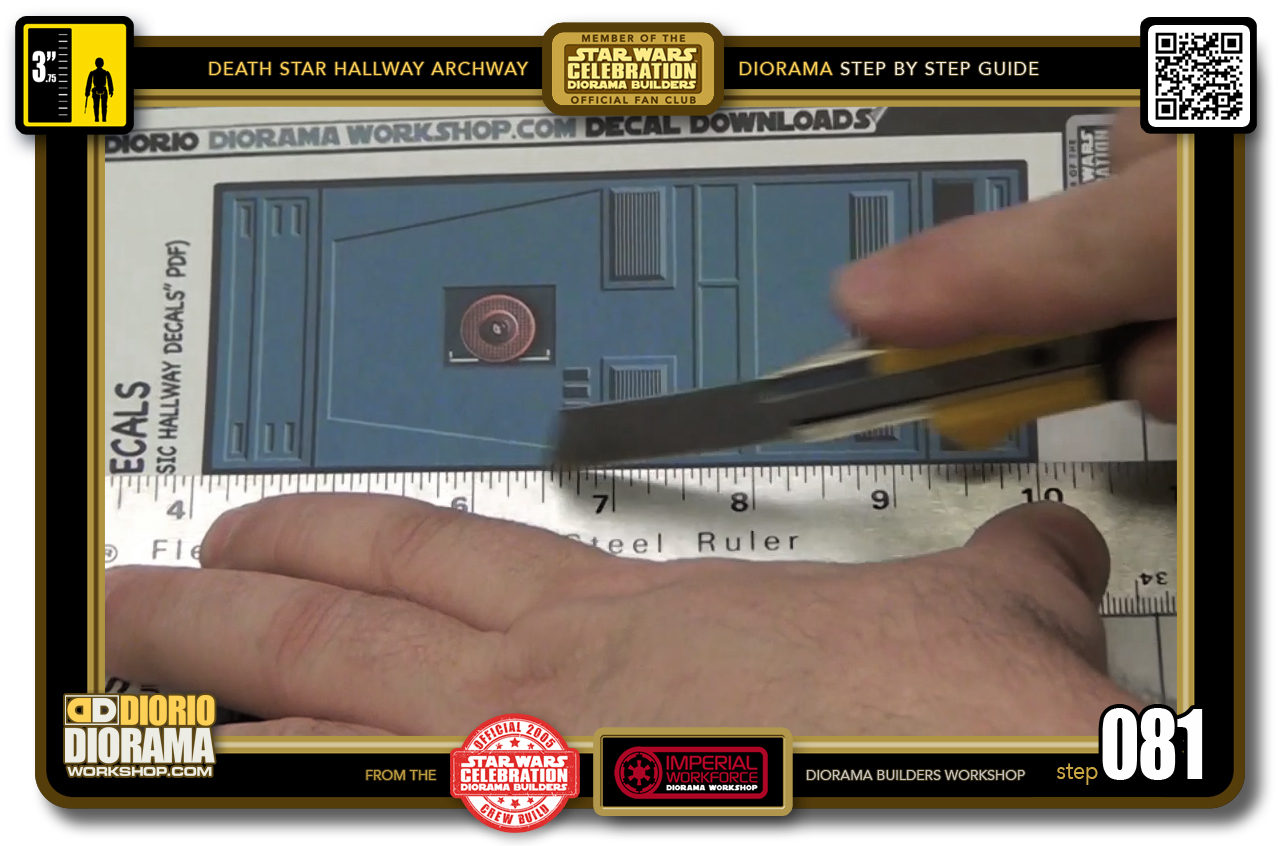
- STEP 081 > Before cutting around any of the wall panel edges on this page, it is VERY IMPORTANT to connect the 2 red line guides with your ruler and then CUT DOWN HERE FIRST. Also note : THESE RED GUIDE CONNECTING CUTS ARE EASIER DONE WITH X-ACTO than scissors if you want a perfect even division all around your wall decal piece.
-
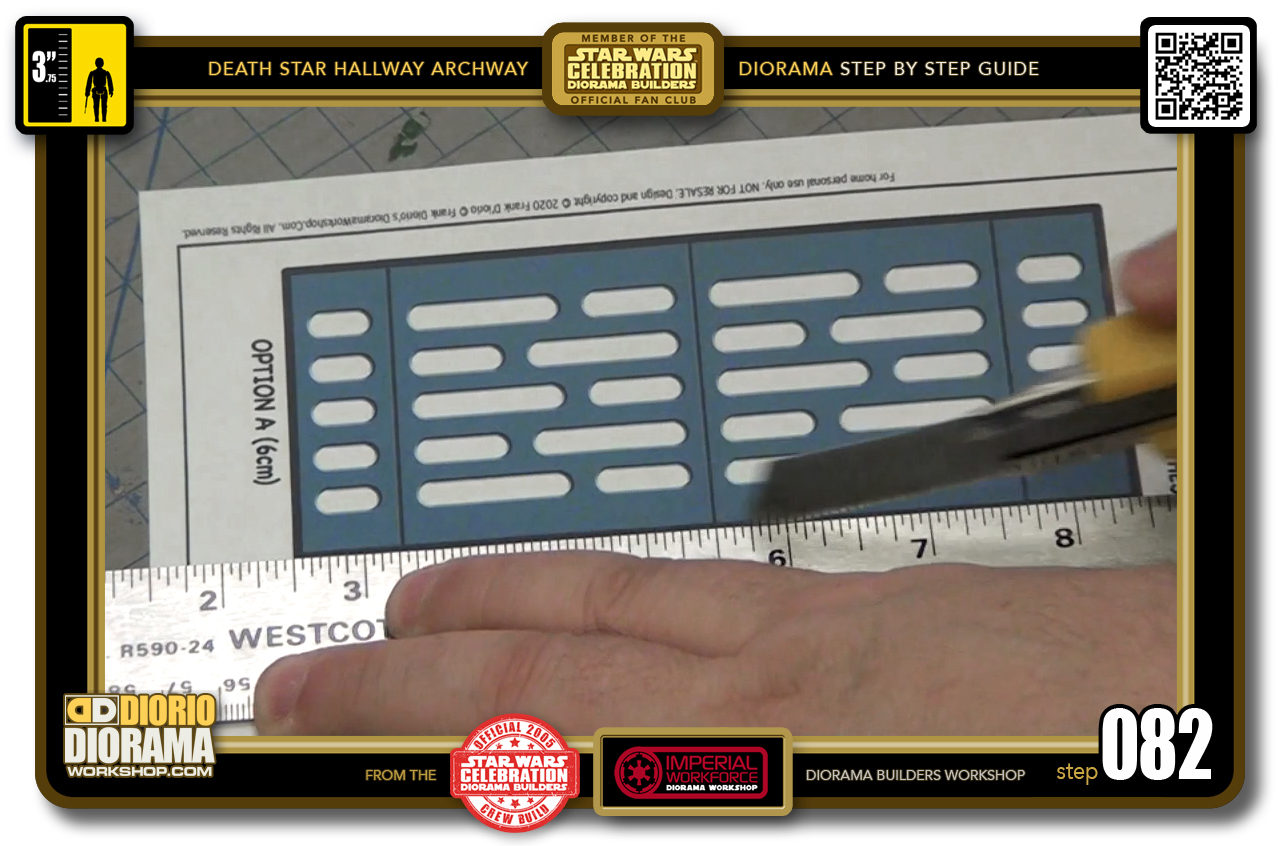
- STEP 082 > Next choice for wall panel #2 is the iconic NEONS. Again, line up the Red Guides and CUT HERE FIRST then go all the way around the outside edge bleed colour.
-
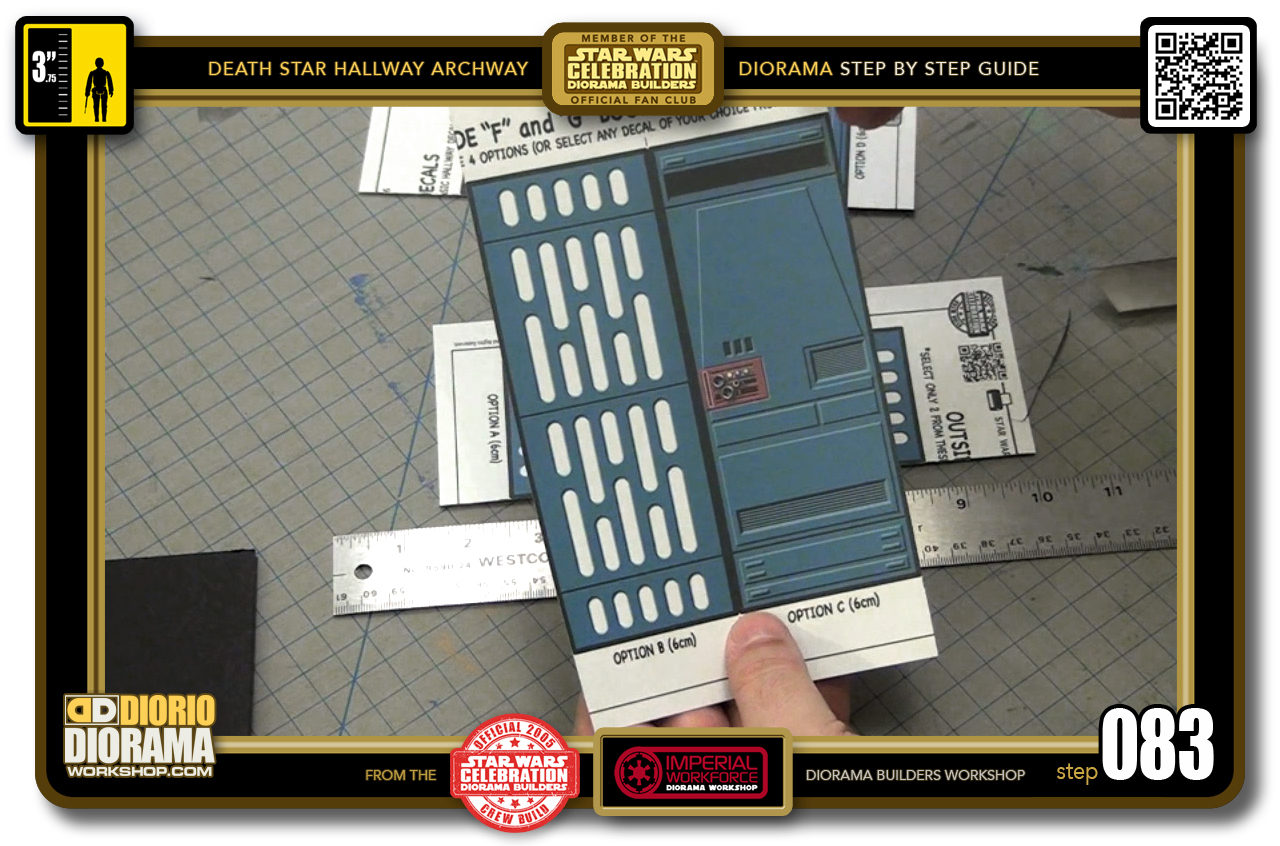
- STEP 083 > You will have 2 - not necessarily these 2 if you chose different than I used which is perfectly ok - panels left over. You don't need these anymore for this build, Keep them for later, you can use them in your Death Star Basic Hallway build or any other hallway for that matter as these are the same exact dimensions as the other 30+ Wall Panel designs you can choose from in the BASIC HALLWAY WALL PANEL DECALS.
-
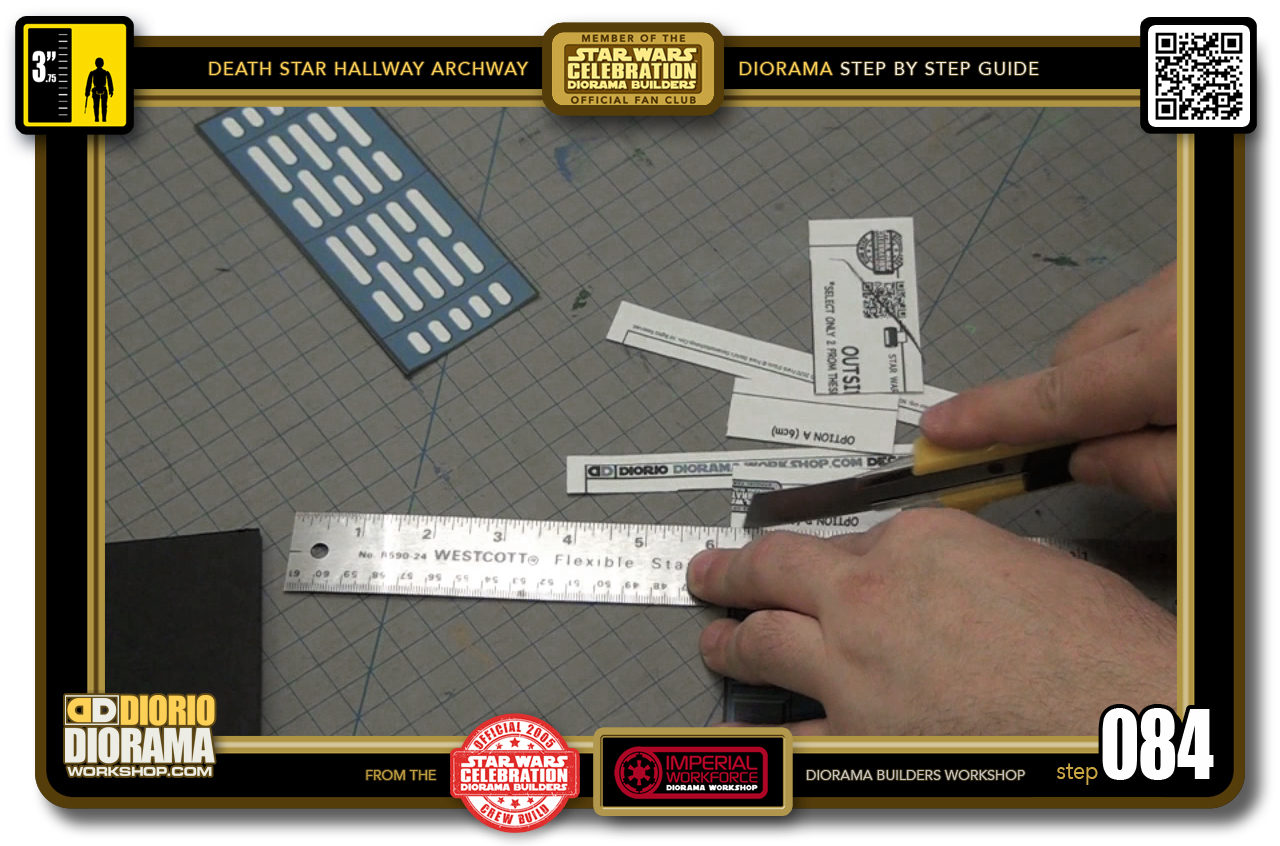
- STEP 084 > Keep going around all the outside edges. Remember cut center of the dark bleed colour.
-
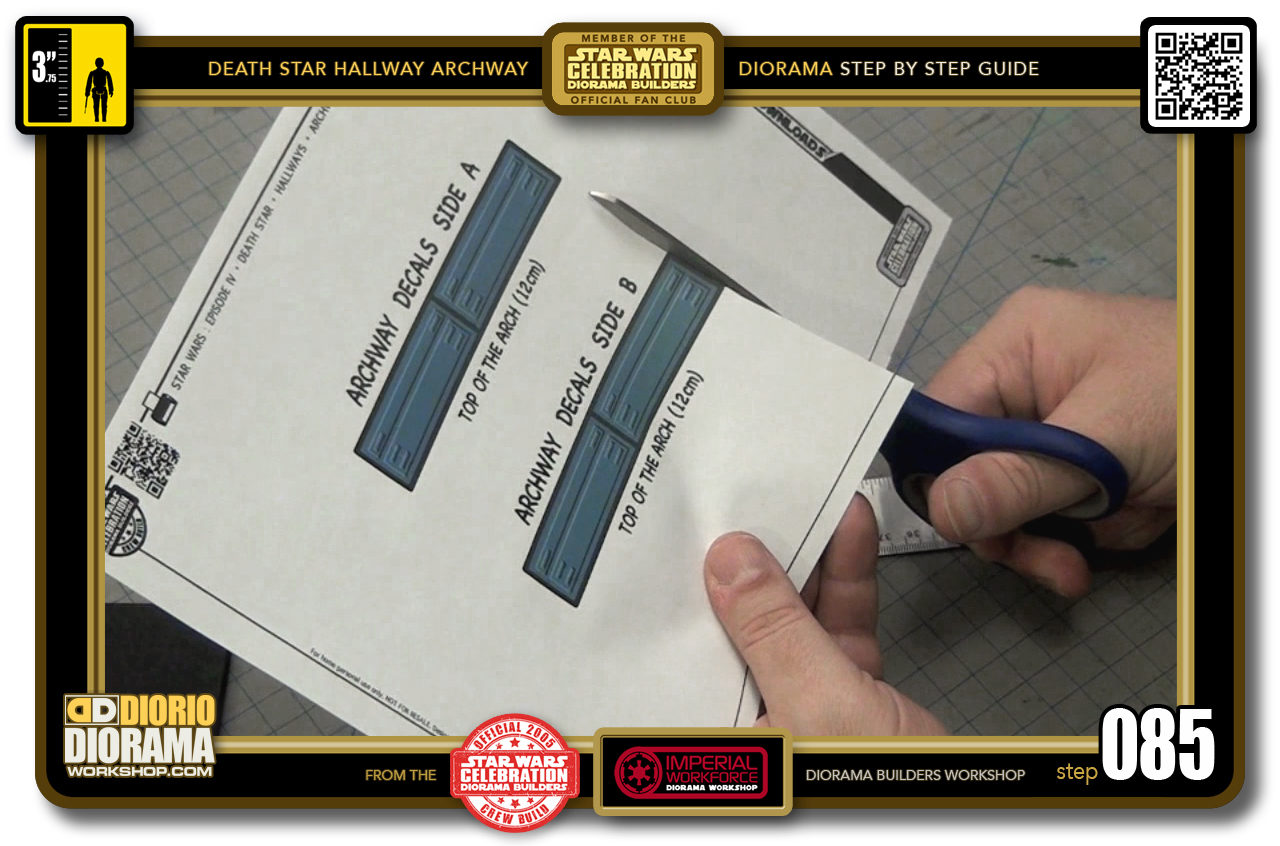
- STEP 085 > For the top panel pieces of your archway, just cut along the OUSTIDE edges in between the dark bleed colour. DO NOT CUT DOWN THE CENTER CONNECTING LINE unless you want waste more time glueing 🙂
-
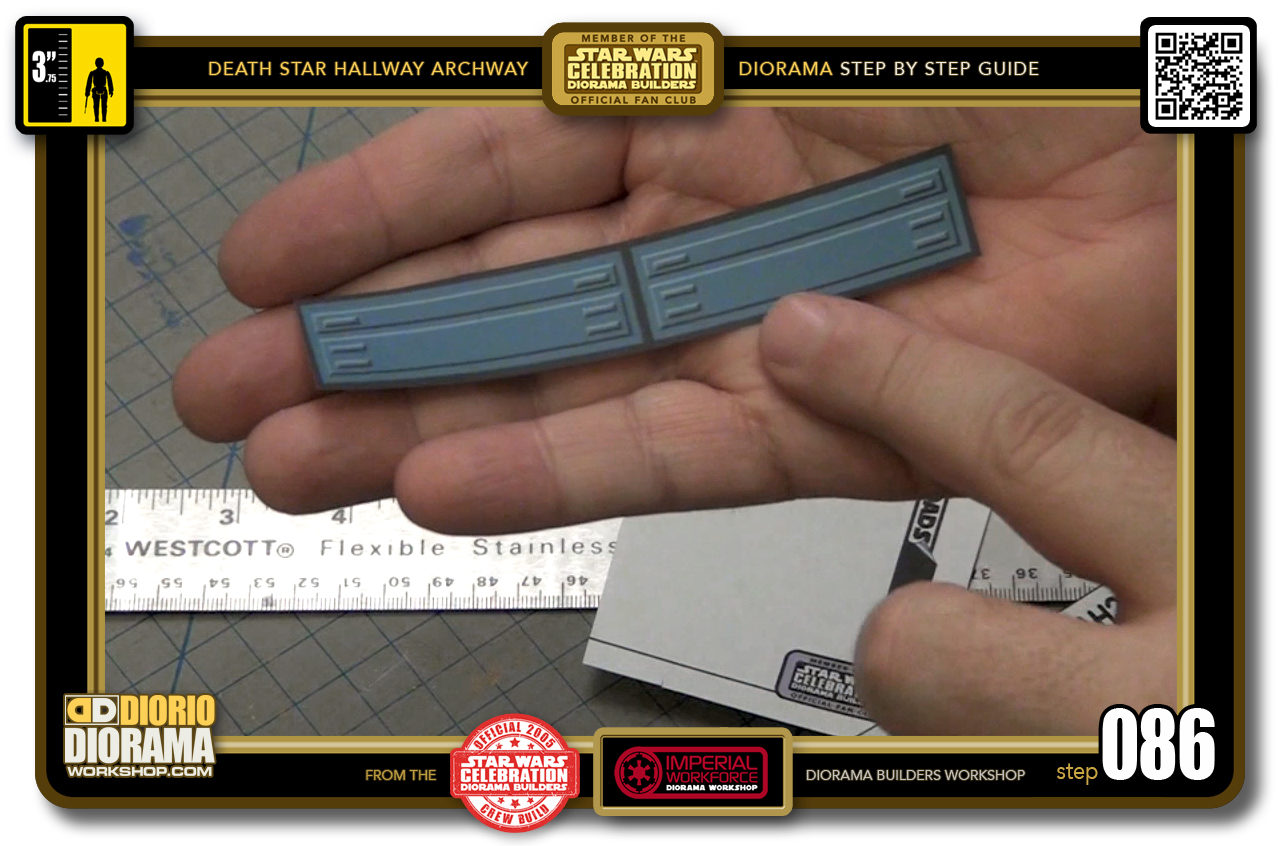
- STEP 086 > As with the double wall panels I created for "A" and "B" archway front and rear, to save you time, I connected these two panel tops together so you can glue them in one step.
-
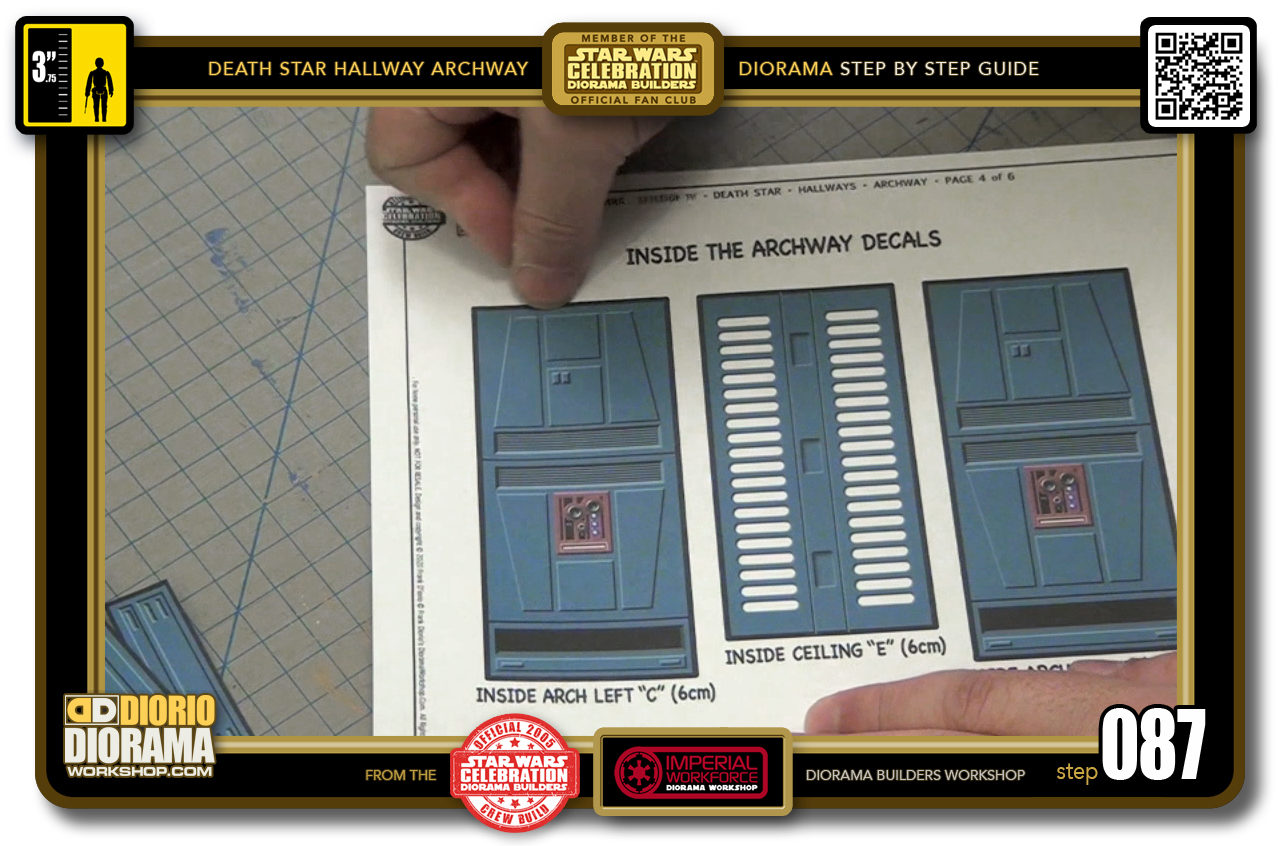
- STEP 087 > The double archway panel tops you just cut in Step 086 will fit just perfectly above these inner wall skins. Notice where they would be located in a standard 15 cm BASIC WALL PANEL height. Simply cut all around each piece as you did the other decals.
-
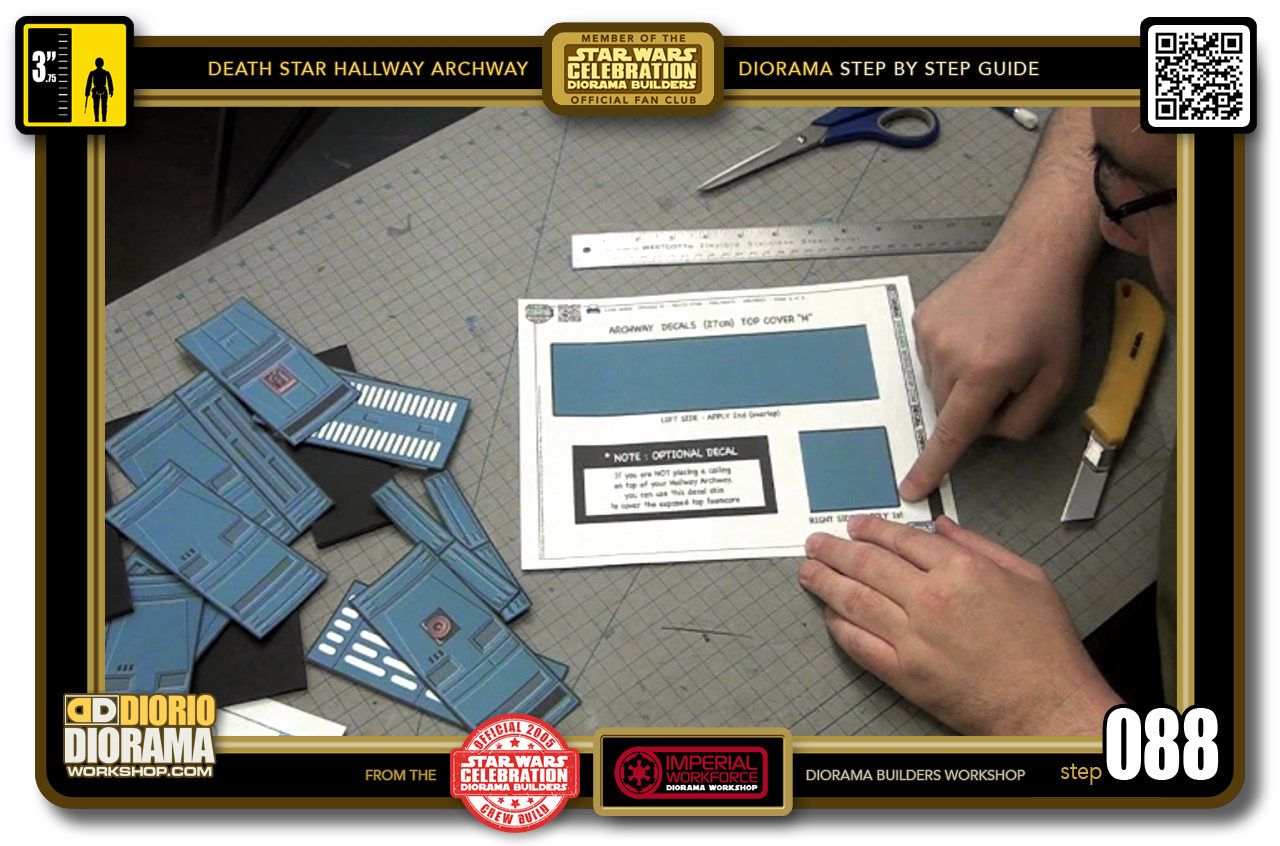
- STEP 088 > For the "H" Top Cap cover decal there is a VERY IMPORTANT CUTTING INFORMATION for you to follow. So read on to Step 093 before starting your cuts here.
-
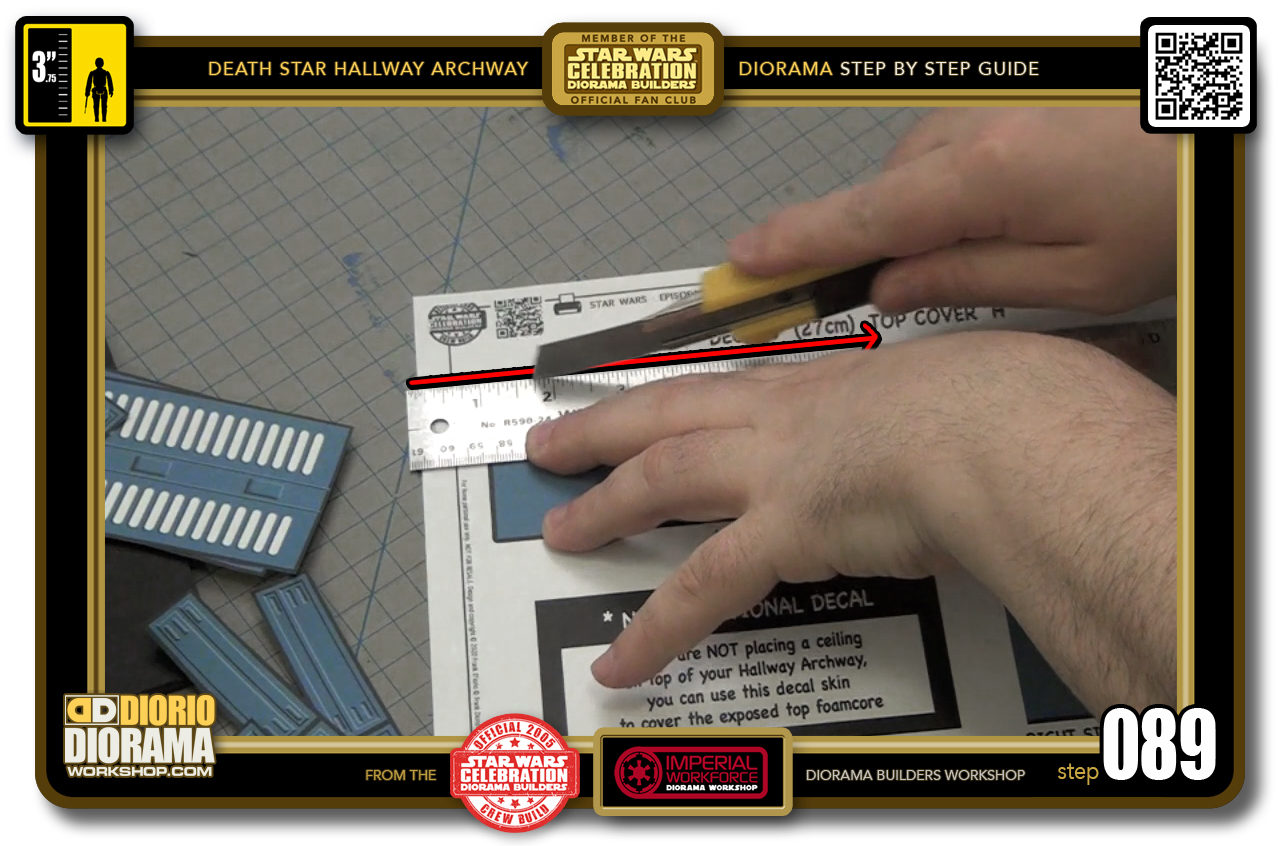
- STEP 089 > For these 2 pieces you will need to cut along the centre of your dark bleed edges but ONLY ON 3 SIDES !!!
-
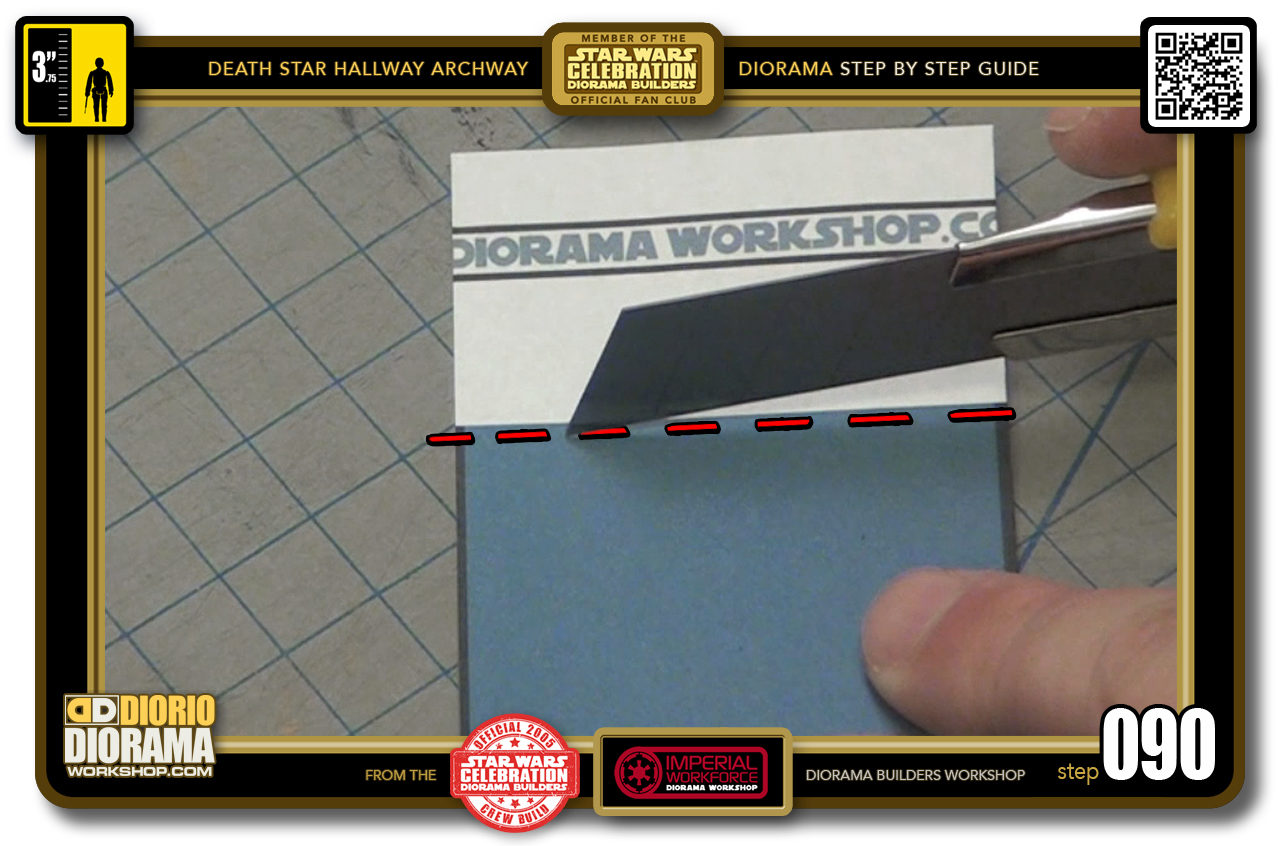
- STEP 090 > The overlap side you will notice has NO BLEED and THIS is where you MUST CUT just a little past the white edge.
-
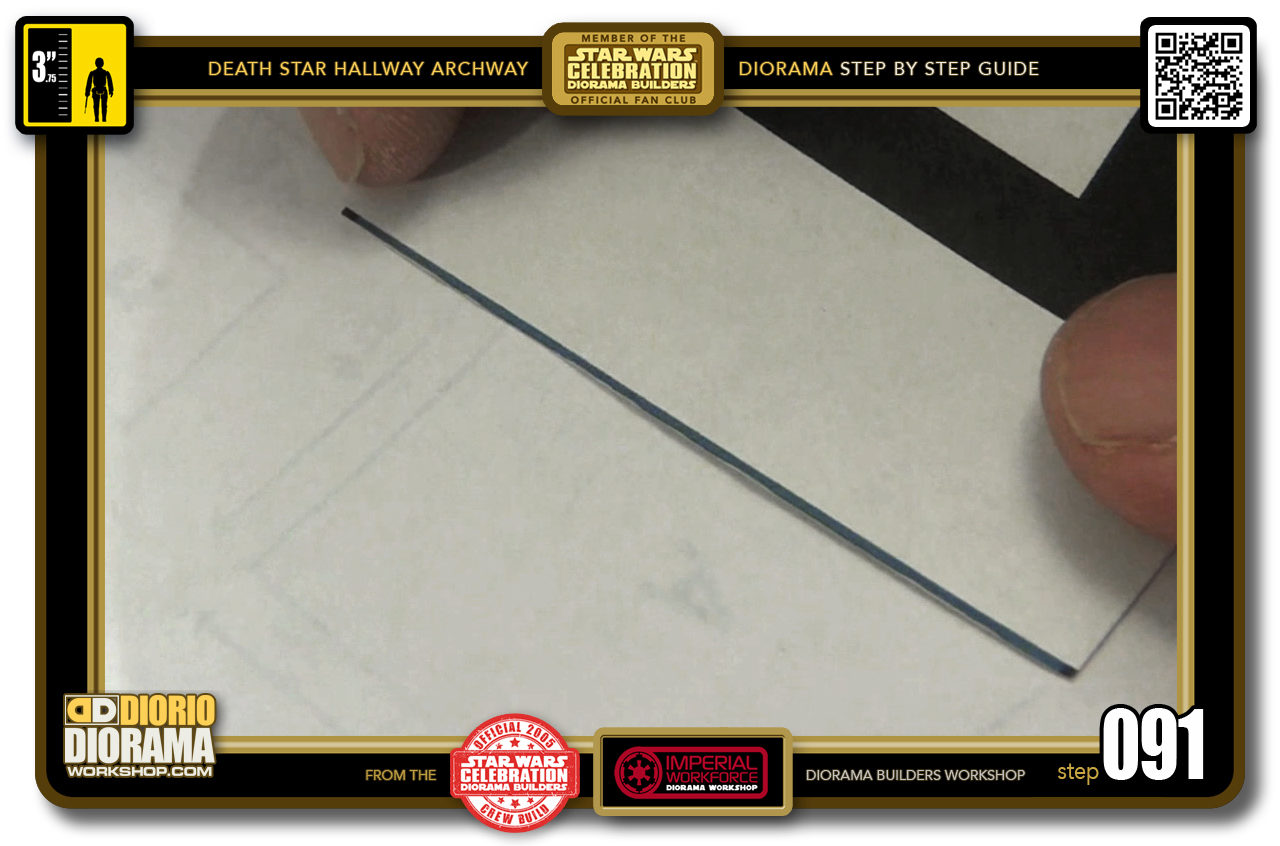
- STEP 091 > Leaving but the smallest colour line on the printed paper.
-
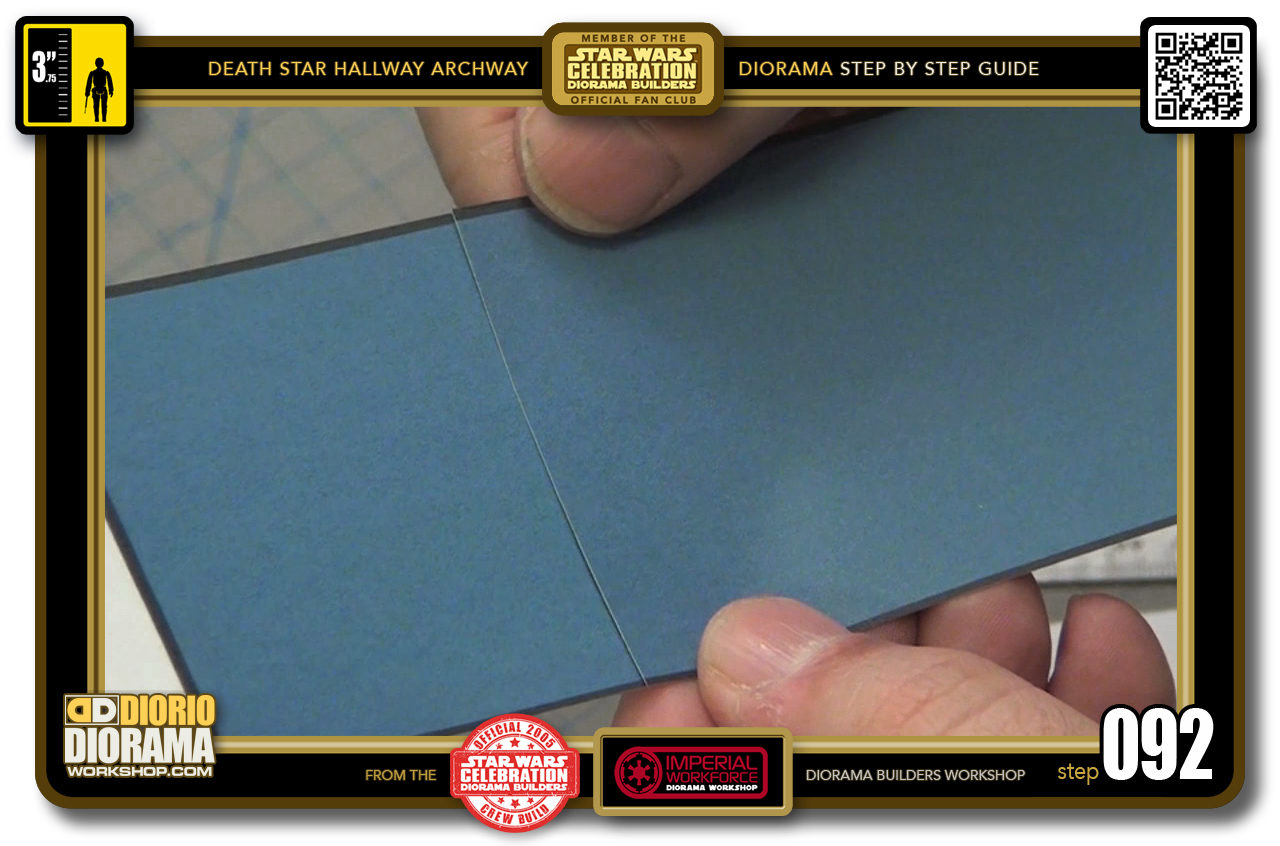
- STEP 092 > This way when you overlap your long end over the short end - the colours merge into each other, giving the illusion that no cut even exists here from this viewing angle.
-
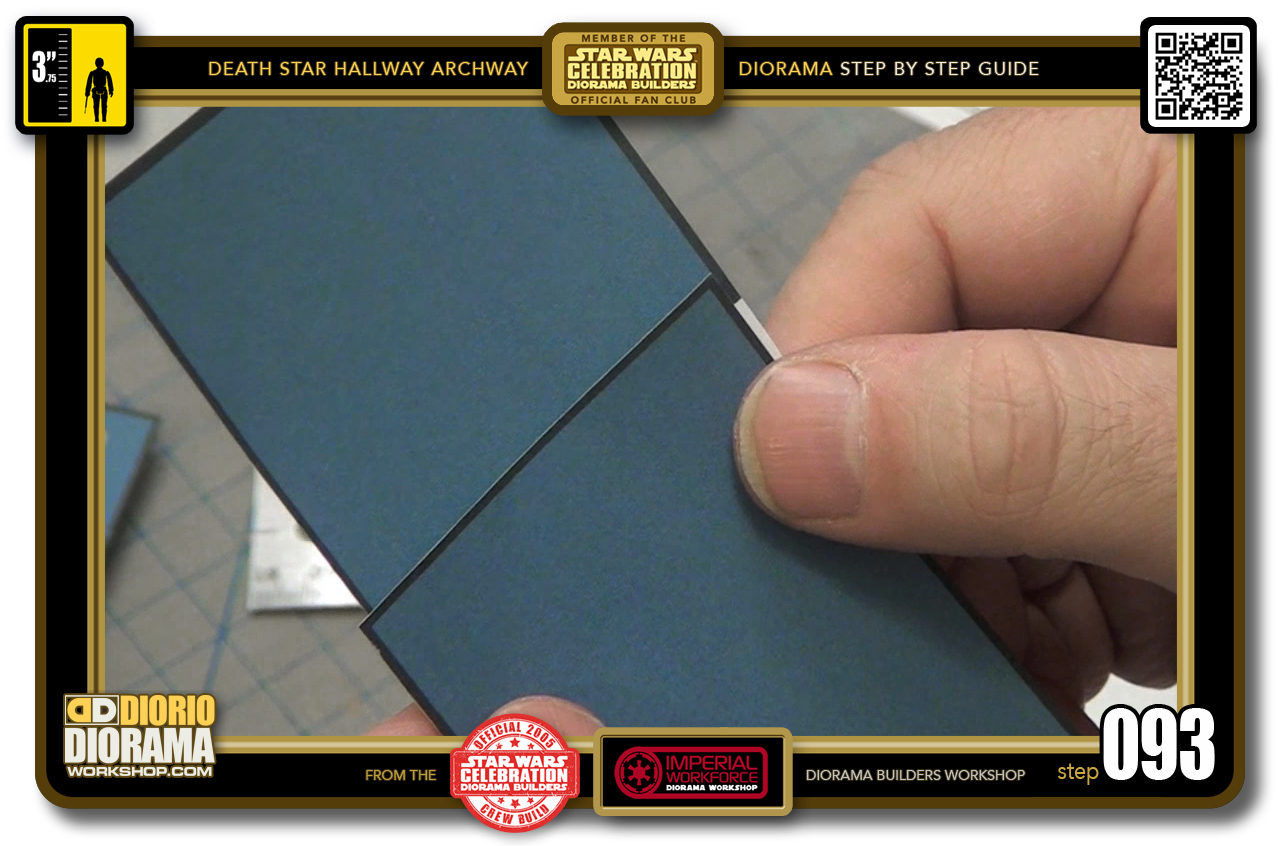
- STEP 093 > Had there been bleeds all around the pieces, when overlapped you would have gotten a big dark line and kill the illusion that it is one piece.
-
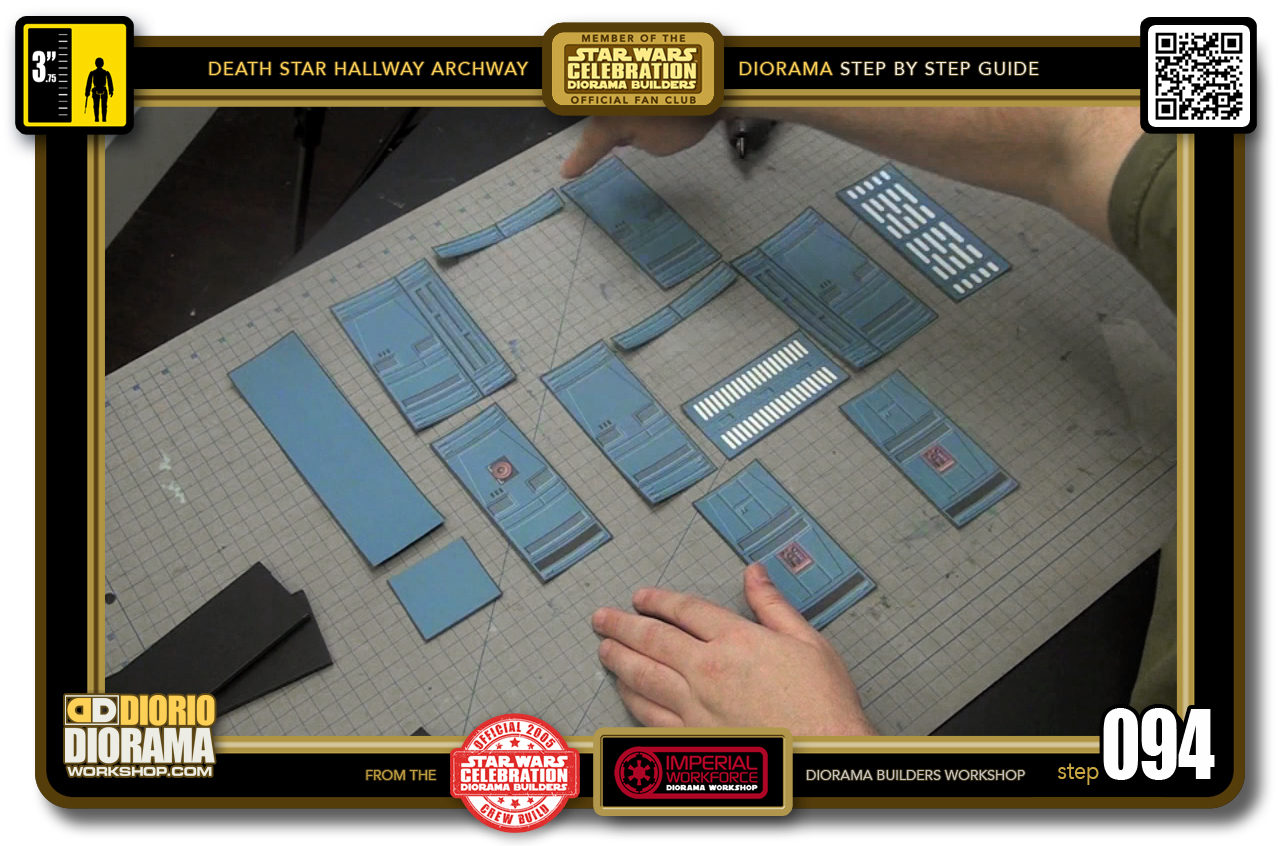
- STEP 094 > All of your decal skins are now cut out. But before we can have the most fun of putting them on the foamcore, we have to assemble the Hallway Archway first.
-
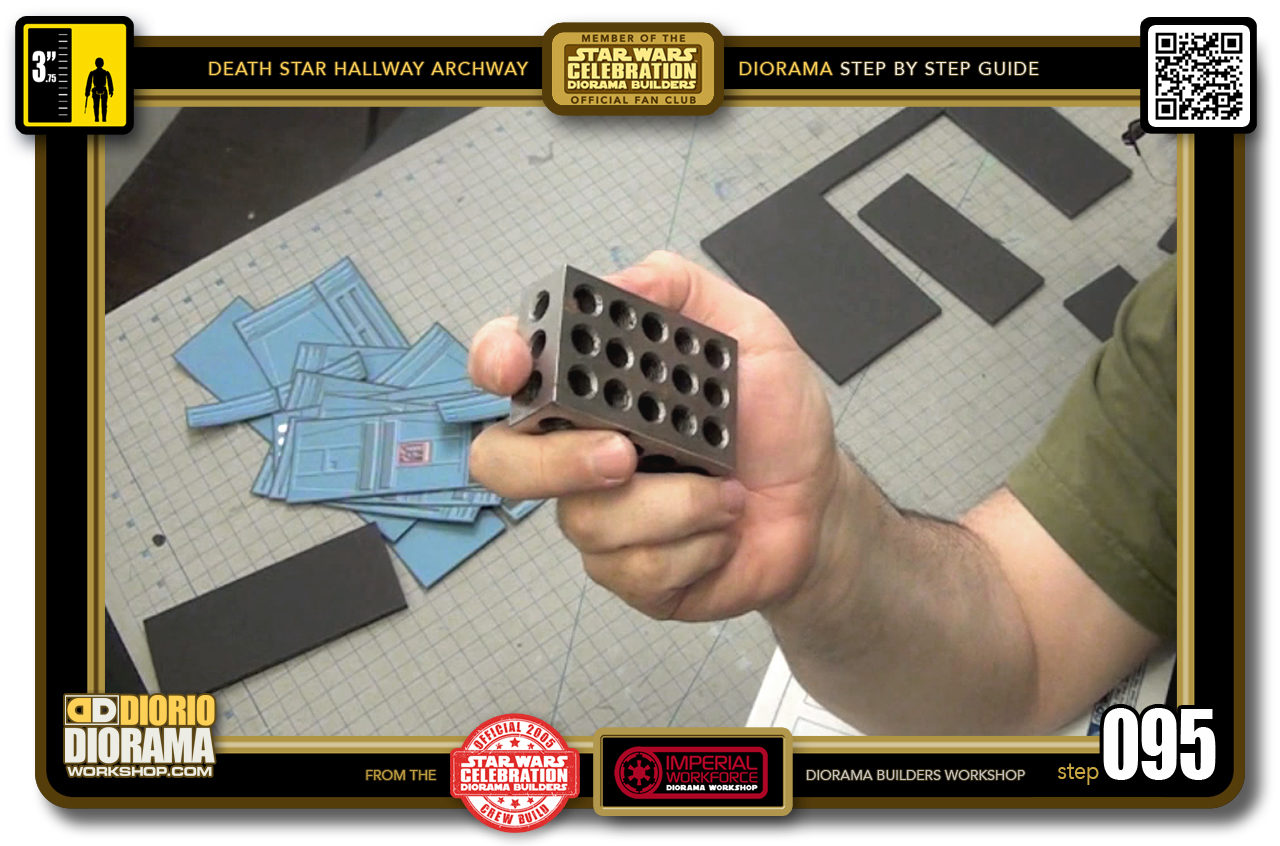
- STEP 095 > You maybe wondering what these things are in the upcoming photos, well they are called "1-2-3 blocks" and I first learned about these last year when I was watching Adam Savage build a diorama house out of foamcore and that he used these to help support foamcore during your build. He said he used them at ILM all the time and so I found them and ordered them on Amazon. I don't always use them but they are a good adition to your workshop materials.
-
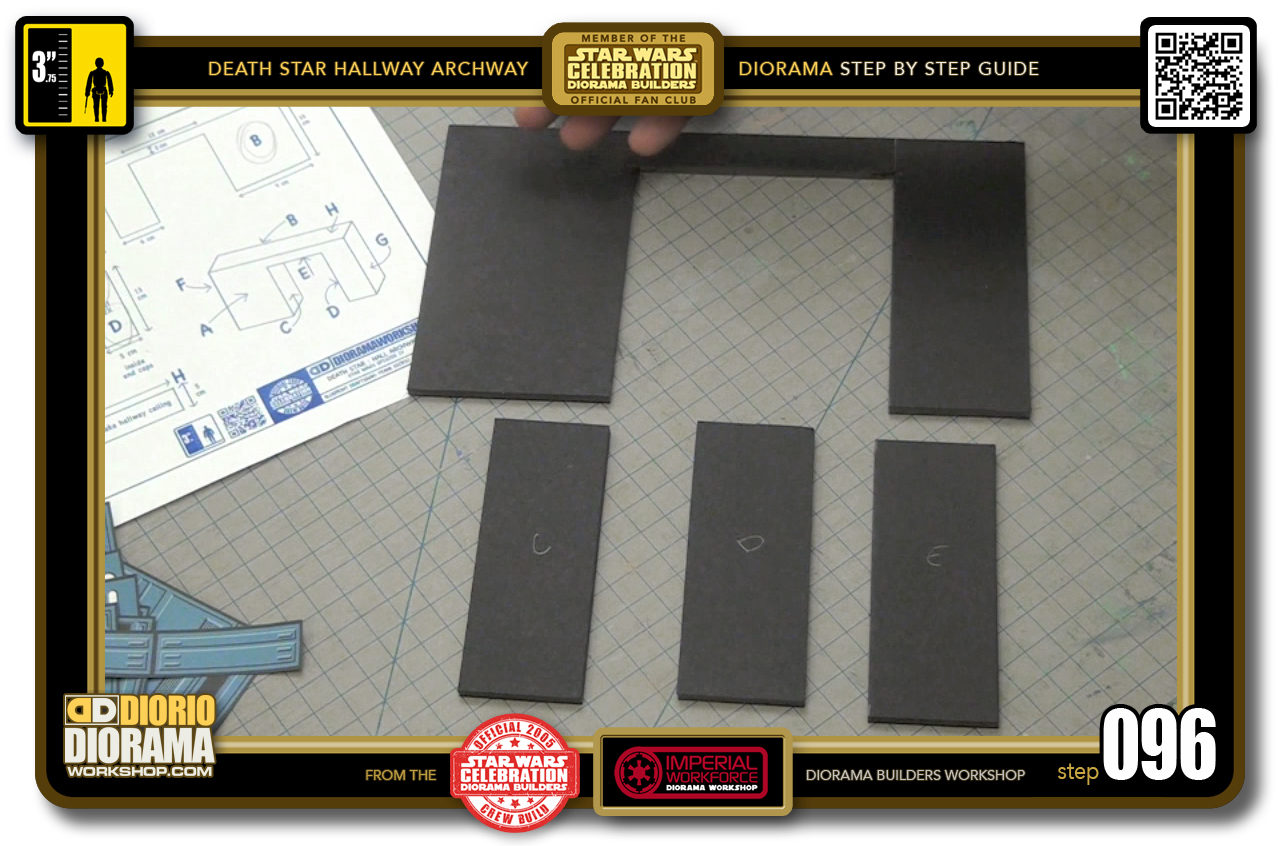
- STEP 096 > Let us begin with the assembly of the inner arch walls to your front archway piece.
-
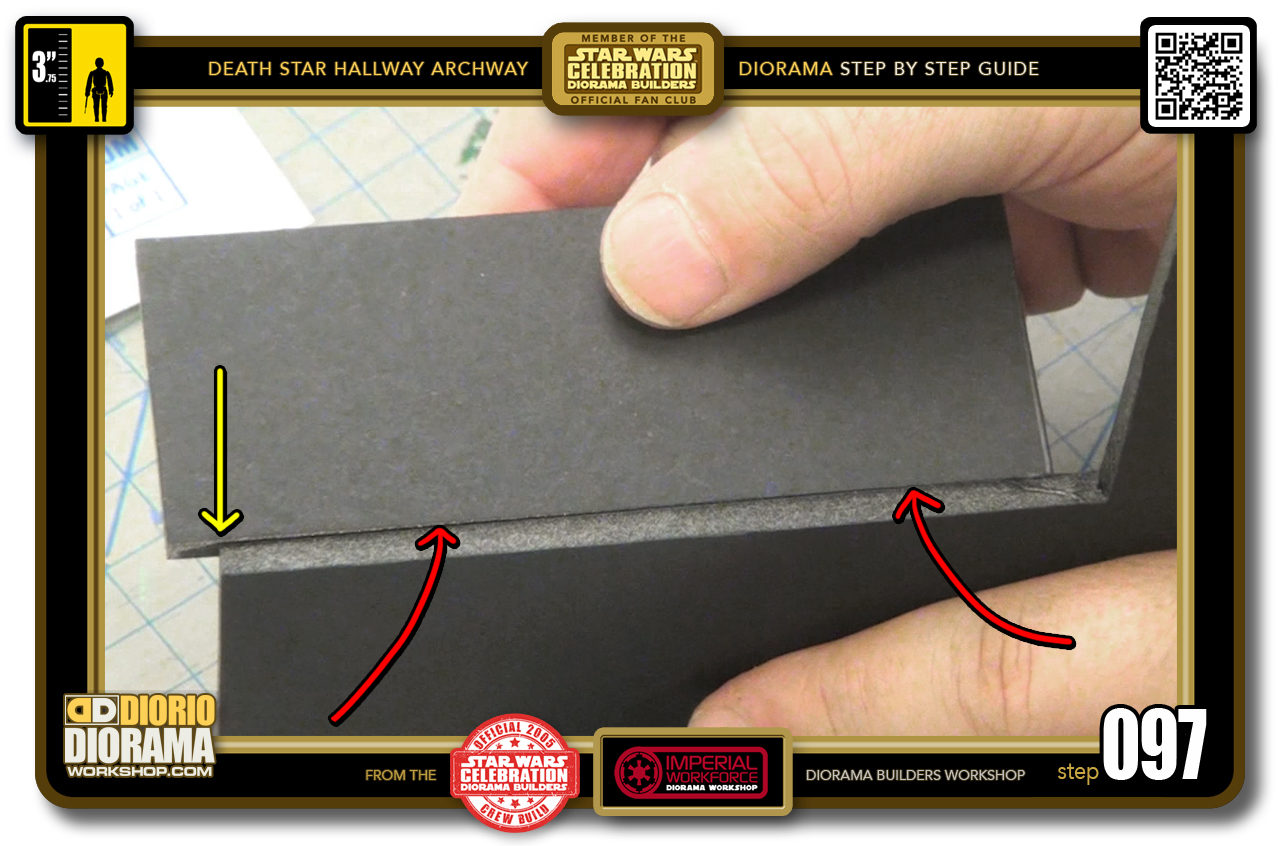
- STEP 097 > The very important thing you want to make sure of in these steps is that you want your pieces to touch flat - flush along each other so that when you touch them, you don't feel a speedbump effect, but rather as if it was one smooth surface.
-
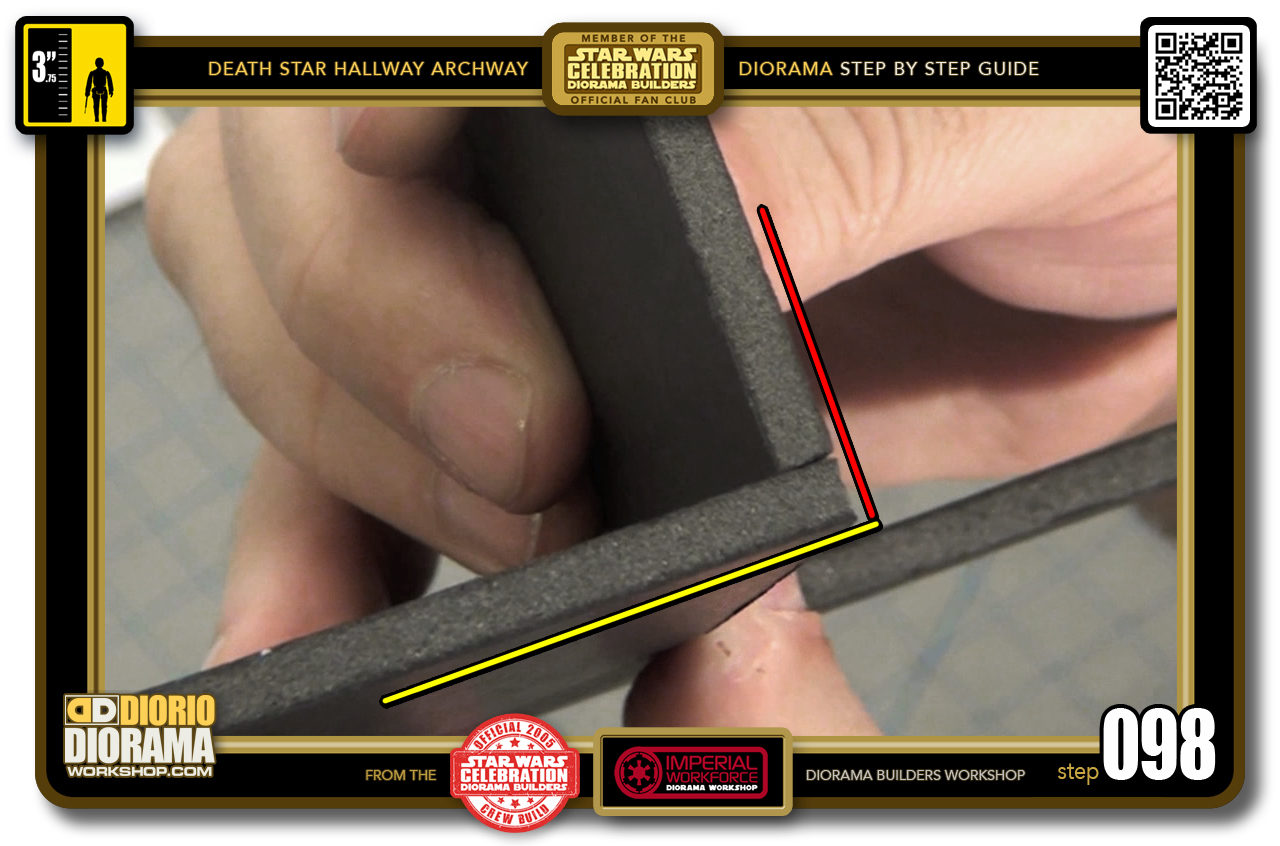
- STEP 098 > The other very important thing is you want to try and keep the connections as perfect to 90 degrees as you can.
-
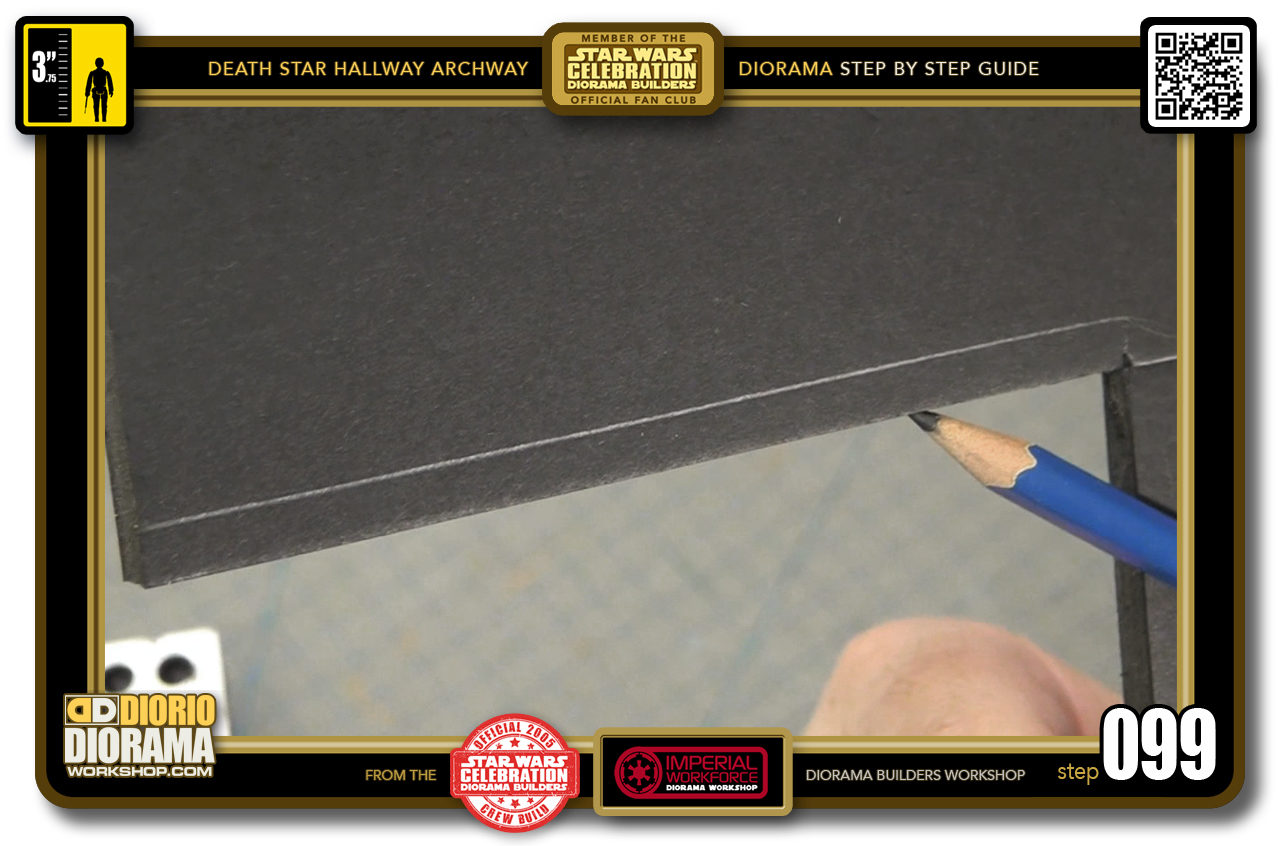
- STEP 099 > After I remove the foamcore side, you can see how the thickness aligns with the edge of your front and rear walls.
-
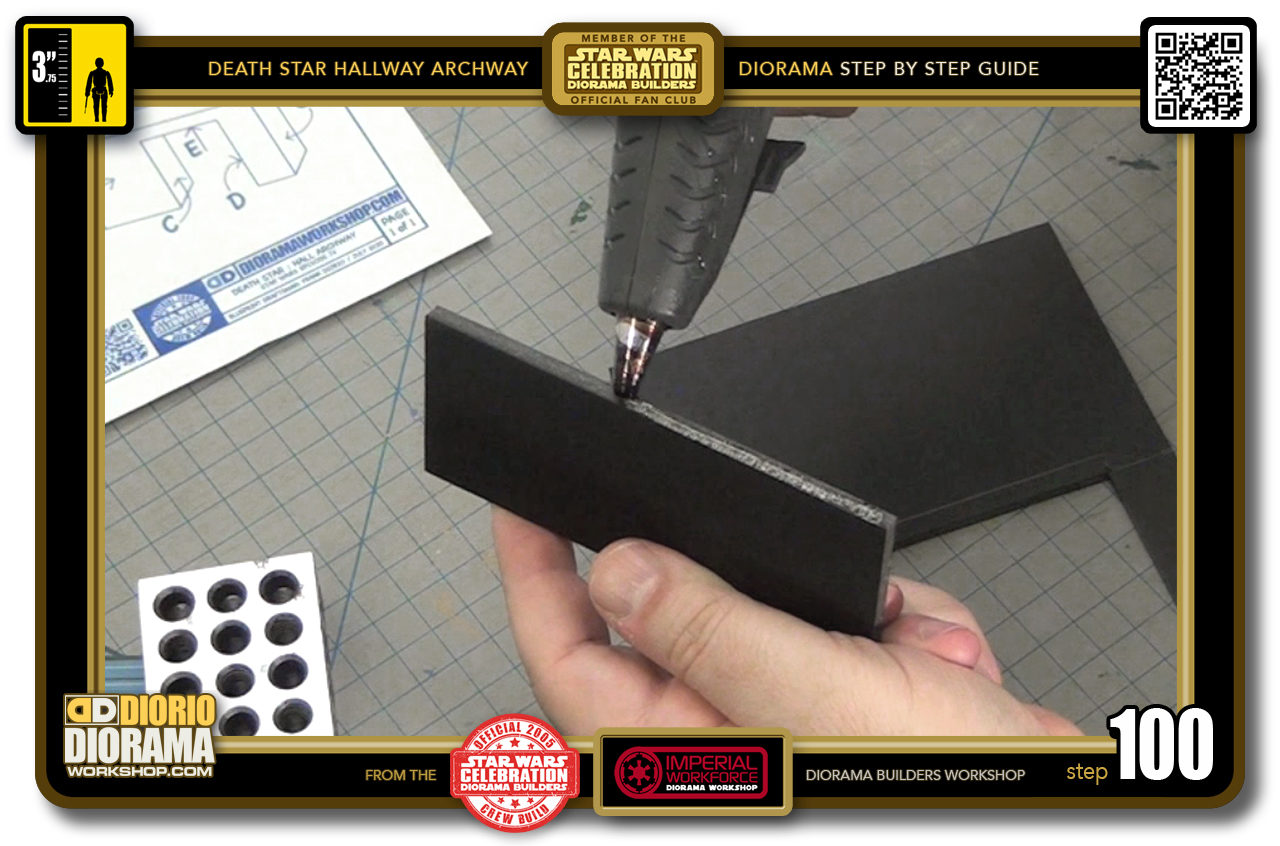
- STEP 100 > A quick line of hot glue along one side...

.
Did you already build this Diorama ? At home or at our Star Wars Celebration Diorama Builders workshop ? Would you like to show it in the site’s GALLERY VISITORS DIORAMAS section, YES ? That is Awesome !!! You can find out all the details on how to email me your photos on the VISITORS SUBMISSIONS INFO page … When I get your photos, I will create your very own page just like this one. You may not realize it but work does inspire others to join in the fun of making Action Figure Dioramas.
.
NOT FOR RESALE ALL Decals, tutorials and artwork are ©FrankDiorio (dioramaworkshop.com) and offered FOR FREE to the fans – that would be you ? so you can build and display my diorama designs in your very own home. I realize I cannot control what one does with my graphics once I place them on the web, I can only ask you as one fan to another, please respect the artist and do not be that jerk who uses my designs and tutorials to build a copy of my work only to sell it on EBAY or trade/sale groups and forums. Thank You. Frank.
.
.
If you have a facebook account, why not join the Official Diorama Builders Fan Club today, simply click the logo link below.
 .
.
Catch up with fellow visitors and exchange stories, read cool interviews with the crew, exchange photos, fun surprises and grab some FAN ONLY merchandise next year at actual future conventions ?
.
©2018 Frank Diorio DioramaWorkshop.Com
.
IF YOU LIKE WHAT YOU SEE, PLEASE SHARE WITH YOUR FRIENDS
USING THE SOCIAL MEDIA BUTTONS BELOW