


-
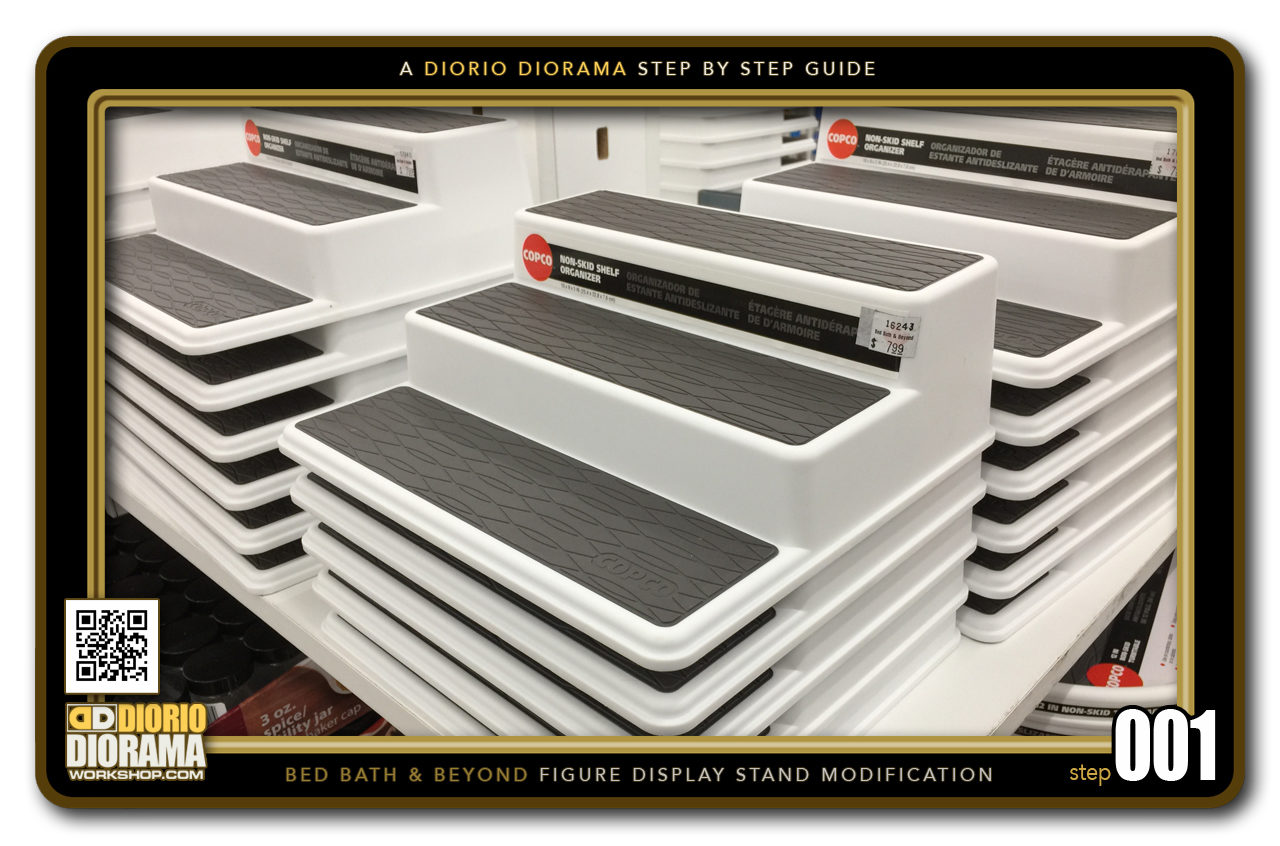
- STEP 001 > Last year on a shopping trip to the mall, I was in Bed Bath & Beyond and passing through the kitchen area, SPICE RACK ? Hell No !!! ACTION FIGURES !!!! 🙂 They got this all wrong 😛
-

- STEP 002 > So the next week, I brought a few action figures with me to see if this would look cool as a figure stand. It's like it was made just for this purpose 🙂 Forget the kitchen use, it's perfect for the toy room or home office display shelf don't you think ? So I did what any normal person would, I bought about 20 of them 😛
-
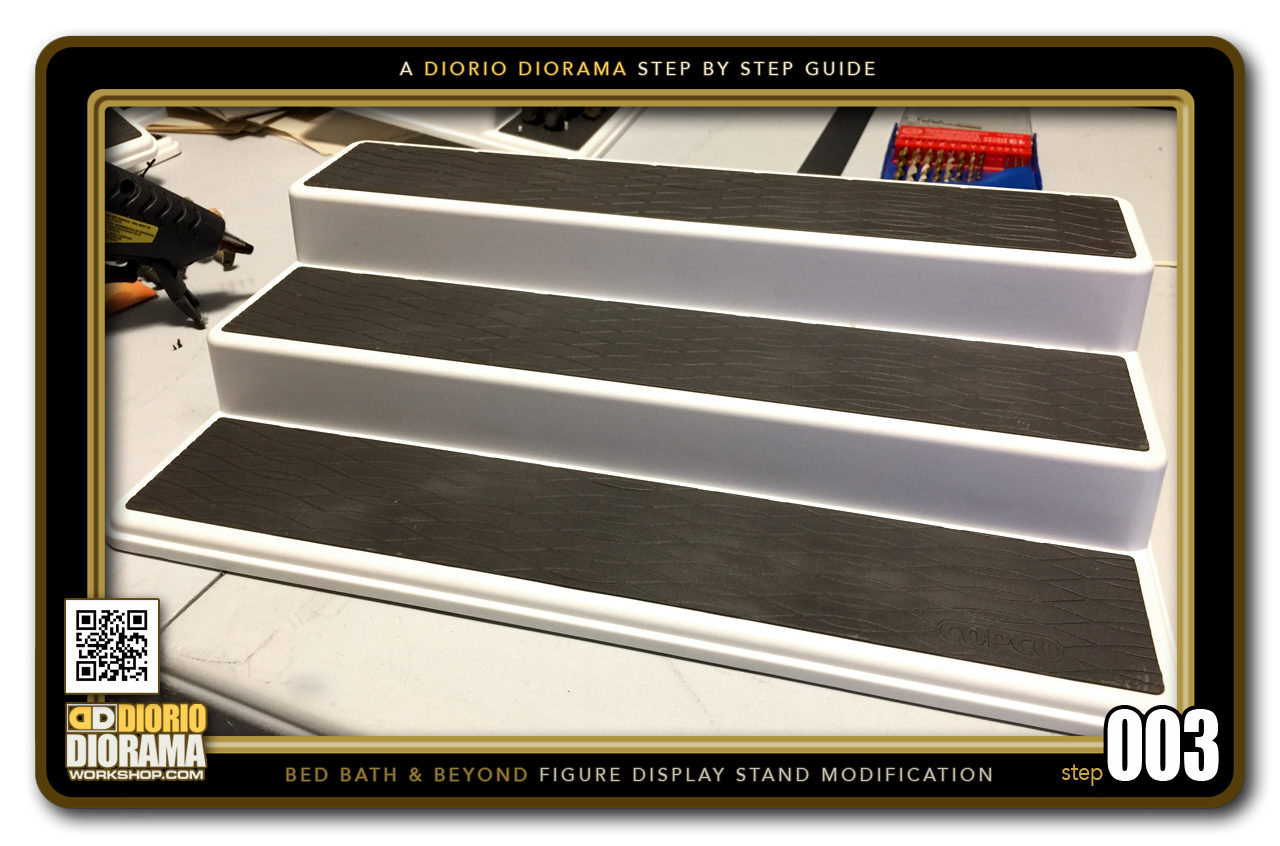
- STEP 003 > So this is what the actual item looks like. White, Clean, Rubber base, very nice and for only about $10 Canadian once you add the taxes. So it's just PERFECT AS IS for your figures right ?
-

- STEP 004 > Nooooo - When placing the LAST FIGURE, the DREADED DOMINO NIGHTMARE !!!! Just like bowling pins, plonk, plonk, plonk. OK Not that sound but you get the idea. The rubber base does not prevent the figures to be knocked over.
-
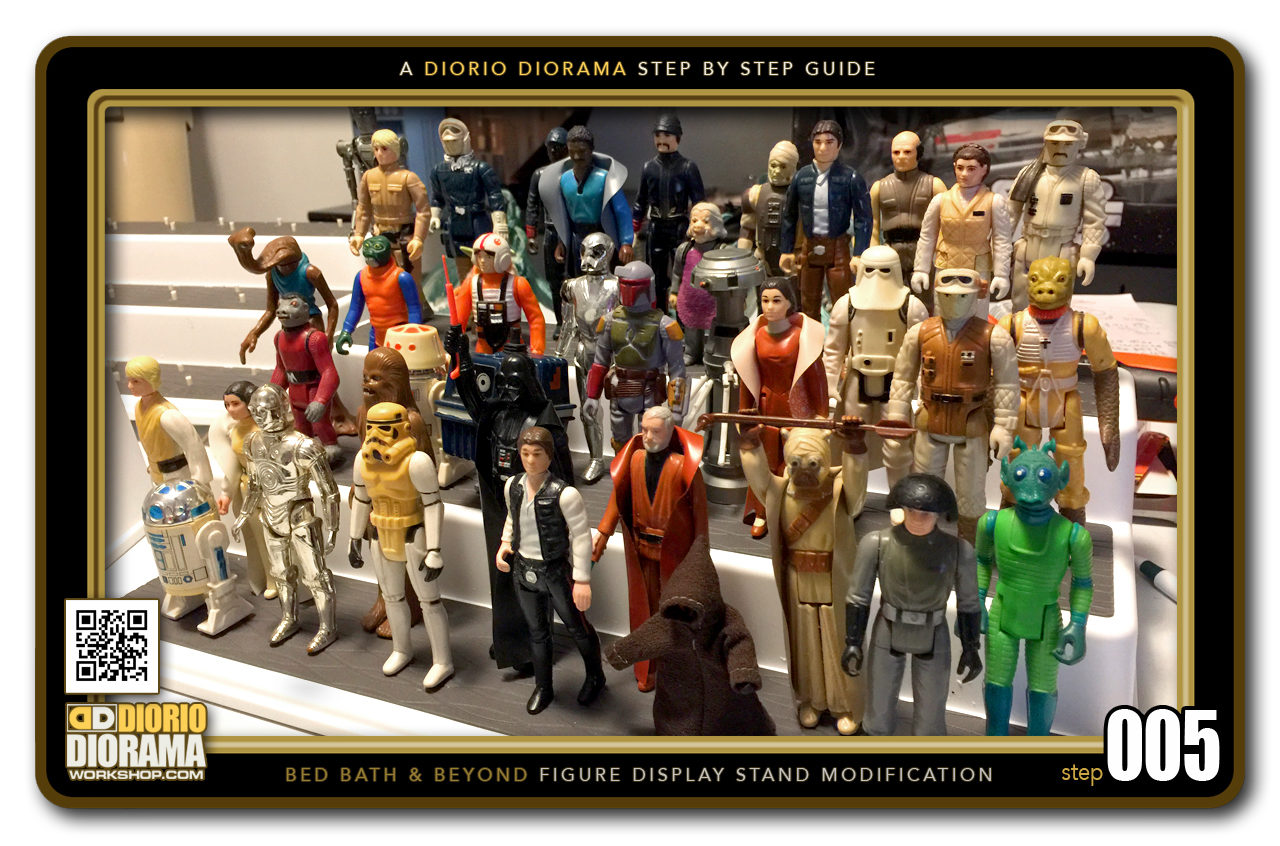
- STEP 005 > So when you finally get all the figures to stand perfectly together - doesn't that look great ? Time to pick it up and place it on the actual shelf all of these will be displayed side by side.
-
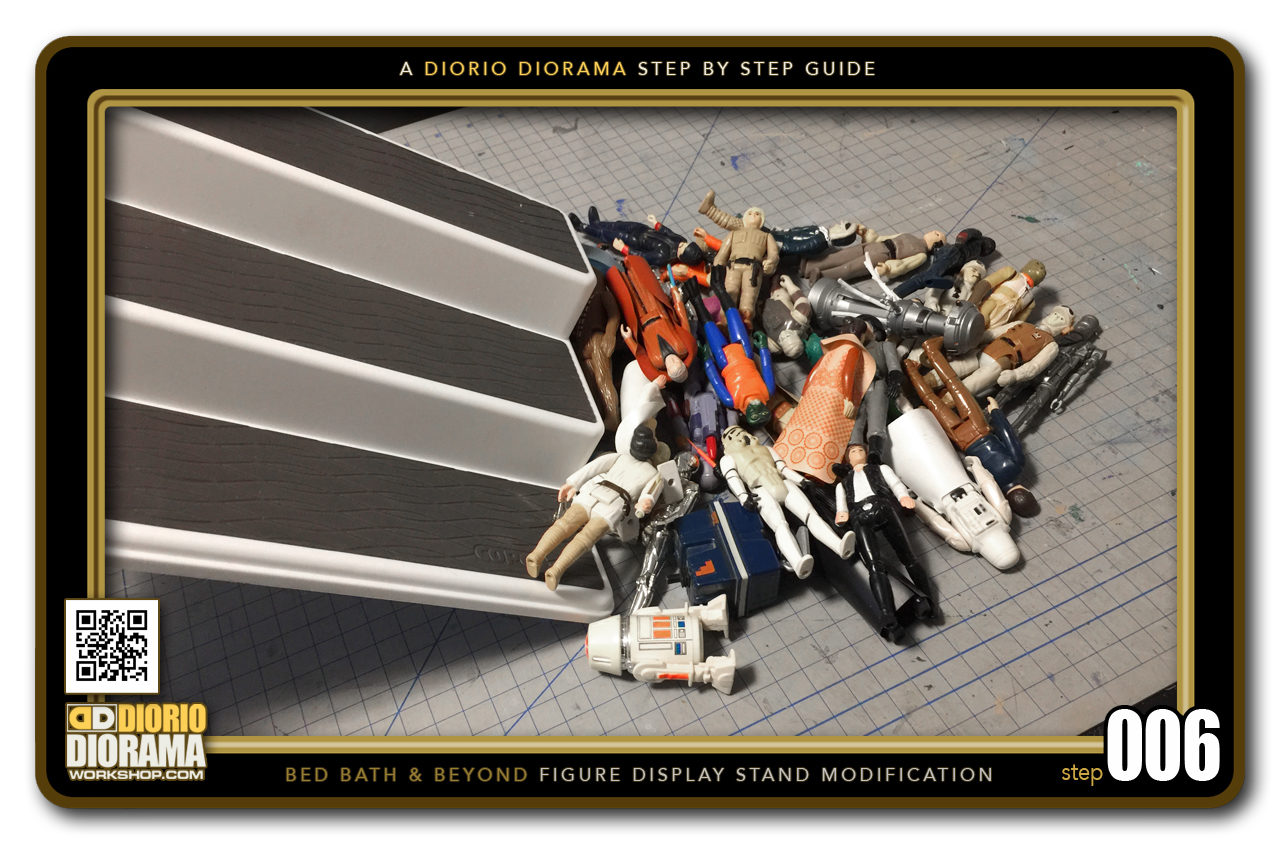
- STEP 006 > Oh Yeah !!! You guessed it !!!! Back to square 1 - as they say all the time on Shark Tank... There's GOT to be a BETTER way 🙂
-
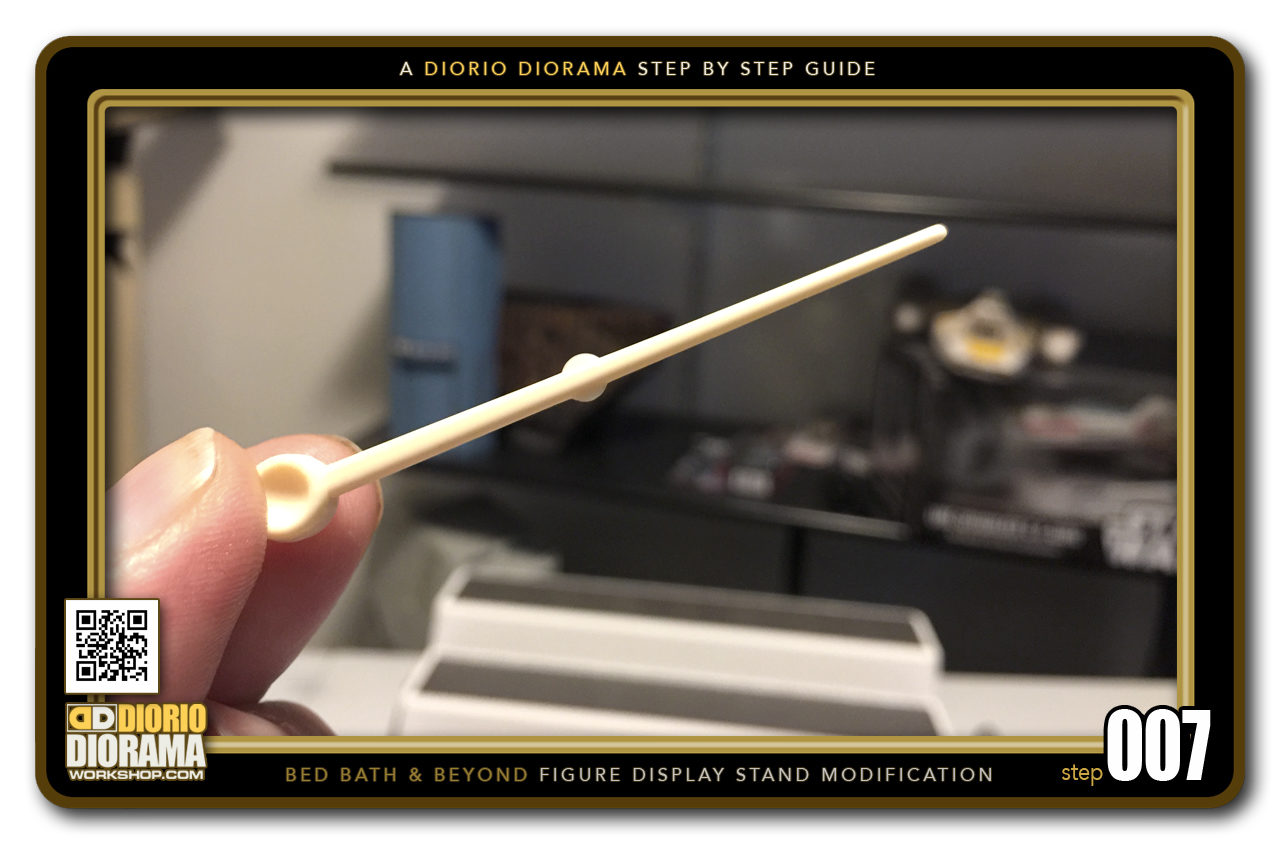
- STEP 007 > Well, with the magic of these easy to cut plastic hair curler pins...
-
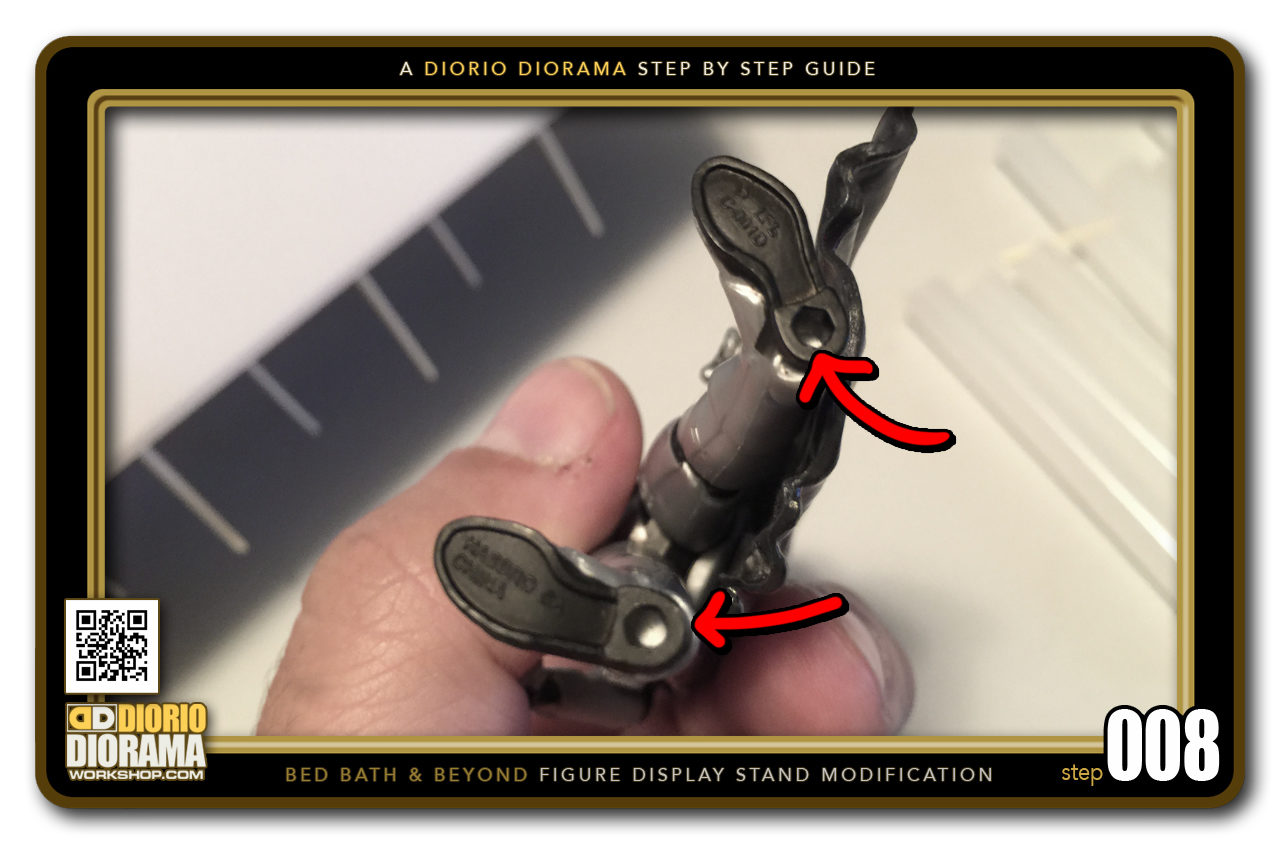
- STEP 008 > And the magnificent little holes at the bottom of your figures feet ... (thank you Hasbro for continuing this great feature from the Kenner 70's originals)
-
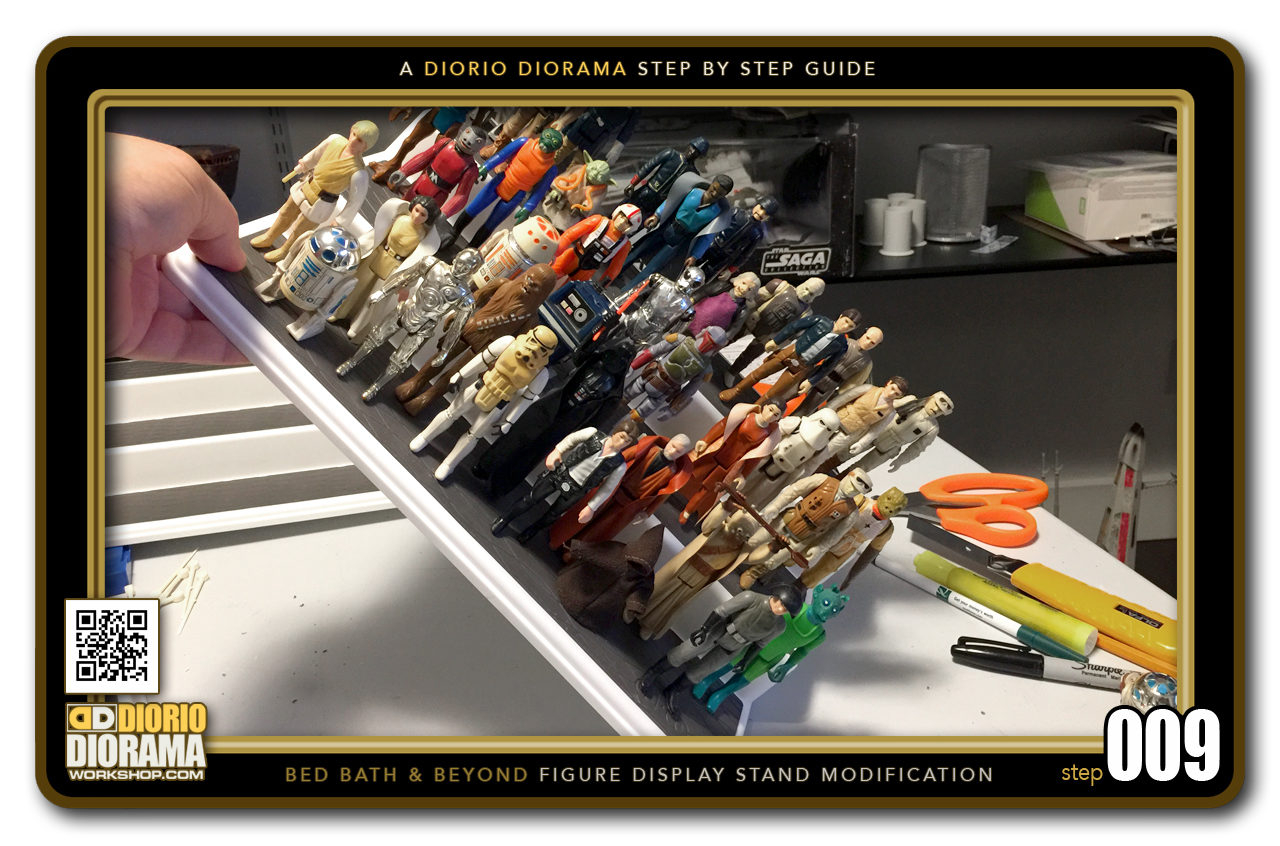
- STEP 009 > Like MAGIC !!! Place, TILT and WHAT !!! ??? !!! They aren't FALLING and TIPPING OVER - It's so beautiful I just had to share how to do it for yourslves in your own home.
-
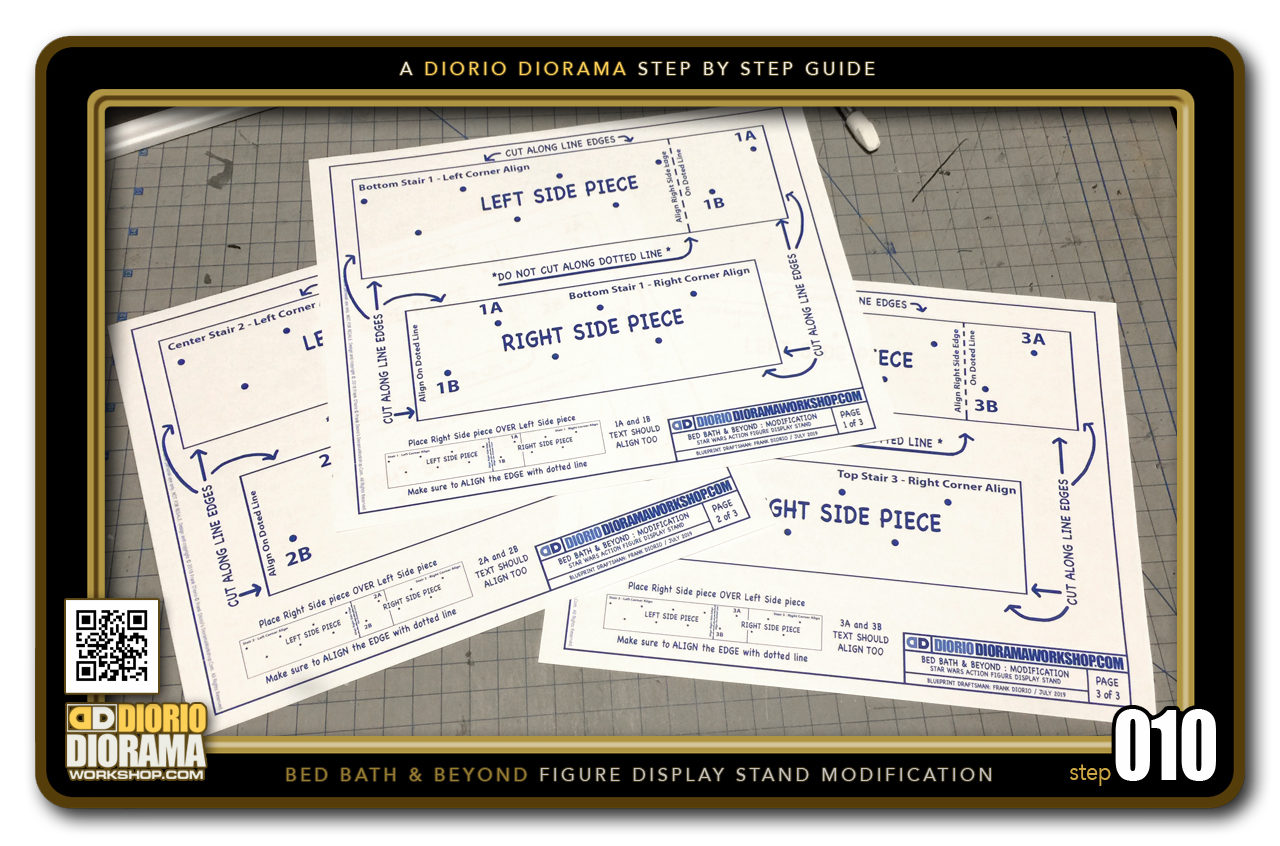
- STEP 010 > First thing you need to do is go on my site's tutorial section and download the FREE Blueprint Templates... https://dioramaworkshop.com/tutorials-blueprints-bed-bath-beyond-figure-stand-mod/ and print them on standard 8.5"x11" sheets. Make sure to NOT REDUCE THE SIZE. PRINT 100% SCALE.
-
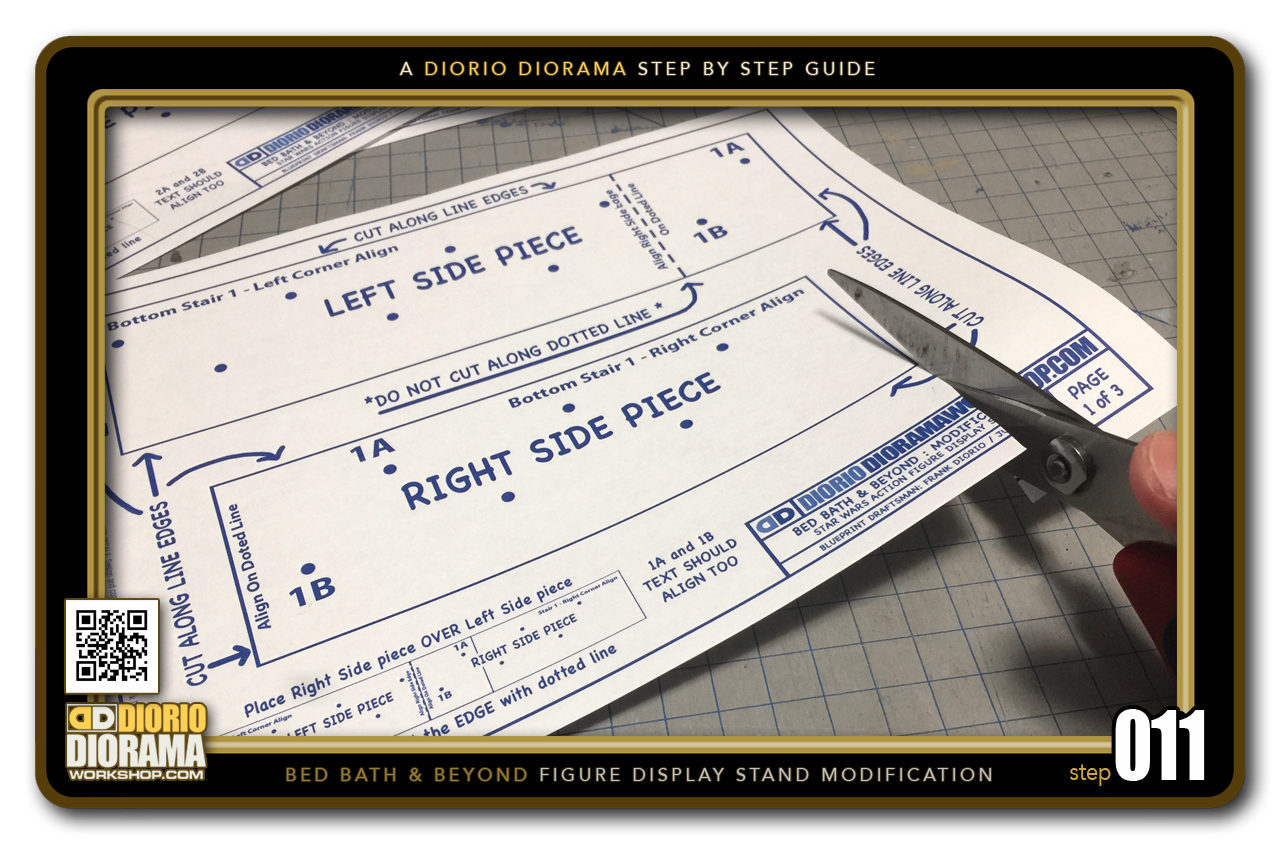
- STEP 011 > So let's get cutting, because of the width of the figure stand, I had to divide each stairs template into 2 halves. Start cutting along the lines of the Bottom Stair 1 Right Side.
-

- STEP 012 > Cut along the entire rectangle.
-
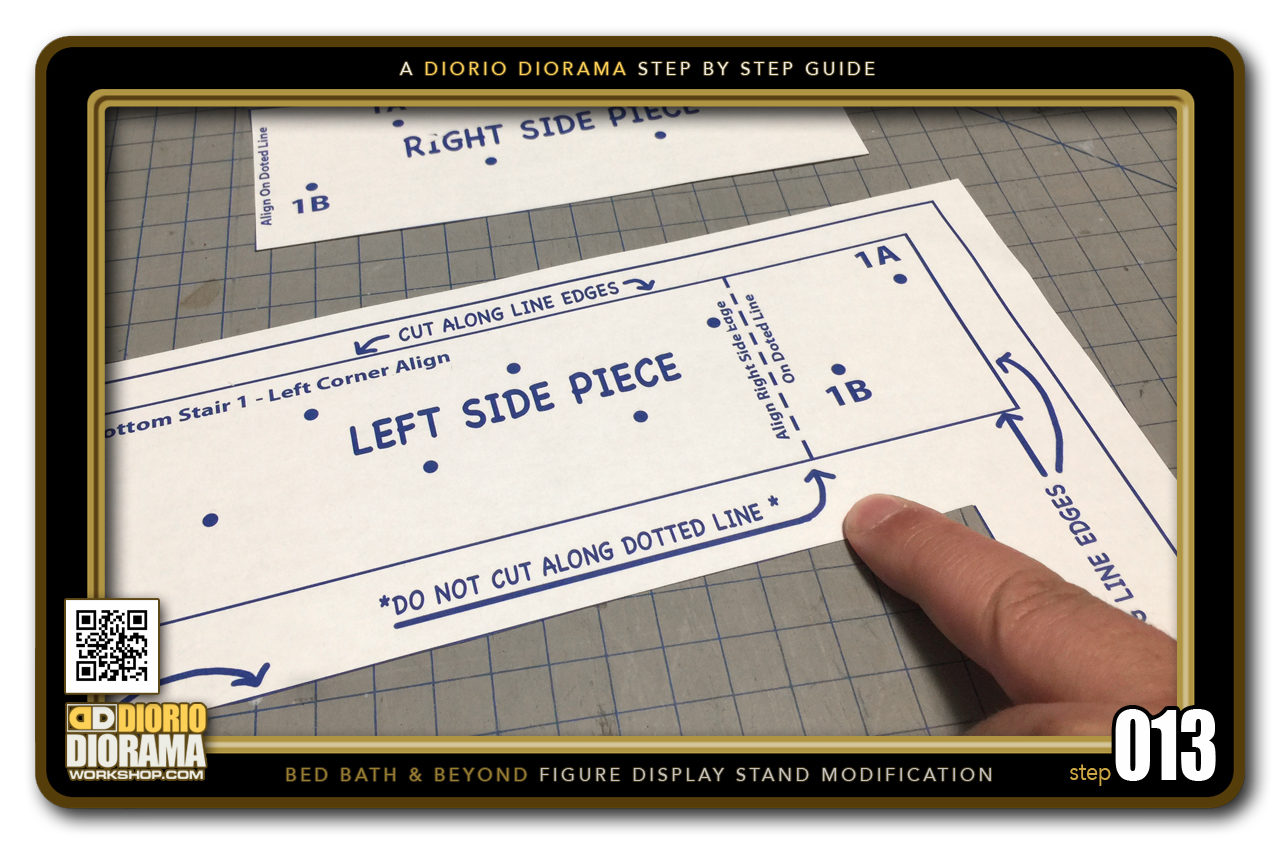
- STEP 013 > Now for the Left Side it is EXTREMELY IMPORTANT to NOT CUT along the dotted lines !!!
-
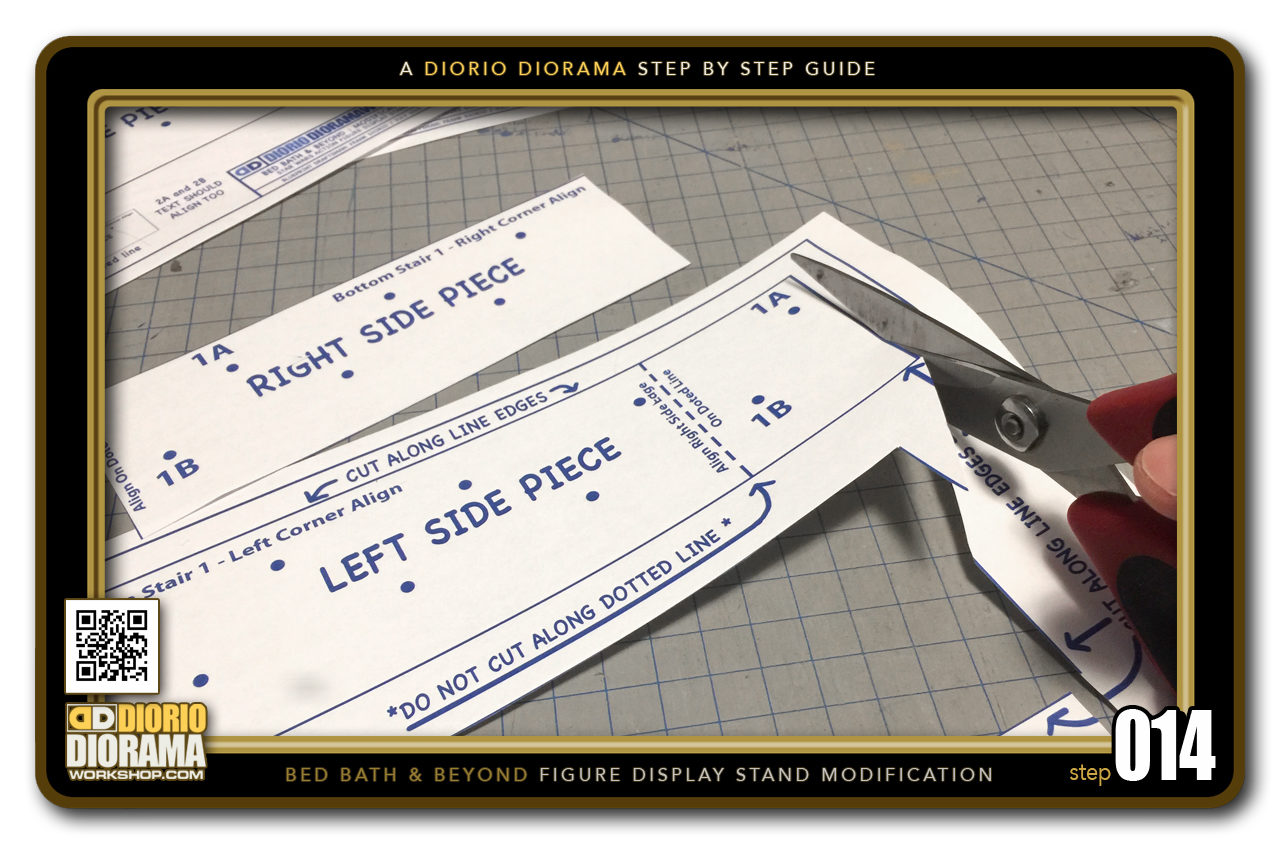
- STEP 014 > You want to go completely to the right edge and as you did in Steps 011-012, Cut all the way around the outside LINE edges.
-
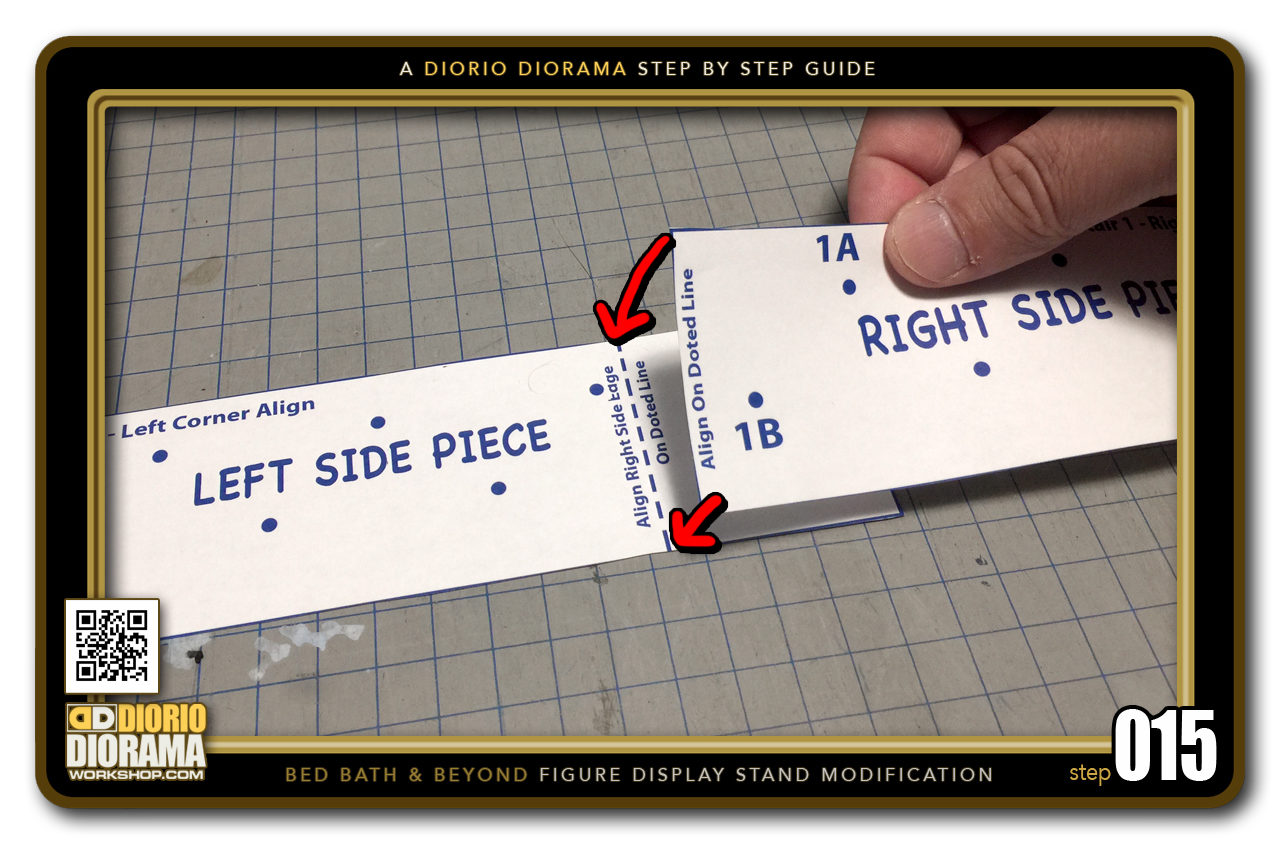
- STEP 015 > Now take your Bottom Stair 1 RIGHT SIDE rectangle and place it ON TOP of the Bottom Stair LEFT SIDE rectangle.
-
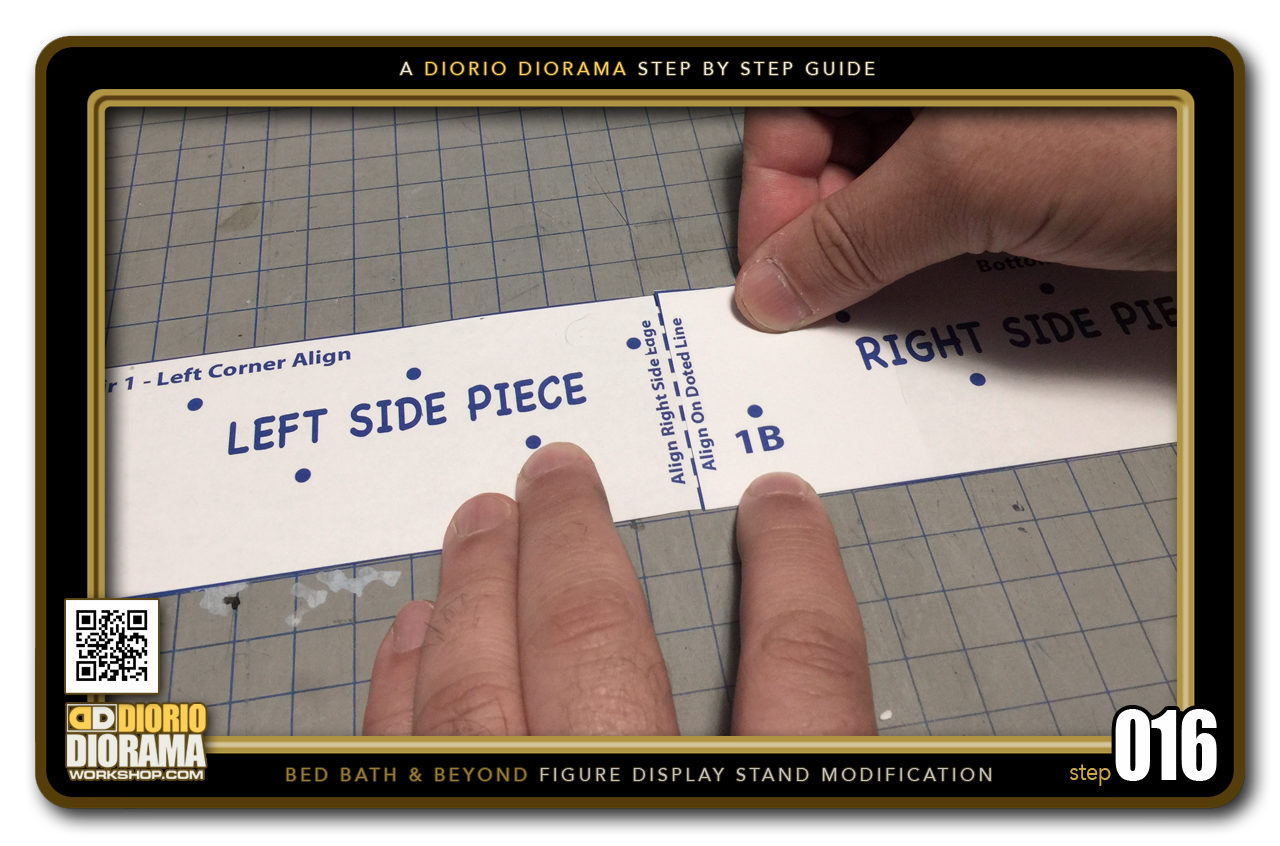
- STEP 016 > Make sure to align the RIGHT SIDE with the dotted lines
-
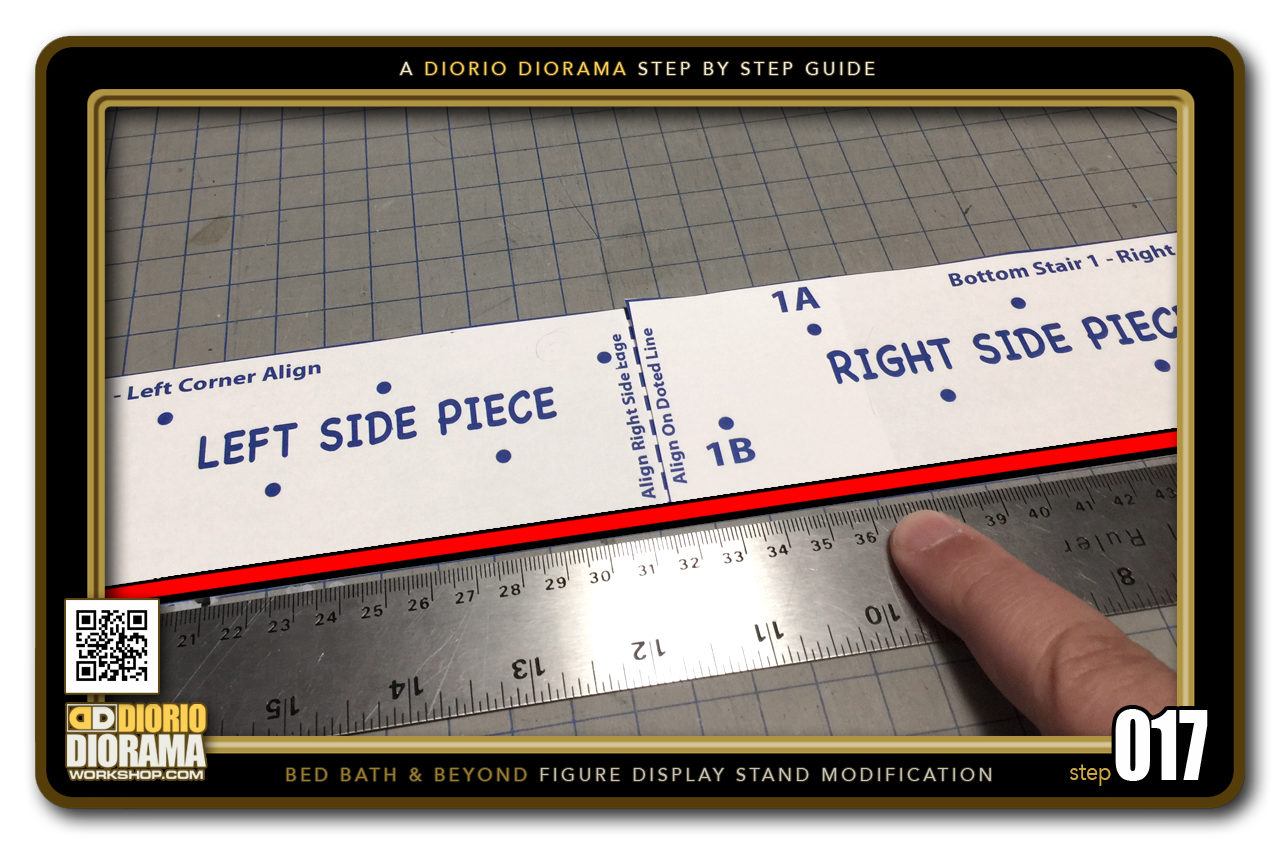
- STEP 017 > Make sure that the bottom 2 halves make a STRAIGHT LINE. If you don't have a cutting board with a grid pattern, you can always use a ruler as your guide.
-
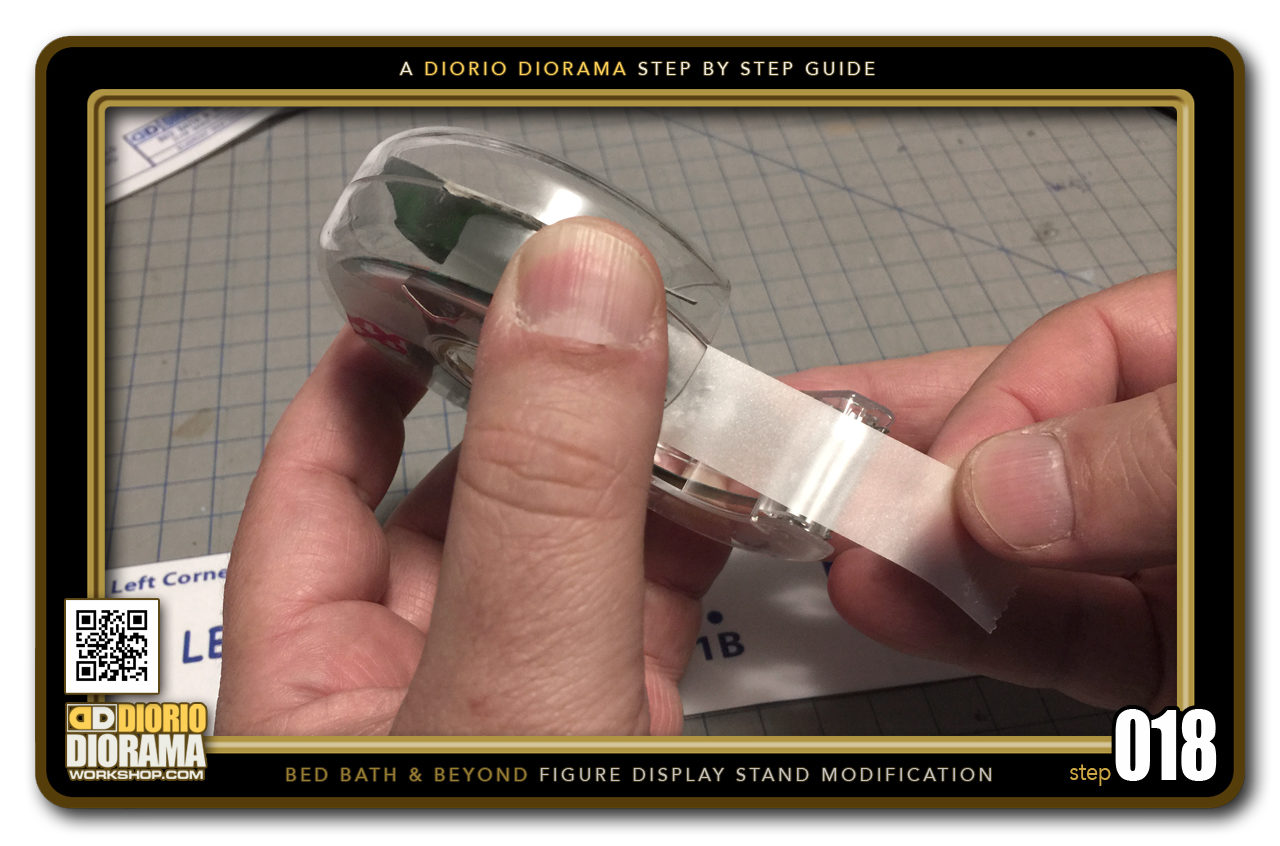
- STEP 018 > Tear a little piece of scotchtape...
-
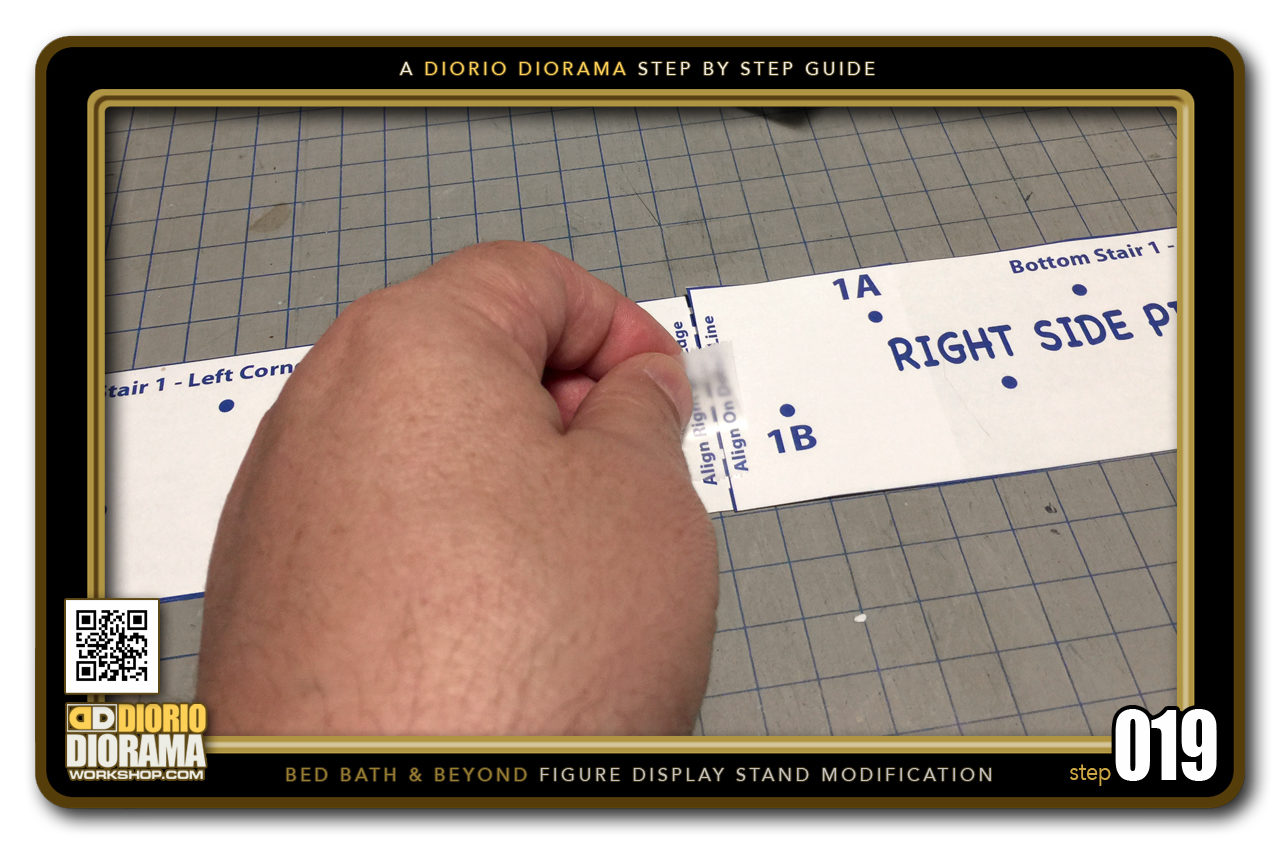
- STEP 019 > And press it onto the center line, connecting the 2 BOTTOM STAIR 1 pieces together.
-
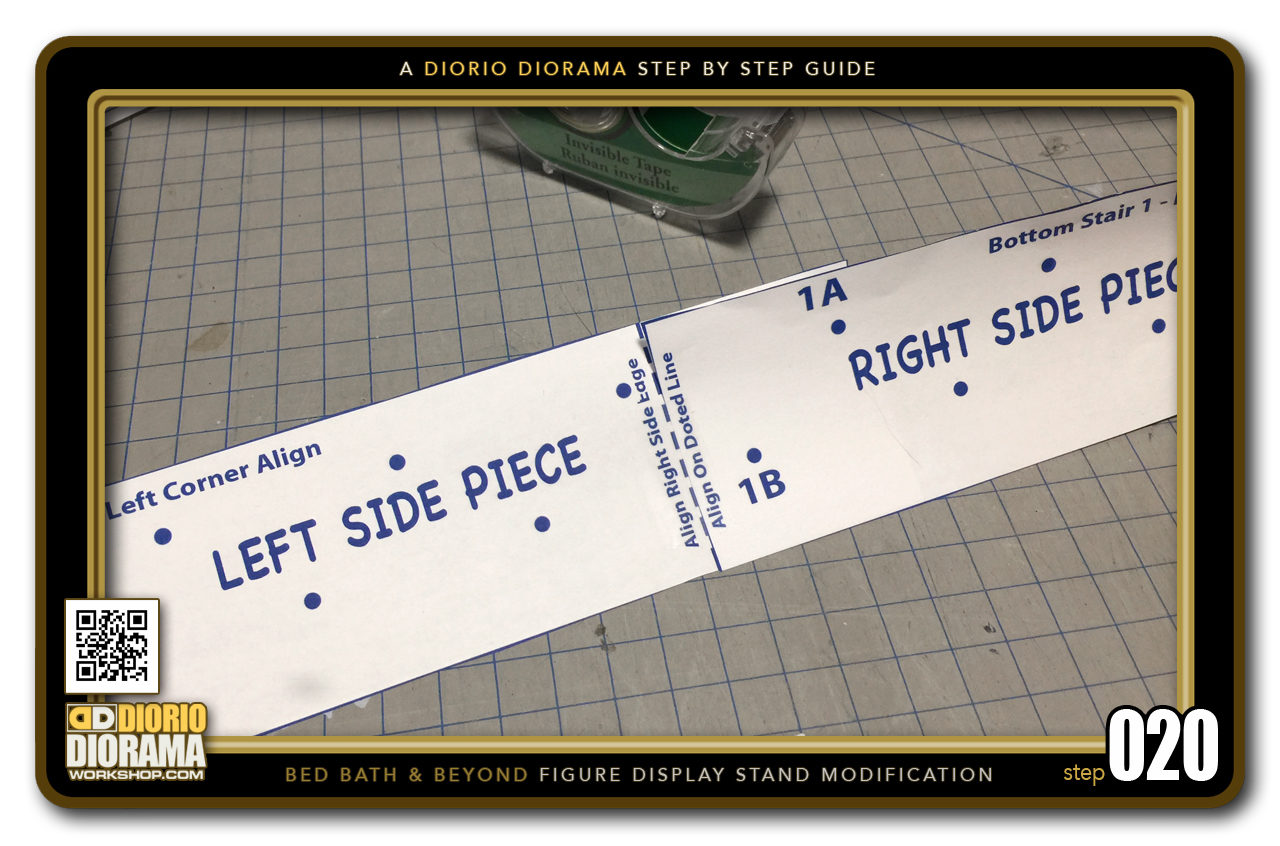
- STEP 020 > You now have the FULL LENGTH template for the BOTTOM STAIR 1.

.
Did you already build this Diorama ? At home or at our Star Wars Celebration Diorama Builders workshop ? Would you like to show it in the site’s GALLERY VISITORS DIORAMAS section, YES ? That is Awesome !!! You can find out all the details on how to email me your photos on the VISITORS SUBMISSIONS INFO page … When I get your photos, I will create your very own page just like this one. You may not realize it but work does inspire others to join in the fun of making Action Figure Dioramas.
.
NOT FOR RESALE ALL Decals, tutorials and artwork are ©FrankDiorio (dioramaworkshop.com) and offered FOR FREE to the fans – that would be you ? so you can build and display my diorama designs in your very own home. I realize I cannot control what one does with my graphics once I place them on the web, I can only ask you as one fan to another, please respect the artist and do not be that jerk who uses my designs and tutorials to build a copy of my work only to sell it on EBAY or trade/sale groups and forums. Thank You. Frank.
.
.
If you have a facebook account, why not join the Official Diorama Builders Fan Club today, simply click the logo link below.
 .
.
Catch up with fellow visitors and exchange stories, read cool interviews with the crew, exchange photos, fun surprises and grab some FAN ONLY merchandise next year at actual future conventions ?
.
©2018 Frank Diorio DioramaWorkshop.Com
.
IF YOU LIKE WHAT YOU SEE, PLEASE SHARE WITH YOUR FRIENDS
USING THE SOCIAL MEDIA BUTTONS BELOW