


As seen at STAR WARS CELEBRATION VII • BESPIN CLOUD CITY DIORAMA BUILDERS
Anaheim, CA, USA from April 16 to 19 2015
pre production Celebration VII DESIGNS & PROTOTYPES
Welcome to the OFFICIAL Star Wars Celebration VII Bespin Cloud City Diorama Builders workshop site featuring my EXCLUSIVE CREW COVERAGE not seen anywhere else on the web.
X
X
Friday, January 30 2015
X
When I started looking deeper at Empire Strikes Back, I was taken aback at just how many different rooms, or sets there are on Bespin. I was gonna have a bigger challenge than I thought but at the same time, knew how much fun and variety this was gonna be both at the show, and for you guys, wanting to build this Cloud City at home.
-
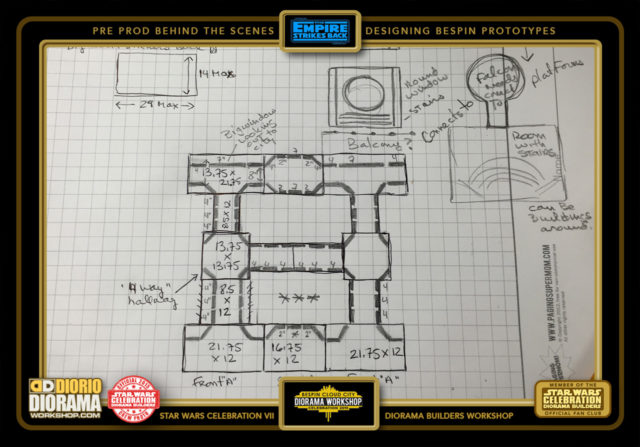
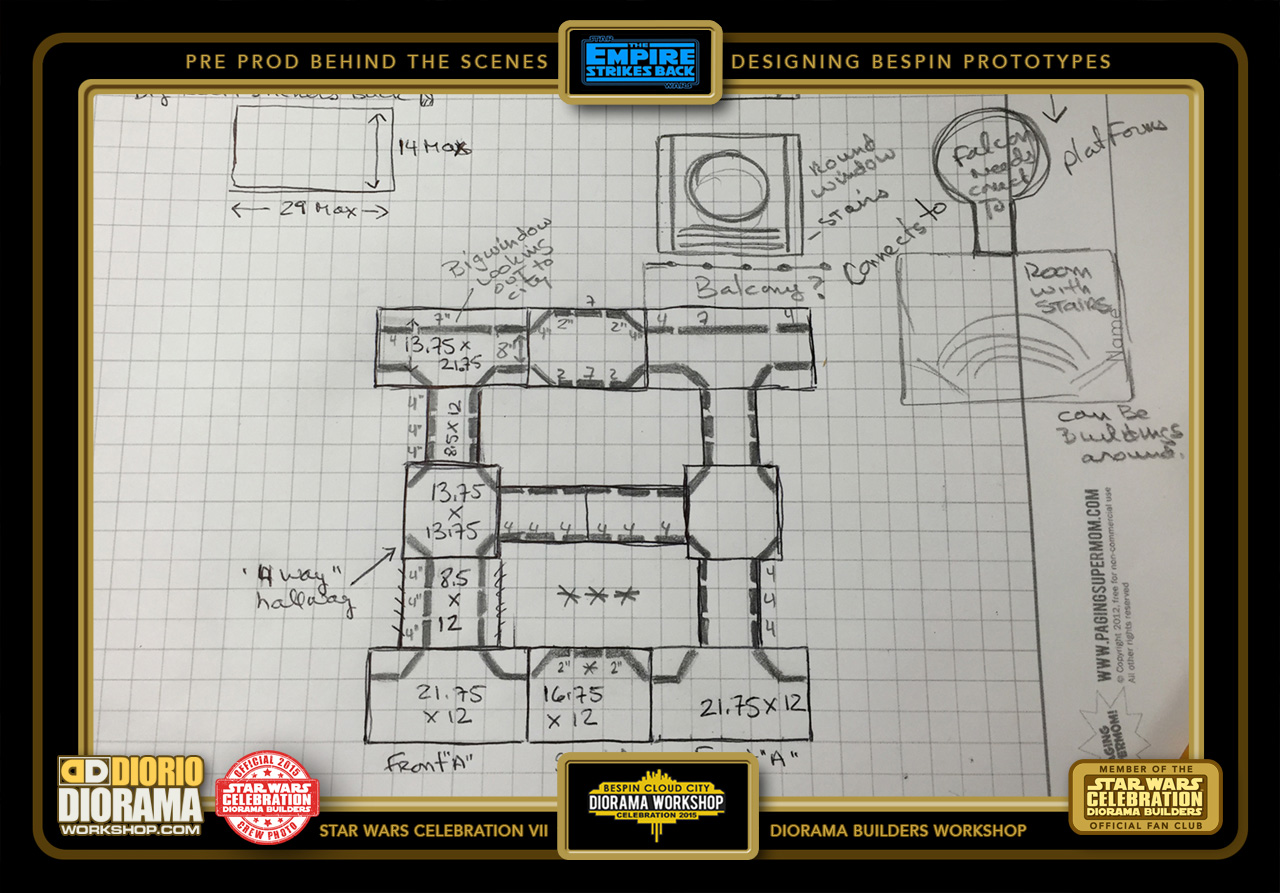
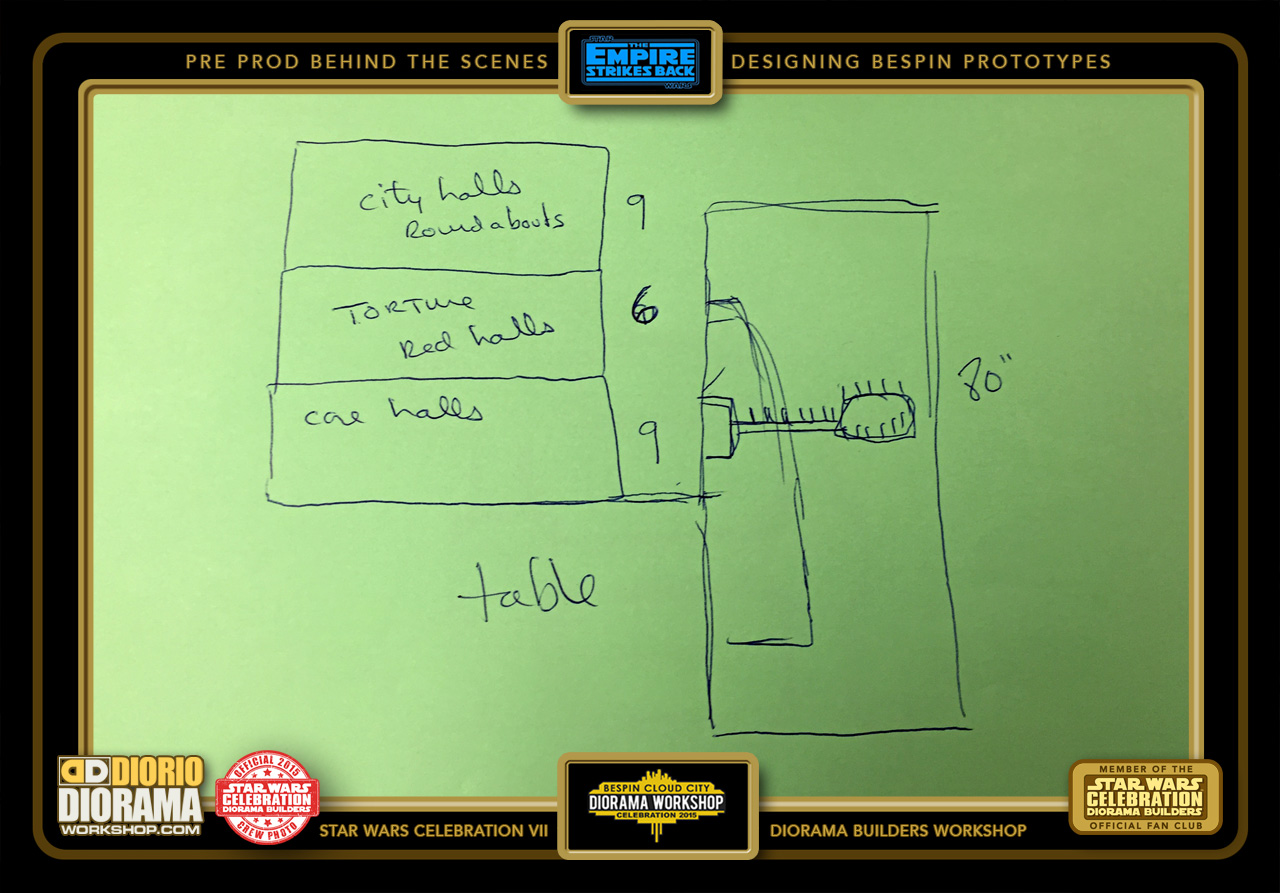
- Here is the first sketch I did on how all the hallways would fit together like Lego bricks. Hallways "A" and "B" styles in the front row. The "C" style hallways connect to those. These are the main copy paste hallways if you will. You can leave them simple walls or add a closet door. The center rows are where the "Roundabout" hallways are placed as you can see through them from the front, rear AND sides. The main "C" hallways connect the "Roundabout's" together in the middle. With halls placed in the front, rear and sides for Celebration. At home the depth and number of sections will obviously vary and depend on your shelf display space. Last but not least, the "A" and "B" rear hallways include walls with windows and, or staircases, that give the film effect. The fan made Skyscrapers that are placed on the far end tables, will be seen through these windows adding lots of depth. Again, for the home scene, you may have to put City Matte Paintings behind the windows due to limited space.
-
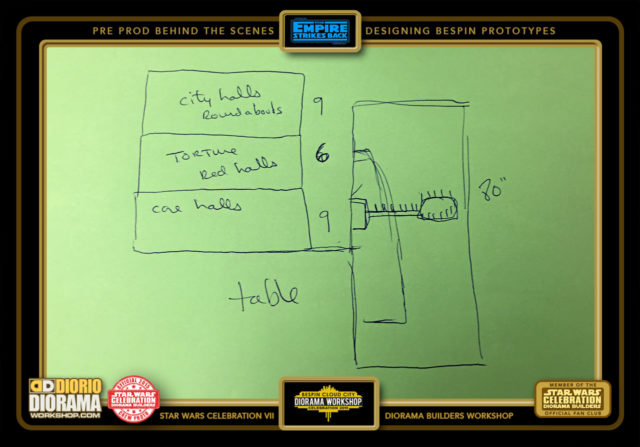
- The idea behind the design is to build like a cake. The bottom layer - Floor 1 - would be the core walls, torture chambers and Ugnaught boilers. Floor 2 would be everything that is painted RED. Including the Torture chambers. Floor 3 would be all the main white hallways, roundabouts and window halls. The core hall would be resting on the tables obviously, and the hole going to the catwalk would coincide with the height of those tables. Since the "box" of the core itself starts at the floor, with 2 tables removed, you will get the effect that the halls go through the weather vane and out to the catwalk. Just like the movie scene when looking from the side view.
-
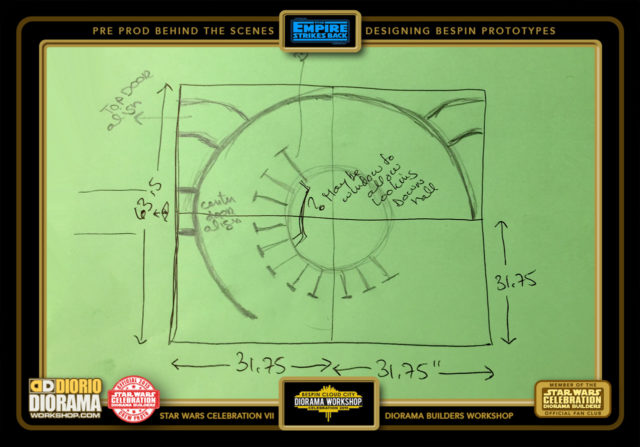
- One of the hallways I was most excited about was the corner round hallways, which would be divided in 4 to allow the most fans to participate in this build. This is the room with the Stained Glass walls and I had found transparent paper etc... In the end, I didn't have time to design this before getting on the plane, and it's just too complex to do in the time we had on Set Up. Don't worry though, I will finish the design and give you EVERYTHING you will need to make this diorama section, blueprints, decals and all. Will be in the Workshop menu when I get the time to make it.

-
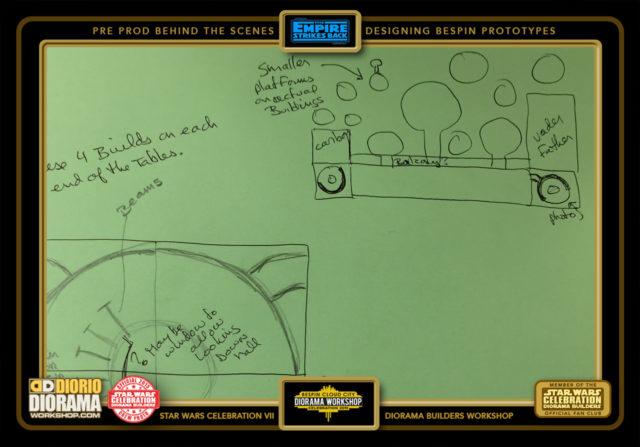
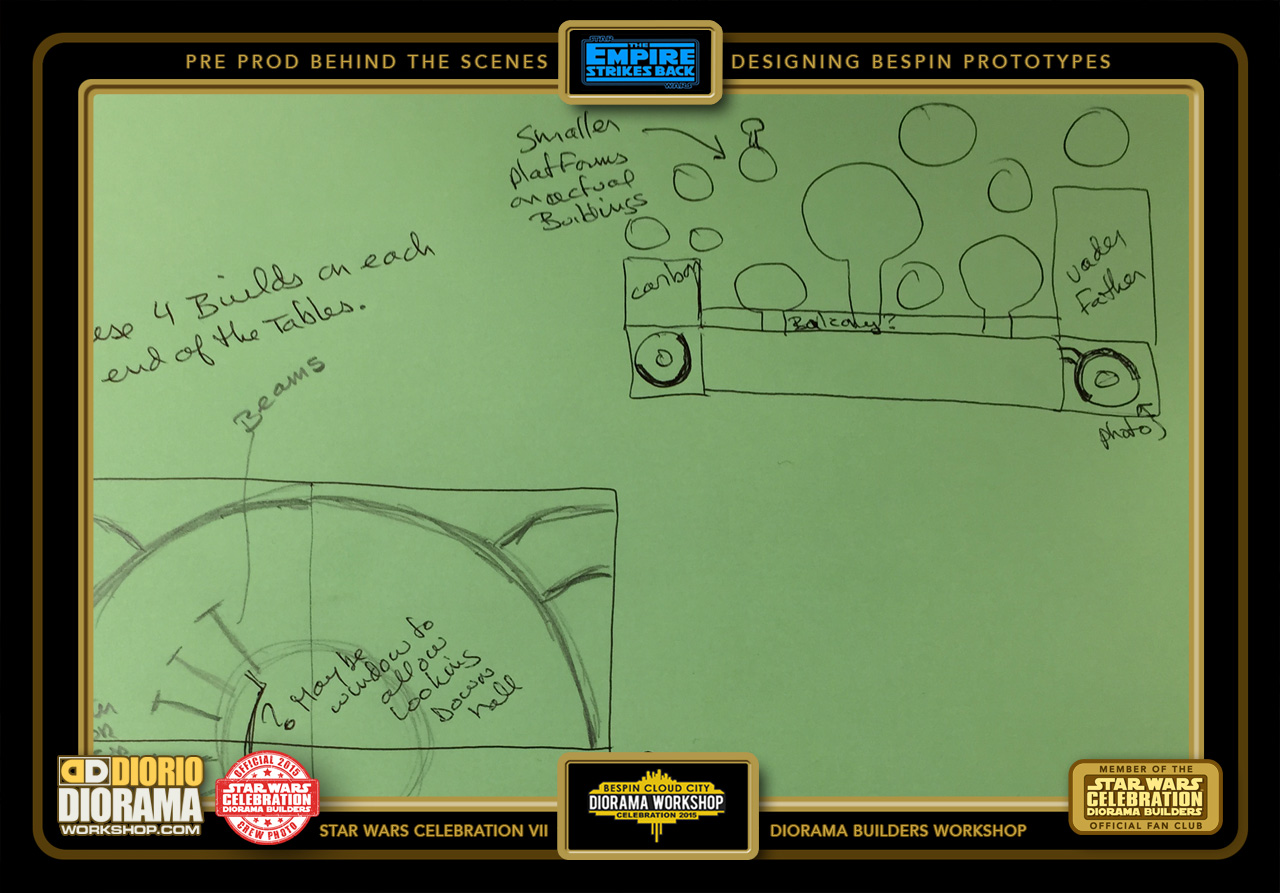
- The outside design would consist of rows of platforms that connect to the interior halls and lined with balconies that overlook the ship landing platforms like Boba Fett's Slave 1.
-
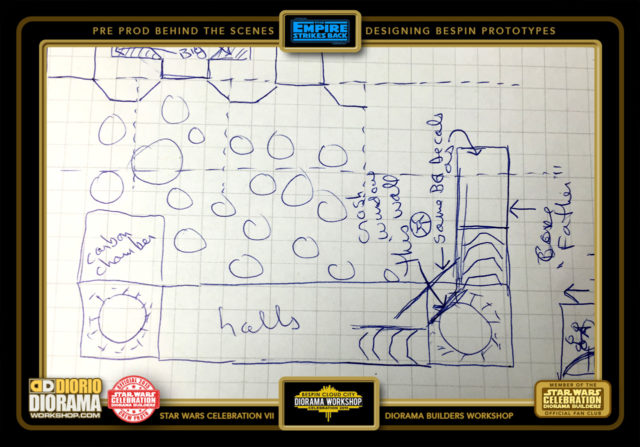
- Here is a bird's eye view of the final layout... in the bottom corners were the round hallways, above that on the left, Carbon Chamber and on the opposite end, Vader's Father Reactor Core catwalk. And above it all... Skyscrapers of all sizes and heights. I know, it's SO detailed, you can just see it all LOL.

-
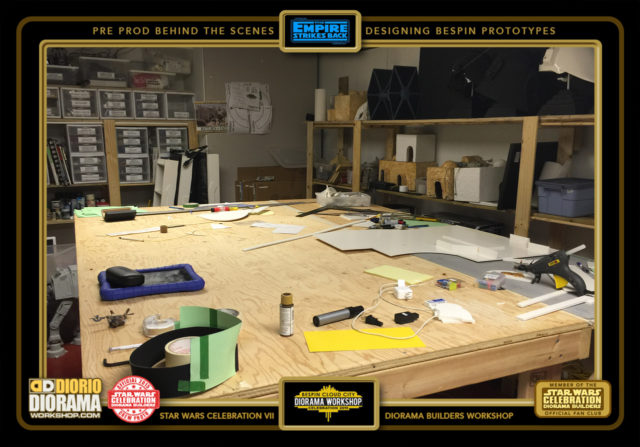
- My wonderfull Montreal Workshop. Table semi clean, let's start building prototypes...

-
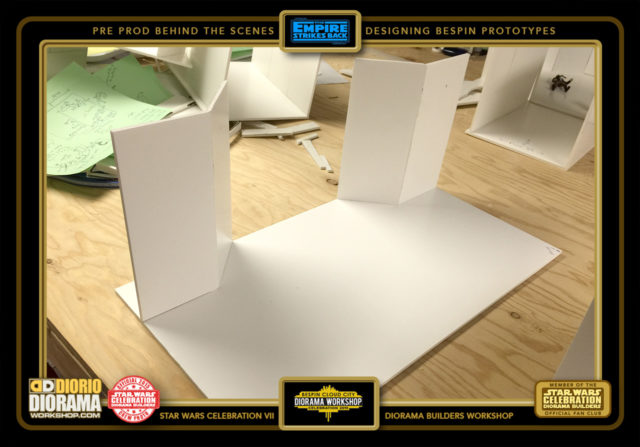
- My first prototype built, you can't get more simple then this, perfect for the padawan or older beginners who never really built a diorama yet. This Hallway "A" Front (notice it has no walls in the front to block the sideways view when placed on a shelf) has a floor base and 2x 4" wall panels. The details that you can put on these are either FULL "3D" wall textures, or, 2X frame borders.

-
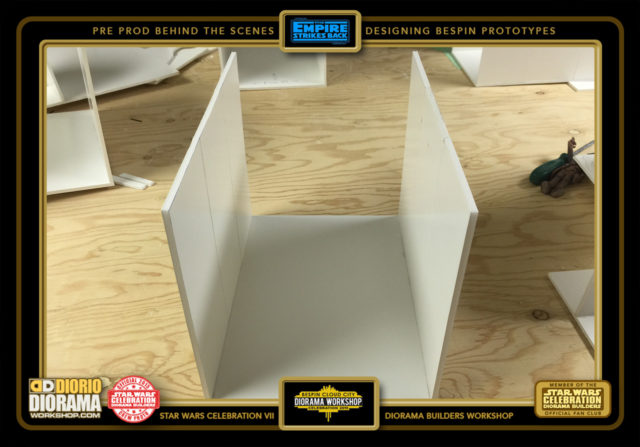
- The second main prototype built, is another simple enough hallway, perfect for the padawan or older beginners who never really built a diorama yet. Plus if you want to go more detailed, you have the option to ADD a door frame on either or both sides of the walls. See the photo with Lando to understand what I am talking about. This Hallway "C" has a floor base, ceiling (not pictured) and 6x 4" wall panels. The details that you can put on these are either FULL "3D" wall textures, or, 2X frame borders or Doors. See the blueprints (coming soon) in the WORKSHOP menu for more details on these options.

-

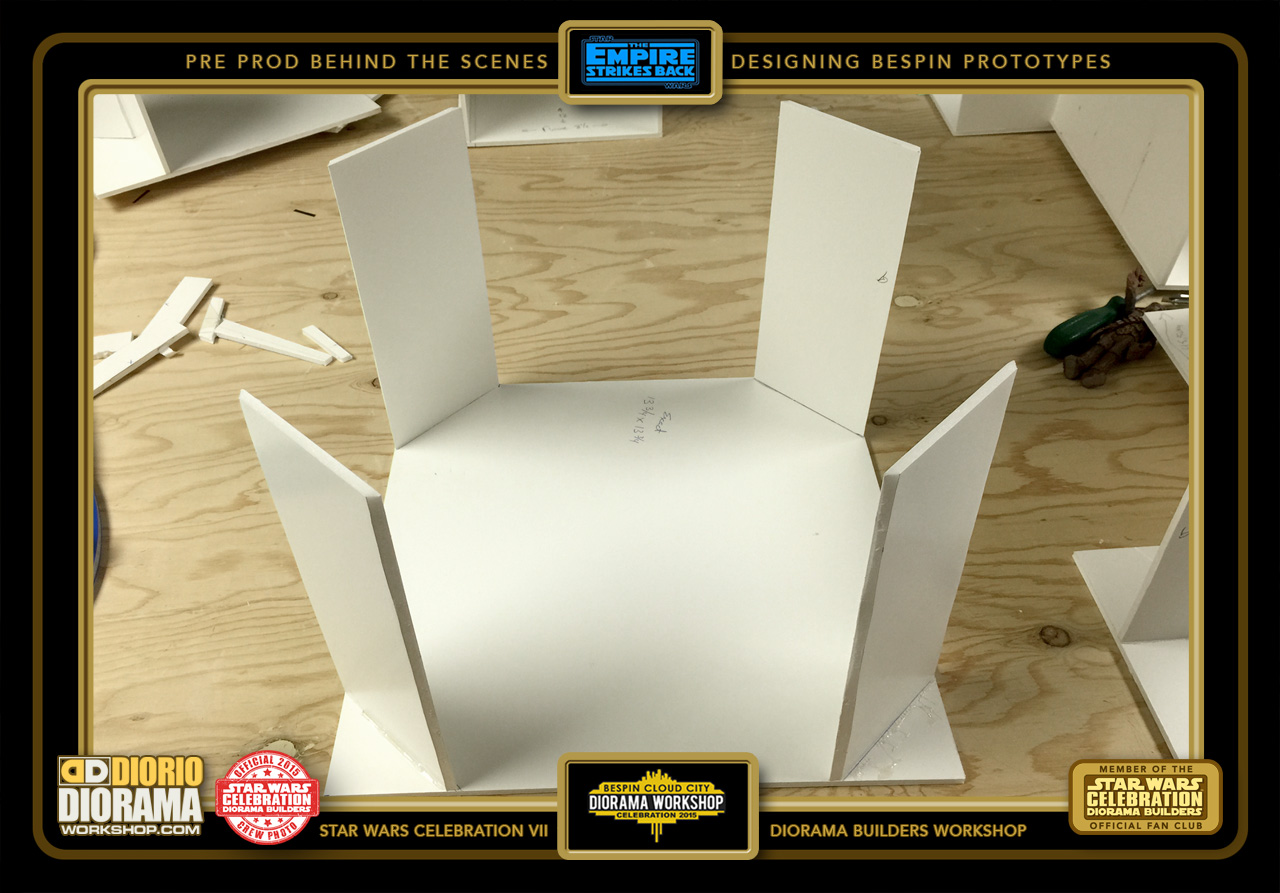
- The next prototype built, is another simple enough hallway, perfect for the padawan or older beginners who never really built a diorama yet. Plus if you want to go more detailed, you have the option to ADD floor tiles and ceiling lights. Some of these roundabouts in the film have center sculpture. You can copy the film versions or use your imagination to do so. This "Roundabout" Hallway has a floor base, ceiling (not pictured) and 4x 4" wall panels. The details that you can put on these are either FULL "3D" wall textures, or, 2X frame borders. See the blueprints (coming soon) in the WORKSHOP menu for more details on these options.
-
- zxzzzz

-
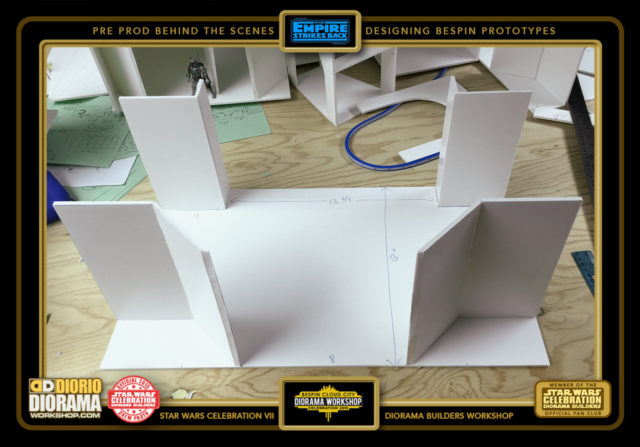
- One of the next prototypes built, is another Medium level hallway, since you have extra walls, windows and stair possibilities (see other photo) it's good for the builders who want to spend a little more time at the workshop. Plus if you want to go more detailed, you have the option to ADD floor tiles and ceiling lights. For the convention the windows will reveal the actual skyscrapers built in the BG. For home use, because of space limitations, City landscape prints maybe more usefull. This "A" style Rear Hallway has a floor base, ceiling (not pictured) and various 4" wall panels. You decide just what shape you want the corners to be. This is just an example of what you can do. The details that you can put on these are either FULL "3D" wall textures, or, 2X frame borders. See the blueprints (coming soon) in the WORKSHOP menu for more details on these options.

-
- Here is the same "A" style Rear prototype built, but with added window and staircase options. This adds a little challenge for the builders. You can put only the windows, or a square window, or stairs with no window. Use your imagination or film reference photos if yu want to be movie accurate. This "A " Style Rear Hallway has a floor base, ceiling (not pictured) and various 4" wall panels depending if you want to copy my idea or do one of your own. The details that you can put on these are either FULL "3D" wall textures, or, 2X frame borders. See the blueprints (coming soon) in the WORKSHOP menu for more details on these options.

-
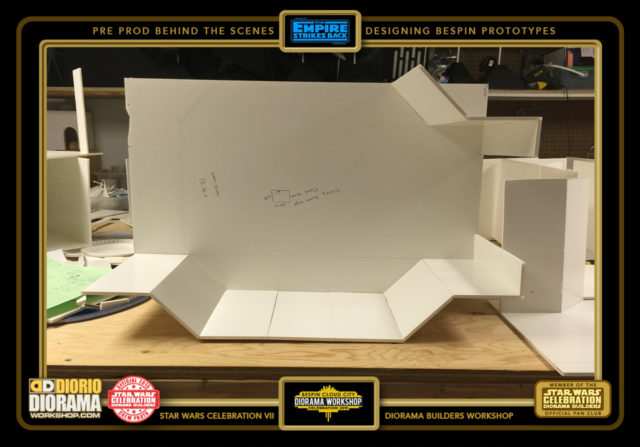
- The next Rear prototype built, is another simple enough hallway, perfect for the padawan or older beginners who never really built a diorama yet. or it can be little more chalenging if you decide to cut out some bay windows. You can if you want to go more detailed, have the option to ADD floor tiles. This "B" Style Rear Hallway has a floor base, ceiling (not pictured) and 1x16 " wall panel. The details that you can put on these are either FULL "3D" wall textures, or, 2X frame borders, or cut out windows. See the blueprints (coming soon) in the WORKSHOP menu for more details on these options.

-
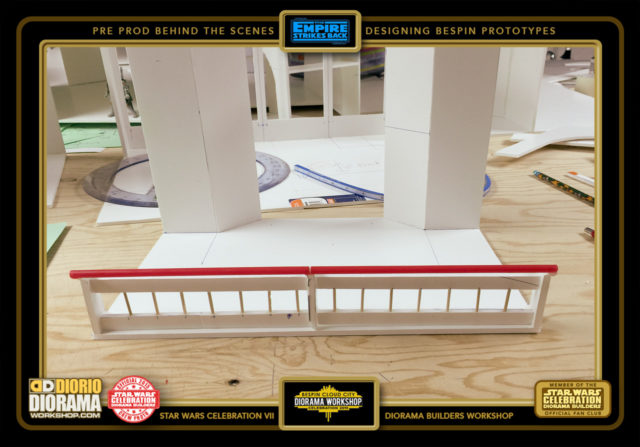
- One of the TOP level prototypes built, is like a mini model kit, perfect for Medium Level builders who enjoy cutting a lot of tiny toothpics detail pieces and spending hours gluing and painting straws to look like metal pipes. This "Balcony" has a floor base, ceiling (not pictured) and 4x 4" wall panels and the banisters in the front. See the blueprints (coming soon) in the WORKSHOP menu for more details on these options. The rear of the balcony look back towards the inside of the Bespin Halls.

-
- n the lower levels you will find the Ugnaut Boiler Rooms. These are Medium skill Level prototypes build, with lots of various angles to make it movie accurate. The details that you will use for these wall textures is corrugaded cardboard to make it look like metal sheets. See the blueprints (coming soon) in the WORKSHOP menu for more details on these options.
-

- One of the Advanced Level prototypes built, is more like a model kit, perfect for the Jedi Masters who enjoy cutting a lot of tiny detail pieces and spending hours gluing and painting rusty colored walls. This "Torture" cell room has a floor base, ceiling (not pictured) and lots of 4" wall panels. The details that you will use for these wall textures is corrugaded cardboard to make it look like metal sheets. See the blueprints (coming soon) in the WORKSHOP menu for more details on these options.

-
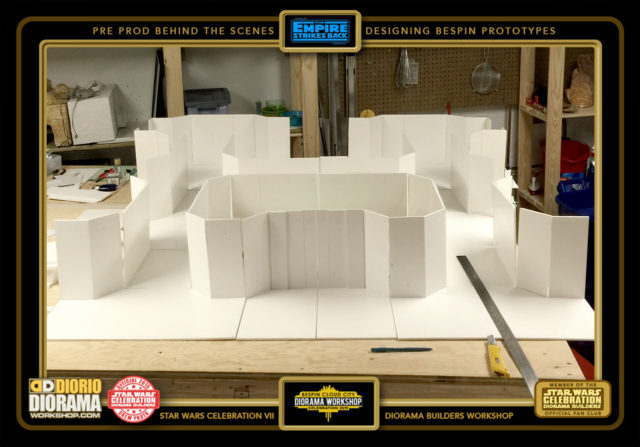
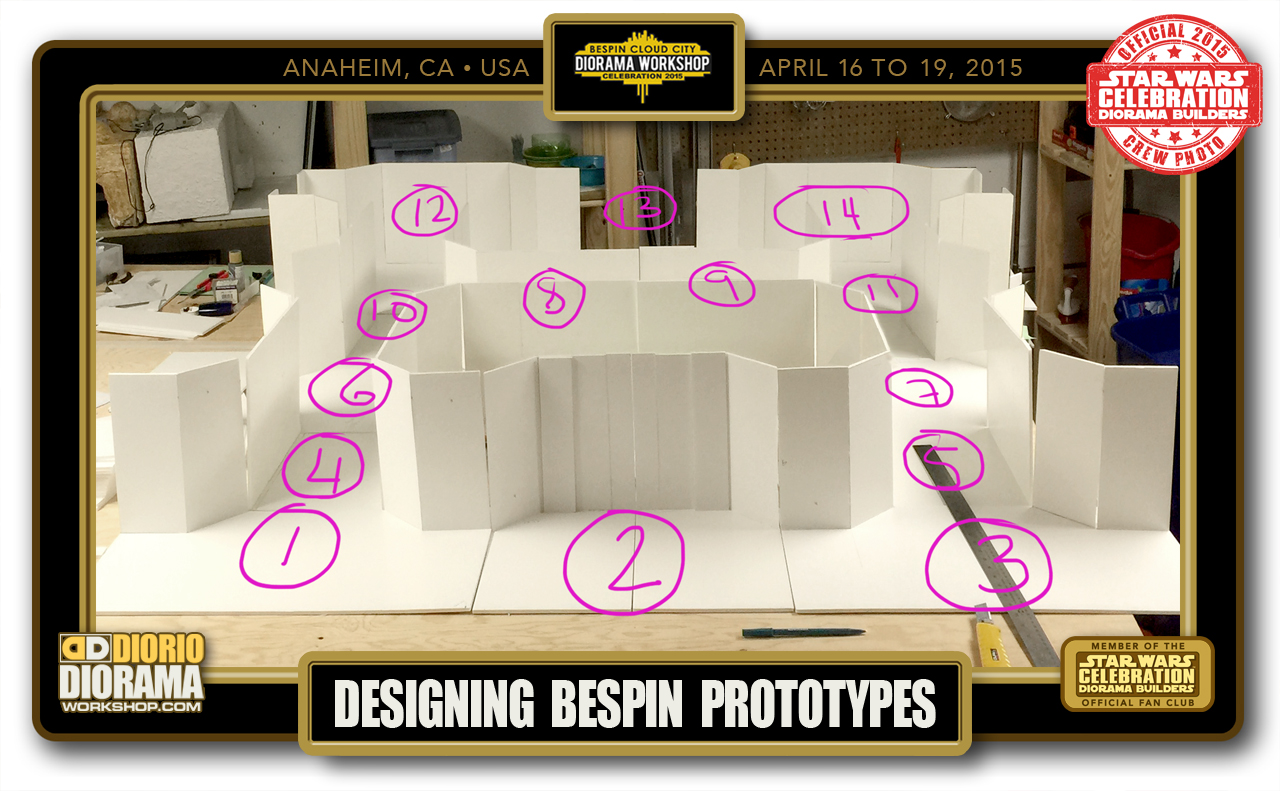
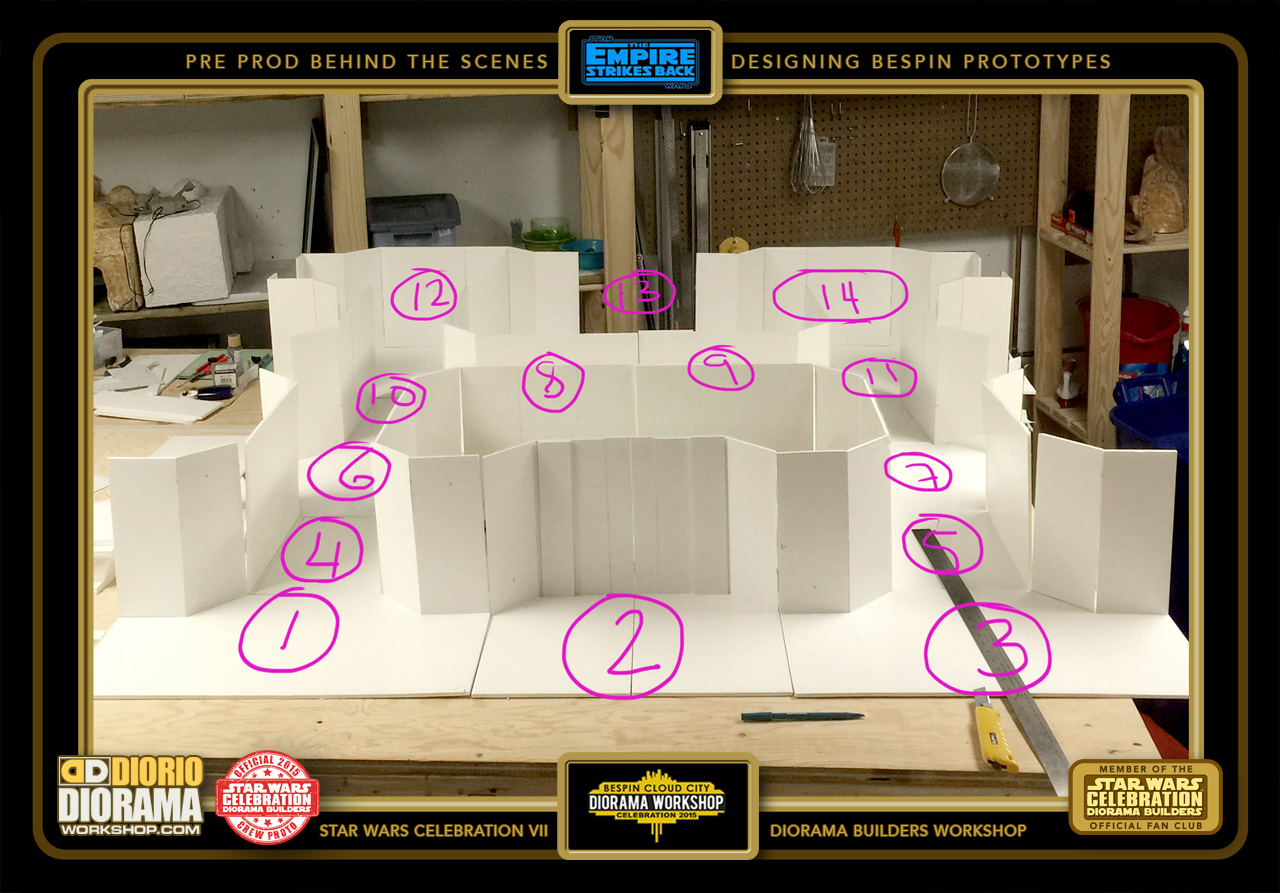
- Here is a clean bird's eye view of how all the hall section connect together to make the Bespin Diorama.

-
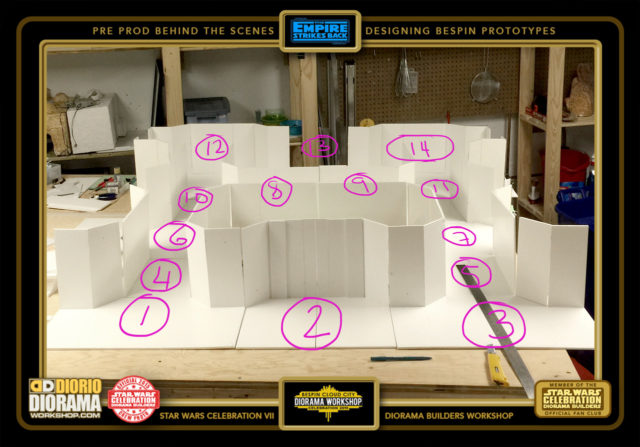
- Here is a quick way for you to understand the builds. 1, 3 are the "A" Style Front hallways and 12, 14 "A" Style Rear. 2 is the "B" Style Front hallways and 13 the "B" Style Rear. 4,5,8,9,10 & 11 "C" Style main hallways. 10 & 11 are the "Roundabout" connecting hallways. 2 can have window or door to a closet or dining room. 12, 13 & 14 can have window details.
-
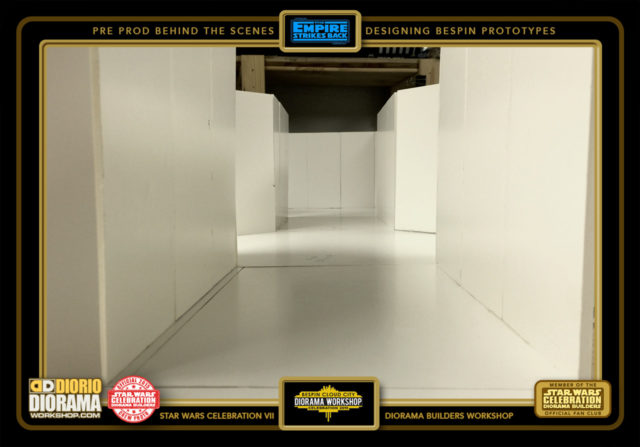
- And here you go, the view of what people will see at the show when looking through the front layer of hallways. Hallways "C" are on the sides and you can see the "Roundabout" that turns left and right and the "A" style hallway all the way in back. If you choose to add a windo to the rear wall, then you would see skyscrapers behind that.

-
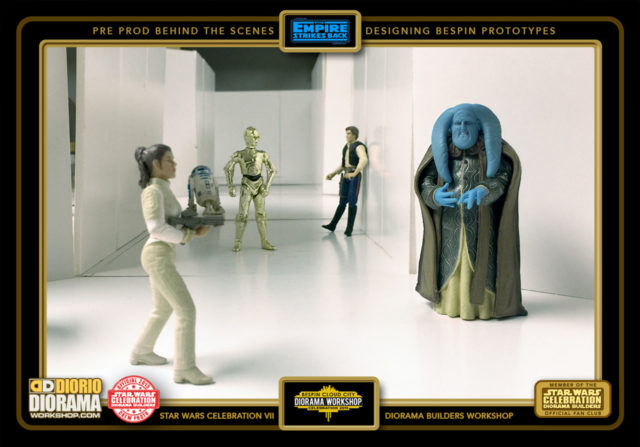
- No paint or wall textures yet, but add some Hasbro figures, and you can picture how Bespin will come to life.

-
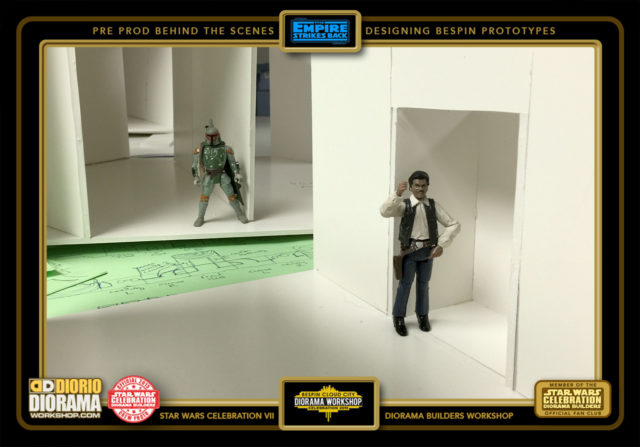
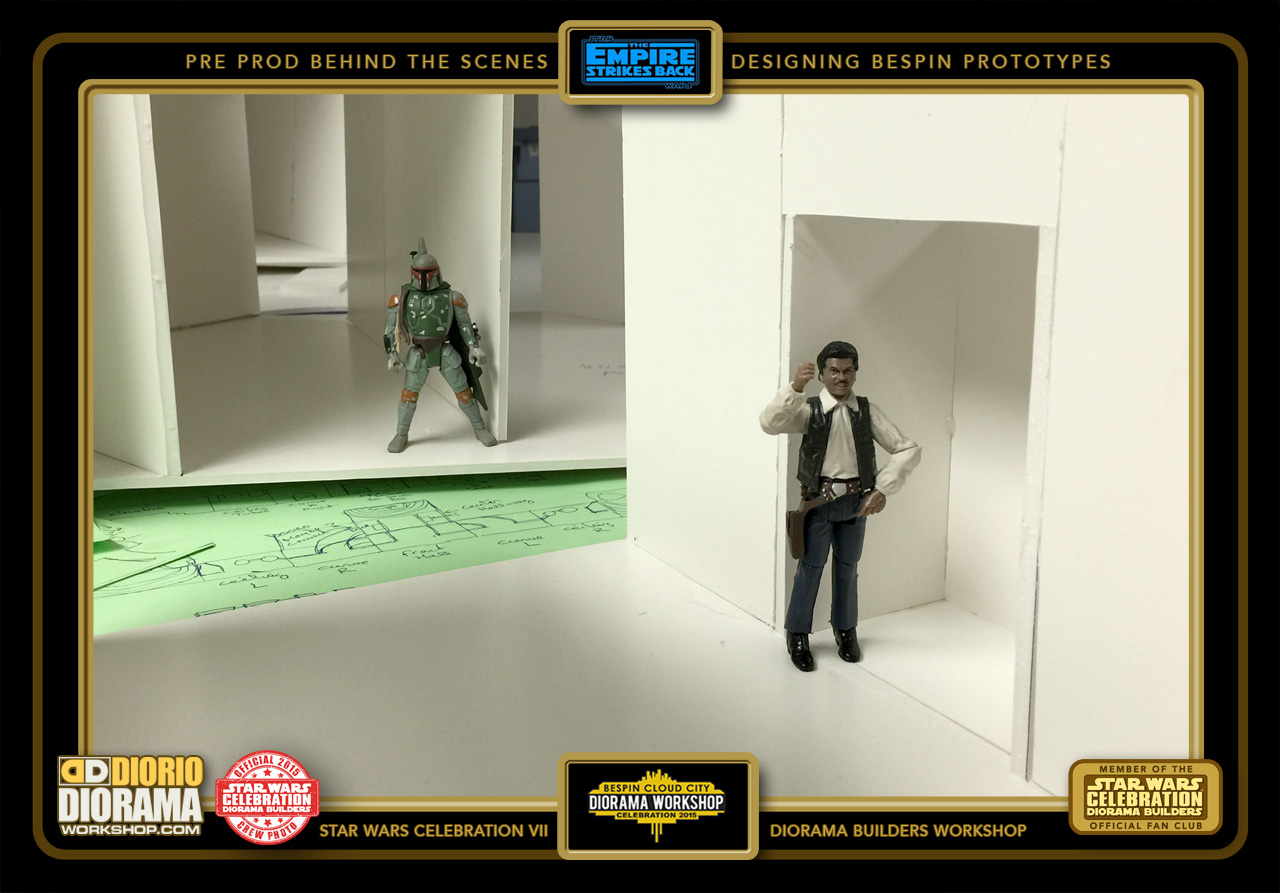
- The man of the hour himself Lando (don't tell him Boba Fett is sneaking up on him) standing by a doorframe option that you can build for your "C" Style Hallways. If you don't want to spend the time to do a door, you can leave this wall panel full floor to ceiling and add foamie details of your choice.
-
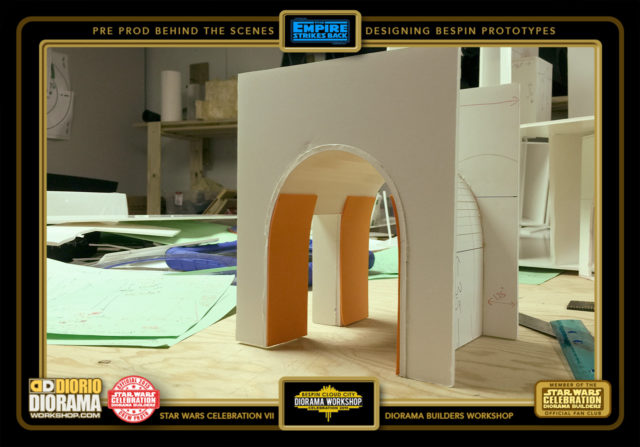
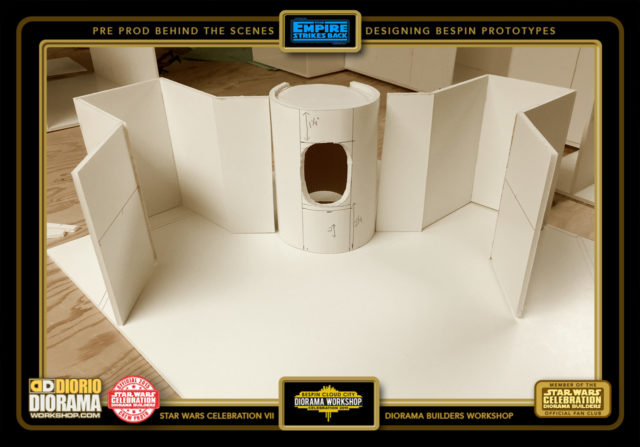
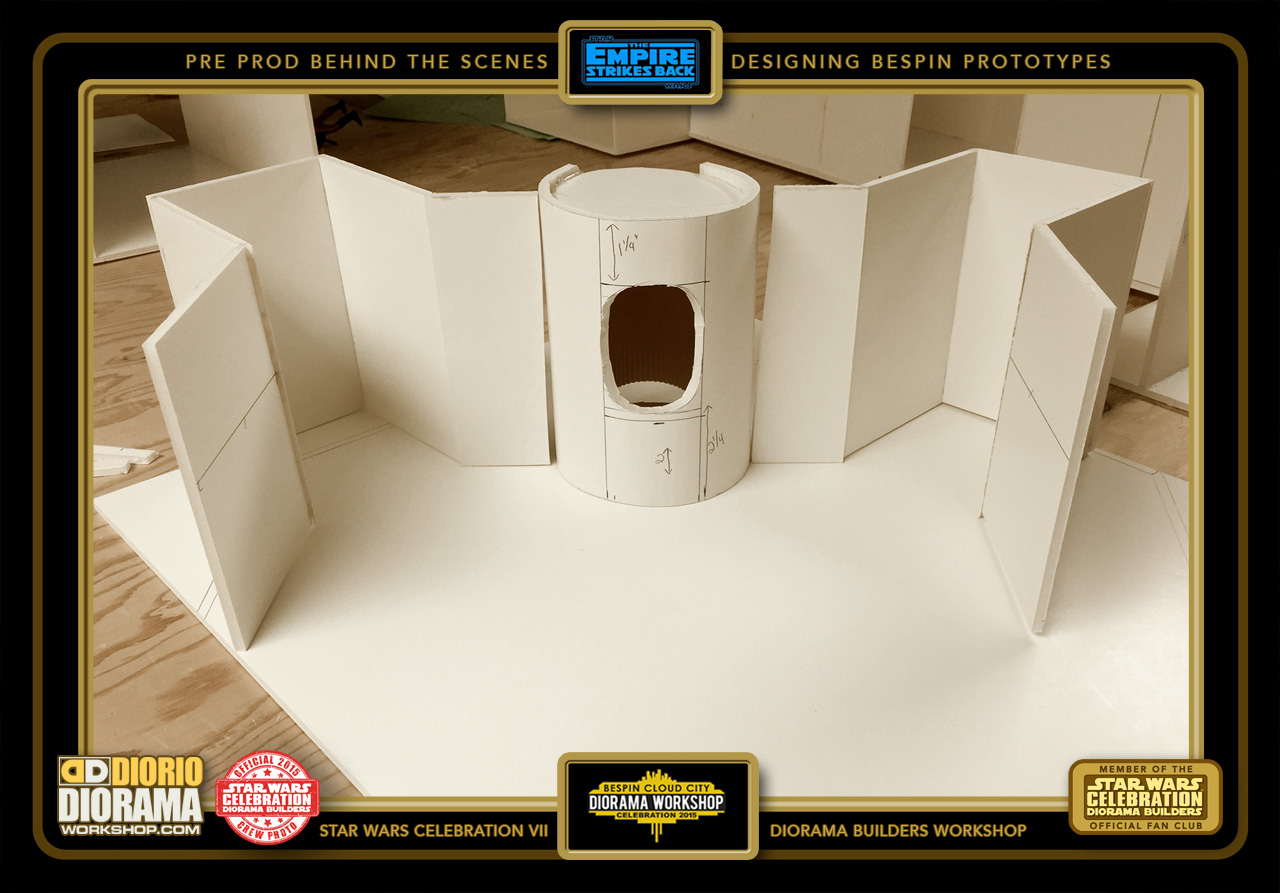
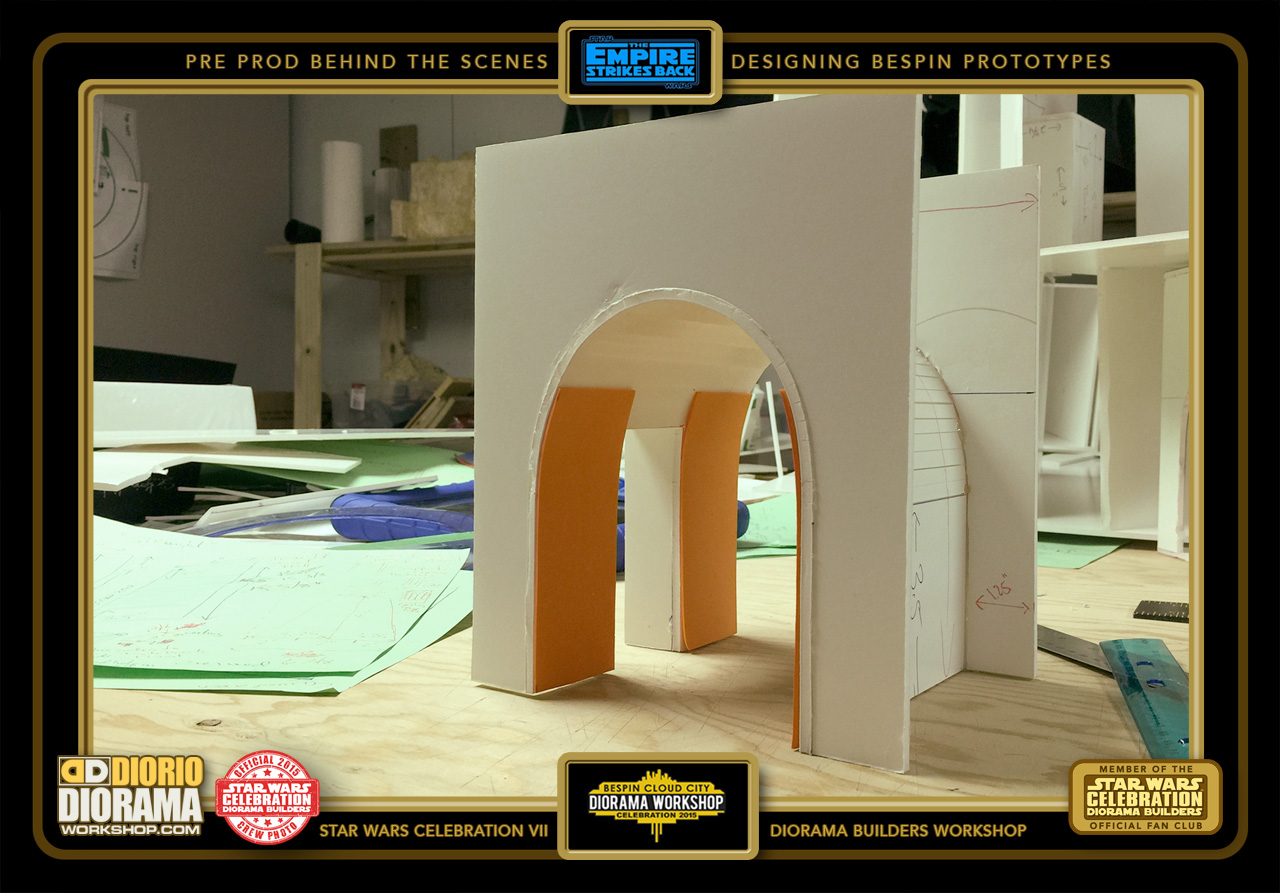
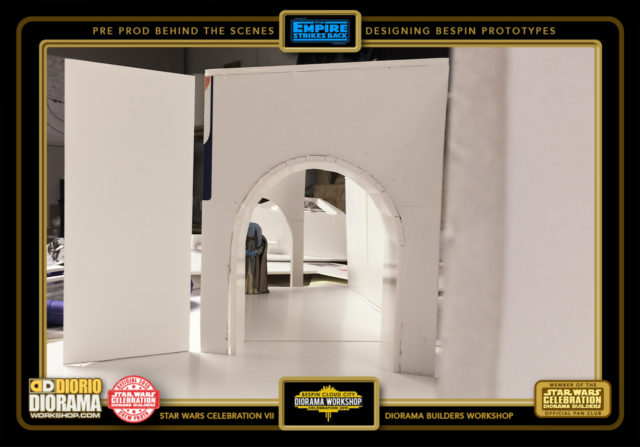
- The last prototype I was able to do just one day before going to California, was the "CURVED" archway. You can have it be just a hallway or you can build a door in the center walls, one side or both. It's all up to your imagination.
-

- A quick shot from behind the windows. Looking COOL, At the convention, you will have the skyscrapers placed between the Diorama and the camera.
-

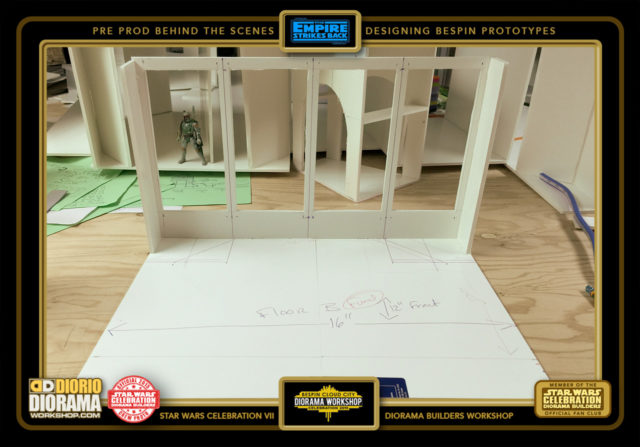
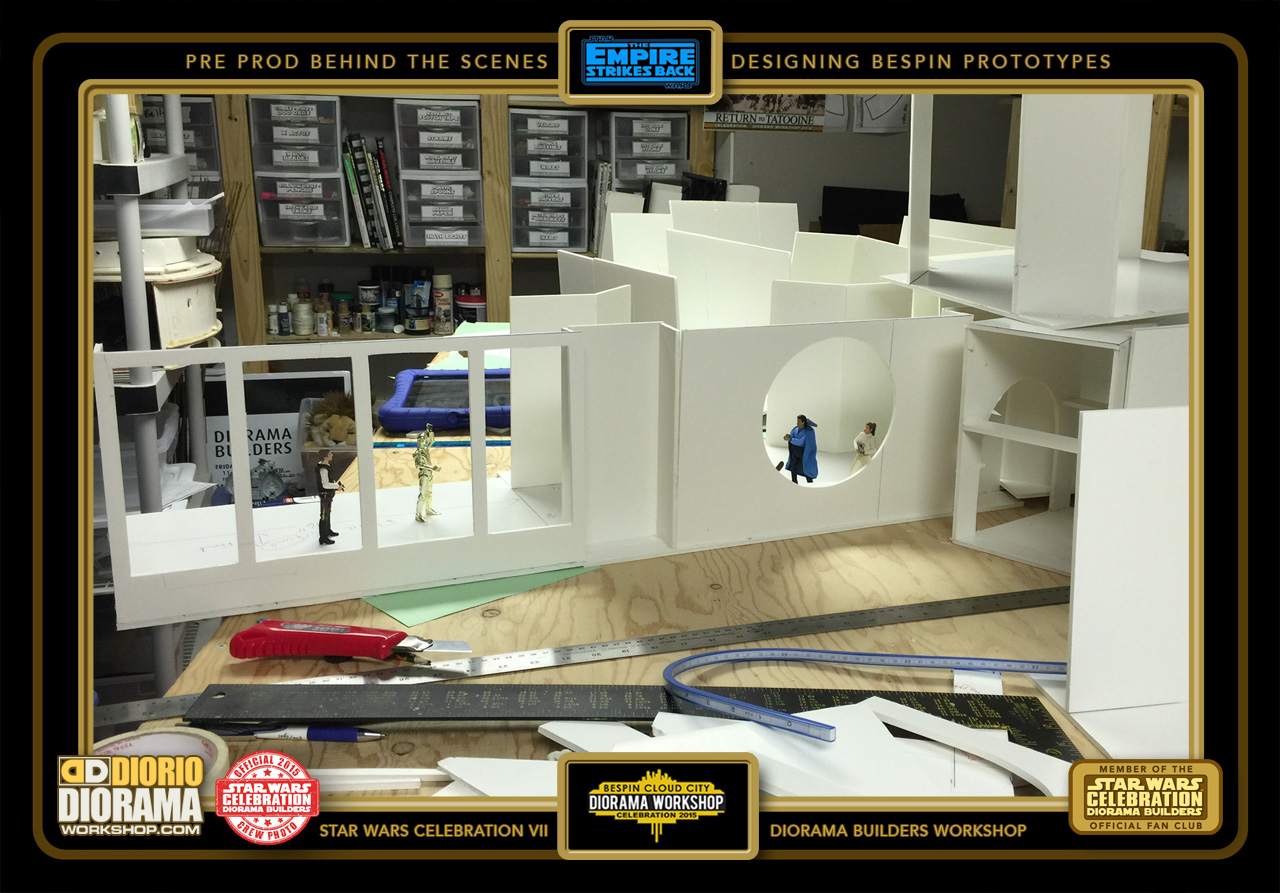
- Here I am trying to figure out the accurate dimension for Lei and Han's hotel room. Each of the little pieces would be a tall wall obviously.
-
- The design makes it so much fun, just like LEGO, you can place your pieces almost anywhere and when you look inside, it just makes you smile 🙂

-
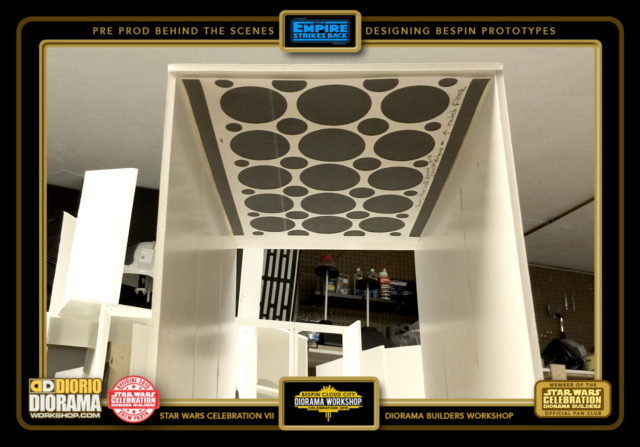
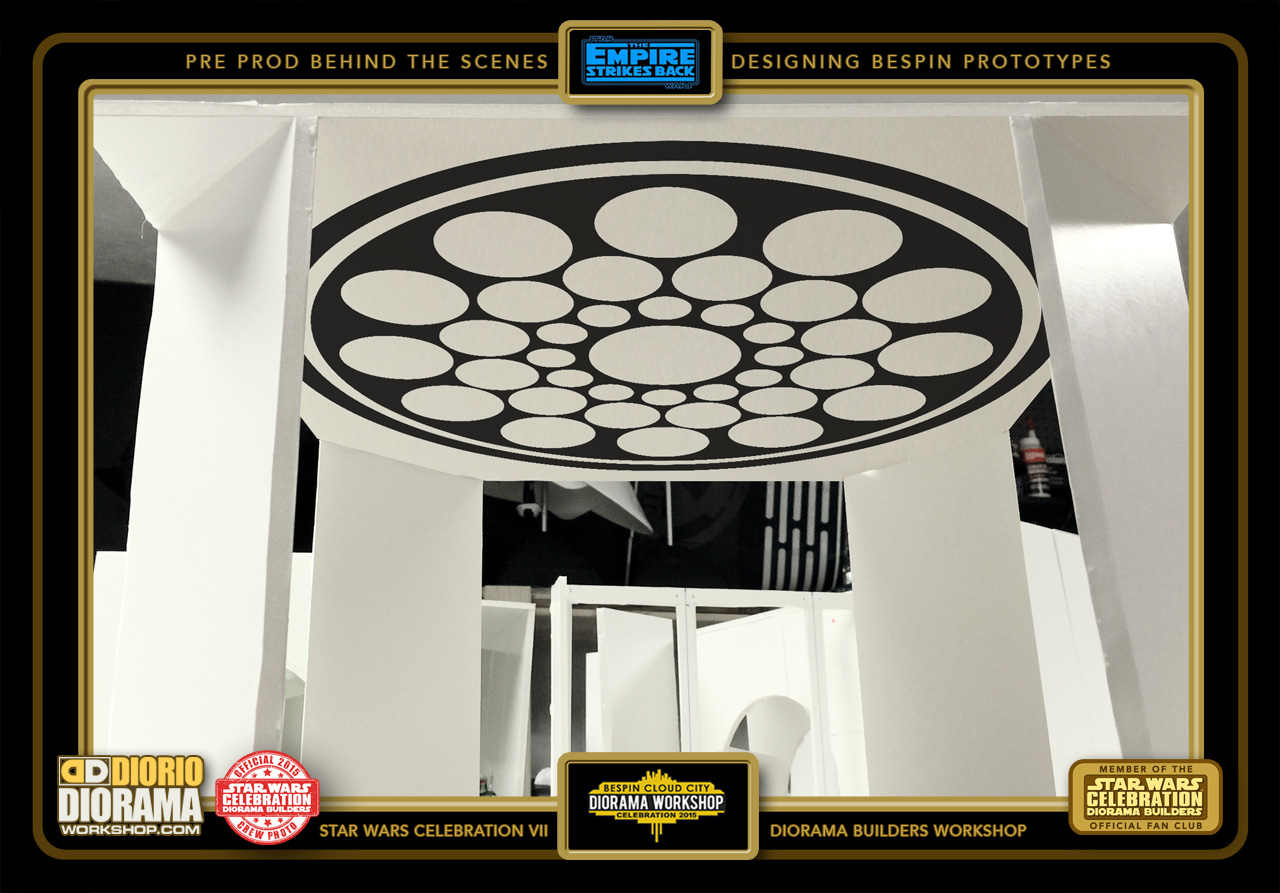
- With this angle you can see the skylight details that need to be cut out. Using LED lights, and transparent film with wax paper will really give you a movie accurate look.

-
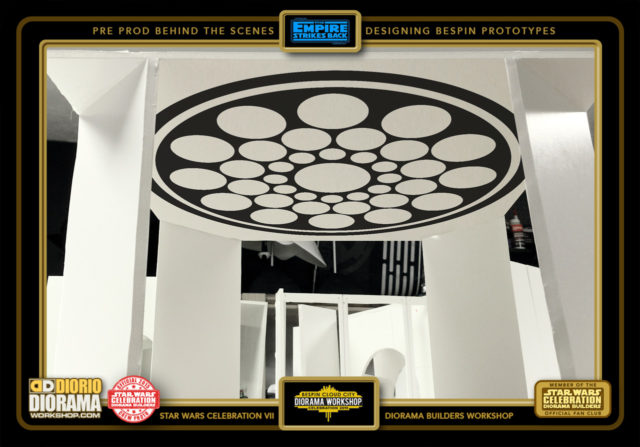
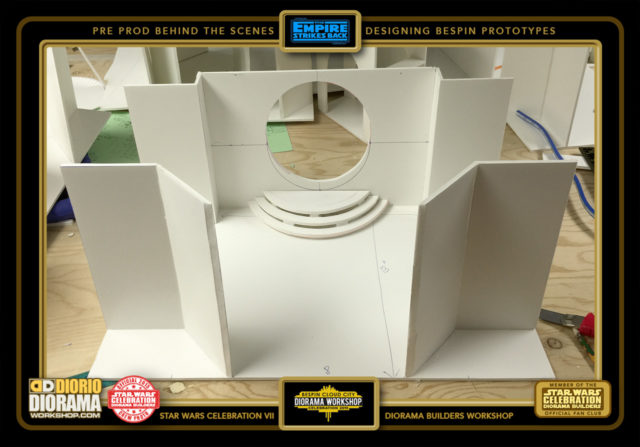
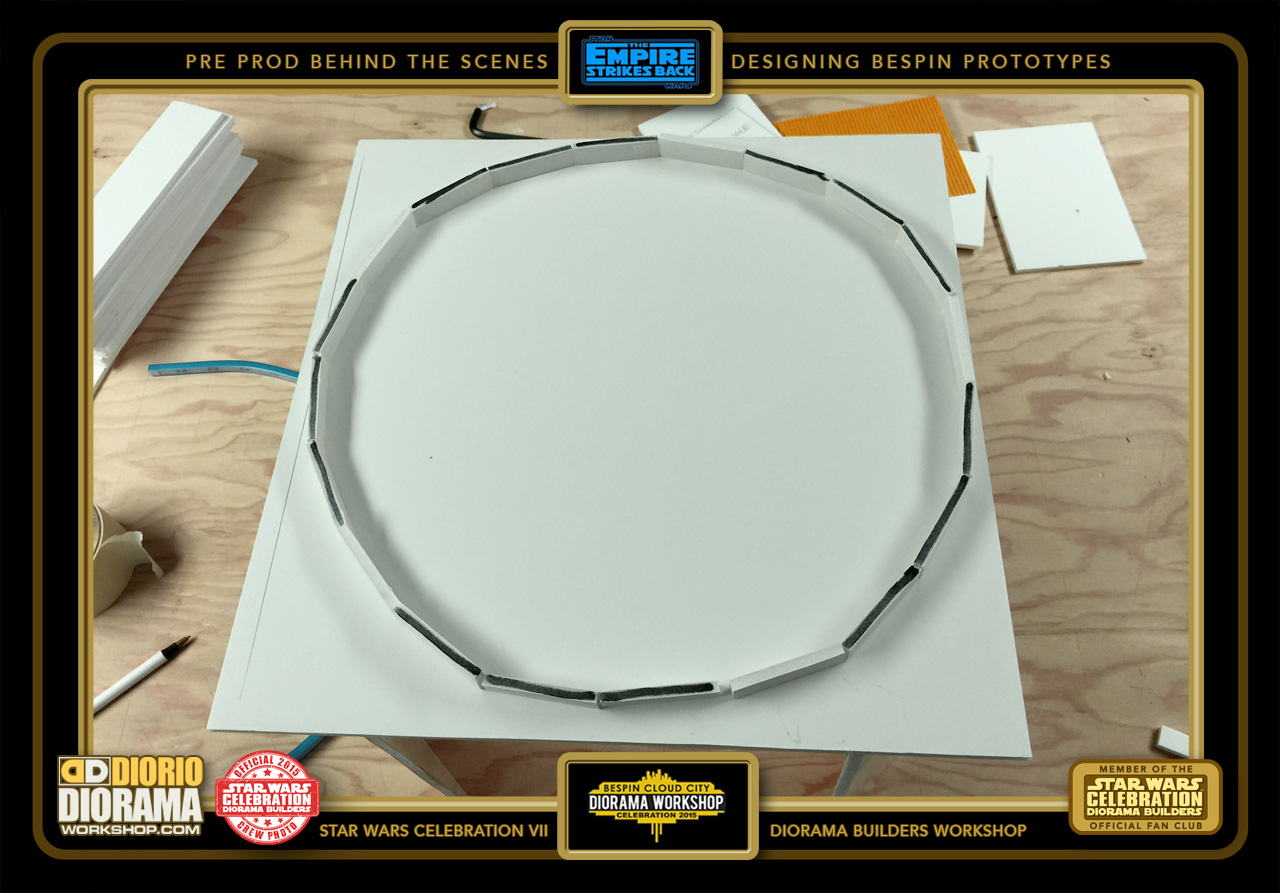
- This angle shows us the template details for the "Roundabout's" skylight. This will be available in the Workshop menu for home printing so that you can either just glue it as details or as a guide to cut out the circles and place LED lights in your diorama.
-
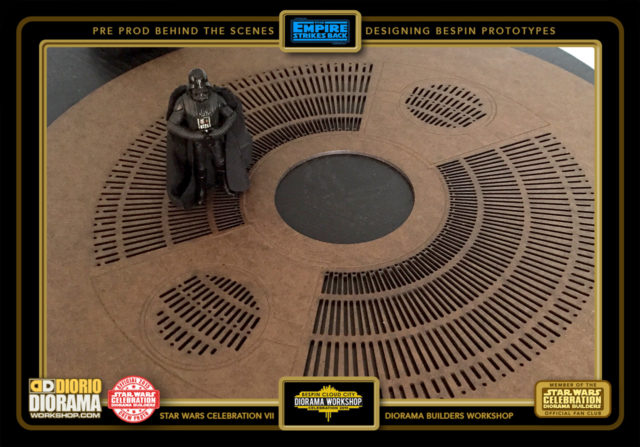
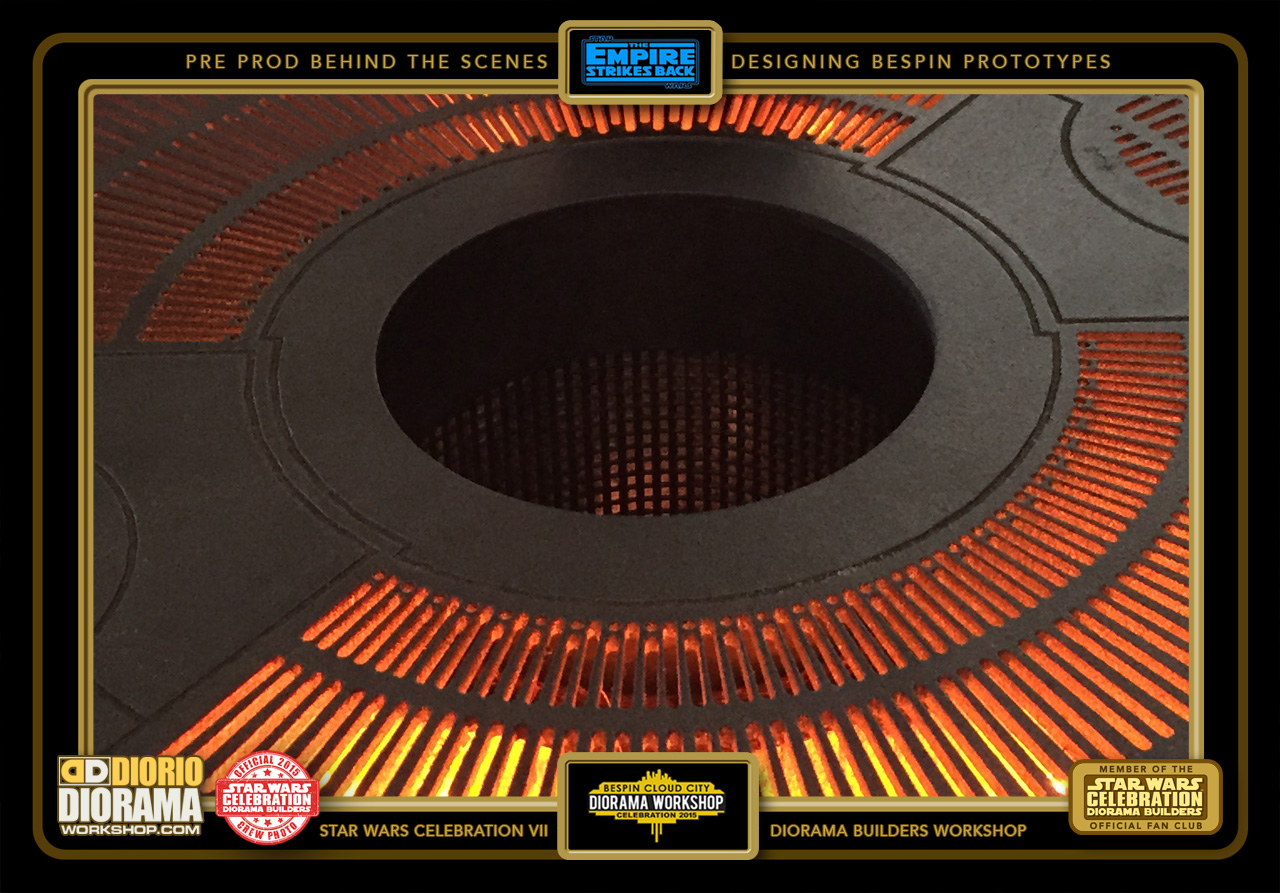
- A close up of the Carbon Chamber floor. It would be impossible to cut out all these tiny shapes with an Xacto Blade. Unless you have a 3D printer at home, if you want lights, Jeff is a great guy who can make one for you at decent price. you can write directly to him Laserama@live.com to find out more info and pricing.

-
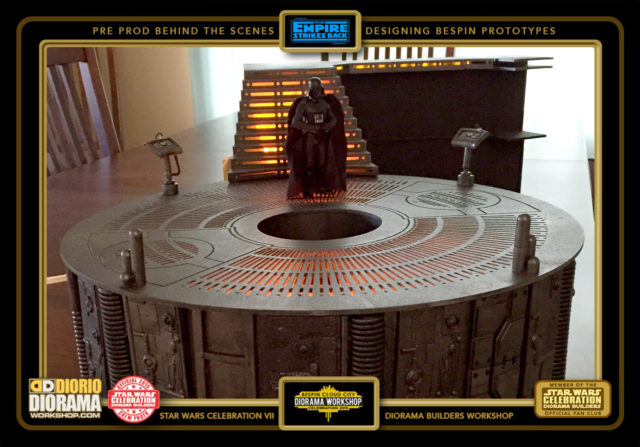
- The jewel centerpiece of Bespin, The Carbon Chamber. Jamie decided that since we are short on time, he would bring this core element from his house that his friend Jeff made for him. Of course it's all machine cut which would be impossible for you to do at home without the machine, so I will be doing a NEW Deluxe version using Decals available soon in through the WORKSHOP menu.

-
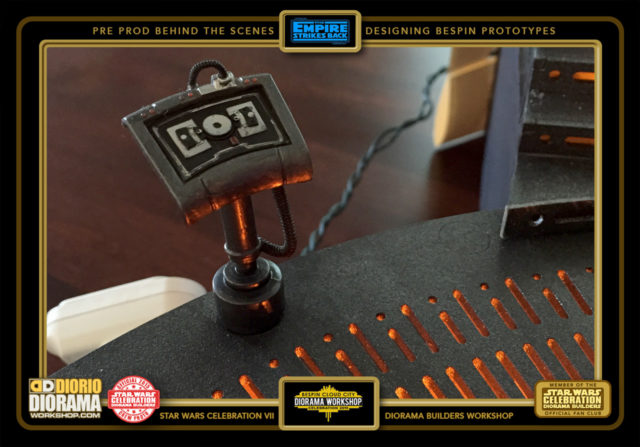
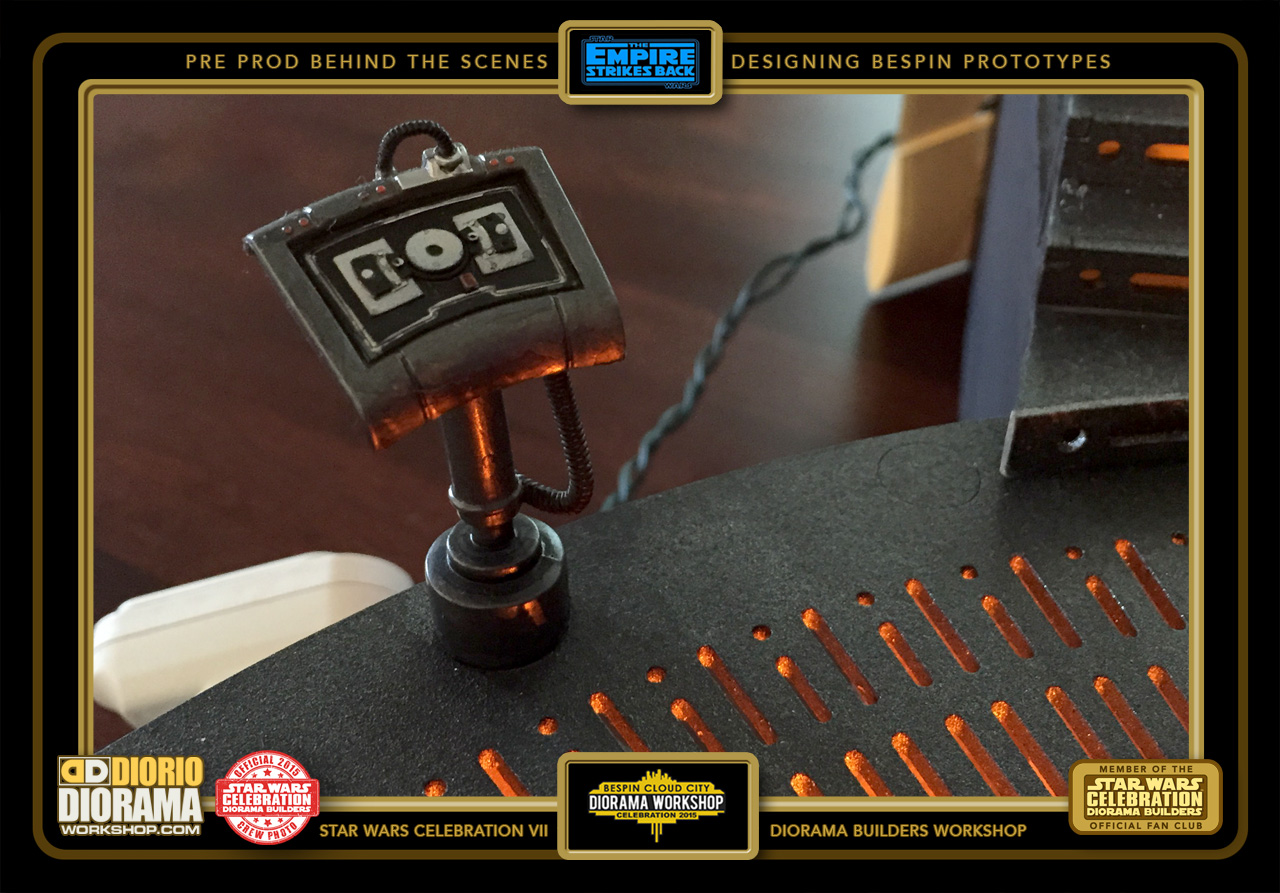
- Close up of one of the Hasbro ugnaught consoles that was attached to the Carbon Freeze base.
-
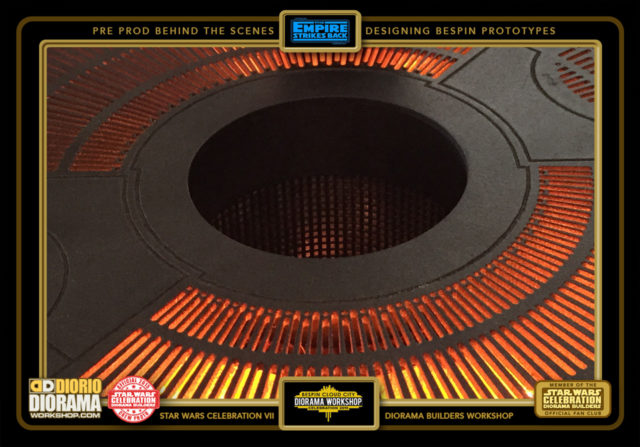
- Looking VERY VERY COOL with the orange lights shining through. This level of detail would be really hard cutting in Foamcore or Cardboard even.
-
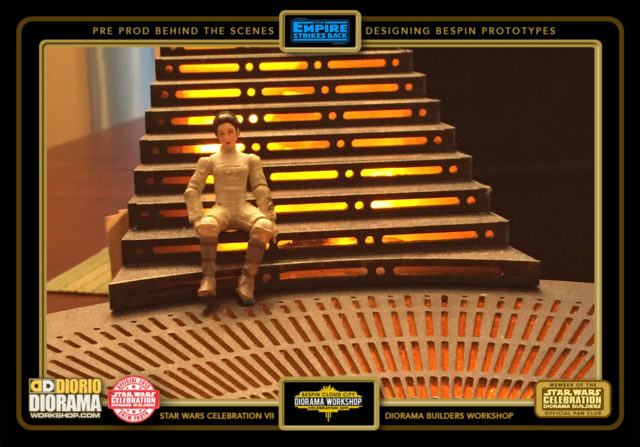
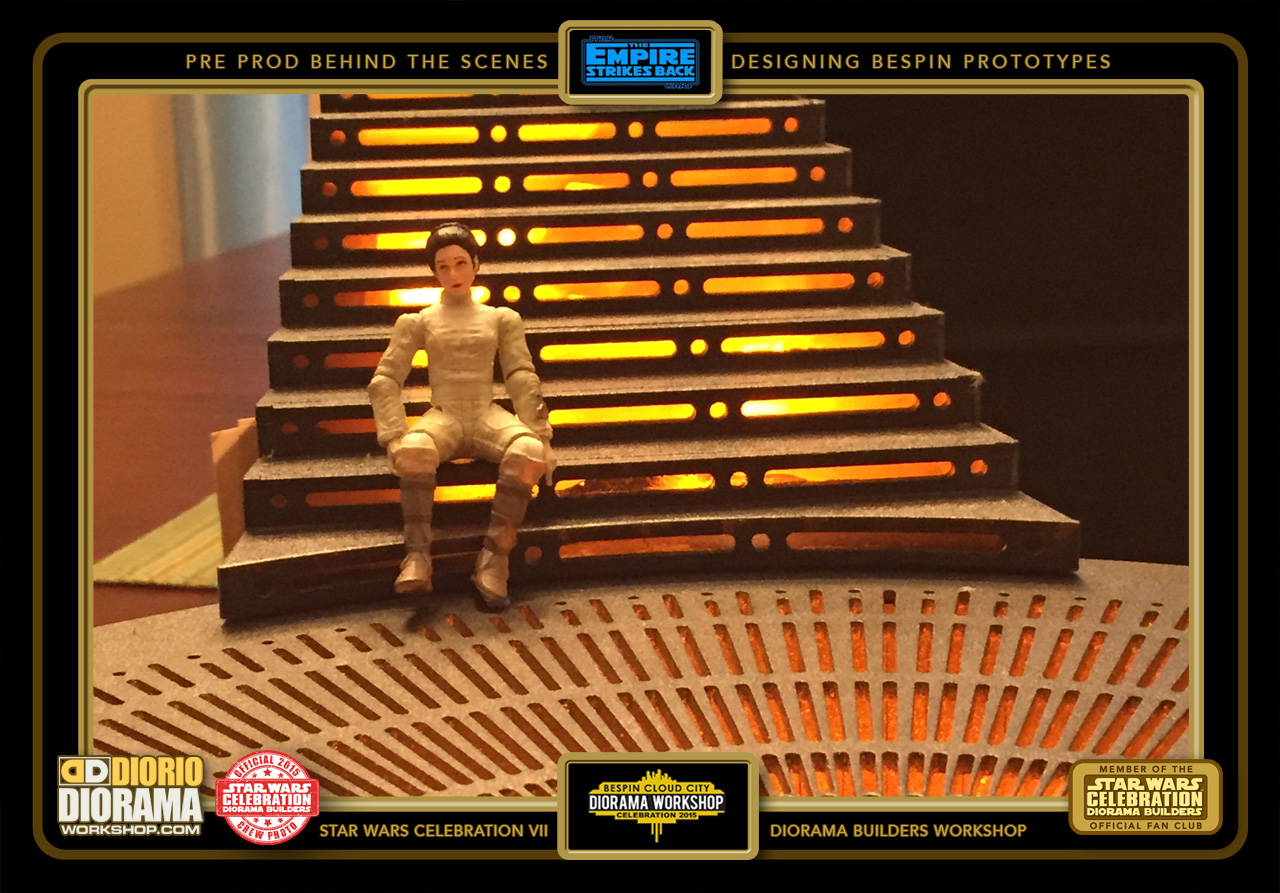
- A close up of the Carbon Chamber stairs. These were die cut by Jamie's friend to get super pricision. In the future, with lower prices, people will have these cutters or 3D printers in their workshops to go beyond stickers can do. Speaking of decals, I will have NEW deluxe Neon decals for those who don't want to use lights for you to print at home. These will be found in the WORKSHOP menu.
-
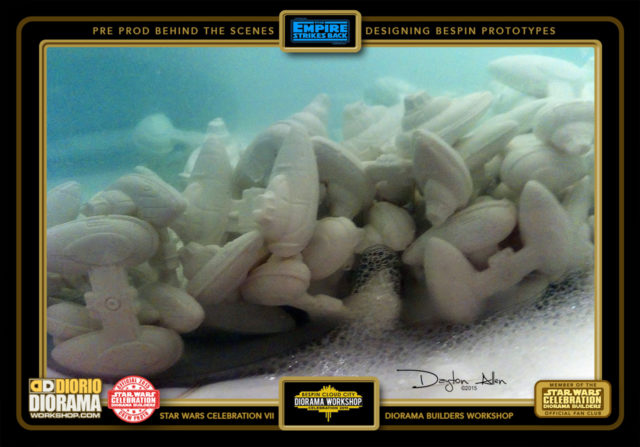
- Dayton Allen agreed to my plea of making us 100 mini resin cloud cars since it would cost WAY too much to buy these on Ebay. Dayton, if you do not know, is a master mold maker worked his magic and delivered these sweet ships for us. You can search and see his AMAZING work on his FACEBOOK PAGE... https://www.facebook.com/daytonallenart Here they are soaking in a soapie solution to remove the molds release agents and allow the paint to stick when the kids work their Orange painting skills 🙂

-
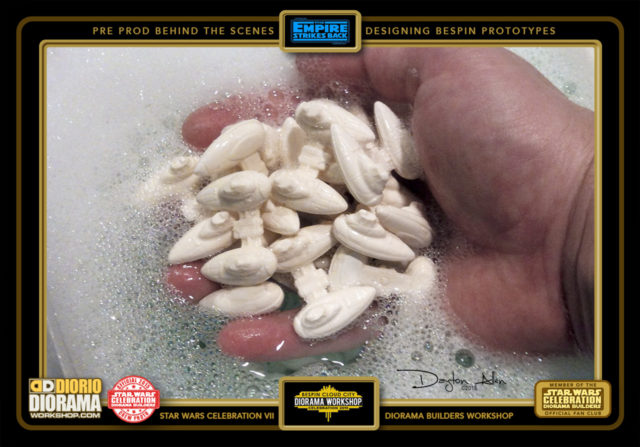
- Dayton Allen agreed to my plea of making us 100 mini resin cloud cars since it would cost WAY too much to buy these on Ebay. Dayton, if you do not know, is a master mold maker worked his magic and delivered these sweet ships for us. You can search and see his AMAZING work on his facebook page... https://www.facebook.com/daytonallenart?fref=ts Here they are soaking in a soapie solution to remove the molds release agents and allow the paint to stick when the kids work their Orange painting skills 🙂

-
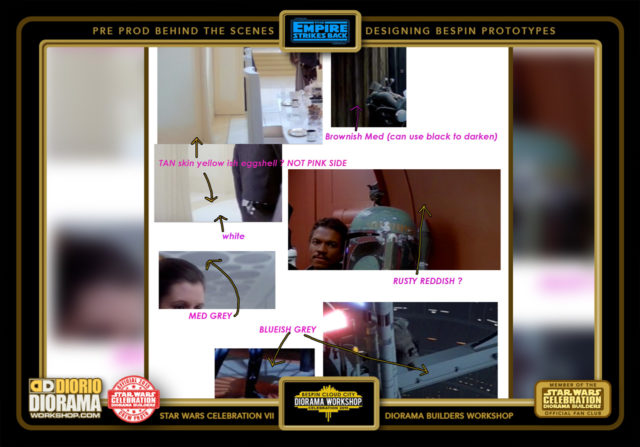
- Last but not least, my color choices for what paints to go but at home depot once I arrive in California.
