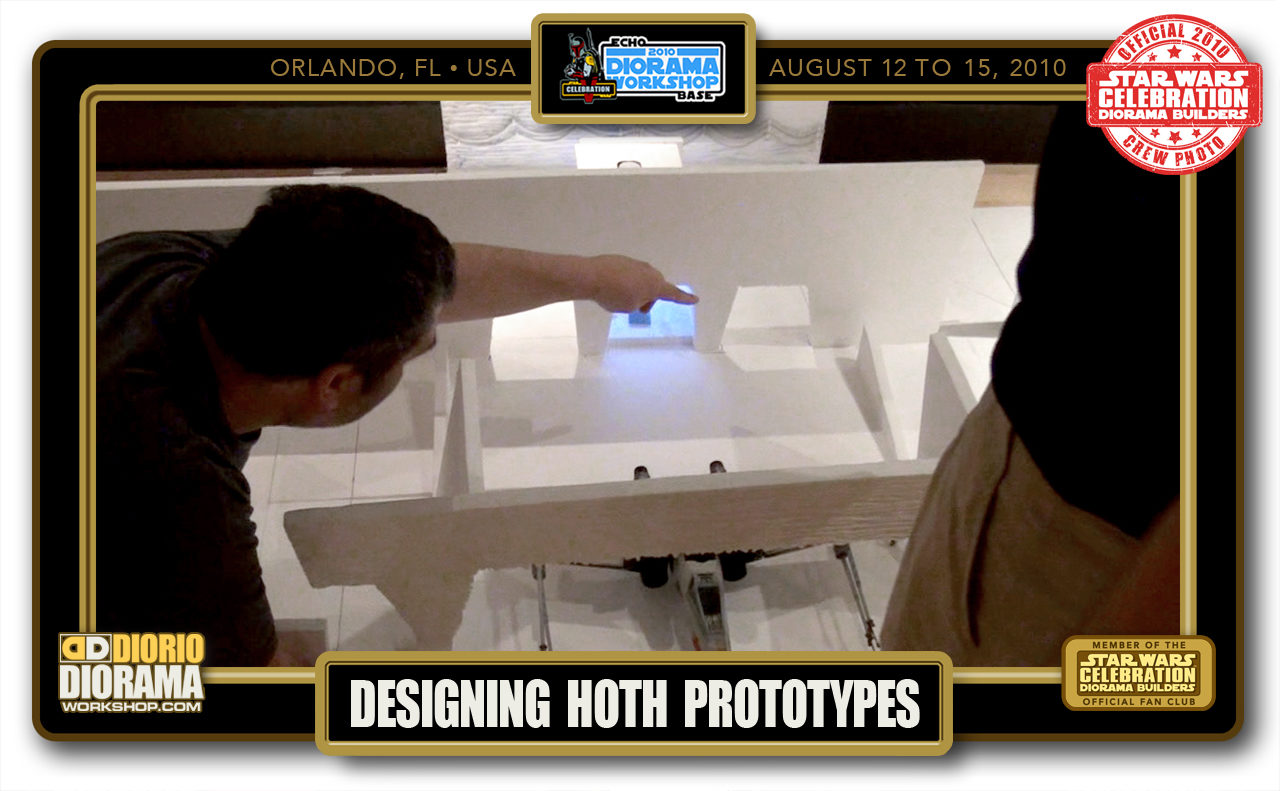
As seen at STAR WARS CELEBRATION V • HOTH ECHO BASE DIORAMA BUILDERS
Orlando, FL, USA from August 12 to 15 2010.
pre production Celebration V DESIGNING HOTH PROTOTYPES
Welcome to the OFFICIAL Star Wars Celebration V Hoth Echo Base Diorama Builders workshop site featuring my EXCLUSIVE CREW COVERAGE not seen anywhere else on the web.
X
X
From May to July 2010
X
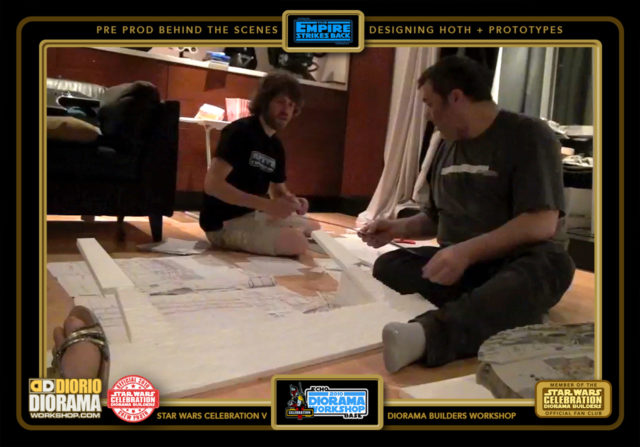
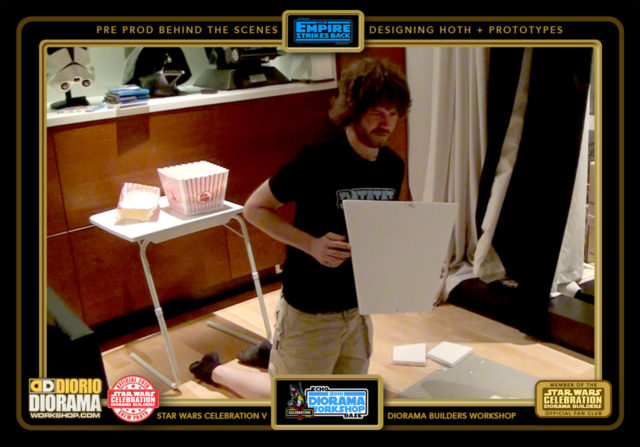
The first thing to do after selecting your theme, and getting it approved by Lucasfilm, is for me to design and make prototypes to make sure it’s easy to make for all ages using materials you can find at home if you want to continue your build, or for those who couldn’t make it at the actual convention, build it for the first time as well. With the prototypes, I can create the instructions for the fans and most important, how it will all FIT together. The simplicity of the final design, to have it all fit like LEGO was genius. If I do say so myself 🙂 It captures the look of the movie and made sense. Of course we were lucky to have 30 feet of tables to display it on which a lot of us at home don’t have, but it is easily modified to fit anywhere and any size.
X
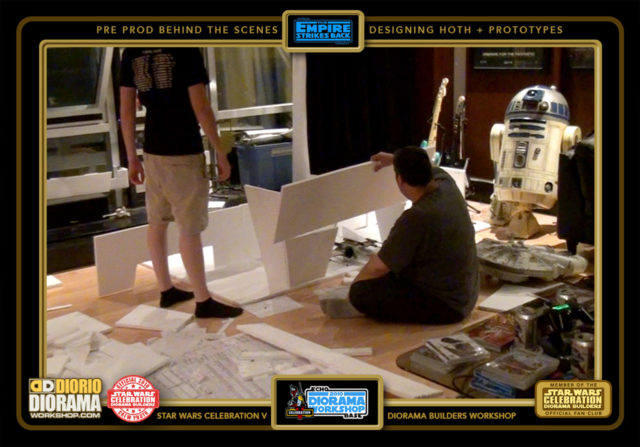
The photos below span 2 months of watching the Empire Strikes Back Hoth scenes and taking lots of notes, sketches, testing builds and having my friend Andre, who lived in my home town Montreal and was crew with us at STAR WARS CELEBRATION III DEATH STAR DIORAMA BUILDERS, help out 2 days on a long weekend finisheg up the tests. There are more than 138 photos of what it takes to prepare the convention for you guys, so sit back and enjoy my photos…
-

- Echo Base was divided int 2 parts, AT-AT Outside battle and this Interior Main Hangar
-
- The Interior would consist of more than 100 fan builds.

-
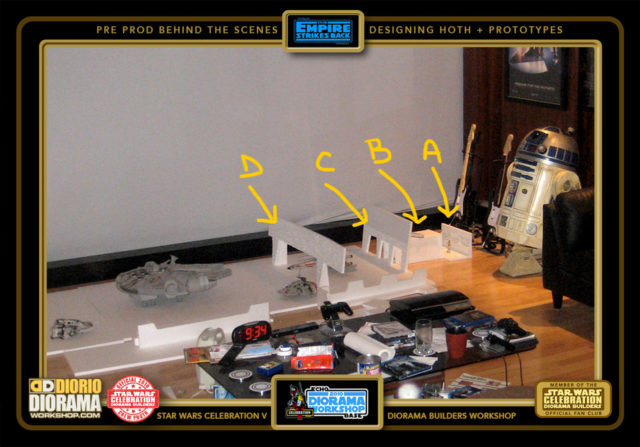
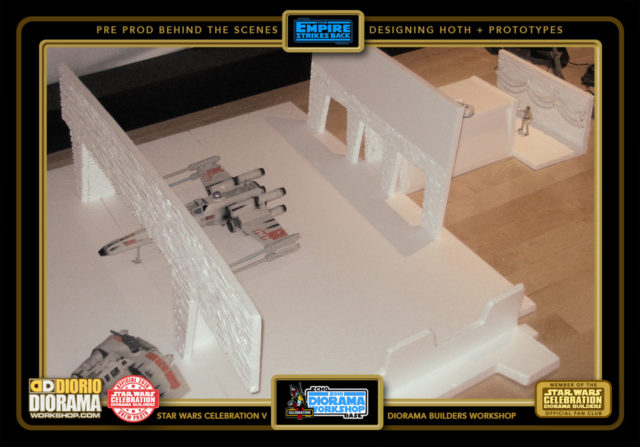
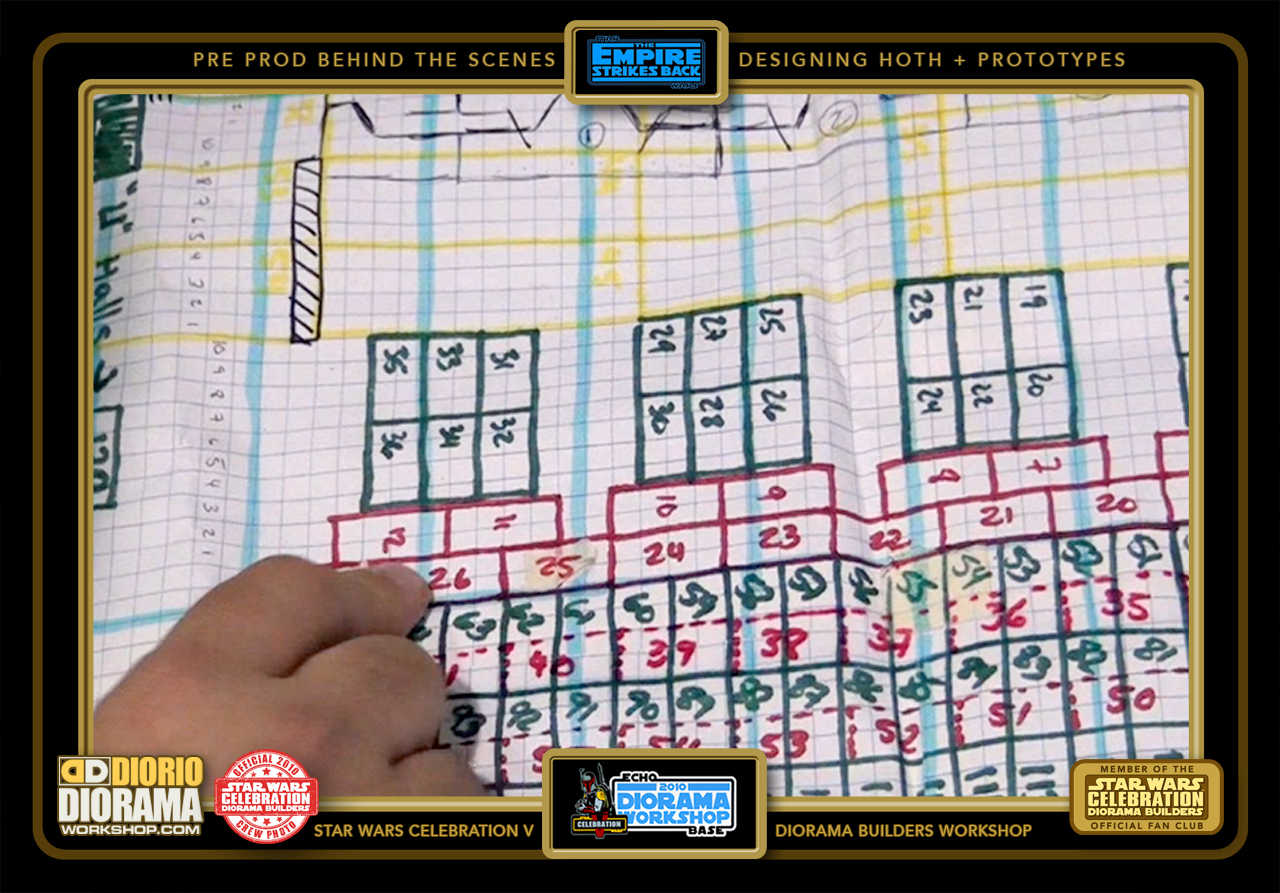
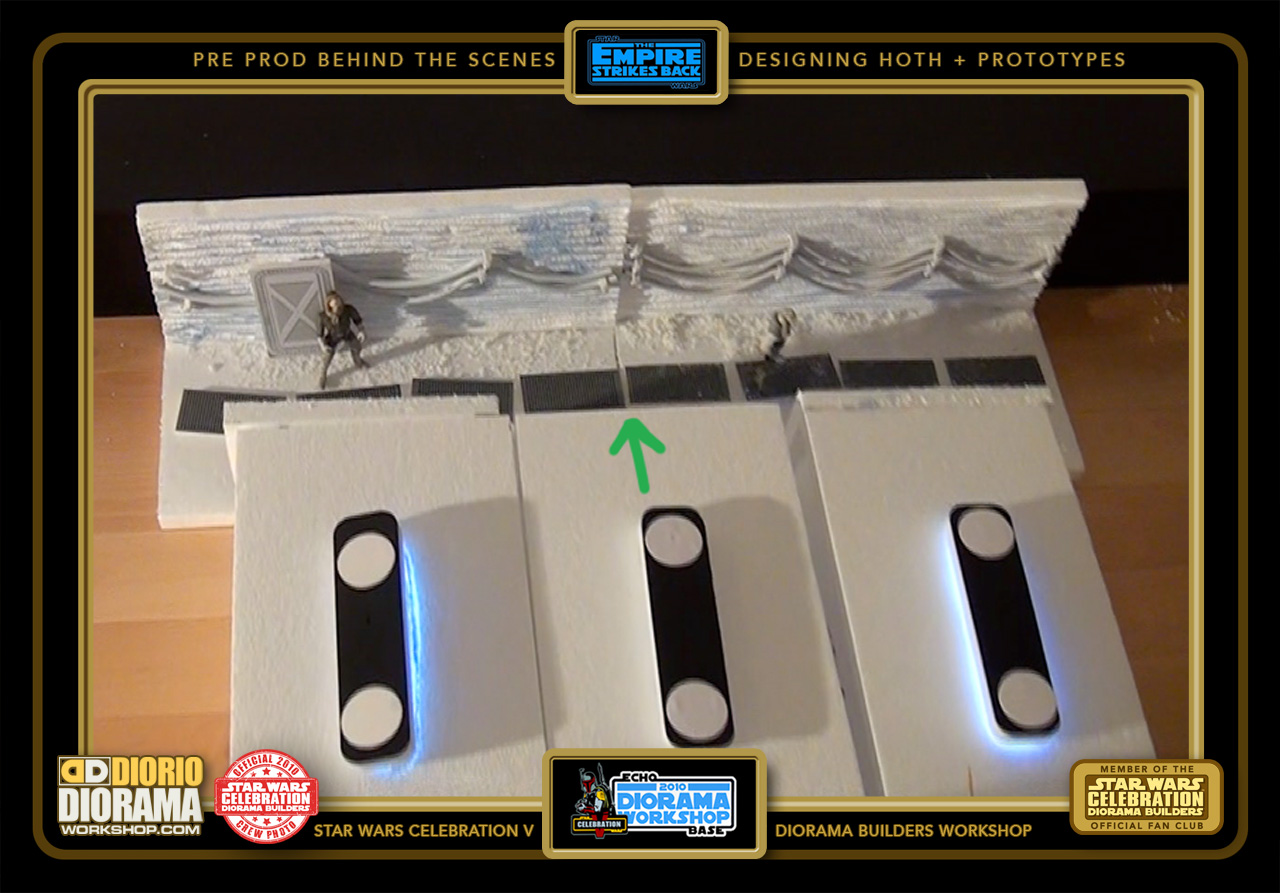
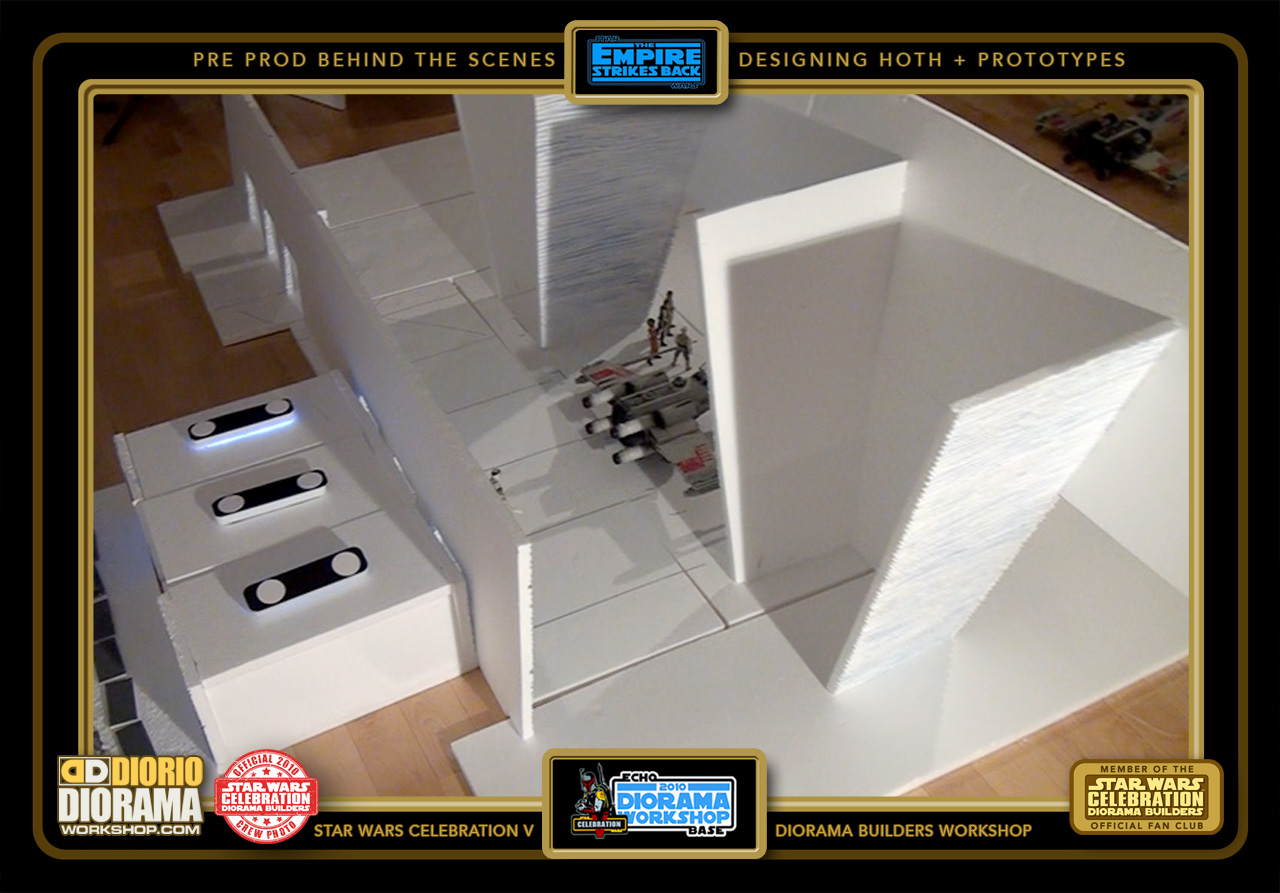
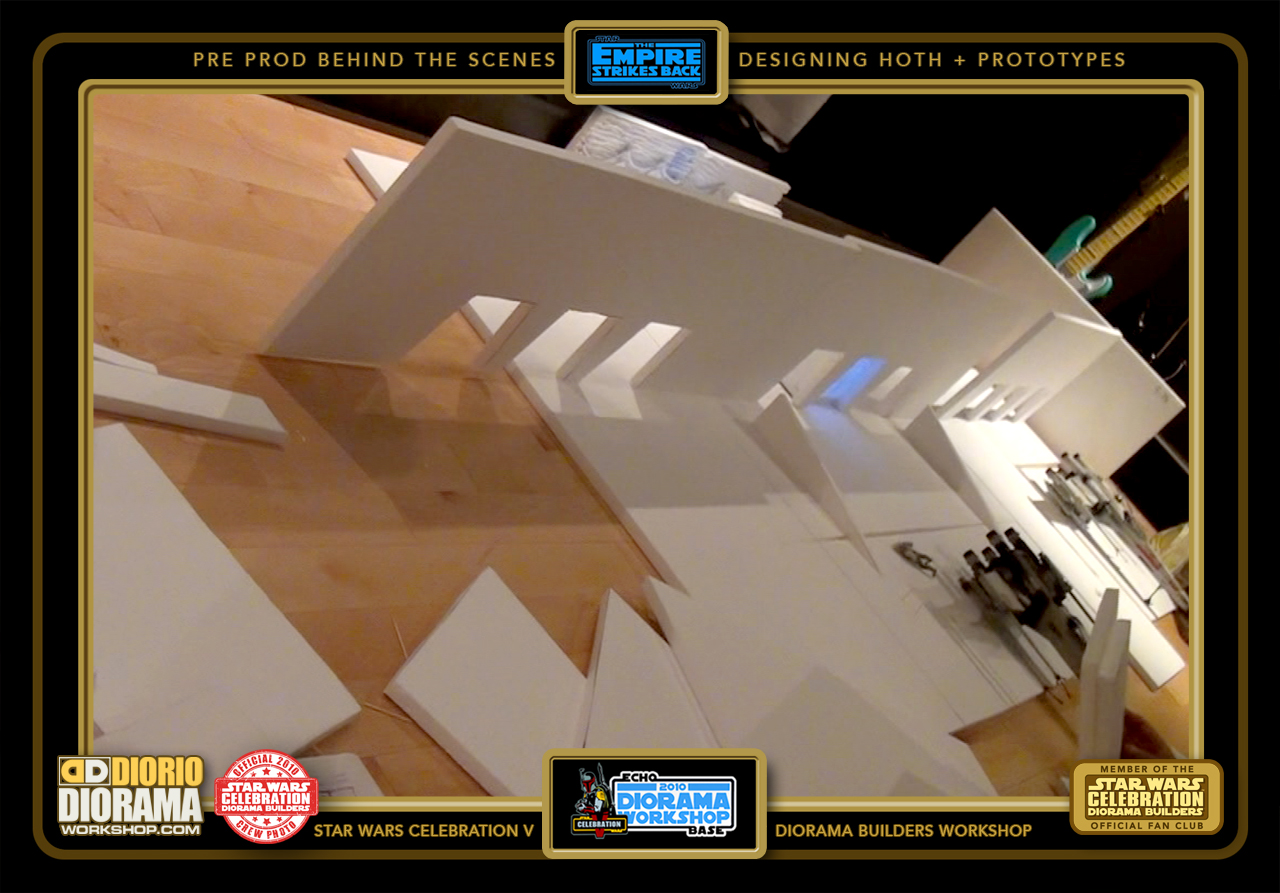
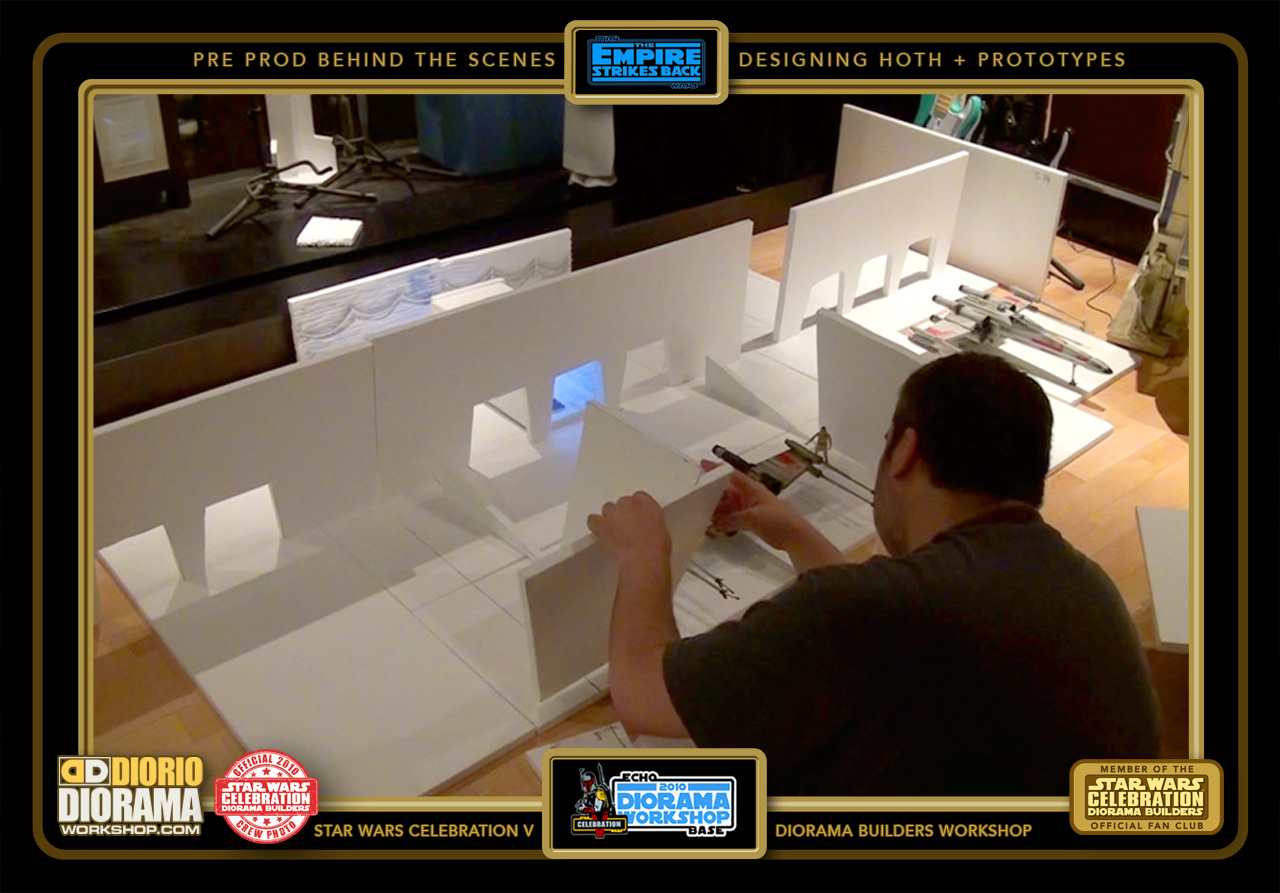
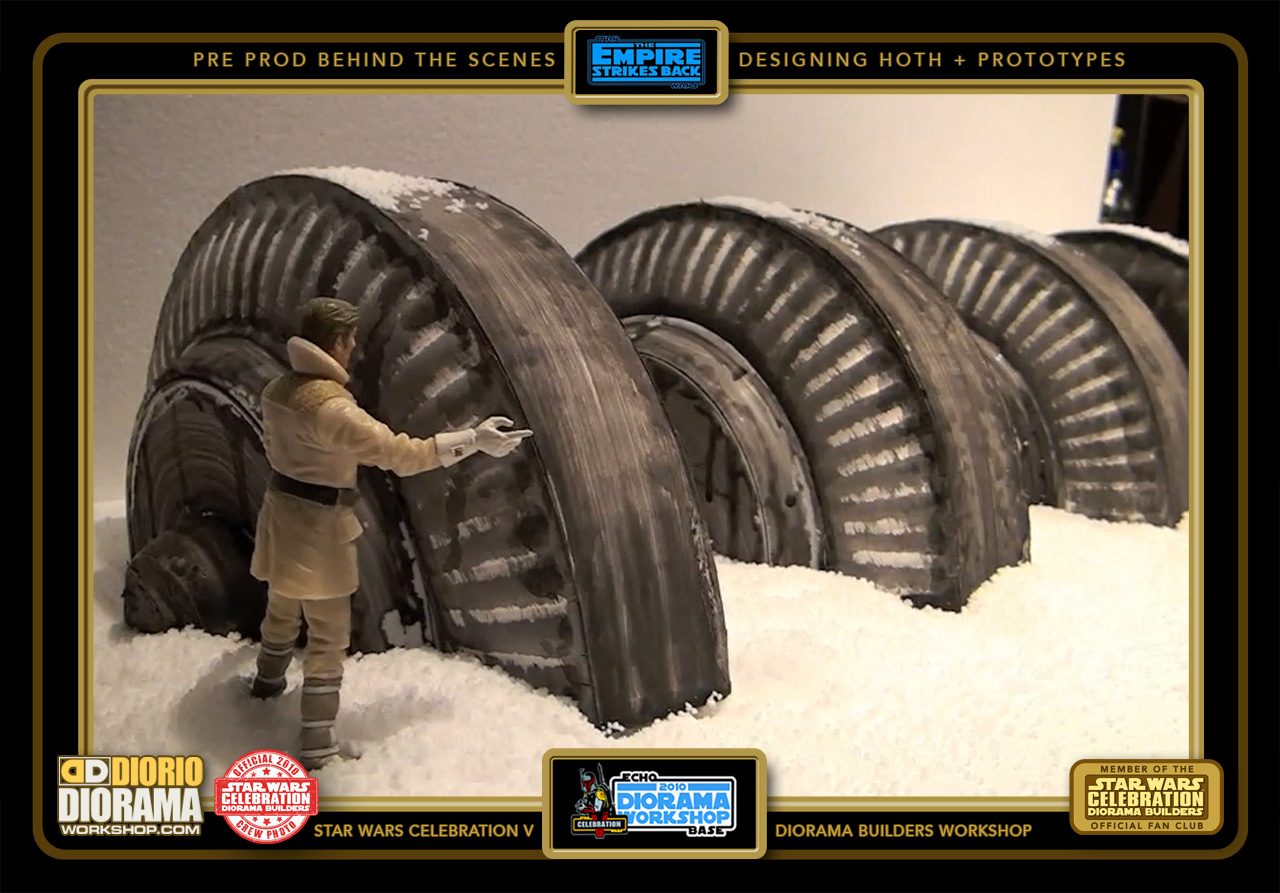
- The main part of the design was to divide the build options as sections. A (L style hallway) B (U style hallway) C (3 archway) and D (V style flower pot) when put all together , this would form one side of the base where the Snowspeeders, Falcon and X-wing would reside.

-
- Rear part is the simplest build, the L Style Hallway (A)

-
- In front of that will be 2 rows deep of "U Style Hallway (B).

-
- The 3 Arch Wall hides the seems of the U Hallways and is our 3rd build (C).

-
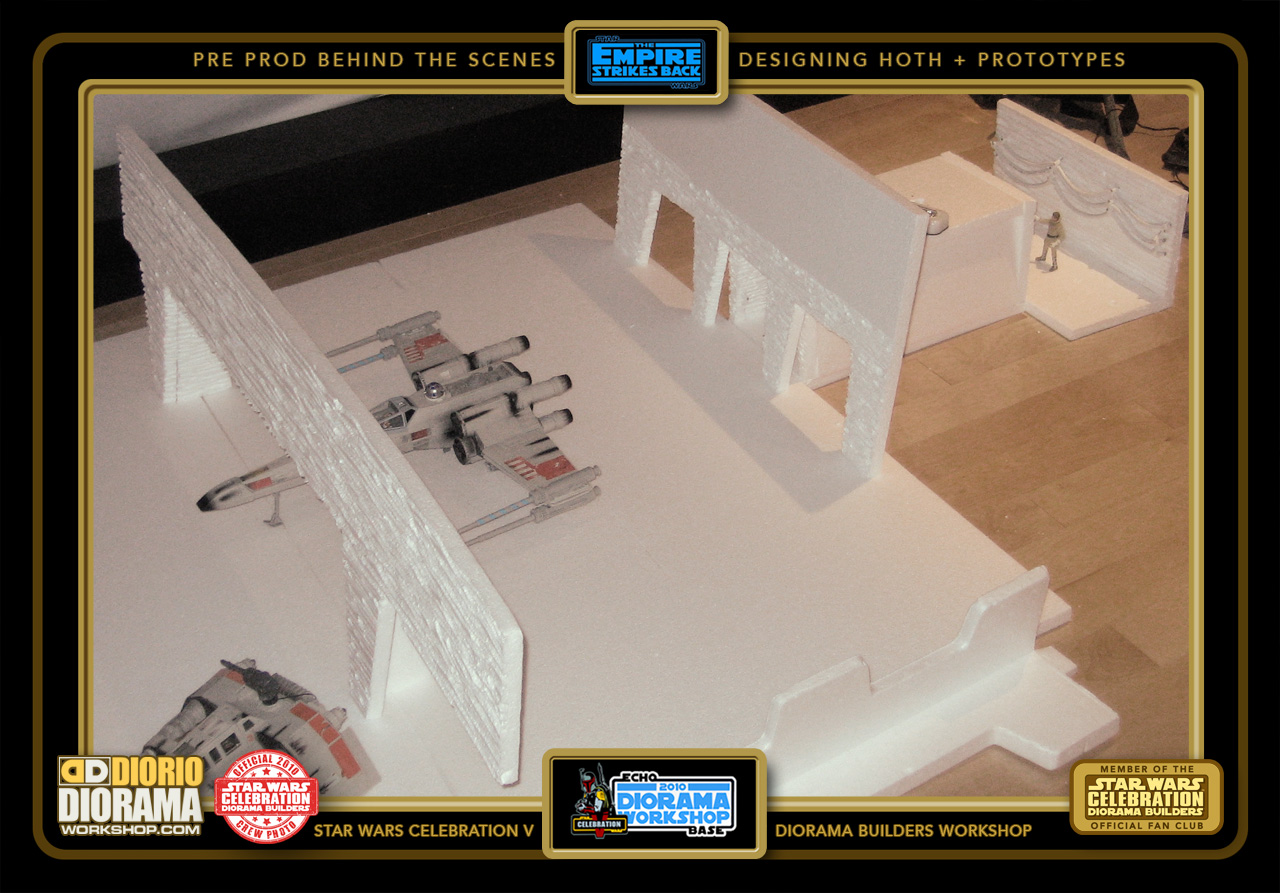
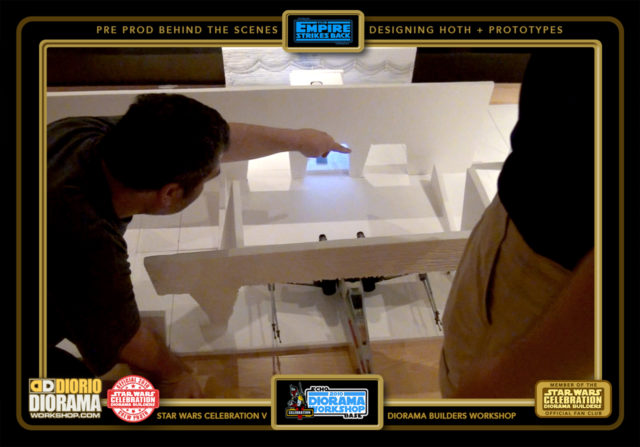
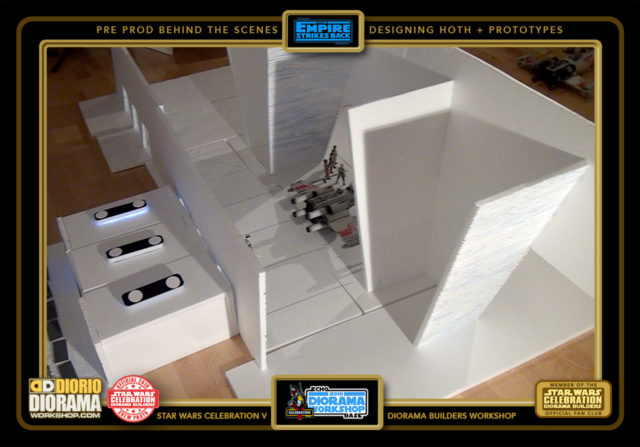
- Looking down at the (C) (B) and (A) build options.

-
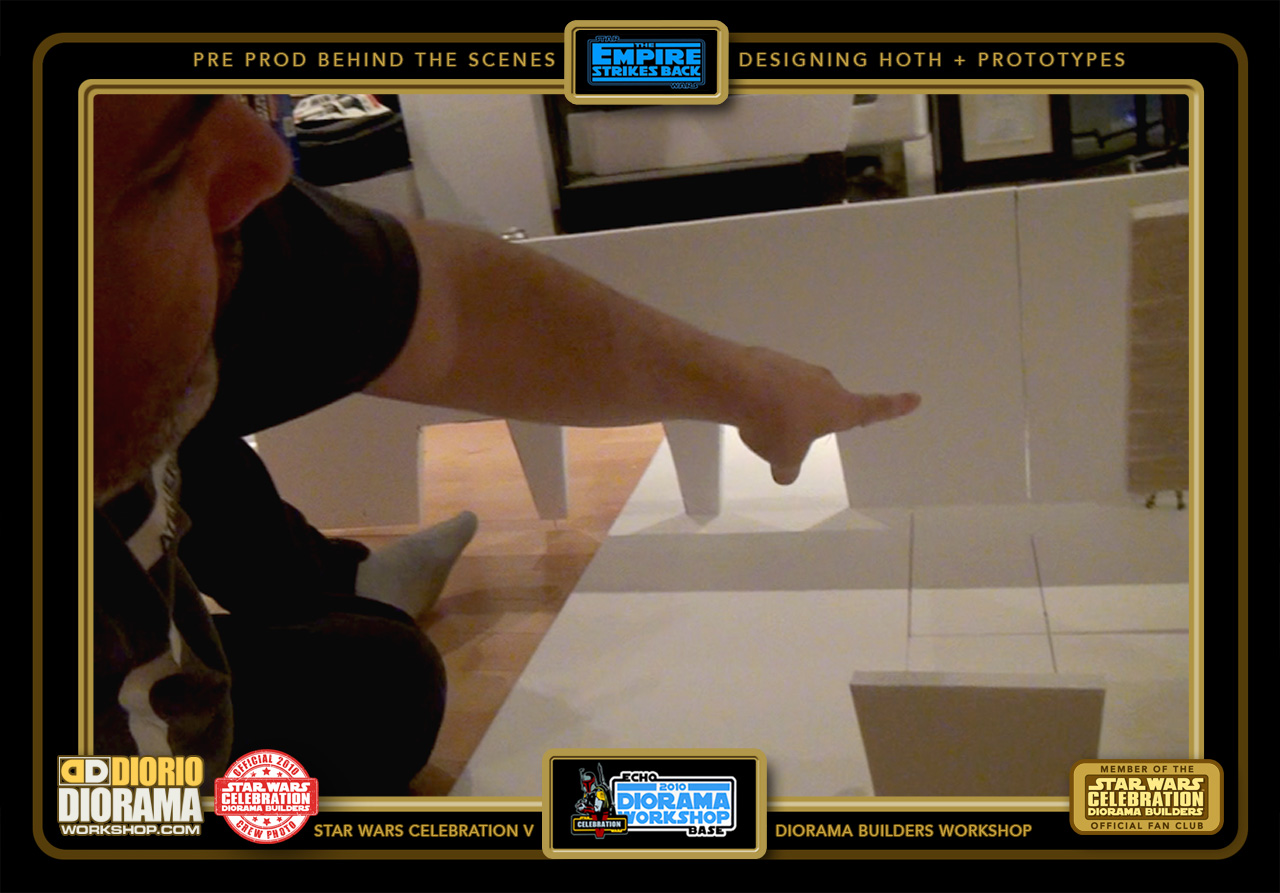
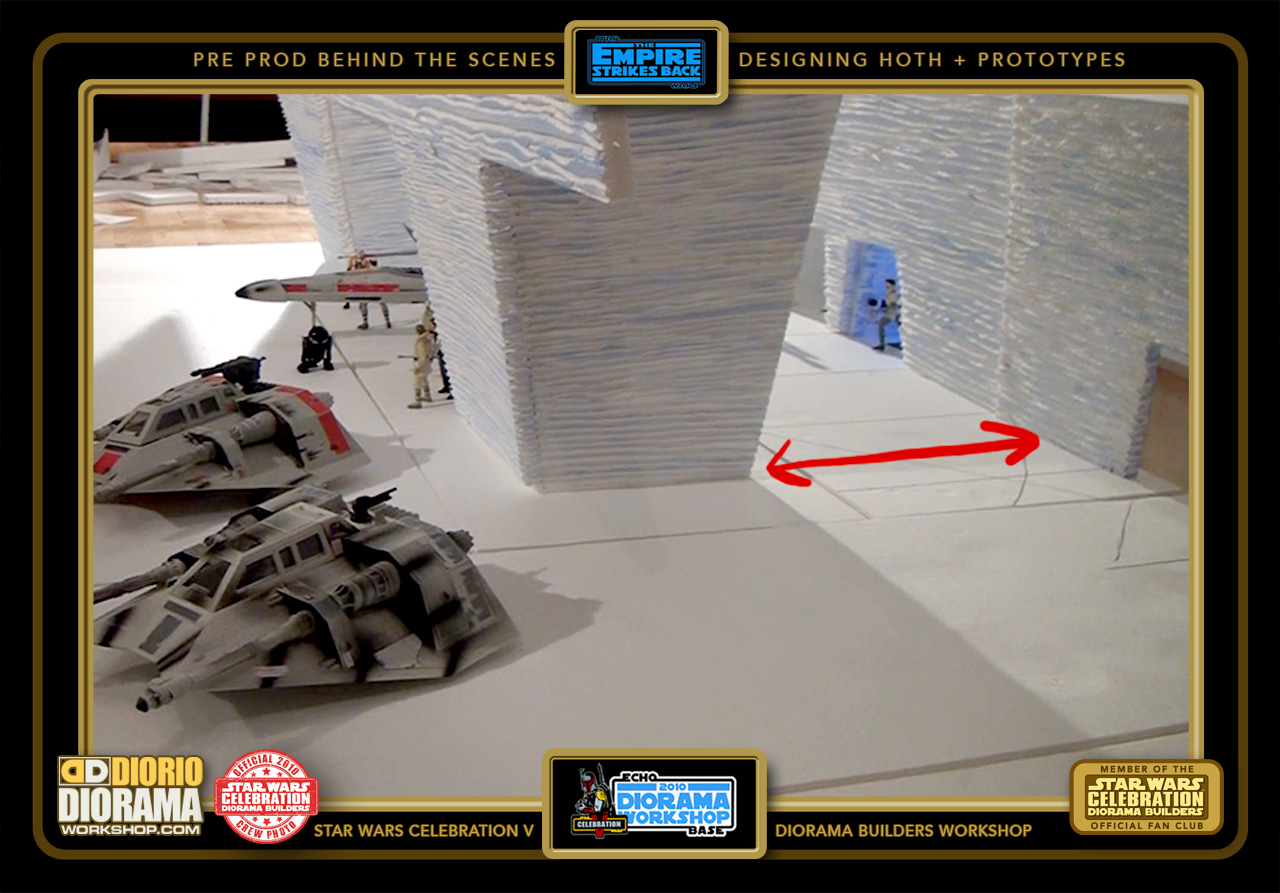
- A higher angle shows the distance to be determined between the Flower Pot arch (D) and 3 Arch Walls.
-
- And standing back, looking at the (D) combined Flower Pot Arches.

-

- Those are the main build choices to create the INTERIOR of the Echo Base. Stacked side by side it would form a huge 30+ foot hangar.
-
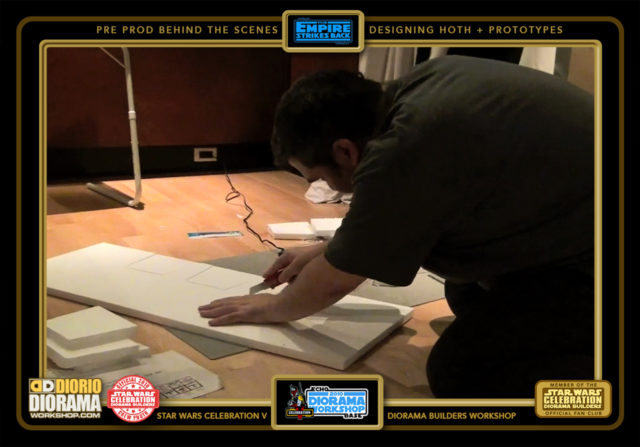
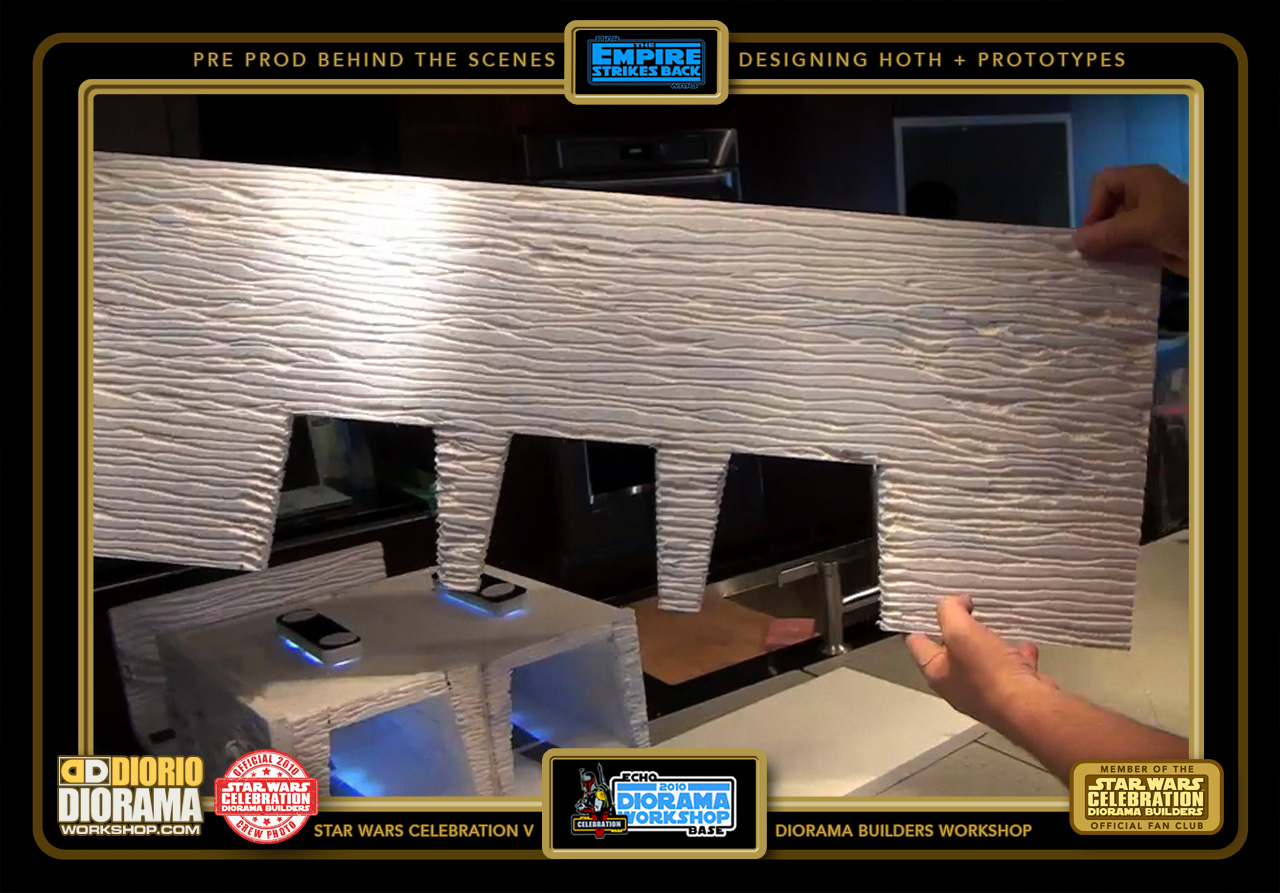
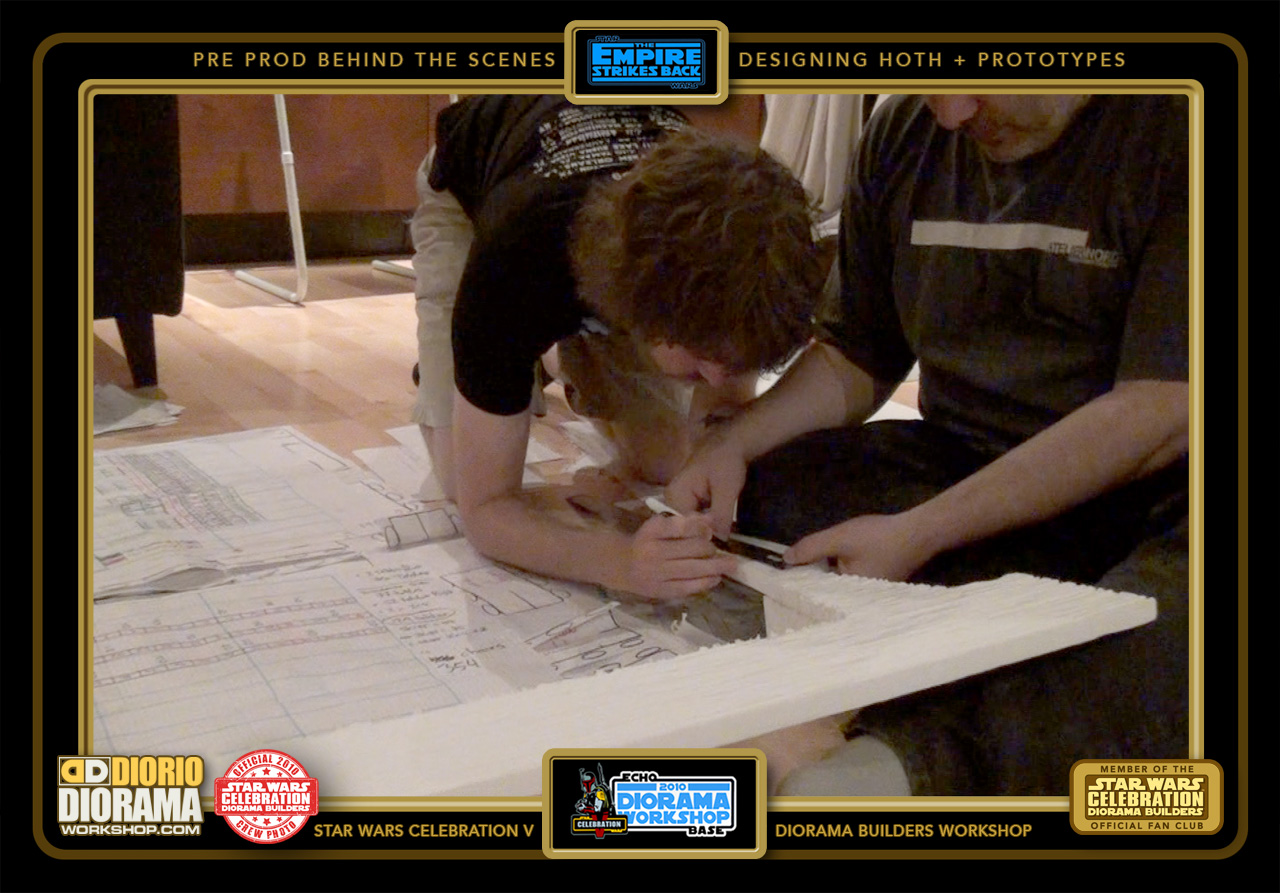
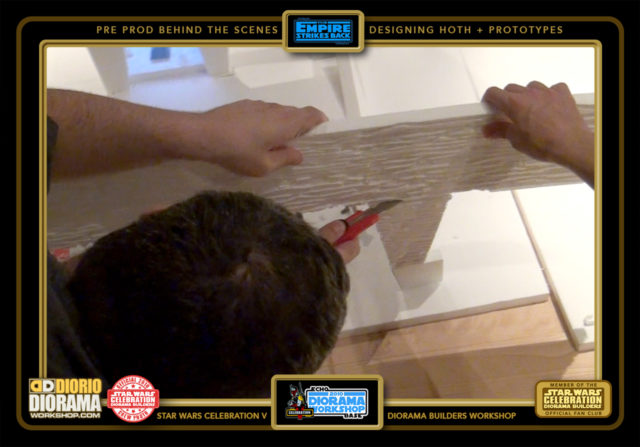
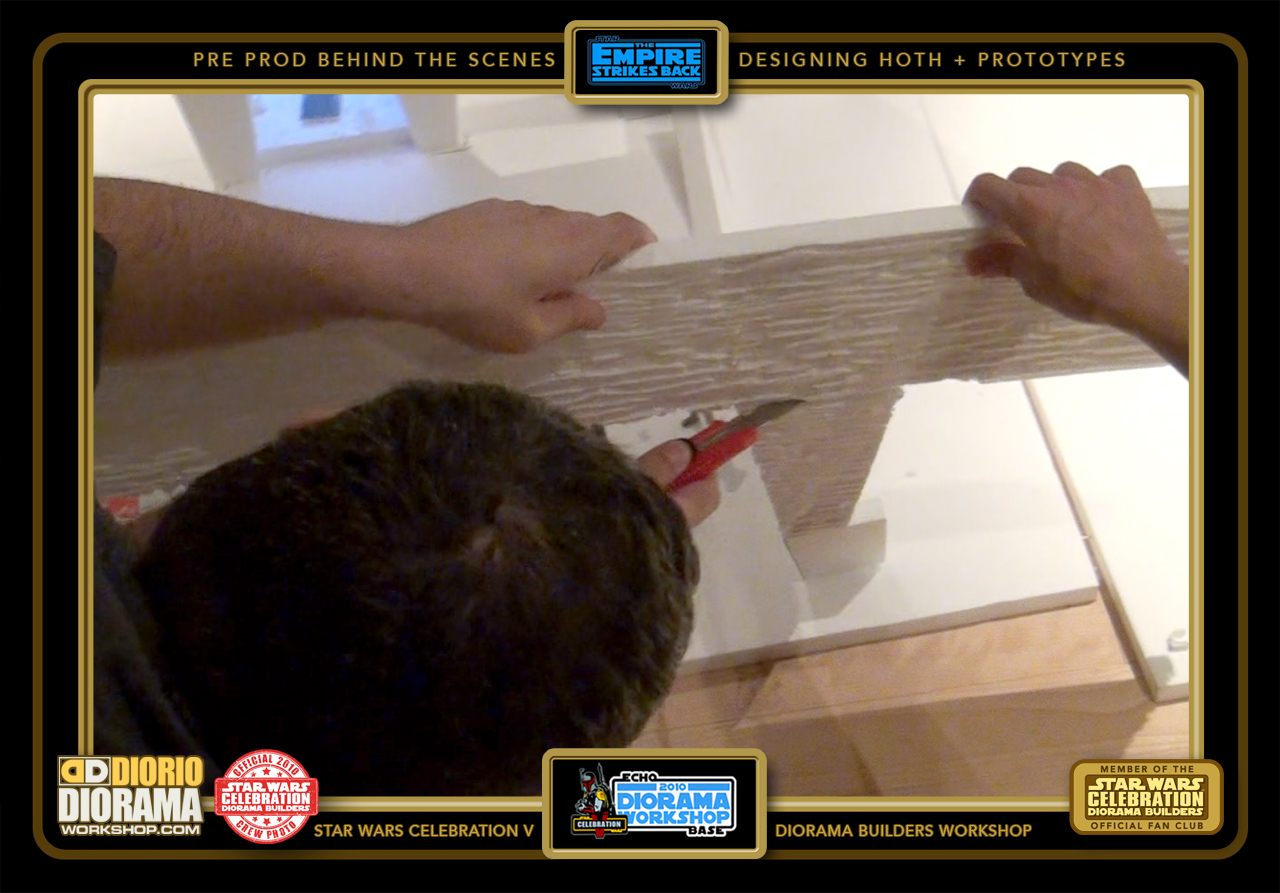
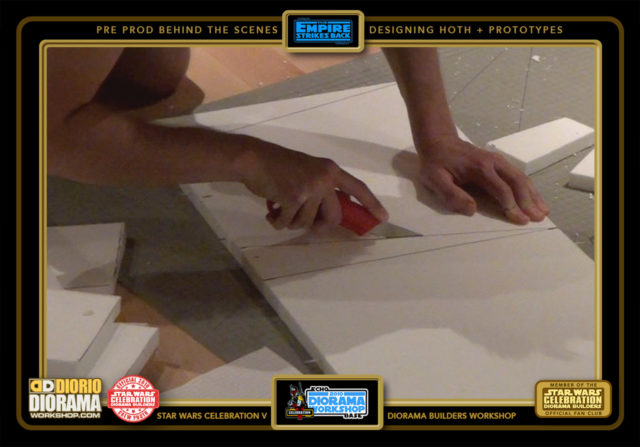
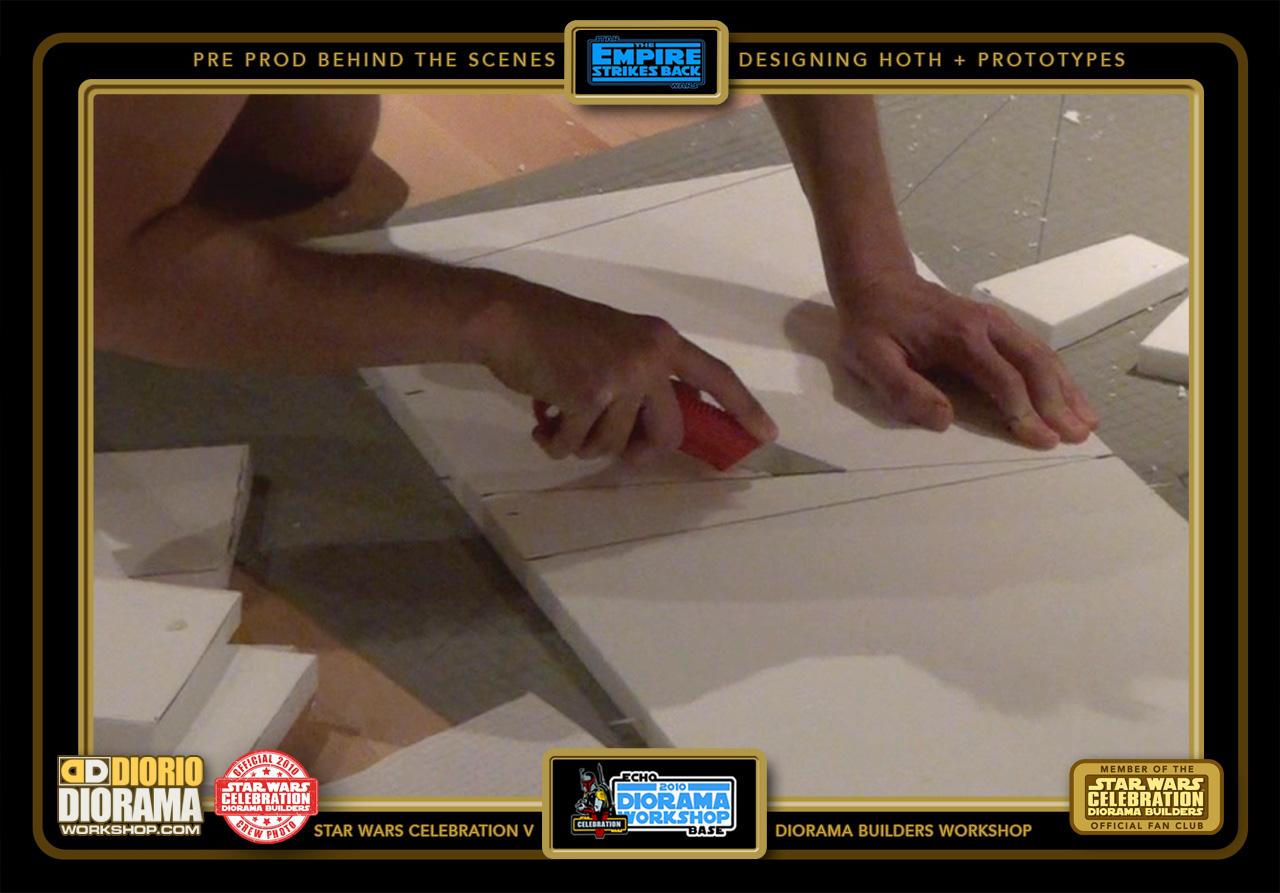
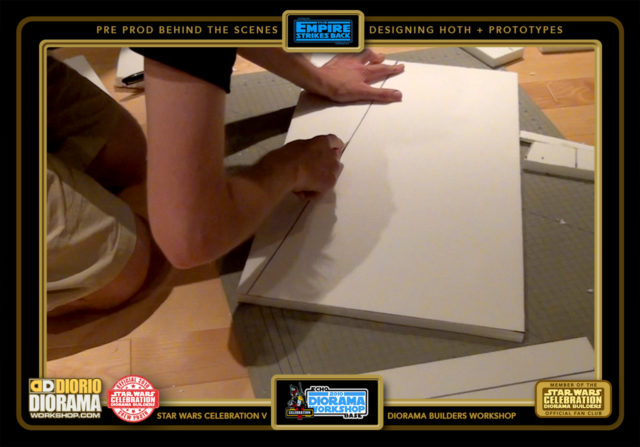
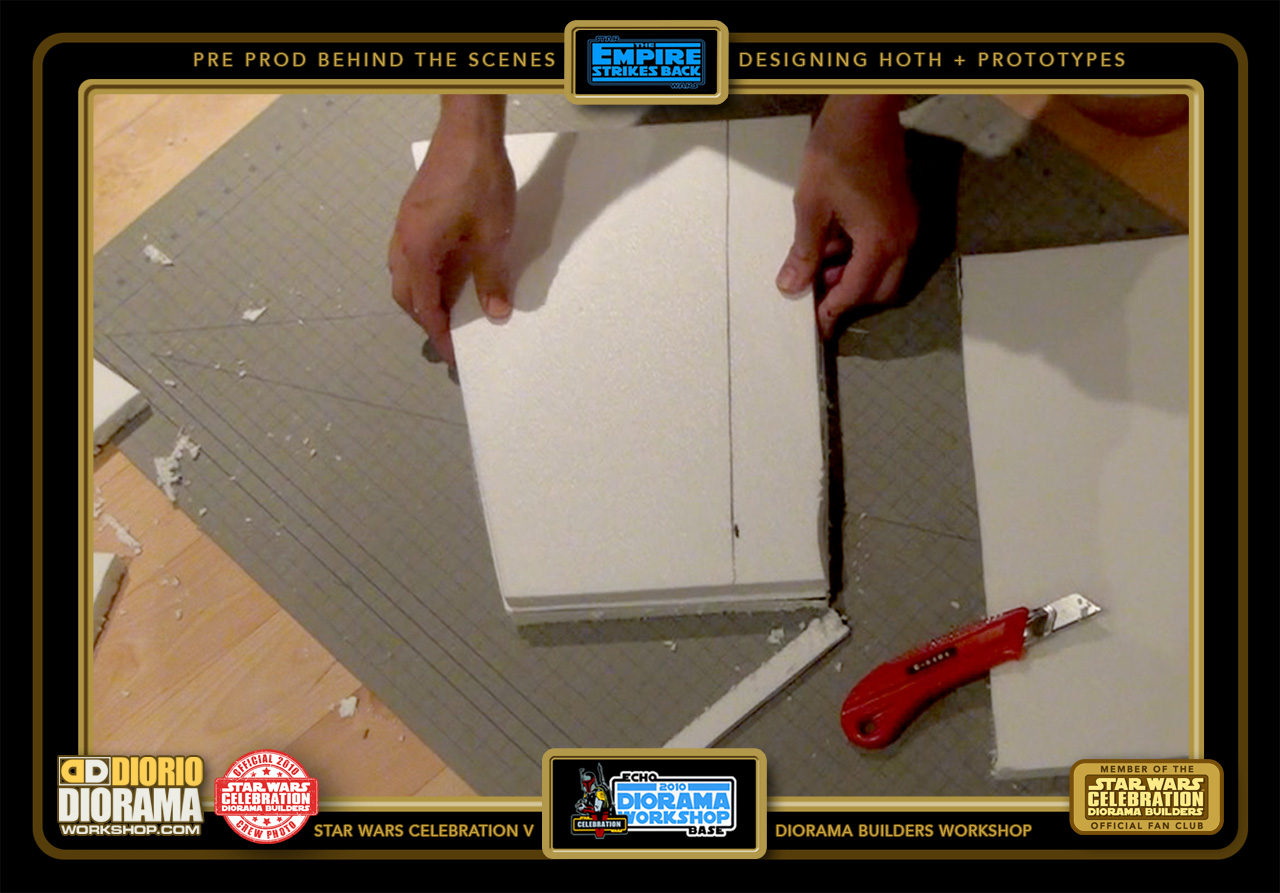
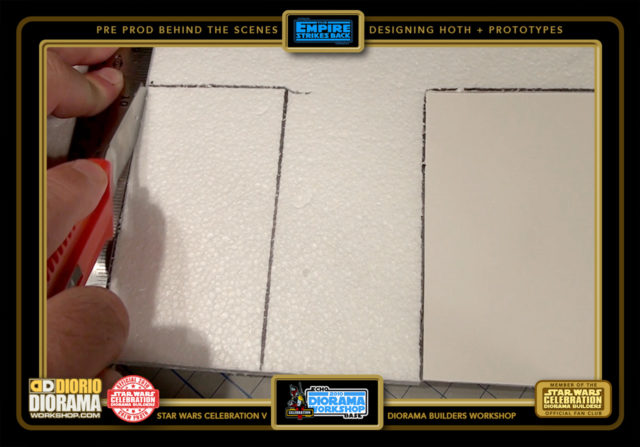
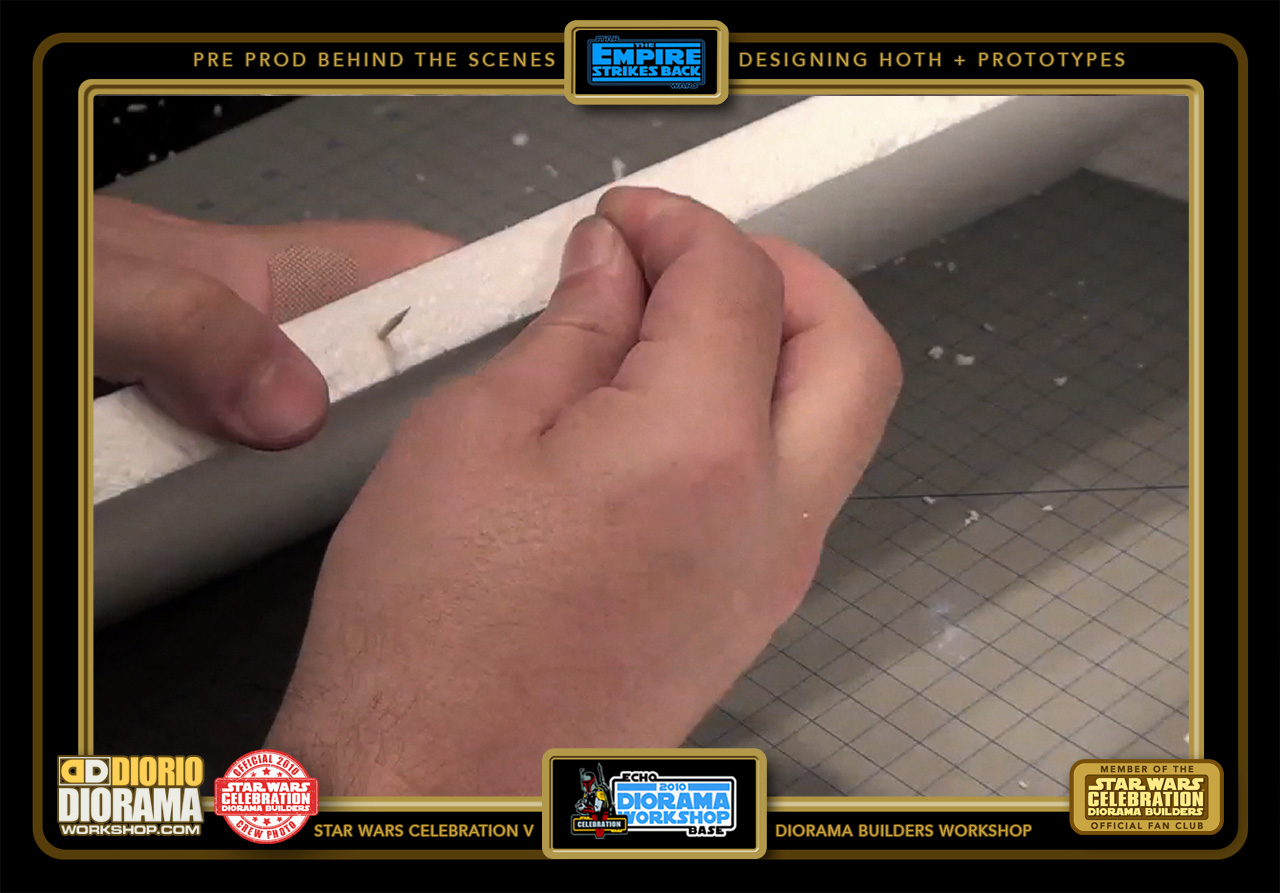
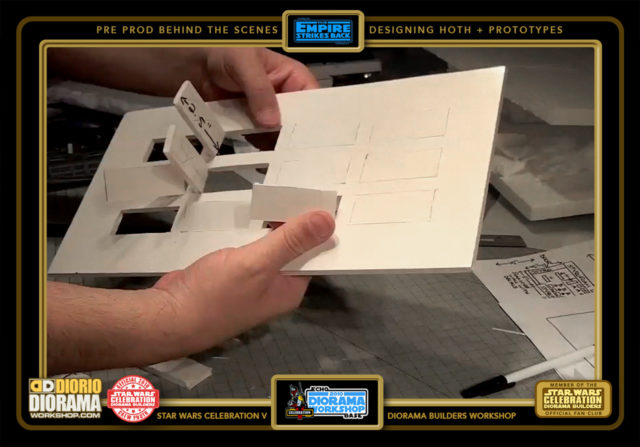
- Let's get precise shal we ? Here I am cutting a few more of the 3 Archway walls that act as a facade, or front wall to hide the 3 U style tunnels that go behind.

-

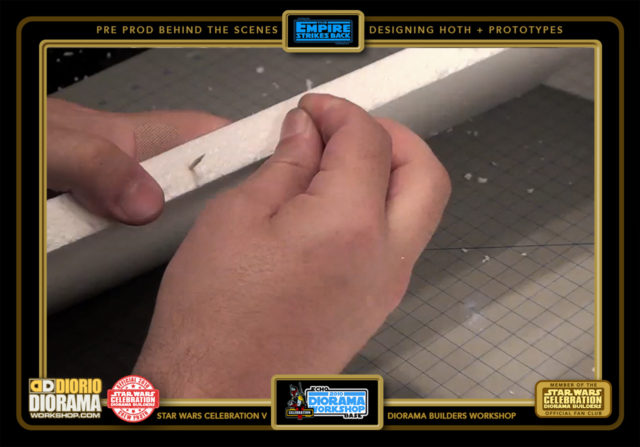
- Once cut, I inserted some Toothpics in the bottom. That's the fun thing about using styrofoam, you can secure your tests with Toothpics before having to use HotGlue that will permenantly bond the pieces together.
-
- The 3 Archway wall can be placed in front of the first U Style hallway prototype I made.

-
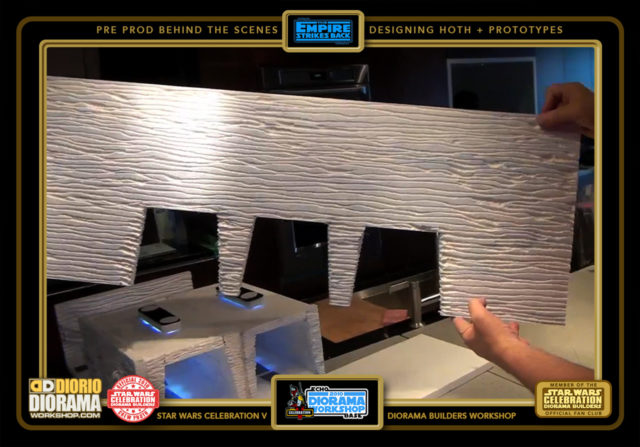
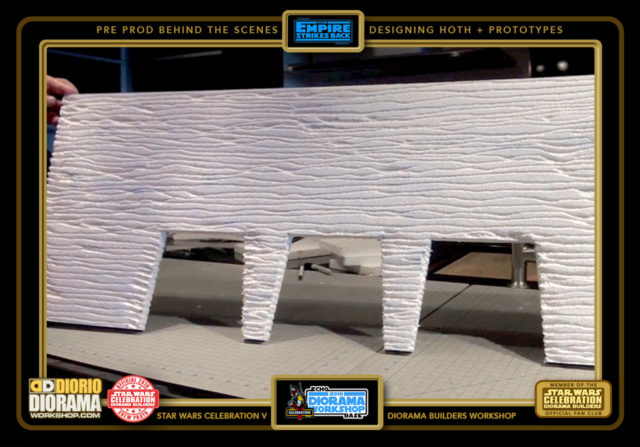
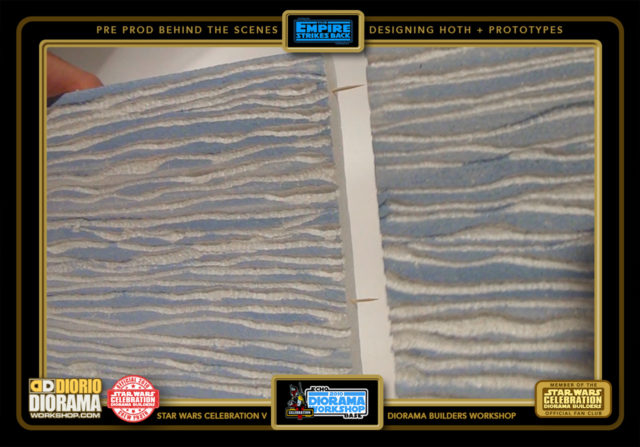
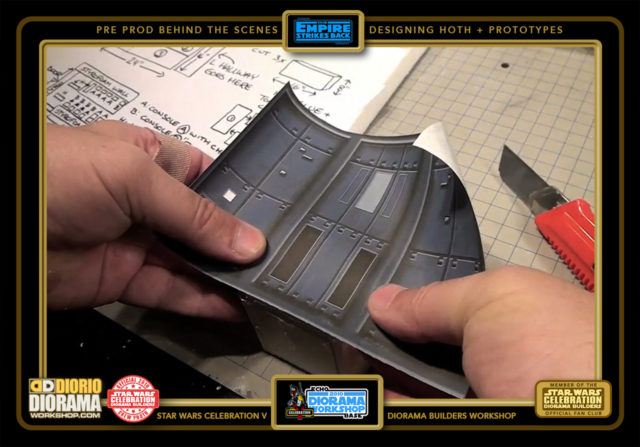
- The 3 Archway Wall was the simplest of the designs, basically it was a full size sheet, no cutting, just some tests with the wood burning pen to find the best look for Hoth movie like texture. The arch shapes were calculated after I finished the U'Style hallway, which was the very first thing I made to see if this Hoth idea was even gonna work.
-
- The thought behind this wall, was to not only look movie accurate, but to hide the seams of the 3 tunnels behind it.
-

- When I saw this the first time, it really made me smile, and I knew this was gonna be a big hit.
-
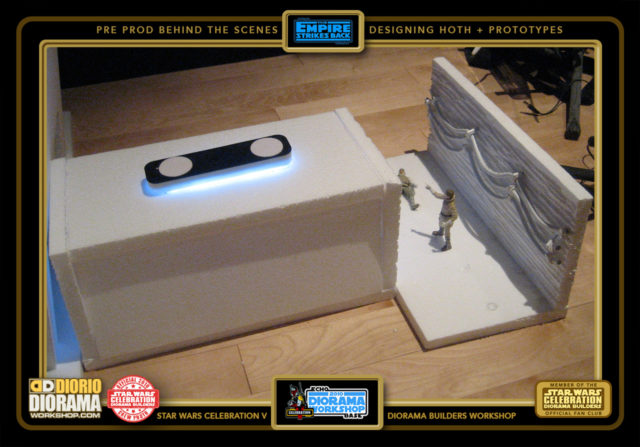
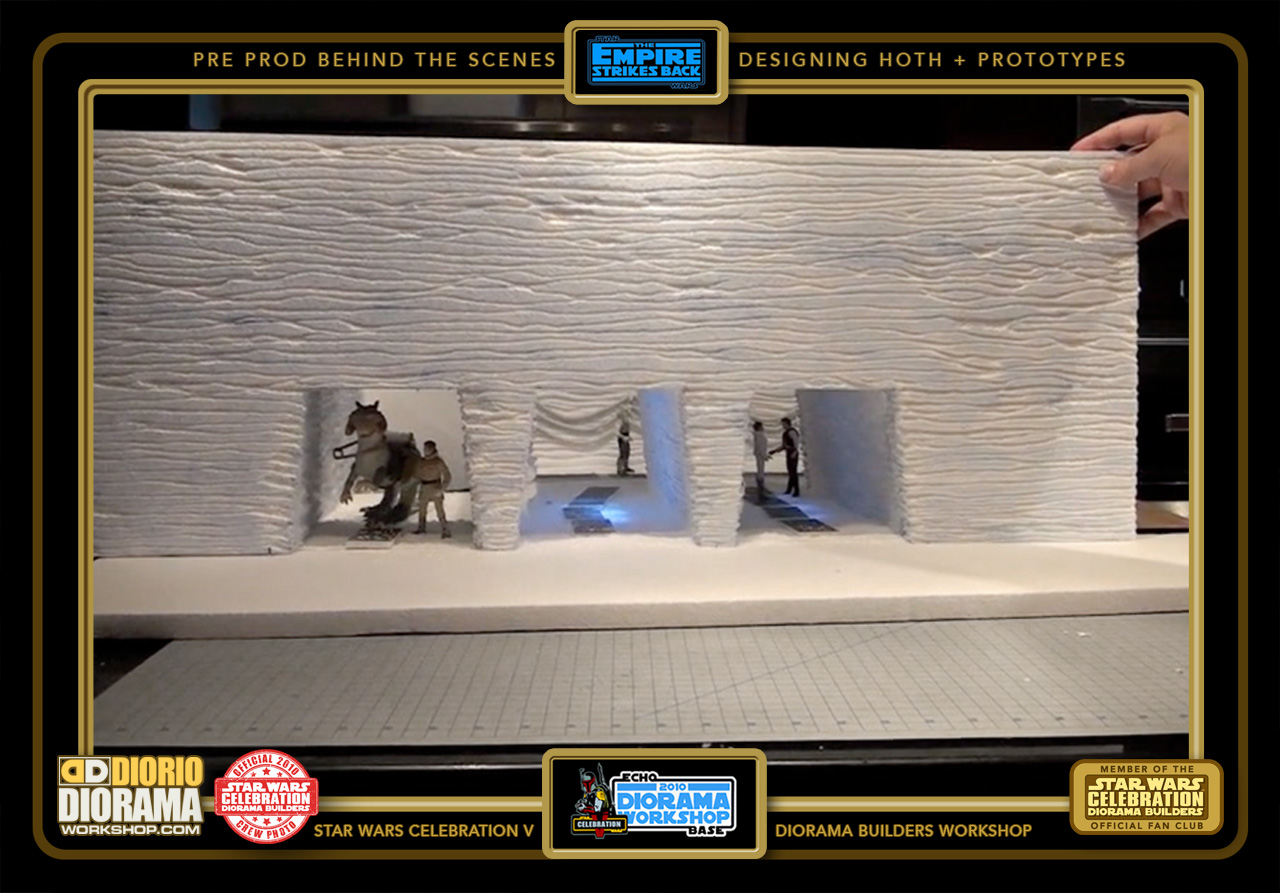
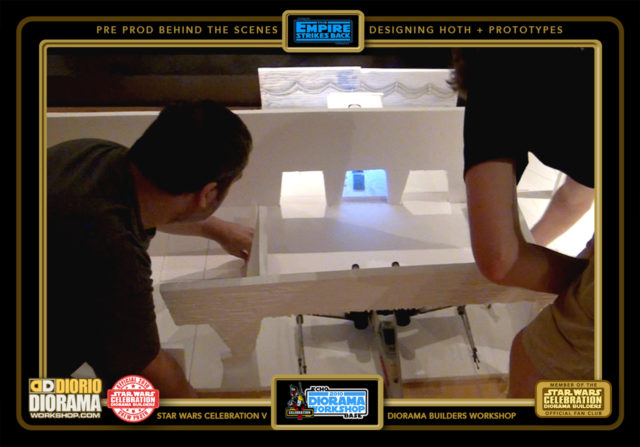
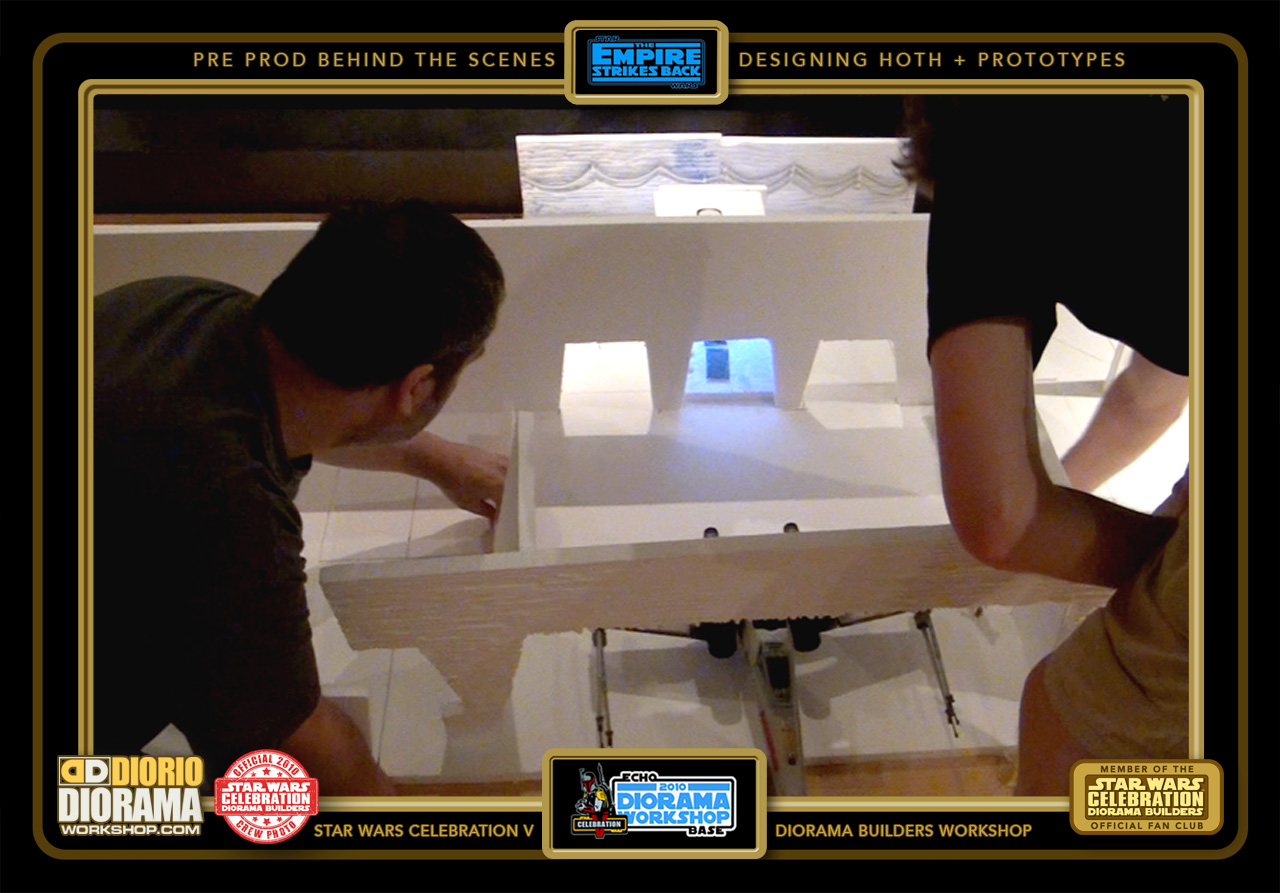
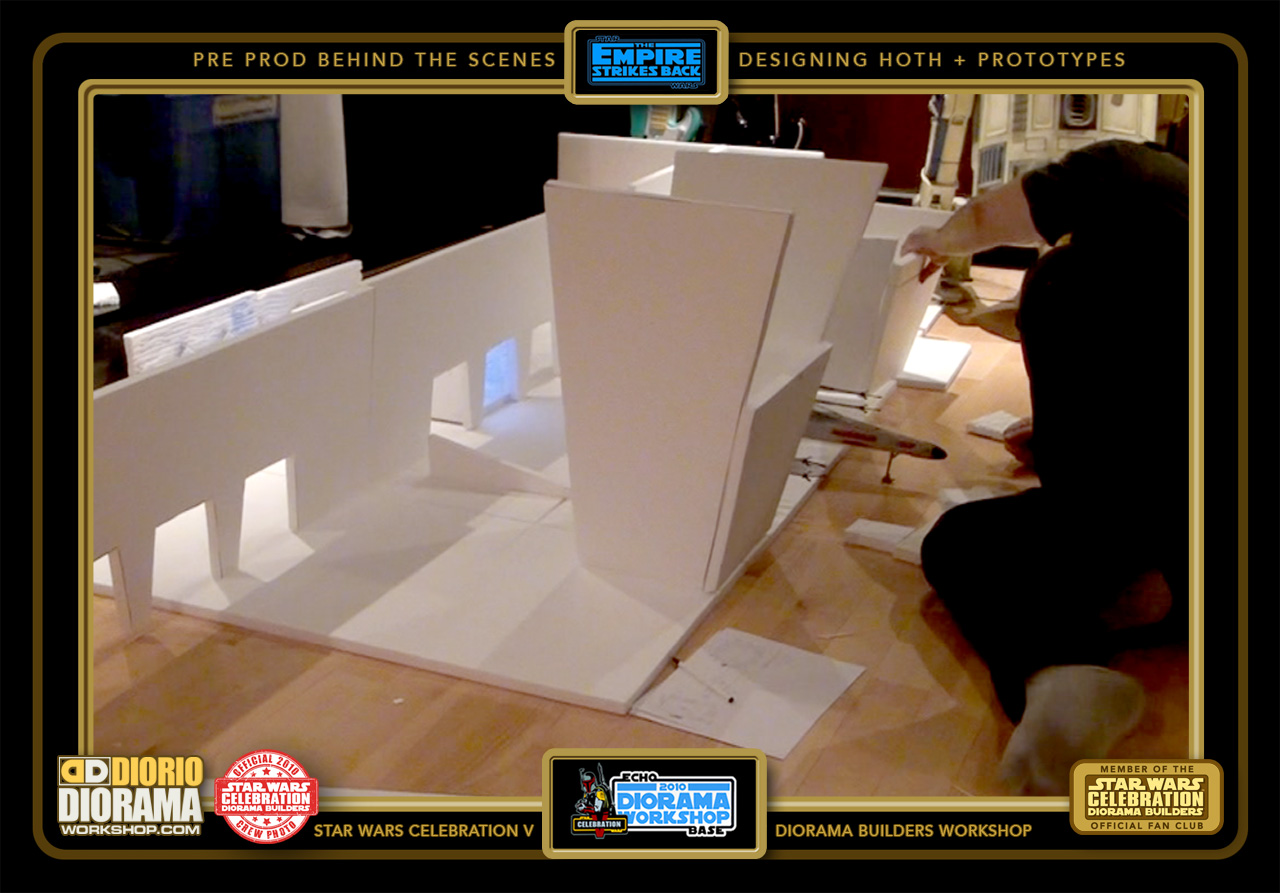
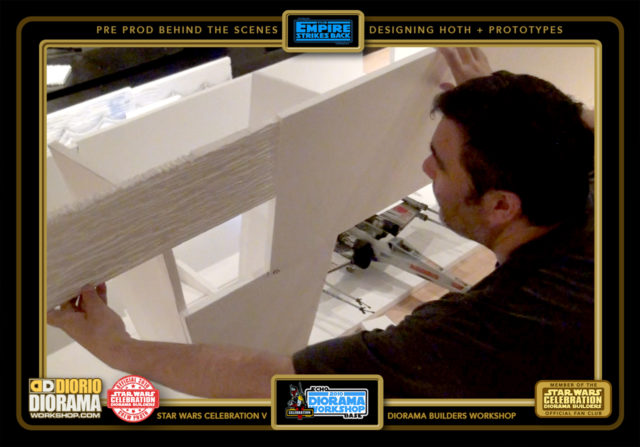
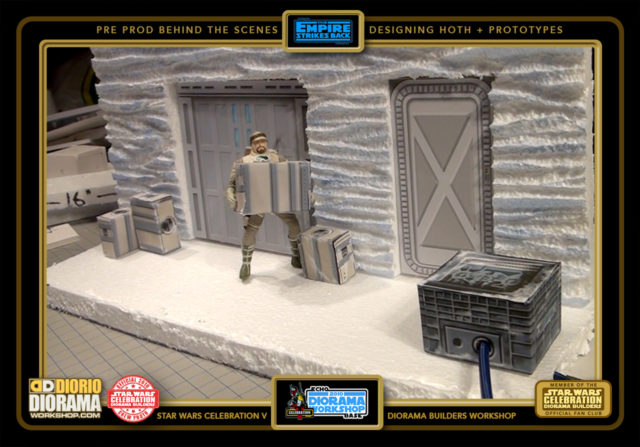
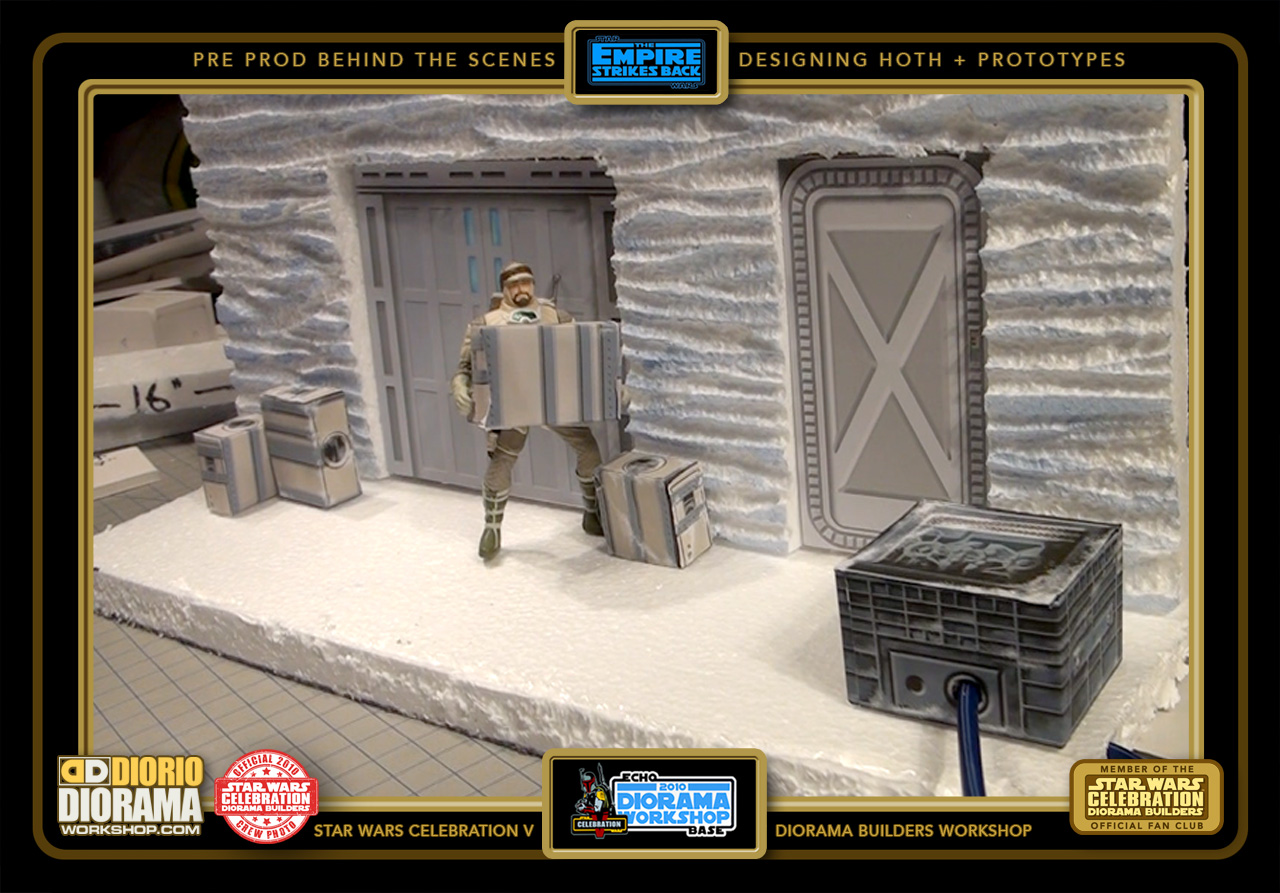
- The main Echo Base walls were the "V" Flower pot design. This is the window that fans would look through to the inside
-

- And see the 3 Arch Wall covering the Echo Base "U" main hallways.
-
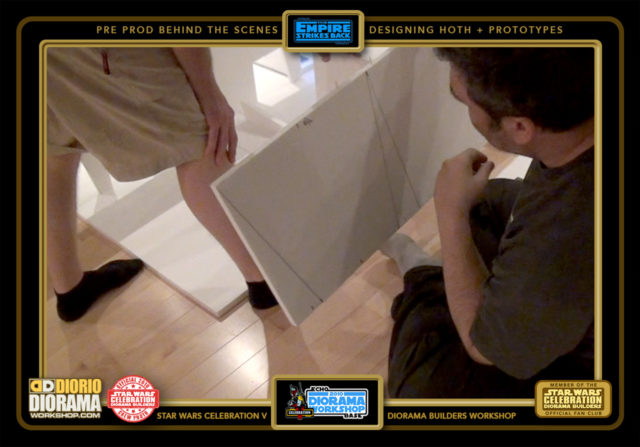
- We knew we had to modify and find the perfect height for all to see and take photos.

-

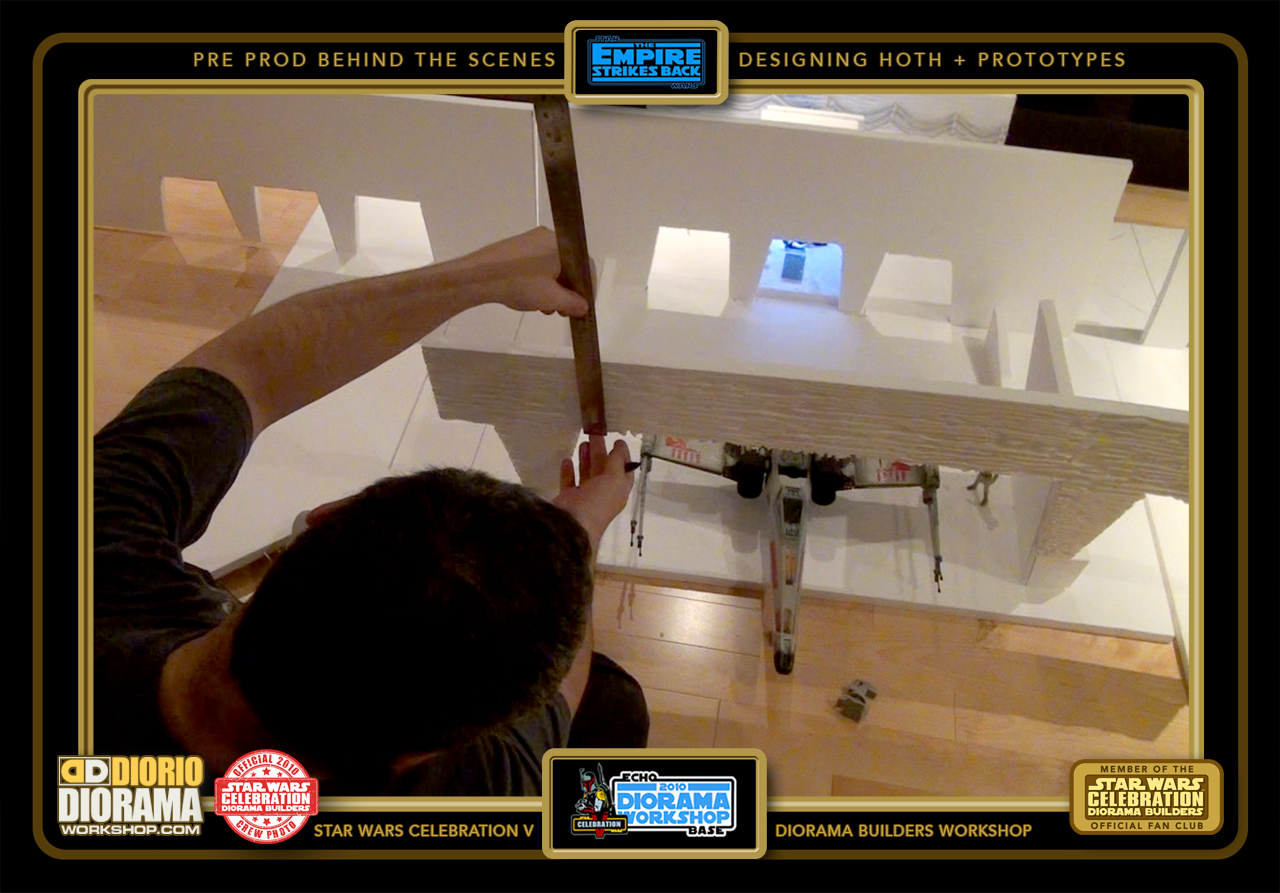
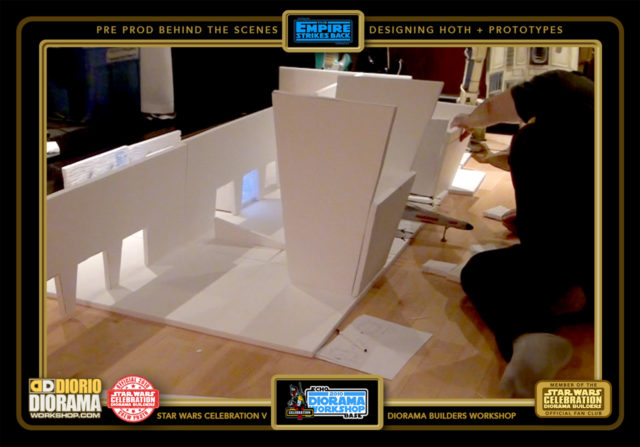
- Andre is making some measurement adjustments to the height of the archway. It was a little tricky to find what matched the movie reference photos and tall enough for fans to be able to take photos through the arch at the convention center.
-

- It's a little Frankenstein looking all scrap pieces together but...

-
- when put on the floor it does the job. Now taller, the proportions were good enough to start cutting the pieces.

-
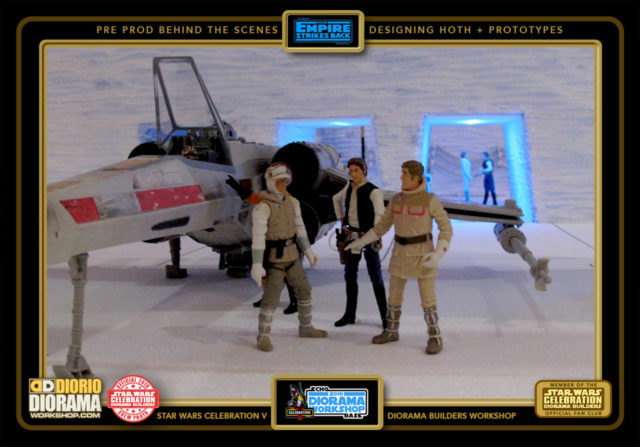
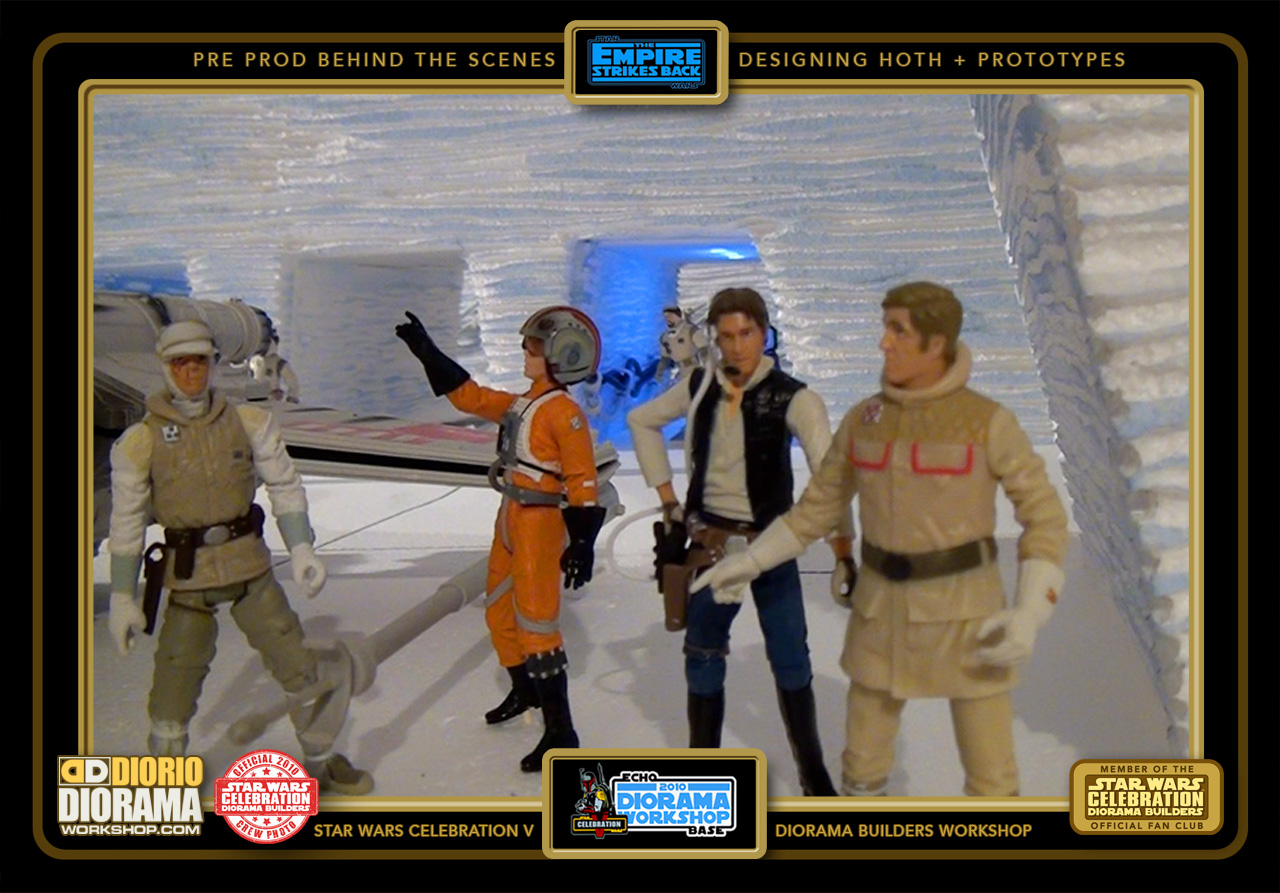
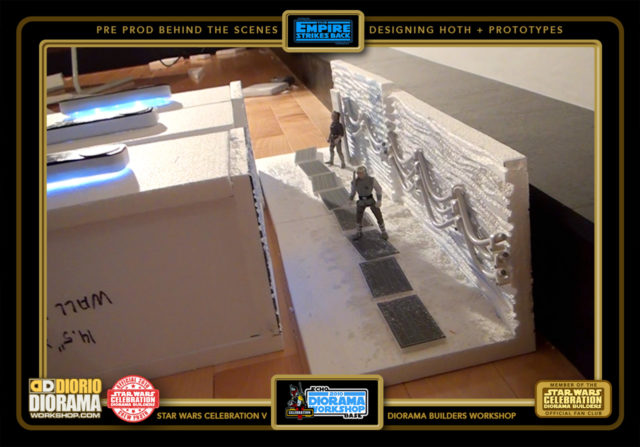
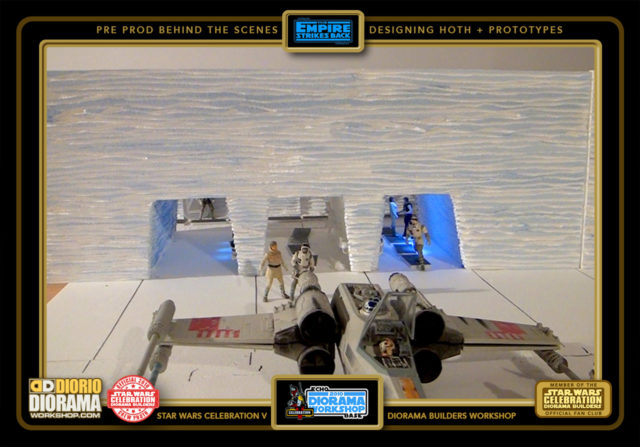
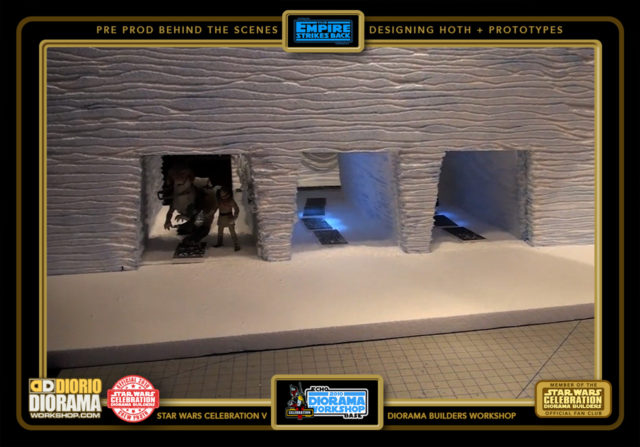
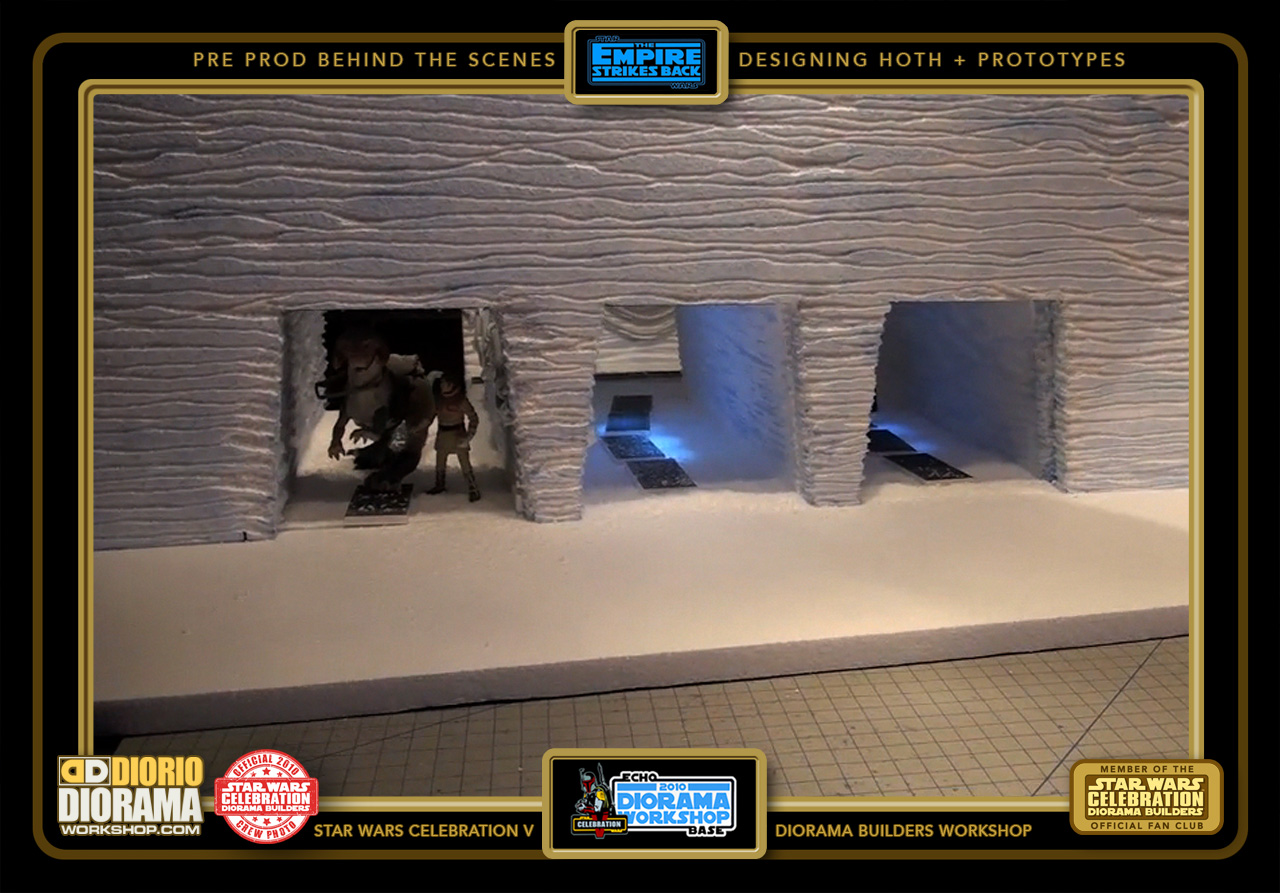
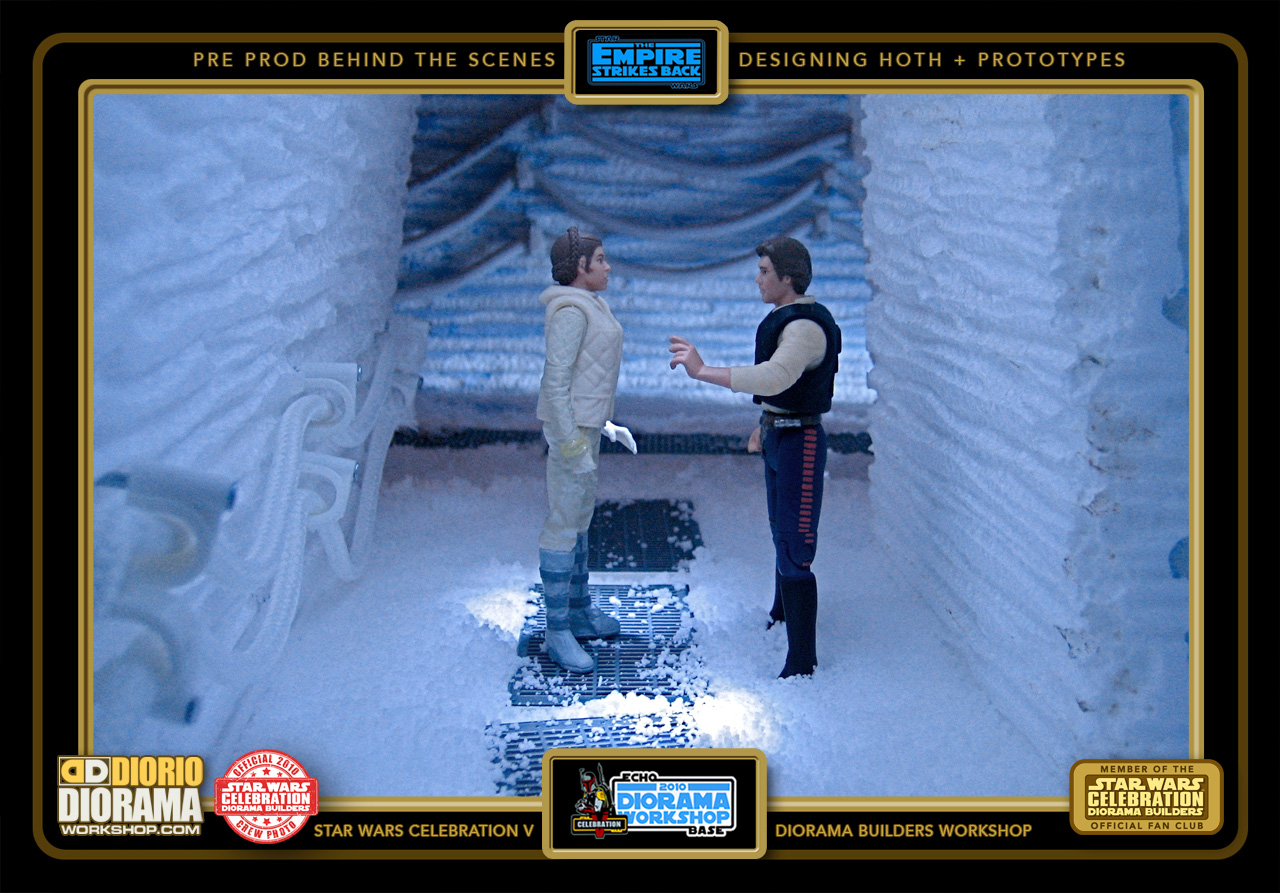
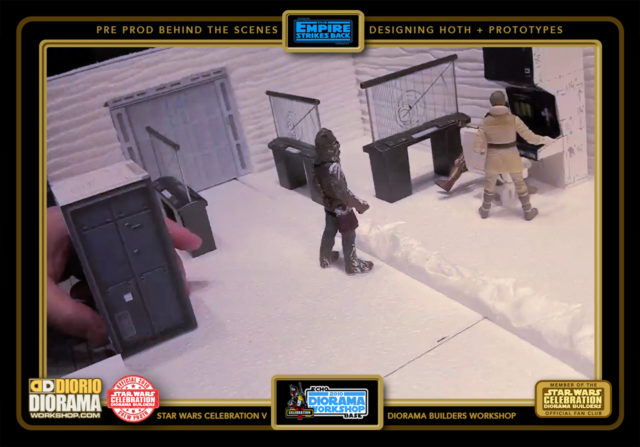
- Place a couple of Hasbro Figures in there, and it is starting to look like the movie. We can also tell from these photo tests, that the spacing between the arches to the U tunnels was movie accurate and very cool to look at 🙂
-

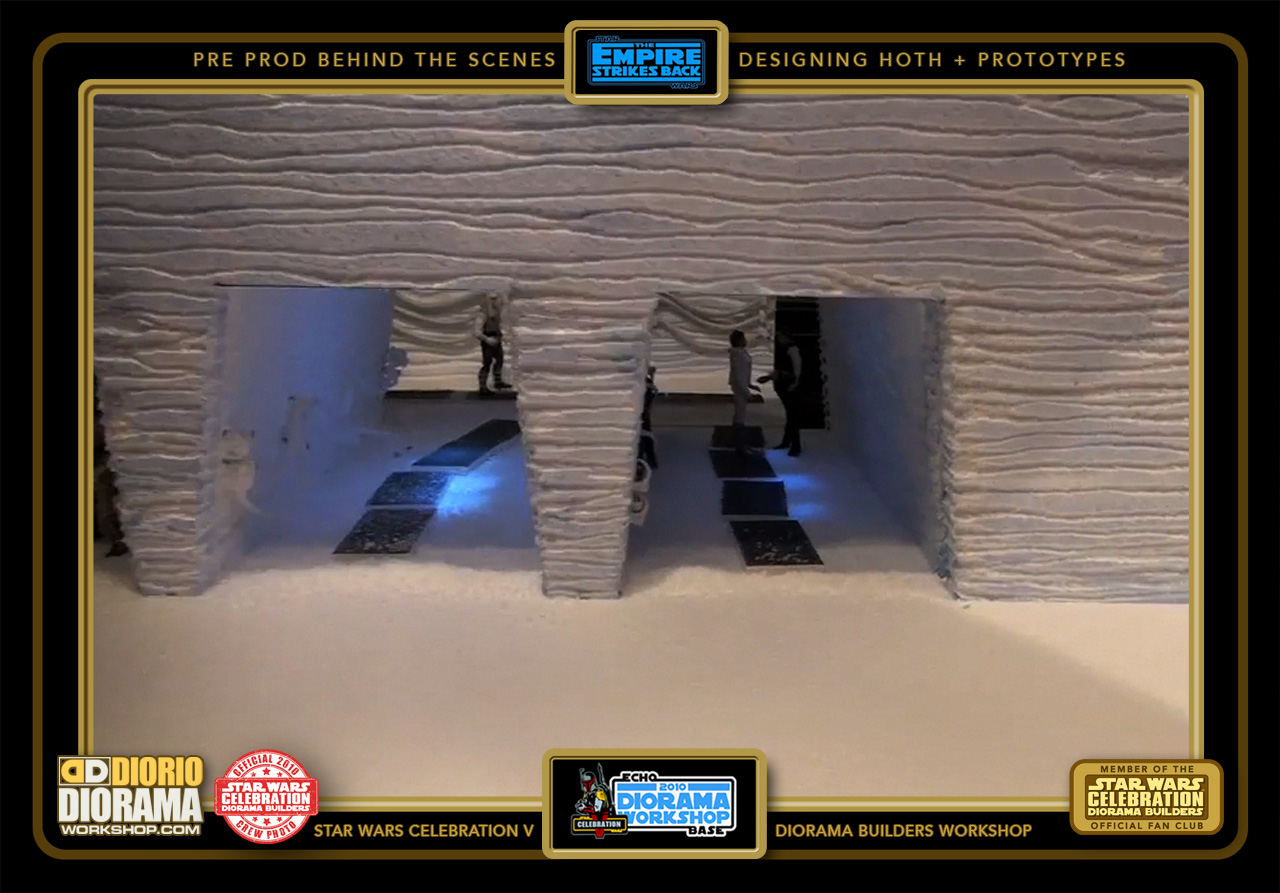
- Having a gap between the exit of the U Hallway and the back of the L Hallway really adds depth of field when looking in.
-
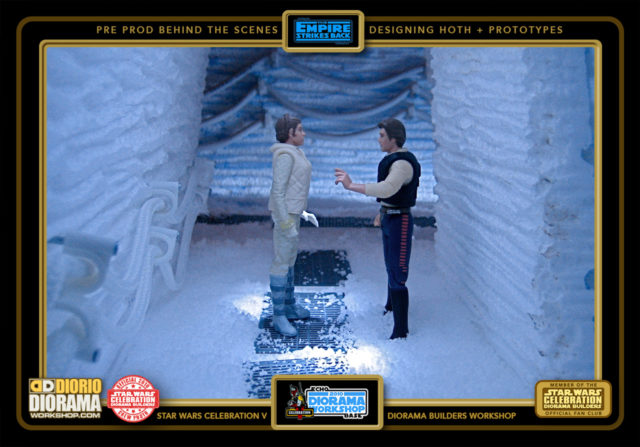
- A close up interior view really shows this effect off. I can look at this photo all day and make me smile 🙂
-
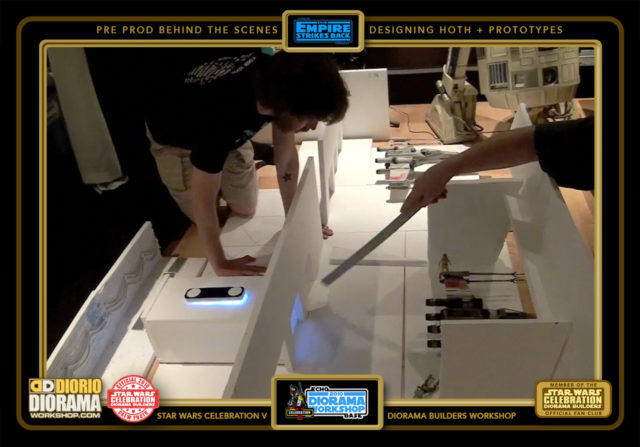
- Next up, trying to figure out where to slice to create the best blend the Archway wall when fans would put all their pieces side by side.

-

- Aligning the V flowerpot arch perfectly so it would hide the connection of the rear pieces was key to the design.
-

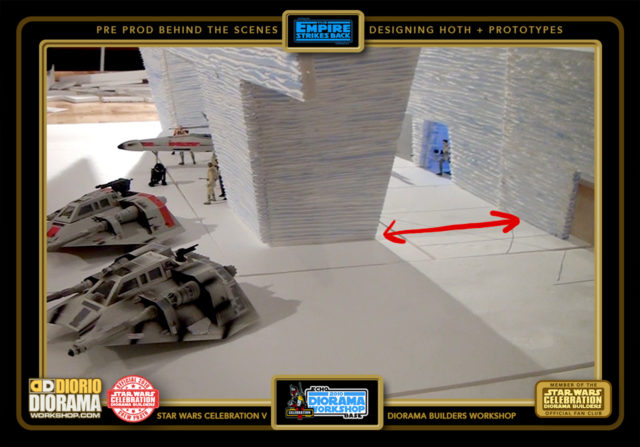
- I knew that the width of the 3 Archway was 3 Hallways, but unsude how close they would have to be from each other to look good from the front.

-
- We decided that the best place would be a little extra then one arch distance so that the V Flower pot shapes would actually hide the seams a little better.

-
- And also allow more space in the rear for the U Style Arches.
-
- Now that we had the distance set, we could tackle what height the "window" be of the facade.
-
- Another measurement that caused us headaches was the amount of space needed at the top to HIDE the rear in the photos and to limit the waste of a piece of foam at its minimum.
-
- Playing with toothpics and angled styrofoam is a little more complicated. Be still damn you LOL.
-
- So a quick slice off at the top of the column...
-
- Place some more temporary side pieces for the top front to lean on...

-
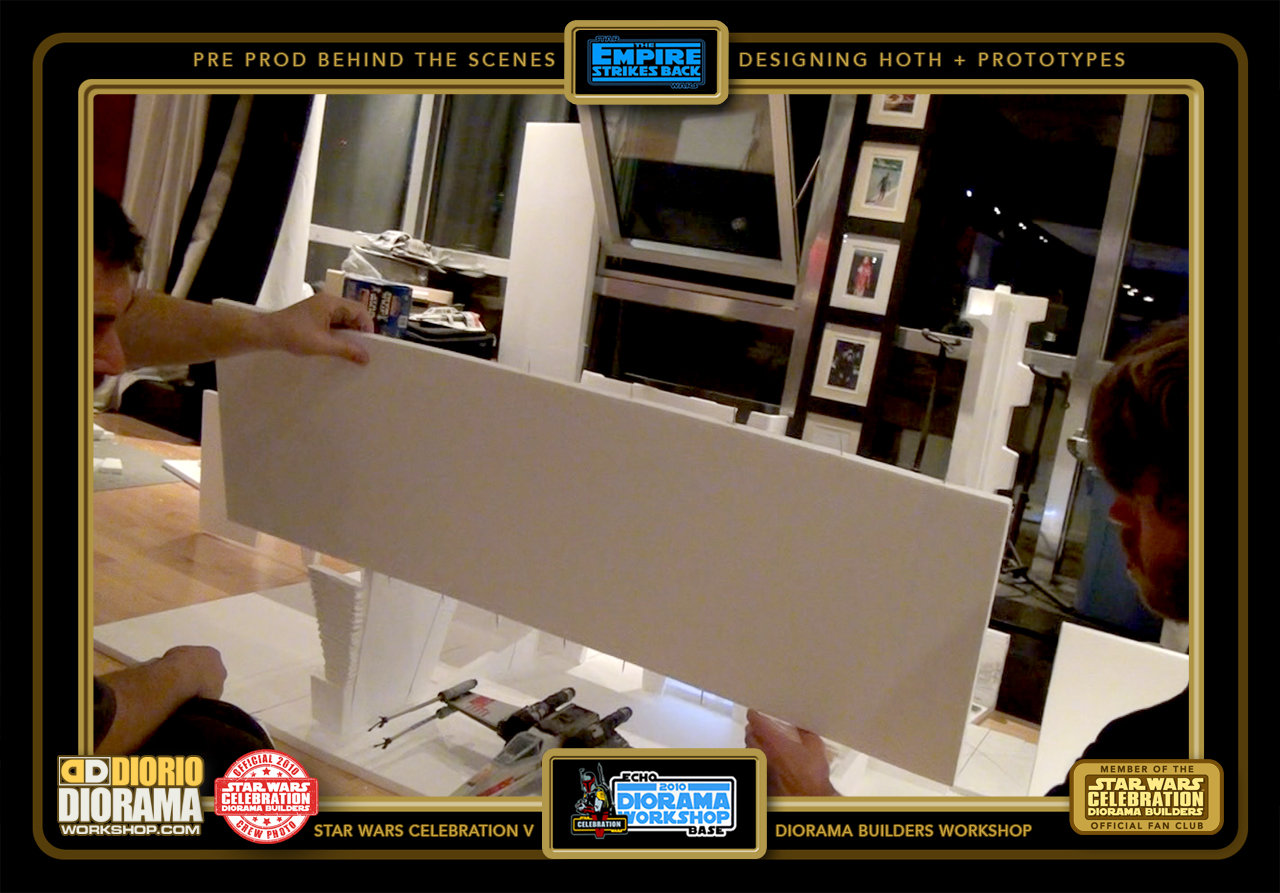
- Grab a full sheet of styrofoam...

-
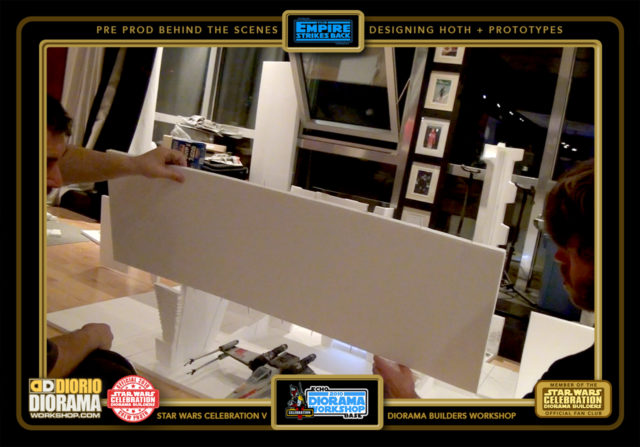
- And we can start to feel the look of the end result.
-

- The size of the one sheet worked, but would it match, blend in with the bottom columns ? I had a spare test sheet of foam that we had done texture tests on earlier, and grabed that in place at the top
-
- And sure enough... the pieces blended together as one. You couldn't really tell where the joint was. Excellent. One more problem solved 🙂

-
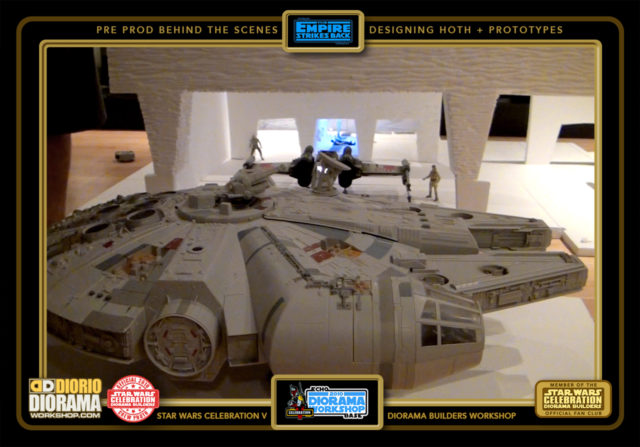
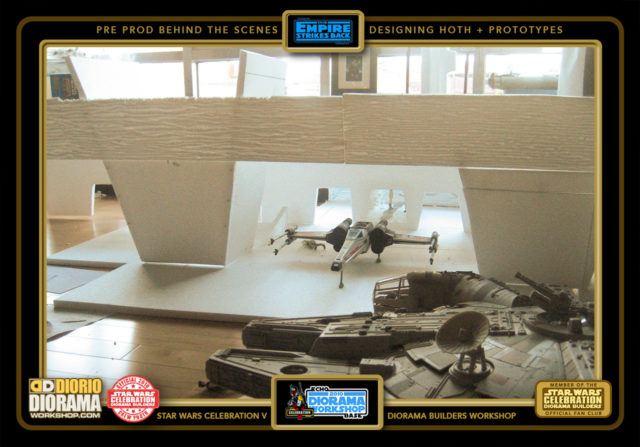
- Placing the Falcon in the center of the hangar and stepping way back, you could get an idea what the fans would see at the show 🙂

-

- But first I had to build some extra 3 Arch Walls even though there weren't enough U Hallways to put behind them.
-
- Now onto the FRONT of the V Flower pot design. We called it the V because of the angles on each side and its big enough to look like a flower pot , so ... 🙂

-
- Andre cut me 2 pieces for the sides of the Flower Pot arch
-
- Andre asks "is this alright boss ? " LOL. I think, this was the 6 or 7th time we changed the measurements. It would always seem a little Odd.

-

- Here I am attaching the V piece to the temporary sides with Toothpics to see if the size if finally good to go. If you follow along the line on the floor along the back, you can see how the V pot will hide the cut seam of the 2 joining 3 Archway Walls.
-
- I think it needs to tilt more, Let's cut another piece...
-
- Will try number 3 be the charm ?

-
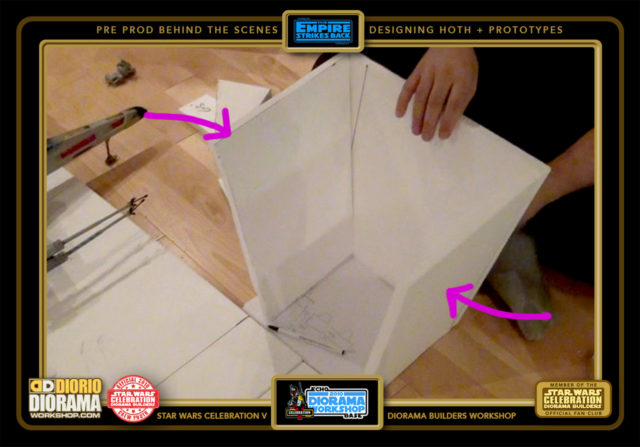
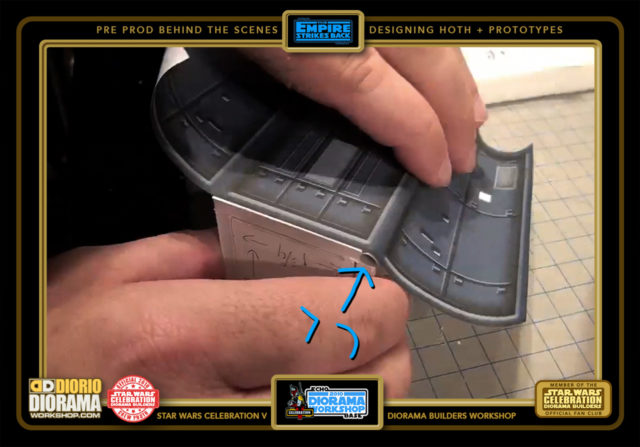
- More toothpics hold the pieces (Purple arrows) delicately together for me to place it on the front position of the Hangar.

-
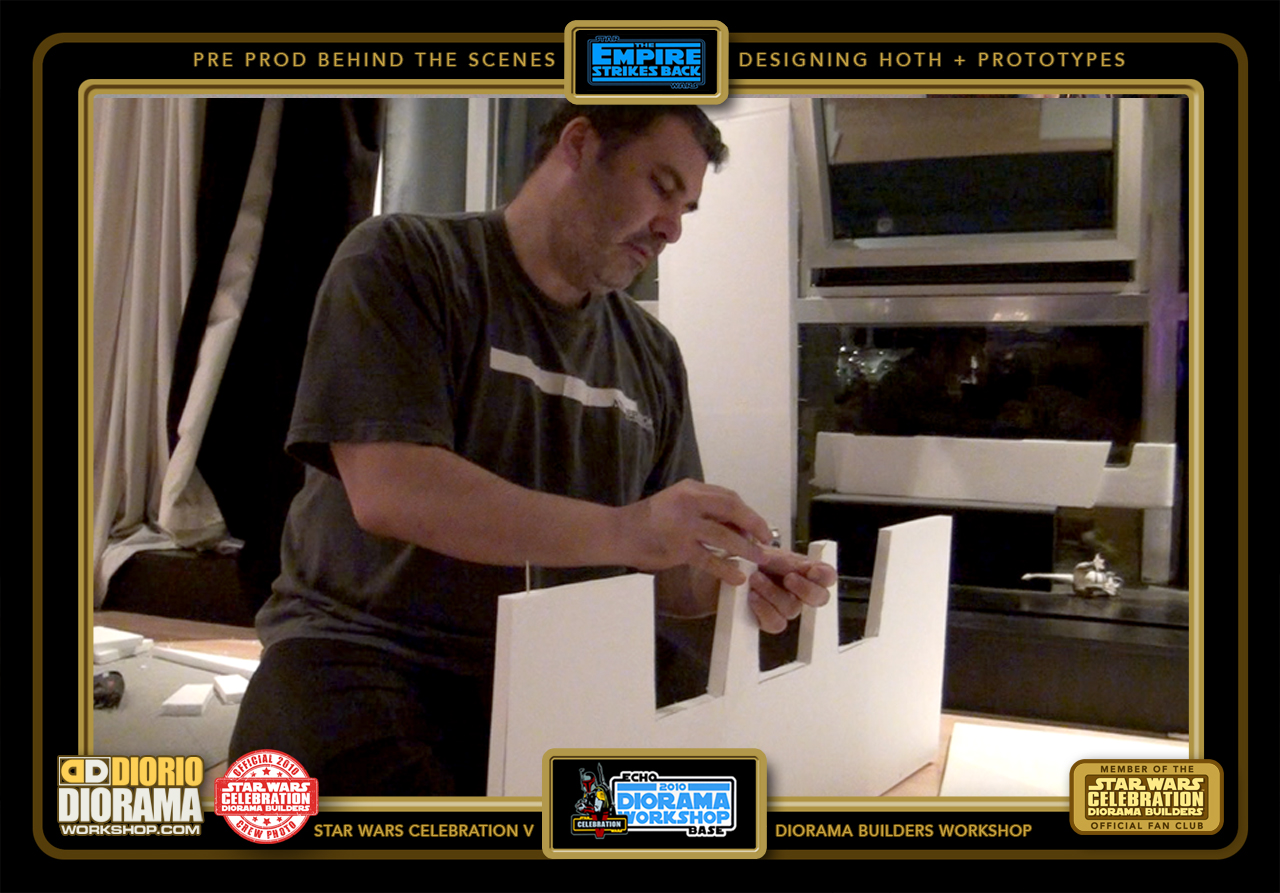
- Sticking toothpics into the base trying to keep this from tipping over.
-

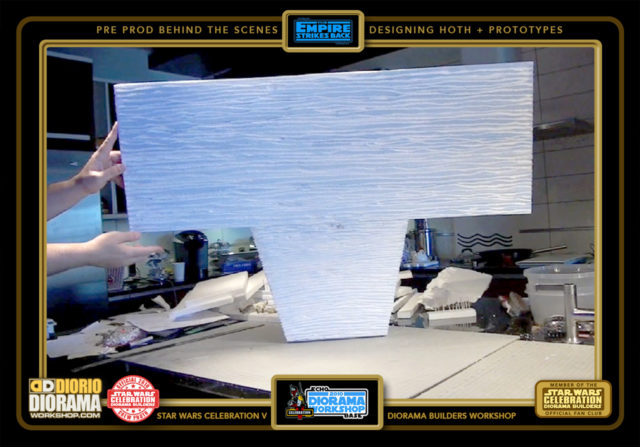
- YES ! Now the Front shape approved, we needed to cut 2 identical side pieces. This was also tricky as they are ANGLED as if falling, or tipping towards the front. But at just what angle ?
-
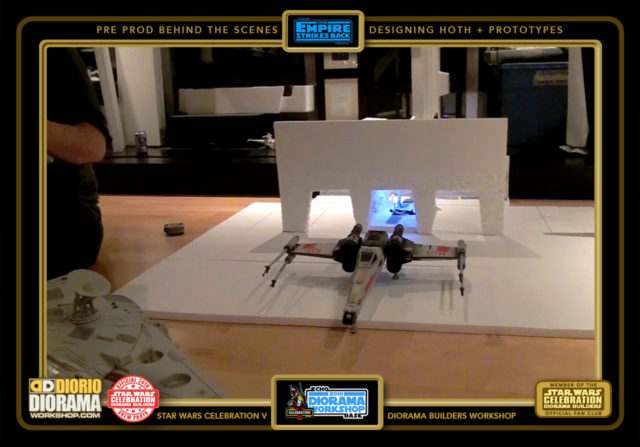
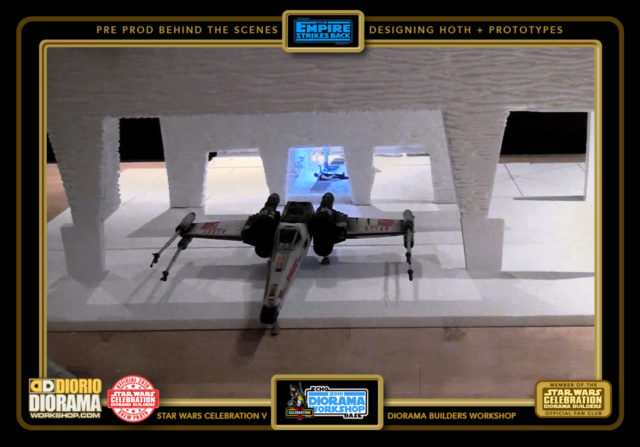
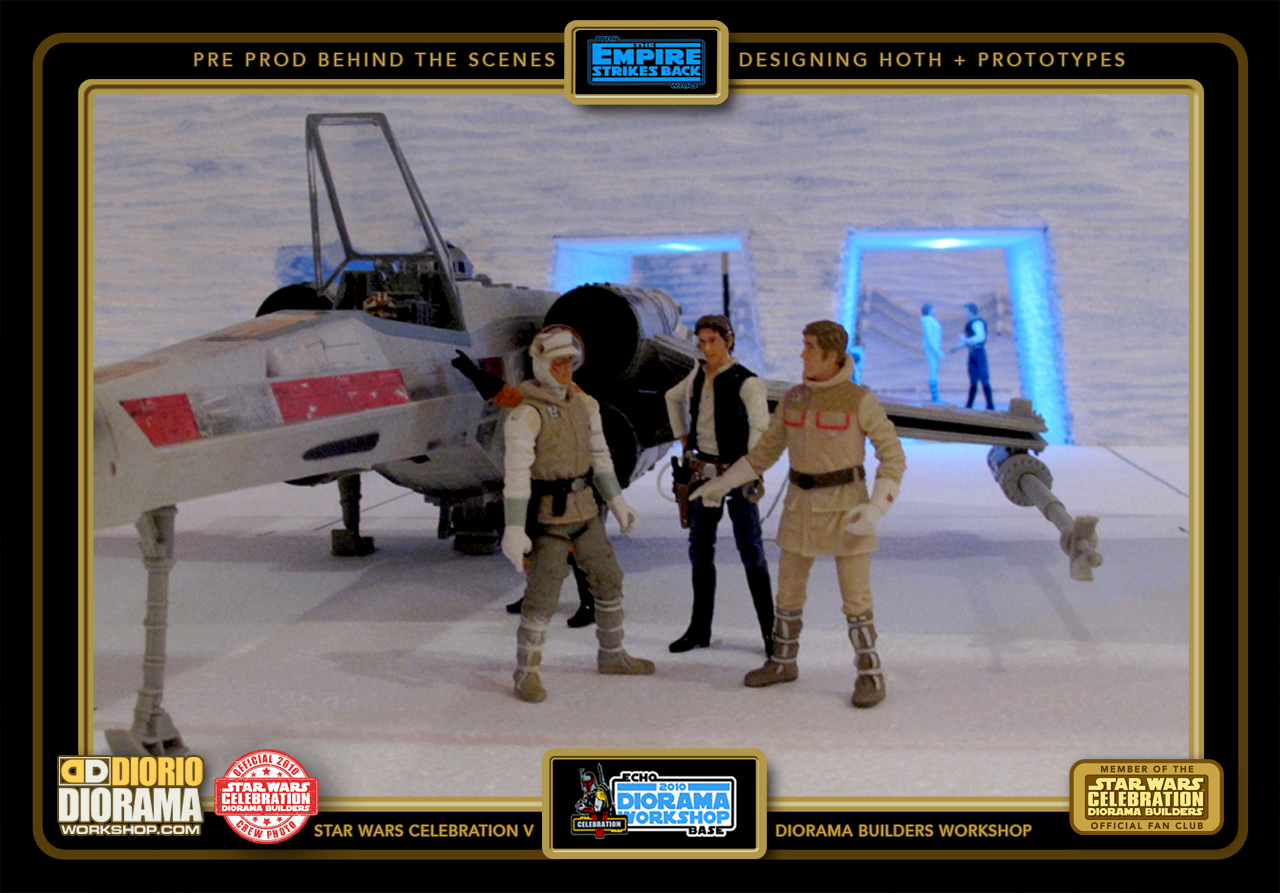
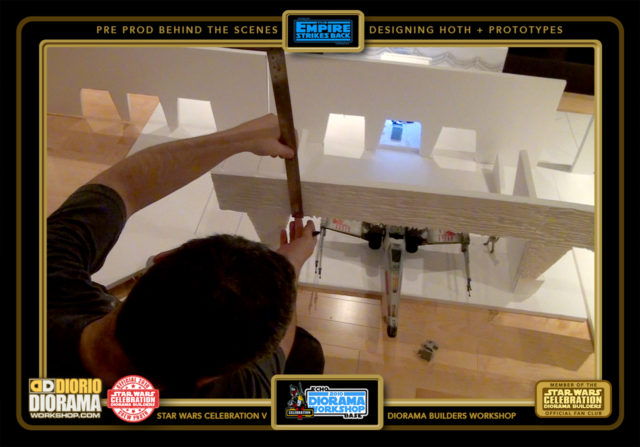
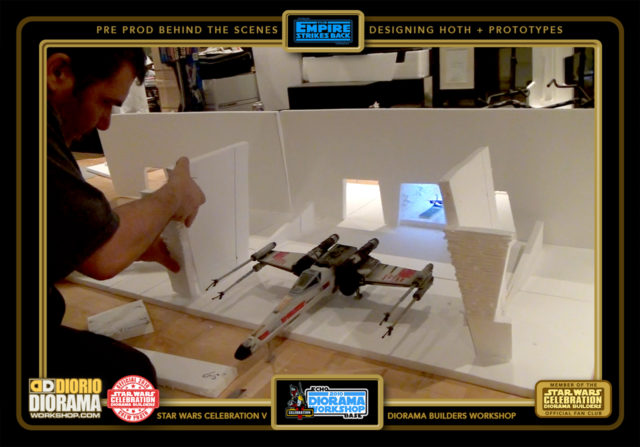
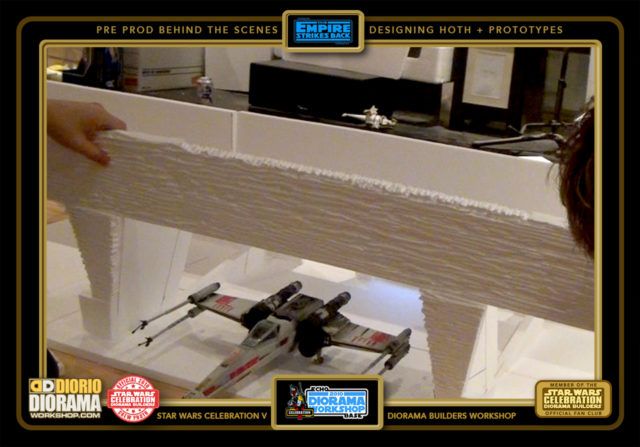
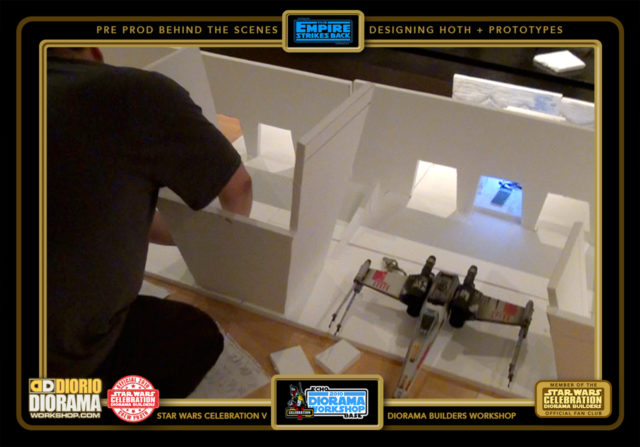
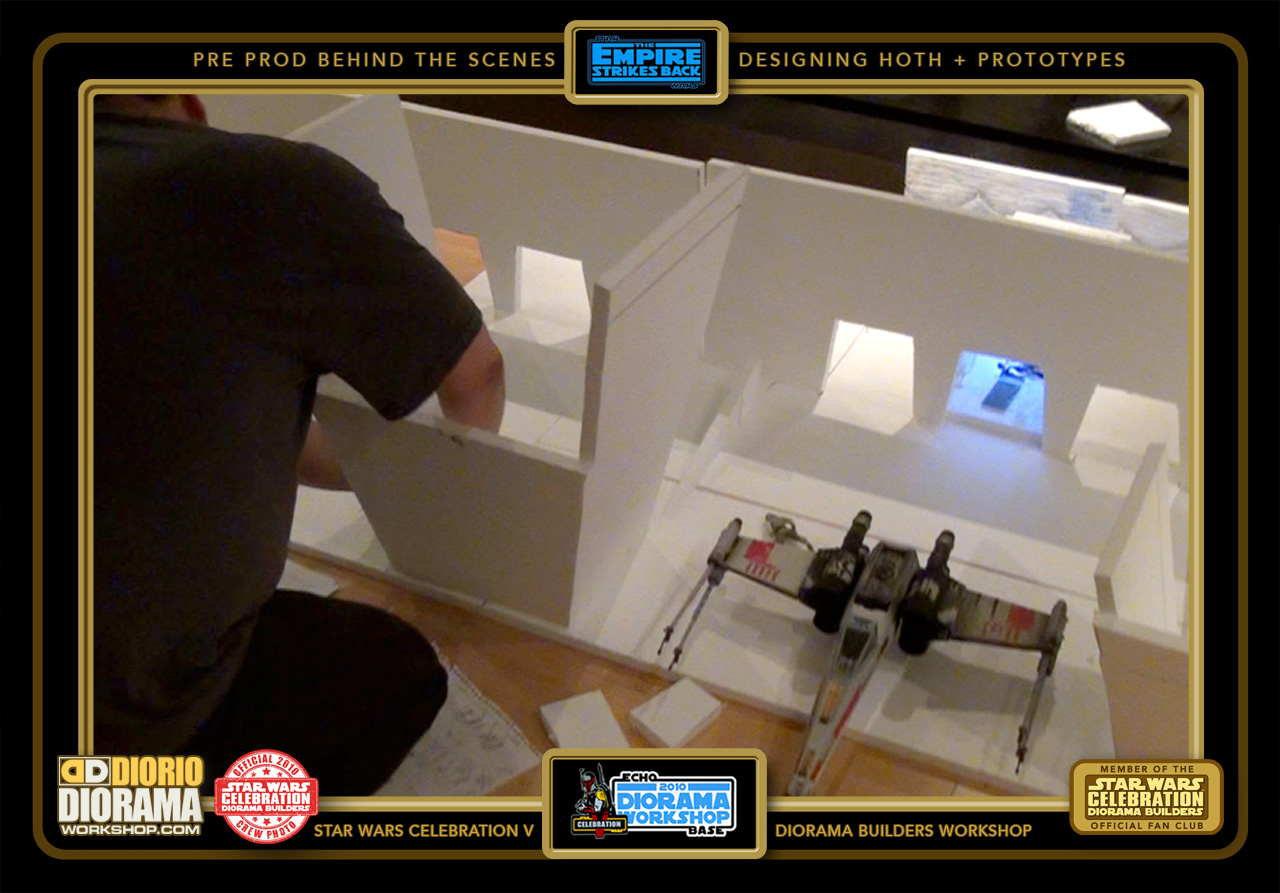
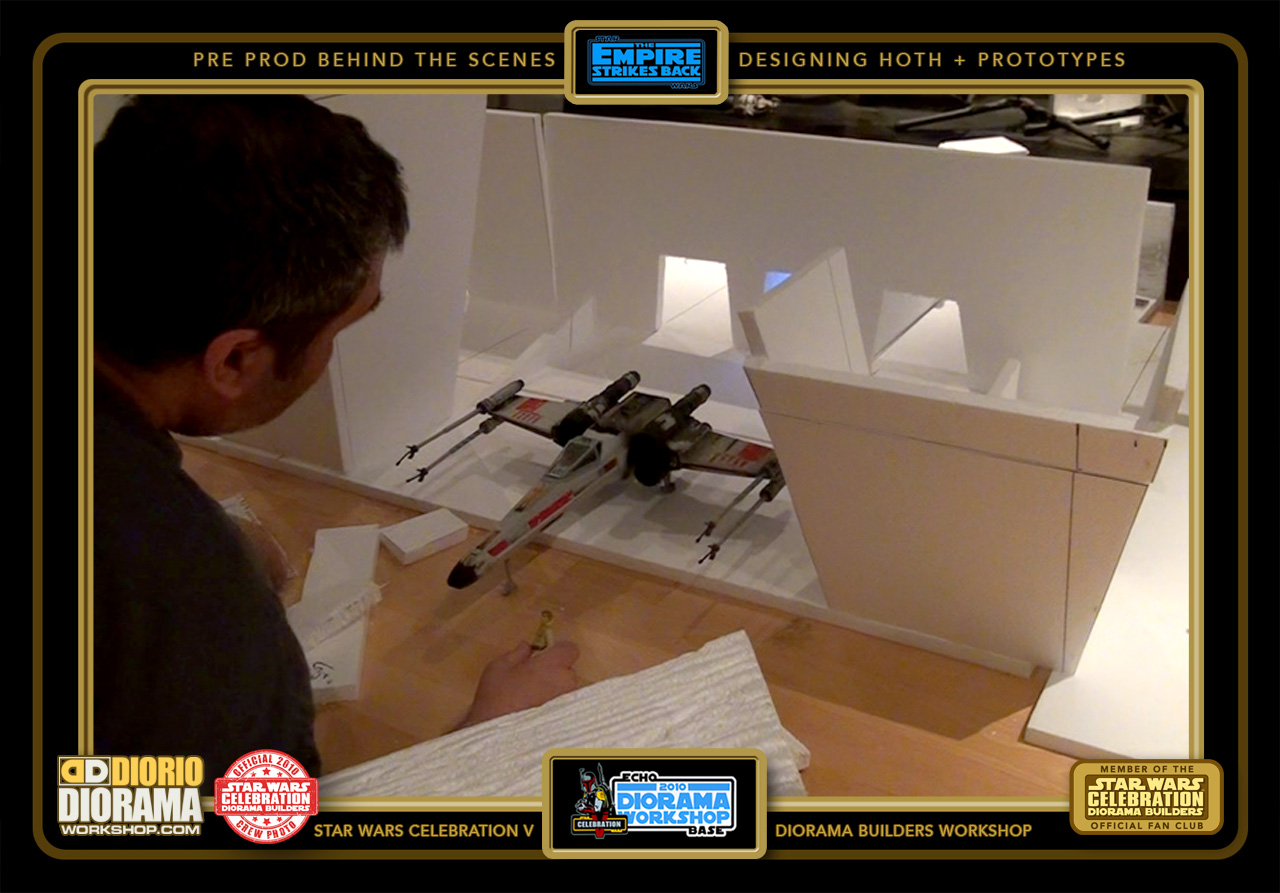
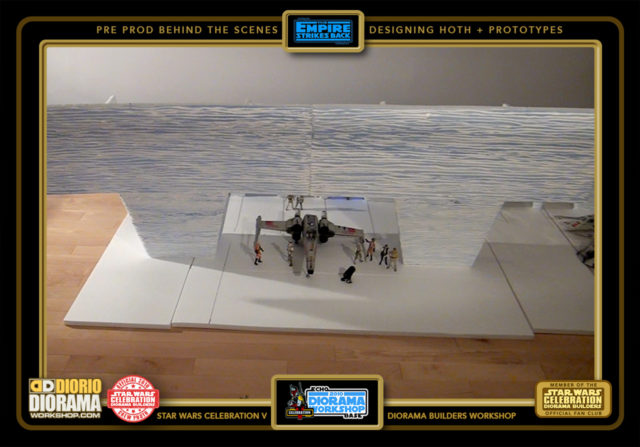
- Once we saw the angle worked, we took some more styrofoam and cut two NEW pieces, much taller this time, the same height as the TOP piece, so that it could be attached easily at the show. I am seen placing the first prototype lower ones at the right side so we can test and see what the archway above the X-Wing will look like.
-

- The spacing between the X-Wing is looking good, now to see what it looks like with the TOP on ...
-
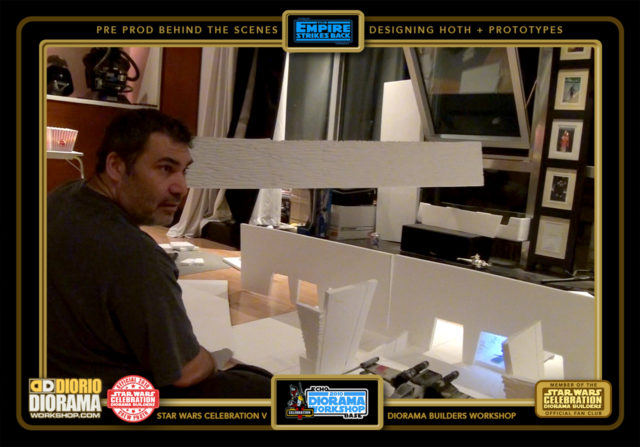
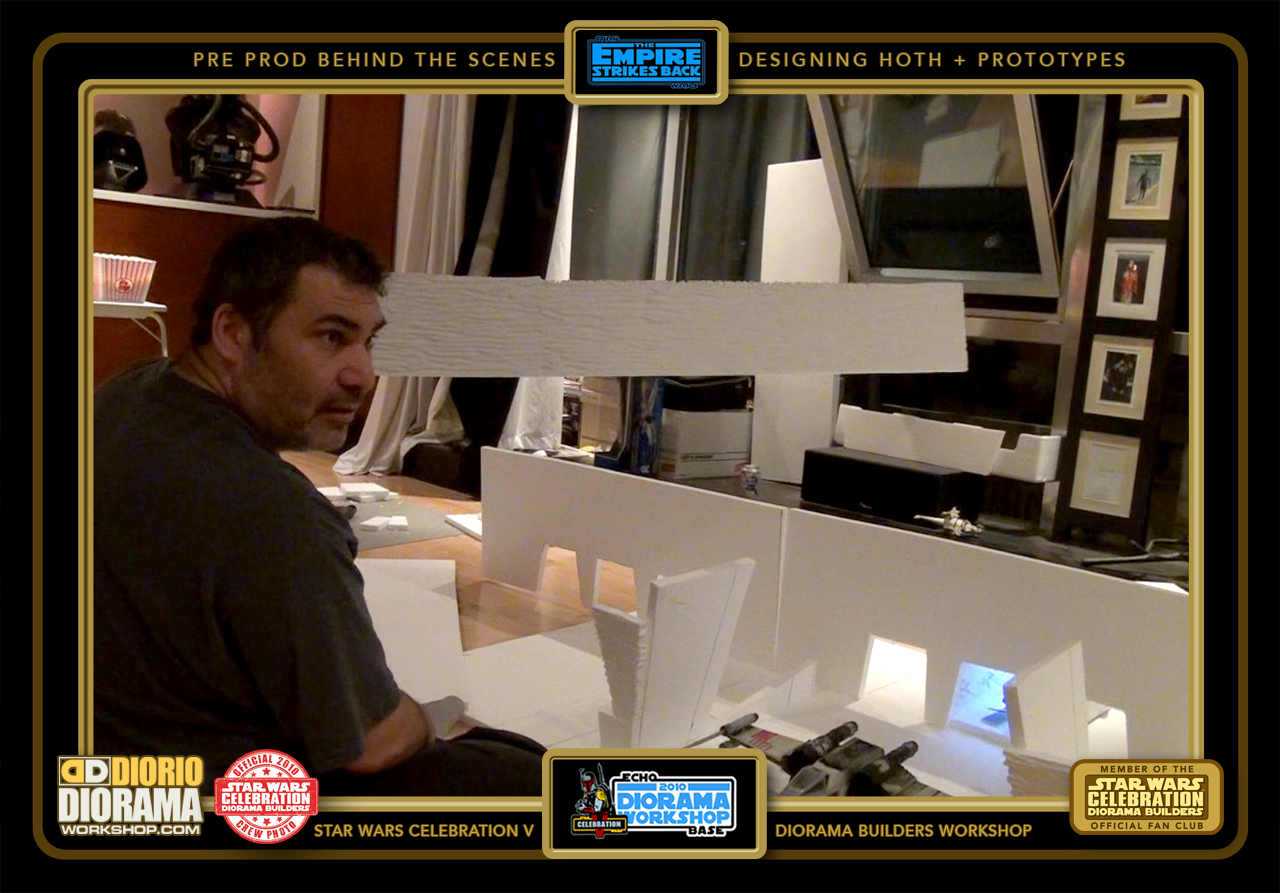
- It always looks a little weird, and you have to use your imagination when designing, because you keep cutting and changing dimensions, you want to minimise wasting good pieces of foam. So this is working as for the height but something is still bugging me a little, can't yet put my finger on it. After building another one, I realised, having the JOINT right accross the center of the V was ugly and HARD to keep connected 100% flat. So Andre got the brilliant idea of placing the TOP Sheet of foam right across the middle of the V. to make it look more like a T shape.

-
- Now when you look at it, it's all ONE piece at the top, with equal distance off to each side.

-
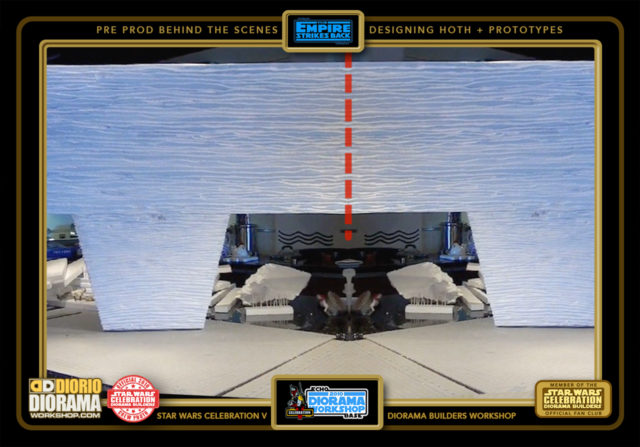
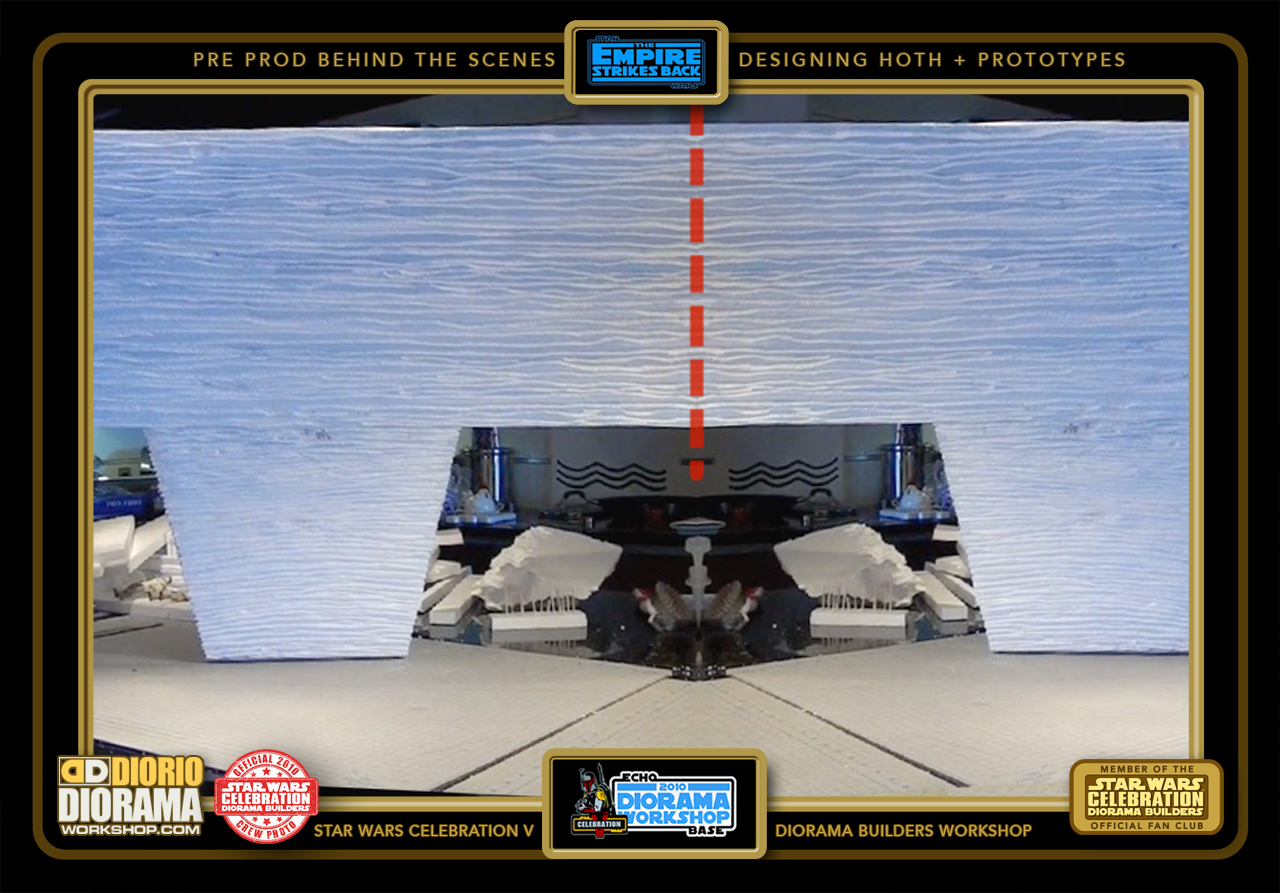
- You can see that even though I flip floped one photo (I hadn't built a second one yet) the connection is along the RED dotted line now, which will be just above the X-Wings. The eye is no longer annoyed by a huge cut down the center of the beam.
-
- Toothpics work wonders when using Styrofoam so you can play and cut without Hot Glue gun until you are certain of your dimensions.

-
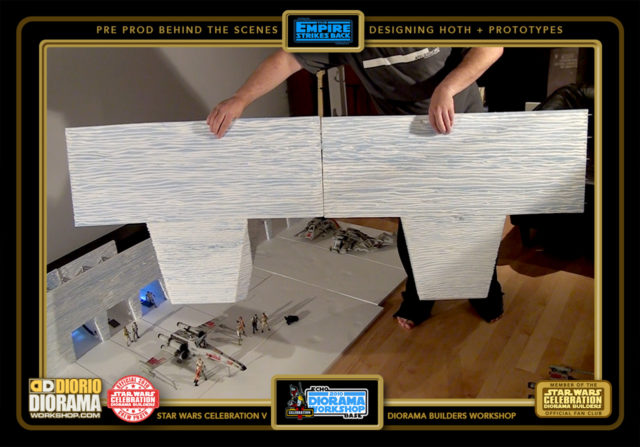
- Connecting 2 completed flower pots create the huge window arch.

-
- That will be the parking space for the X-Wings and Snow Speeders.

-
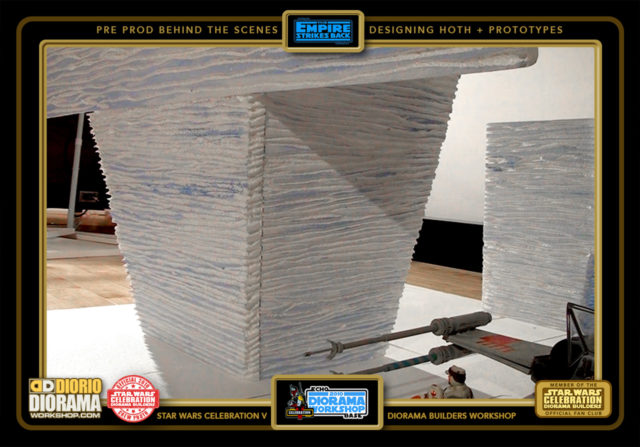
- Here is a perfect angle to show you how the textures connect and give the illusion of one giant block of ice.

-

- Decals are another thing I really enjoy creating. And what kid does NOT like to apply decals right ? 🙂
-

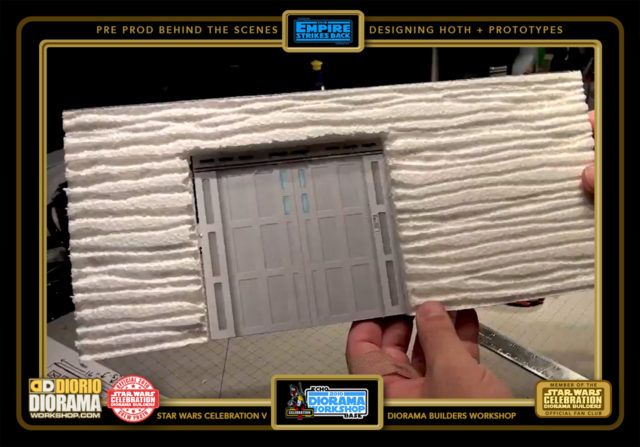
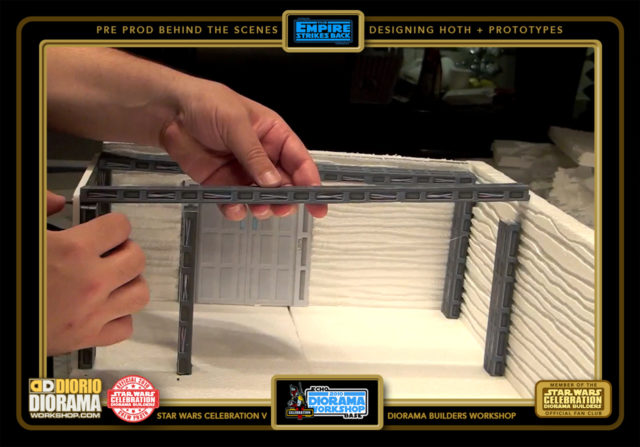
- Adding BONUS options for you to add to your hallways - like this small door - will make them unique to YOU.
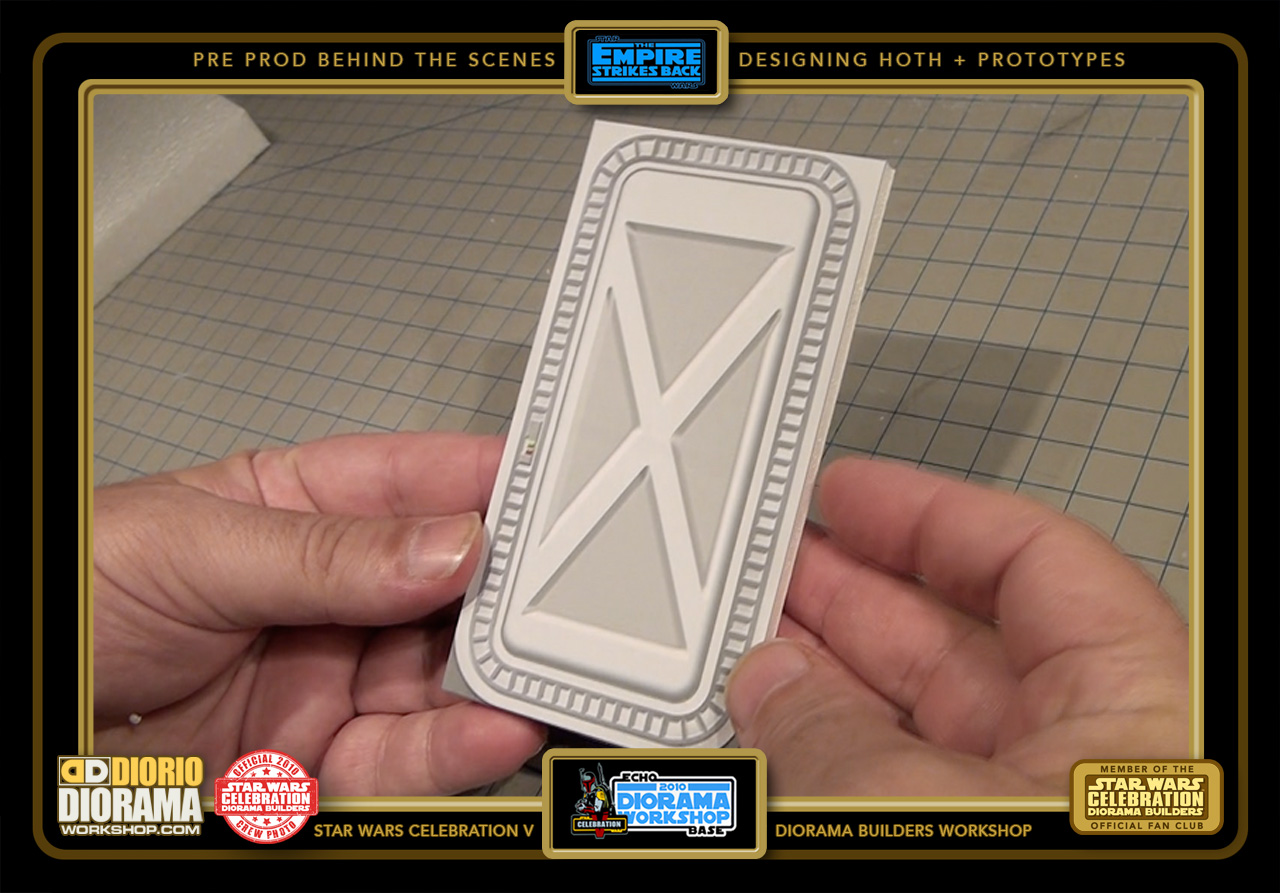
-
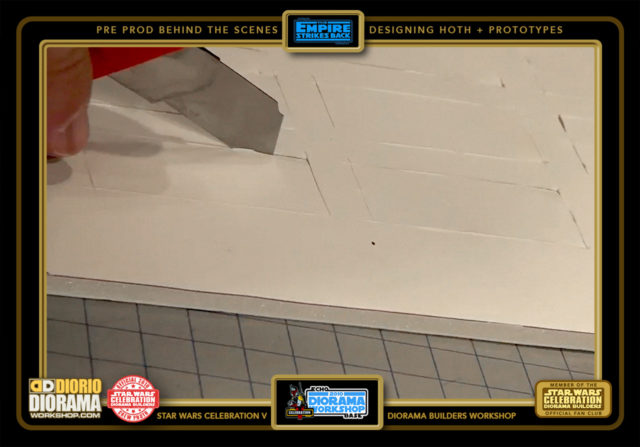
- Simply trace the shape of your doors into your wall and cut along the lines.

-
- For the prototypes I poked toothpicks before using the Hot Glue, just in case... 🙂
-
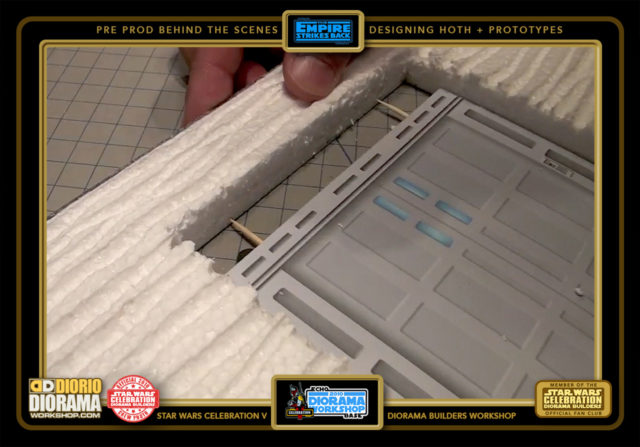
- The DOUBLE Hallway doors are movie accurate. YOU decide WHERE you want to put the doors, if at all.

-
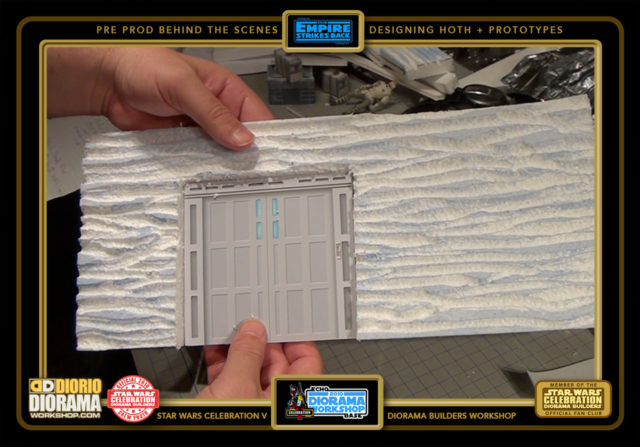
- See how simple that is. Now if you were at home, you could modify this to even OPEN and CLOSE by adding SLOTS in back of your wall piece.

-
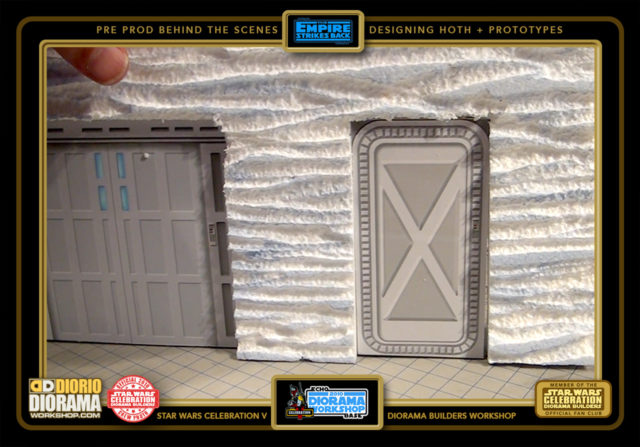
- Comparisons of the DOUBLE and SMALL Doors.

-
- Once your door is installed in your wall you can Hot Glue it to your floor base.

-
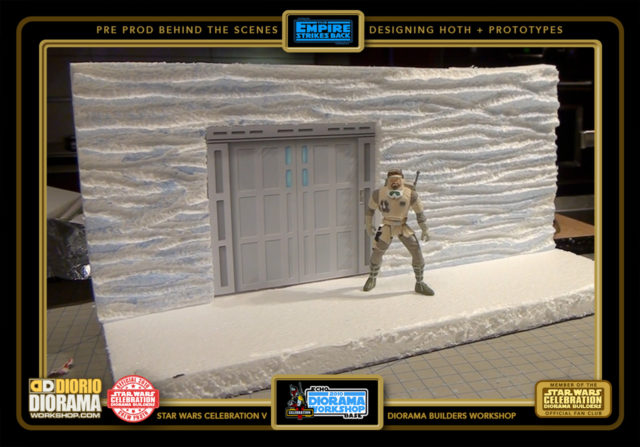
- Add your figures and you have a kids BASIC HAllway build.

-

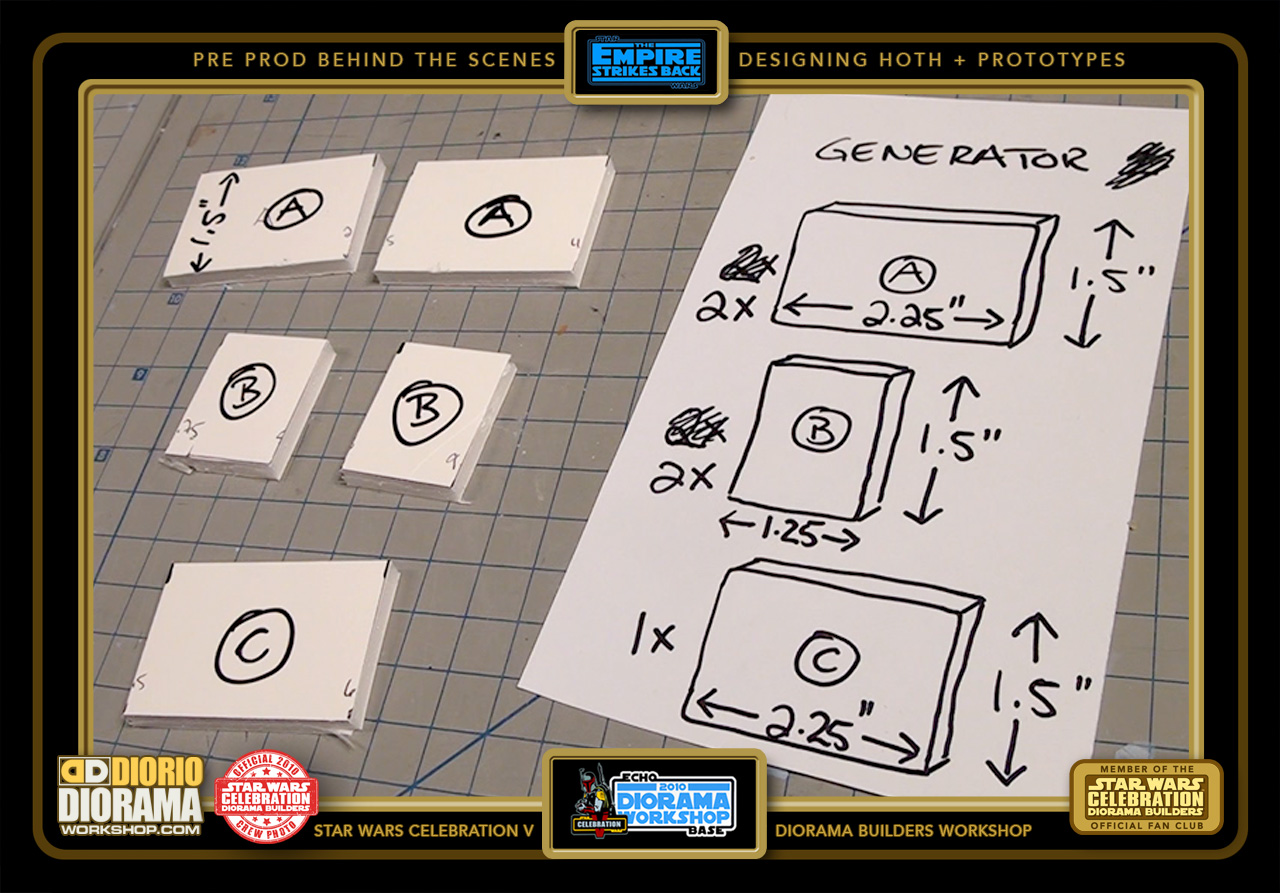
- Some more BONUS builds are Rebel Generators and cases.
-
- Of course you get to play with Decals when you make these 🙂

-
- You don't need to make these but they add a little more life to your build.
-
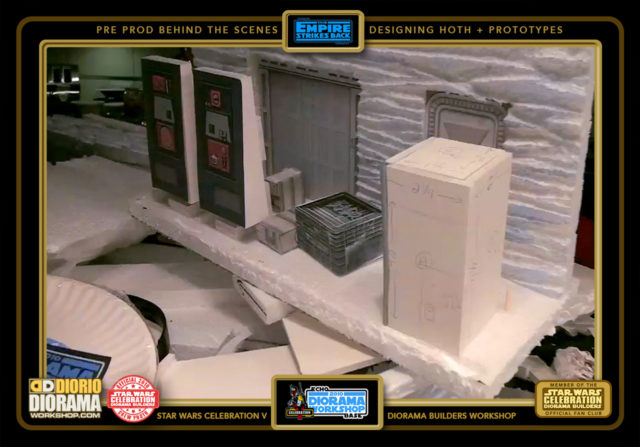
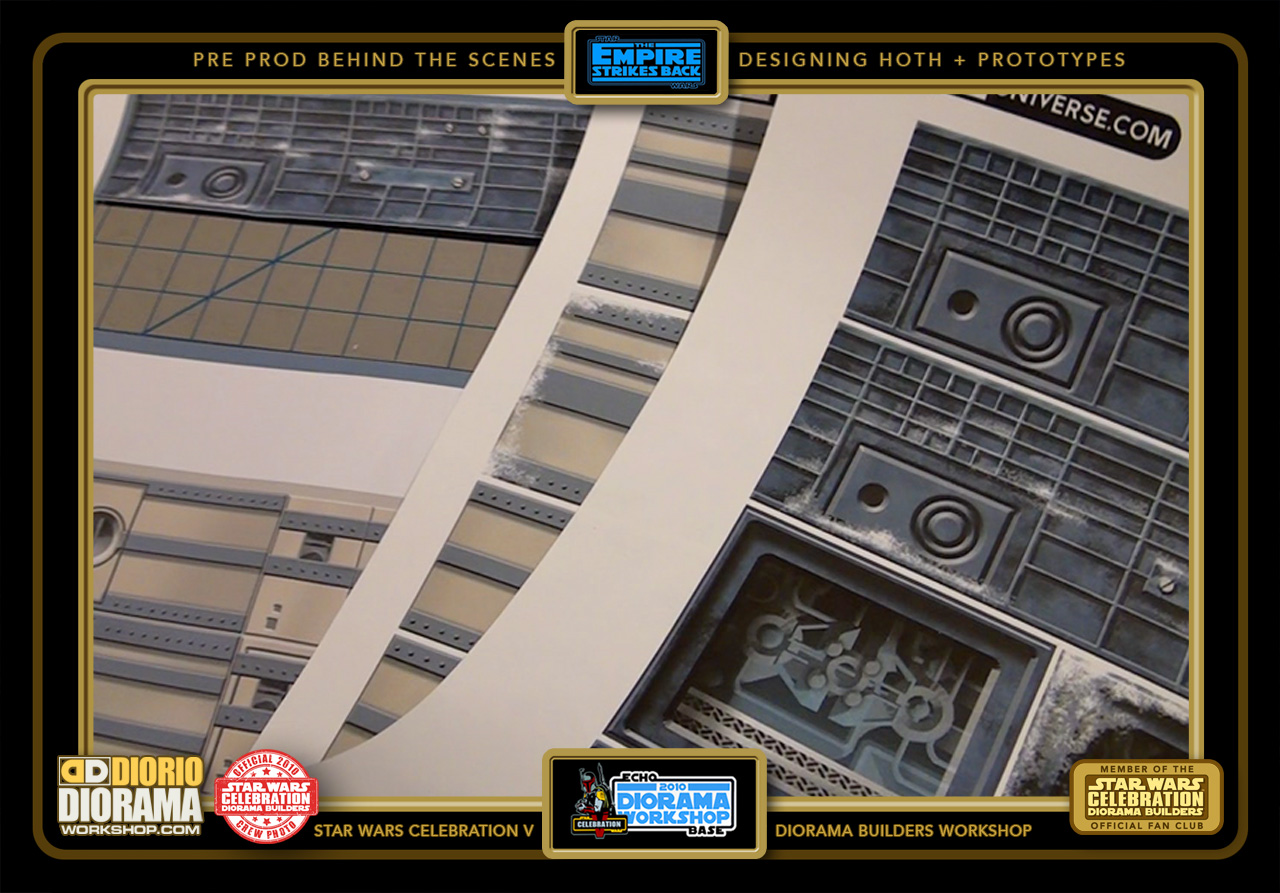
- Some more BONUS accessories are various CONTROL PANELS, Type C seen on the left has it's DECAL SKINS already applied.

-
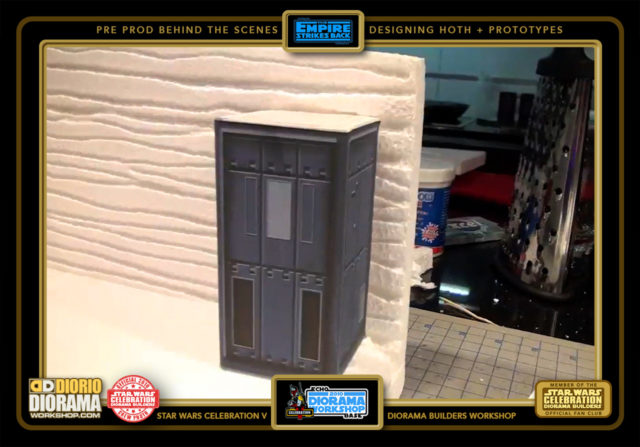
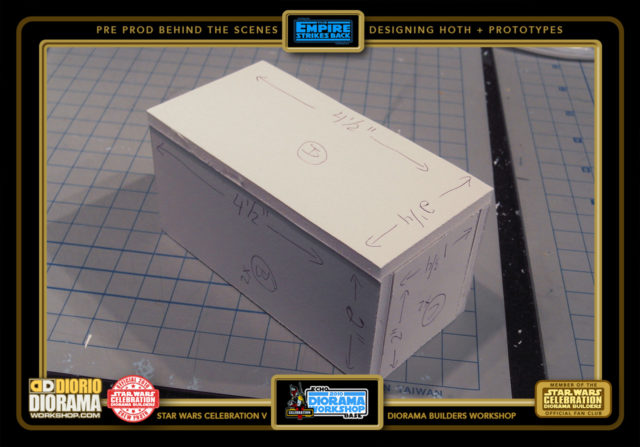
- The most EASY Control Panel is the A Design cabinet.

-
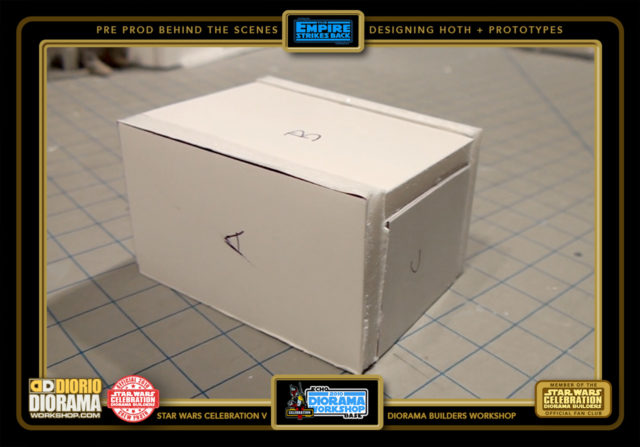
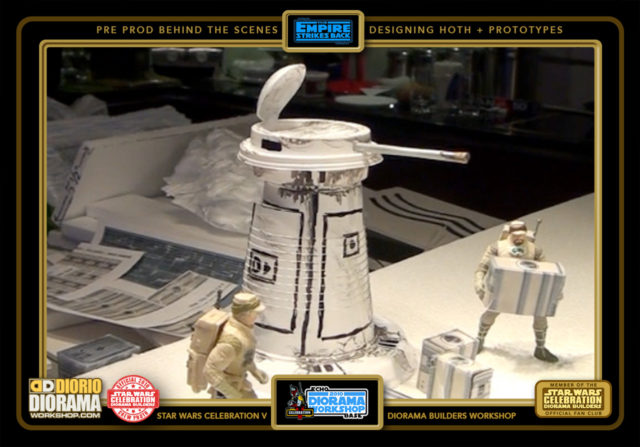
- A more simple box skin to design, the DECALS STYLE B look more like a refrigerator, or 1970's computer tower from the 6 million dollar man 🙂 Just grab my box dimensions I figured out using movie freeze frames and print, peel, and apply.

-
- If you add a straw to a corner, you can give it a rounded effect once the Decal is applied.

-
- Once all the decal has been pressed around the Foamcore box, your console set piece is done.

-
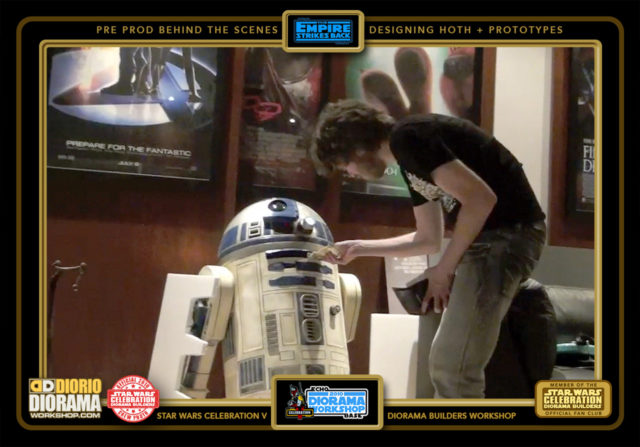
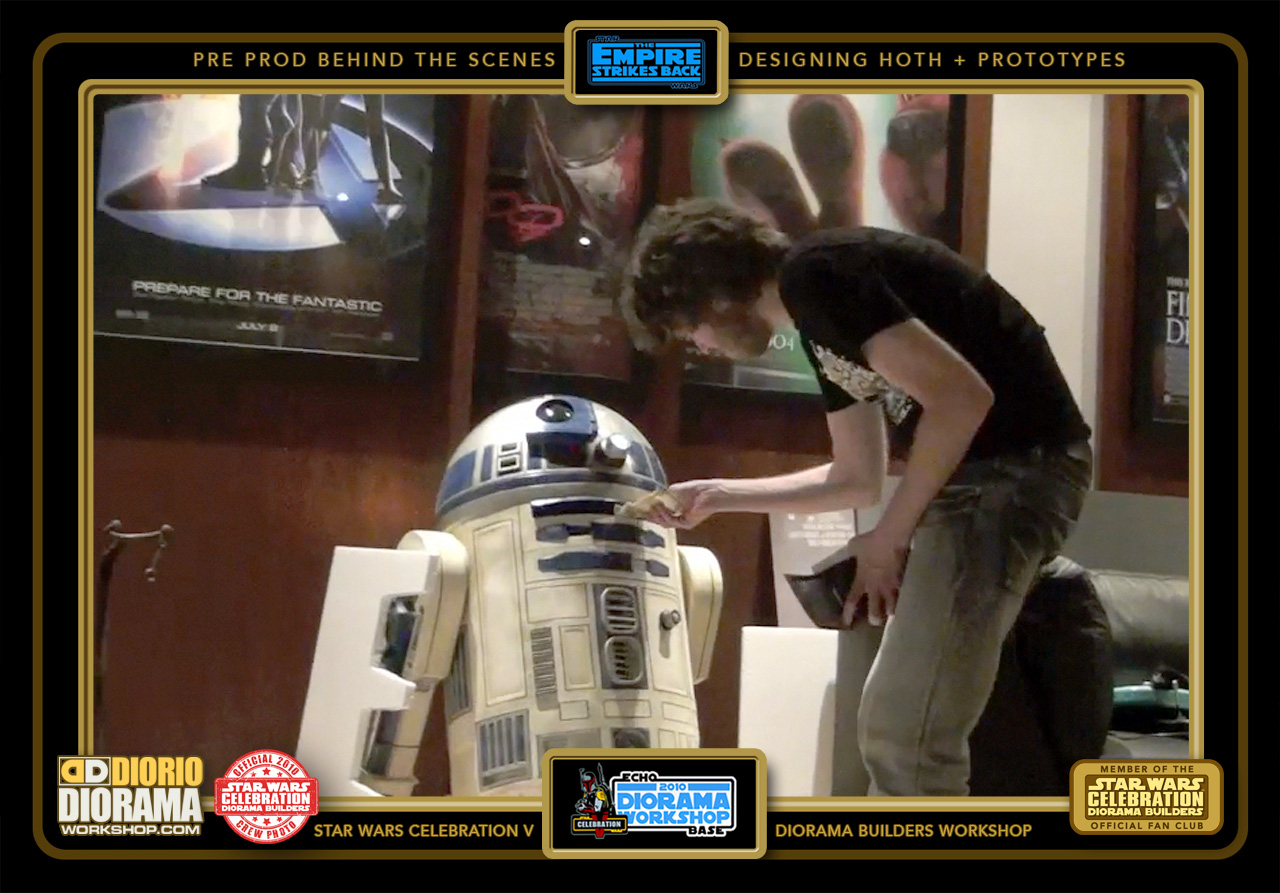
- No, Andre, R2 is NOT a ATM, he cannot help us order our Pizza LOL.
-
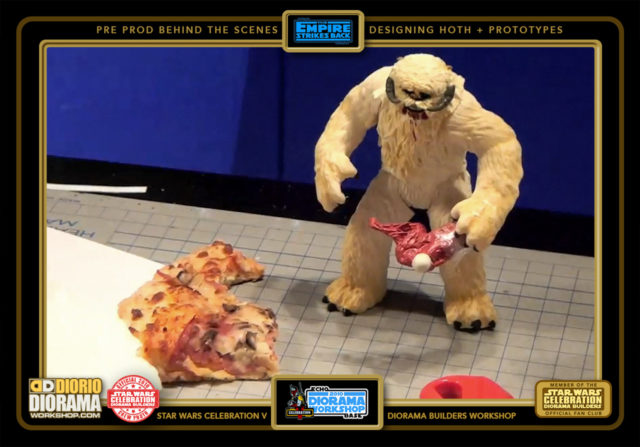
- Even Wampas get hungry. MMM, Pizza !!! 🙂

-

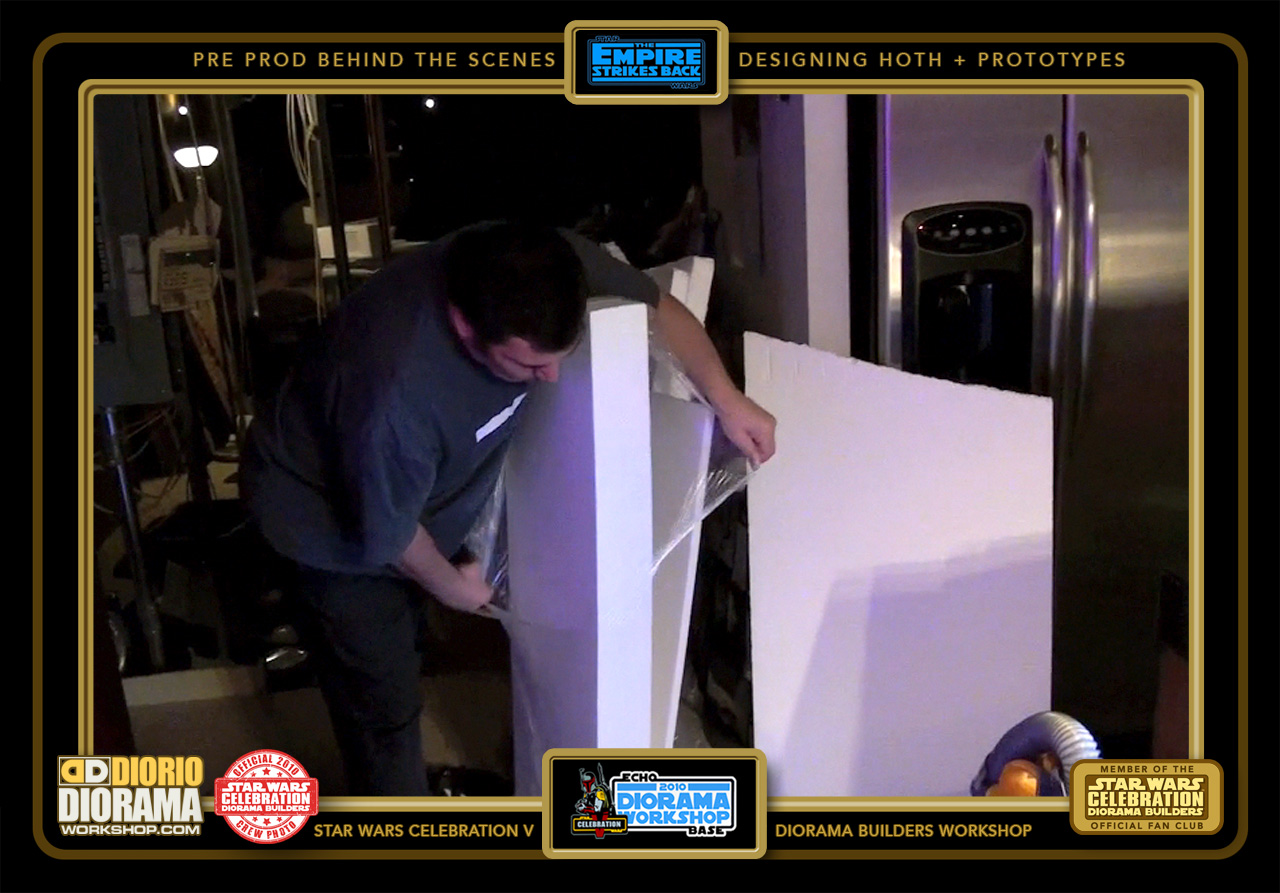
- Time to play with these big sheets of Styrofoam I bought at Home Depot.
-
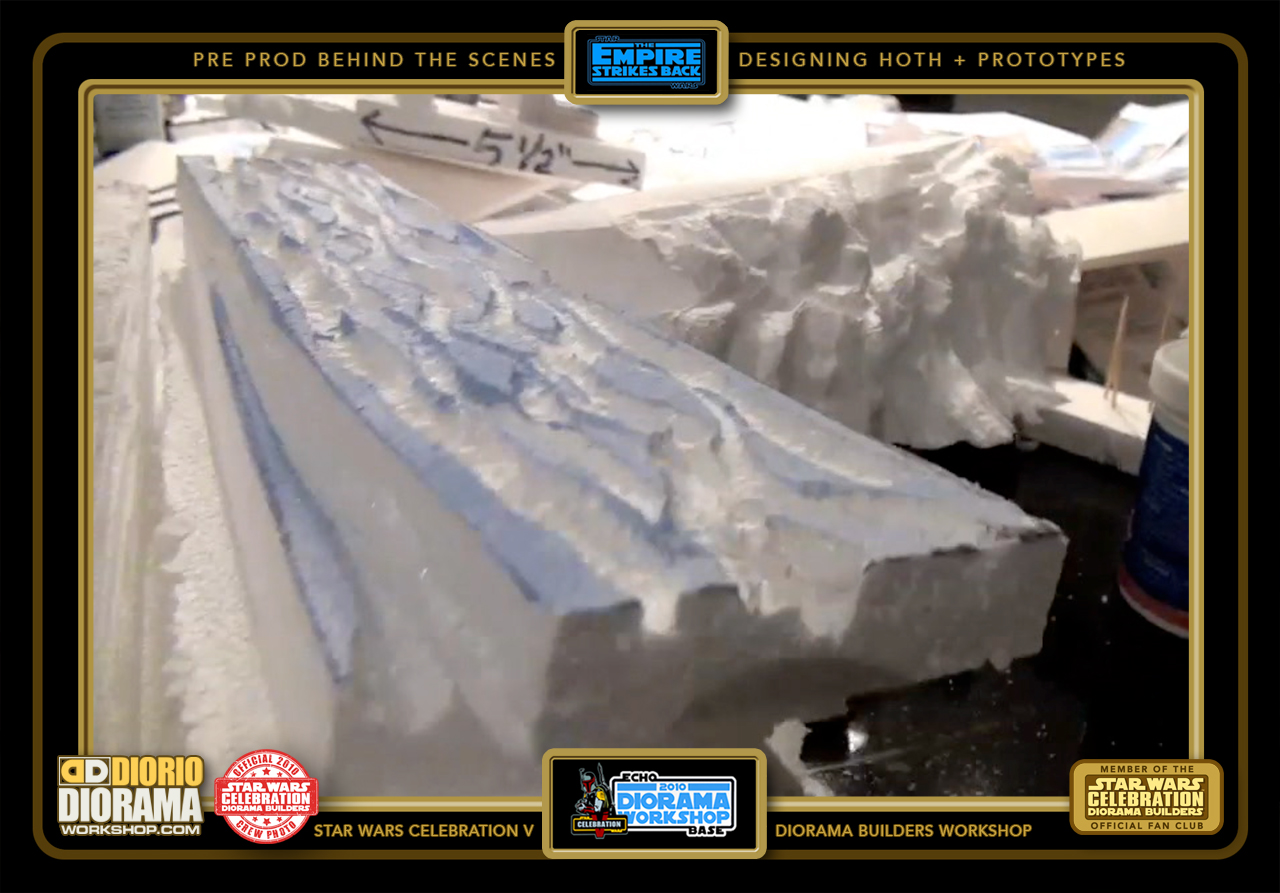
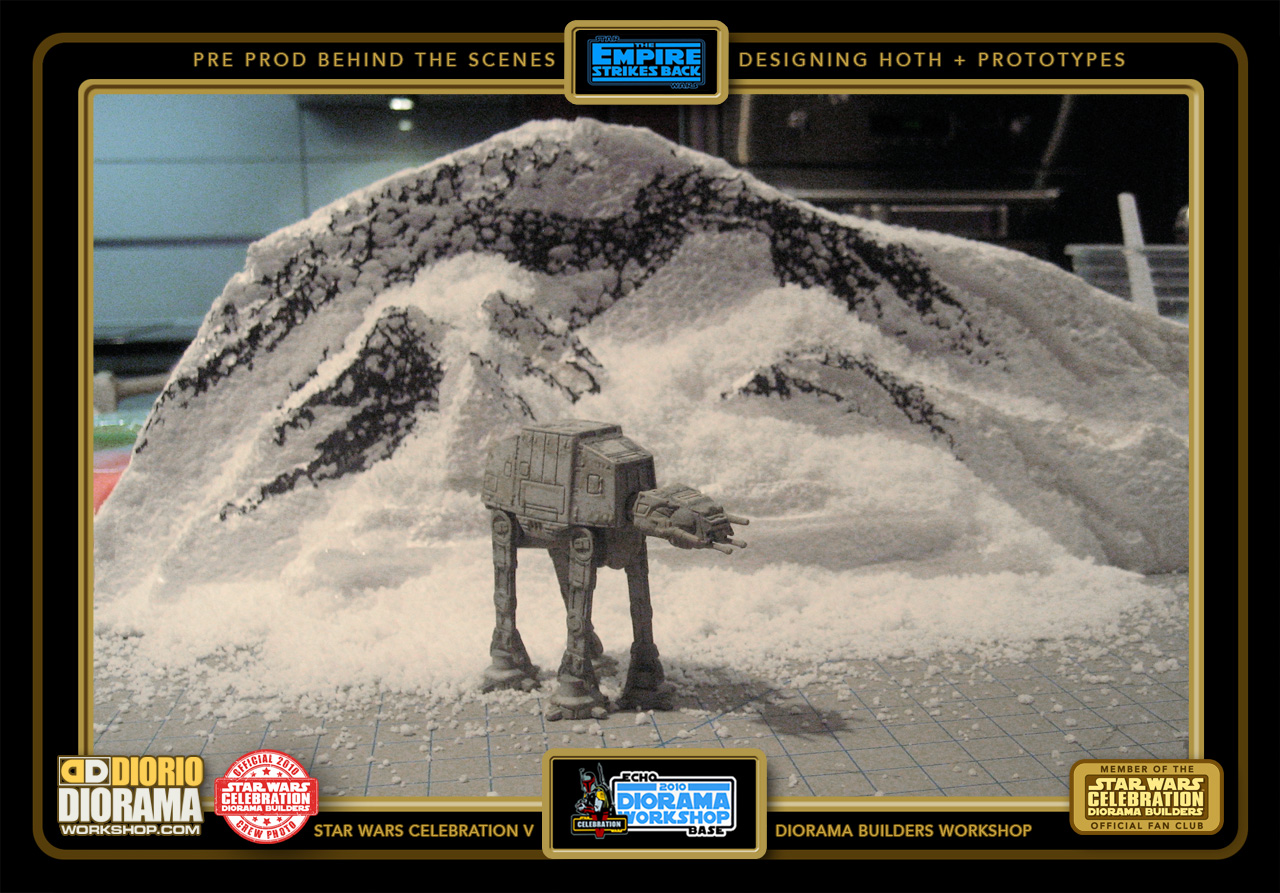
- One cool thing I discovered designing this workshop was Styrofoam and sculpting using a Heated Wire Cutter. Believe it or not, you can turn a stack of Fugly styrofoam like this...

-

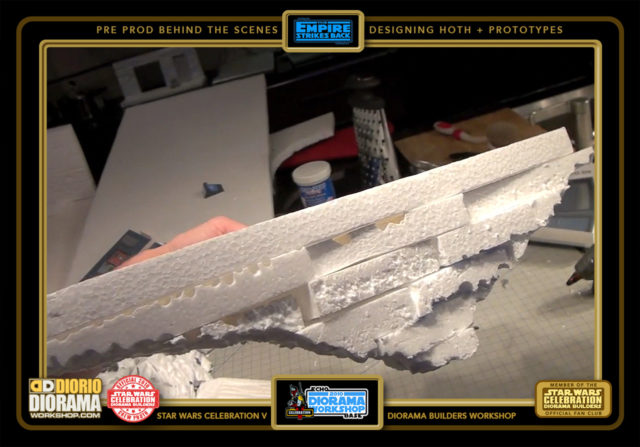
- And a couple of ZIG ZAGS sliding down with your HOT WIRE cutter...
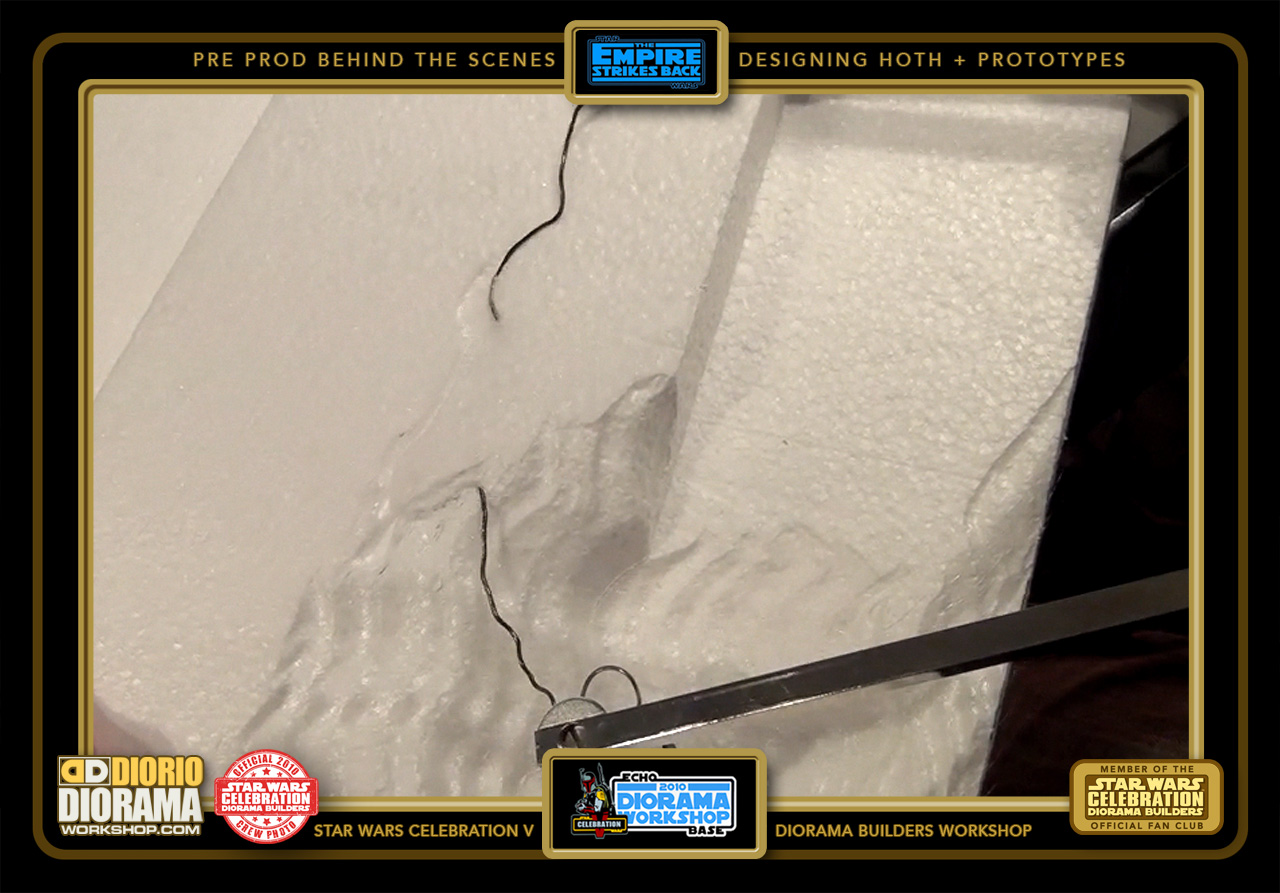
-
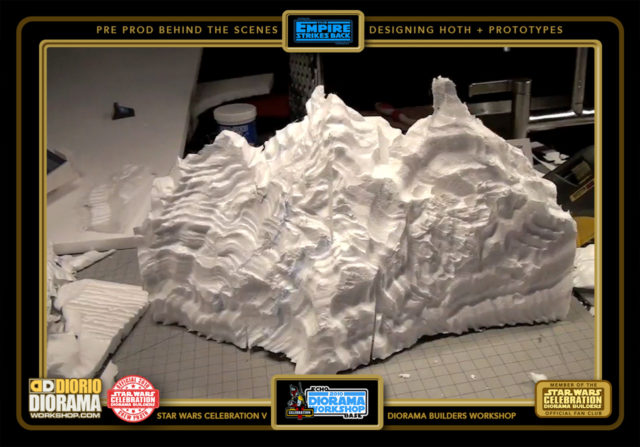
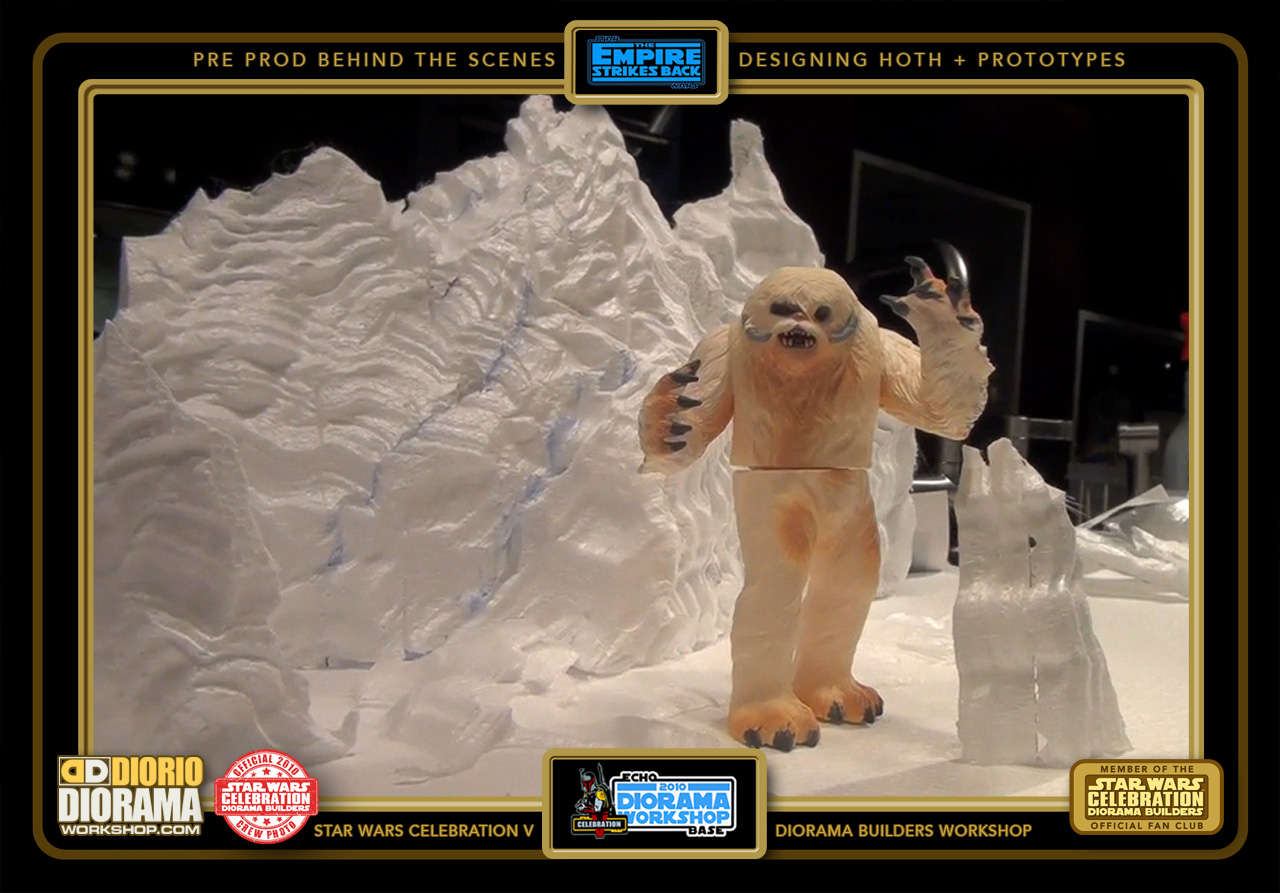
- Get an ULTRA COOL looking MOUNTAIN shape. You can even do stalagmites and stalagtites. Just don't ask me which one goes UP and which is DOWN 🙂

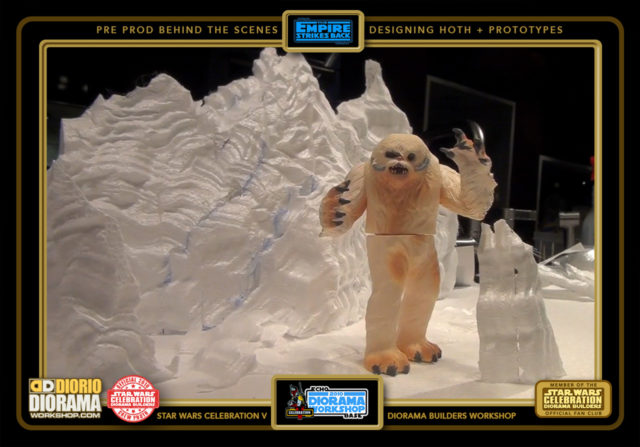
-
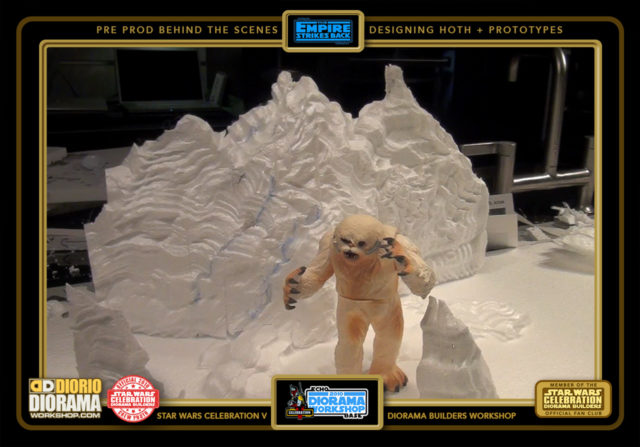
- Put a Wampa and there you go 🙂

-
- Just REMEMBER to do your "melting" in a WELL VENTILATED SPACE - OUTDOORS even on a sunny sunday. When I did the tests at home, it smelt a little but was ok, but at the show, when you had 10 people melting at the same time. PEE YOU !!!! Toxic clouds were heading to the actors signing autographs 400 feet away. And we could hear them say UGH Whats that SMELL. Pretty Funny, but it could have turned into serious issues. So VENTILATE !!! It's a good and smart thing to do 🙂
-

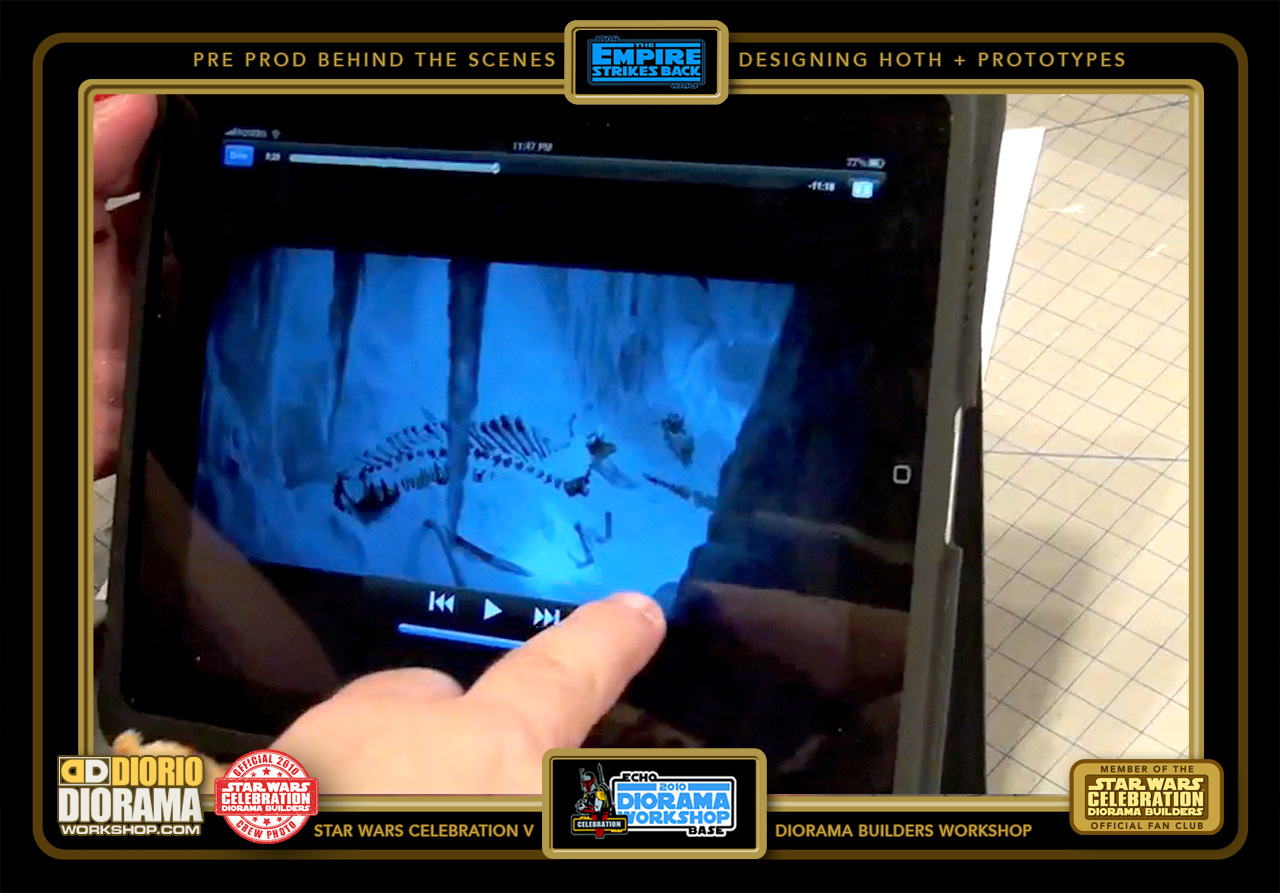
- Looking at any of the movies is the BEST referal source if you want it to be just right.
-

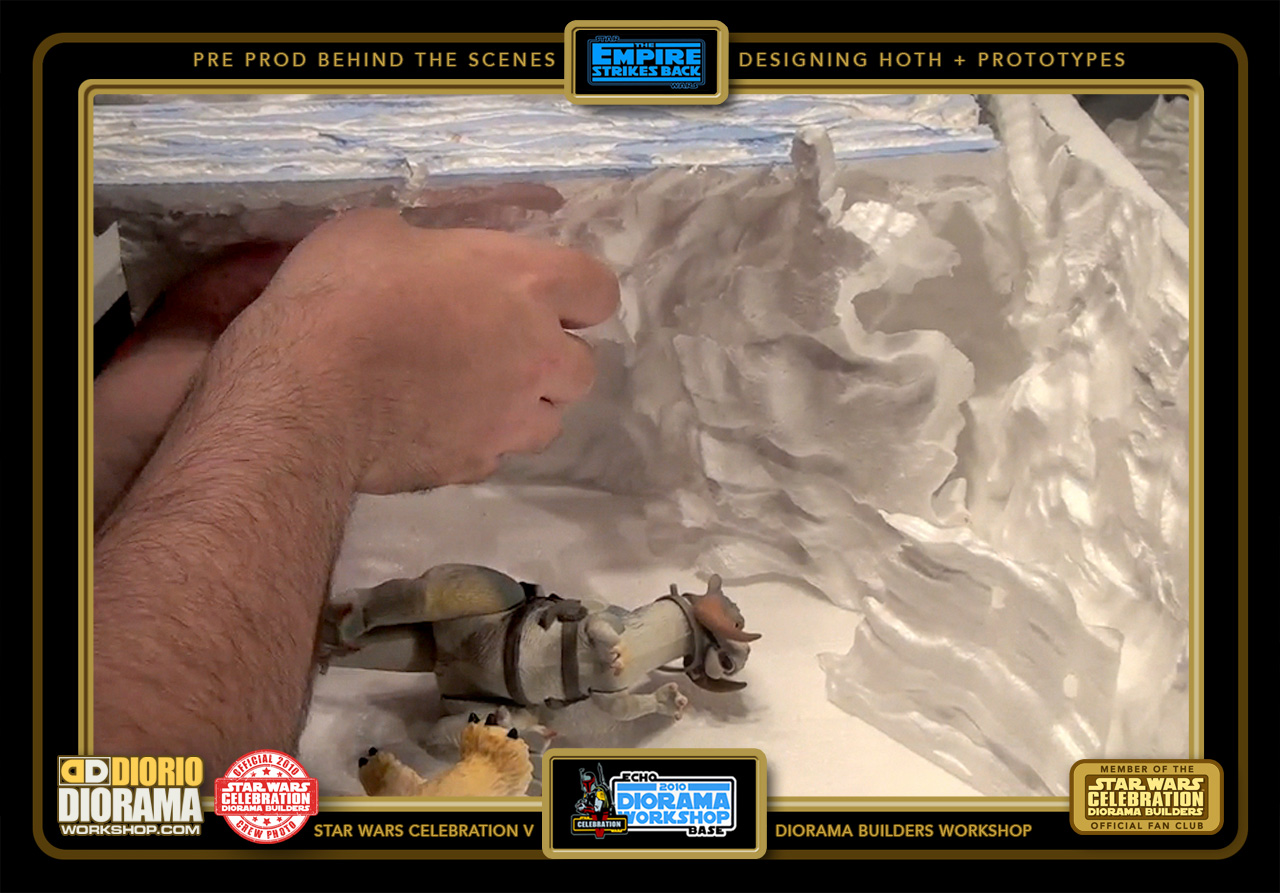
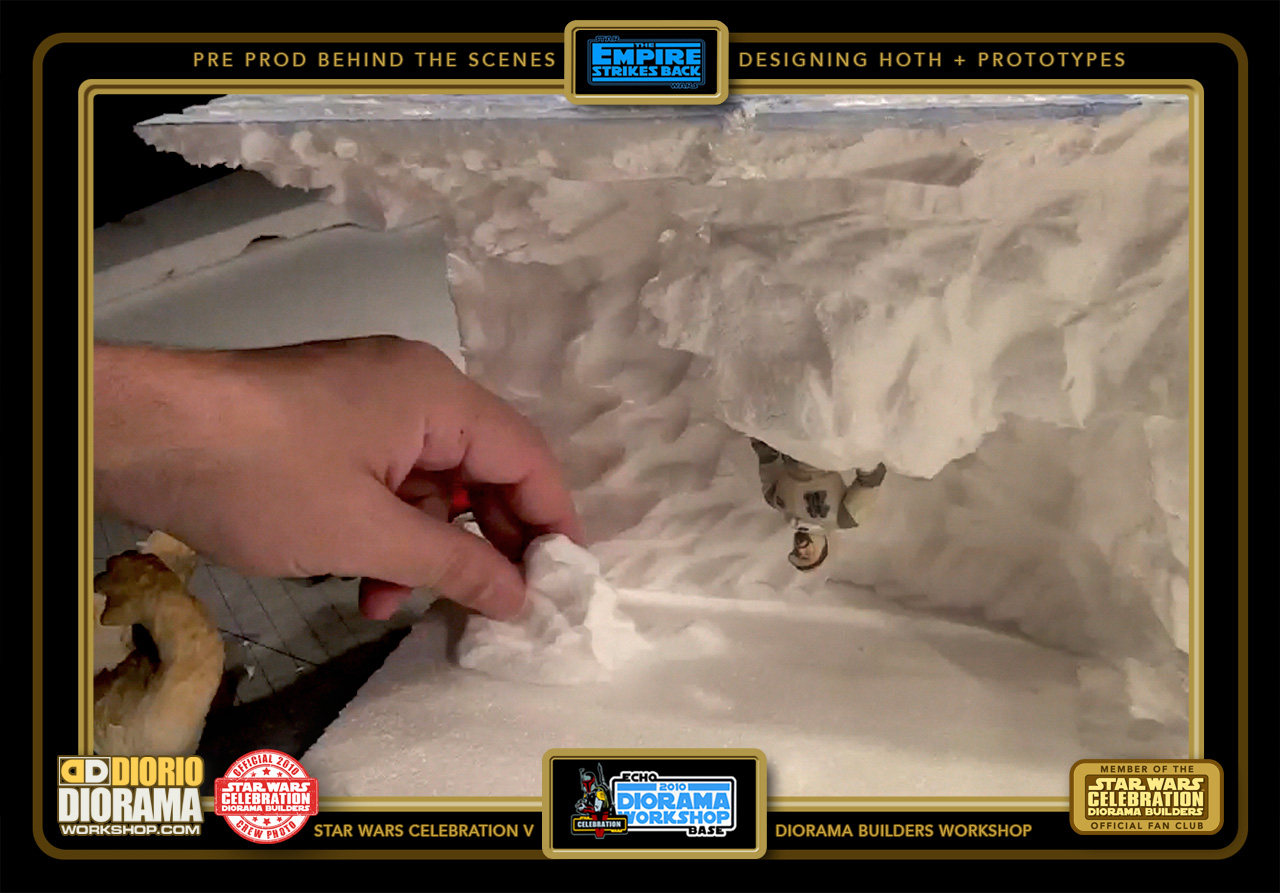
- Playing around with some Wampa Cave tests.
-
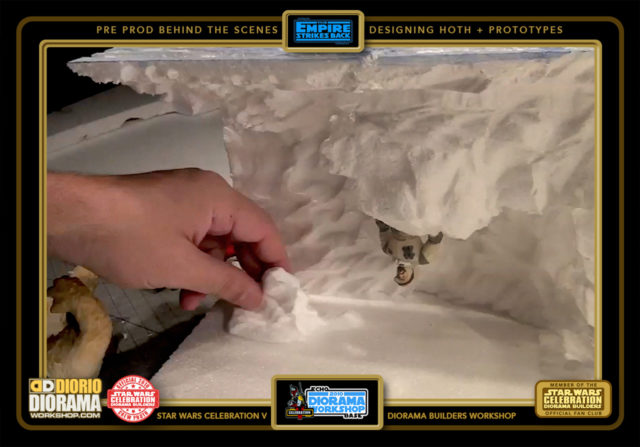
- Fans will be able to hang their figures upside down if they wish 🙂
-

- A quick little test scene using black sharpie on the mountains and covered with the Instant Snow powder we discovered for the show.
-

- Andre suggest we move on to the EXTERIOR Hoth Fan Builds.

-

- The 3 principle choices are Trenches, Shield Generators and Turrets.
-

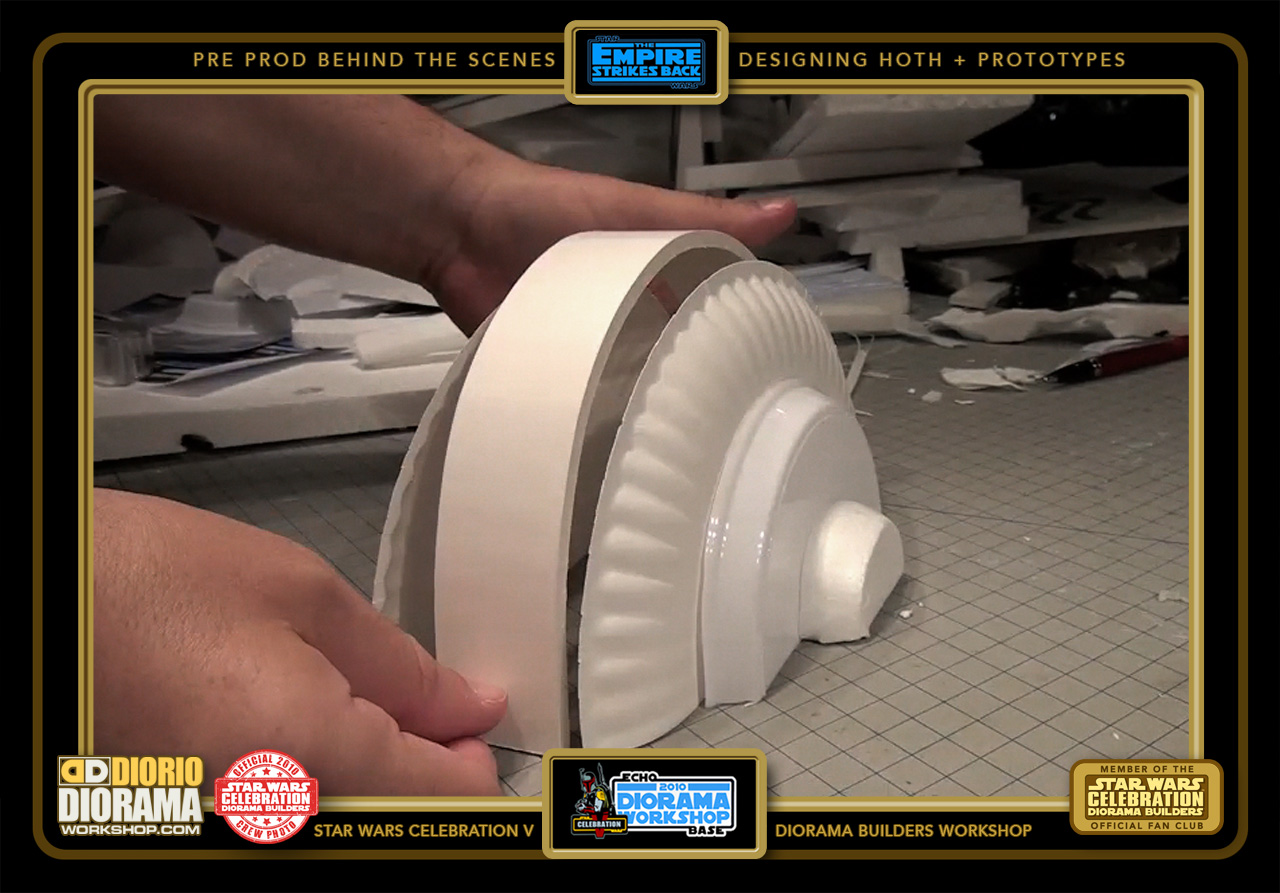
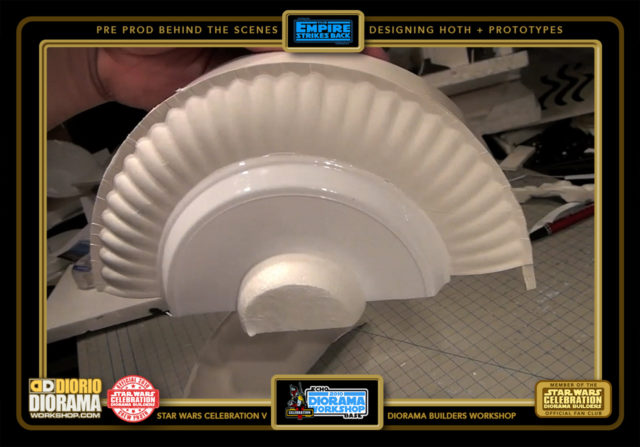
- Many of the scenes in the Hoth battle take place on the outside of the base, with the trenches and Shield Generator. The idea for the Shield Generators was to use paper plates. But would it work ?

-
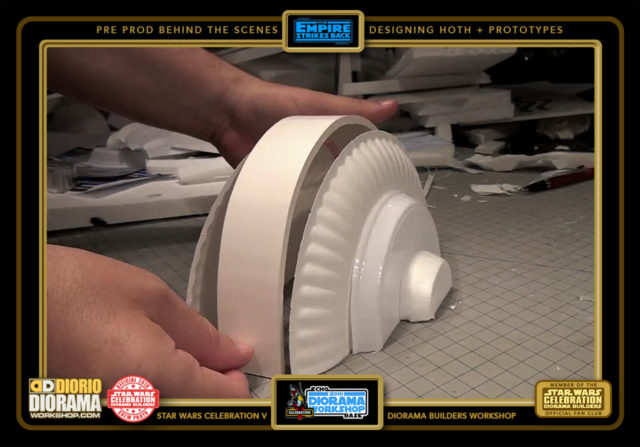
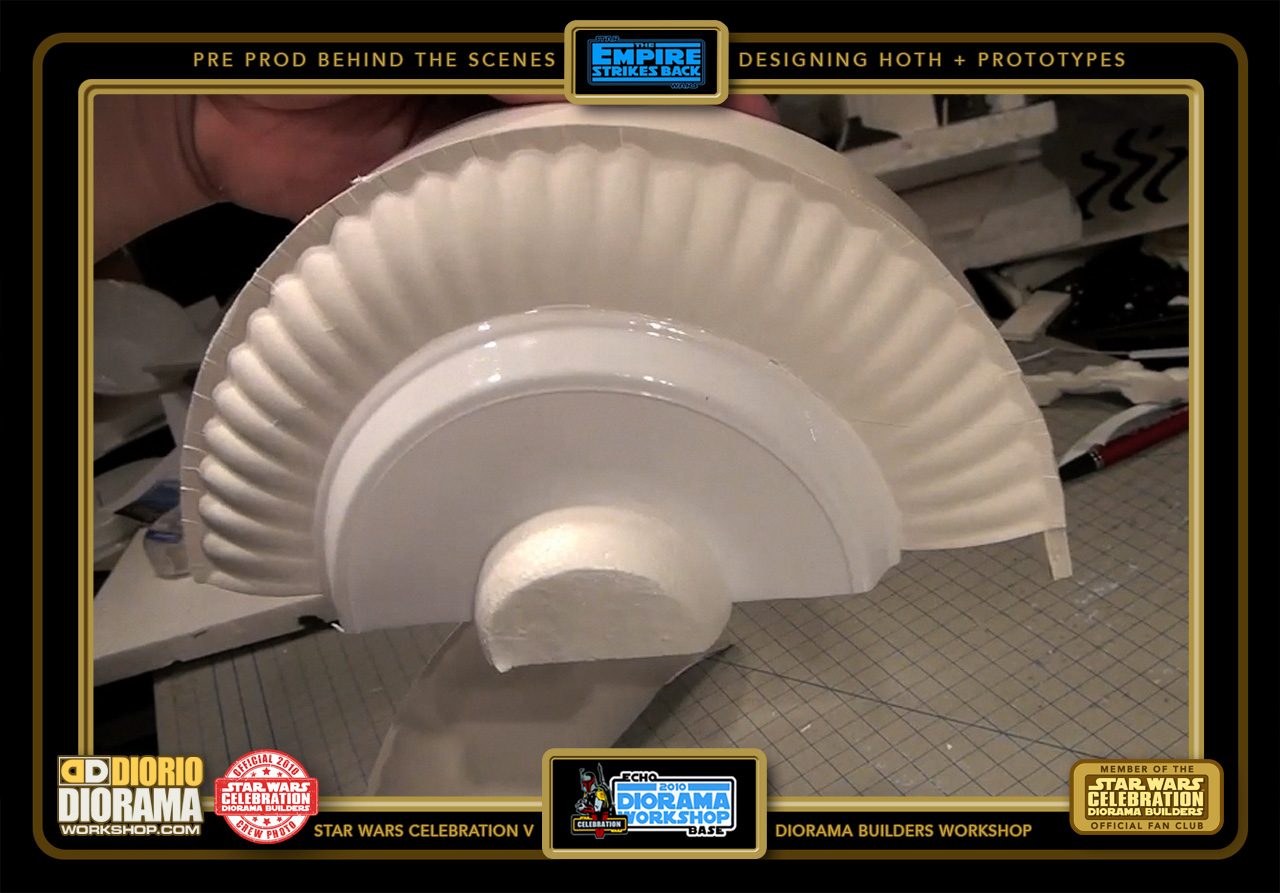
- Placing 2 half paper plates on either side of a bent piece of Foamcore, with some smaller plastic plates glue to that... mmmmm, it could just turn out amazing.
-
- The thing with the designs that I come up with, even if I work in film FX and can use techniques and materials that would look exactly like the ILM modelshop models, most people don't have those materials in their cities and skills or patience to do it that way
-

- Which is why I've always prefered trying to make the coolest movie accurate Dioramas with every day dollar store objects.
-
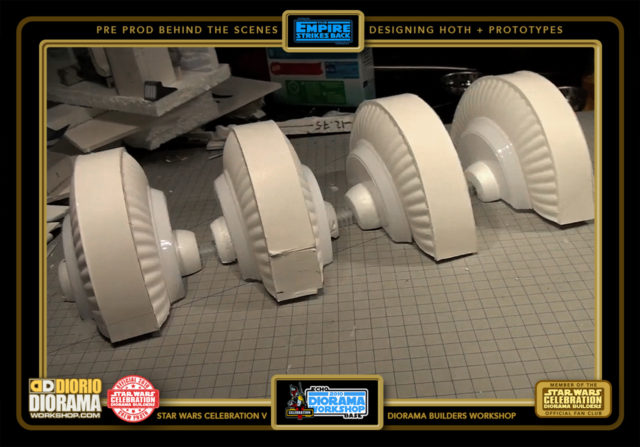
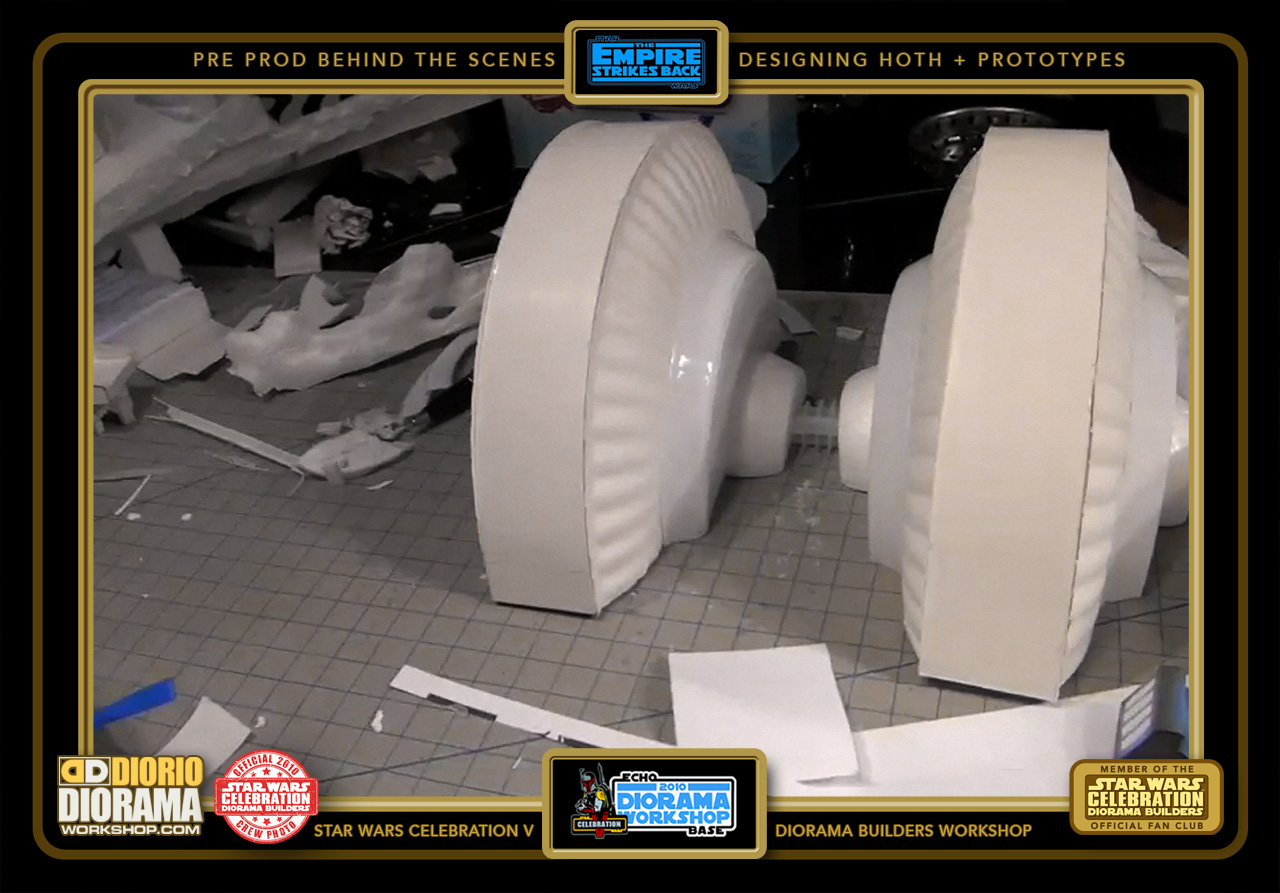
- A couple more units, 4 to be precise, and we got it made.

-
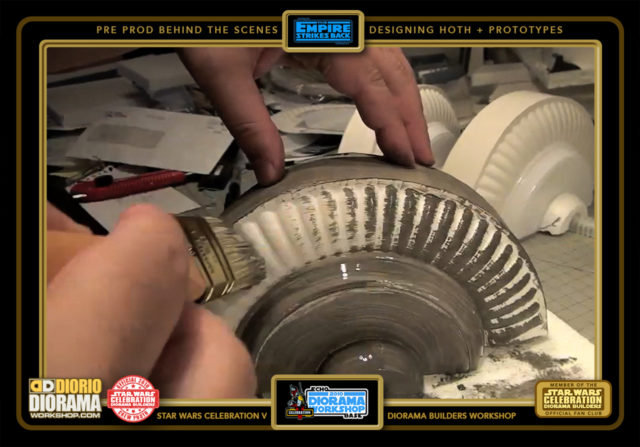
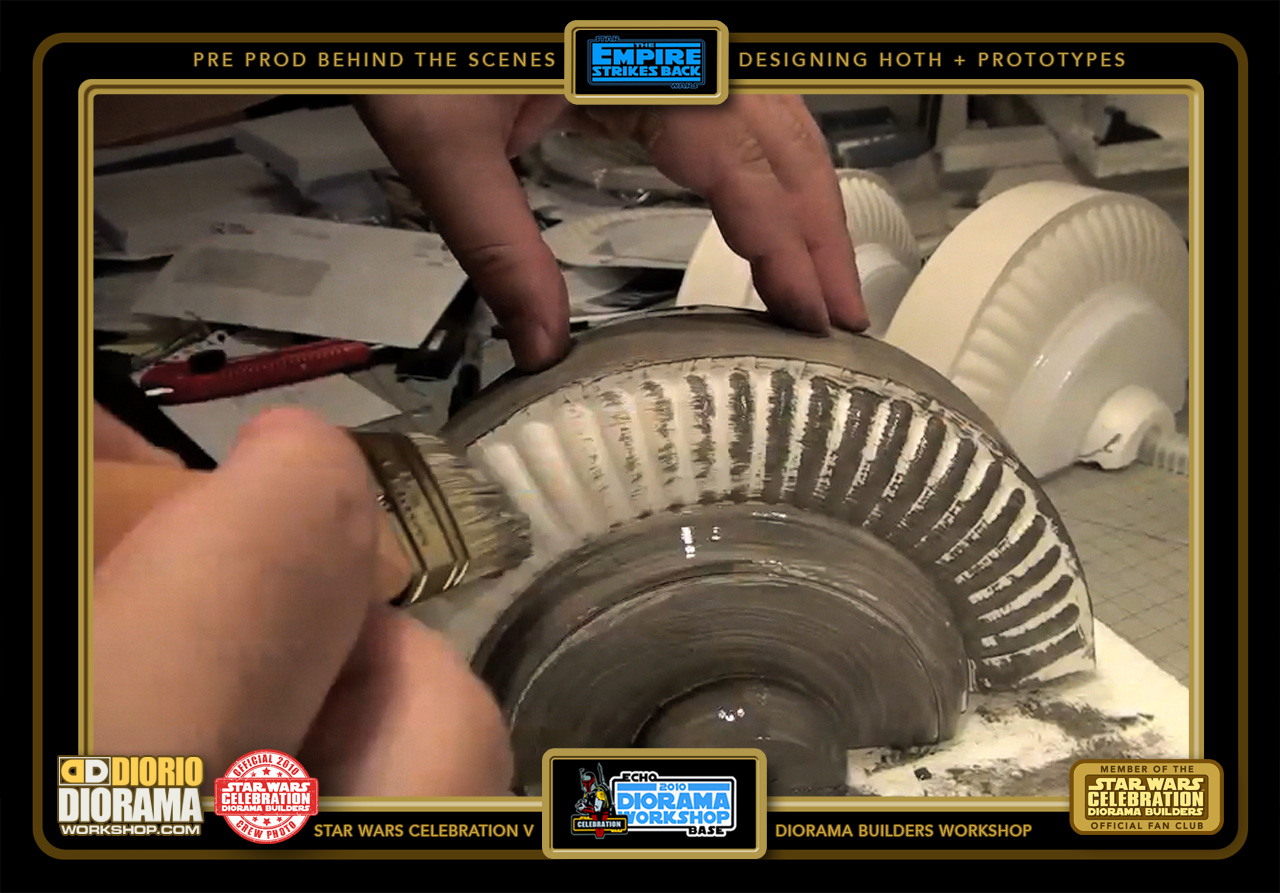
- With a little bit of grey latex paint on the plates, you get some neat texture. Add some blackish oil drips afterwards and...
-
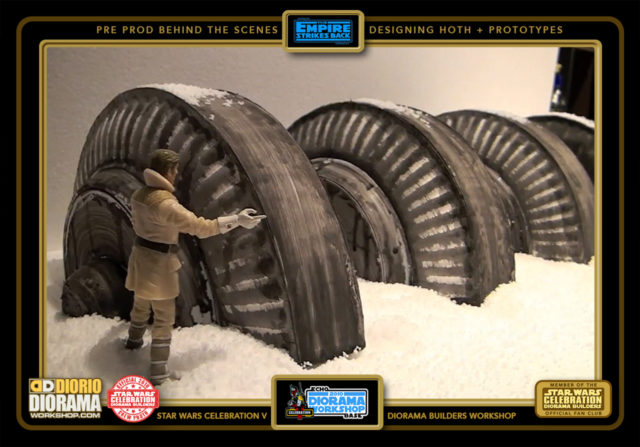
- You got yourself an inexpensive cool looking generator. The kids REALLY LOVED this project. Add some instant snow or Laundry detergent and your Action Figures are ready to play.
-

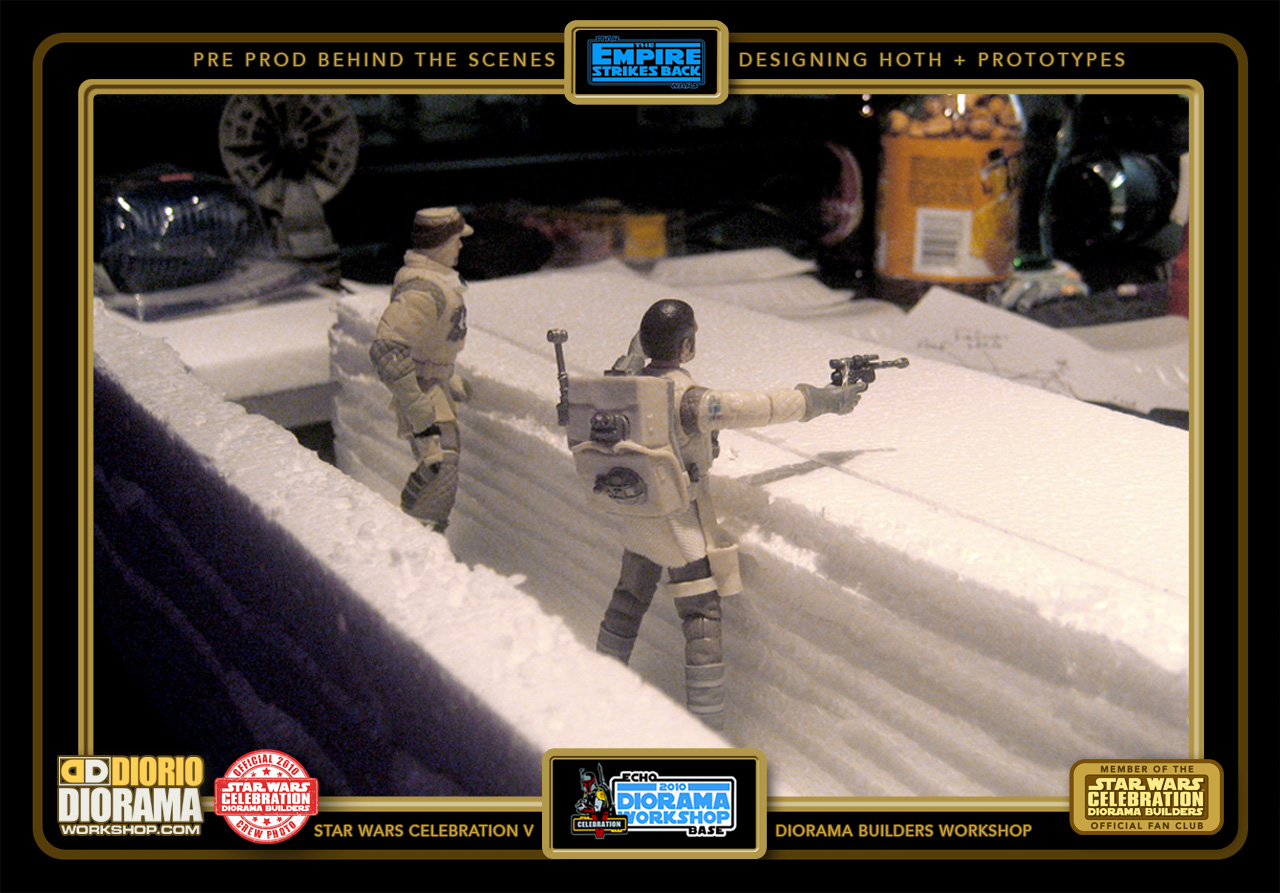
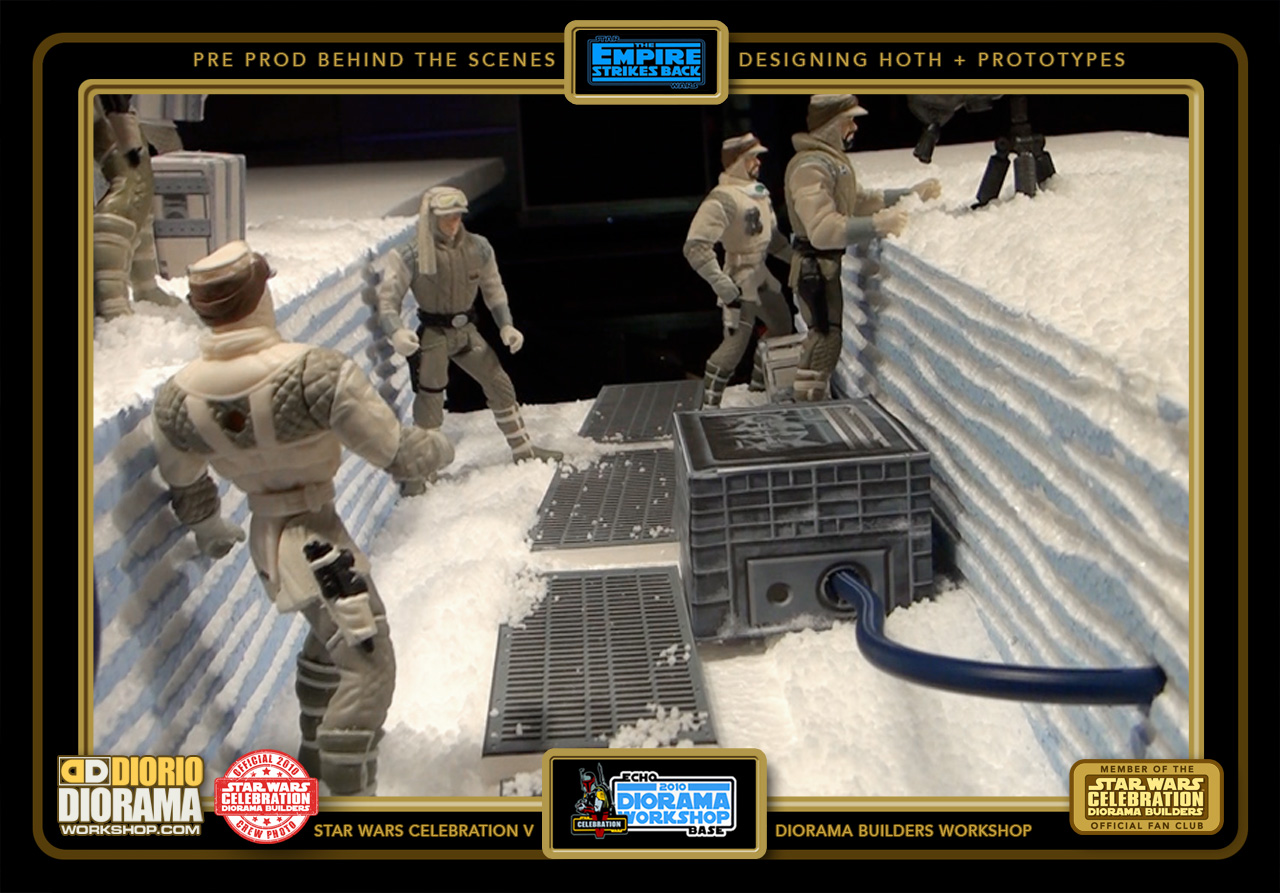
- Next up the Trenches, 3 long pieces of styrofoam that will suspend between 2 seperated tables.

-

- Simple in design, the illusion to have them sink beneath the surface like in the movie and have 50 or so kids build 20 inch long trenches, put side to side...
-

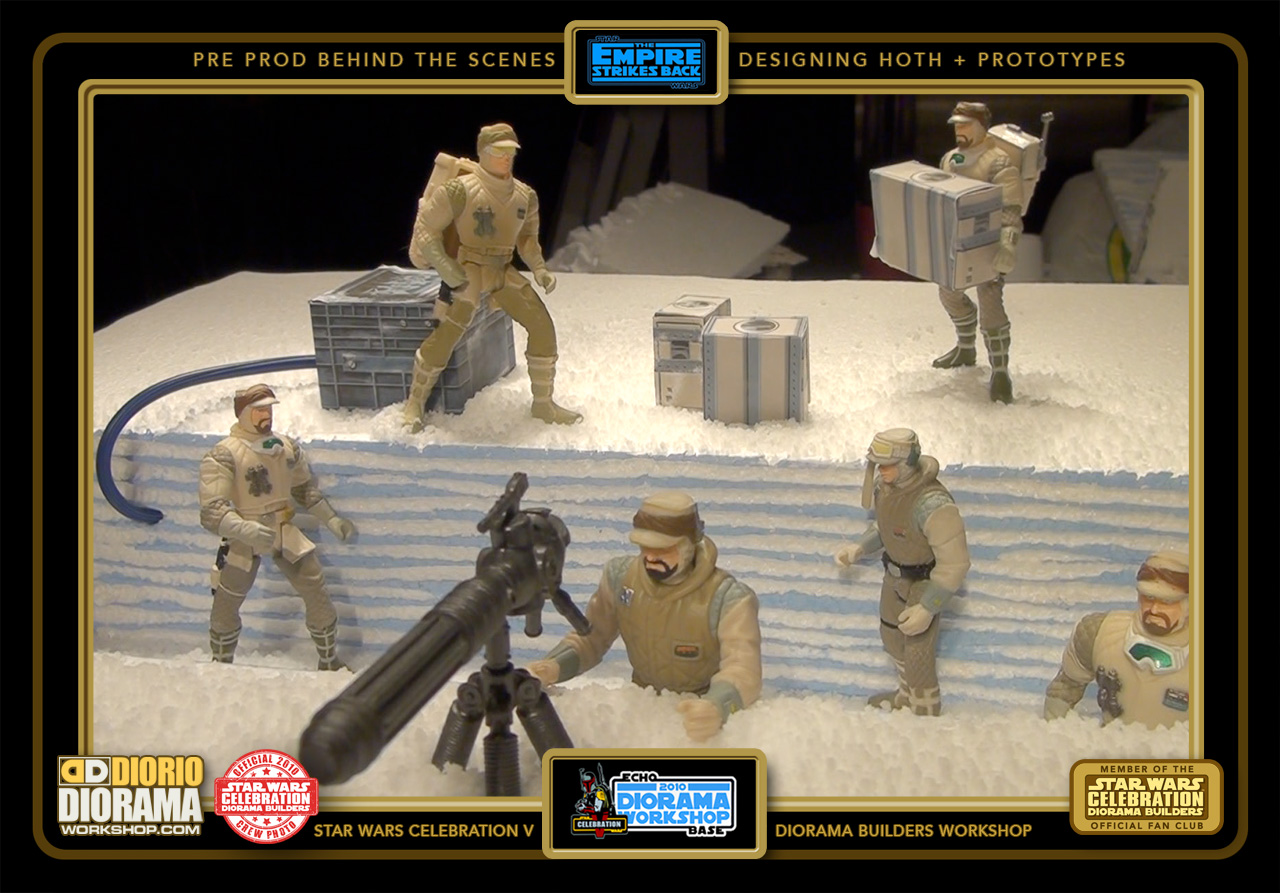
- And you got a fantastic playset for all of your Rebel Troops. Sometimes the simplest ideas are the ones that make me smile the most. When I am able to have a flash of what could work at the show, and pull it off so easy, it's so cool. Because what we try to offer at these shows is multiple piece choices that are both different in TIME construction but also SKILL.
-
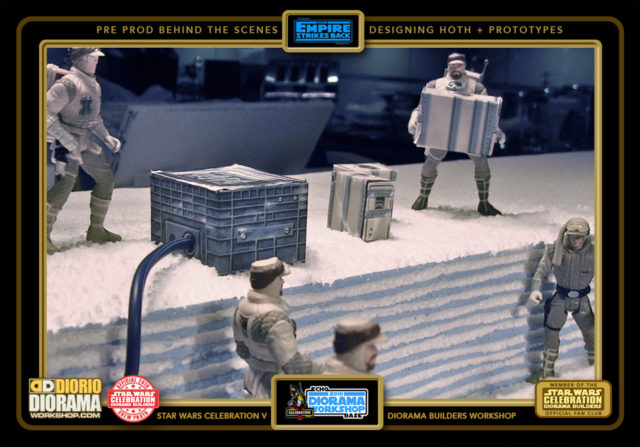
- Here you can also notice some of the kids BONUS accessories like Generators and Boxes

-

- Some parents and kids want to come in 2 hours and leave, others spend all 4 days with us, become friends and make the most AMAZING art, even modifying my basic design to surprise us with often hillarious JOKE results. Anyone remember the Wampa Cookie Monster ? 🙂
-

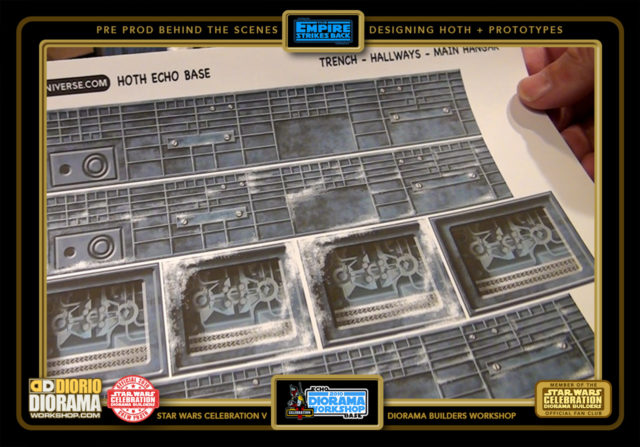
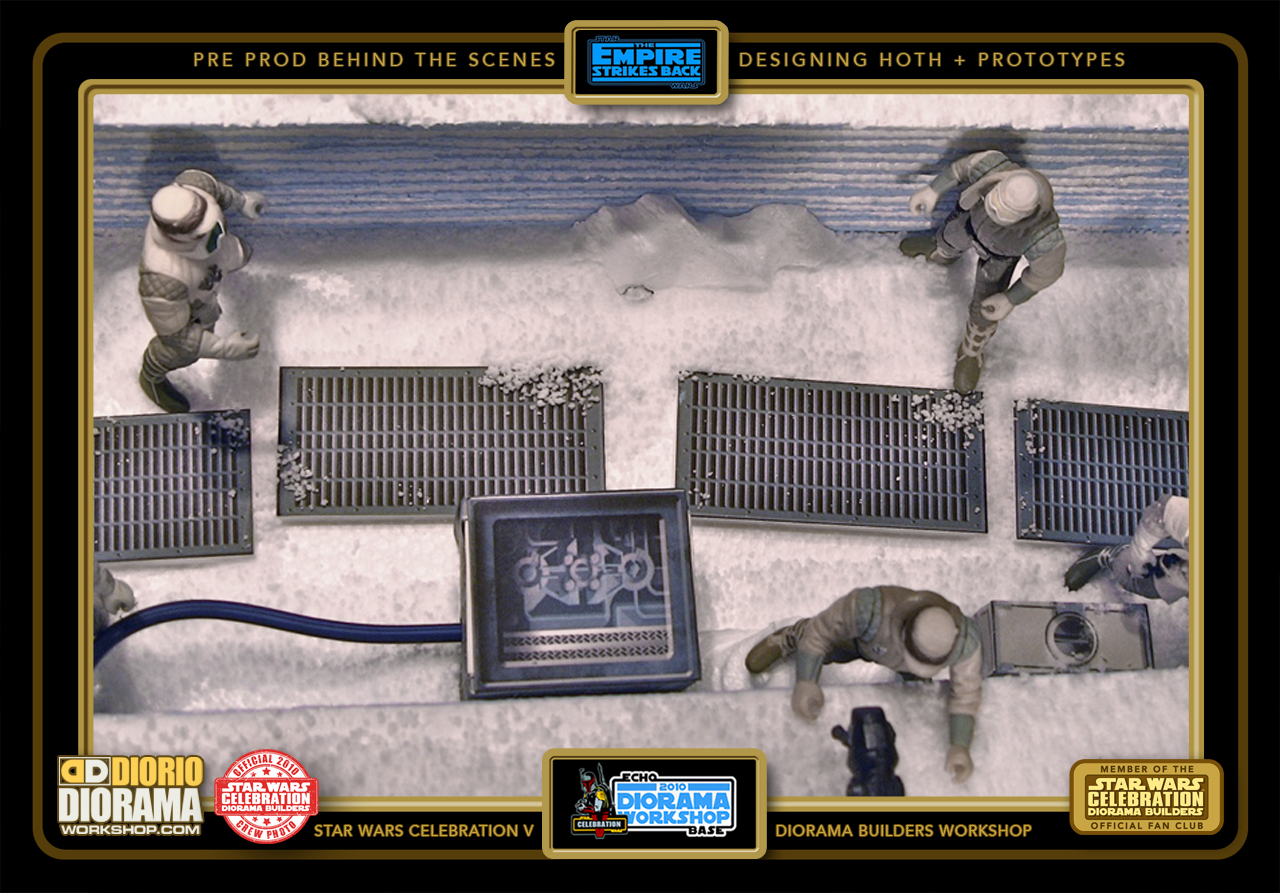
- A high angle view shows you the floor panels and instant snow really bring this to life.
-
- Other kids build will be the Laser Turrets, simple plastic cups and straws.

-

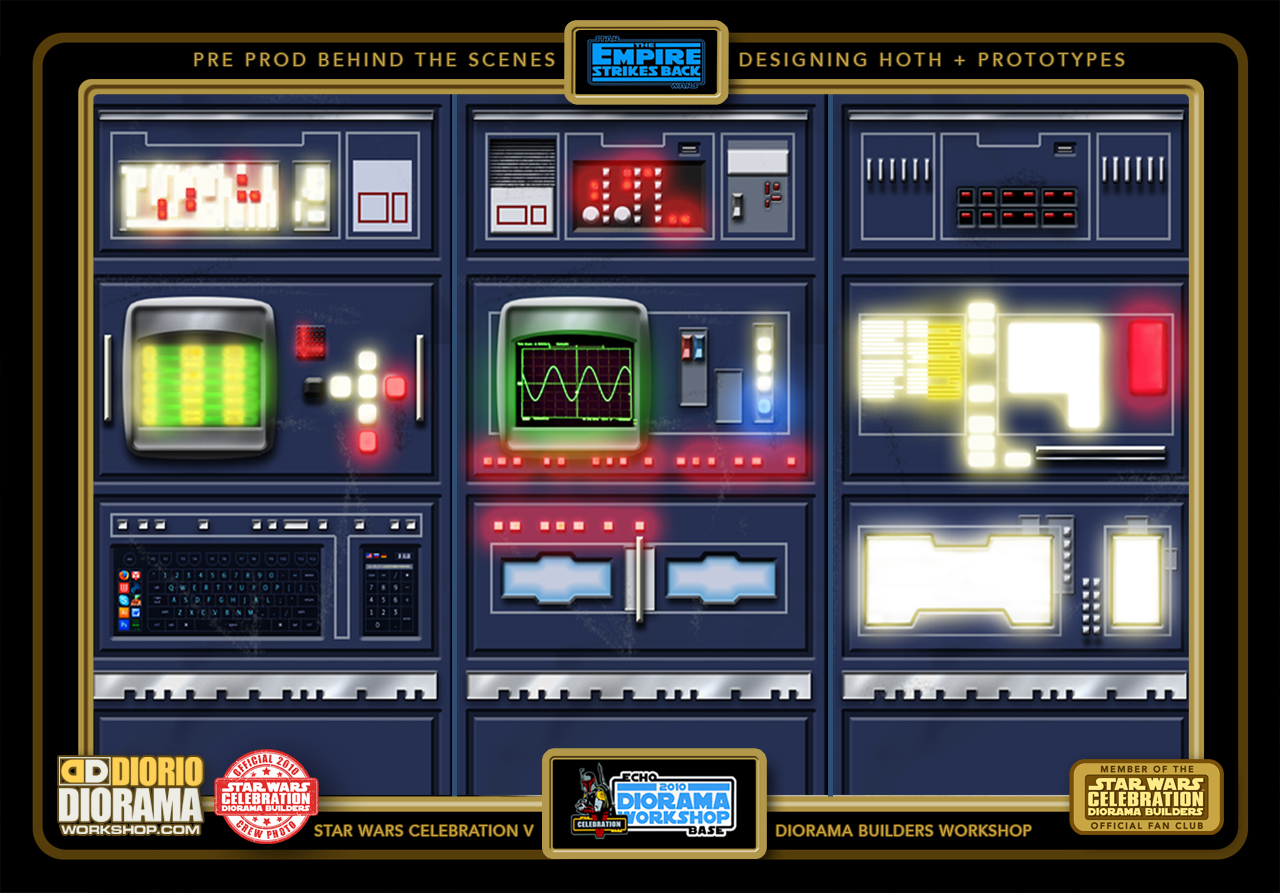
- Did I tell you making Photoshop Decals is so much fun ? Using the film as a reference, trying to get all the buttons and colors just in the right place in scale with the Hasbro Action Figures, just too cool. And after I put them on my diorama, you can print them at home when following the Making Of instructions. How cool is that. Eveything that the fans use at Celebration, you guys, who may not have had the opportunity to attend, can still build along with us. Or for those who did attend, a chance to CONTINUE building your Hoth scene at home to place next to what you built in Orlando.
-

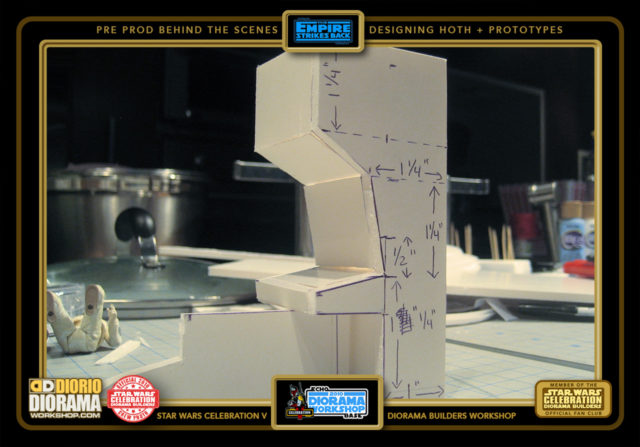
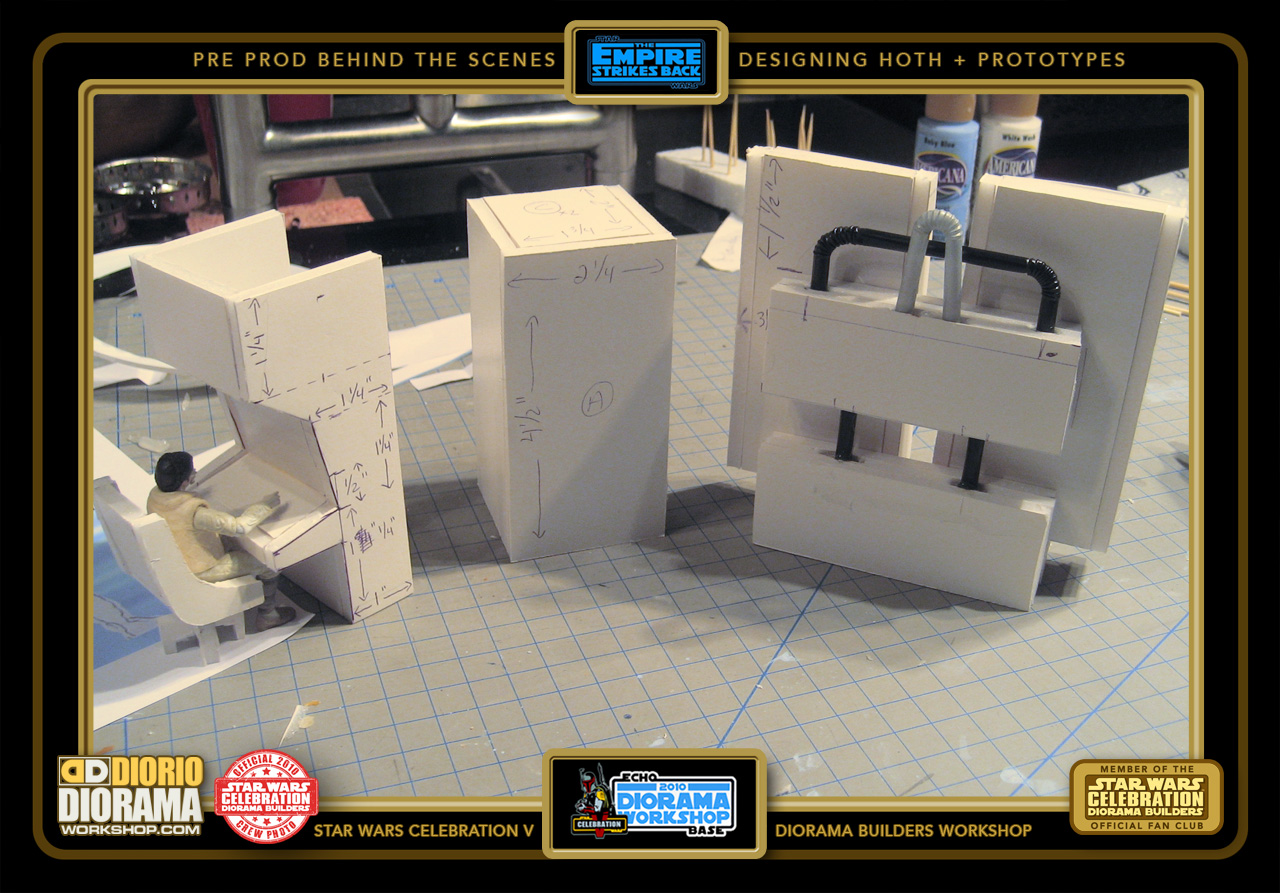
- Side view of the most complex Console.
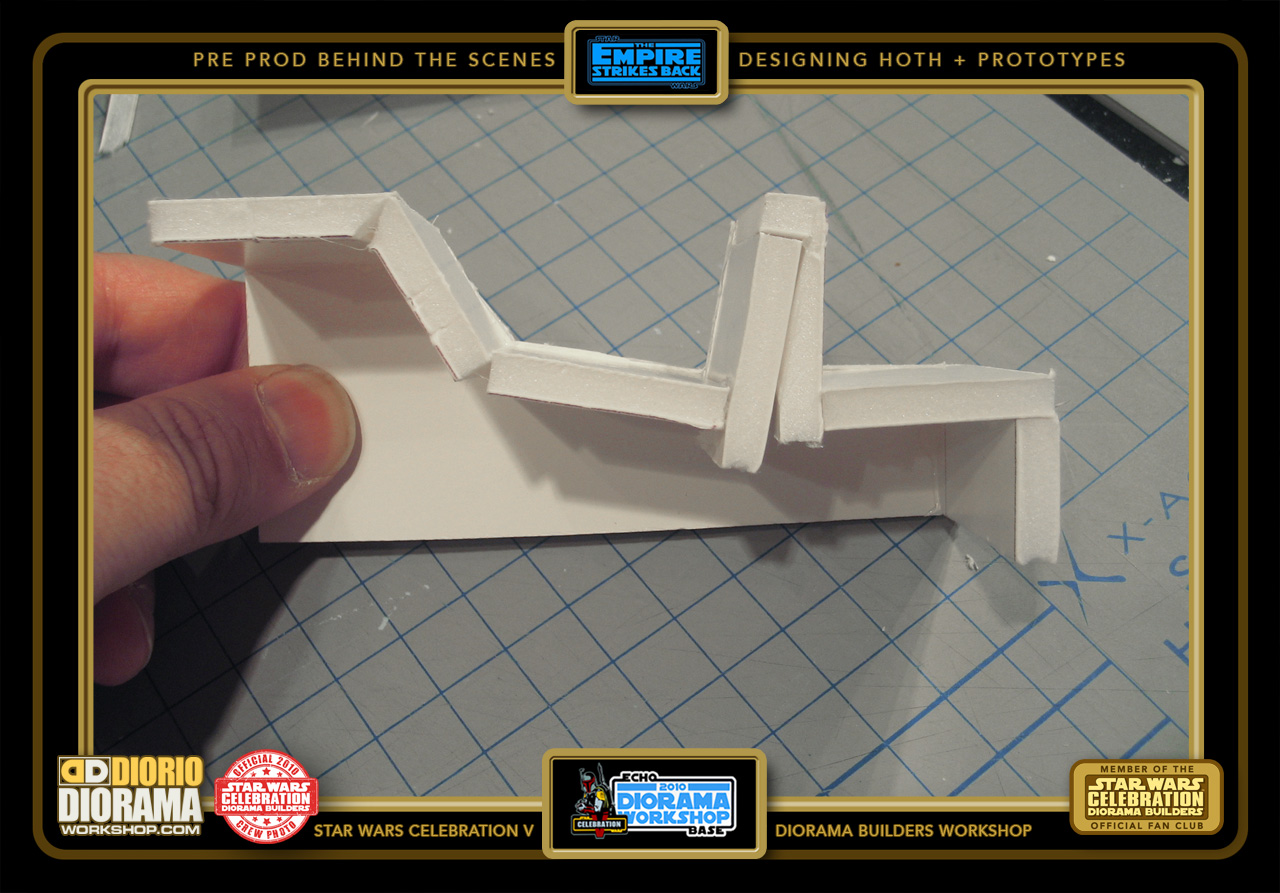
-
- Lot's little pieces and angles.

-
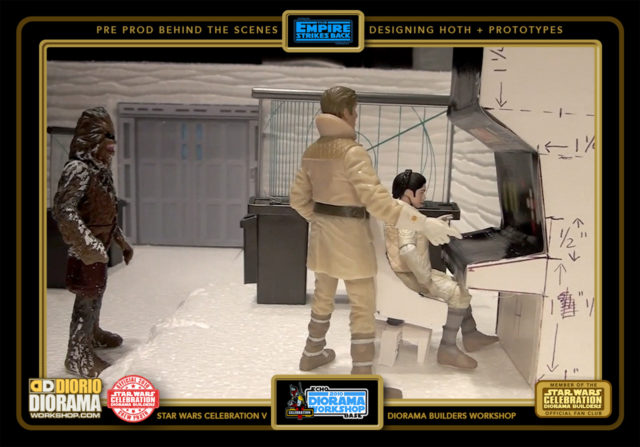
- But the coolest and most iconic console in the control center.

-
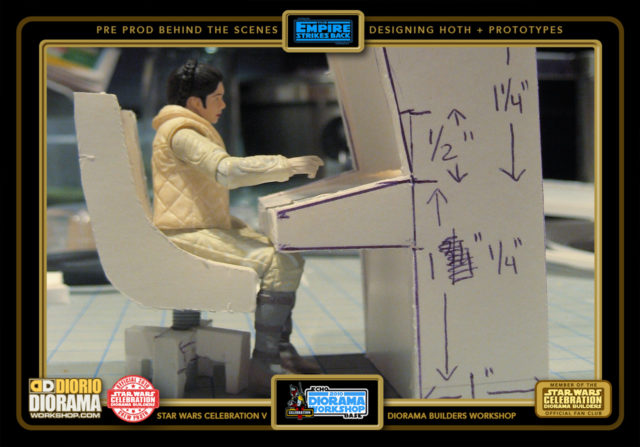
- Leia sitting at her control panel. Once the decals are applied, will look just like the movie.

-
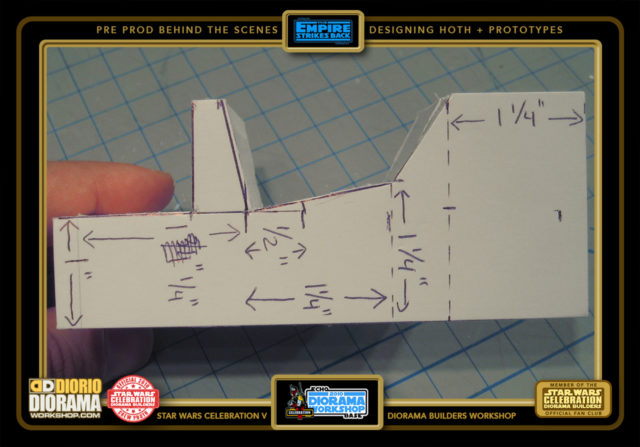
- Basic Console dimensions, will all be available in Blueprints Tutorial menus.

-
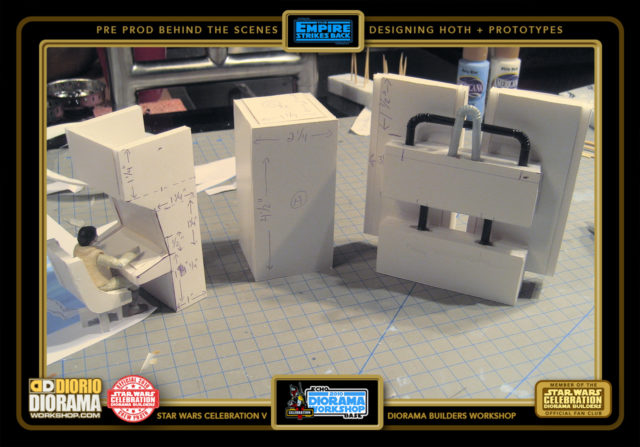
- The 3 console designs from the Echo Base movie set.
-
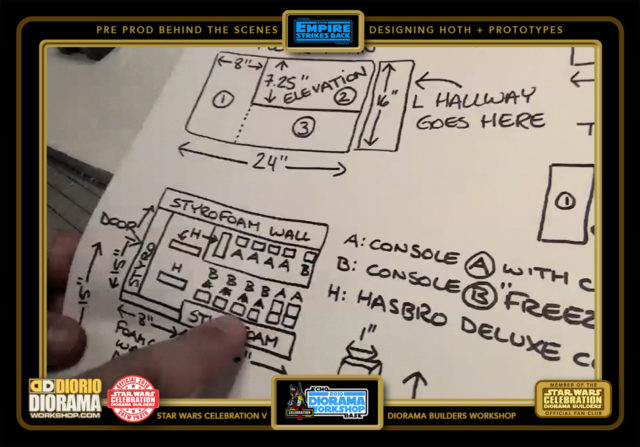
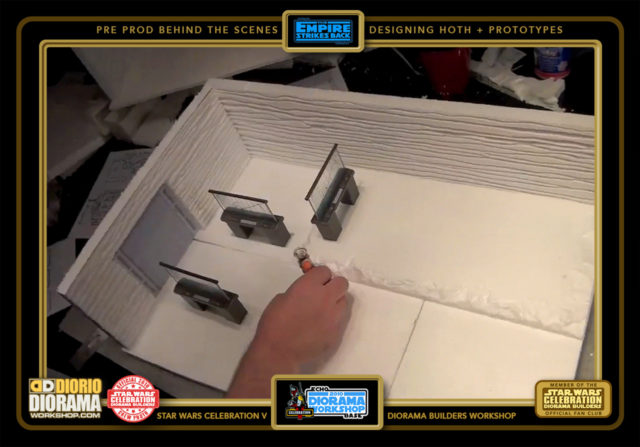
- This next room, was a HARD ONE to plan out, using still frames in books and pausing the blu-ray, I could get an idea of what it was supposed to be shaped like. An iconic room, the Hoth Control Center, is as complex as a model kit, in that you have many many tiny parts that you need to build, but in the end, you get a really awesome playset.

-
- It's cool when Hasbro makes accessories like these because it's harder to build than the rooms themselves.

-
- Finding all the angles for this room was tricky. I used a combination of freeze frames and scaling those down to figures height, pasting here and there. In the end, it turned out really sweet. But then, after the SHAPE is made, I needed to make, design the decals SKIN to bring it to life.

-
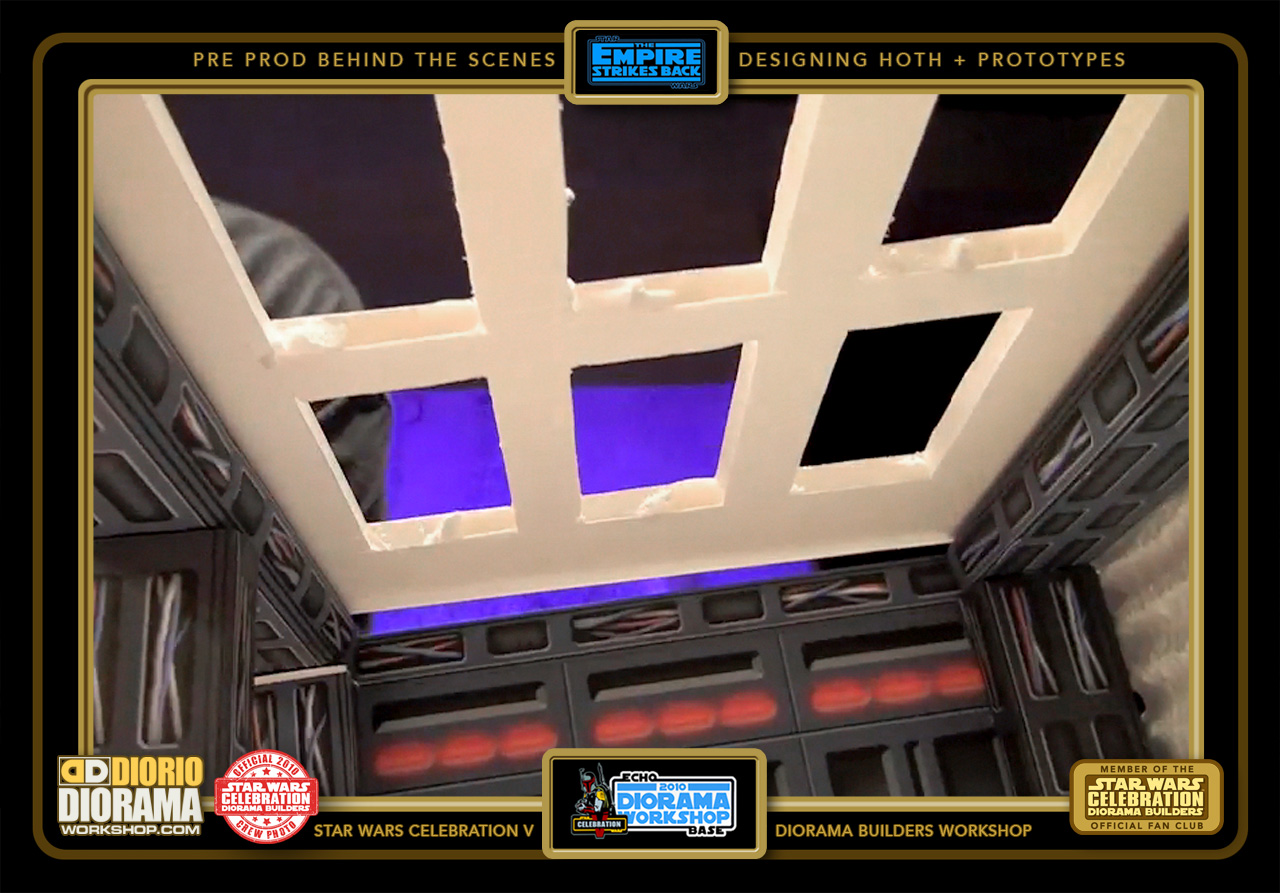
- This photo shows you the power of DECALS 🙂 It looks 3 dimensional, having wires pass inside the girders, but it's all a photoshop illusion.

-
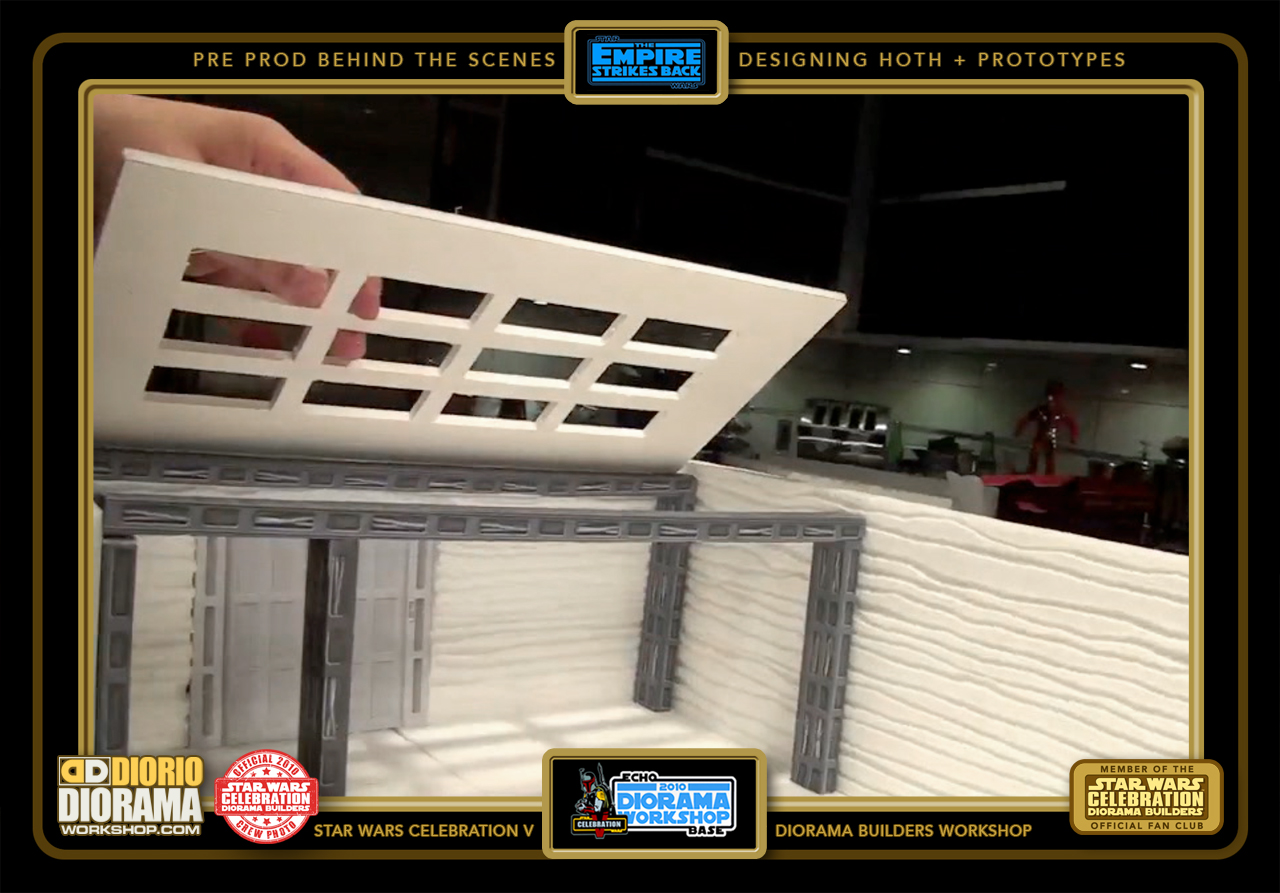
- When I looked at the movie, I noticed that a small portion of the ceiling had a grid light system.

-
- After calculating where the girder beams went, I could know the size of this ceiling piece, divide it into 3 sections, cut out the rectangles with my X-Acto knife and pop them out like puzzle pieces.

-
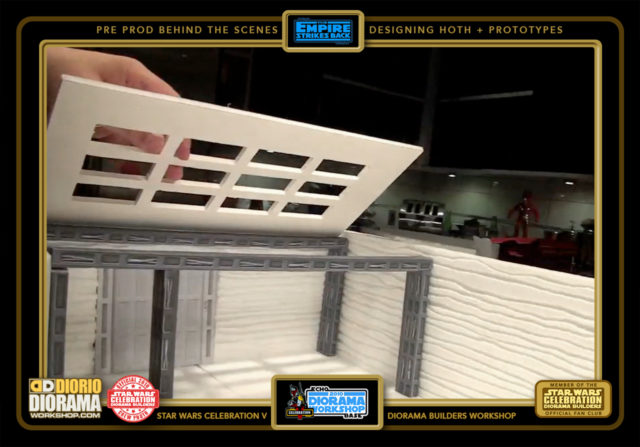
- The whole ceiling fits right on top of the steel girders.
-

- Looking good. Now sometime between now and the summer, I should continue this build, and be able to share the FULL making of this room. All that would be left now, would be to place a small plexi plastic on the ceiling, and some mini Christmas LED lights to light it all up. Sweet !!!
-
- Just place your completed Rebel Consoles and your diorama will be done.

-

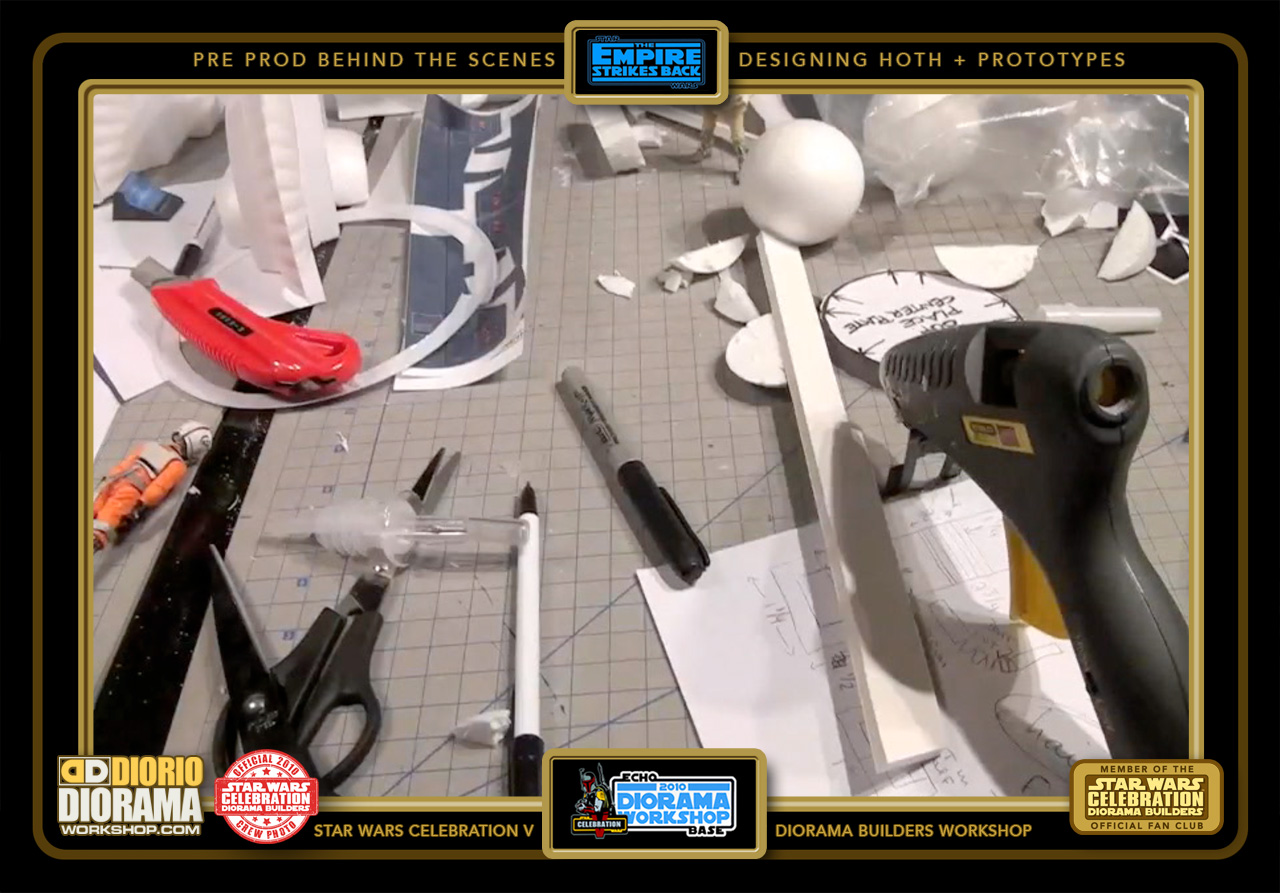
- This was my LAST design I had time to do before leaving 3 days later for the show. We had 5 fans build this room, and they looked awesome.

-

- was a messy day of construction 🙂
-
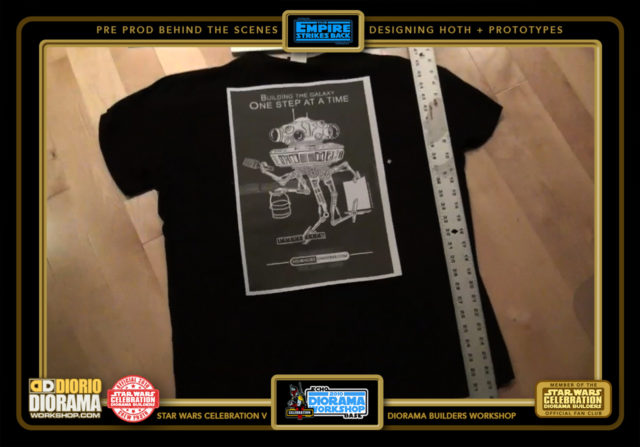
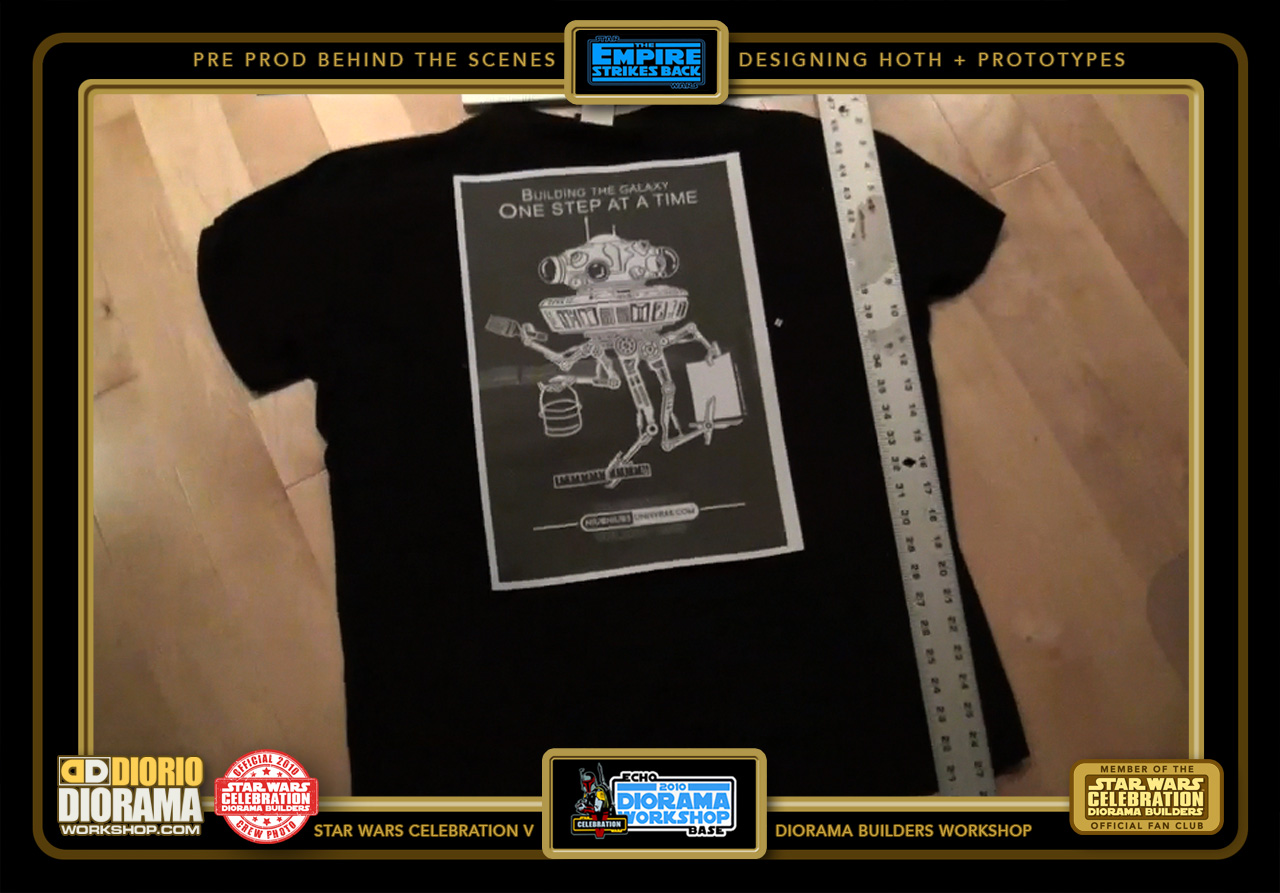
- Aha - Every convention has to have a Giveaway T-Shirt for the Staff and Fans to wear. I have to thank Steve Sansweet at Rancho Obi-Wan for helping me select this style. The Probot's multi arms were just perfect match for all the options fans get to build at the show.
-

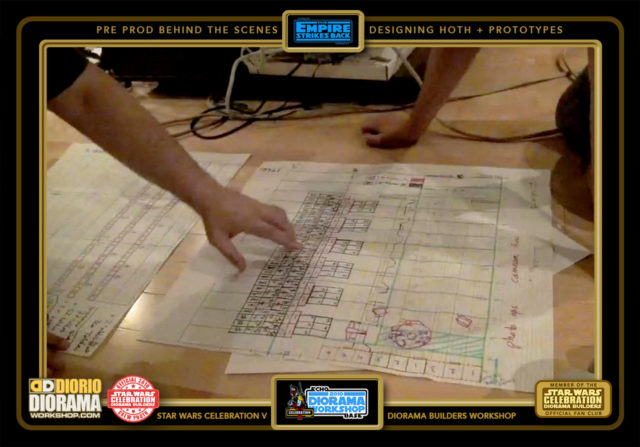
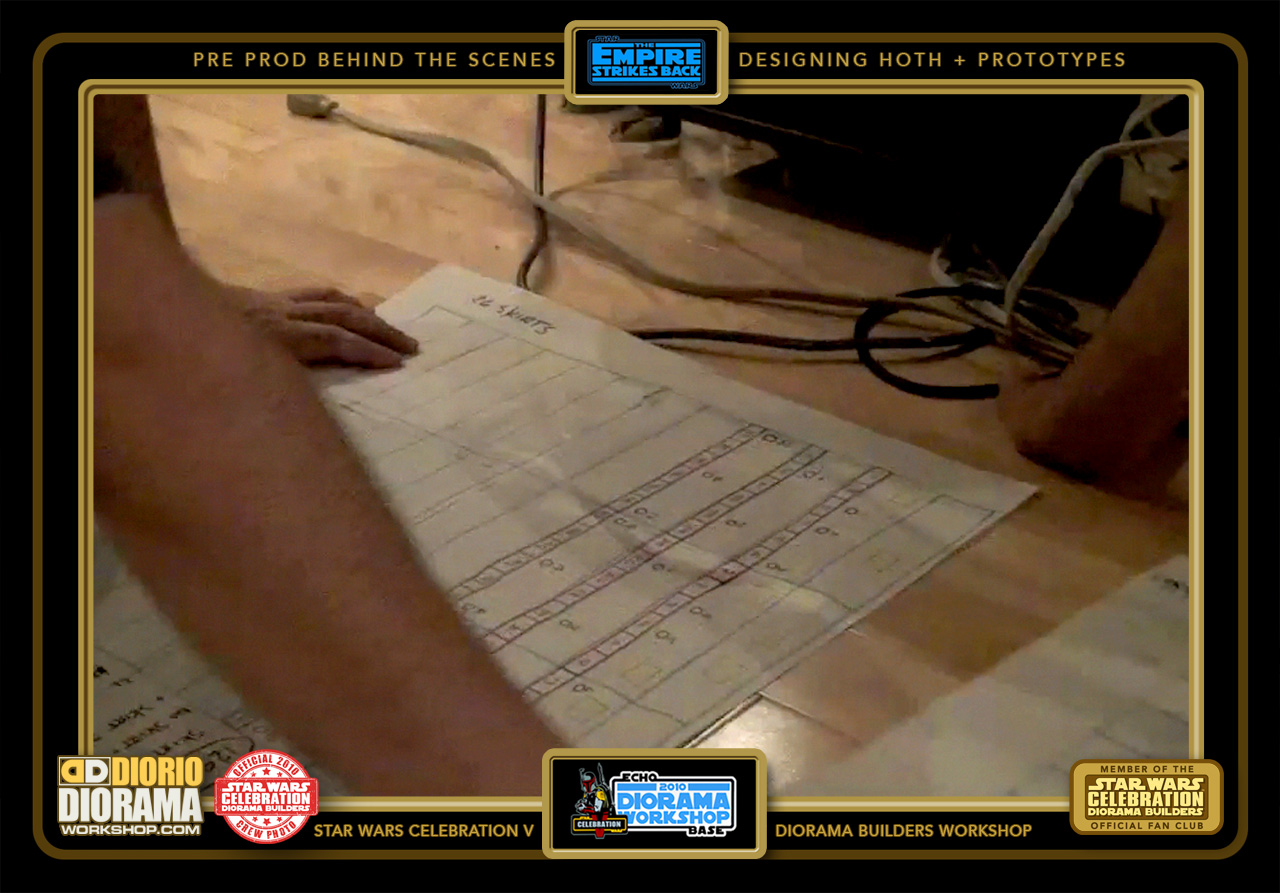
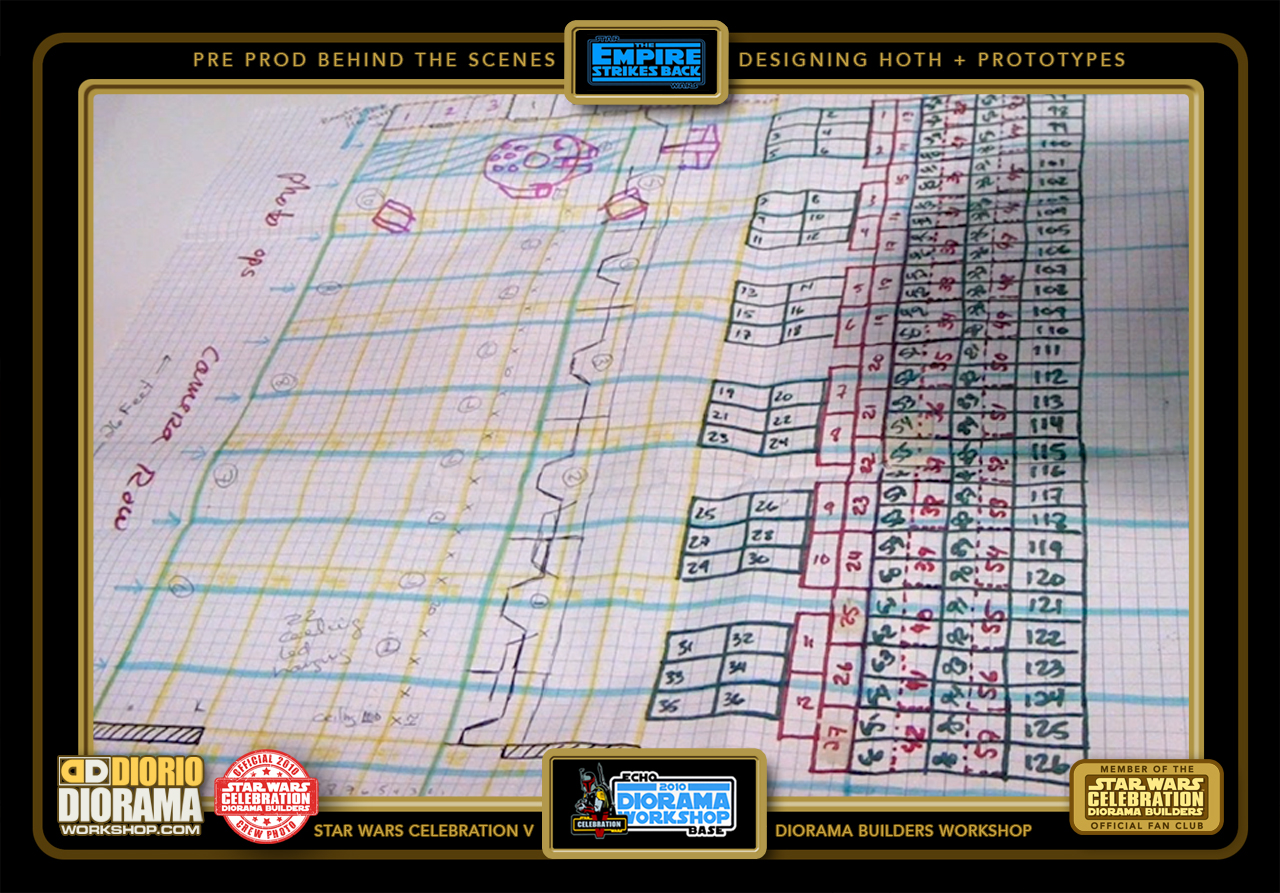
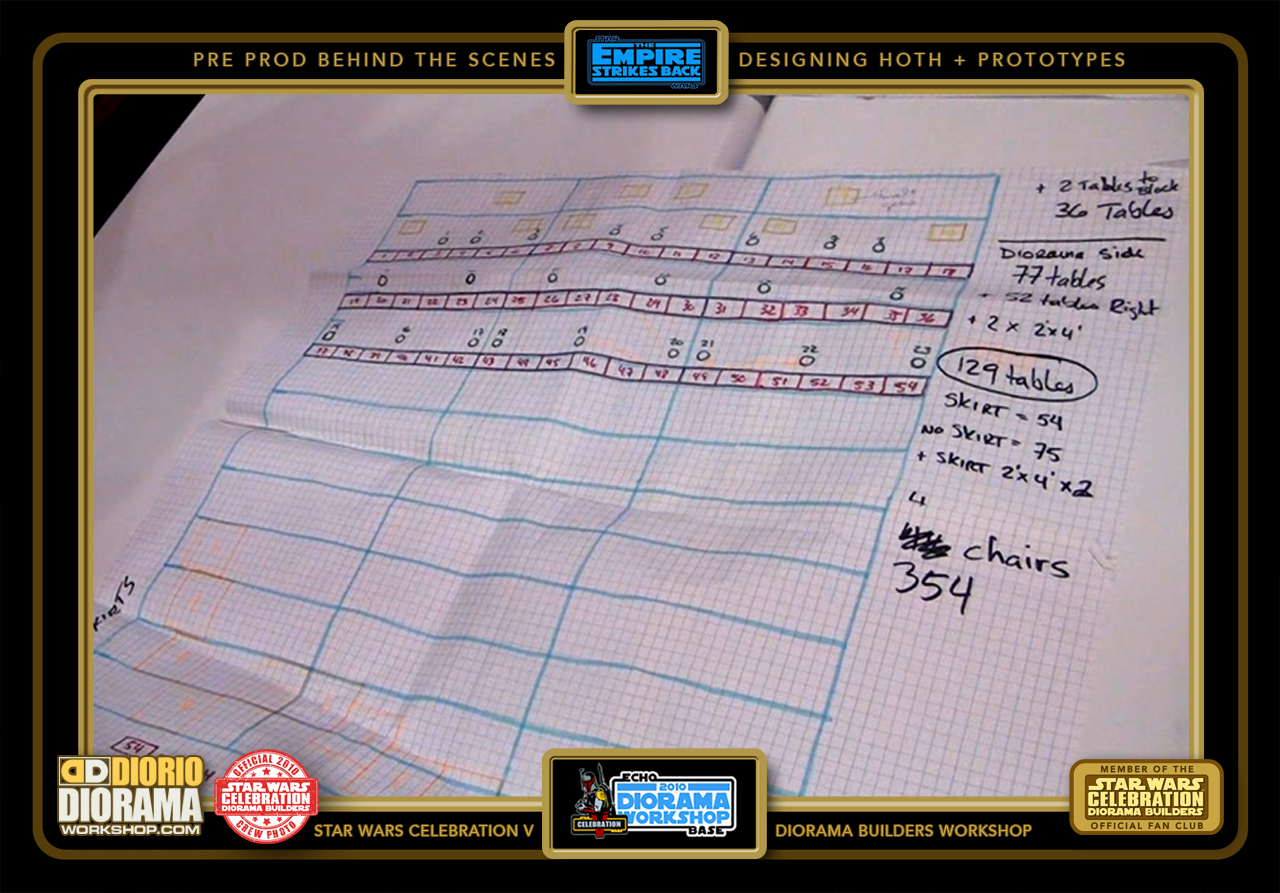
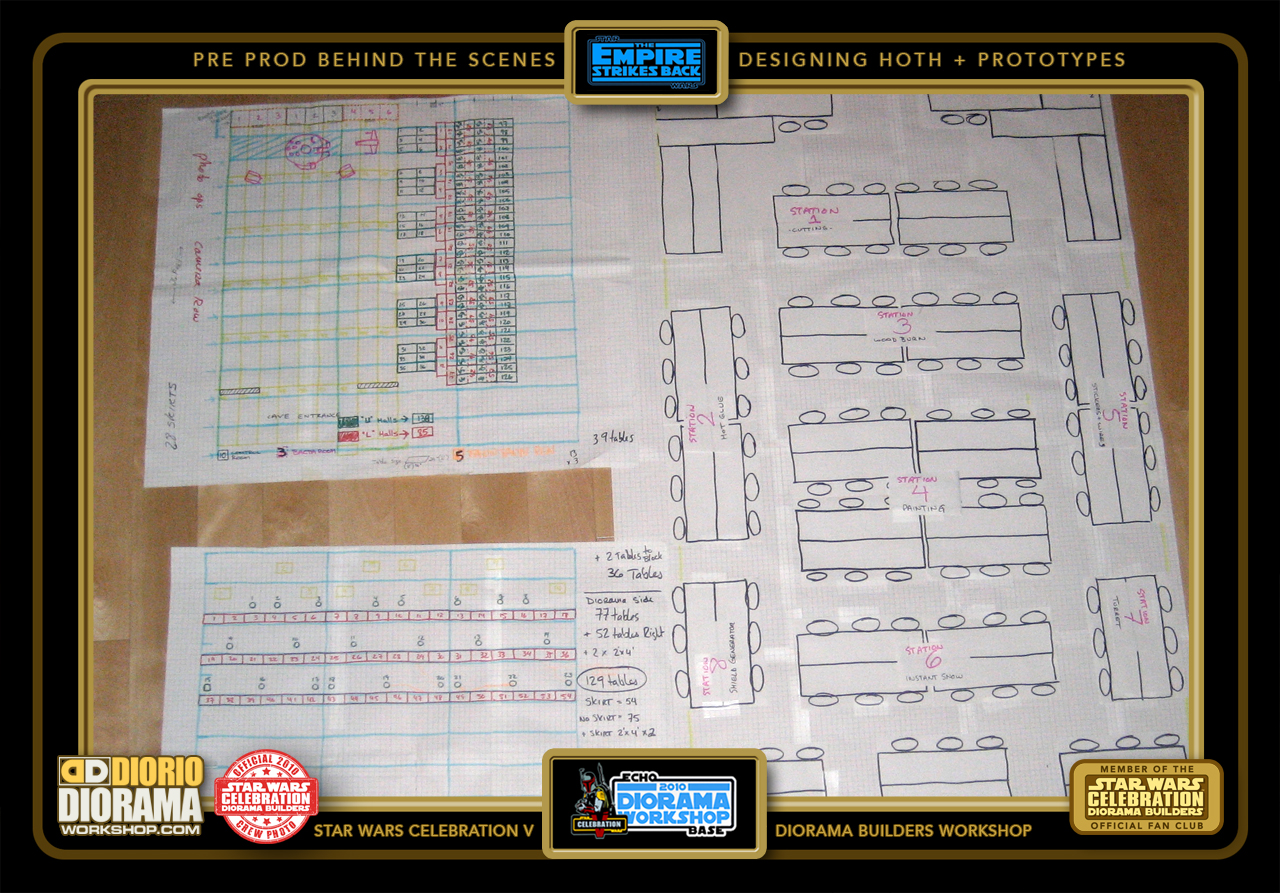
- Last but not least, it's then time to try and figure out just HOW MANY of these items we NEED to build a cool diorama that fits in our booth.
-
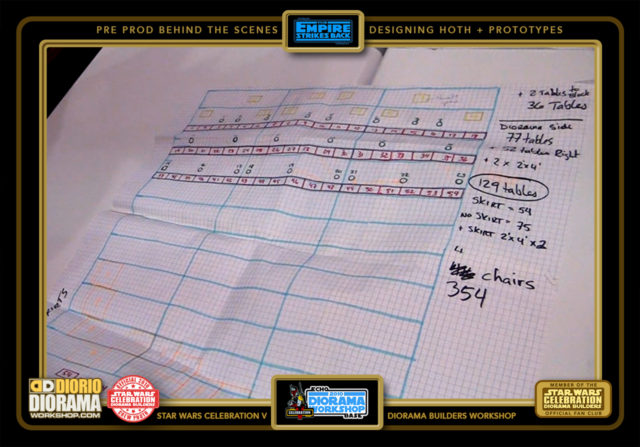
- How many Trenches do we need to fill the gaps between the tables ?
-
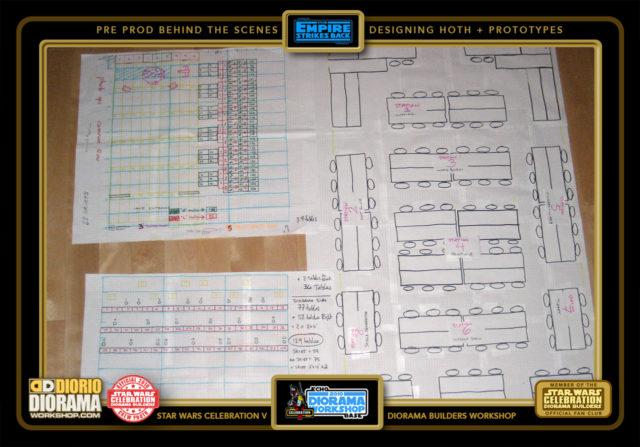
- And also, where and howmany tables and chairs will be needed to accomodate the hundreds of builders passing through the 4 days of the workshop.
-

- Andre and I think we are ready 🙂 I Hope this gave you a good idea of the time and thinking it goes into creating and designing a convention workshop. It is many long hours but SO MUCH FUN. Now, what shall we make for the NEXT Star Wars Celebration ? 🙂